
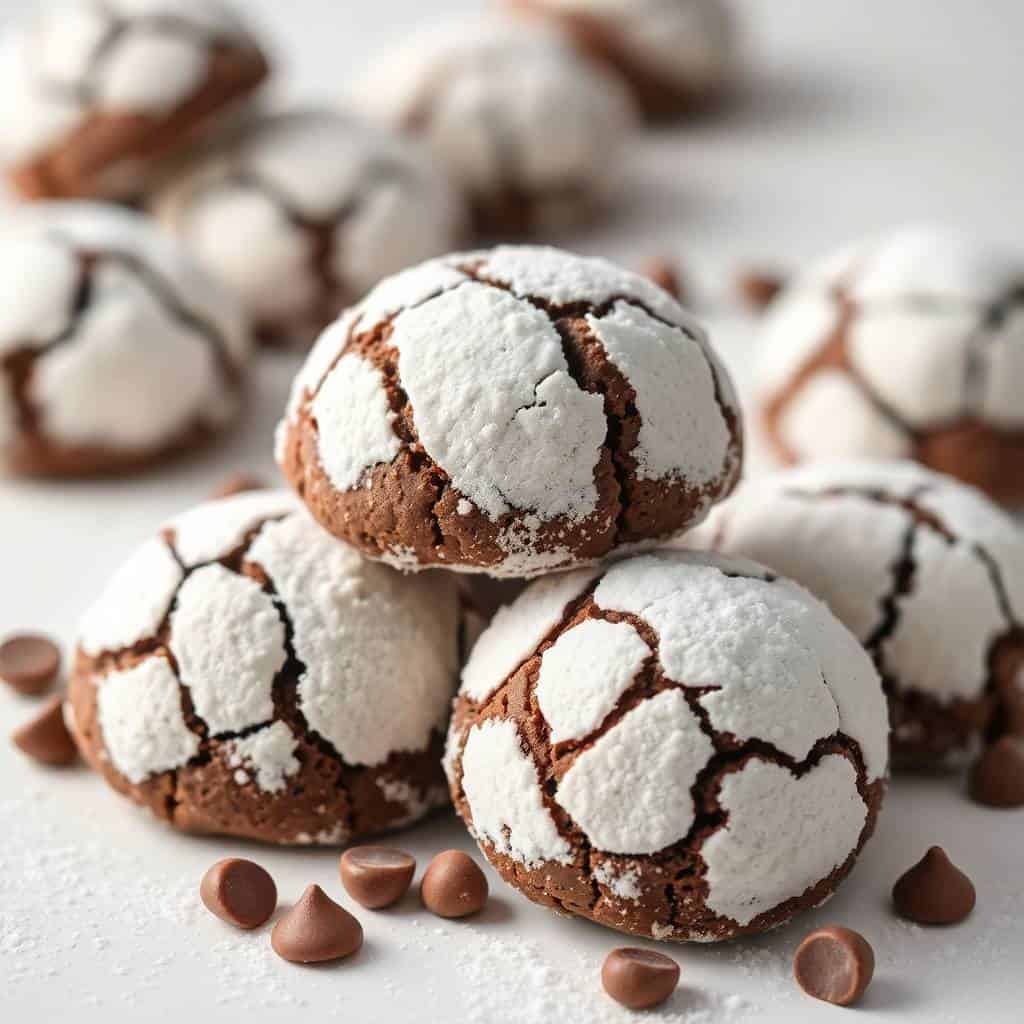
I first made these double chocolate snowball cookies on a cold December afternoon when Zainab had a school holiday party and I needed something that looked festive without requiring hours in the kitchen. I already had butter softening on the counter and a half-used bag of mini chocolate chips in the pantry, so I figured I'd give them a shot. What came out of that oven was one of the most satisfying cookies I've made in years — deeply chocolatey, melt-y, and covered in a cloud of white powdered sugar that made them look like tiny snowballs.
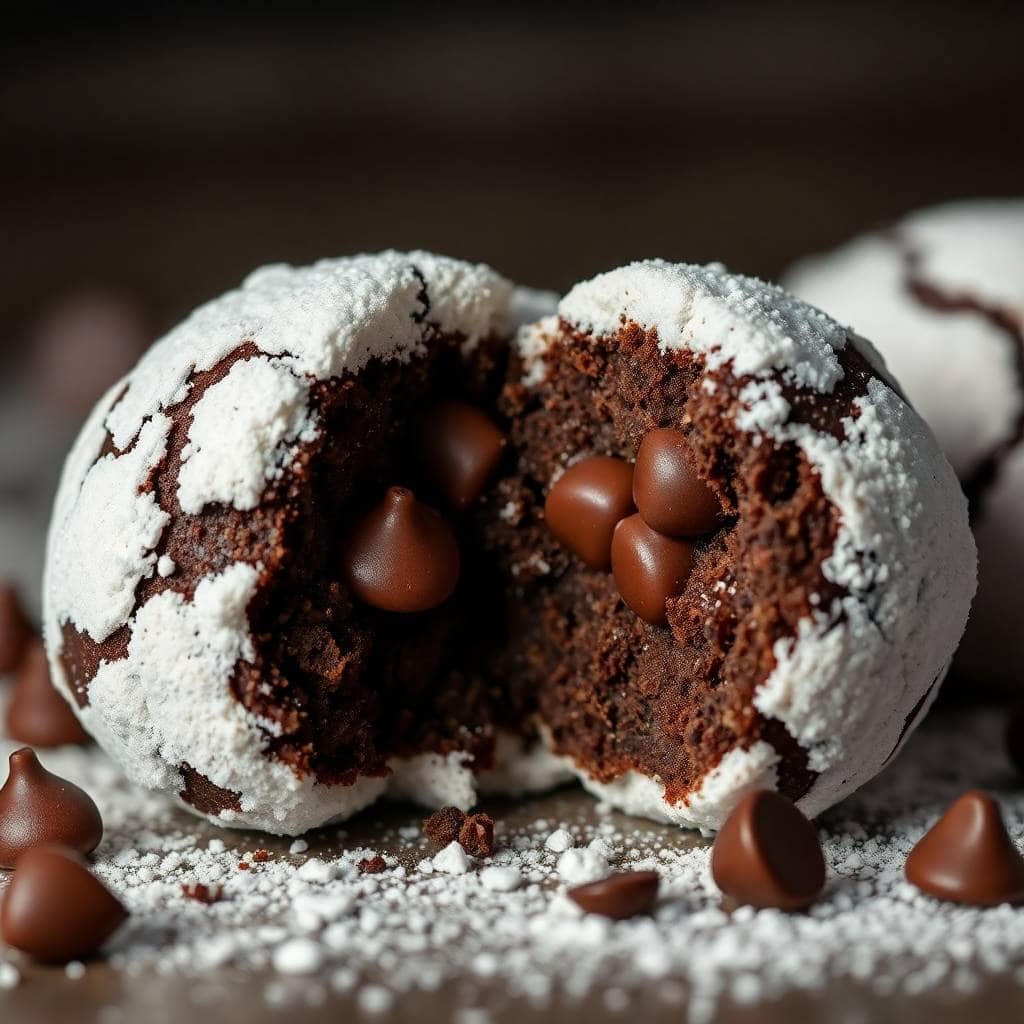
What makes these different from regular snowball cookies is that you're getting chocolate from two directions: cocoa powder worked into the dough, and mini chocolate chips folded through. The cocoa gives the base a rich, almost fudgy quality, and the chips add little pockets of melted chocolate in every bite. I've played around with this recipe a fair bit — at one point I tried adding espresso powder (just a quarter teaspoon) and it genuinely deepened the chocolate flavor without making them taste like coffee. That's become my standard move now.
My husband is the one who requests these most, which surprised me because he usually reaches for something with fruit or nuts. Zainab's job every time is to do the powdered sugar rolling — she takes it very seriously and gets covered in white dust from head to toe. I always make a double batch because one batch disappears before it even cools properly, and then I have nothing left for the next morning with my tea.
One thing to know going in: the chilling step is not optional. I tried skipping it once when I was impatient, and the cookies spread out flat and looked nothing like snowballs. They still tasted fine, but the shape was gone. Give the dough at least 30 minutes in the fridge — an hour is better. If you're already in holiday baking mode, check out my Oreo Balls too, because they're similarly no-fuss and go on the same tray beautifully.
Why You'll Love This Recipe
- Double the chocolate, real depth of flavor: Cocoa powder alone gives you a mild chocolate base, but folding in chocolate chips turns that into something genuinely rich. When you bite in, you get the dark, earthy cocoa from the dough and then a little hit of melted chocolate from the chips. It's not subtle. My husband says these taste more like a chocolate truffle than a cookie, which I think is exactly the right way to describe them.
- No fancy equipment needed: I made these with a wooden spoon and a regular hand mixer I've had for eight years. You don't need a stand mixer, you don't need a food processor, you don't need anything special. A large bowl, a baking sheet, and parchment paper — that's it. The dough comes together in about 10 minutes before it even goes in the fridge.
- They look way more impressive than they are: The powdered sugar coating is doing a lot of visual work here. Once you double-roll these cookies, they look like something from a bakery display. Every year I bring them to a cookie swap and someone always asks for the recipe, then looks genuinely surprised at how straightforward it is.
- Make-ahead friendly: The dough keeps in the fridge for up to 2 days, so I often mix it up on a Thursday night and bake on Saturday morning. You can also freeze unbaked dough balls on a sheet pan, then transfer to a bag — bake them straight from frozen at 350°F, just add 2-3 extra minutes. Having that kind of flexibility during the holidays is genuinely useful.
- Great for gifting and cookie trays: These hold up really well — they don't crumble, they keep their shape, and the powdered sugar stays put if you do the double roll. I've packed them in small tins lined with tissue paper and given them as gifts. They travel well and look beautiful next to something bright like my Purple Velvet Cake on a dessert table.
Ingredients
- 1 cup unsalted butter, softened to room temperature
- ½ cup powdered sugar (plus about 1 cup more for coating)
- 1 teaspoon vanilla extract
- ¼ teaspoon salt
- 1 ¾ cups all-purpose flour
- ⅓ cup unsweetened cocoa powder (I use Hershey's or any good quality unsweetened cocoa)
- ¾ cup mini chocolate chips (or finely chopped dark chocolate)
Directions
- Cream the butter and sugar: In a large bowl, beat the softened butter and powdered sugar together until light and fluffy — about 2-3 minutes with a hand mixer. Add the vanilla extract and salt and mix again briefly. The butter really does need to be soft here, not melted. Cold butter won't cream properly and you'll end up with lumpy dough.
- Add the dry ingredients: In a separate bowl, whisk together the flour and cocoa powder. Add this to the butter mixture gradually, mixing until a soft dough forms. It'll look a bit crumbly at first but keep mixing — it comes together. Don't overmix once the flour is incorporated or the cookies can get tough.
- Fold in the chocolate chips: Stir in the mini chocolate chips with a wooden spoon or spatula. Make sure they're distributed evenly so every cookie gets some. This is the moment the dough starts smelling incredible.
- Chill the dough: Cover the bowl with plastic wrap and refrigerate for at least 30 minutes, ideally 1 hour. This is the step that keeps your cookies round and prevents spreading. I usually pop it in while I'm cleaning up the kitchen and preheating the oven.
- Preheat and shape: Preheat your oven to 350°F (175°C) and line a baking sheet with parchment paper. Scoop the chilled dough and roll into 1-inch balls — about the size of a large marble. Place them about 1 inch apart on the prepared sheet. They don't spread much, but give them a little room.
- Bake: Bake for 10-12 minutes, until the bottoms are just set. Don't look for browning — these cookies stay dark from the cocoa and you won't see color cues the way you would with a regular cookie. They'll feel slightly soft when you press gently on top, but they firm up as they cool. Pull them out at 10 minutes if your oven runs hot.
- Roll in powdered sugar — twice: Let the cookies cool for about 5 minutes, then roll each one in powdered sugar while still warm. Set them on a rack and let them cool completely, then roll them a second time. The first coat soaks into the warm cookie; the second coat is what gives you that thick, snowy finish. Don't skip the second roll.
Tips for Success
- Your butter temperature actually matters: I learned this the hard way — I once tried to rush it and used butter that was still a little firm in the middle. The dough was uneven and the cookies baked inconsistently. Truly room-temperature butter (soft enough to leave an indent when you press it, but not greasy or melted) is what makes the dough come together smoothly. I usually leave mine out for 45 minutes to an hour before starting.
- Don't skip the chill: I already mentioned this but it's worth repeating because the first time I made these I skipped it and ended up with flat chocolate discs instead of snowballs. When dough is cold, the fat solidifies slightly, which means the cookies hold their shape in the oven instead of spreading out. If you're really impatient, 20 minutes in the freezer will work in a pinch, but 30-60 minutes in the fridge is better.
- Measure your flour correctly: Scooping the measuring cup directly into the flour bag packs it in and you end up with too much — which makes the cookies dry and dense. Instead, spoon the flour into your measuring cup and level it off with a knife. It takes an extra 30 seconds and makes a real difference to the texture.
- Roll warm, then roll again cold: The warm first roll lets the sugar partially absorb into the cookie, giving it a thin base layer. Once the cookies are fully cooled, the second roll gives you that thick, even white coating. If you only do one roll when they're fully cooled, the sugar doesn't stick as well and you get patchy coverage. Both rolls matter.
- Try a pinch of espresso powder: This is optional but it's something I do every single time now. About ¼ teaspoon of instant espresso powder mixed into the dry ingredients makes the chocolate flavor noticeably deeper without any coffee taste. If you don't have espresso powder, you can skip it — the cookies are still very good. But if you have a jar in your pantry, use it.
Variations
- Peppermint chocolate snowballs: Add ¼ teaspoon of peppermint extract along with the vanilla. The mint cuts through the richness of the cocoa in a really lovely way, and it makes these feel very specifically Christmas. I'd skip the espresso powder if you're going the peppermint route — the two together get a bit busy. These are the version I made for Zainab's holiday party and the kids absolutely destroyed them.
- Add chopped nuts: Mix in ½ cup of finely chopped pecans or walnuts with the chocolate chips. The nuts add some crunch to what is otherwise a very soft, melt-y cookie. This is closer to the traditional Mexican wedding cookie base, and it's genuinely good. Just make sure the nuts are chopped small — big chunks make the dough hard to roll into smooth balls.
- White chocolate version: Swap the mini chocolate chips for white chocolate chips and reduce the cocoa to 2 tablespoons. You end up with something that's more subtly chocolatey with a creamy sweetness from the white chocolate. My husband actually prefers this version, which I didn't expect. It's less intense and a little more delicate.
- Stuffed surprise center: Press a single chocolate chunk or a frozen Nutella dollop into the center of each dough ball before rolling it closed. When you bite into it, there's a gooey chocolate center. This takes a bit more effort but it's worth it for special occasions. Just make sure you seal the dough completely around the filling or it leaks out during baking.
- Dairy-free version: Use a good plant-based butter (I've used Earth Balance with good results) and dairy-free chocolate chips. The texture is very slightly different — a tiny bit less rich — but they're still excellent and no one at a party will know the difference. This is worth knowing if you're baking for someone with a dairy sensitivity.
Serving and Storage
Serving
These are best served at room temperature, not straight from the fridge. I like them with a strong cup of tea or alongside a mug of hot cocoa on a cold evening. They also look great on a holiday cookie tray next to something lighter — if you're building a full dessert spread, pairing them with something like an Eggnog Milkshake makes for a proper festive moment. Because they're small and not too sweet, people tend to eat two or three without thinking about it.
Storage
Store baked cookies in an airtight container at room temperature for up to one week. They stay soft and the powdered sugar holds up well as long as they're not exposed to moisture. If you're stacking them, put a sheet of parchment between layers so the sugar doesn't rub off. For freezing: freeze the unbaked dough balls on a sheet pan first, then transfer to a zip-lock bag. They'll keep frozen for up to 3 months. Bake straight from frozen at 350°F and add 2-3 minutes to the bake time. If you freeze baked cookies, roll them in fresh powdered sugar after thawing since the coating gets absorbed during freezing.

Frequently Asked Questions
Can I make the dough ahead of time?
Yes, and honestly I recommend it. The dough keeps in the fridge for up to 2 days — just cover the bowl tightly with plastic wrap. You can also roll the dough into balls and freeze them on a sheet pan, then bag them for up to 3 months. When you're ready to bake, pull them straight from the freezer and add 2-3 minutes to the bake time. No need to thaw.
Why did my cookies come out flat?
Almost always this means the dough wasn't cold enough when it went into the oven. Even 20 minutes of chilling helps, but 30-60 minutes is better. Also check that your butter wasn't too soft or partially melted before you creamed it — that can make the dough too warm and loose from the start. If your kitchen is very warm, chill the shaped dough balls on the pan for 15 minutes before baking.
Can I freeze the baked cookies?
You can, but the powdered sugar coating absorbs moisture during freezing and will look patchy when they thaw. The fix is easy: just roll them in fresh powdered sugar once they're fully thawed and at room temperature. They'll look just as good as the day you baked them. I prefer freezing the unbaked dough balls rather than the baked cookies, but both work.
How do I keep the powdered sugar coating from disappearing?
The double-roll method is key. Roll the cookies in powdered sugar while they're still warm (not hot) — this gives the first layer something to grip. Then let them cool completely and roll again. That second coat is thicker and stays put. The coating can fade if the cookies sit in a humid environment, so keep them in an airtight container if your kitchen is warm or the weather is damp.
Can I use regular-sized chocolate chips instead of mini?
You can, but mini chips work better here because the dough balls are small and regular chips can make them harder to roll into smooth rounds. If regular chips are all you have, just chop them roughly so the pieces are smaller. Alternatively, finely chop a chocolate bar — I've used a cheap dark chocolate bar from Aldi and it works perfectly well.
DOUBLE CHOCOLATE SNOWBALL COOKIES
Ingredients
For the Cookies:
- 1 cup unsalted butter softened
- ½ cup powdered sugar plus more for coating
- 1 teaspoon vanilla extract
- ¼ teaspoon salt
- 1 ¾ cups all-purpose flour
- ⅓ cup unsweetened cocoa powder
- ¾ cup mini chocolate chips
For Coating:
- 1 cup powdered sugar
Instructions
Preheat the Oven:
- Preheat your oven to 350°F (175°C). Line a baking sheet with parchment paper.
Make the Dough:
- In a large bowl, cream together the butter and powdered sugar until light and fluffy. Mix in the vanilla and salt. Gradually add the flour and cocoa powder, mixing until fully combined. Stir in the mini chocolate chips.
Shape the Cookies:
- Roll the dough into 1-inch balls and place them on the prepared baking sheet about 1 inch apart.
Bake:
- Bake for 10–12 minutes or until the cookies are just set. Allow to cool for 5 minutes.
Coat in Powdered Sugar:
- While still warm, roll the cookies in powdered sugar. Let cool completely and roll again for a snowy finish.
Notes
{"@context":"https://schema.org","@type":"Article","headline":"DOUBLE CHOCOLATE SNOWBALL COOKIES","description":"Double Chocolate Snowball Cookies are rich, buttery, and melt-in-your-mouth treats perfect for holidays or any time chocolate cravings strike.","datePublished":"2025-04-26T09:04:56+00:00","dateModified":"2026-05-04T03:55:55+00:00","author":{"@type":"Person","name":"Sana Umer","url":"https://forfoodiefriends.com/about/","description":"Self-taught home cook with 10+ years of kitchen experience. Mom of two who develops every recipe in her own kitchen.","jobTitle":"Recipe Developer & Food Blogger","image":"https://forfoodiefriends.com/wp-content/uploads/sana-umer-author-photo.jpg"},"publisher":{"@type":"Organization","name":"For Foodie Friends","url":"https://forfoodiefriends.com/","logo":{"@type":"ImageObject","url":"https://forfoodiefriends.com/wp-content/uploads/forfoodiefriends-logo.png"}},"mainEntityOfPage":{"@type":"WebPage","@id":"https://forfoodiefriends.com/double-chocolate-snowball-cookies/"},"image":"https://forfoodiefriends.com/wp-content/uploads/2025/04/DOUBLE-CHOCOLATE-SNOWBALL-COOKIES.jpg"}





Comments
No Comments