
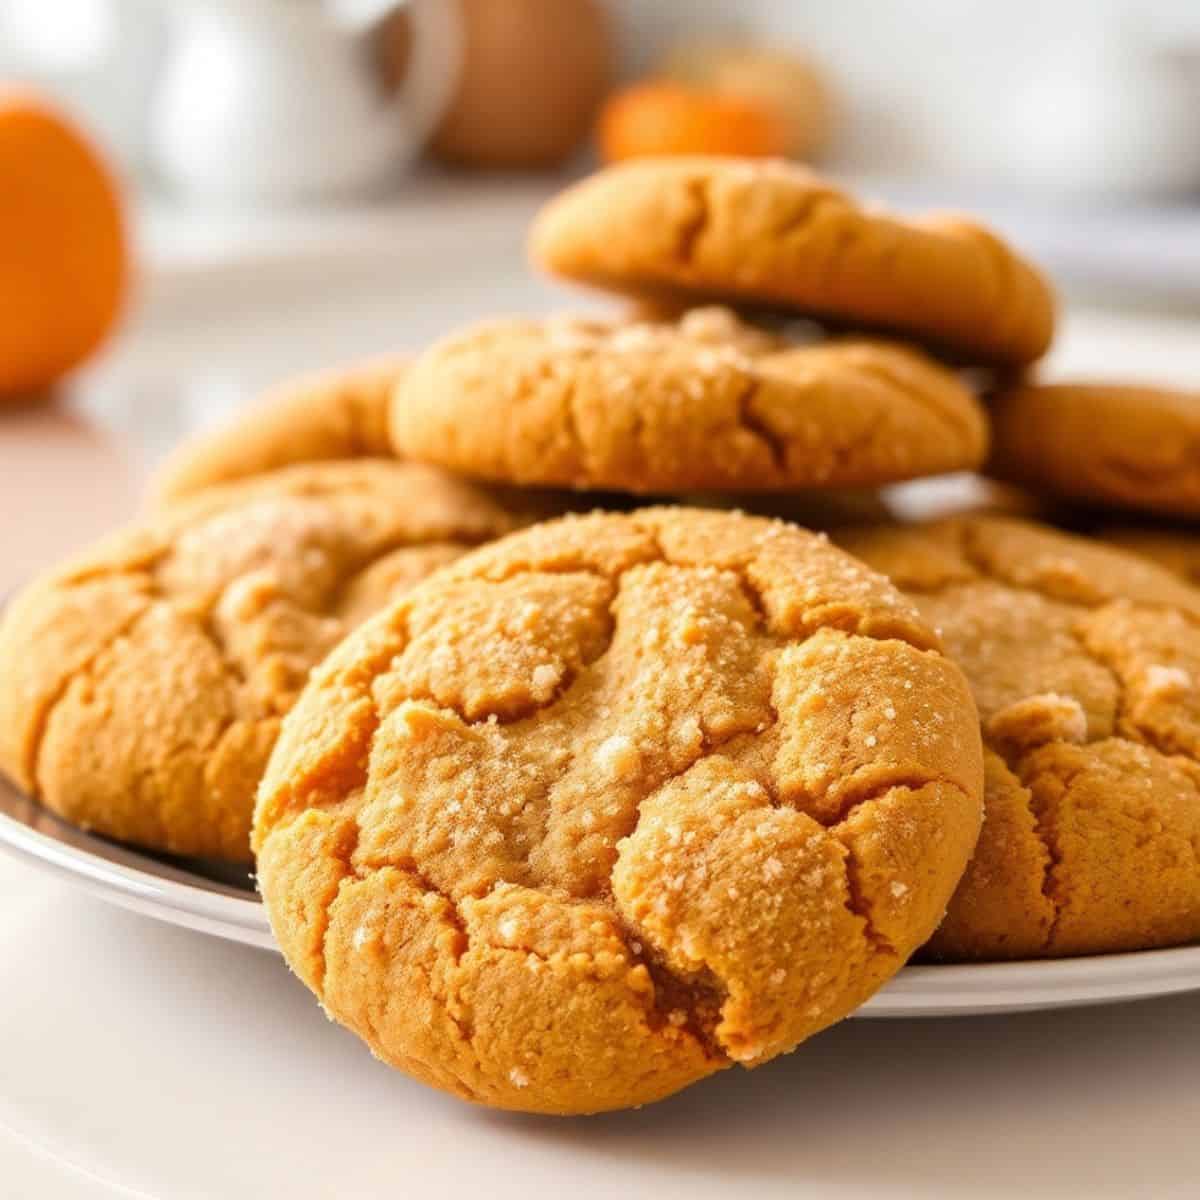
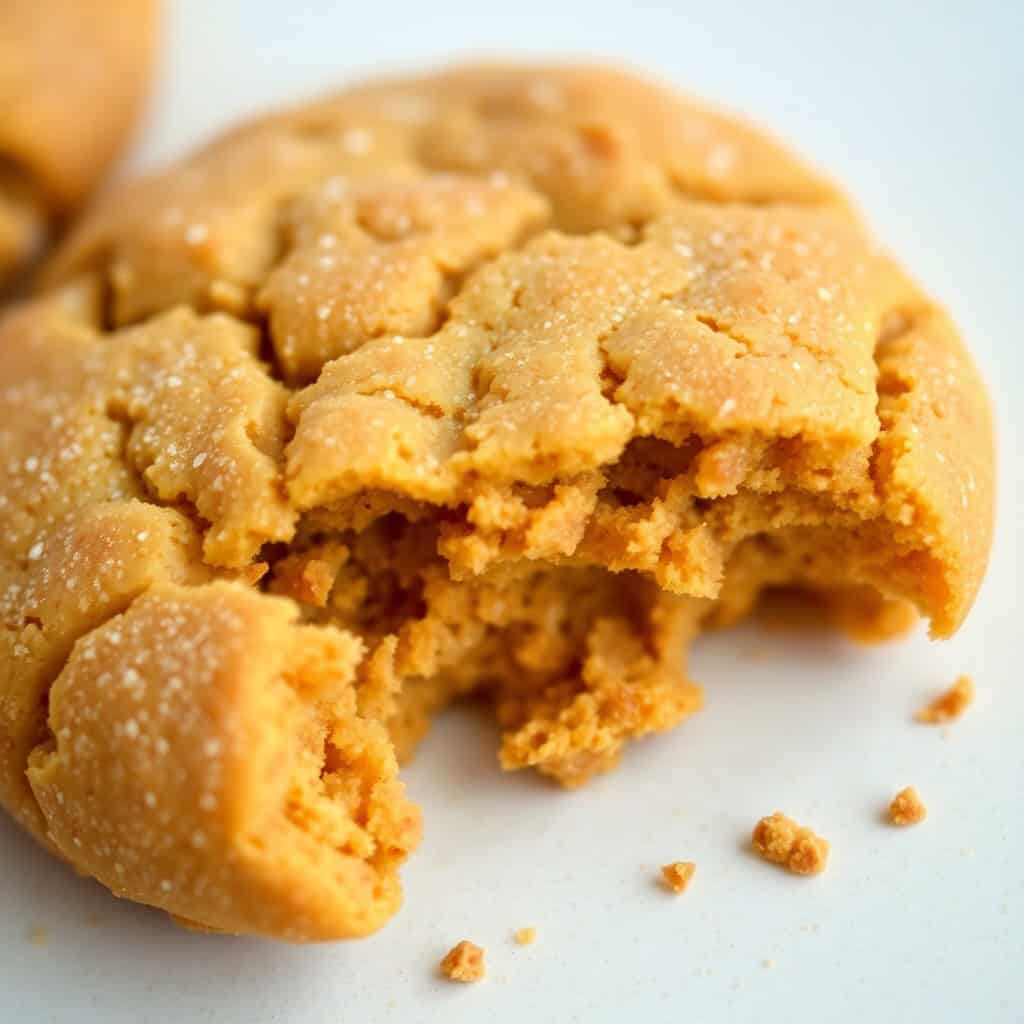
Zainab asked me to make these three weekends in a row before I finally wrote the recipe down properly. She's not usually a cookie kid — she'll take a brownie or a slice of cake over cookies any day — but something about the cinnamon-sugar crust on these got her. I think it's the way they crinkle at the edges when they bake, that slightly crispy outside giving way to a soft, almost pillowy center.
What makes these different from a standard snickerdoodle is the pumpkin puree in the dough. It keeps the cookies soft for days — longer than most cookies I've made — and it adds this gentle warmth that works beautifully with the cinnamon coating. I use a full can of pumpkin puree, which sounds like a lot, but the dough absorbs it. The cream of tartar is non-negotiable; that's what gives snickerdoodles their signature tang. Skip it and you just have a cinnamon sugar cookie, which is fine, but it's not the same thing.
I make these every autumn without fail, usually starting in October when the weather gets cooler and the kids start asking for "fall desserts." They're also one of the few cookies I make that hold up well in a tin, so they travel well if you're bringing something to a gathering. If you're in the mood for more fall baking after this, my Chocolate Lava Cake Cookies are another one worth bookmarking.
One thing to know before you start: this dough needs to chill. At least 2 hours in the fridge, ideally overnight. I know that's annoying when you want cookies now, but pumpkin adds moisture to the dough and if you skip the chill, they'll spread flat and bake up thin and sad. I learned that the hard way on my first attempt. Plan ahead, and you'll be fine.
Why You'll Love This Recipe
- That cinnamon-sugar crust is the whole point: Rolling the dough balls in cinnamon sugar before baking creates this thin, slightly crisp shell that contrasts beautifully with the soft interior. It's what makes these taste like a snickerdoodle rather than just a pumpkin spice cookie. Every bite has that crunch-then-chew thing going on that I genuinely can't stop eating.
- They stay soft for days: The pumpkin puree in the dough acts like a built-in moisture keeper. I've had these sitting in an airtight container for four days and they were still soft. Most cookies I bake go a bit firm by day two — not these. That makes them a great make-ahead option if you're baking for a weekend event.
- The spicing is subtle, not overwhelming: I've had pumpkin spice things that taste like someone emptied a candle into the batter. These aren't that. The pumpkin flavor is there but quiet, and the warmth comes mostly from the cinnamon in the coating. If you want more spice, you can add a pinch of cloves or allspice to the dough — but as written, these are approachable even for people who don't usually love "pumpkin spice everything."
- No special equipment needed: I make these with a hand mixer and a wooden spoon. You don't need a stand mixer, a cookie scoop, or anything fancy. A regular sheet pan, parchment paper, and two bowls will do it. I use a $15 hand mixer I've had since my first apartment and it works perfectly fine.
- The dough can be made ahead and frozen: I often make a double batch, bake half immediately, and freeze the rest as coated dough balls. When I want cookies mid-week, I pull a few from the freezer and bake straight from frozen, adding 2-3 minutes to the bake time. It's one of the better baking shortcuts I've figured out.
Ingredients
- 1 cup (2 sticks) unsalted butter, softened
- 1 ½ cups granulated sugar
- 2 large eggs
- 1 teaspoon vanilla extract
- 1 (15 oz) can pumpkin puree (not pumpkin pie filling — they're different things)
- 2 ¾ cups all-purpose flour
- 1 teaspoon baking soda
- 1 teaspoon cream of tartar
- ½ teaspoon salt
For the Cinnamon-Sugar Coating:
- ¼ cup granulated sugar
- 2 tablespoons ground cinnamon
Directions
- Cream the butter and sugar: In a large bowl, beat the softened butter and granulated sugar together until light and fluffy, about 2-3 minutes. The mixture should look pale and almost airy. This step matters — properly creamed butter gives the cookies better structure.
- Add eggs and vanilla: Beat in the eggs one at a time, making sure each one is fully incorporated before adding the next. Stir in the vanilla extract. The mixture might look slightly curdled at this point — that's okay, it comes together once you add the dry ingredients.
- Add the pumpkin puree: Stir in the pumpkin puree until evenly combined. The dough will look quite wet and soft at this stage. Don't panic — that's normal and exactly why we chill it.
- Mix the dry ingredients: In a separate bowl, whisk together the flour, baking soda, cream of tartar, and salt. Give it a proper whisk so everything is evenly distributed before you add it to the wet ingredients.
- Combine wet and dry: Gradually add the dry ingredients to the wet, mixing until just combined. Stop as soon as you don't see any more dry flour streaks. Overmixing develops the gluten and makes cookies tough — I've done it and the difference is noticeable.
- Chill the dough: Cover the bowl with plastic wrap and refrigerate for at least 2 hours, or overnight if you can manage it. This isn't optional with pumpkin cookies. The cold dough holds its shape in the oven and gives you that thick, chewy center instead of a flat, crispy disappointment.
- Preheat your oven: When you're ready to bake, preheat to 375°F (190°C) and line your baking sheets with parchment paper. Take the dough out of the fridge while the oven heats up — it's easier to scoop when it's not ice cold.
- Make the cinnamon-sugar coating: Stir together the ¼ cup sugar and 2 tablespoons cinnamon in a small bowl. Set it next to your baking sheet so the rolling goes quickly.
- Shape and coat: Scoop the dough into balls about 1½ tablespoons each — roughly the size of a large walnut. Roll each ball in the cinnamon-sugar mixture until fully coated. Don't be shy with the coating; it forms that signature crust.
- Bake: Place cookies on the prepared sheets, spacing them about 2 inches apart. Bake for 10-12 minutes, until the edges are set and the centers still look slightly underdone. They firm up as they cool — pull them when they look just barely done and trust the process.
- Cool: Let the cookies rest on the baking sheet for 5 minutes before moving them to a wire rack. They're fragile straight from the oven. Once they've cooled for another 10 minutes, they're ready to eat.
Tips for Success
- Do not skip the cream of tartar: I know it sounds like an obscure ingredient but it's what separates a snickerdoodle from a generic cinnamon cookie. It creates that slight tangy flavor and contributes to the chewy texture. You can find it in the spice aisle at any Walmart, Trader Joe's, or regular grocery store — it's usually right next to the baking powder. If you truly can't find it, substitute 2 teaspoons of baking powder for the baking soda plus cream of tartar combined, but the flavor will be slightly different.
- Your butter needs to be properly softened, not melted: This is a distinction that tripped me up early on. Softened butter should hold an indent when you press it but still hold its shape — if it's shiny and greasy, it's too warm. Melted or overly soft butter will cause the cookies to spread too much, even after chilling. If you forgot to take butter out in advance, cut it into small pieces and let it sit at room temperature for 20 minutes — faster than waiting for a whole stick.
- Measure your flour the right way: Spoon the flour into your measuring cup and level it off with a knife — don't scoop directly from the bag. Scooping packs the flour down and you end up using more than the recipe calls for, which leads to dry, dense cookies. I got in the habit of doing this after a batch came out cakey and thick when I was sure I'd followed the recipe.
- Watch the bake time on your first batch: Every oven runs slightly different. My oven runs a little hot so I check at 9 minutes. The cookies are done when the edges look set and matte, and the centers still have a slight gloss or look underdone. They continue cooking on the hot pan after you pull them out, so don't wait until they look fully baked in the oven or they'll be overdone once cooled.
- Chill in batches if needed: If you're baking all the cookies at once, keep the unrolled dough in the fridge between batches so it stays cold. Warm dough spread on a warm baking sheet is a flat cookie waiting to happen. I pull out only as much as I'm about to roll and coat while the previous batch bakes.
Variations
- Brown butter version: Brown the butter before using it — melt it in a light-colored saucepan over medium heat, swirling occasionally, until it smells nutty and the milk solids turn golden. Let it solidify in the fridge before creaming. This adds a deeper, almost caramel-like flavor to the cookies that works incredibly well with the pumpkin. It takes an extra 20 minutes of wait time but the result is noticeably better — my husband prefers these over the regular version.
- Add chocolate chips: Stir ¾ cup of semi-sweet chocolate chips into the chilled dough before shaping. The chocolate doesn't overpower the pumpkin — it actually complements it in a way that surprised me the first time I tried it. Zainab requests this version specifically. Use mini chips if you want them distributed more evenly through each cookie.
- Extra spiced: Add ¼ teaspoon each of ground cloves and allspice to the dry ingredients along with the other spices. This pushes the flavor more toward a classic pumpkin pie spice profile. It's not something I do every time, but when I'm in the mood for something with more depth, this small addition makes a real difference. Goes especially well with the brown butter variation.
- Maple glaze drizzle: Whisk together 1 cup powdered sugar, 2 tablespoons maple syrup, and 1-2 tablespoons milk until smooth. Drizzle over completely cooled cookies. This makes them feel more dessert-like and a bit more special for when you're bringing them somewhere. I'd pair these alongside something like my Cherry Mash Bars for a proper fall dessert spread.
- Cream cheese frosted: Beat 4 oz softened cream cheese with ¾ cup powdered sugar and a splash of vanilla until smooth. Spread a thin layer on cooled cookies. This version is richer and turns them into more of a proper fall cookie bar situation. Let the cream cheese sit out for at least 15 minutes before mixing — cold cream cheese lumps and won't spread cleanly.
Serving and Storage
Serving
These are best at room temperature, about 20-30 minutes after they've come off the cooling rack. Warm from the oven they're soft to the point of being almost too soft — give them time to set. They're good plain, good with tea or coffee, and honestly good with a cold glass of milk if you're having one of those evenings. In Pakistan, we'd serve warm cookies with chai — the cinnamon in these makes that pairing work beautifully. If you're putting together a dessert table, these pair well next to something chocolatey for contrast.
Storage
Store cooled cookies in an airtight container at room temperature for up to 5 days. They genuinely stay soft that long — the pumpkin helps with that. Don't refrigerate baked cookies; the fridge dries them out. If you want to freeze the baked cookies, layer them in a container with parchment paper between layers and freeze for up to 3 months. Let them thaw at room temperature for an hour before eating. Alternatively, freeze the unrolled dough balls, then coat in cinnamon sugar and bake from frozen at 375°F — just add 2-3 minutes to the bake time.

Frequently Asked Questions
Can I use pumpkin pie filling instead of pumpkin puree?
No — they're genuinely different products. Pumpkin pie filling already has sugar and spices added, which will throw off the balance of the entire recipe. You want plain pumpkin puree, which is just cooked pumpkin and nothing else. Libby's is the most common brand in the US and works perfectly. The label should say "100% Pure Pumpkin" or just "Pumpkin Puree."
Why do I need to chill the dough — can I skip it?
I really wouldn't skip it. Pumpkin adds a lot of moisture to the dough, and without chilling, the cookies spread flat and lose that thick, chewy texture. Two hours minimum in the fridge is what it takes for the dough to firm up enough to hold its shape while baking. Overnight is even better if you have the time — the flavor also deepens slightly after a longer rest.
How do I know when the cookies are done baking?
The edges should look set and slightly matte, while the centers still look a tiny bit underdone or glossy. They'll finish cooking on the hot pan as they cool, so pulling them when they still look soft in the middle is exactly right. If the whole cookie looks done in the oven, it'll be overdone once it cools — I've made that mistake and ended up with cookies that were more crispy than chewy.
My cookies came out flat. What went wrong?
Usually one of three things: the butter was too soft or partially melted when you creamed it, the dough wasn't chilled long enough, or the baking sheet was still hot from a previous batch when you added the next round of cookies. All three cause spreading. Let your pan cool completely between batches, and make sure the dough is cold when it goes in the oven.
Can I freeze these cookies after baking?
Yes, they freeze well. Cool them completely, then layer in a freezer-safe container with parchment between layers. They keep for up to 3 months. Thaw at room temperature for about an hour — they come back to their soft texture without any issue. I actually prefer freezing the raw dough balls and baking fresh as needed, but either method works.
CHEWY PUMPKIN SNICKERDOODLE COOKIES
Ingredients
- 1 cup (2 sticks) unsalted butter, softened
- 1 ½ cups granulated sugar
- 2 large eggs
- 1 teaspoon vanilla extract
- 1 (15 ounce) can pumpkin puree (not pumpkin pie filling)
- 2 ¾ cups all-purpose flour
- 1 teaspoon baking soda
- 1 teaspoon cream of tartar
- ½ teaspoon salt
Cinnamon Sugar Coating:
- ¼ cup granulated sugar
- 2 tablespoons ground cinnamon
Instructions
- Cream butter and sugar: In a large bowl, cream together the softened butter and granulated sugar until light and fluffy.
- Add eggs and vanilla: Beat in the eggs one at a time, then stir in the vanilla extract.
- Add pumpkin puree: Stir in the pumpkin puree until well combined.
- Combine dry ingredients: In a separate bowl, whisk together the flour, baking soda, cream of tartar, and salt.
- Combine wet and dry ingredients: Gradually add the dry ingredients to the wet ingredients, mixing until just combined. Do not overmix.
- Chill dough: Cover the dough and refrigerate for at least 2 hours, or preferably overnight. This chilling is essential for preventing spreading and creating a chewy texture.
- Preheat oven: Preheat oven to 375°F (190°C). Line baking sheets with parchment paper.
- Prepare cinnamon sugar coating: In a small bowl, combine the granulated sugar and cinnamon for the coating.
- Scoop and coat cookies: Use a cookie scoop or your hands to roll the dough into balls (about 1-2 tablespoons each). Roll each ball in the cinnamon sugar coating.
- Bake: Place the cookies on the prepared baking sheets, leaving some space between each cookie. Bake for 10-12 minutes, or until the edges are set and the centers are still slightly soft.
- Cool: Let the cookies cool on the baking sheets for a few minutes before transferring them to a wire rack to cool completely.
Notes
- Pumpkin Puree: Make sure to use pumpkin puree, not pumpkin pie filling.
- Cream of Tartar: Cream of tartar is what gives snickerdoodles their signature tang and chewy texture. Don't skip it!
- Chilling: Chilling the dough is crucial for preventing the cookies from spreading too much during baking and for developing their chewy texture.
- Baking Time: Baking times may vary slightly depending on your oven. Keep an eye on the cookies and remove them when the edges are set and the centers are still slightly soft.





Comments
No Comments