
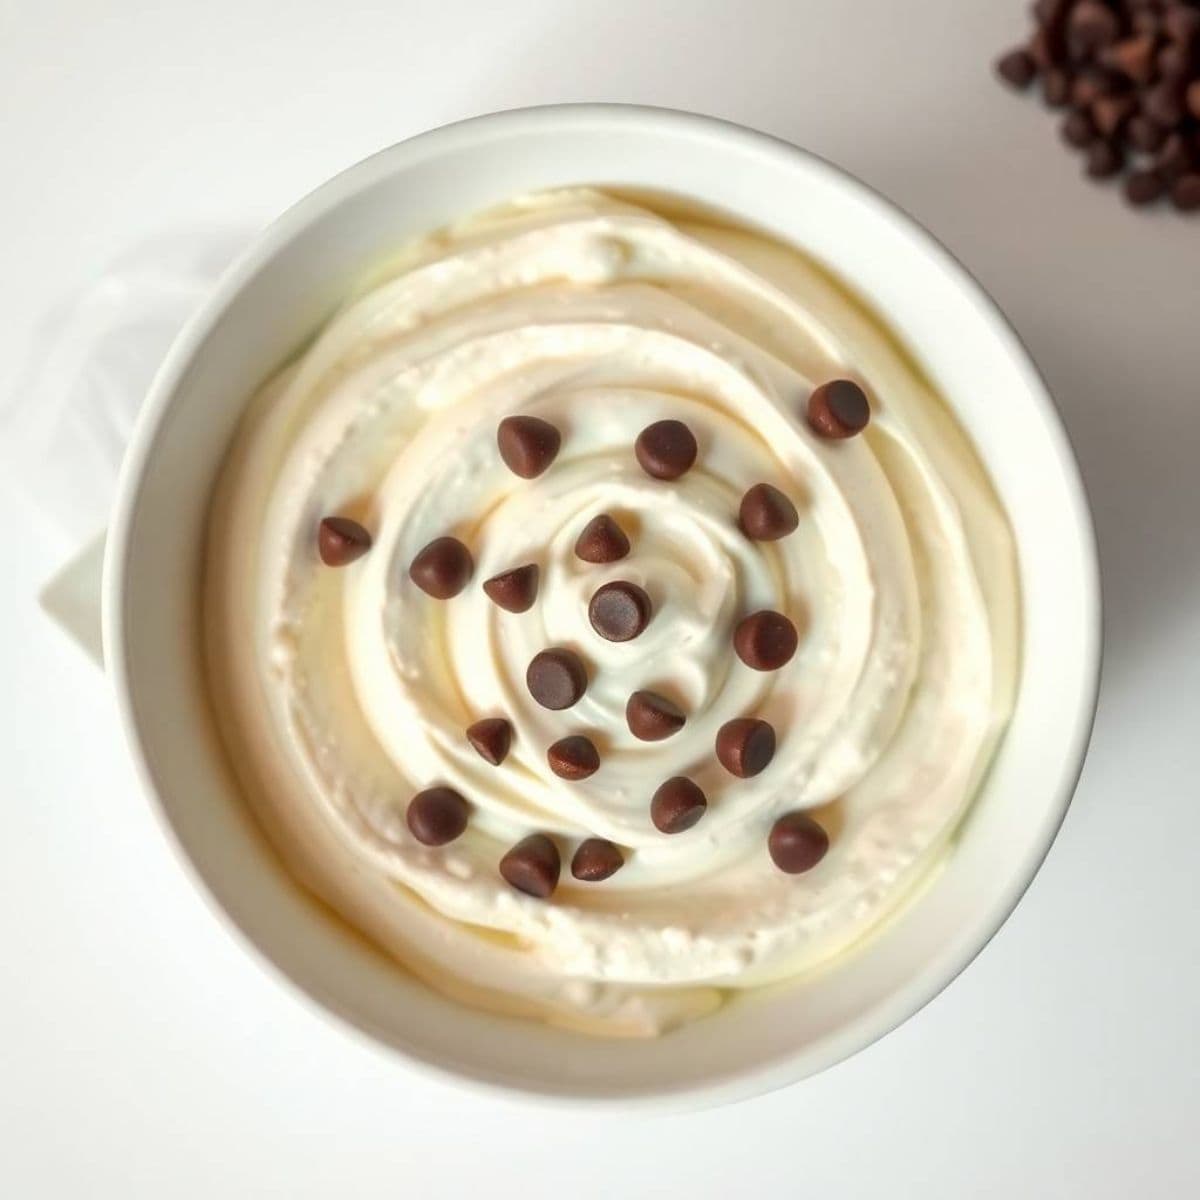
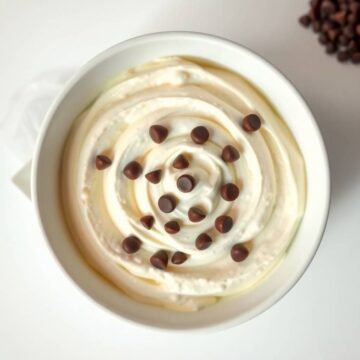
The filling that makes every cannoli worth eating — the filling that separates a spectacular cannoli from an ordinary one, and that I have spent considerable effort perfecting to the point where guests who have eaten cannoli in Sicily tell me mine tastes genuinely authentic — is this cannoli filling: well-drained whole-milk ricotta beaten to a silky cream, sweetened with sifted powdered sugar, perfumed with vanilla, and finished with a fold of mini chocolate chips that provide small, sweet crunchpoints against the smooth cream. The entire preparation takes 10 minutes of active work and a patient refrigerator drain, and the result is genuinely extraordinary.
The single most important element of excellent cannoli filling is not the ratio of sugar to ricotta, not the quality of the vanilla, not whether you add chocolate chips or orange peel — it is the draining of the ricotta. Fresh whole-milk ricotta straight from the container contains a significant amount of whey that, if not removed, produces a thin, watery filling that immediately softens the cannoli shell and produces a soggy, disappointing result. Drained overnight through cheesecloth or a fine-mesh strainer, the same ricotta becomes dense, dry, and spreadable — a completely different ingredient with the body and structure to hold its shape when piped and the richness to taste luxurious rather than watery.
This post covers the classic cannoli filling in full detail — the draining technique, the beating method, the correct sugar ratio — plus seven variations including a chocolate chip version, a citrus zest version, a pistachio version, a spiced version, a mascarpone blend, a liqueur-infused adult version, and a Nutella swirl. Every variation fills 12 cannoli shells and keeps refrigerated for up to 3 days. Find more Italian dessert inspiration in our classic Italian recipes, our tiramisu, and our best Italian desserts.
Let's make cannoli filling that genuinely rivals the best pastry shop you have ever visited!
WHY YOU WILL LOVE THIS RECIPE
- The Draining Technique Is What Makes This Genuinely Bakery-Quality: The difference between a homemade cannoli filling that tastes like it came from a great Italian bakery and one that is a disappointing approximation comes entirely down to how well the ricotta was drained before mixing. Overnight-drained ricotta produces a filling that is dense, smooth, and holds its shape when piped — exactly like the filling in the best cannoli you have ever eaten. Inadequately drained ricotta produces a runny filling that immediately softens the shell and tastes watery. The draining requires no active effort, only planning — set it up the night before and the hard work is done before you have even started.
- Just 5 Ingredients — Ready in 10 Minutes of Active Work: Drained ricotta, powdered sugar, vanilla extract, a pinch of cinnamon, and mini chocolate chips — that is the entire ingredient list for the most classic, most satisfying cannoli filling. The mixing takes under 10 minutes: beat the ricotta smooth, fold in the powdered sugar and vanilla, fold in the chips, chill. There is no cooking, no tempering, no special technique beyond the overnight drain and a brief refrigeration before piping. This is the easiest genuinely impressive Italian dessert preparation available to a home cook.
- Transforms Store-Bought Shells into an Exceptional Dessert: Quality cannoli shells are available from Italian bakeries, specialty food stores, and many supermarkets — and filling them with this homemade ricotta cream elevates them entirely beyond the pre-filled packaged cannoli that sit on shelves. The combination of a crispy store-bought shell (filled right before serving so it stays crisp) and this fresh, properly drained, properly sweetened ricotta filling produces a cannoli that is genuinely indistinguishable from the ones I have eaten in the best pasticcerie in Southern Italy. The filling is what makes the cannoli, and this filling is exceptional.
- Versatile Beyond Cannoli — a Genuinely Multi-Purpose Dessert Filling: The same ricotta cream that fills cannoli shells works beautifully as a dip for biscotti and cookies, a filling for cream puffs and mini tart shells, a layer in a dessert cup with crushed amaretti cookies, a spread on toasted brioche, and a spooned topping for fresh fruit. Once I make a batch I find myself using it in a dozen different ways over the refrigerator window — it is one of the most genuinely versatile dessert preparations in Italian baking. See our easy dessert recipes for more ideas on how to use it.
- Make-Ahead Friendly — Prepare Up to 3 Days in Advance: The cannoli filling keeps refrigerated in an airtight container for up to 3 days — the flavor actually improves slightly over the first 24 hours as the vanilla and cinnamon infuse through the ricotta. This makes it an excellent advance preparation for dinner parties, holiday gatherings, and any occasion where you want to minimize the day-of preparation. Fill the shells right before serving — the filling stays perfect in the refrigerator, but filling should be piped at the last possible moment to preserve the shell's crispness.
- Easily Scaled for Any Quantity — from 12 Shells to 100: This recipe fills approximately 12 small cannoli shells. Doubling, tripling, or quadrupling the recipe requires no technique adjustment — simply multiply every ingredient proportionally and drain a proportionally larger amount of ricotta. For large events, I make the filling in batches of four times the recipe, divide it into separate containers, and flavor each container differently (classic, chocolate chip, pistachio, citrus) for a cannoli station that allows guests to choose their filling. The presentation is spectacular and the preparation is entirely manageable. See our elegant brunch recipes for serving inspiration.
INGREDIENTS
- 2 cups whole-milk ricotta cheese, drained (see directions for draining method)
- 1 cup powdered sugar, sifted
- 1 teaspoon pure vanilla extract
- ½ teaspoon ground cinnamon (optional but recommended)
- ½ cup mini chocolate chips (optional)
- ¼ cup finely chopped candied orange peel or pistachios (optional)
DIRECTIONS
- Step No.1: Drain the ricotta (the night before)
Line a fine-mesh strainer with two layers of cheesecloth or a clean, damp kitchen towel and set it over a deep bowl. Spoon the ricotta into the lined strainer, fold the edges of the cheesecloth over the top to cover, and press down gently with a plate to start the draining process. Refrigerate for a minimum of 2 hours — overnight (8–12 hours) produces the best, thickest, most bakery-quality result. You will see a pool of clear or slightly milky whey collected in the bowl beneath the strainer; this is normal and desirable — the more whey removed, the thicker and richer the filling. After draining, discard the whey and transfer the drained ricotta to a mixing bowl. It should feel noticeably dryer and more compact than it did before draining.
- Step No.2: Beat the ricotta smooth
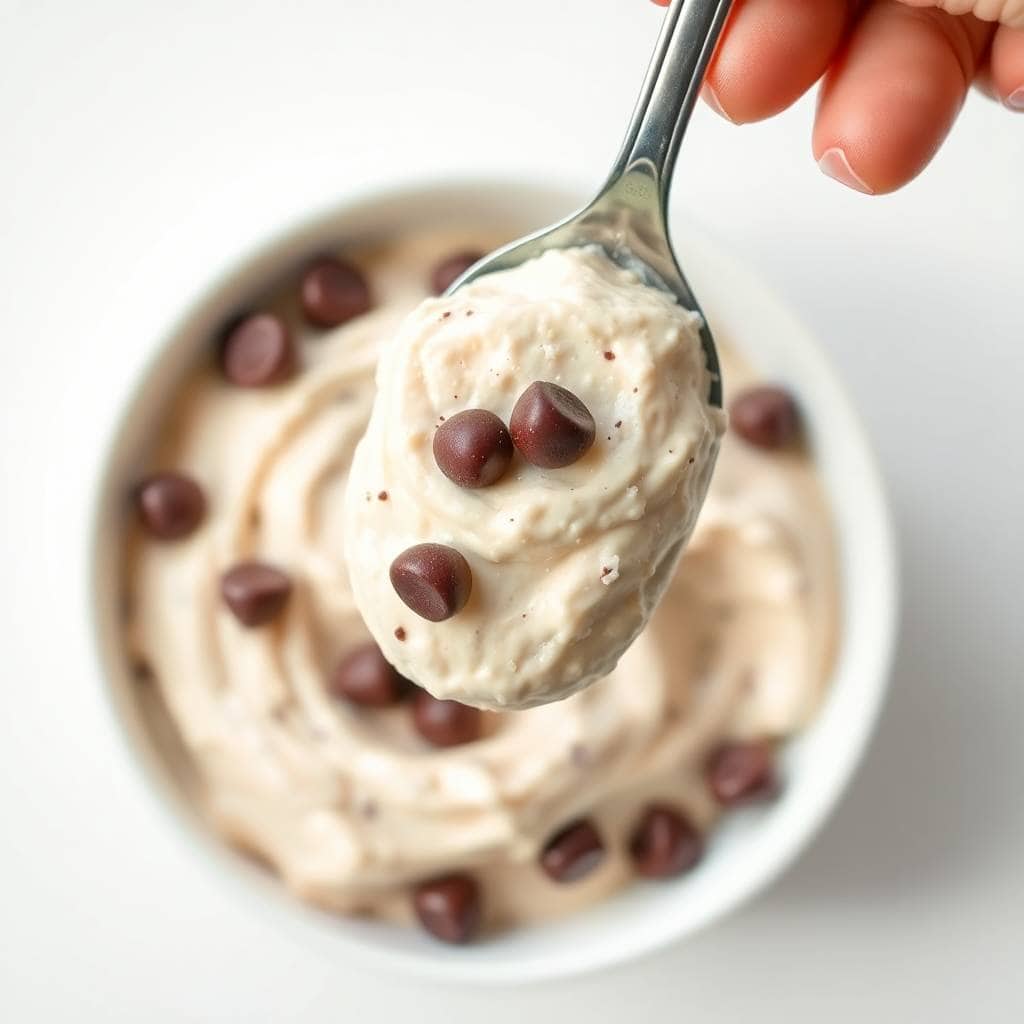
Using a hand mixer on medium speed (or a whisk and significant elbow grease), beat the drained ricotta for 1–2 minutes until it is completely smooth, creamy, and free of any grainy or curdy texture. Fresh ricotta has a slightly granular texture from the curds; beating it breaks those curds down and produces a uniformly smooth, spreadable cream. Do not skip this beating step — unbeaten ricotta produces a filling that is slightly grainy and textually imperfect, while properly beaten ricotta produces the silky, luxurious cream that defines an excellent cannoli.
- Step No.3: Add sugar and flavorings
Sift the powdered sugar directly over the beaten ricotta — sifting prevents lumps that would not incorporate smoothly into the cream. Add the vanilla extract and optional cinnamon. Mix on low speed (or stir with a rubber spatula) until the powdered sugar is completely incorporated and the filling is smooth, thick, and uniform. Taste at this point and adjust the sweetness — the filling should be distinctly sweet but not cloyingly so, with a clear ricotta flavor underneath the sweetness. If it needs more sugar, add a tablespoon at a time and mix thoroughly before assessing. If it is too sweet, a small pinch of salt will balance the sweetness without adding a salty flavor.
- Step No.4: Fold in add-ins
Using a rubber spatula, gently fold in the mini chocolate chips and any other add-ins (candied orange peel, pistachios) with a few large circular strokes — fold rather than stir to preserve the light, airy quality of the beaten ricotta and to distribute the add-ins evenly without breaking them down. Mini chocolate chips are specifically called for here rather than regular chips — the small size distributes more evenly through the cream and provides a chocolate note in almost every bite rather than large, infrequent chunks. Do not use a mixer for this step; the machine will crush the chocolate chips and produce a beige-tinted filling rather than white cream with visible chocolate chips.
- Step No.5: Chill before using
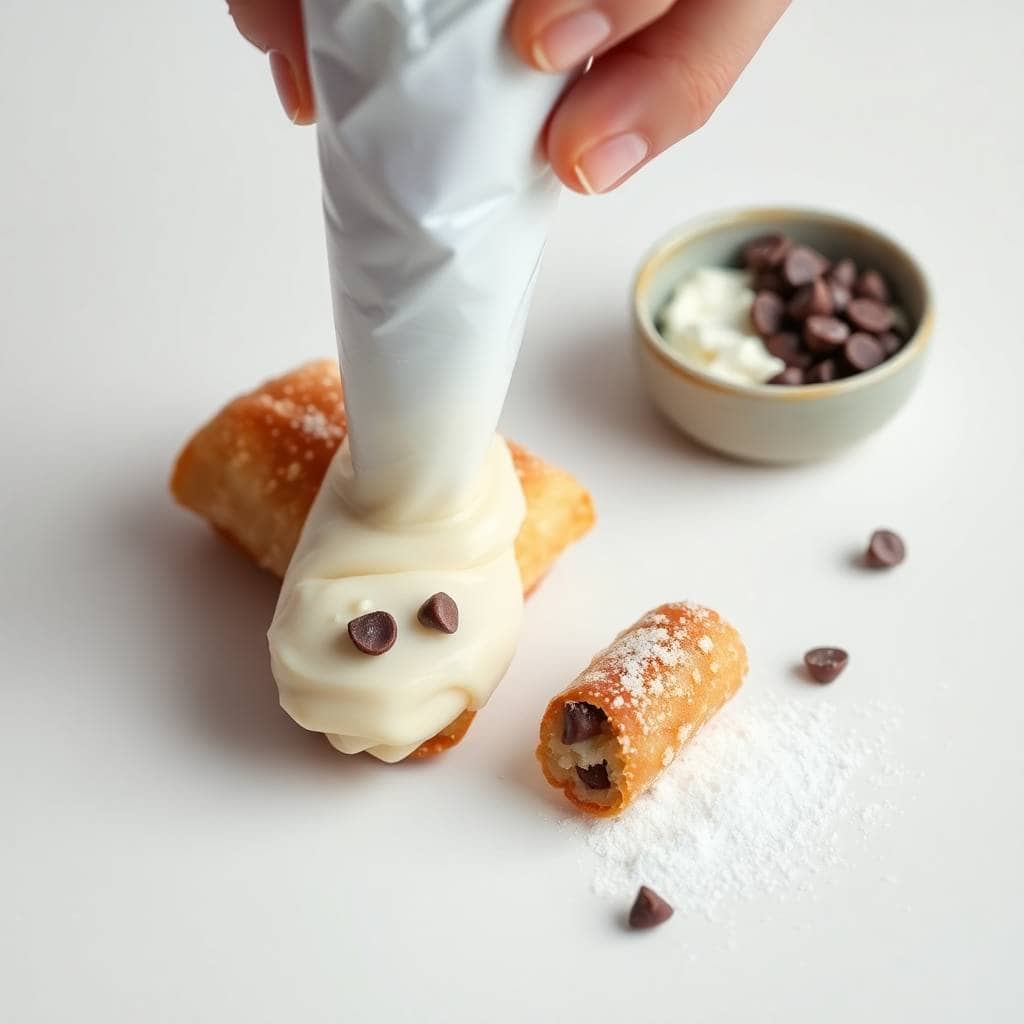
Transfer the finished filling to an airtight container or cover the mixing bowl tightly with plastic wrap and refrigerate for at least 30 minutes before piping — ideally 1–2 hours. The chilling step firms the filling from a soft, easily spreadable cream to a slightly stiffer, more pipeable consistency that holds its shape when piped into the shell opening and mounded slightly above the rim. Room-temperature filling is too soft to pipe cleanly and will not produce the neat, defined filling appearance of a properly chilled cream. When ready to use, transfer the filling to a piping bag fitted with a wide round or star tip, or to a zip-top bag with the corner cut.
TIPS FOR SUCCESS
- Always Use Whole-Milk Ricotta — Not Part-Skim or Low-Fat: Whole-milk ricotta has a higher fat content that produces a richer, creamier, more flavorful filling that holds its structure much better than part-skim versions after draining. Part-skim ricotta has a higher water content, drains less effectively, and produces a filling that is lighter in flavor and softer in texture — both qualities that work against cannoli filling quality. Impastata ricotta (a very dry, very smooth ricotta used by professional Sicilian pastry chefs) produces the absolute best result if you can find it at an Italian specialty grocer.
- Drain Overnight for the Best Texture: A 2-hour drain is the minimum and produces a usable result; an overnight drain (8–12 hours) is what produces the genuinely dense, smooth, bakery-quality filling. The difference in texture between 2-hour-drained and overnight-drained ricotta is dramatic — the overnight version is noticeably dryer, denser, and more compact, and produces a filling that pipes cleanly, holds its shape at room temperature for longer, and does not soften the shell as quickly after piping.
- Sift the Powdered Sugar Before Adding: Powdered sugar has a tendency to form hard lumps during storage, and these lumps do not dissolve completely when stirred into ricotta — they remain as small, gritty sweet spots in the otherwise smooth filling. Sifting the powdered sugar through a fine strainer before adding it takes 30 seconds and ensures completely smooth, lump-free incorporation.
- Fill Shells at the Last Possible Moment: Cannoli shells are crispy because they are dry, and ricotta filling — even well-drained — contains moisture that begins softening the shell interior from the moment it is piped in. A cannoli filled 30 minutes before serving is still crispy; one filled an hour ahead is beginning to soften; one filled 3 hours ahead may be noticeably soggy. For the most authentic cannoli experience, pipe the filling into shells within 15–20 minutes of serving. If serving at a party, set up a self-serve filling station — shells in one container, filling in a piping bag — and let guests fill their own for maximum freshness and engagement.
- Fold in Chocolate Chips by Hand — Never with a Mixer: The chocolate chips should remain whole, visible, and intact in the finished filling — small dark specks throughout the white cream that are clearly identifiable as chocolate chips. A mixer will break the chips into smaller pieces and tint the filling beige or grey. Always fold add-ins in by hand using a spatula, with the most minimal stirring needed to distribute them through the filling.
VARIATIONS
- Classic Chocolate Chip Cannoli Filling: The most beloved variation — fold in ½ cup of mini chocolate chips as directed in the base recipe. The tiny chips distribute evenly through the cream and provide a small sweet crunch in almost every bite. For an elevated version, use premium mini dark chocolate chips rather than standard semi-sweet for a more complex, slightly bitter chocolate note that contrasts beautifully against the sweet ricotta cream. This is the variation that most people picture when they think of an authentic Italian-American cannoli. See our chocolate chip recipes for more chocolate inspiration.
- Citrus Zest Cannoli Filling: Add 1 teaspoon of freshly grated orange zest or lemon zest (or a combination of both) along with the vanilla — the citrus oils perfume the entire filling with a bright, floral citrus note that is one of the most classic Sicilian flavor combinations in pastry. Candied orange peel (finely chopped, approximately ¼ cup) folded in at the end adds both the citrus flavor and small, chewy, sweet-tangy pieces of candied fruit throughout the cream. This is the most traditionally Sicilian version of cannoli filling and the one that tastes most authentically of a real Palermo pastry shop.
- Pistachio Cannoli Filling: Fold in ¼ cup of very finely chopped unsalted pistachios into the filling, and press an additional small cluster of chopped pistachios into each end of the filled cannoli as garnish — the green pistachio against the white cream and golden shell is one of the most visually striking dessert presentations available. For a more intensely pistachio-flavored filling, replace ¼ cup of the powdered sugar with an equal amount of very finely ground pistachios processed to a powder. This is the variation I make most often for Italian-themed dinner parties.
- Mascarpone Blend Cannoli Filling: Replace ½ cup of the drained ricotta with ½ cup of room-temperature mascarpone cheese — the mascarpone adds a richer, denser, more velvety quality to the filling and produces a cream that is slightly more stable at room temperature and slightly more indulgent in flavor. The mascarpone version is the richest and most luxurious of all the variations, and the one to make for any occasion where you want the most impressive, most indulgent cannoli. Mascarpone does not need to be drained — simply beat it into the drained ricotta at the beginning of step 2. See our tiramisu for another excellent mascarpone dessert application.
- Liqueur-Infused Cannoli Filling (Adults Only): Add 1–2 tablespoons of amaretto, Marsala wine, Frangelico, or Grand Marnier along with the vanilla extract. The liqueur adds a sophisticated, deeply adult flavor dimension — amaretto produces a marzipan-adjacent almond note; Marsala adds rich, wine-forward complexity; Grand Marnier adds a concentrated orange sweetness. Reduce the vanilla extract to ½ teaspoon when adding liqueur to avoid the filling tasting over-flavored. This is the variation to make for adult dinner parties where you want a dessert that feels genuinely grown-up and special.
SERVING AND STORAGE
Serving
Transfer chilled cannoli filling to a piping bag fitted with a large round tip (or a zip-top bag with the corner cut to a ½-inch opening) and pipe into cannoli shells from both ends, filling from the center outward until the filling is just visible at each opening. Dust the finished cannoli with powdered sugar through a fine sieve immediately before serving. For a presentation flourish, dip each end of the piped cannoli into mini chocolate chips, finely chopped pistachios, or finely shaved dark chocolate. Arrange on a platter and serve immediately — or set up a filling station with shells, piping bag, and toppings for guests to assemble their own.
Storage
Store unused cannoli filling in an airtight container in the refrigerator for up to 3 days — the filling thickens slightly over time as the ricotta continues to release a small amount of whey. Give it a gentle stir before using and it will return to the correct consistency. Do not freeze — freezing causes the ricotta proteins to break apart and the filling to become grainy and separated after thawing. Keep shells and filling stored separately until the moment of serving for the crispiest possible cannoli at any time during the storage window.
FAQ
A runny cannoli filling is almost always caused by ricotta that was not drained sufficiently before mixing. Ricotta straight from the container contains significant whey that must be removed before the cheese can form a thick, stable cream. If your filling is runny after mixing, there are two options: (1) transfer it back to a cheesecloth-lined strainer and refrigerate for another 2–4 hours to drain further; or (2) add a small amount of mascarpone cheese (2–3 tablespoons at a time) which will thicken the mixture without requiring additional draining. For future batches, always drain overnight for the most reliably thick result.
Yes — cannoli filling actually benefits from being made ahead. Prepare it up to 2–3 days in advance, store in an airtight container in the refrigerator, and fill the shells right before serving. The flavor improves over the first 24 hours as the vanilla and cinnamon infuse through the ricotta. The filling will thicken slightly during refrigeration — stir gently before using and add a small splash of cream (½ teaspoon) if it needs softening. Never fill the shells more than 20–30 minutes before serving to preserve their crispness.
You can use mascarpone as either a full replacement or a partial replacement for the ricotta. Full-mascarpone filling is denser, richer, and more velvety than ricotta filling, with a less distinctly Italian-American flavor and more of a cream-cheese-adjacent quality. The half-ricotta, half-mascarpone blend (described in the Mascarpone Blend variation above) produces the most balanced result — the ricotta provides the traditional flavor and lightness while the mascarpone adds richness and structure. Full-ricotta remains the most authentic choice for traditional cannoli.
Leftover cannoli filling is genuinely delicious in a variety of applications beyond cannoli shells: use it as a dip for biscotti, pizzelle, or fresh fruit (strawberries and cannoli filling is an extraordinary combination); spread it on toasted brioche or crostini; spoon it into mini tart shells with a sprinkle of pistachios for an elegant party dessert; layer it with crushed amaretti cookies in a dessert glass for a deconstructed cannoli parfait; or pipe it into cream puffs for a ricotta-filled cream puff variation. The filling is good enough to eat straight from the bowl with a spoon, which is its own entirely valid application.
No — freezing causes the ricotta proteins to separate and clump, and the filling becomes grainy, watery, and unpleasant in texture after thawing. The water that freezes and then melts back into the filling during thawing also makes the filling runny regardless of how well it was originally drained. Cannoli filling should always be made fresh (or up to 3 days ahead) and stored refrigerated, never frozen. If you need to make cannoli for a large event and want to plan ahead, the drained ricotta can be frozen before mixing (plain drained ricotta freezes better than the finished sweetened cream), then thawed and mixed fresh the day before serving.
Cannoli filling is the preparation that proves great Italian pastry does not require advanced technique or specialized equipment — it requires patience with the overnight drain and attention to the quality of the ricotta, and then it virtually makes itself. Fill good shells with this cream, dust with powdered sugar, and every person you serve will feel transported to a Sicilian pasticceria.
Try the pistachio version for the most beautiful presentation, the mascarpone blend for the richest result, and the citrus zest version for the most authentically Sicilian flavor. Pair with our tiramisu, our best Italian desserts, our classic Italian recipes, and our easy dessert recipes for the complete Italian-inspired spread. 🇮🇹🧀✨
CANNOLI FILLING RECIPE
Ingredients
- 2 cups whole milk ricotta cheese well-drained
- 1 cup powdered sugar or to taste
- 1 teaspoon vanilla extract
- ½ teaspoon ground cinnamon optional
- ½ cup mini chocolate chips optional
- ¼ cup finely chopped candied orange peel or pistachios optional
Instructions
Drain Ricotta:
- Place ricotta in a fine mesh strainer or cheesecloth over a bowl. Let drain for at least 2 hours or overnight in the fridge for a thick, non-runny filling.
Mix Ingredients:
- In a mixing bowl, beat the ricotta until smooth. Add powdered sugar and vanilla extract (and cinnamon if using). Mix until creamy and fully combined.
Fold in Add-Ins:
- Gently fold in mini chocolate chips, pistachios, or candied fruit if desired.
Chill (Optional):
- For a firmer texture, chill the filling for 30 minutes before piping into cannoli shells.
Use or Store:
- Fill shells just before serving to keep them crisp. Store unused filling in the refrigerator for up to 3 days.
Notes
Straining Tip: Use a cheesecloth-lined strainer for best texture.
Serving Suggestions: Fill cannoli shells, sandwich between cookies, or use as a fruit dip.
Storage Tips: Store in an airtight container in the fridge. Do not freeze.





Comments
No Comments