
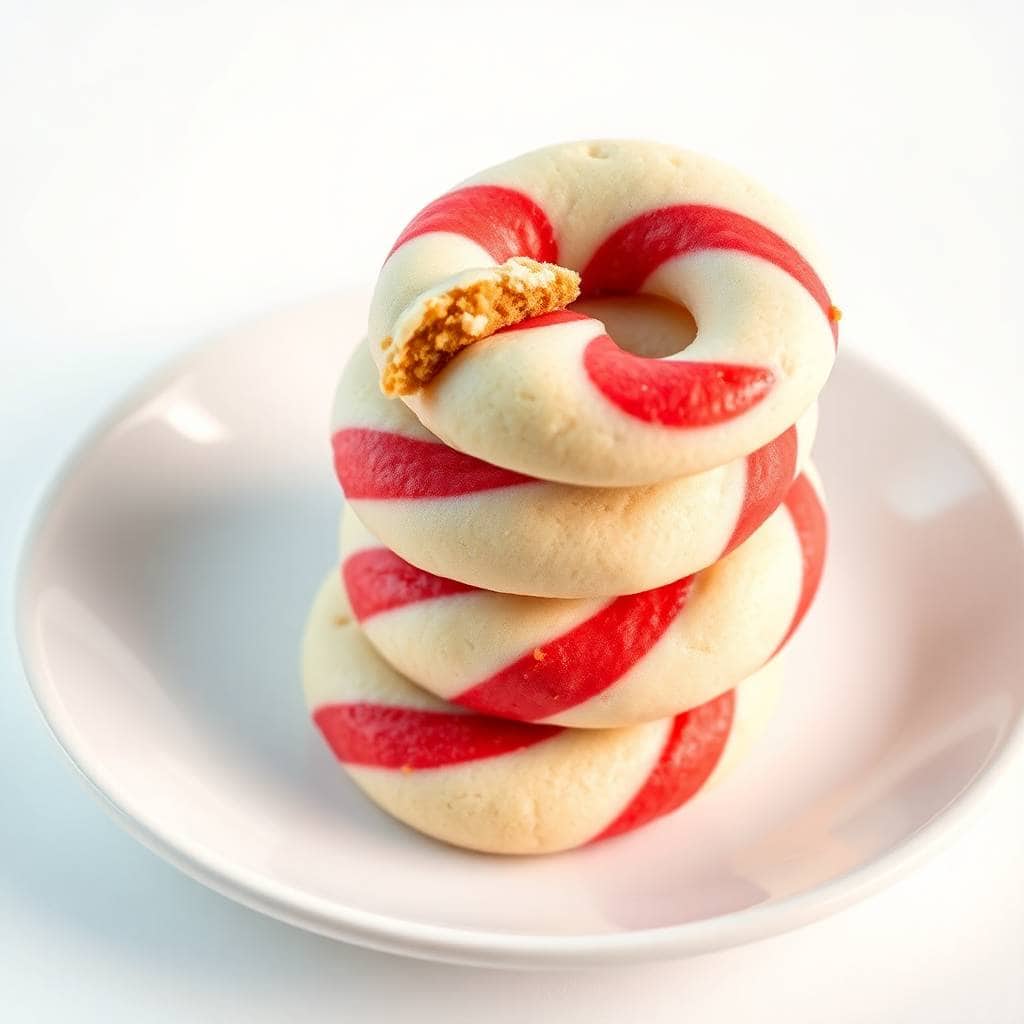
Every December, I make at least three or four batches of these candy cane cookies — and every year I forget how satisfying it is to twist those little ropes of red and white dough together. There's something about the shape that just feels like Christmas in a way that a regular round cookie doesn't.
What I love about this recipe is how simple the dough actually is. It's a basic butter cookie dough — softened butter, powdered sugar, an egg, flour — and the peppermint extract does the real work on flavour. The dough is firm enough to roll into ropes without sticking to everything, which took me a couple of attempts to get right. The first time I made these, my ropes kept pulling apart when I tried to twist them because I hadn't chilled the dough long enough. Thirty minutes in the fridge makes a real difference.
Zainab helped me make these last Christmas and she took the twisting very seriously — spent about twenty minutes making sure every single one looked perfect. Saad mostly ate the dough scraps and declared himself the quality tester. We bake these alongside my Christmas bundt cakes and package everything up for a big cookie tin we put together for family every year.
One thing to set expectations on: these cookies stay very pale when they're done. That threw me off the first time — I kept them in longer because I thought they weren't baked through, and they came out dry and crumbly. Pull them when they're just set and still look almost underdone. They firm up as they cool and the texture is exactly right: soft in the middle, barely crisp at the edges.
Why You'll Love This Recipe
- The shaping is genuinely fun: Rolling out little ropes of red and white dough and twisting them together is one of those rare baking tasks that feels relaxing rather than fiddly. Kids can do it without much supervision once they get the hang of the rope size. It's the kind of thing where even imperfect ones still look charming on a tray.
- The flavour is classic and crowd-approved: Peppermint and vanilla in a buttery cookie is one of those combinations that just works. It's not overwhelming — more of a soft, cool note that reminds you of actual candy canes without tasting like mouthwash. If you've got people who aren't huge peppermint fans, you can pull back to half a teaspoon and it's still lovely.
- They pack and gift beautifully: Because of the cane shape, these stack neatly in a tin with parchment between layers and they arrive looking exactly as good as they did when you baked them. I've sent these in cookie boxes across the city and not a single one arrived broken — unlike some of the more fragile decorated sugar cookies I've tried to mail.
- The dough can be made ahead: I usually make the dough two days before I actually want to bake, wrap both halves in plastic wrap, and keep them in the fridge. On the day, the dough comes out already perfectly chilled and ready to shape. This is a real help during the weeks when I'm juggling too many holiday things at once.
- No special equipment needed: I make these with my hands, a sheet pan, and parchment paper. No cookie cutters, no stand mixer, no piping bags. Just a regular bowl, a wooden spoon (or a hand mixer if you have one), and your hands for the shaping. That's it.
Ingredients
- 1 cup unsalted butter, softened
- 1 cup powdered sugar
- 1 large egg
- 1½ teaspoons vanilla extract
- 1 teaspoon peppermint extract (or almond extract if you prefer)
- 2½ cups all-purpose flour
- ½ teaspoon salt
- Red food colouring (gel colouring works best — the colour is much more vivid)
- Crushed peppermint candies or candy canes for decoration (optional)
Directions
- Step 1: Make the dough. In a large bowl, beat the softened butter and powdered sugar together until smooth and creamy. Add the egg, vanilla, and peppermint extract and mix until fully combined. The butter needs to be properly softened — not melted, not fridge-cold. I pull mine out an hour before I start.
- Step 2: Add the flour. Mix in the flour and salt gradually until a soft dough comes together. It should feel smooth and not sticky. If it's sticking to your hands, add a tablespoon of flour at a time until it's workable.
- Step 3: Divide and colour. Split the dough into two equal halves. Add red food colouring to one half and knead it in until the colour is completely even — no streaks. Wrap both halves separately in plastic wrap and refrigerate for at least 30 minutes. Don't skip this; the chilling is what makes the ropes hold their shape.
- Step 4: Preheat your oven. Set it to 375°F (190°C) and line your baking sheets with parchment paper. A regular sheet pan from any grocery store works perfectly.
- Step 5: Shape the cookies. Take about 1 teaspoon of red dough and 1 teaspoon of plain dough. Roll each piece into a rope about 4 inches long. Lay them side by side and twist them together, then curve one end to make the candy cane hook. Place on the lined baking sheet with a little space between each one. If the dough gets soft while you're working, pop it back in the fridge for 10 minutes.
- Step 6: Bake. Bake for 8 to 10 minutes until just set. They should look barely done — still pale, no browning. This is the part where I had to train myself to trust the timer, because underdone-looking cookies feel wrong but they firm up perfectly as they cool. Leave them on the tray for 2 minutes before moving to a wire rack.
- Step 7: Decorate (optional). While the cookies are still just slightly warm, sprinkle crushed peppermint candy or a little coarse sugar over the top. The warmth helps it stick without needing any glaze.

Tips for Success
- Use gel food colouring, not liquid: I made the mistake of using liquid red food colouring my first time and ended up with pink dough, not red. Gel colouring (the kind that comes in a small pot) gives you that vivid candy-cane red without adding extra liquid to the dough, which can mess with the texture. Wilton and AmeriColor are both easy to find at Walmart or craft stores.
- Keep your ropes even: The twist looks cleanest when both ropes are the same thickness and the same length. I roll them against the countertop with my palm, starting from the centre and working outward. If one rope is thicker than the other, the twist comes out lopsided and the baking time gets uneven too.
- Don't overbake: These cookies are done when they look like they might need another minute. I know that sounds backwards but it's true. The edges should be set and the bottom should be just barely starting to turn golden — the tops will still look pale. They continue cooking on the hot tray for the two minutes after you pull them, so trust the process.
- Work in small batches from the fridge: I take out just enough dough to shape 6 or 8 cookies at a time and leave the rest chilled. Warm dough gets sticky and the ropes start to tear when you twist them. This small habit made the whole process so much less frustrating.
- Store in a single layer (or with parchment between layers): The candy cane shape makes these a bit fragile if you just dump them in a tin. I line each layer with parchment paper and they come out looking exactly as they went in. Worth the extra 30 seconds of care.
Variations
- Almond instead of peppermint: The original recipe I learned from used almond extract, and honestly both versions are wonderful. Almond gives a slightly warmer, more marzipan-like flavour that some people actually prefer. If you're serving these to anyone who's not a big peppermint person, almond is a safe and delicious swap — use the same amount.
- Chocolate twist: Instead of red food colouring, mix 2 tablespoons of cocoa powder into one half of the dough. You get a chocolate-vanilla twist that looks beautiful and tastes like a shortbread meets a brownie. My husband actually prefers this version — he's not big on peppermint.
- Mini candy canes: Roll smaller ropes using just half a teaspoon of each dough and make miniature candy canes. They bake in about 6 to 7 minutes and are great for cookie platters where you want more variety and smaller portions. I made these for Zainab's school party and they disappeared first.
- Different shapes: You don't have to stick to the candy cane curve. Twist the ropes and form them into stars, wreaths, or simple spirals. The twisted dough looks good in any shape, and it's a fun way to mix up a cookie tray. If you're doing a full holiday spread alongside something like a pull-apart garlic bread wreath, the twisted star shapes echo that look really nicely.
- Gluten-free: I haven't tested this myself, but a 1:1 gluten-free flour substitute (like Bob's Red Mill or King Arthur's) should work well here since this dough doesn't rely on gluten for structure. The texture might be slightly more delicate, so handle the shaped cookies gently before baking.
Serving and Storage
Serving
These are lovely with hot cocoa or a cup of tea. They're sweet but not aggressively so, which means people tend to eat more than one without feeling like it's too much. For holiday parties, I lay them out on a white plate so the red and white twists really pop. They also work well tucked into a cookie tin alongside other holiday bakes — the shape fills the gaps between round cookies nicely.
Storage
Store in an airtight container at room temperature for up to a week. Layer with parchment paper between each row to protect the shape. For longer storage, you can freeze baked cookies for up to a month — just let them thaw at room temperature for about 30 minutes before serving. Alternatively, freeze the unbaked dough (wrapped tightly in plastic wrap) for up to 2 months and bake fresh when you need them.

Frequently Asked Questions
Can I make the dough ahead of time?
Yes, and I actually recommend it. Wrap both halves of dough tightly in plastic wrap and refrigerate for up to 2 days. You can also freeze the dough for up to 2 months — just thaw it overnight in the fridge before shaping. Having the dough ready to go makes the actual baking day much more relaxed.
Why are my cookies spreading and losing their shape?
This usually means the dough was too warm going into the oven. Make sure you chill the shaped cookies on the tray for 10 minutes before baking if your kitchen is warm, and always start with properly chilled dough. Also check that your butter was softened but not melted — melted butter makes the dough much harder to control.
Can I skip the peppermint extract?
Absolutely. You can use almond extract instead (same amount), or just increase the vanilla to 2 teaspoons for a plain butter cookie flavour. The cookies will taste different but still be genuinely good. Almond is my personal favourite alternative — it gives a warmth that works really well in a buttery cookie like this.
Do I have to use food colouring?
You don't have to, but the red and white twist is the whole visual point of these cookies. Without it, you just have a plain twisted butter cookie, which is still nice but loses the candy cane identity. If you want to avoid artificial dyes, you can try a natural red colouring like beet powder — I haven't tested it with this dough specifically, but it works in other baked goods I've tried.
How do I know when the cookies are done if they stay pale?
The cookies are done when the edges look set and the bottoms are just barely starting to colour — very lightly golden, not brown. The tops will still look pale and slightly underdone. That's correct. If you wait until they look fully baked on top, they'll be dry once they cool. Pull them at the 8-minute mark and check the underside; that's your real tell.
These candy cane cookies have become one of my favourite things to bake in December — not because they're the fastest or the most impressive, but because the process of making them actually feels like the holidays. Rolling out little ropes of dough, twisting them together, laying them on the tray in a row. It's slow in a good way.
I make at least two batches every year: one for the family and one for the cookie tin we put together for relatives. I always double the recipe now because the first batch barely survives the cooling rack before someone in this house starts helping themselves. If you're building out a bigger holiday dessert spread, my round-up of easy Christmas bundt cake recipes is worth a look — several of them can be made ahead the same way the dough for these cookies can.
I know these aren't complicated or fancy. But sometimes the simple things — a buttery, peppermint-scented cookie shaped like a candy cane — are exactly what the season needs. Make them once and I think you'll understand why I come back to them every year without fail. 🍬❄️

CANDY CANE COOKIES
Ingredients
- 1 cup unsalted butter softened
- 1 cup powdered sugar
- 1 large egg
- 1½ teaspoons vanilla extract
- 1 teaspoon peppermint extract
- 2½ cups all-purpose flour
- ½ teaspoon salt
- Red food coloring
- Optional: crushed peppermint candies for garnish
Instructions
Preheat Oven:
- Preheat oven to 375°F (190°C). Line baking sheets with parchment paper.
Make Dough:
- Cream butter and powdered sugar until fluffy. Beat in egg, vanilla, and peppermint extract. Gradually mix in flour and salt until a dough forms.
Divide and Color Dough:
- Divide dough in half. Tint one half with red food coloring. Leave the other half plain.
Shape Cookies:
- Roll 1 teaspoon of each dough color into ropes about 4 inches long. Twist red and white ropes together and curve the top to form a candy cane shape.
Bake:
- Place on baking sheet and bake for 8–10 minutes or until edges are just beginning to brown.
Cool and Garnish:
- Cool on sheet for 2 minutes, then transfer to wire racks. Sprinkle with crushed peppermint candies if desired.
Notes
Customisations: Use gel coloring for brighter red or add almond extract for variation.
Serving Suggestions: Serve with hot cocoa or pack in cookie tins for gifting.
Storage Tips: Store in an airtight container at room temperature for up to 1 week.
If you're baking for the holidays and want more ideas to fill out your spread, here are a few things from my kitchen that might help:
- 19 Easy Christmas Bundt Cake Recipes — a whole collection of make-ahead holiday cakes that look stunning with minimal effort
- Pull Apart Garlic Bread Wreath — my go-to showstopper for holiday dinners, and the kids demolish it every time
- Tater Tot Sausage Breakfast Casserole — for the morning-of chaos when you need something hands-off and filling
- Blueberry Cream Cheese Egg Rolls — a fun dessert option if you want something different on the holiday table
- Paula Deen's Corn Casserole — a side dish that disappears faster than any cookie at a holiday dinner





Comments
No Comments