
The first time I made buffalo wings at home, I skipped the step where you pat the chicken dry. I was in a hurry, the kids were loud, and I figured it couldn't matter that much. It mattered. The wings came out pale and soft and a little sad, and I stood there eating them over the kitchen sink wondering why I'd bothered. That was the moment I actually started paying attention to how these wings work.
What I've figured out after making these probably two dozen times: the baking powder trick is real, the drying step is non-negotiable, and the sauce needs butter to go glossy and cling properly. This isn't a complicated recipe — it's actually one of the more forgiving things I make — but those three things make the difference between wings you eat because they're there and wings you eat until they're gone.
My husband asks for these whenever there's a match on. Saad, who normally picks at everything, will sit down and quietly eat six wings without looking up. I serve them with celery sticks and blue cheese dressing on the side, and honestly that combination keeps everyone happy enough that I don't have to make anything else. On big game days I'll do a double batch because a single batch disappears embarrassingly fast.
If you're making these for a crowd, you can bake the wings ahead and toss them in sauce right before serving — they hold up well. I've also paired them with my shrimp, corn, potatoes, and smoked sausage foil packs for a full spread when we have people over. One more thing: don't sauce the wings until the very last minute. If they sit in sauce too long, the skin softens and you lose all that crunch you worked for.

Why You'll Love This Recipe
- The skin actually gets crispy: Baking powder is the secret here, and I was skeptical when I first heard about it. But it genuinely works — it changes the pH of the skin slightly, which helps it brown faster and get that crunch you expect from a good wing. Combined with drying the wings thoroughly first, you get texture that holds up even after tossing in sauce.
- Five ingredients for the sauce: Butter, hot sauce, a splash of vinegar — that's really it. I use Frank's RedHot when I can find it at Walmart or Costco, but any cayenne-based hot sauce works. The butter is what makes the sauce rich and glossy instead of thin and watery, so don't skip it or reduce it.
- You can control the heat: I make these medium-spicy because my husband can take it but the kids are still getting there. If you want milder wings, just reduce the hot sauce and add a little more butter. Want them fiery? Go the other direction. The ratio is flexible in a way that most recipes aren't.
- No deep fryer needed: I know some people swear by frying wings, and I understand — fried wings have a specific kind of crunch. But baking on a wire rack gets you genuinely close, without the oil, the smell, and the mess. A wire rack over a sheet pan is all you need, and if you don't have one, a regular oven rack pulled out and placed over a foil-lined pan works fine.
- Works as a meal, not just a snack: In Pakistan we'd never really eat wings as a standalone dinner, but here I've started serving a big pile of these with a simple salad and calling it dinner on a Friday. My marinated cucumber, tomato, and onion salad actually cuts through the richness of the sauce really well alongside these.
Ingredients
- 2 lbs chicken wings (split into flats and drumettes if not already)
- ½ teaspoon salt
- ½ teaspoon black pepper
- ½ teaspoon garlic powder
- ½ teaspoon paprika
- 1 tablespoon baking powder (not baking soda — this is important)
- 2 tablespoons olive oil
- ½ cup buffalo sauce (I use Frank's RedHot, available at most major grocery stores)
- 1 tablespoon unsalted butter, melted
- 1 teaspoon white vinegar (optional, but it brightens the sauce)
Directions
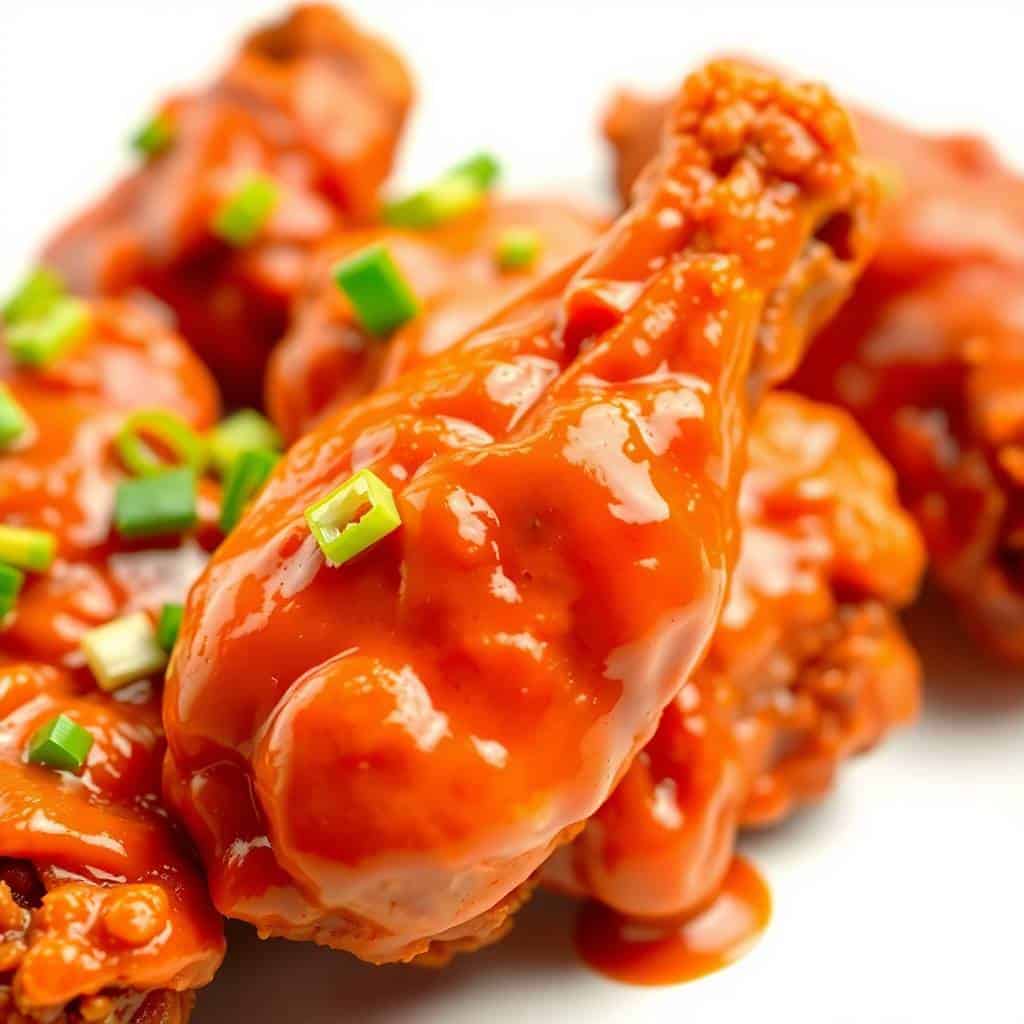
- Step 1: Dry the wings thoroughly. Use paper towels and really press them into the chicken — you want the surface as dry as possible. This is the step I skipped the first time and regretted. Moisture is the enemy of crispy skin, so take the extra two minutes here.
- Step 2: Season the wings. In a large bowl, toss the dry wings with salt, pepper, garlic powder, paprika, baking powder, and olive oil. Make sure every wing is coated evenly. The baking powder coats the outside and helps the skin brown and crisp in the oven.
- Step 3: Arrange on a wire rack. Place the seasoned wings on a wire rack set over a baking sheet. Space them out so they're not touching — if they're crowded, they'll steam instead of roast and you'll lose the crunch. Preheat your oven to 400°F (200°C).
- Step 4: Bake the wings. Bake for 20–25 minutes, then flip each wing and bake for another 15–20 minutes until deeply golden and crispy. Total time in the oven is usually around 40–45 minutes. Don't rush this — the color tells you when they're ready.
- Step 5: Make the buffalo sauce. While the wings finish baking, melt the butter in a small saucepan over low heat. Add the buffalo sauce and vinegar, and stir until smooth and glossy. Taste it — if it's too sharp, add a tiny bit more butter. If it needs more heat, add a few drops more hot sauce.
- Step 6: Toss and serve immediately. Transfer the hot wings to a large bowl, pour the sauce over them, and toss to coat. Serve right away — the longer they sit in sauce, the less crispy they'll be. Put any extra sauce on the side for dipping.
Tips for Success
- Don't skip the drying step: I know I already said this in the intro, but I'm saying it again because it's the single thing that made the biggest difference in my wings. Pat them dry, then if you have time, let them sit uncovered on a plate in the fridge for an hour or even overnight. The fridge air dries them out even further and the skin gets noticeably crispier.
- Use a wire rack, not just a baking sheet: Placing wings directly on a flat pan means the bottom of the wing sits in its own juices and steams. The rack lifts them up so hot air circulates all the way around. I use a basic cooling rack set inside a rimmed sheet pan — the kind you can get at any kitchen store for under $15.
- Don't crowd the pan: This is the other thing I got wrong early on. When wings are touching each other, the moisture has nowhere to go and they end up steaming rather than roasting. If your batch is large, split it across two sheet pans. It's worth the extra pan to wash.
- Sauce at the last possible moment: Once the sauce goes on, the clock is ticking. Buffalo sauce has moisture in it, and that moisture will slowly soften the skin. Toss the wings, plate them immediately, and serve. If you're making these for a party and timing is tricky, keep the wings warm in the oven and toss in sauce in small batches as people eat.
- Check the internal temperature: Wings are done when they hit 165°F (74°C) internally. I check the thickest part of the drumette with a cheap instant-read thermometer. If you don't have one, cut into the thickest wing — the meat should be fully white with no pink near the bone.
Variations
- Honey buffalo: Add 2 tablespoons of honey to the buffalo sauce while you're warming it. The honey softens the heat and gives the wings a sticky, lacquered coating that my husband is completely obsessed with. This is probably my most-made variation — it takes five seconds and transforms the whole flavor profile.
- Garlic parmesan: Skip the buffalo sauce entirely. Toss the baked wings in melted butter, 2 teaspoons of garlic powder (or minced fresh garlic), and a generous handful of finely grated parmesan. Finish with chopped parsley. This is the version Saad prefers, and honestly it's a completely different meal — savory and rich instead of spicy and tangy.
- Smoky buffalo: Use smoked paprika in the dry rub instead of regular paprika, and add a smoky hot sauce (some stores carry chipotle-based hot sauces in the same aisle as Frank's). The smokiness adds a layer of depth that makes these taste like they came off a grill, not out of an oven.
- Air fryer wings: If you have an air fryer, use it. Arrange seasoned wings in a single layer and cook at 400°F for 20–22 minutes, flipping halfway through. They come out incredibly crispy — even crispier than the oven version sometimes. Just make sure not to overlap them or you'll undo all the good work.
- Lemon pepper: After baking, skip the hot sauce and instead toss the wings in melted butter, fresh lemon zest, cracked black pepper, and a pinch of salt. This is a lighter, brighter option that's great for people who don't want heat. I made these once when I had a guest who couldn't handle spice and they were a genuine hit.
Serving and Storage
Serving
Serve these hot, right out of the bowl after tossing. Classic sides are celery sticks, carrot sticks, and a bowl of blue cheese or ranch dressing for dipping. I usually put both dressings out and let people choose — ranch is what my kids go for, my husband takes the blue cheese. If you're making this part of a bigger spread, these wings sit alongside a heart-shaped pizza surprisingly well for a fun casual dinner at home. For a crowd, I keep extra sauce warm in a small saucepan on the stove and let people drizzle more as they eat.
Storage
Leftover wings keep in an airtight container in the fridge for up to 3 days. To reheat and get some of the crispiness back, put them on a wire rack over a baking sheet in a 375°F oven for about 10–12 minutes. The microwave works in a pinch but the skin goes soft. I would not freeze these — the texture of reheated frozen wings is just not worth it when the recipe is this quick to make fresh.

Frequently Asked Questions
Can I make buffalo wings ahead of time?
Yes — bake the wings fully, then let them cool and refrigerate. When you're ready to serve, reheat them in a 375°F oven for 10 minutes until hot and crispy again, then toss in fresh sauce right before serving. Don't sauce them and then reheat, or the skin will be soft and the sauce will look dull.
How do I make the wings crispier?
Three things make the biggest difference: dry the wings thoroughly before seasoning, add baking powder to the dry rub, and make sure the wings aren't touching each other on the pan. If you have time, let the seasoned wings sit uncovered in the fridge for an hour before baking — the cold, dry air pulls even more moisture out of the skin.
Can I use frozen chicken wings?
You can, but thaw them completely first — either overnight in the fridge or under cold running water. After thawing, pat them very dry. Frozen wings tend to release more water than fresh, so the drying step is even more important here. Don't try to bake them straight from frozen; the timing gets unreliable and the texture suffers.
How spicy are these wings?
Using Frank's RedHot at the standard ratio, these are medium-spicy — noticeable heat but not overwhelming. To make them milder, use less hot sauce and more butter in the sauce. To make them hotter, add a pinch of cayenne to the dry rub or use a hotter sauce like Tabasco as part of the mix. The base recipe is a good middle ground that most people can handle.
What dipping sauces work best with buffalo wings?
Blue cheese dressing is the classic pairing — the cool, creamy, tangy flavor genuinely counterbalances the heat of the buffalo sauce. Ranch is a close second and more kid-friendly. Both are easy to find in the refrigerated section at most grocery stores. If you want to make your own, a simple mix of sour cream, mayo, garlic powder, and lemon juice gets you close to ranch in about two minutes.
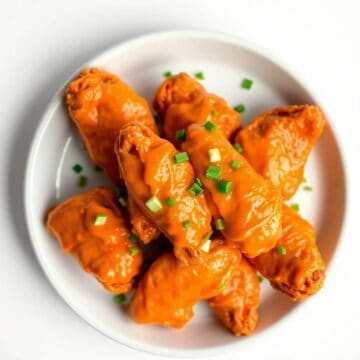
BUFFALO CHICKEN WINGS
Ingredients
For the Wings:
- 2 lbs chicken wings
- ½ teaspoon salt
- ½ teaspoon black pepper
- 2 tablespoons olive oil
- ½ cup buffalo sauce
- 1 tablespoon unsalted butter melted
Instructions
Prepare Wings:
- Preheat oven to 200°C (400°F). Pat chicken wings dry, season with salt and pepper, and toss with olive oil.
Bake Wings:
- Arrange wings on a baking sheet lined with parchment paper and bake for 20–25 minutes until cooked through and slightly crispy.
Coat Wings:
- In a bowl, mix buffalo sauce and melted butter. Toss baked wings in the sauce until evenly coated.
Serve:
- Return coated wings to the oven for 5 minutes to set the sauce, then serve immediately with celery sticks if desired.
Notes
- Make Ahead: Wings can be seasoned ahead and stored in the fridge for a few hours before baking.
- Variations: Add hot sauce or honey for different flavor profiles.
- Serving Suggestions: Serve with celery sticks and blue cheese dressing.
- Allergy-Friendly: Ensure buffalo sauce ingredients fit dietary needs.
- Storage Tips: Refrigerate leftovers for up to 2 days and reheat in the oven to retain crispiness.
I've made a lot of appetizers and snacks over the years, and buffalo wings are one of the few things that genuinely get requested by name in my house. My husband will text me mid-afternoon on a Saturday asking if I'm making them. That doesn't happen with a lot of recipes. There's something about the combination of crispy skin, tangy sauce, and that cooling dip on the side that just works every single time.
What I like most about this recipe is that the skill curve is shallow but the results don't look like it. Once you internalize the drying step and the baking powder trick, you can make these without thinking. The sauce takes about three minutes. The whole thing is genuinely doable on a weeknight if you're not exhausted — and I've done it on weeknights when I absolutely was exhausted and it still came out fine.
If you're putting together a bigger spread, these go really well next to something rich and comforting like my crock pot smothered pork chops for a proper game-day table. And if you need a dessert to finish things off, my chocolate lava cakes are shockingly simple and feel like a real occasion — the contrast after all that spicy sauce is genuinely satisfying.
Make these once and pay attention to the steps. The second time you make them, you'll be doing it from memory. 🍗🔥
If you liked this recipe, you'll probably enjoy these too:
- Shrimp, Corn, Potatoes, and Smoked Sausage Foil Packs
- Crock Pot Smothered Pork Chops
- Marinated Cucumber, Tomato, and Onion Salad
- Chocolate Lava Cakes (Gooey Molten Center, Easy & Restaurant-Quality)
- Heart-Shaped Pizza



Comments
No Comments