
Zainab asked me to make Christmas cookies three weekends in a row before I finally stopped eyeballing the recipe and wrote everything down. She's seven, she has opinions, and her opinion is that cookies must be soft, must have sprinkles, and must taste like butter and vanilla — no exceptions.
The secret that took me a few batches to figure out is the sour cream. I know it sounds odd in a cookie, but it's what keeps these from going dry and crumbly by day two. The fat in the sour cream works with the butter to keep the crumb tender even after the cookies have been sitting in a tin for three days. I'd tried versions without it and they were fine fresh, but by the next morning they'd lost that soft, pillowy quality that makes a Christmas cookie worth making a double batch of.
These are the cookies I make every December — sometimes for the school holiday party, sometimes just because my kids are antsy on a cold afternoon and need something to do. They're also dead easy to dress up for gifting. If you're already planning a holiday baking spread, these pair really well next to something like a slice of Dutch Christmas Stollen on a cookie plate.
One thing to know going in: this dough does need to chill. Don't skip that step. I tried to rush it once and the cookies spread into flat discs with crispy edges — salvageable but not what I was going for. Give it at least 30 minutes in the fridge, and if you can manage an hour, even better. Everything else about this recipe is forgiving.

Why You'll Love This Recipe
- They stay soft for days: Most sugar cookies I've made turn hard and chalky by day two. These don't — the sour cream keeps them tender well past the first day. I've eaten one on day four straight from the tin and it was still soft in the middle. That matters a lot when you're baking ahead for a holiday gathering.
- The dough is easy to work with: I don't have a stand mixer, and I make this with a wooden spoon and a hand mixer I've had since before my kids were born. The dough comes together smoothly and doesn't stick to everything the way some sugar cookie doughs do. If you've ever wrestled with an overly soft cut-out dough, this one is more cooperative.
- Kids can actually help: Zainab handles the sprinkles, Saad flattens the dough balls, and I do the oven part. It's one of those recipes where the kids feel like they're really cooking, not just watching. The dough doesn't need a lot of precision, so little hands poking at it doesn't ruin anything.
- You can make the dough ahead: December is hectic. I usually make the dough two days before I actually plan to bake, keep it wrapped in the fridge, and pull it out when I have a free hour. You can also freeze the dough for up to two months if you want to get really ahead of yourself.
- Simple pantry ingredients: Nothing here requires a trip to a specialty store. Flour, butter, sugar, egg, vanilla, sour cream, baking soda, baking powder, salt — that's the whole list. I've picked up every single one of these at a regular Walmart or Aldi. The sprinkles are optional, obviously, but Zainab would disagree with that statement.
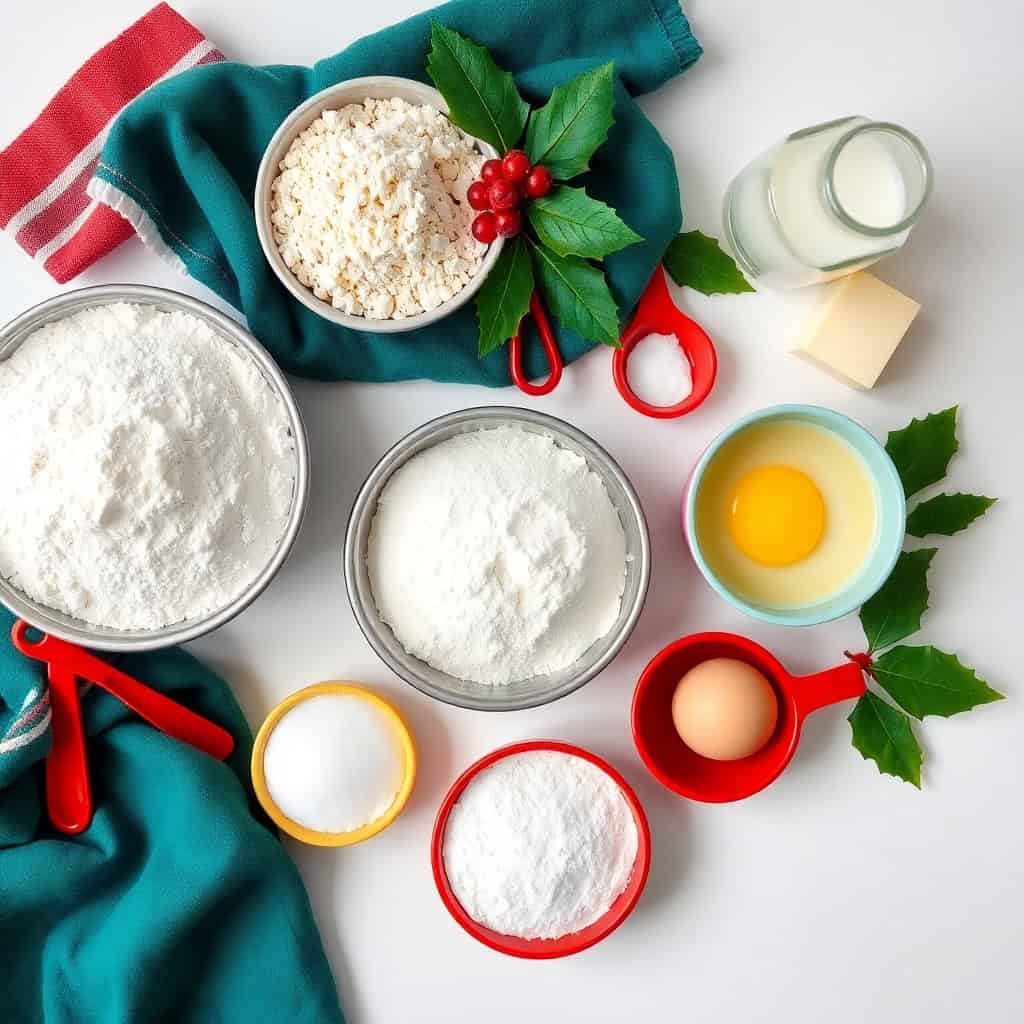
Ingredients
- 2 ½ cups all-purpose flour
- 1 teaspoon baking soda
- ½ teaspoon baking powder
- ½ teaspoon salt
- 1 cup unsalted butter, softened (leave it out for about 30 minutes — cold butter won't cream properly)
- 1 ¼ cups granulated sugar
- 1 large egg
- 2 teaspoons vanilla extract
- ¼ cup sour cream (full-fat works best; Greek yogurt is a decent substitute)
- Holiday sprinkles for decorating
Directions
- Step 1: Preheat and prep — Heat your oven to 350°F (175°C) and line a baking sheet with parchment paper. I always use parchment — it's the difference between cookies that slide off easily and cookies you're scraping off the pan.
- Step 2: Mix the dry ingredients — In a medium bowl, whisk together the flour, baking soda, baking powder, and salt. Set it aside. Whisking instead of just stirring makes sure everything is evenly distributed so no cookie gets a mouthful of plain baking soda.
- Step 3: Cream butter and sugar — In a larger bowl, beat the softened butter and sugar together until the mixture looks pale and fluffy — about 2-3 minutes with a hand mixer. Add the egg, vanilla extract, and sour cream, and mix until smooth. The sour cream makes the mixture look slightly curdled for a second; keep mixing and it comes together.
- Step 4: Combine wet and dry — Add the dry ingredients to the wet mixture gradually, stirring until just combined. Don't overmix here — once you stop seeing dry flour, stop. Overmixing develops the gluten and makes the cookies tough instead of tender.
- Step 5: Chill the dough — Cover the bowl with plastic wrap and refrigerate for at least 30 minutes, up to overnight. I know waiting is annoying, but this step is what keeps your cookies from spreading into puddles. Cold dough = defined edges.
- Step 6: Shape and decorate — Scoop tablespoon-sized balls of dough onto the prepared baking sheet, spacing them about 2 inches apart. Gently press each one down to flatten slightly — they won't spread much on their own. Add sprinkles on top before they go in the oven so they stick.
- Step 7: Bake — Bake for 10-12 minutes, until the edges look set but the centers still look a little underdone. That's exactly where you want them. They firm up as they cool on the pan. Leave them on the baking sheet for 5 minutes before moving to a wire rack.

Tips for Success
- Don't skip the chill: The first time I made these I was impatient and skipped the fridge step entirely. The cookies spread into thin, crispy disks — not terrible, but not what I wanted. Chilling the dough keeps the butter solid enough to hold its shape in the oven. Even 30 minutes makes a real difference.
- Pull them out while they still look underbaked: This is the single most important tip. The cookies will look soft and slightly raw in the center when you open the oven — that's correct. The residual heat from the pan finishes them off in those 5 minutes of resting. If you wait until they look done in the oven, they'll be dry and hard by the time they cool.
- Use room temperature butter: Cold butter won't cream with sugar properly — you'll end up with a gritty, uneven dough. I leave mine on the counter for about 30 minutes before I start. If you're in a hurry and forgot to take it out, cut the butter into small pieces and it'll warm up faster.
- Space the cookies out properly: Two inches between each one isn't just a guideline — when I've crowded the pan, the cookies spread into each other and the edges don't set right. If you're making a big batch, bake in two rounds rather than cramming everything onto one sheet.
- Store with a slice of bread: This is something my mother used to do — put a small piece of white bread in the cookie tin. It sounds strange, but the cookies absorb moisture from the bread and stay softer longer. The bread goes stale, the cookies stay soft. I've done this for years and it genuinely works.
Variations
- Almond extract swap: Replace half the vanilla with ½ teaspoon of almond extract. It gives the cookies a slightly more complex, almost bakery-style flavor. My husband prefers these — he says the straight vanilla version tastes "too plain," which is funny because he'll eat plain rice for dinner without complaint.
- Cinnamon sugar roll: Instead of sprinkles, roll each dough ball in a mix of 2 tablespoons sugar and ½ teaspoon cinnamon before flattening. They come out with a slightly crisp, spiced exterior and a soft center — it's a different vibe from the sprinkle version but really good with hot tea.
- Chocolate drizzle: Once the cookies are fully cooled, melt about ½ cup of semi-sweet chocolate chips (30 seconds in the microwave, stir, repeat until smooth) and drizzle over the tops with a fork. Let it set at room temperature for about 20 minutes. These look impressive on a holiday plate and they taste better than they look.
- Lemon zest version: Add 1 teaspoon of fresh lemon zest to the dough when you add the vanilla. It doesn't make the cookies taste lemony exactly — it just brightens everything up. This is the variation I reach for when I want something that feels a little less heavy after a big holiday meal.
- Red and green M&M's: Press a few red and green M&M's into the tops instead of sprinkles. Saad is very into this version. The chocolate in the M&M's melts slightly in the oven and the candy shell stays crunchy — it's a good texture contrast against the soft cookie. You can find holiday M&M's at most grocery stores starting in November.
Serving and Storage
Serving
These are good at room temperature with a glass of cold milk or alongside a mug of hot cocoa. At holiday parties I'll stack them on a plate with a few pieces of Dutch Christmas Stollen and some mixed nuts — it makes a nice spread without much effort. For a full holiday dessert table, the Giant Reese's Peanut Butter Cup Pie is an absolutely ridiculous and wonderful thing to put next to these cookies. If you're serving drinks alongside, a pitcher of Snowy Pineapple Punch pairs perfectly with the vanilla-butter flavor of the cookies.
Storage
Store in an airtight container at room temperature for up to 5 days. I always add a small piece of white bread to the container (see tips above) to keep them from drying out. If you want to freeze baked cookies, lay them flat on a baking sheet first until frozen solid, then transfer to a zip-lock bag — they'll keep for up to 3 months. Thaw at room temperature for about 20 minutes. The dough itself can be refrigerated for up to 3 days or frozen (wrapped tightly in plastic, then foil) for up to 2 months.

Frequently Asked Questions
Can I make the dough ahead of time?
Yes, and honestly I'd encourage it. The dough keeps in the fridge for up to 3 days wrapped in plastic — I usually make it two days before I plan to bake. If you want to get further ahead, freeze the dough for up to 2 months. Just wrap it tightly in plastic wrap first, then put it in a freezer bag. Thaw it overnight in the fridge before using.
Why are my cookies spreading too much?
Almost always it's because the dough wasn't cold enough going into the oven. Make sure you chill it for at least 30 minutes — I've pushed to an hour when I have time. Also check that your butter wasn't too warm when you creamed it. If it was melted or very soft, the dough won't hold its shape well. Pop the shaped cookies back in the fridge for 10 minutes if your kitchen is warm.
Can I use Greek yogurt instead of sour cream?
Yes, full-fat Greek yogurt works as a 1:1 substitute. I've used it when I ran out of sour cream and couldn't tell a major difference in the final texture. Low-fat yogurt is less ideal — the reduced fat content means slightly less richness — but it'll still work in a pinch. I wouldn't use flavored yogurt for obvious reasons.
What icing works best for decorating these cookies?
For clean, decorative lines that set firm, royal icing is the way to go — it dries hard and won't smear. For something easier and faster (especially if kids are helping), a simple buttercream works fine, though it stays soft. I usually mix powdered sugar with a tablespoon of milk and a drop of vanilla for a quick glaze — it dries with a slight shine and takes maybe 2 minutes to make.
How do I keep the cookies soft after baking?
Two things: don't overbake them (pull them out when the centers still look soft) and store them in an airtight container with a piece of plain white bread. The bread trick sounds weird but genuinely works — the cookies absorb just enough moisture to stay chewy. My mother taught me this years ago and I've never gone back to storing cookies without it.

BEST SOFT CHRISTMAS COOKIES
Ingredients
- 2 ½ cups all-purpose flour
- 1 teaspoon baking soda
- ½ teaspoon baking powder
- ½ teaspoon salt
- 1 cup unsalted butter softened
- 1 ¼ cups granulated sugar
- 1 large egg
- 2 teaspoons vanilla extract
- ¼ cup sour cream
- Holiday sprinkles for decorating
Instructions
STEP NO.1: PREHEAT OVEN
- Preheat oven to 350°F (175°C). Line a baking sheet with parchment paper.
STEP NO.2: MIX DRY INGREDIENTS
- In a bowl, whisk together flour, baking soda, baking powder, and salt.
STEP NO.3: CREAM BUTTER AND SUGAR
- In a separate bowl, beat butter and sugar until light and fluffy. Add egg, vanilla, and sour cream, mixing until smooth.
STEP NO.4: COMBINE WET AND DRY INGREDIENTS
- Gradually add dry ingredients to the wet mixture, stirring until just combined.
STEP NO.5: SHAPE AND DECORATE
- Scoop dough into tablespoon-sized balls and place on the baking sheet. Gently flatten each ball and top with festive sprinkles.
STEP NO.6: BAKE THE COOKIES
- Bake for 10-12 minutes, until edges are set but centers are soft. Let cool on the baking sheet for 5 minutes before transferring to a wire rack.
Notes
- Sour Cream: Adds moisture for a softer cookie.
- Chill Dough: For even softer cookies, refrigerate dough for 30 minutes before baking.
- Don’t Overbake: The cookies should look slightly underbaked when removed from the oven.
- Festive Additions: Try adding red and green M&M’s or white chocolate chips for extra holiday fun!
- Almond Christmas Cookies: Add ½ teaspoon almond extract.
- Chocolate Drizzle Cookies: Drizzle melted chocolate over cooled cookies.
- Cinnamon Sugar Cookies: Roll dough balls in cinnamon sugar before baking.
- Lemon Zest Cookies: Add 1 teaspoon lemon zest for a citrusy twist.

These cookies have become a December fixture in my house, and honestly I don't see that changing. They're not complicated, they don't require special equipment, and the ingredients are things I keep in my kitchen year-round. What I like most is that they taste genuinely good plain — before any frosting or decorating happens — which means the decoration is a bonus, not a cover-up for a mediocre base cookie.
I usually make a double batch in the first week of December — one batch for the kids to decorate immediately, and one I freeze for later in the month when I need something for last-minute guests or a school event. Having cookie dough in the freezer is one of those things that makes December feel manageable instead of chaotic. If you're planning a bigger holiday baking day, the Heaven Cake is another one I make at the same time — it refrigerates well and the flavors actually improve overnight.
If you make these, the main thing I'd say is trust the process on the chilling and the early pull-out from the oven. Those two steps feel counterintuitive but they're what makes the difference between a good cookie and one you





Comments
No Comments