
I made this for the first time during a Sunday football afternoon, mostly because I had leftover cream cheese and a handful of jalapeños sitting in my fridge that I needed to use up. I wasn't expecting much — I just threw things together. By the time it came out of the oven, my husband had already pulled up a chair next to the oven rack. That should tell you everything.
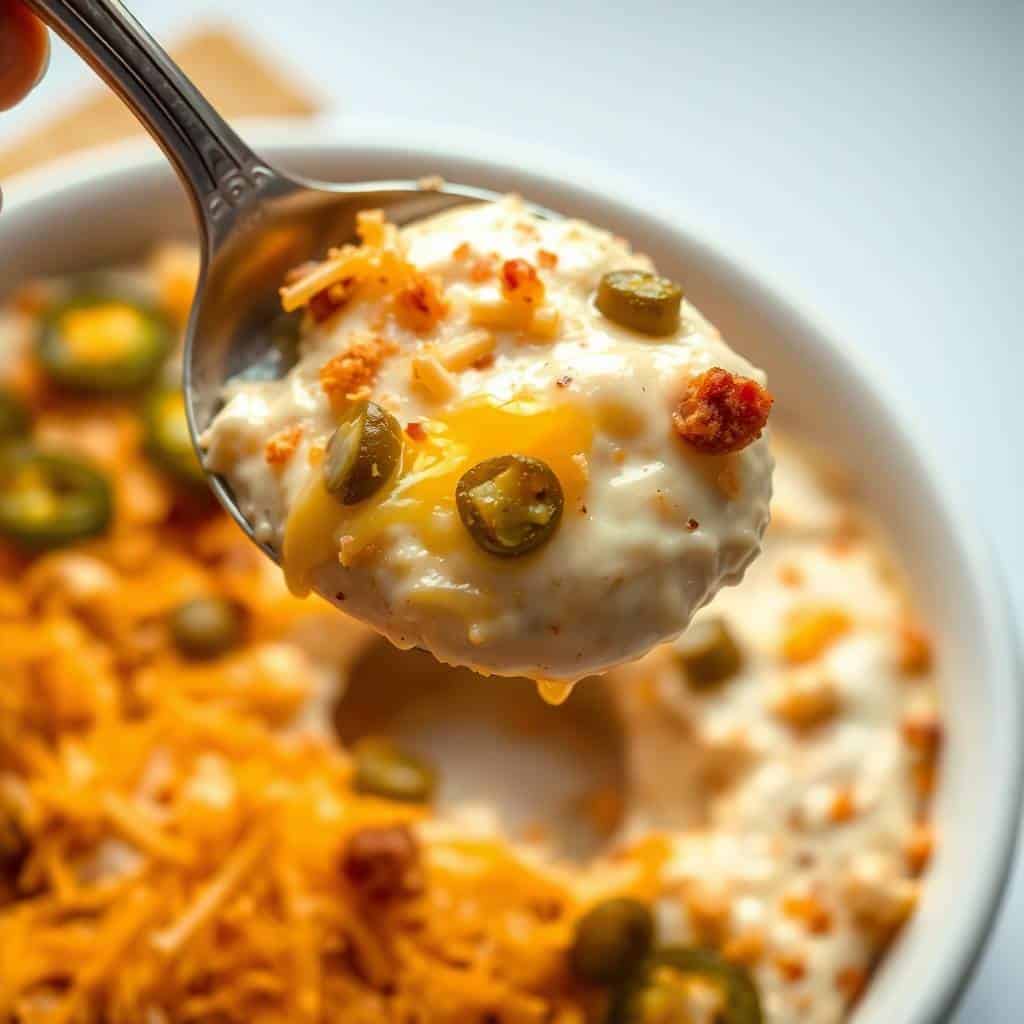
What makes this dip work is the panko breadcrumb topping — it gives you that slight crunch on top while the inside stays completely molten and creamy. A lot of dip recipes skip the topping and they're fine, but this one isn't fine without it. The texture contrast is the whole point. I also use both cheddar and Parmesan, which sounds like overkill but isn't — the cheddar melts into the base and the Parmesan crisps up a little on top.
I make this whenever we have people over, whenever there's a game on, or honestly whenever I want something warm and cheesy that isn't a full meal. My husband always requests it alongside something cold to drink — he pairs it with a bourbon margarita when it's that kind of evening. Saad just wants to eat it with chips straight from the dish before I've even set it on the table.
One thing to know going in: make sure your cream cheese is fully softened before you start mixing. I skipped this step once and ended up with lumpy dip that never fully smoothed out, even after baking. Pull it out of the fridge at least 30 minutes early. That one step makes the whole thing easier.

Why You'll Love This Recipe
- It comes together in under 30 minutes: The mixing takes maybe 10 minutes, then it goes into the oven for 15 to 20. I've made this when guests showed up early and I still had it on the table before they'd finished their first drink. Nothing complicated, nothing that requires special skill — just mixing and baking.
- The panko topping makes it feel restaurant-quality: Most homemade dips look a little flat. The buttered panko on top of this one turns golden and slightly crisp in the oven, so it actually looks impressive when you pull it out. Nobody needs to know it took you 10 minutes to assemble.
- You can control the heat: With seeds and membranes removed, the jalapeños give flavor without blowing anyone's head off. If you're making this for people with different spice tolerances — which is always the case at my house — removing the seeds is the move. If your crowd likes heat, leave a few seeds in or add a pinch of cayenne to the mix.
- It reheats well the next day: I make a full batch even when it's just us, because the leftovers reheat beautifully. A few minutes in the oven at low heat and it's back to creamy. Saad eats the cold leftovers straight from the container sometimes, which is not what I intended but also not the worst thing.
- It works with whatever you're dipping: Tortilla chips are the obvious choice, but I've served this with sliced baguette, crackers, celery sticks, and once with pita chips from Trader Joe's. All of them work. It's genuinely flexible that way.
Ingredients
- 8 oz cream cheese, softened (pull it out of the fridge 30 minutes early)
- ½ cup mayonnaise
- 1 cup shredded cheddar cheese (freshly shredded if you can — it melts smoother)
- ½ cup grated Parmesan cheese
- 4 jalapeños, finely chopped (seeds removed for less heat)
- 2 cloves garlic, minced
- Salt and black pepper, to taste
- ¼ cup panko breadcrumbs (for topping)
- 1 tablespoon butter, melted (for topping)
Directions
- Preheat the oven: Set your oven to 375°F (190°C) and lightly grease a small baking dish — an 8x8 or a similar size works well. This just prevents the edges from sticking and makes serving cleaner.
- Mix the base: In a large bowl, beat together the softened cream cheese and mayonnaise until completely smooth. If your cream cheese is still cold, you'll fight lumps the whole way through, so don't skip the softening step.
- Add everything else: Stir in the shredded cheddar, Parmesan, chopped jalapeños, minced garlic, salt, and pepper. Mix until everything is evenly distributed — you want jalapeño in every bite, not all piled in one corner.
- Transfer and top: Spread the mixture evenly into your greased baking dish, smoothing the top with a spatula. In a small bowl, combine the panko breadcrumbs and melted butter, then scatter that over the top in an even layer.
- Bake and rest: Bake for 15 to 20 minutes, until the top is golden and the edges are visibly bubbling. Pull it out and let it sit for 5 minutes before serving — it scoops much more cleanly once it's had a moment to settle.
Tips for Success
- Soft cream cheese is non-negotiable: I learned this the hard way on my second batch — I was in a rush and tried to use cold cream cheese straight from the fridge. Even after mixing for several minutes, there were still small white lumps in the dip, and baking didn't fix them. Set it out 30 minutes before you start, or cut it into small cubes to speed up the softening. It makes a real difference.
- Shred your own cheese: Pre-shredded cheese from the bag has a starch coating that prevents it from melting as smoothly. It's not terrible, but when I started shredding my own cheddar from a block, the texture of the dip noticeably improved. It takes an extra two minutes and it's worth it. Any standard box grater works fine.
- Taste before it goes in the oven: The salt level depends on your Parmesan — some Parmesans are quite salty on their own, so taste the mixture before you bake it. I've over-salted this by adding too much before tasting, because I wasn't paying attention. One quick taste before it goes in the dish saves you from a too-salty dip.
- Don't skip the resting time: Five minutes feels like forever when you're hungry and staring at something that smells incredible, but the dip actually firms up slightly as it rests and scoops much more cleanly. Right out of the oven it's almost too liquid — give it the five minutes.
- Watch your jalapeños: Four jalapeños with seeds removed gives you noticeable flavor with mild heat — most people can handle it. If you're cooking for kids or people who genuinely can't do spice, use two or three. If you want real heat, leave some seeds in or add a pinch of cayenne to the mix. Adjust based on who you're feeding, not on what the recipe says.
Variations
- Add bacon: Crumble 3 or 4 strips of cooked bacon into the mixture before baking. This is the most common variation I make — it adds a smoky, salty layer that works really well with the jalapeño heat. Cook the bacon crispy, let it cool, and crumble it in. My husband considers this the "real" version and will mention if I forget it.
- Swap the cheese: Cheddar is my default but pepper jack is genuinely great in this — it adds another layer of heat and melts beautifully. A Mexican cheese blend from Walmart or Costco also works well. I've even used mozzarella when that was all I had, and while it's milder, it still tastes good.
- Make it vegetarian: Skip the bacon and stir in a teaspoon of smoked paprika instead — it gives you that smoky depth without the meat. Finely diced roasted red peppers also work well here and add a bit of color. This is how I make it when I have vegetarian guests, and nobody misses the bacon.
- Add some sweetness: A small handful of frozen corn stirred into the mixture balances the jalapeño heat in a way that surprised me the first time I tried it. It also makes the dip go further, which matters when you're feeding a crowd. Sweet corn and spicy jalapeño is a combination that works far better than it sounds.
- Turn up the heat: If you want something genuinely spicy, swap one or two of the jalapeños for serranos and leave the seeds in. You can also add a few dashes of hot sauce directly into the base. I made this version for a group of chili-heads once and they finished it in under ten minutes. Not my personal preference, but it went over extremely well.
Serving and Storage
Serving
Serve this straight from the baking dish while it's still warm — it's at its best in the first 20 minutes out of the oven when the topping is still crisp and the inside is fully molten. Tortilla chips are the classic pairing, but sliced baguette, sturdy crackers, celery sticks, or even pita chips all work well. I usually put out two or three dipping options because people have opinions about this. If you're making it for a game day spread, it pairs really nicely alongside something like my crockpot crack chicken for a full snack table situation.
Storage
Let it cool completely before covering, then refrigerate in the baking dish or transfer to an airtight container. It keeps well for up to 3 days. To reheat, cover loosely with foil and warm in a 325°F oven for about 10 minutes, or microwave in 30-second bursts, stirring between each. The panko topping softens in the fridge but still tastes good — if you want the crunch back, the oven method is the better way to reheat. I wouldn't freeze this one; the cream cheese and mayo base can separate when thawed and the texture gets grainy.

Frequently Asked Questions
Can I make this dip ahead of time?
Yes — I do this often when I'm hosting. Mix everything together, spread it into the baking dish, cover tightly with plastic wrap, and refrigerate for up to 24 hours before baking. Add the panko topping right before it goes into the oven so the breadcrumbs don't get soggy. You may need to add 3 to 5 extra minutes of baking time since it's going in cold.
How spicy is this recipe?
With seeds and membranes removed, it's a mild-to-medium heat that most adults can handle without issue. The dairy in the dip also helps temper the spice. If you're serving it to kids or spice-averse guests, use 2 jalapeños instead of 4. If you want more heat, leave a few seeds in or add a pinch of cayenne to the base.
Can I freeze baked jalapeño popper dip?
I wouldn't. Cream cheese and mayo-based dips tend to separate when frozen and thawed, and the texture turns grainy rather than creamy. It keeps well in the fridge for 3 days and reheats nicely, so that's the better approach if you're making it ahead.
What can I use instead of mayonnaise?
Sour cream works as a direct swap and gives the dip a slightly tangier flavor. Full-fat Greek yogurt also works in a pinch, though the texture is a little lighter. I've used both when I ran out of mayo and the dip still turned out well both times.
How do I reheat leftovers?
The oven is the best method — cover the dish loosely with foil and heat at 325°F for about 10 minutes. The microwave works too if you're in a hurry: heat in 30-second intervals and stir between each one to keep the texture even. Either way, it comes back to creamy without much effort.

BAKED JALAPEÑO POPPER DIP
Ingredients
For the Baked Jalapeño Popper Dip:
- 8 oz cream cheese softened
- ½ cup mayonnaise
- 1 cup shredded cheddar cheese
- ½ cup grated Parmesan cheese
- 4 jalapeños chopped seeds removed for less heat
- 2 cloves garlic minced
- salt and pepper to taste
- ¼ cup panko breadcrumbs for topping
- 1 tablespoon butter melted, for topping
Instructions
Mix Ingredients:
- Preheat oven to 375°F (190°C). In a bowl, mix cream cheese, mayonnaise, cheddar, Parmesan, jalapeños, garlic, salt, and pepper until smooth.
Assemble Dip:
- Transfer mixture to a greased baking dish. Combine panko breadcrumbs and melted butter, then sprinkle over the top.
Bake Dip:
- Bake for 15–20 minutes, until bubbly and golden on top.
Serve:
- Serve warm with crackers, tortilla chips, or sliced baguette.
Notes
- Make Ahead: Can be assembled a few hours before baking and stored in the fridge.
- Variations: Add cooked bacon bits for extra flavor or use pepper jack cheese for more spice.
- Serving Tips: Serve with crackers, bread, or vegetable sticks for a delicious appetizer.
This is one of those recipes I keep coming back to because it never fails me. It's not complicated, it doesn't require any special technique, and it works every single time I make it. I've brought it to potlucks, I've made it for family movie nights, I've put it together in 25 minutes flat when friends showed up unannounced. It always disappears fast.
If you're building out a full snack spread, this dip goes well alongside sweeter finishes — I usually put out something like my easy football cupcakes when it's a game day situation, so people have something to reach for after the savory stuff. The contrast works really well. And if you want a full dessert to finish the night, the hazelnut chocolate tart is worth making ahead.
What I like most about this one is that it genuinely tastes like more effort than it took. That golden breadcrumb top, the creamy cheesy pull when you scoop into it, the little kick of jalapeño — it's the kind of thing that makes people ask you for the recipe. And the answer is always: it's easier than it looks. 🧀🌶️✨
If you liked this, here are a few more recipes from my kitchen worth trying:
- Crockpot Crack Chicken — creamy, cheesy, bacon-loaded slow cooker dinner that runs on the same flavor logic as this dip
- Bourbon Margarita — what my husband drinks alongside this dip, every time
- Easy Football Cupcakes — for when you need a sweet finish to a game day spread
- Hazelnut Chocolate Tart — make-ahead dessert that looks far more impressive than it is
- Marinated Cucumber, Tomato, and Onion Salad — if you want something fresh and light on the table alongside all the warm cheesy things




Comments
No Comments