
The first time I made these, I didn't freeze the cheesecake filling first — I just plopped it straight onto the dough and hoped for the best. What came out of the oven was a flat, spread-out mess with cream cheese pooled around the edges like it was trying to escape. Embarrassing. But I figured out what went wrong, fixed it, and now these apple pie cheesecake cookies are one of the things I make most often when I want to bring something genuinely impressive to the table.
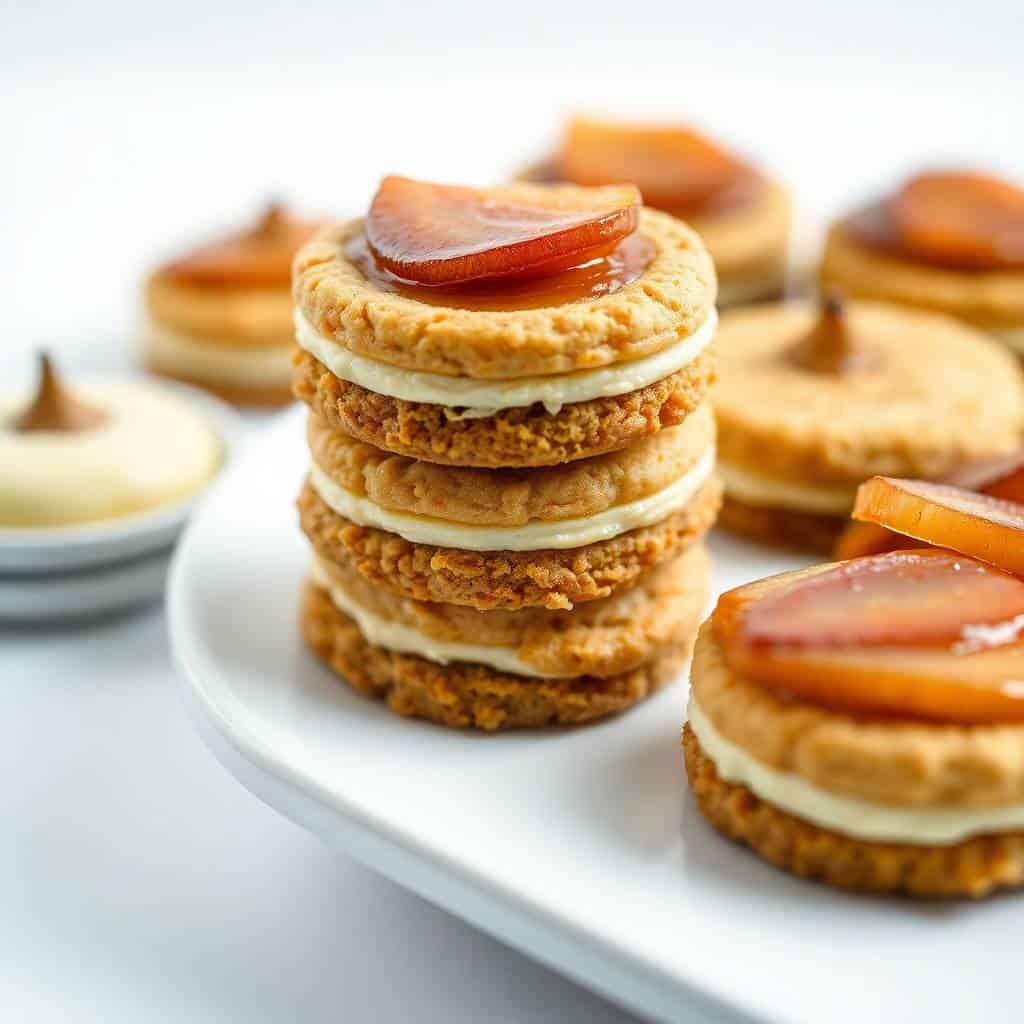
What makes these work is the layering. You freeze the cheesecake filling into little rounds first, then wrap cookie dough around them — so when the cookies bake, the filling stays put inside instead of melting out. The apple topping goes on top, cooked down with butter and cinnamon until it's thick and jammy. It's three components, but none of them is complicated on its own, and once you've done it once you'll have the rhythm down completely.
Zainab saw me making these and immediately claimed them as her favourite cookies, which is saying something because she's also obsessed with my no-bake Oreo mint cheesecake. My husband ate four in one sitting and then asked if there were more. There were not. I now make a double batch every time because a single batch disappears before it even cools properly.
One thing to set expectations on: this is a three-step recipe with chilling time built in, so it's not a 30-minute drop-cookie situation. Plan for about two hours total from start to finish, though most of that is hands-off chilling. If you want to break it up, you can make the filling and the apple topping the day before and just do the dough and assembly the next day. That actually makes it easier.
Why You'll Love This Recipe
- Three desserts in one cookie: You get a buttery, chewy cookie on the outside, a cold creamy cheesecake centre, and a soft spiced apple topping all in one bite. It sounds like a lot but it genuinely works — each element stays distinct. My kids can't figure out how I got all of that into one cookie and I like letting them wonder.
- The freezing trick actually works: Freezing the cheesecake filling before you bake is the move that makes everything else possible. It means the filling holds its shape inside the dough and you get that distinct creamy pocket in the middle instead of it just disappearing into the cookie. Once I learned this, I started using the same trick for other stuffed cookies too.
- No fancy equipment needed: I don't have a stand mixer. I cream the butter and sugar with a wooden spoon and it works just fine — it takes maybe five extra minutes of elbow grease. A hand mixer speeds things up if you have one, but it's not required at all.
- The apple topping is better than canned: I know canned apple pie filling is tempting because it saves time, but the homemade version takes about ten minutes on the stove and the difference is real. Fresh Granny Smith or Honeycrisp apples cooked down with butter, brown sugar, and cinnamon have a tartness that balances the rich cookie and creamy filling in a way canned filling just doesn't.
- Make-ahead friendly: The filling and apple topping can both be made a day ahead and stored in the fridge. This makes same-day assembly much less stressful, especially if you're baking for a gathering or want to spread the work out across two days.
Ingredients
- For the Cookie Dough:
- 1 cup unsalted butter, softened
- ¾ cup brown sugar, packed
- ¼ cup granulated sugar
- 1 large egg
- 1 teaspoon vanilla extract
- 2 ½ cups all-purpose flour
- 1 teaspoon baking soda
- ½ teaspoon ground cinnamon
- ¼ teaspoon salt
- For the Cheesecake Filling:
- 6 oz cream cheese, softened (Philadelphia works well, or any full-fat block cream cheese)
- ¼ cup powdered sugar
- ½ teaspoon vanilla extract
- For the Apple Pie Topping:
- 1 ½ cups peeled and diced apples (Granny Smith or Honeycrisp — about 2 medium apples)
- 2 tablespoons unsalted butter
- 2 tablespoons brown sugar
- ½ teaspoon ground cinnamon
- 1 teaspoon cornstarch mixed with 1 tablespoon cold water (for thickening)
Directions
- Make the cheesecake filling first: Beat the cream cheese, powdered sugar, and vanilla together in a bowl until completely smooth — no lumps. Scoop 1-teaspoon portions onto a parchment-lined plate or baking sheet. Pop the whole thing in the freezer for at least 30 minutes. This step is non-negotiable. Frozen filling stays inside the cookie while it bakes; soft filling leaks out and makes a mess. I learned that the hard way.
- Make the apple topping: Melt butter in a small saucepan over medium heat. Add the diced apples, brown sugar, and cinnamon and cook, stirring occasionally, for about 6–8 minutes until the apples soften. Stir in the cornstarch slurry and cook another minute until the mixture thickens up. Take it off the heat and let it cool completely before using — putting warm topping on the cookies will make them soggy.
- Make the cookie dough: In a large bowl, beat the softened butter with both sugars until the mixture looks lighter in color and a bit fluffy. Add the egg and vanilla and mix until combined. Add the flour, baking soda, cinnamon, and salt, mixing until a dough forms. Refrigerate the dough for 30 minutes — this keeps the cookies from spreading too much in the oven.
- Preheat the oven: Set your oven to 350°F (175°C) and line your baking sheets with parchment paper.
- Assemble the cookies: Scoop about 1½ tablespoons of dough and flatten it in your palm. Place one frozen cheesecake ball in the center, then scoop another piece of dough, flatten it, and press it on top. Pinch the edges together to seal the filling inside. Place on the parchment-lined tray and spoon a small amount of the cooled apple topping onto each cookie.
- Bake: Bake for 12–14 minutes until the edges are just golden. The centers will still look a little underdone — that's fine, they firm up as they cool. Let them sit on the baking tray for 5 minutes before moving to a wire rack. They're fragile when hot.
Tips for Success
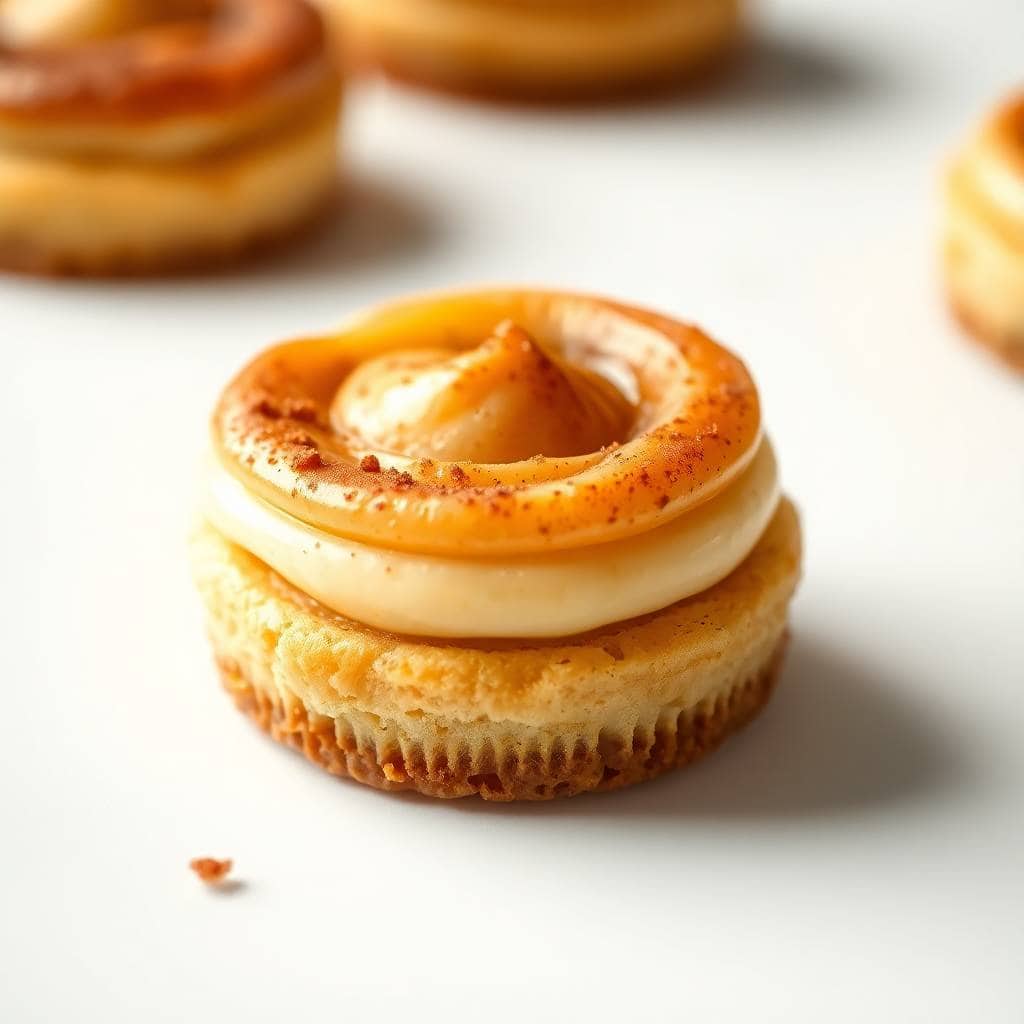
- Freeze the filling longer if you have time: I said 30 minutes minimum, but honestly an hour is better. The more solid those little cream cheese rounds are when they go into the oven, the cleaner your cheesecake centre will be. When I'm in a hurry and only freeze them 20 minutes, I can tell the difference in the final cookie.
- Use firm apple varieties: Granny Smith is my go-to because it stays a little tart even after cooking, which offsets the sweetness of the cookie and filling. Honeycrisp also holds up well. I tried Fuji once and they turned to mush — the topping was too soft and slid off the cookies. Stick with a firmer apple.
- Don't skip chilling the dough: I tried baking without the chill once when I was impatient. The cookies spread out thin and flat and the filling had nowhere to hide. Cold dough holds its shape, giving you that thick, bakery-style cookie. 30 minutes in the fridge makes a real difference.
- Work in batches and keep dough cold: If you're doing a double batch (which I always do), keep the remaining dough in the fridge while you assemble the first tray. Warm dough gets sticky and hard to work with, and you'll end up frustrated. Cold dough is much easier to shape and seal.
- Cool the apple topping fully before topping the cookies: I know it's tempting to rush, but warm topping will make your cookies go soft and soggy on the surface. Make the topping first, let it cool while you do the filling and dough, and by the time you need it, it'll be at room temperature and ready. The timing works out perfectly that way.
Variations
- Caramel drizzle on top: Once the cookies are out of the oven and cooled, drizzle a little store-bought caramel sauce (Trader Joe's has a good one, or the squeeze bottle kind from Walmart) over the apple topping. It makes them look genuinely impressive and adds a butterscotch depth to the flavour. This is what I do when I'm taking them somewhere and want them to look like they came from a bakery.
- Cinnamon sugar crust: Before baking, roll each assembled cookie ball in a mix of 2 tablespoons sugar and 1 teaspoon cinnamon. It gives the outside a slightly crisp, spiced crust that contrasts nicely with the soft inside. Saad likes these best — he calls them "the crunchy ones."
- Add pecans to the topping: Stir a handful of roughly chopped pecans into the apple mixture after it cools. It adds crunch and a nutty flavour that works really well with the cinnamon. I sometimes do this for Thanksgiving-style batches when I want them to feel a bit more special.
- Switch to pears: Diced ripe but firm pears work in place of apples — use Bosc or Bartlett and cook them the same way. The flavour is a bit more floral and subtle. I made these with pears once when I ran out of apples and they were genuinely lovely, though different enough that I wouldn't call them the same cookie.
- Dairy-free version: Use dairy-free cream cheese (Violife or Kite Hill both work) and plant-based butter in both the dough and the topping. I haven't tested this version myself, but a reader told me it works well — the cheesecake filling is slightly less rich but the overall cookie still holds together properly.
Serving and Storage
Serving
These are best served at room temperature, about 20–30 minutes out of the fridge — the cheesecake filling softens back up to a creamy texture and the apple topping loosens slightly. Serve them with chai (obviously, in my house), black coffee, or if you're feeling extra, a small scoop of vanilla ice cream on the side. If you're putting them out for guests, a small caramel drizzle right before serving makes them look bakery-level without much effort. They also go beautifully alongside my vanilla bean crème brûlée cheesecake cupcakes on a dessert platter — both have that creamy cheesecake richness and they complement each other well.
Storage
Because of the cream cheese filling, these need to be refrigerated after the first day. Store them in an airtight container in the fridge for up to 4 days. At room temperature they'll last about 2 days, but I'd rather be safe with anything containing cream cheese. To freeze: place baked and fully cooled cookies in a single layer on a tray, freeze until solid, then transfer to a zip-lock bag. They keep well frozen for up to 2 months. Thaw in the fridge overnight before serving.

Frequently Asked Questions
Can I use canned apple pie filling instead of making my own topping?
Yes, you can — just chop the apple pieces smaller so they sit neatly on top of the cookie. Canned filling tends to be sweeter and softer than homemade, so the flavour will be a bit different, but it still works. If you're short on time it's a reasonable shortcut.
Can I freeze these cookies after baking?
Yes. Let the cookies cool completely first, then freeze them in a single layer before stacking in a bag or container. They keep well for up to 2 months. Thaw in the fridge overnight and let them come to room temperature before eating so the cheesecake filling softens properly.
Why did my cheesecake filling leak out during baking?
Almost always this happens because the filling wasn't frozen solid enough, or the edges of the cookie dough weren't sealed properly. Make sure your filling rounds are fully firm before you assemble, and pinch the dough edges firmly all the way around. If you press down on a seam and can feel it give, it needs more sealing.
Can I make the dough ahead of time?
Absolutely. The dough keeps in the fridge for up to 2 days, wrapped tightly in plastic wrap. The cheesecake filling can be made and frozen up to a week ahead. I often do both the day before and just do the assembly and baking fresh — it makes the whole process much more relaxed.
Do I have to refrigerate these cookies after baking?
I'd recommend it, yes. The cream cheese filling technically needs refrigeration after a few hours at room temperature. They'll be fine sitting out for a couple of hours if you're serving them at a gathering, but for storage overnight or longer, keep them in an airtight container in the fridge.

APPLE PIE CHEESECAKE COOKIES
Ingredients
For the Cookie Dough:
- 1 cup unsalted butter softened
- ¾ cup brown sugar
- ¼ cup granulated sugar
- 1 large egg
- 1 teaspoon vanilla extract
- 2 ½ cups all-purpose flour
- 1 teaspoon baking soda
- ½ teaspoon cinnamon
- ¼ teaspoon salt
For the Cheesecake Filling:
- 6 oz cream cheese softened
- ¼ cup powdered sugar
- ½ teaspoon vanilla extract
For the Apple Pie Topping:
- 1 ½ cups peeled and diced apples like Granny Smith
- 2 tablespoons butter
- 2 tablespoons brown sugar
- ½ teaspoon cinnamon
- 1 teaspoon cornstarch + 1 tablespoon water for thickening
Instructions
Prepare the Filling:
- In a bowl, beat cream cheese, powdered sugar, and vanilla until smooth. Scoop 1-teaspoon portions onto a baking sheet lined with parchment. Freeze for 30 minutes.
Make the Apple Pie Topping:
- Cook apples, butter, brown sugar, and cinnamon in a saucepan over medium heat until softened. Stir in cornstarch slurry and cook until thickened. Cool completely.
Make the Cookie Dough:
- Cream butter and sugars until fluffy. Beat in egg and vanilla. Mix in flour, baking soda, cinnamon, and salt until a dough forms. Chill dough for 30 minutes.
Assemble the Cookies:
- Scoop 1 ½ tablespoons of dough and flatten. Place a frozen cheesecake ball in the center and cover with another flattened dough round. Seal edges. Top each with a spoonful of cooled apple pie mixture.
Bake:
- Place cookies on a parchment-lined tray and bake at 350°F (175°C) for 12–14 minutes or until edges are golden. Cool on the tray for 5 minutes, then transfer to a rack.
Notes
- Make Ahead: Cookie dough and cheesecake filling can be made a day ahead. Store filling frozen until ready to bake.
- Customizing the Flavor: Add a pinch of nutmeg or a drizzle of caramel for a bakery-style touch.
- Serving Suggestions: Serve warm with vanilla ice cream or cool with coffee for a cozy dessert.
- Allergy-Friendly Options: Use dairy-free cream cheese and plant-based butter for a lactose-free version.
- Storage Tips: Store in an airtight container at room temperature for up to 3 days or refrigerate for longer freshness.
I've made a lot of cookies over the years — drop cookies, rolled cookies, sandwich cookies, bar cookies — and these are genuinely one of the ones I'm most proud of figuring out. Not because they're complicated, but because the first attempt was a disaster and I kept going anyway. Once I understood that the frozen filling was the key to the whole thing, the rest came together pretty quickly.
If you're someone who loves no-bake cheesecake desserts, you might also want to try my no-bake mini key lime pies — they're a completely different flavour profile but have that same creamy, tangy filling energy that makes these cookies so good. And if you're on a baking streak, my Greek yogurt pancakes are a great next-morning breakfast after a late-night cookie baking session.
These cookies have become the thing my family requests most when fall arrives — though honestly, they don't wait for fall. My husband asked me to make them in March last year and I didn't argue. They're worth making any time you want something that feels a little special without requiring a whole afternoon. Make the double batch. You'll thank yourself. 🍎🍪✨
If you liked these, here are a few more recipes from my kitchen you might enjoy:





Comments
No Comments