
Summers in Pakistan are brutal — I'm talking 45°C brutal — and the last thing anyone wants to do is stand over a hot oven. That instinct stayed with me. Even now, when June hits and the kitchen turns into a sauna, I refuse to bake. No-bake desserts aren't a compromise. They're a smart call. Some of my most-requested recipes are ones that never see a single degree of oven heat, and this list is full of them.
What makes a no-bake dessert actually worth making? For me, it comes down to three things: it has to set properly (nothing worse than a "dessert" that collapses the second you slice it), it should use ingredients you can find at any Walmart or Aldi without a special trip, and it should taste like you put in more effort than you actually did. I've made plenty that checked none of those boxes — runny cheesecakes, icy fruit pops, mousse that tasted like nothing. The ones on this list survived the real test: my family actually asked for them again.
You'll find a little bit of everything here — creamy frozen pies, fruit-forward granitas, chocolate fudge bites, and a few icebox cakes that I make on repeat all summer long. If you're into easy frozen treats, you might also want to check out my full recipe roundup collection for more ideas across every season. Whether you're feeding kids at a backyard cookout or just need something cold and easy after dinner, there's something on this list for that exact moment.
Here are the 20 I keep coming back to — pick whichever fits your week and your freezer space.
No-Bake Summer Dessert Recipes Worth Making
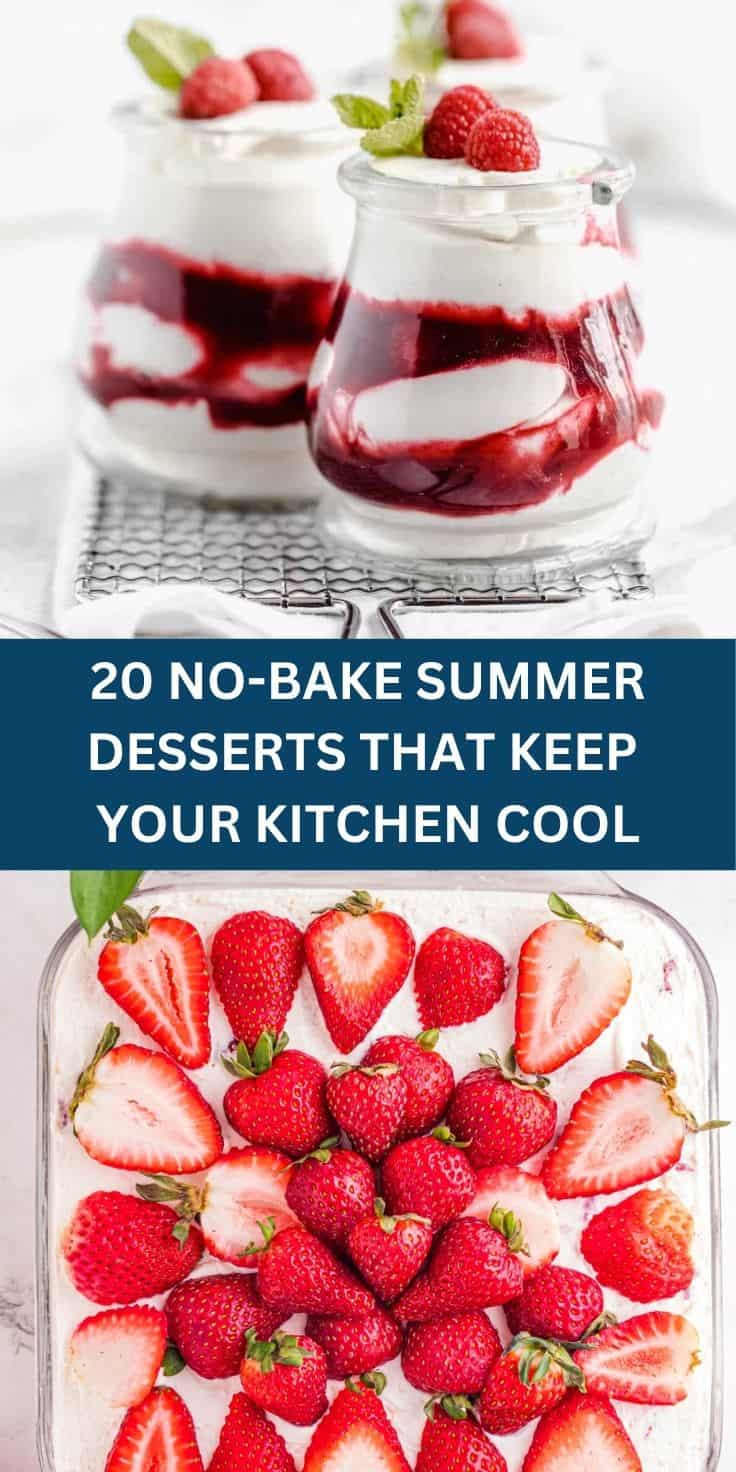
20. Strawberry Icebox Cake with Whipped Cream

Strawberry icebox cake is one of those desserts that sounds too simple to be impressive — and then you slice into it and everyone at the table goes quiet for a second. Layers of graham crackers soften overnight in the fridge, turning almost cake-like between clouds of whipped cream and fresh sliced strawberries. I made this for the first time when my oven was broken in July and I had a house full of people coming over — it saved me completely. The key is giving it a full eight hours in the fridge, not just two. If you rush it, the crackers stay crunchy and the whole thing falls apart when you cut it.
Ingredients
- 2 cups heavy whipping cream, cold
- 3 tablespoons powdered sugar
- 1 teaspoon vanilla extract
- 1 lb fresh strawberries, hulled and sliced thin
- 14–16 full graham cracker sheets
- 2 tablespoons strawberry jam (optional, for layering)
Instructions
- Beat the cold heavy cream, powdered sugar, and vanilla together with a hand mixer on medium-high until stiff peaks form — about 3 to 4 minutes. Don't overbeat or it'll go grainy.
- Spread a thin layer of whipped cream on the bottom of a 9x13 inch dish, just enough to anchor the first layer of crackers.
- Lay graham cracker sheets in a single layer across the bottom, breaking pieces to fill gaps if needed.
- Spread a generous layer of whipped cream over the crackers, then arrange sliced strawberries on top. If using jam, dot small spoonfuls between the strawberry slices.
- Repeat the layers — crackers, whipped cream, strawberries — until you run out of ingredients, finishing with a whipped cream top layer and a final arrangement of strawberries.
- Cover tightly with plastic wrap and refrigerate for at least 8 hours, or overnight. Slice with a sharp knife and serve cold.
19. Frozen Mango Coconut Cream Pie
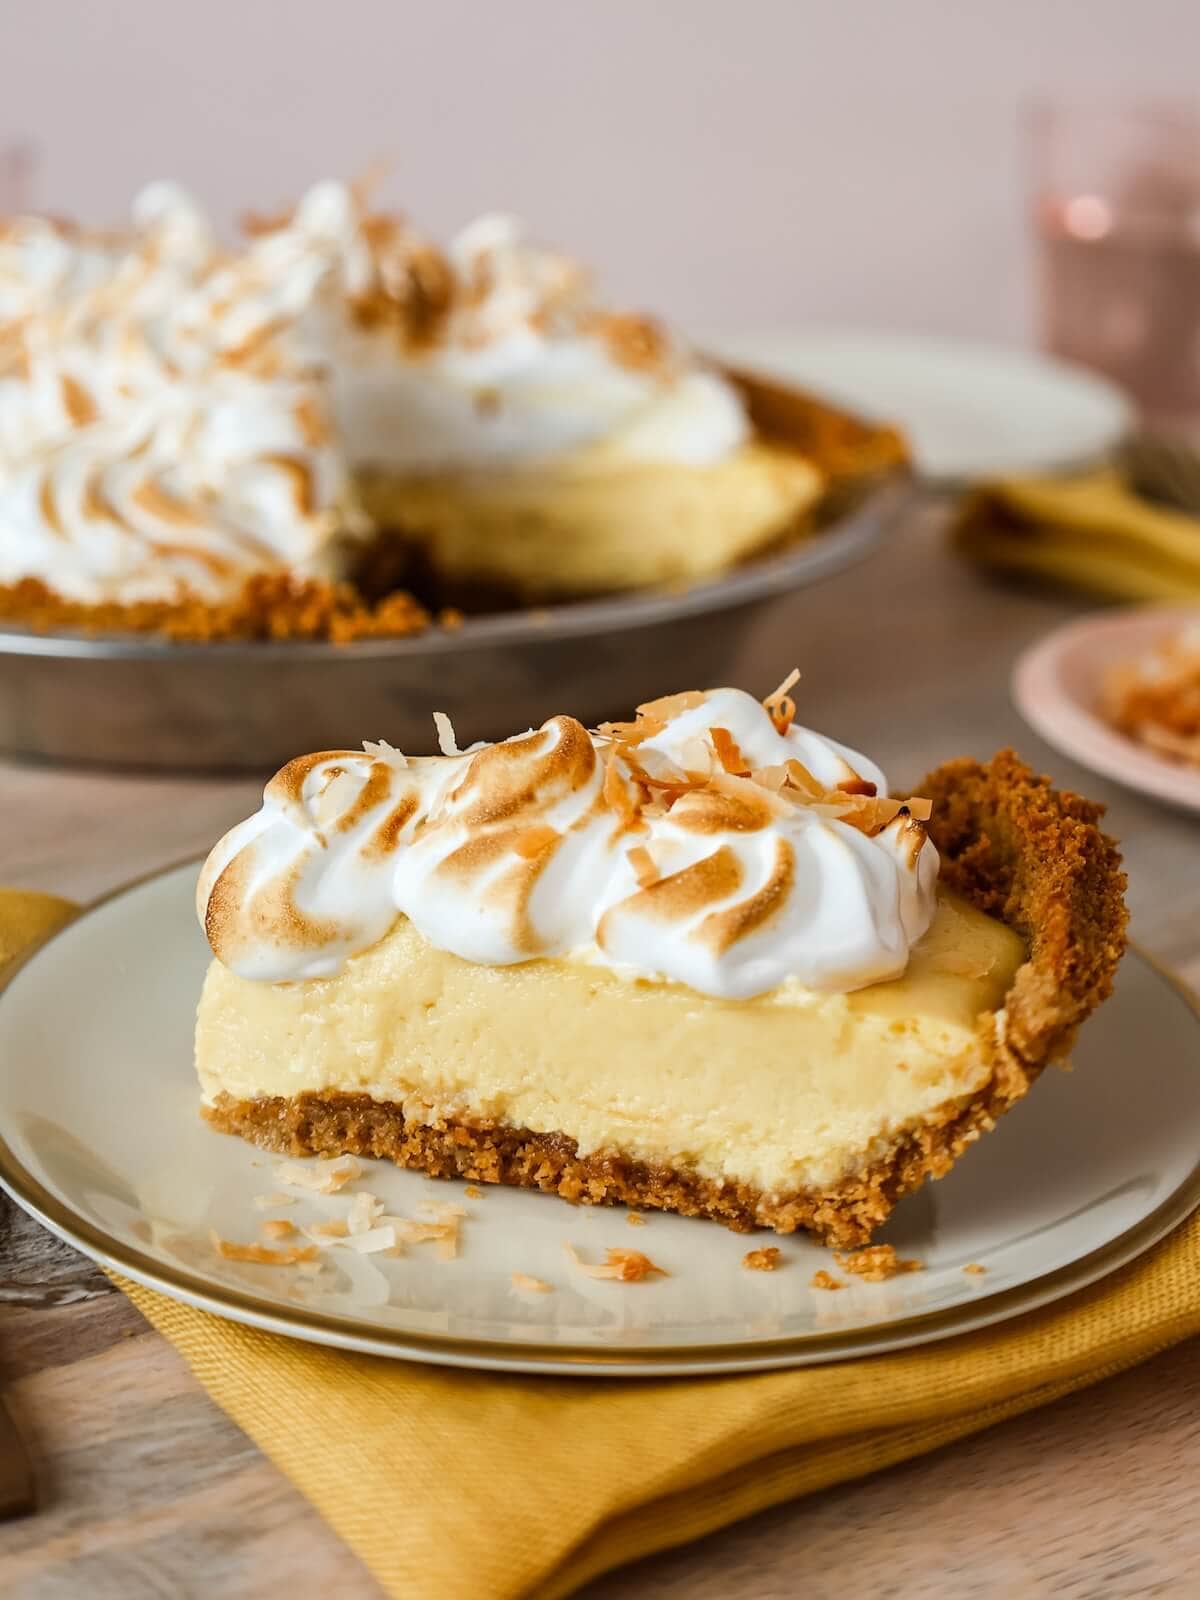
Mango and coconut together in a frozen pie is about as summery as it gets — and honestly, this one reminds me a little of the mango kulfi I grew up eating, just dressed up differently. The base is a simple press-in graham cracker crust, the filling is blended mango folded into coconut cream, and the whole thing goes into the freezer until firm. Frozen mango works beautifully here if fresh mangoes aren't great at your store right now — the flavor actually concentrates nicely. Pull it out of the freezer about 10 minutes before slicing so the knife goes through cleanly.
Ingredients
- 1½ cups graham cracker crumbs (about 10 full crackers)
- 5 tablespoons unsalted butter, melted
- 2 tablespoons sugar
- 2 cups fresh or frozen mango chunks, thawed if frozen
- 1 can (13.5 oz) full-fat coconut cream, refrigerated overnight
- 3 tablespoons powdered sugar
- 1 teaspoon lime juice
- Toasted coconut flakes, for topping
Instructions
- Mix graham cracker crumbs, melted butter, and sugar together until the mixture resembles wet sand. Press firmly into the bottom and up the sides of a 9-inch pie dish. Freeze for 20 minutes while you make the filling.
- Blend mango chunks with lime juice until completely smooth. Taste — if the mango is tart, add a teaspoon of honey.
- Open the refrigerated coconut cream can without shaking it. Scoop out the solidified cream from the top into a bowl, leaving the liquid behind. Whip with a hand mixer until fluffy, about 2 minutes. Add powdered sugar and beat again briefly.
- Fold the mango purée into the whipped coconut cream gently — you can swirl it rather than mixing fully if you want a marbled look.
- Pour the filling into the frozen crust and smooth the top. Scatter toasted coconut flakes over the surface.
- Freeze for at least 4 hours until firm. Remove from freezer 10 minutes before slicing.
18. No-Bake Lemon Cheesecake Bars
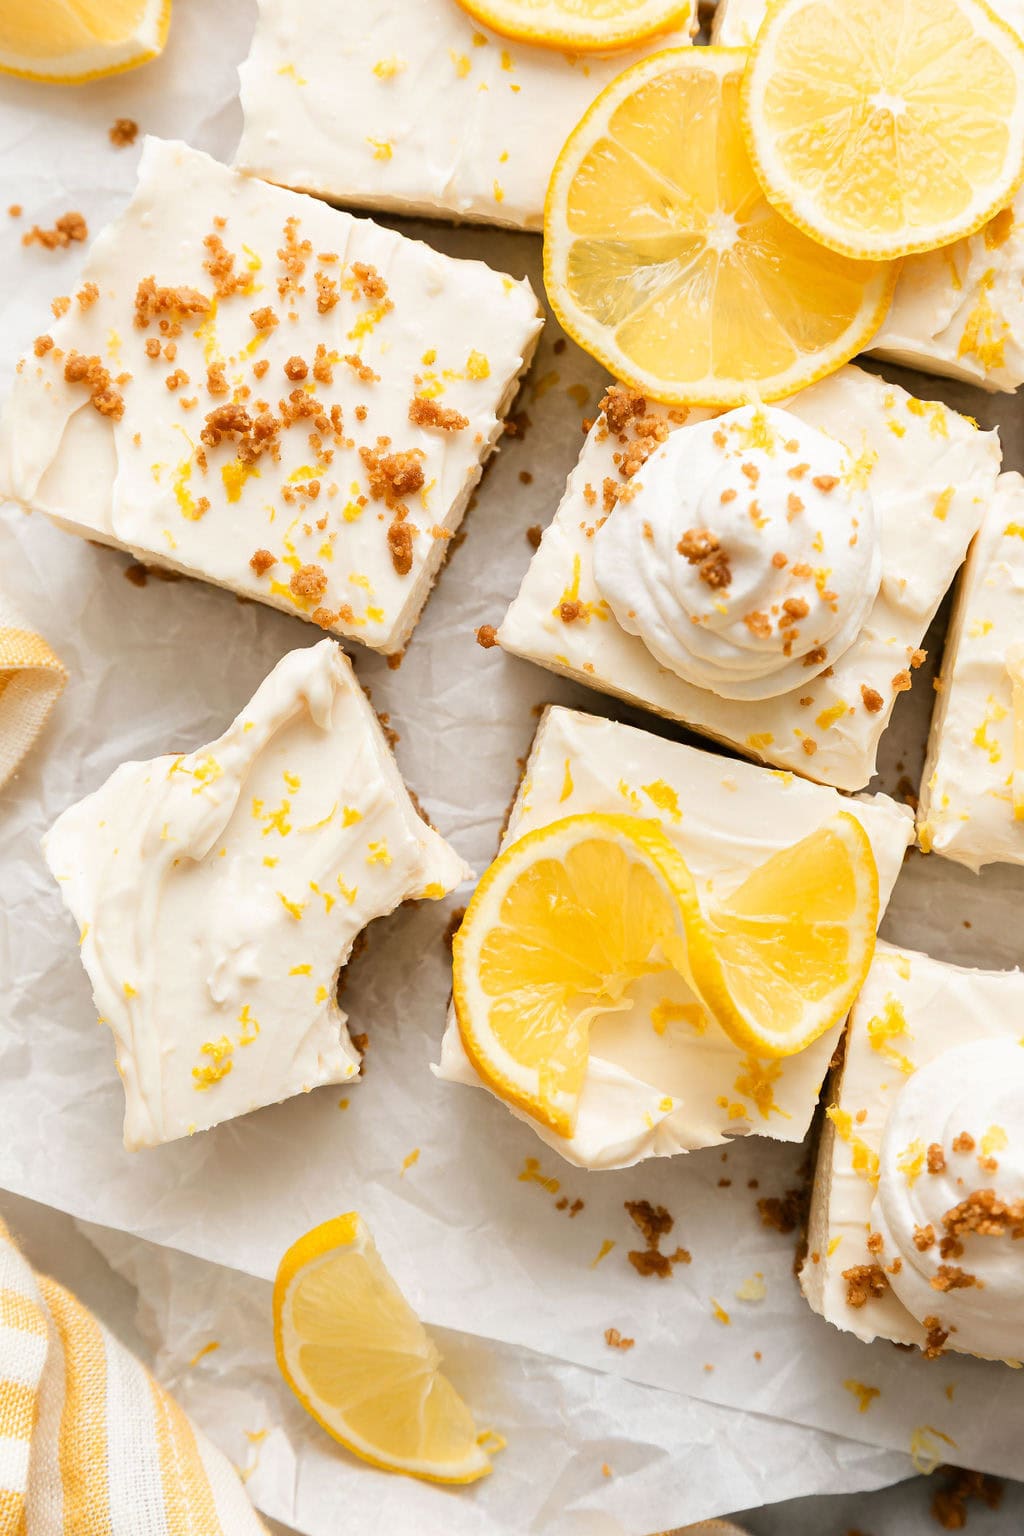
Cold, tangy, and just sweet enough — these lemon cheesecake bars are what I reach for when someone asks me to bring a dessert to a summer gathering and I don't feel like turning on the oven. The crust is crushed Golden Oreos pressed into a pan, which adds a slightly sweeter base than plain graham crackers and pairs beautifully with the sharp lemon filling. I learned the hard way that the cream cheese needs to be fully at room temperature before you beat it — cold cream cheese leaves lumps that no amount of mixing will fix. Set it out at least 30 minutes before you start.
Ingredients
- 24 Golden Oreos, finely crushed (or graham crackers)
- 5 tablespoons unsalted butter, melted
- 16 oz cream cheese (two 8 oz blocks), room temperature
- ¾ cup powdered sugar
- Zest of 2 lemons
- ¼ cup fresh lemon juice (about 2 large lemons)
- 1 teaspoon vanilla extract
- 1 cup heavy whipping cream, whipped to stiff peaks
Instructions
- Line an 8x8 inch pan with parchment paper, leaving overhang on the sides for easy lifting. Mix crushed cookies with melted butter and press firmly into the bottom of the pan. Refrigerate while you make the filling.
- Beat the room-temperature cream cheese with a hand mixer until completely smooth and fluffy, about 2 minutes. Add powdered sugar and beat again until combined.
- Mix in lemon zest, lemon juice, and vanilla. Taste and adjust — if you want more tang, add another teaspoon of juice.
- Whip the heavy cream separately to stiff peaks, then fold it gently into the cream cheese mixture in two additions. This keeps the filling light rather than dense.
- Spread the filling evenly over the crust. Smooth the top with a spatula.
- Refrigerate for at least 4 hours or overnight. Lift out using the parchment overhang, slice into bars, and serve cold. A light dusting of lemon zest on top before serving looks nice if you're taking these somewhere.
17. Chocolate Peanut Butter Freezer Fudge
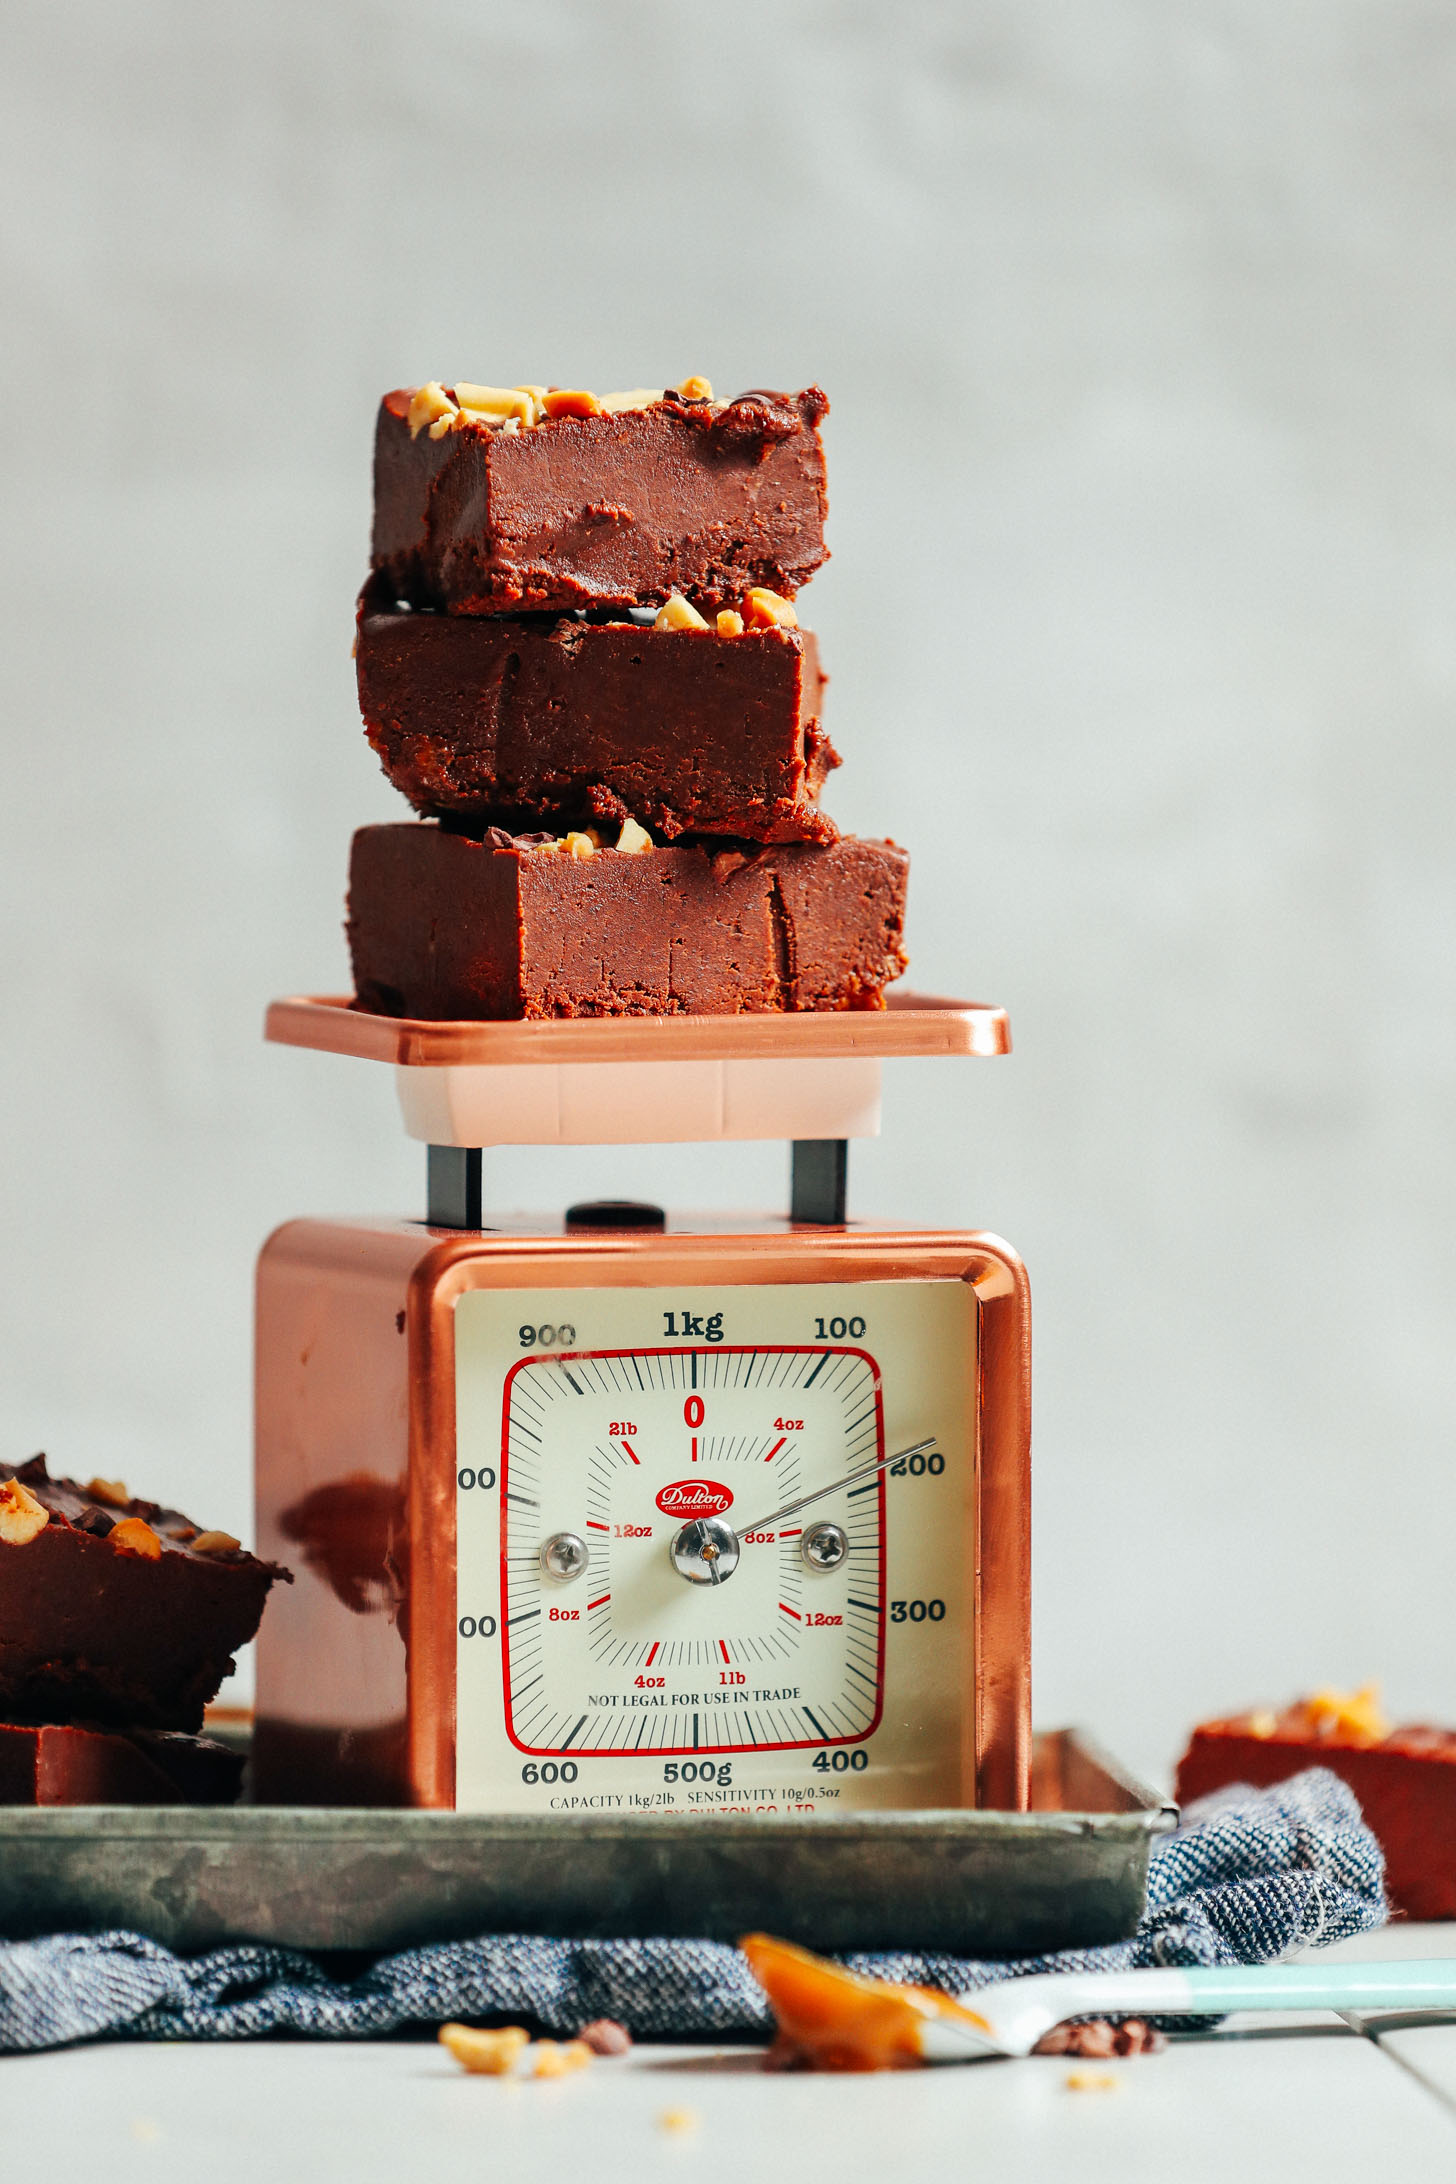
My husband is the kind of person who eats dessert at midnight — and this freezer fudge is the reason our freezer is never quite empty. It's three layers: a peanut butter base, a thin chocolate top, and it sets hard in the freezer so you can snap it into pieces like real fudge without any candy thermometer or cooking involved. Natural peanut butter (the kind where the oil separates) works best here because it has a deeper, less sweet flavor — but regular Jif or Skippy will absolutely work. Saad thinks these taste like frozen Reese's cups, and honestly, he's not wrong.
Ingredients
- 1 cup natural peanut butter (creamy)
- 3 tablespoons coconut oil, melted (divided)
- 3 tablespoons honey or maple syrup
- ½ teaspoon vanilla extract
- ¼ teaspoon salt
- ¾ cup semi-sweet chocolate chips (or dark chocolate chips)
- Flaky sea salt, for topping (optional but recommended)
Instructions
- Line an 8x8 inch pan or a loaf pan with parchment paper.
- Stir together peanut butter, 2 tablespoons of the melted coconut oil, honey, vanilla, and salt until smooth and fully combined.
- Pour the peanut butter mixture into the lined pan and spread into an even layer. Freeze for 15 minutes until it firms up slightly.
- Melt the chocolate chips with the remaining 1 tablespoon coconut oil in a microwave-safe bowl in 30-second intervals, stirring between each, until smooth.
- Pour the melted chocolate over the peanut butter layer and spread evenly. Sprinkle flaky sea salt over the top if using.
- Freeze for at least 1 hour until completely hard. Lift out and break or cut into pieces. Store in an airtight container in the freezer — it softens fast at room temperature, so eat it straight from the freezer.
16. Watermelon Sorbet with Fresh Mint
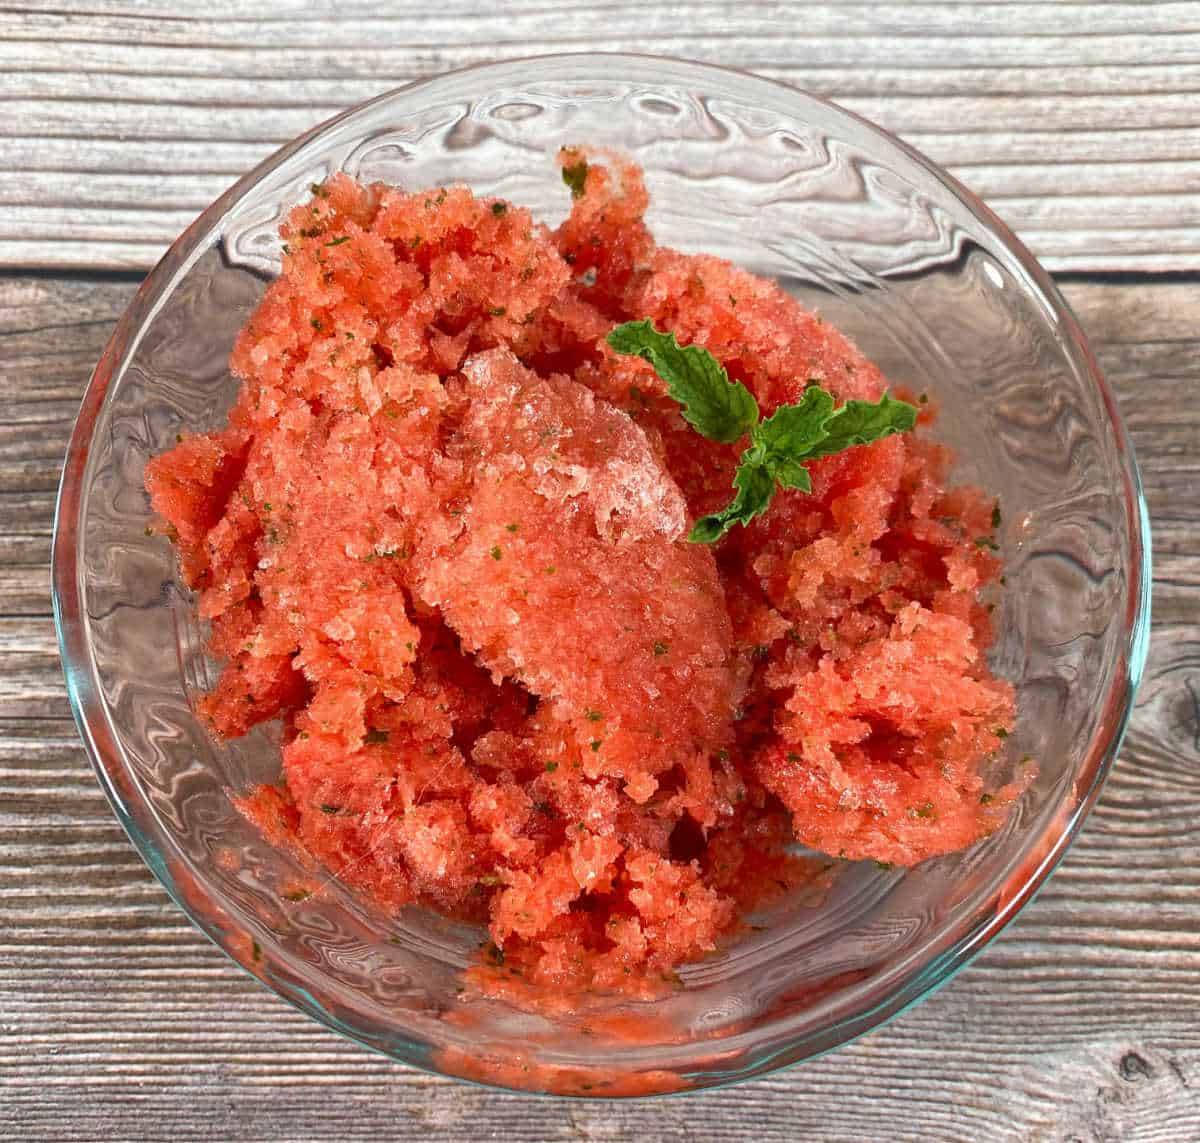
When watermelon is at peak season — that deep red, almost too-juicy stage — turning it into sorbet is one of the best things you can do with it. The color alone is gorgeous: vivid pink-red in a bowl with a few mint leaves on top. No ice cream machine needed here; you blend, freeze, scrape, and freeze again — a method called granita-style that gives you a slightly flaky, snow-cone texture rather than a smooth scoop. If you want it smoother, blend it one more time after the first freeze. Either way it works, and either way it disappears fast on a hot afternoon.
Ingredients
- 6 cups seedless watermelon chunks (about ½ a small watermelon)
- 3 tablespoons sugar (adjust to taste based on melon sweetness)
- 2 tablespoons fresh lime juice
- Pinch of salt
- ¼ cup fresh mint leaves, plus more for serving
Instructions
- Blend watermelon chunks, sugar, lime juice, salt, and mint leaves together until completely smooth. Taste — if the watermelon is very sweet, reduce the sugar; if it's bland, add a touch more lime.
- Pour the blended mixture through a fine mesh strainer into a shallow baking dish or freezer-safe container, pressing with a spoon to get as much liquid through as possible. Discard the pulp.
- Freeze for 2 hours, then use a fork to scrape the mixture from the edges toward the center, breaking up any frozen chunks. The goal is a flaky, icy texture.
- Return to the freezer for another 2 hours and repeat the scraping process. Do this one more time if needed until the whole tray is fluffy and icy rather than solid.
- Scoop into bowls or glasses and top with fresh mint leaves. Serve immediately — it melts quickly, which is half the fun.
15. Peach Cream Cheese Icebox Dessert
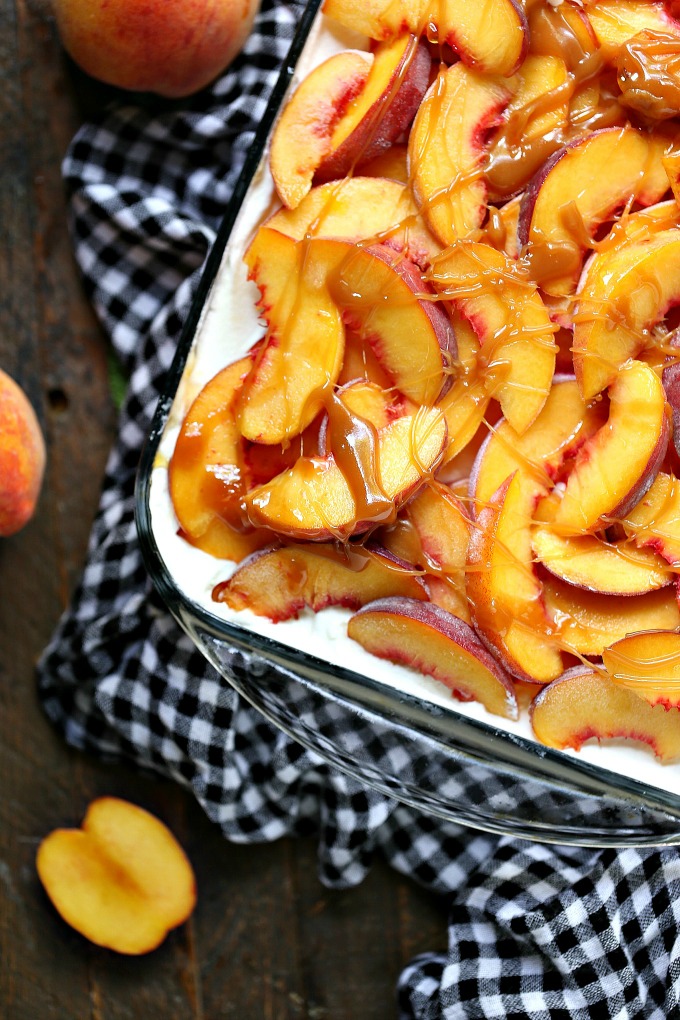
Somewhere between a trifle and a layered icebox cake, this peach dessert is the kind of thing you make in a glass dish so everyone can see the layers before you cut into it. A base of vanilla wafers, then a cream cheese layer sweetened with a bit of sugar and vanilla, then sliced fresh peaches, and repeat. Canned peaches work fine here if fresh aren't available — just drain them very well or the layers get watery. I make a double batch when peaches are in season because it disappears in one sitting and I always want more the next day.
Ingredients
- 1 box (11 oz) vanilla wafer cookies
- 16 oz cream cheese, softened
- 1 cup powdered sugar
- 1 teaspoon vanilla extract
- 1½ cups heavy whipping cream, whipped to stiff peaks
- 4 medium fresh peaches, peeled and sliced thin (or two 15 oz cans sliced peaches, well drained)
- 2 tablespoons peach jam or preserves (optional, for glazing the peach layer)
Instructions
- Beat softened cream cheese with powdered sugar and vanilla until completely smooth. Fold in the whipped cream gently until combined — this is your cream layer.
- If using canned peaches, spread them on paper towels and press gently to remove as much moisture as possible. Toss peach slices with peach jam if using, to give them a little gloss and extra flavor.
- In a 9x13 inch dish, arrange a single layer of vanilla wafers across the bottom. Don't overlap — just fit them in snugly.
- Spread half the cream cheese mixture over the wafers in an even layer. Arrange half the peach slices over the cream layer.
- Add another layer of vanilla wafers, then the remaining cream cheese mixture, then the remaining peaches on top.
- Cover with plastic wrap and refrigerate for at least 6 hours or overnight. The wafers will soften completely into a tender, almost cake-like layer. Slice and serve cold.
14. Raspberry White Chocolate Mousse Cups
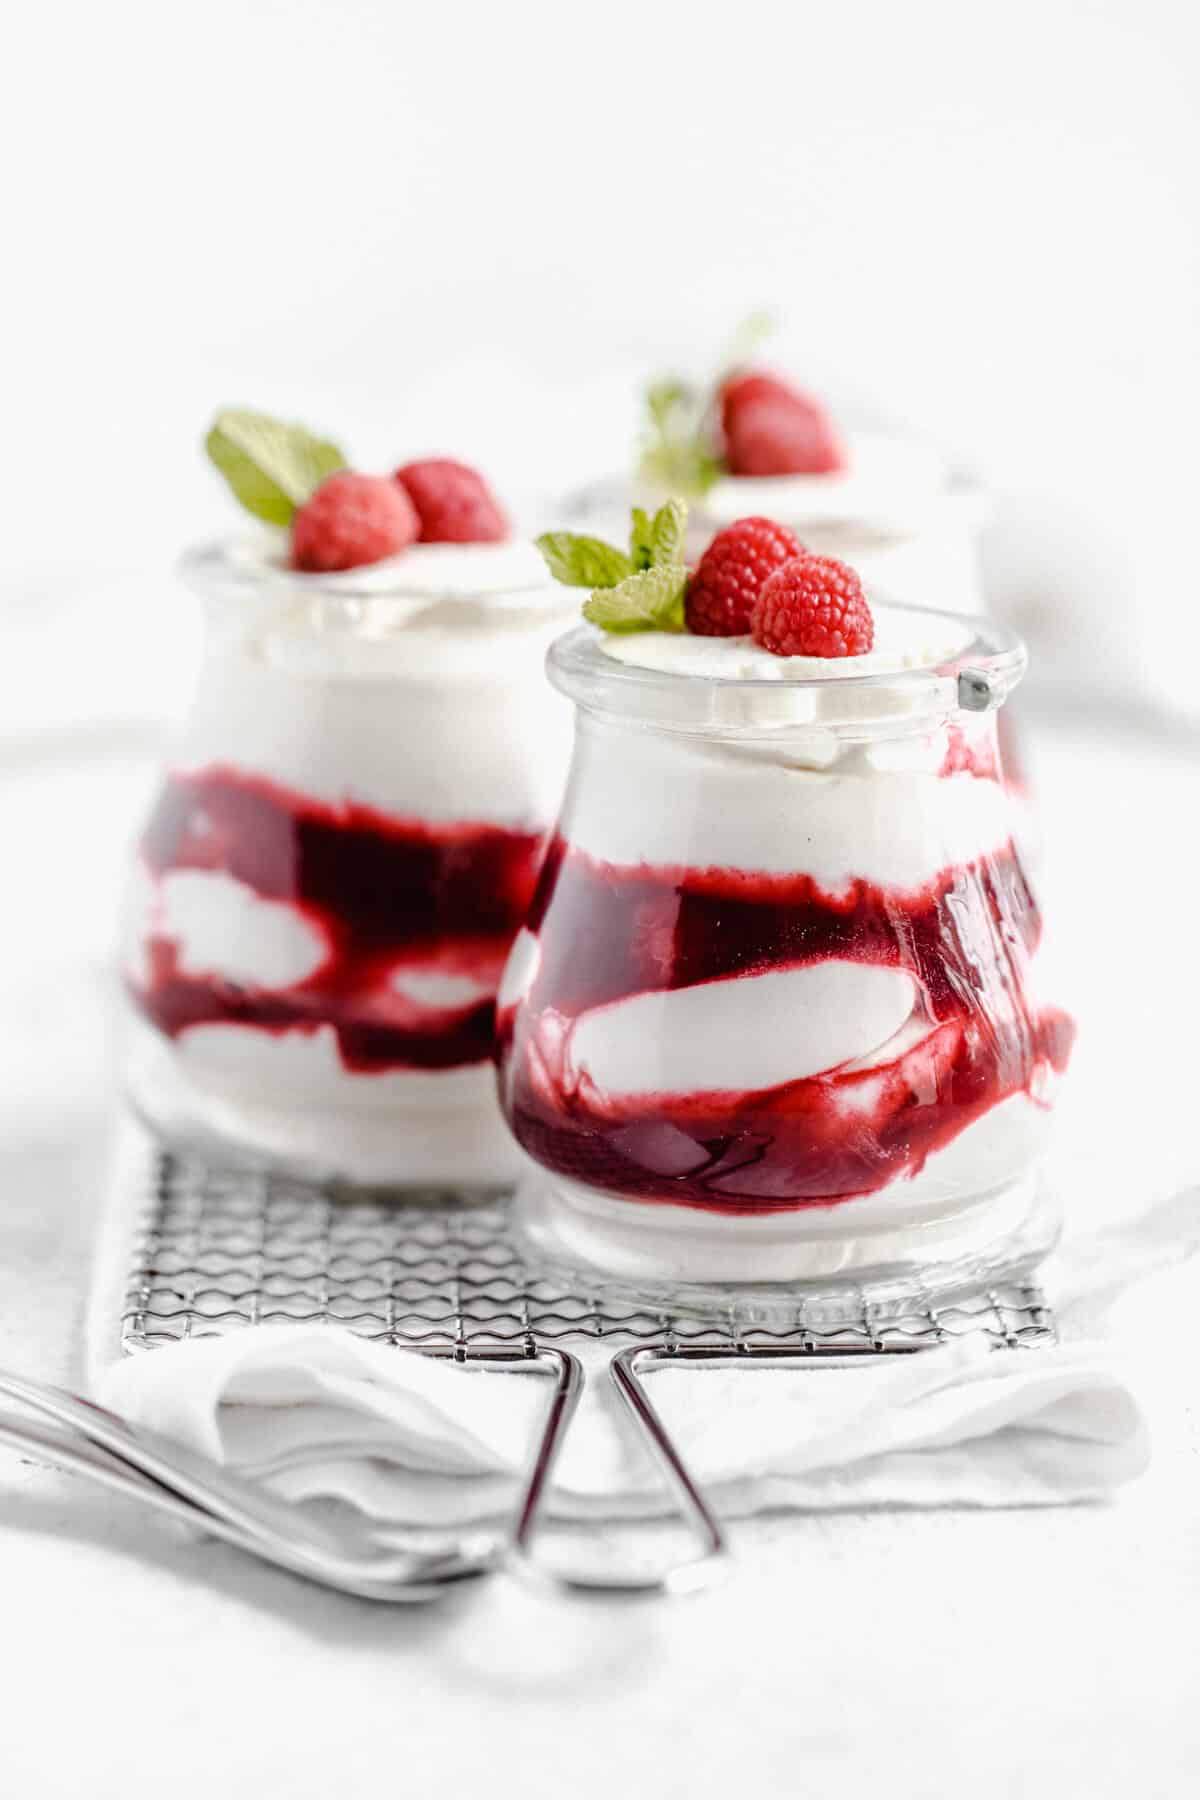
Pretty enough to serve at a dinner party, easy enough to throw together on a Tuesday — these mousse cups are one of my favorite ways to use fresh raspberries when they're at their cheapest and best at the market. White chocolate gets melted and folded into whipped cream, then layered in small glasses with a quick raspberry sauce that you make in about five minutes on the stovetop. No stovetop access? Mash fresh raspberries with sugar and a squeeze of lemon instead — it's looser but just as good. The contrast of the tart raspberry against the sweet, rich white chocolate mousse is what makes these work.
Ingredients
- 4 oz good-quality white chocolate, chopped (or white chocolate chips)
- 1½ cups heavy whipping cream, divided
- ½ teaspoon vanilla extract
- 6 oz fresh raspberries (about 1½ cups)
- 2 tablespoons sugar
- 1 teaspoon lemon juice
- Extra raspberries and white chocolate shavings for topping
Instructions
- Make the raspberry sauce first: combine raspberries, sugar, and lemon juice in a small saucepan over medium heat. Cook, stirring, for about 5 minutes until berries break down and the sauce thickens slightly. Strain through a fine mesh sieve to remove seeds if you prefer smooth, or leave it rustic with seeds. Cool completely.
- Melt the white chocolate with ¼ cup of the heavy cream in a microwave-safe bowl in 30-second intervals, stirring until smooth. Let cool to room temperature — if it's warm when you fold it in, it'll deflate the mousse.
- Whip the remaining 1¼ cups of heavy cream with vanilla to stiff peaks.
- Gently fold the cooled white chocolate mixture into the whipped cream in two additions until no streaks remain. Work slowly — you want it airy, not dense.
- Spoon a layer of raspberry sauce into the bottom of each serving glass or cup. Top with a generous layer of white chocolate mousse. Repeat layers if your glasses are tall enough.
- Refrigerate for at least 2 hours before serving. Top with fresh raspberries and white chocolate shavings just before bringing them to the table.
13. Frozen Banana Peanut Butter Bites
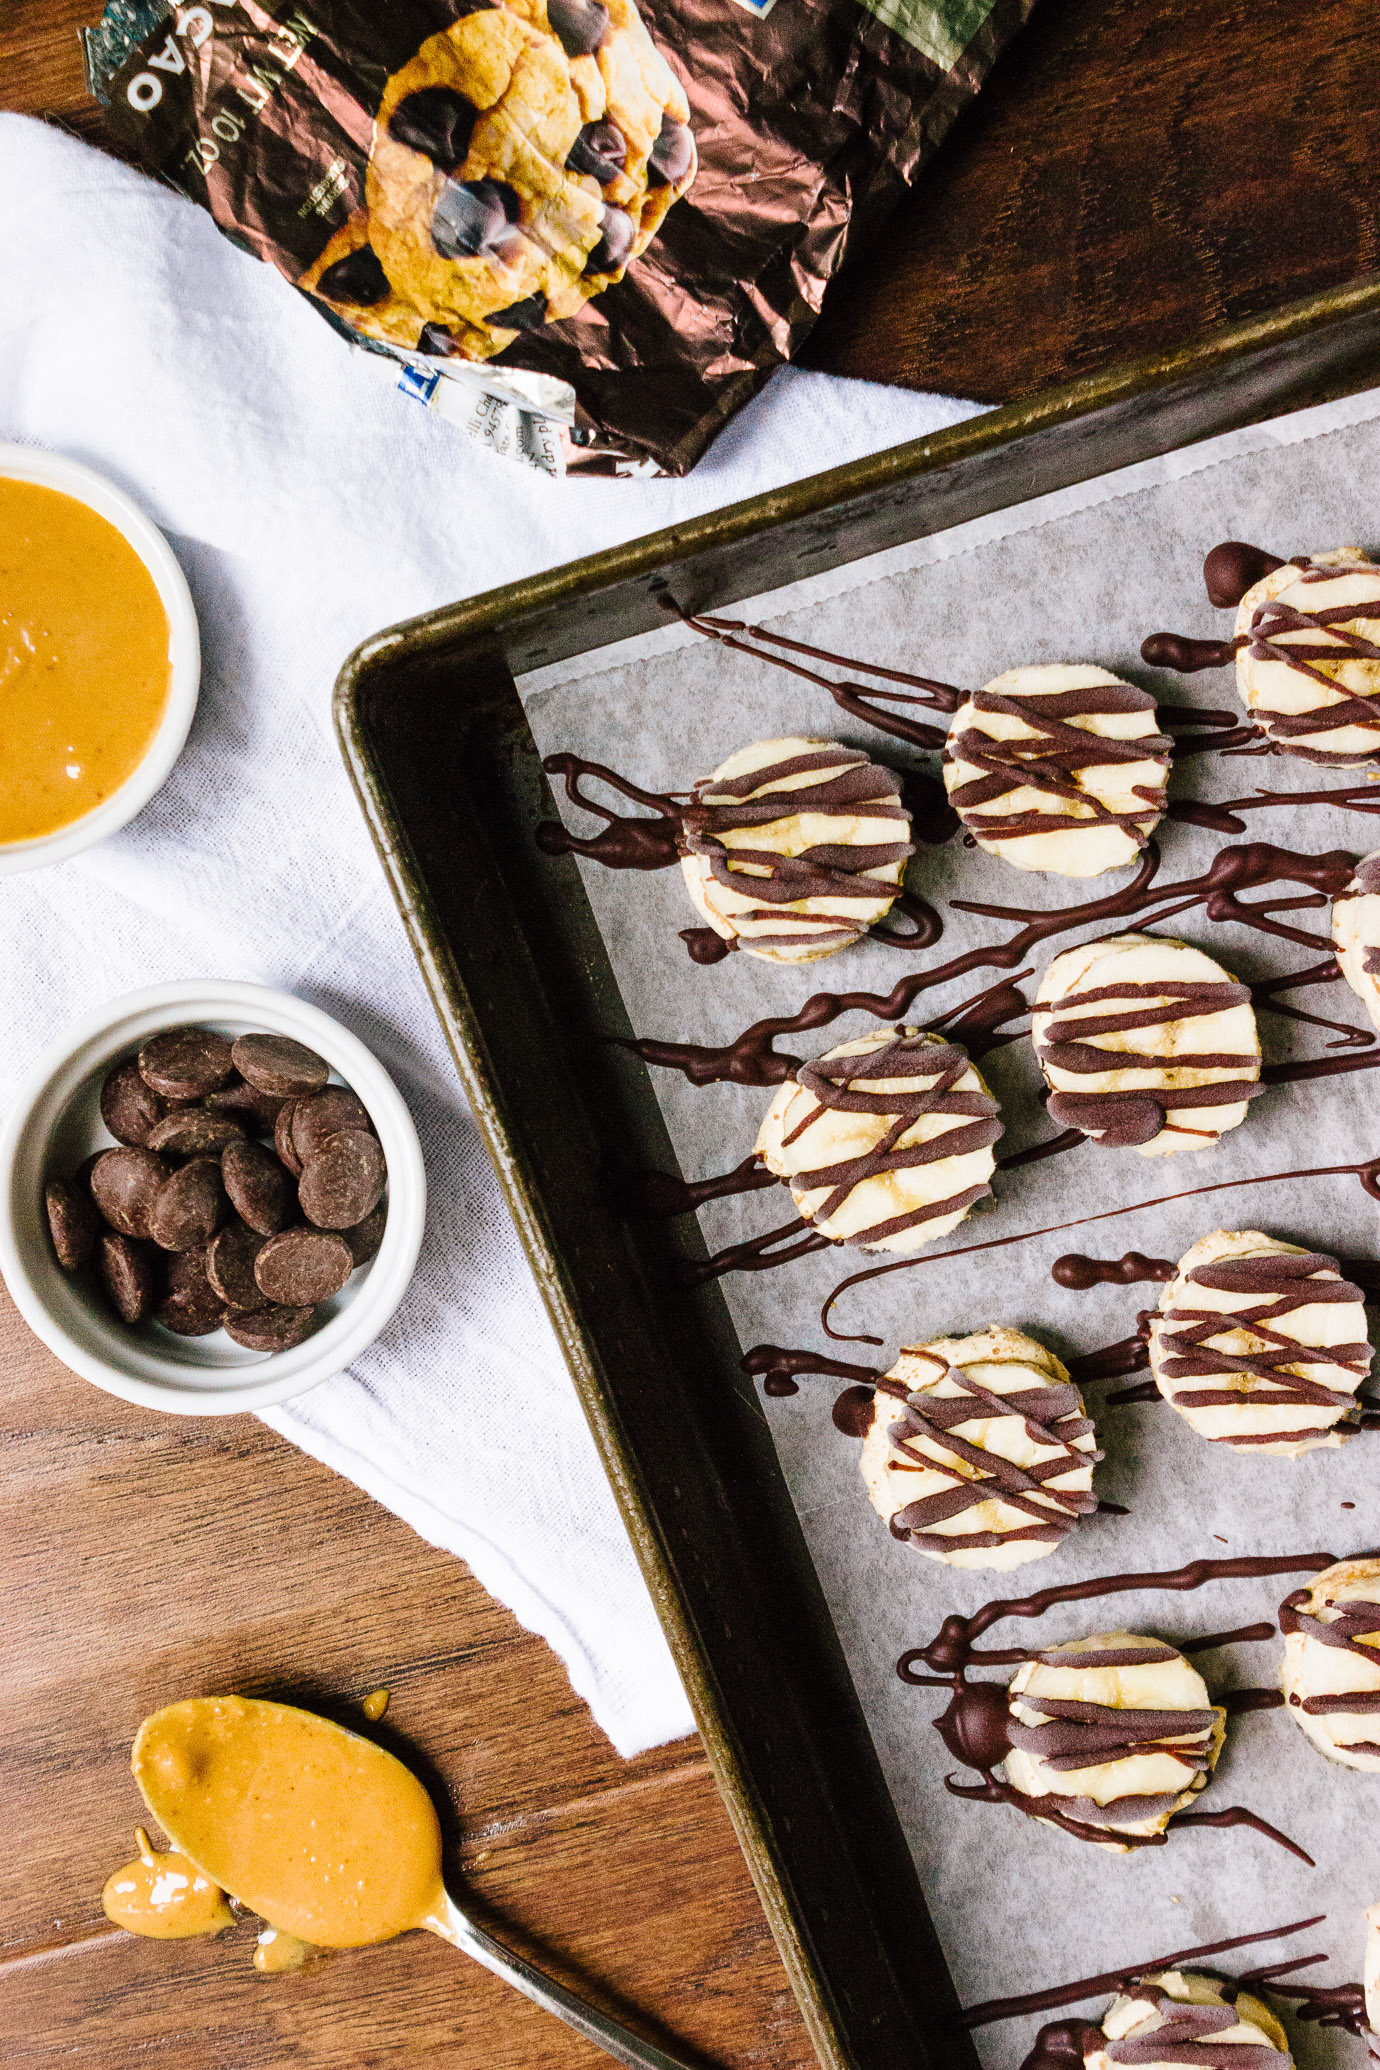
Four ingredients, fifteen minutes of actual work, and then you just wait. These little frozen bites — banana slices sandwiched around peanut butter, dipped in dark chocolate, and frozen solid — are the kind of thing Zainab requests constantly in summer because they feel like candy but I don't feel guilty handing them over. Use bananas that are ripe but not too soft — if they're mushy they'll fall apart when you try to skewer them. The chocolate shell sets fast in the freezer, so work quickly once you start dipping. If you don't have a food processor, just chop by hand or skip any toppings entirely — they're great plain too.
Ingredients
- 3 medium bananas, ripe but firm
- ½ cup creamy peanut butter
- 1½ cups dark or semi-sweet chocolate chips
- 1 tablespoon coconut oil
- Optional toppings: crushed peanuts, flaky salt, rainbow sprinkles
Instructions
- Line a baking sheet with parchment paper. Slice bananas into ½-inch thick rounds — you should get about 8 to 10 slices per banana.
- Spread a small amount of peanut butter (about ½ teaspoon) on one banana slice and press another slice on top to make a sandwich. Place on the lined baking sheet. Repeat with remaining slices.
- Insert a toothpick or short skewer into each sandwich for easy dipping. Freeze the banana sandwiches for 30 minutes until firm — this step is important or they'll fall apart in the warm chocolate.
- Melt chocolate chips and coconut oil together in a microwave-safe bowl in 30-second intervals, stirring between each, until completely smooth.
- Working quickly, dip each frozen banana sandwich into the melted chocolate, letting excess drip off. Return to the parchment-lined sheet and immediately add any toppings you're using before the chocolate sets.
- Freeze for at least 1 hour until completely solid. Store in a zip-top bag in the freezer for up to 2 weeks — if they last that long.
12. No-Bake Blueberry Lemon Cheesecake
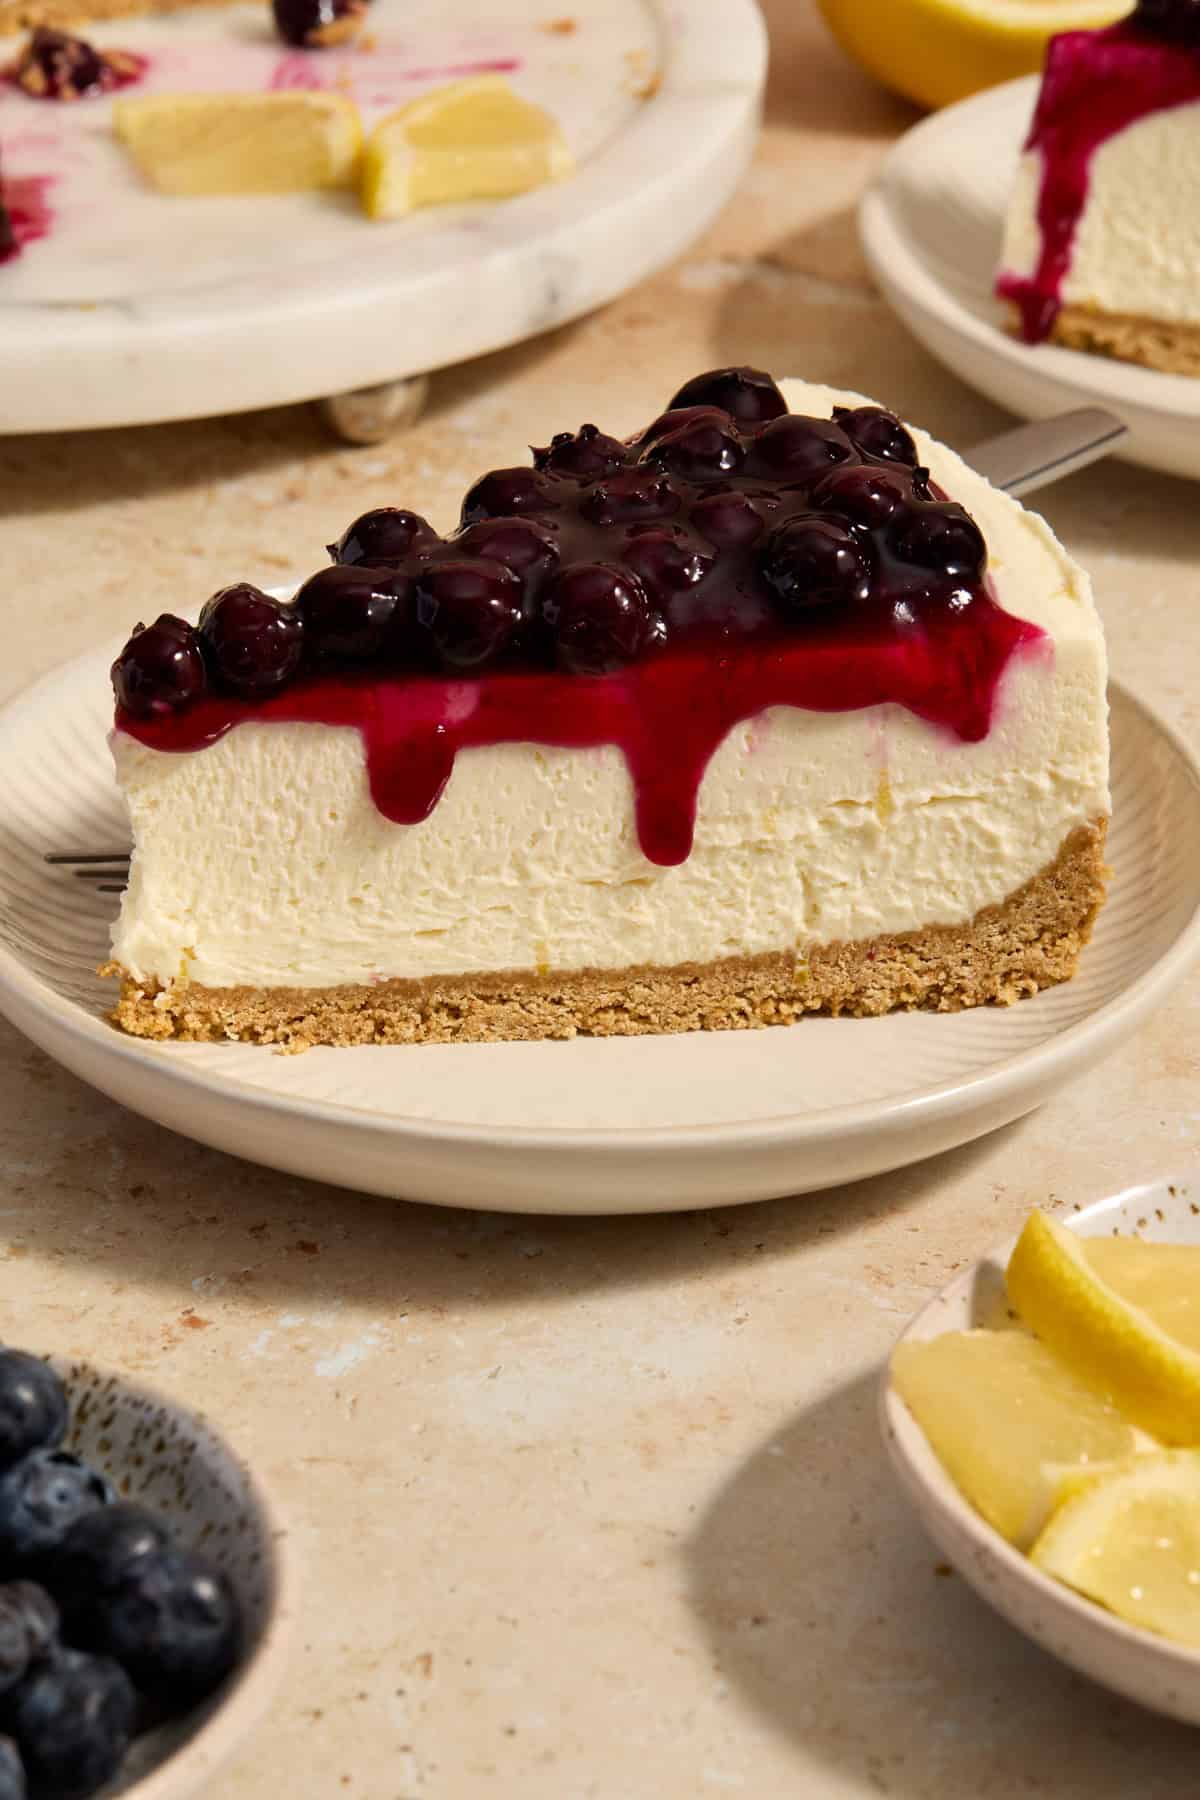
Blueberry and lemon together in a no-bake cheesecake is one of those combinations that just makes sense in summer. The filling is light and tangy from cream cheese and fresh lemon juice, and the blueberry topping on top looks almost too pretty to eat — but you absolutely should. I use a store-bought graham cracker crust when I'm short on time, but pressing your own with melted butter takes maybe five extra minutes and tastes noticeably better. Chill this overnight if you can — the texture firms up beautifully and slices clean without falling apart.
Ingredients
- 1½ cups graham cracker crumbs (about 10 full crackers)
- 5 tablespoons unsalted butter, melted
- 2 tablespoons granulated sugar
- 16 oz cream cheese, softened to room temperature
- ¾ cup powdered sugar
- 2 tablespoons fresh lemon juice
- 1 teaspoon lemon zest
- 1 cup heavy whipping cream, cold
- 2 cups fresh blueberries
- 3 tablespoons blueberry jam or preserves
Instructions
- Mix graham cracker crumbs, melted butter, and granulated sugar together until the crumbs look like wet sand. Press firmly into the bottom and slightly up the sides of a 9-inch springform pan. Refrigerate while you make the filling.
- Beat the softened cream cheese with a hand mixer on medium speed until smooth and fluffy, about 2 minutes. Add powdered sugar, lemon juice, and lemon zest, and beat again until fully combined.
- In a separate cold bowl, whip the heavy cream until stiff peaks form. Gently fold the whipped cream into the cream cheese mixture in two additions — don't stir aggressively or you'll lose the airiness.
- Spread the filling over the chilled crust and smooth the top with a spatula. Refrigerate for at least 6 hours, or overnight for best results.
- Before serving, warm the blueberry jam in a small saucepan over low heat until loose, then stir in the fresh blueberries and let cool for 5 minutes. Spoon over the cheesecake just before slicing.
11. Coconut Lime Pudding Parfaits
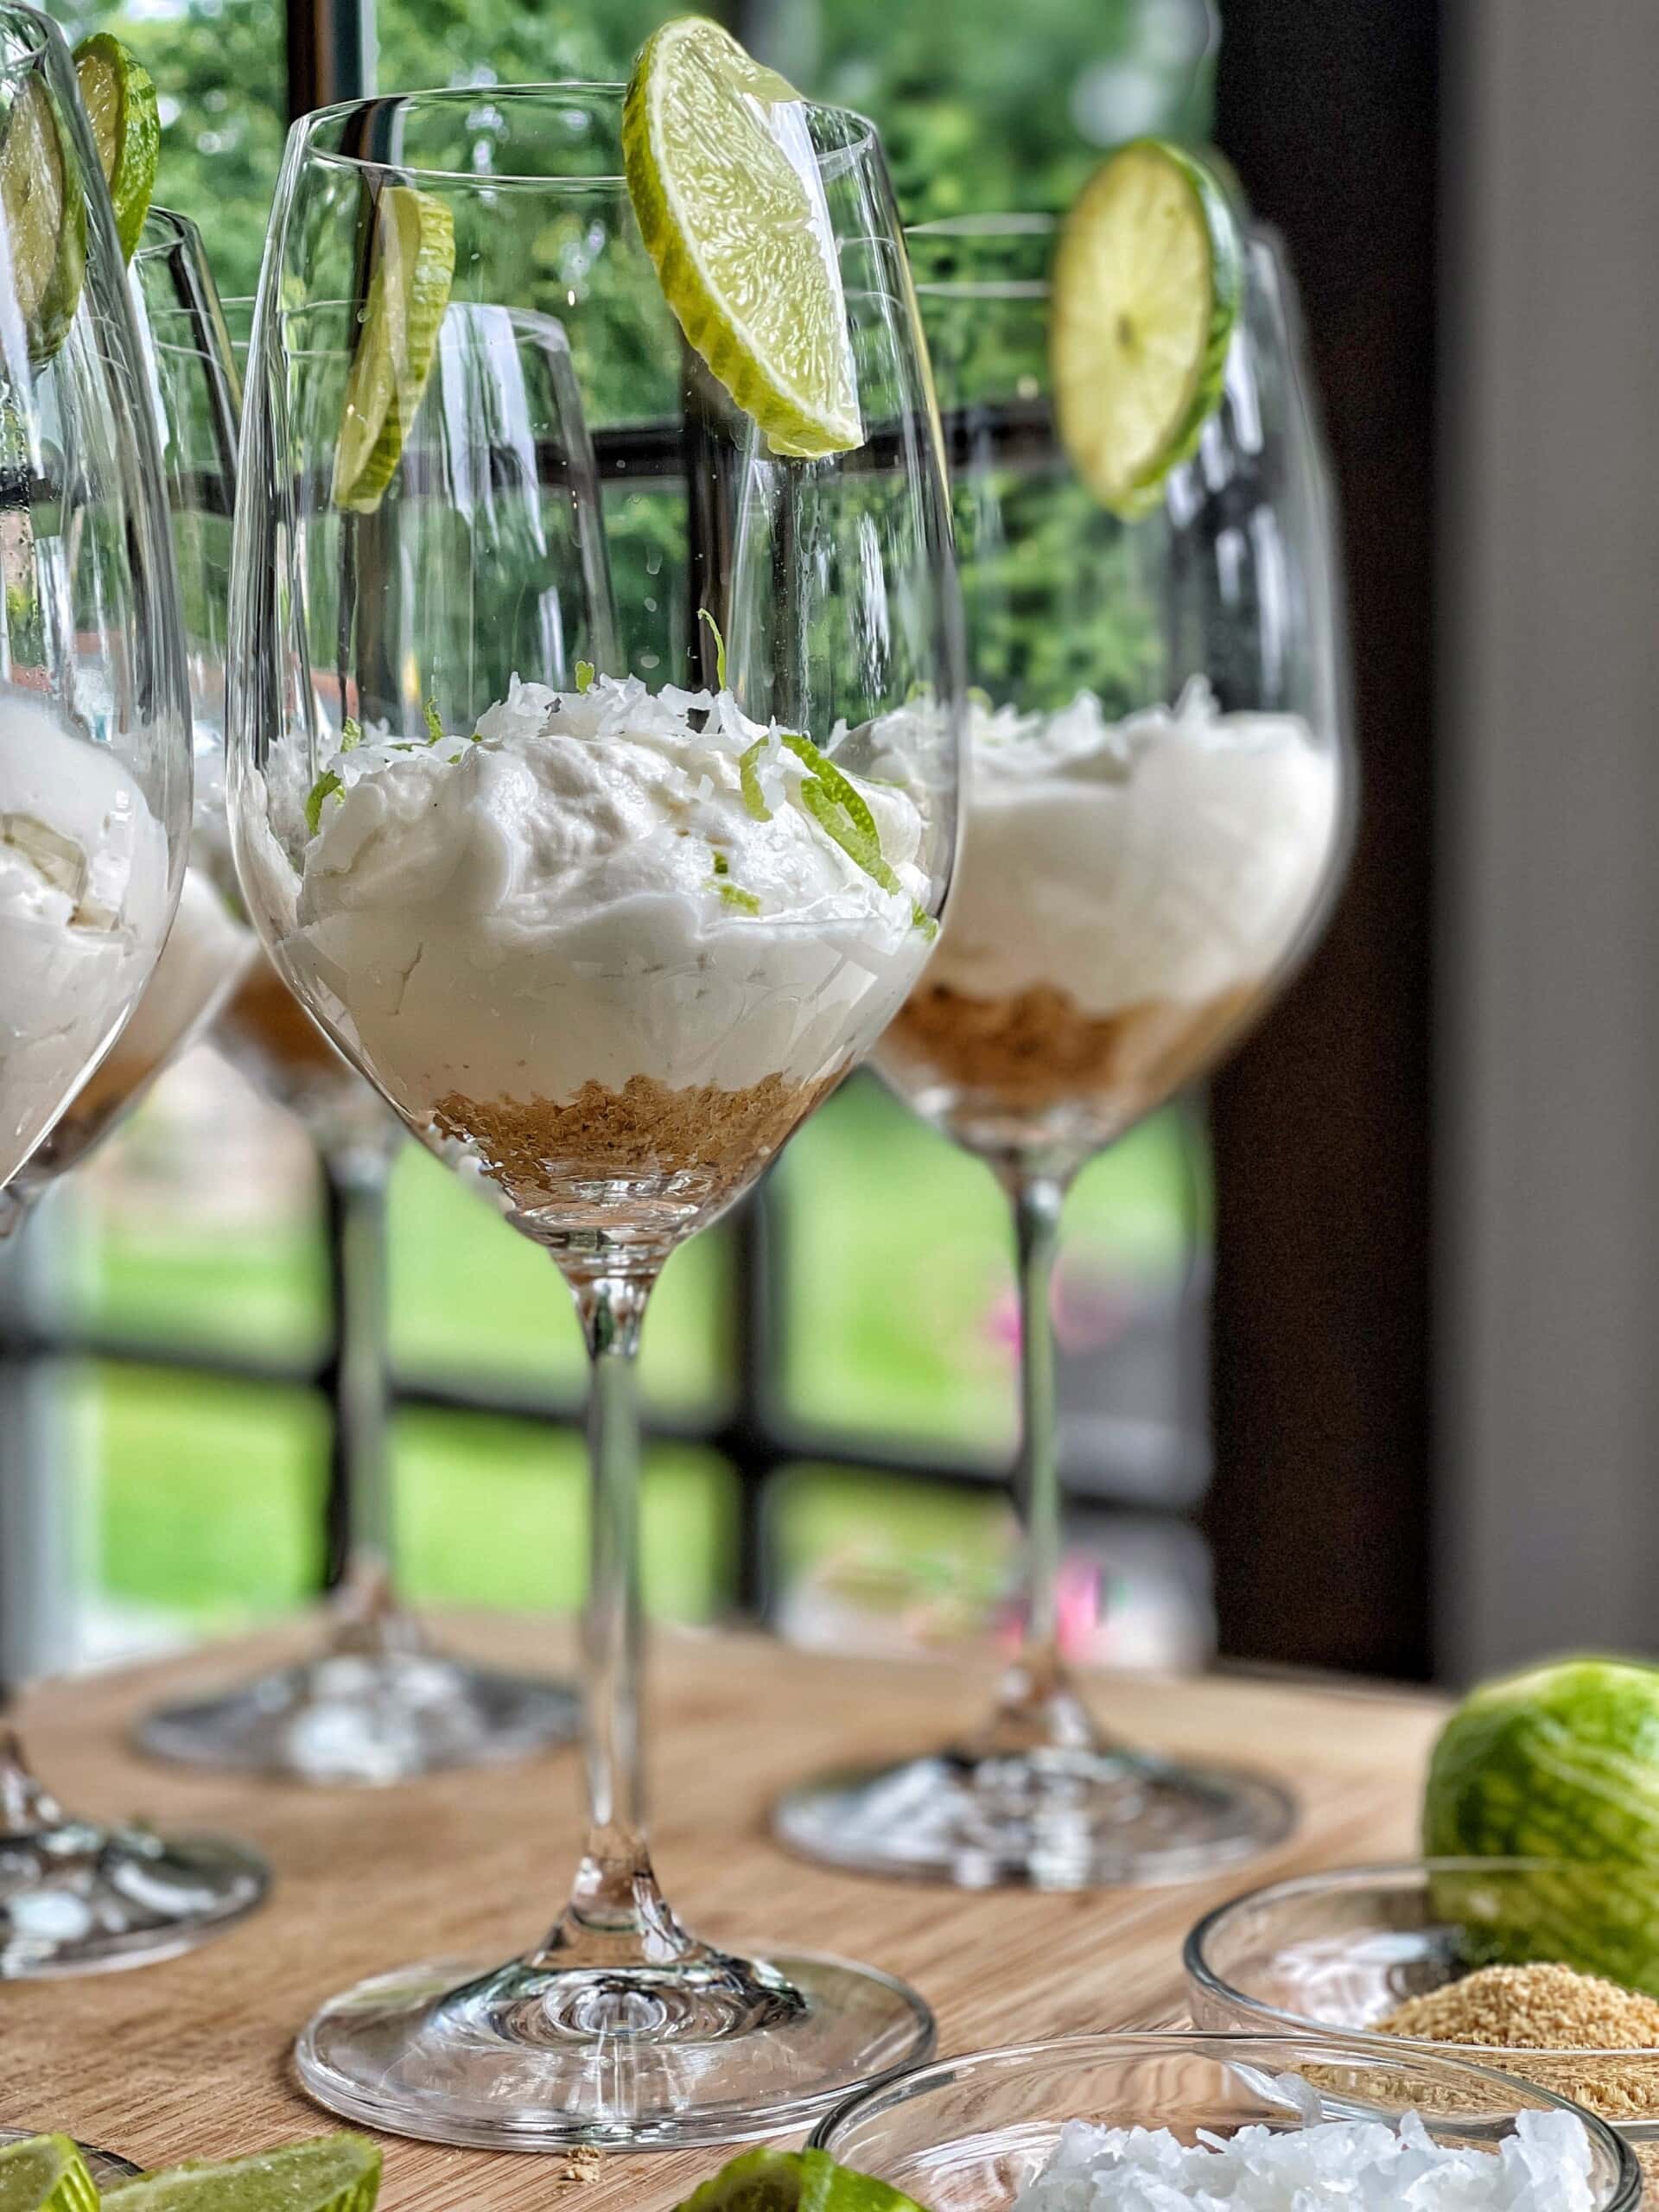
These parfaits came out of a week where I had two cans of coconut milk sitting in my pantry and a bag of limes that were about to turn. The result is something that tastes genuinely tropical — creamy coconut pudding layered with lime whipped cream and crushed graham crackers for a little crunch. Full-fat coconut milk is non-negotiable here — the lite version won't set properly and the whole thing turns soupy. Assemble these in clear glasses so the layers show, then keep them covered in the fridge until you're ready to serve. My husband called them "resort dessert," which I took as a compliment.
Ingredients
- 2 cans (13.5 oz each) full-fat coconut milk, refrigerated overnight
- 3 tablespoons powdered sugar, divided
- 1 teaspoon vanilla extract
- 1 package (3.4 oz) instant vanilla pudding mix
- 1 cup whole milk
- 2 tablespoons fresh lime juice
- 1 teaspoon lime zest
- 1 cup heavy whipping cream
- 1 cup graham cracker crumbs
- Toasted coconut flakes, for topping
Instructions
- Open the refrigerated coconut milk cans without shaking them. Scoop out the thick cream that has risen to the top into a mixing bowl. Reserve the liquid for smoothies or another use.
- Beat the coconut cream with 1½ tablespoons powdered sugar and vanilla extract until fluffy and smooth, about 2-3 minutes. Set aside in the fridge.
- Whisk the instant pudding mix with whole milk for about 2 minutes until it thickens. Fold in half the coconut cream mixture to make a rich coconut pudding layer.
- In a separate bowl, whip the heavy cream with the remaining 1½ tablespoons powdered sugar, lime juice, and lime zest until soft peaks form.
- Layer into glasses: graham cracker crumbs first, then coconut pudding, then lime whipped cream. Repeat the layers and finish with toasted coconut flakes on top.
- Cover and chill for at least 2 hours before serving.
10. Strawberry Pretzel Salad No-Bake
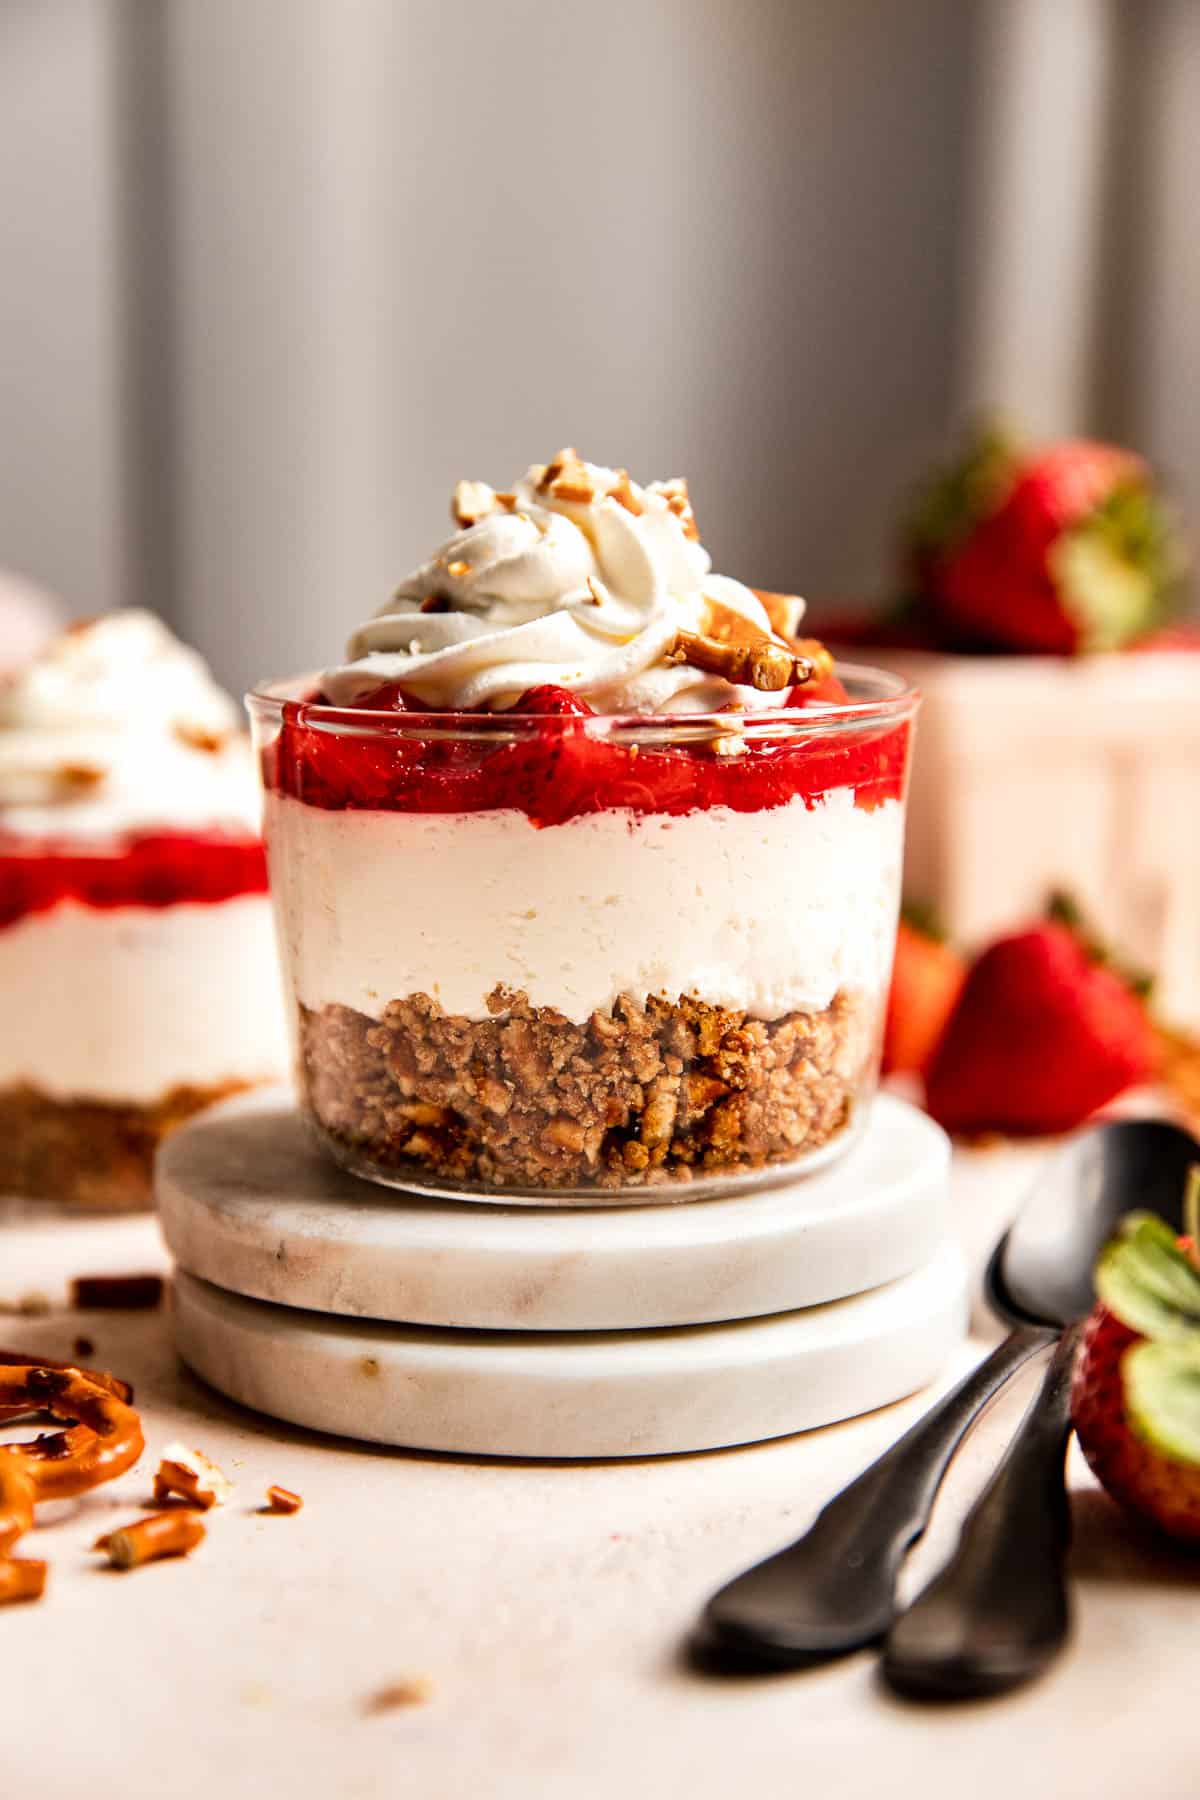
The classic strawberry pretzel salad usually requires baking the pretzel crust — I've adapted it so the whole thing stays out of the oven entirely. The pretzel base is held together with melted butter and pressed cold instead of baked, and it still delivers that salty, crunchy contrast against the creamy cheesecake layer and the strawberry Jell-O top. Fair warning: let each layer set fully before adding the next, otherwise the Jell-O sinks through and you lose the distinct layers. It's a little patient work but none of it is hard, and the end result looks like something from a picnic spread in the 1970s — in the best possible way.
Ingredients
- 2 cups crushed pretzels (not too fine — leave some texture)
- 6 tablespoons unsalted butter, melted
- 3 tablespoons granulated sugar
- 8 oz cream cheese, softened
- 1 cup powdered sugar
- 8 oz whipped topping (Cool Whip or homemade whipped cream)
- 1 package (6 oz) strawberry Jell-O
- 2 cups boiling water
- 2 cups fresh or frozen strawberries, sliced
Instructions
- Combine crushed pretzels, melted butter, and granulated sugar. Press firmly into the bottom of a 9x13-inch dish. Refrigerate for 30 minutes to firm up — this replaces the baking step.
- Beat cream cheese and powdered sugar together until smooth. Fold in the whipped topping until fully combined. Spread this cream cheese layer carefully over the chilled pretzel crust, making sure it reaches all the edges so the Jell-O won't seep through. Refrigerate for 30 more minutes.
- Dissolve the strawberry Jell-O in 2 cups of boiling water, stirring for 2 minutes. Let it cool at room temperature for 20-25 minutes until it's no longer hot but not yet set.
- Stir the sliced strawberries into the cooled Jell-O mixture, then carefully pour over the cream cheese layer.
- Refrigerate the whole dish for at least 4 hours until the Jell-O is fully set. Slice and serve cold.
9. Frozen Pineapple Whip Soft Serve
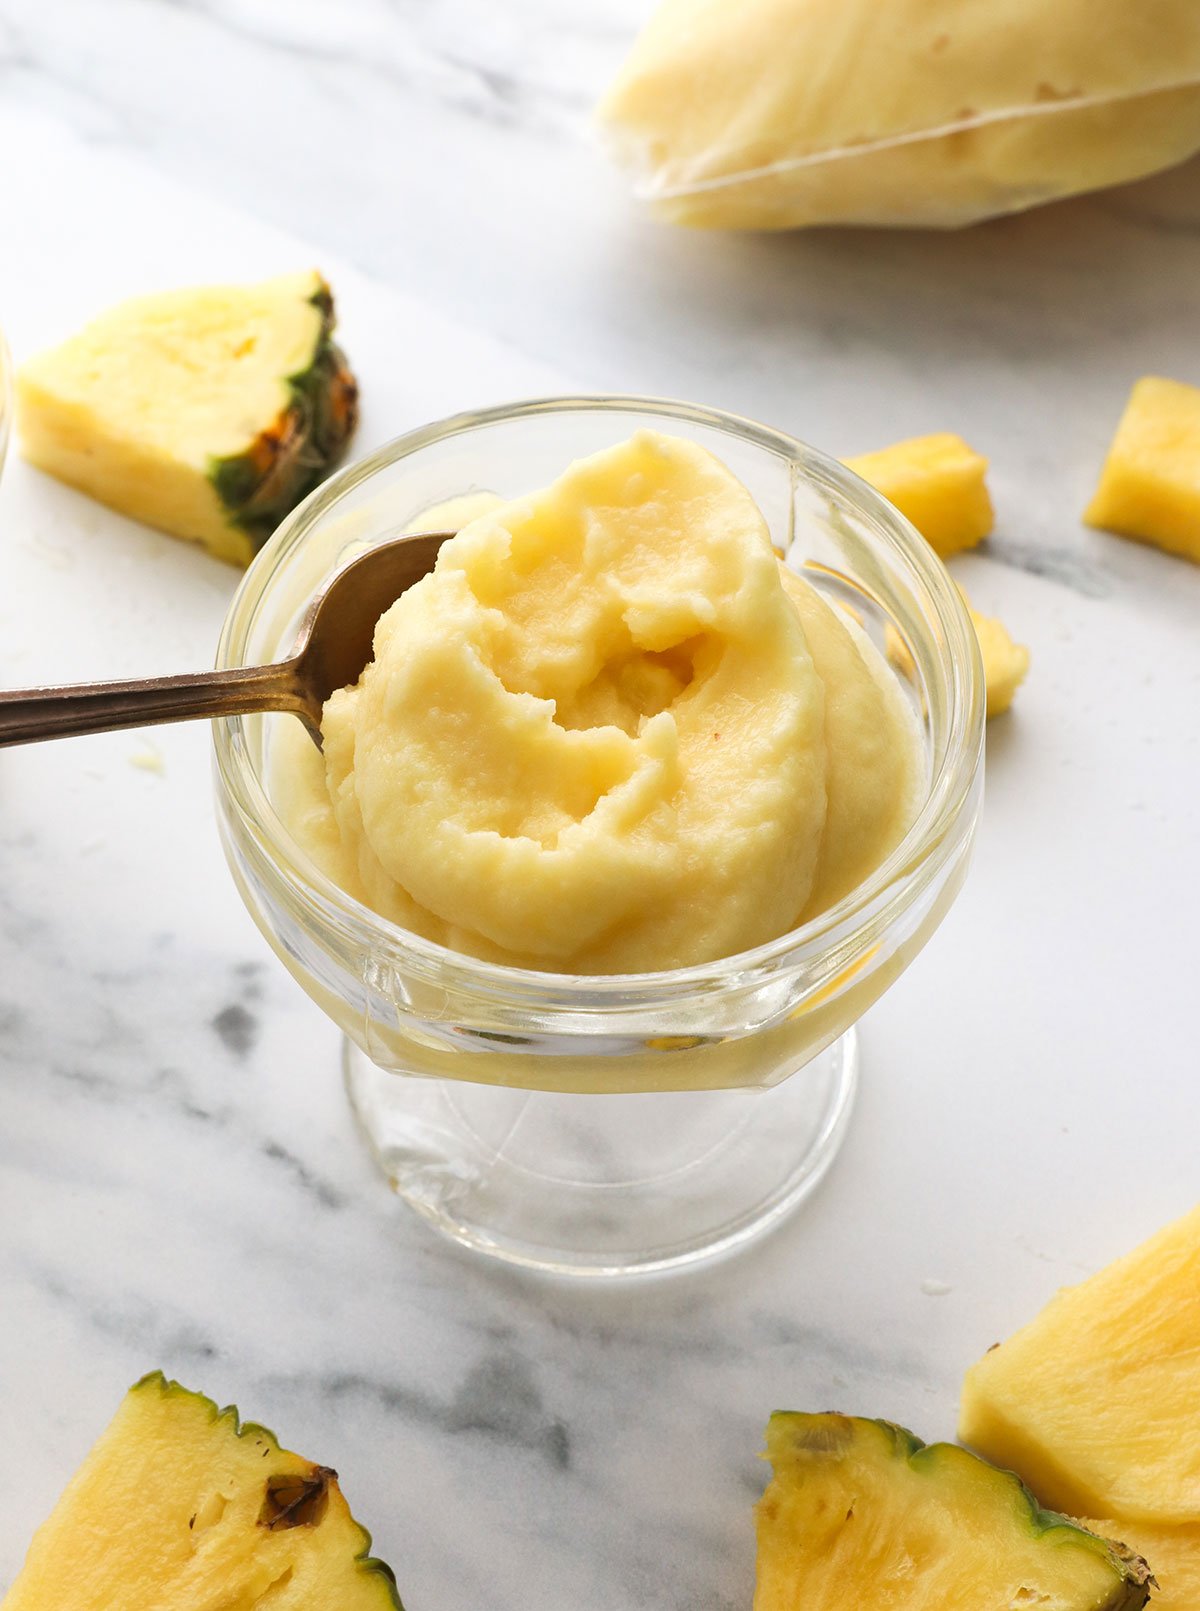
Saad tried something like this at a theme park last summer and immediately asked me to make it at home. Honestly, the homemade version is better — just frozen pineapple, a splash of coconut milk, and a squeeze of lime blended until it's thick and creamy like soft serve. The trick is using fully frozen pineapple chunks and a high-powered blender or food processor — if you stop blending too early it's still icy, but keep going and it transforms into something silky. Serve it straight out of the blender in chilled bowls or pipe it into cones for a proper soft-serve effect. It melts fast, so have your bowls ready.
Ingredients
- 4 cups frozen pineapple chunks (fresh pineapple frozen overnight works great)
- ⅓ cup full-fat coconut milk
- 1 tablespoon fresh lime juice
- 1 tablespoon honey or agave (optional, depending on how sweet your pineapple is)
- Pinch of salt
Instructions
- Let the frozen pineapple sit at room temperature for 5 minutes — just enough to take the hard edge off without thawing it. Overly frozen chunks can strain a food processor.
- Add pineapple, coconut milk, lime juice, honey (if using), and salt to a food processor or high-powered blender.
- Blend on high, stopping to scrape down the sides every 30 seconds. Keep blending for 2-3 minutes total until the texture shifts from chunky and icy to smooth and creamy like soft serve. Don't rush this step.
- Taste and adjust — add more lime for brightness or a little more honey if needed.
- Serve immediately in chilled bowls for soft-serve texture, or transfer to a freezer-safe container and freeze for 1-2 hours for a firmer scoop-able consistency.
8. Chocolate Hazelnut Truffle Balls
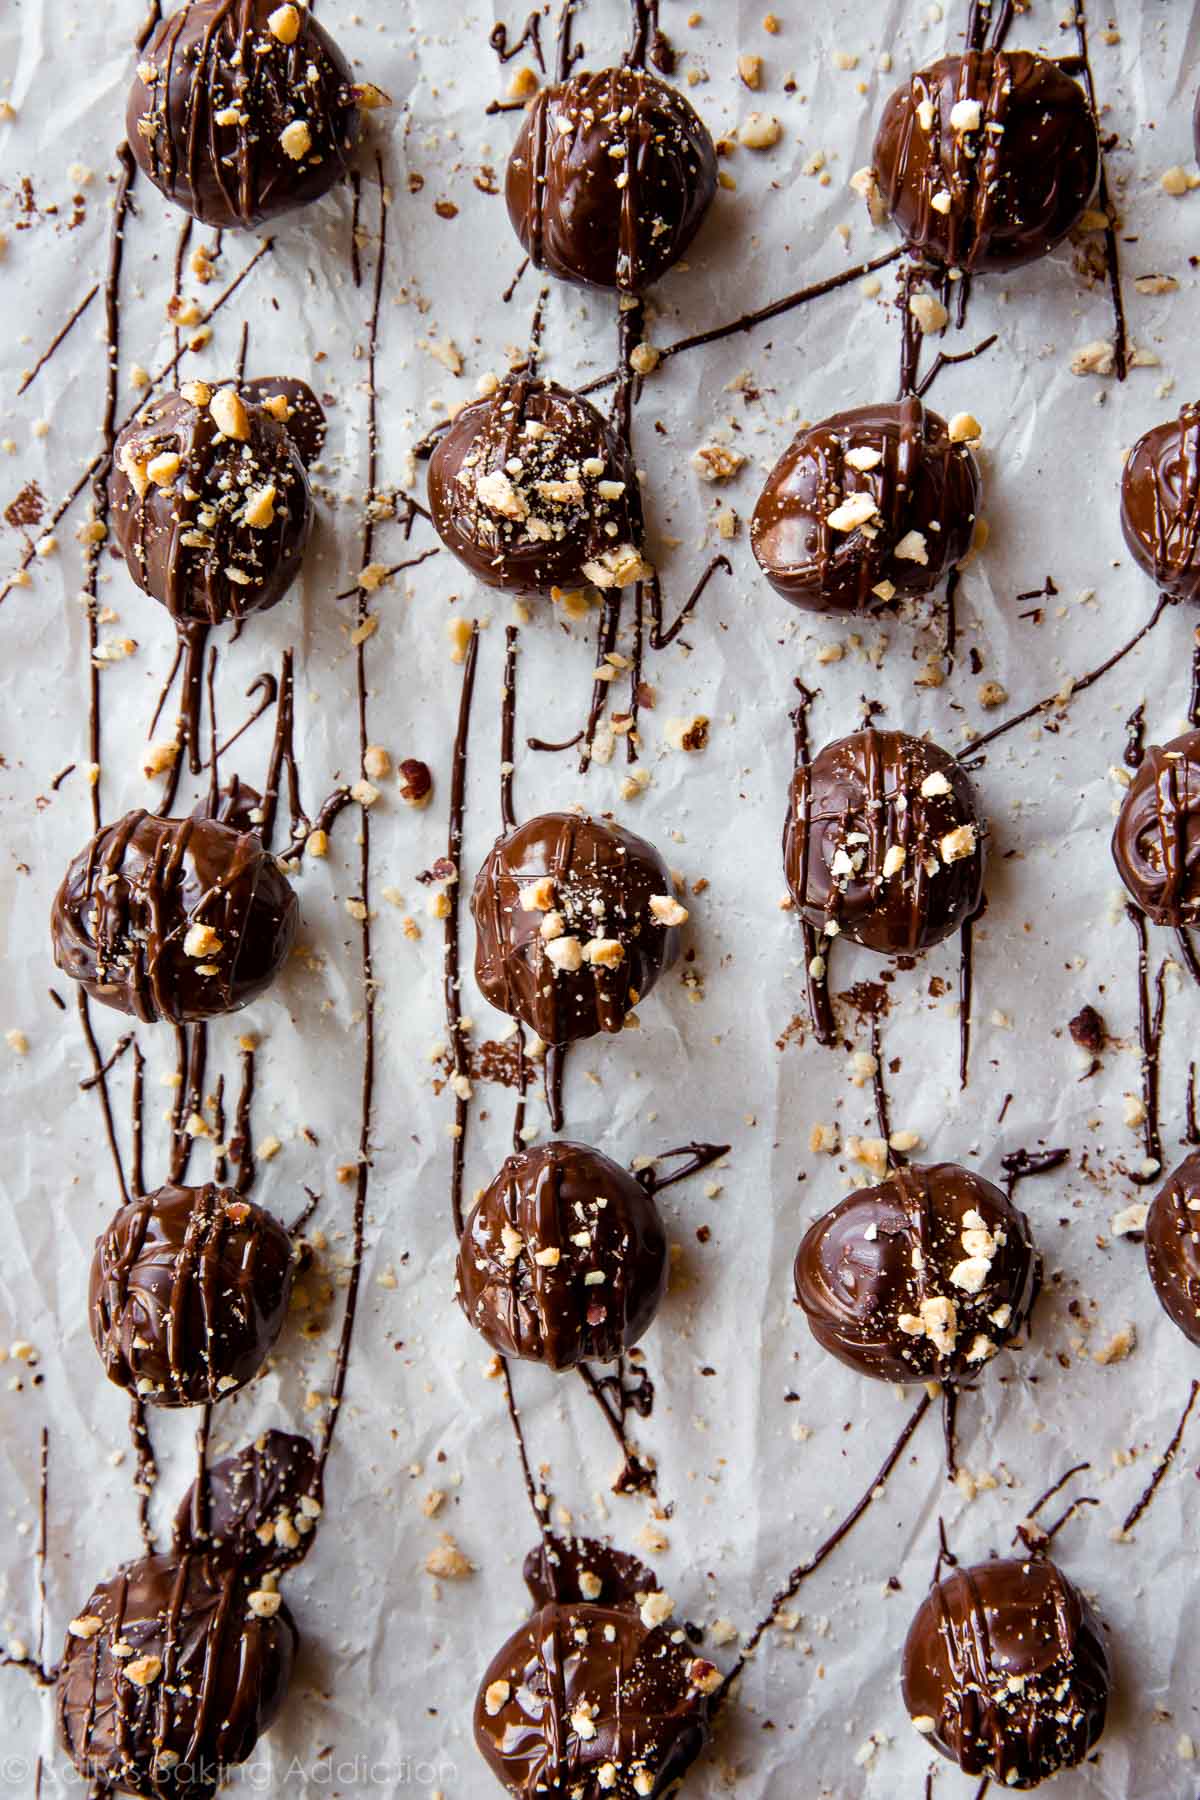
These are what I make when I need something that feels fancy but takes about 20 minutes of actual work. The base is Nutella, cream cheese, and crushed hazelnuts — rolled into balls and coated in melted dark chocolate. Keep them cold right up until serving because they soften quickly at room temperature, especially in summer heat. I've made these for Eid gatherings, birthday parties, and once just for a Tuesday evening when everyone needed something sweet. A bag of hazelnuts from Trader Joe's or Costco works perfectly here, and you don't need to toast them if you're short on time — though toasted is noticeably better.
Ingredients
- ½ cup Nutella (or any chocolate hazelnut spread)
- 4 oz cream cheese, softened
- 1 cup powdered sugar
- ½ cup finely crushed hazelnuts, plus more for rolling
- 1 teaspoon vanilla extract
- 8 oz dark chocolate chips or chopped dark chocolate
- 1 teaspoon coconut oil (helps the chocolate coating stay smooth)
Instructions
- Beat together the Nutella and cream cheese until smooth and fully combined. Add powdered sugar, crushed hazelnuts, and vanilla extract and mix until a thick dough forms.
- Scoop about 1 tablespoon of mixture at a time and roll into smooth balls between your palms. Place on a parchment-lined baking sheet.
- Freeze the truffle balls for 20-30 minutes until firm — this makes dipping in chocolate much easier and cleaner.
- Melt the dark chocolate chips and coconut oil together in a microwave-safe bowl, stirring in 30-second intervals until fully smooth.
- Using a fork or toothpick, dip each chilled truffle ball into the melted chocolate, let the excess drip off, and place back on the parchment sheet. Sprinkle with extra crushed hazelnuts before the chocolate sets.
- Refrigerate until the chocolate is fully set, about 30 minutes. Store in an airtight container in the fridge for up to one week.
7. No-Bake Oreo Dirt Pudding Cups
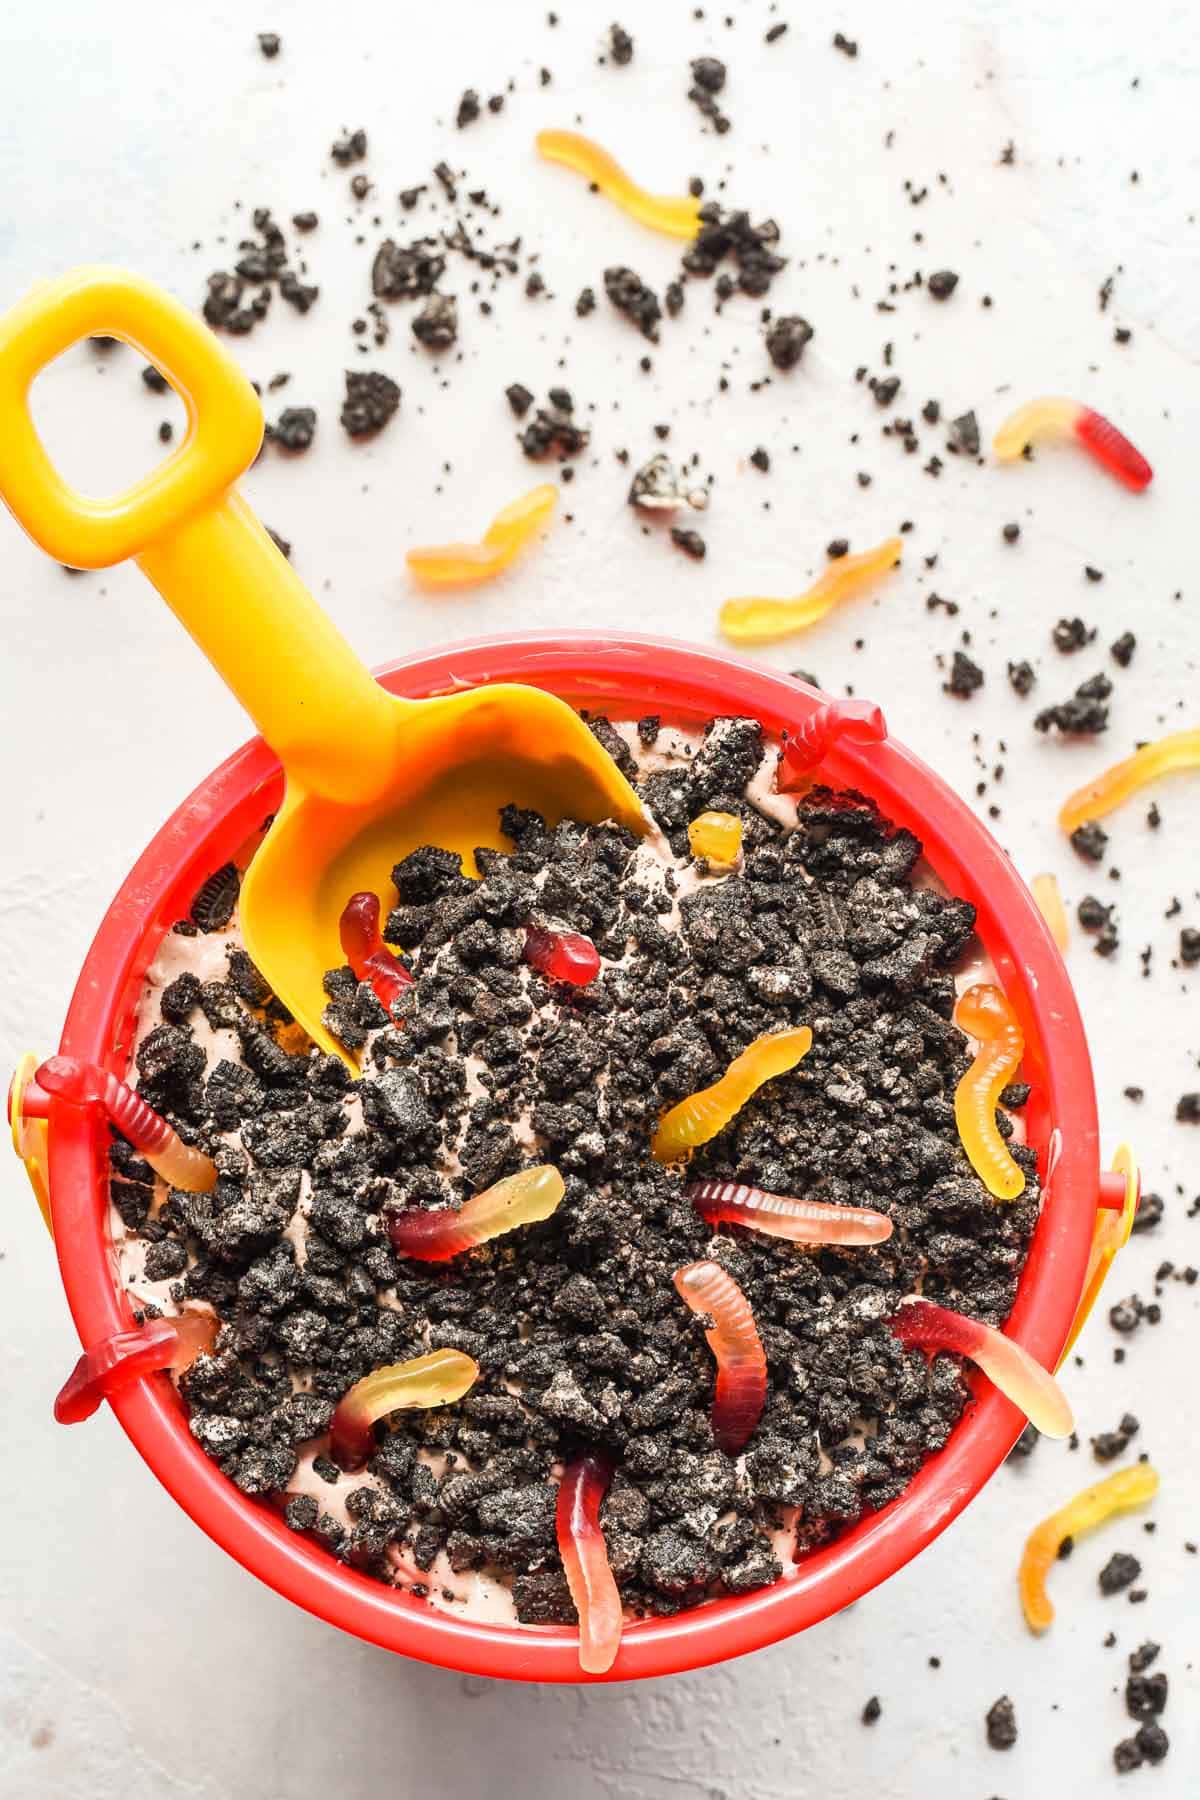
Every kid who has ever eaten at my house has asked for these. Creamy chocolate pudding, clouds of whipped topping, and crushed Oreos on top to look like garden dirt — it's simple, it's fun, and it disappears faster than anything else on the table. Serve them in clear plastic cups for parties so the layers show, or go full theme with small plastic flower pots and gummy worms on top if you have kids who appreciate that kind of thing (Zainab absolutely does). I make a double batch because a single batch lasts about ten minutes at any gathering.
Ingredients
- 2 packages (3.9 oz each) instant chocolate pudding mix
- 3½ cups cold whole milk
- 8 oz cream cheese, softened
- 1 cup powdered sugar
- 16 oz whipped topping (Cool Whip), thawed
- 1 package (14.3 oz) Oreo cookies, crushed
- Gummy worms, for topping (optional but highly recommended)
Instructions
- Whisk the instant pudding mix with cold milk for 2 minutes until thickened. Let it sit for 5 minutes in the fridge to fully set.
- In a large bowl, beat the softened cream cheese with powdered sugar until smooth and fluffy. Fold in the whipped topping until combined.
- Gently fold the set chocolate pudding into the cream cheese mixture until you have a uniform, creamy chocolate filling.
- Crush the Oreos — either in a zip-lock bag with a rolling pin or in a food processor. You want a mix of fine crumbs and small chunks for texture.
- Layer into cups: start with Oreo crumbs on the bottom, then the chocolate pudding mixture, then more Oreo crumbs on top to look like dirt. Add gummy worms poking out of the "dirt" if serving for kids.
- Refrigerate for at least 1 hour before serving so everything firms up nicely.
6. Honeydew Mint Granita Cups
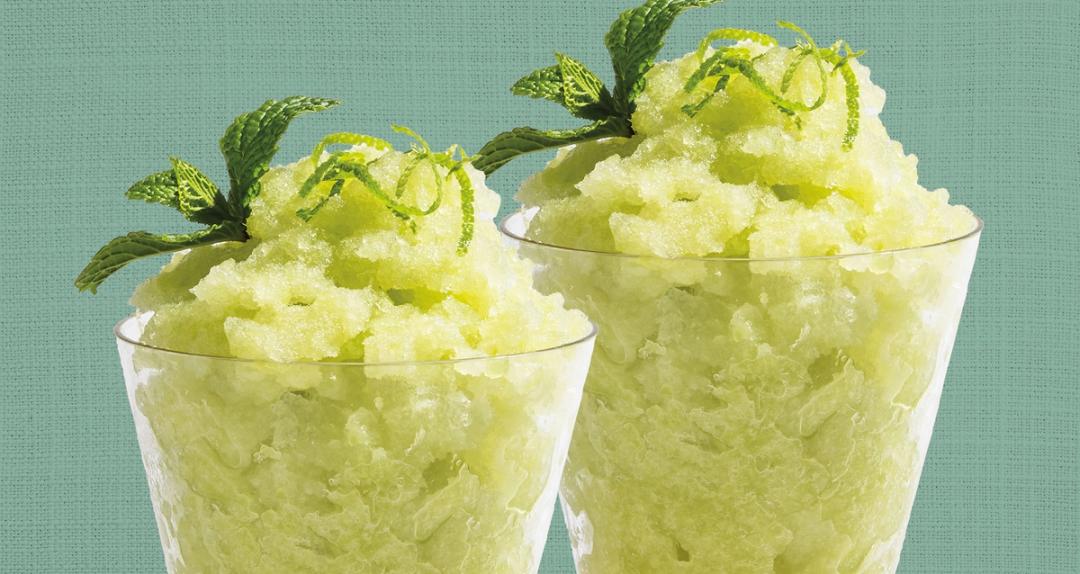
Granita is one of those desserts that sounds more complicated than it is — it's basically flavored water that you scrape with a fork every 30 minutes until it turns into beautiful, fluffy ice crystals. Honeydew and fresh mint together make a flavor that is genuinely refreshing on a hot day — cool, slightly sweet, faintly herby. The scraping is the whole technique — don't skip it and don't let it freeze solid into a block, or you'll have to chip at it. If your honeydew is very ripe and sweet, hold back on the sugar syrup. Serve in small glasses or hollowed-out melon halves for a presentation that looks effortful but really isn't.
Ingredients
- 4 cups honeydew melon chunks (about half a medium melon)
- ¼ cup granulated sugar
- ¼ cup water
- 2 tablespoons fresh lime juice
- ¼ cup fresh mint leaves, loosely packed
- Pinch of salt
- Fresh mint sprigs, for serving
Instructions
- Make a quick simple syrup by combining sugar and water in a small saucepan over medium heat, stirring until the sugar dissolves completely, about 2 minutes. Remove from heat and add the fresh mint leaves. Let steep for 10 minutes, then strain out the mint and let the syrup cool completely.
- Blend the honeydew chunks, cooled mint syrup, lime juice, and salt together in a blender until completely smooth.
- Taste the mixture — if your melon is very sweet, you may not need all the syrup. Adjust to your liking.
- Pour the mixture into a shallow freezer-safe dish (a 9x13 baking dish works well) and freeze for 45 minutes.
- Use a fork to scrape and break up the ice crystals forming around the edges. Return to freezer. Repeat this scraping process every 30 minutes for about 3 hours total, until the entire mixture is light, fluffy, and crystalline.
- Scoop into cups and serve immediately with a sprig of fresh mint.
5. Caramel Banana Pudding Trifle
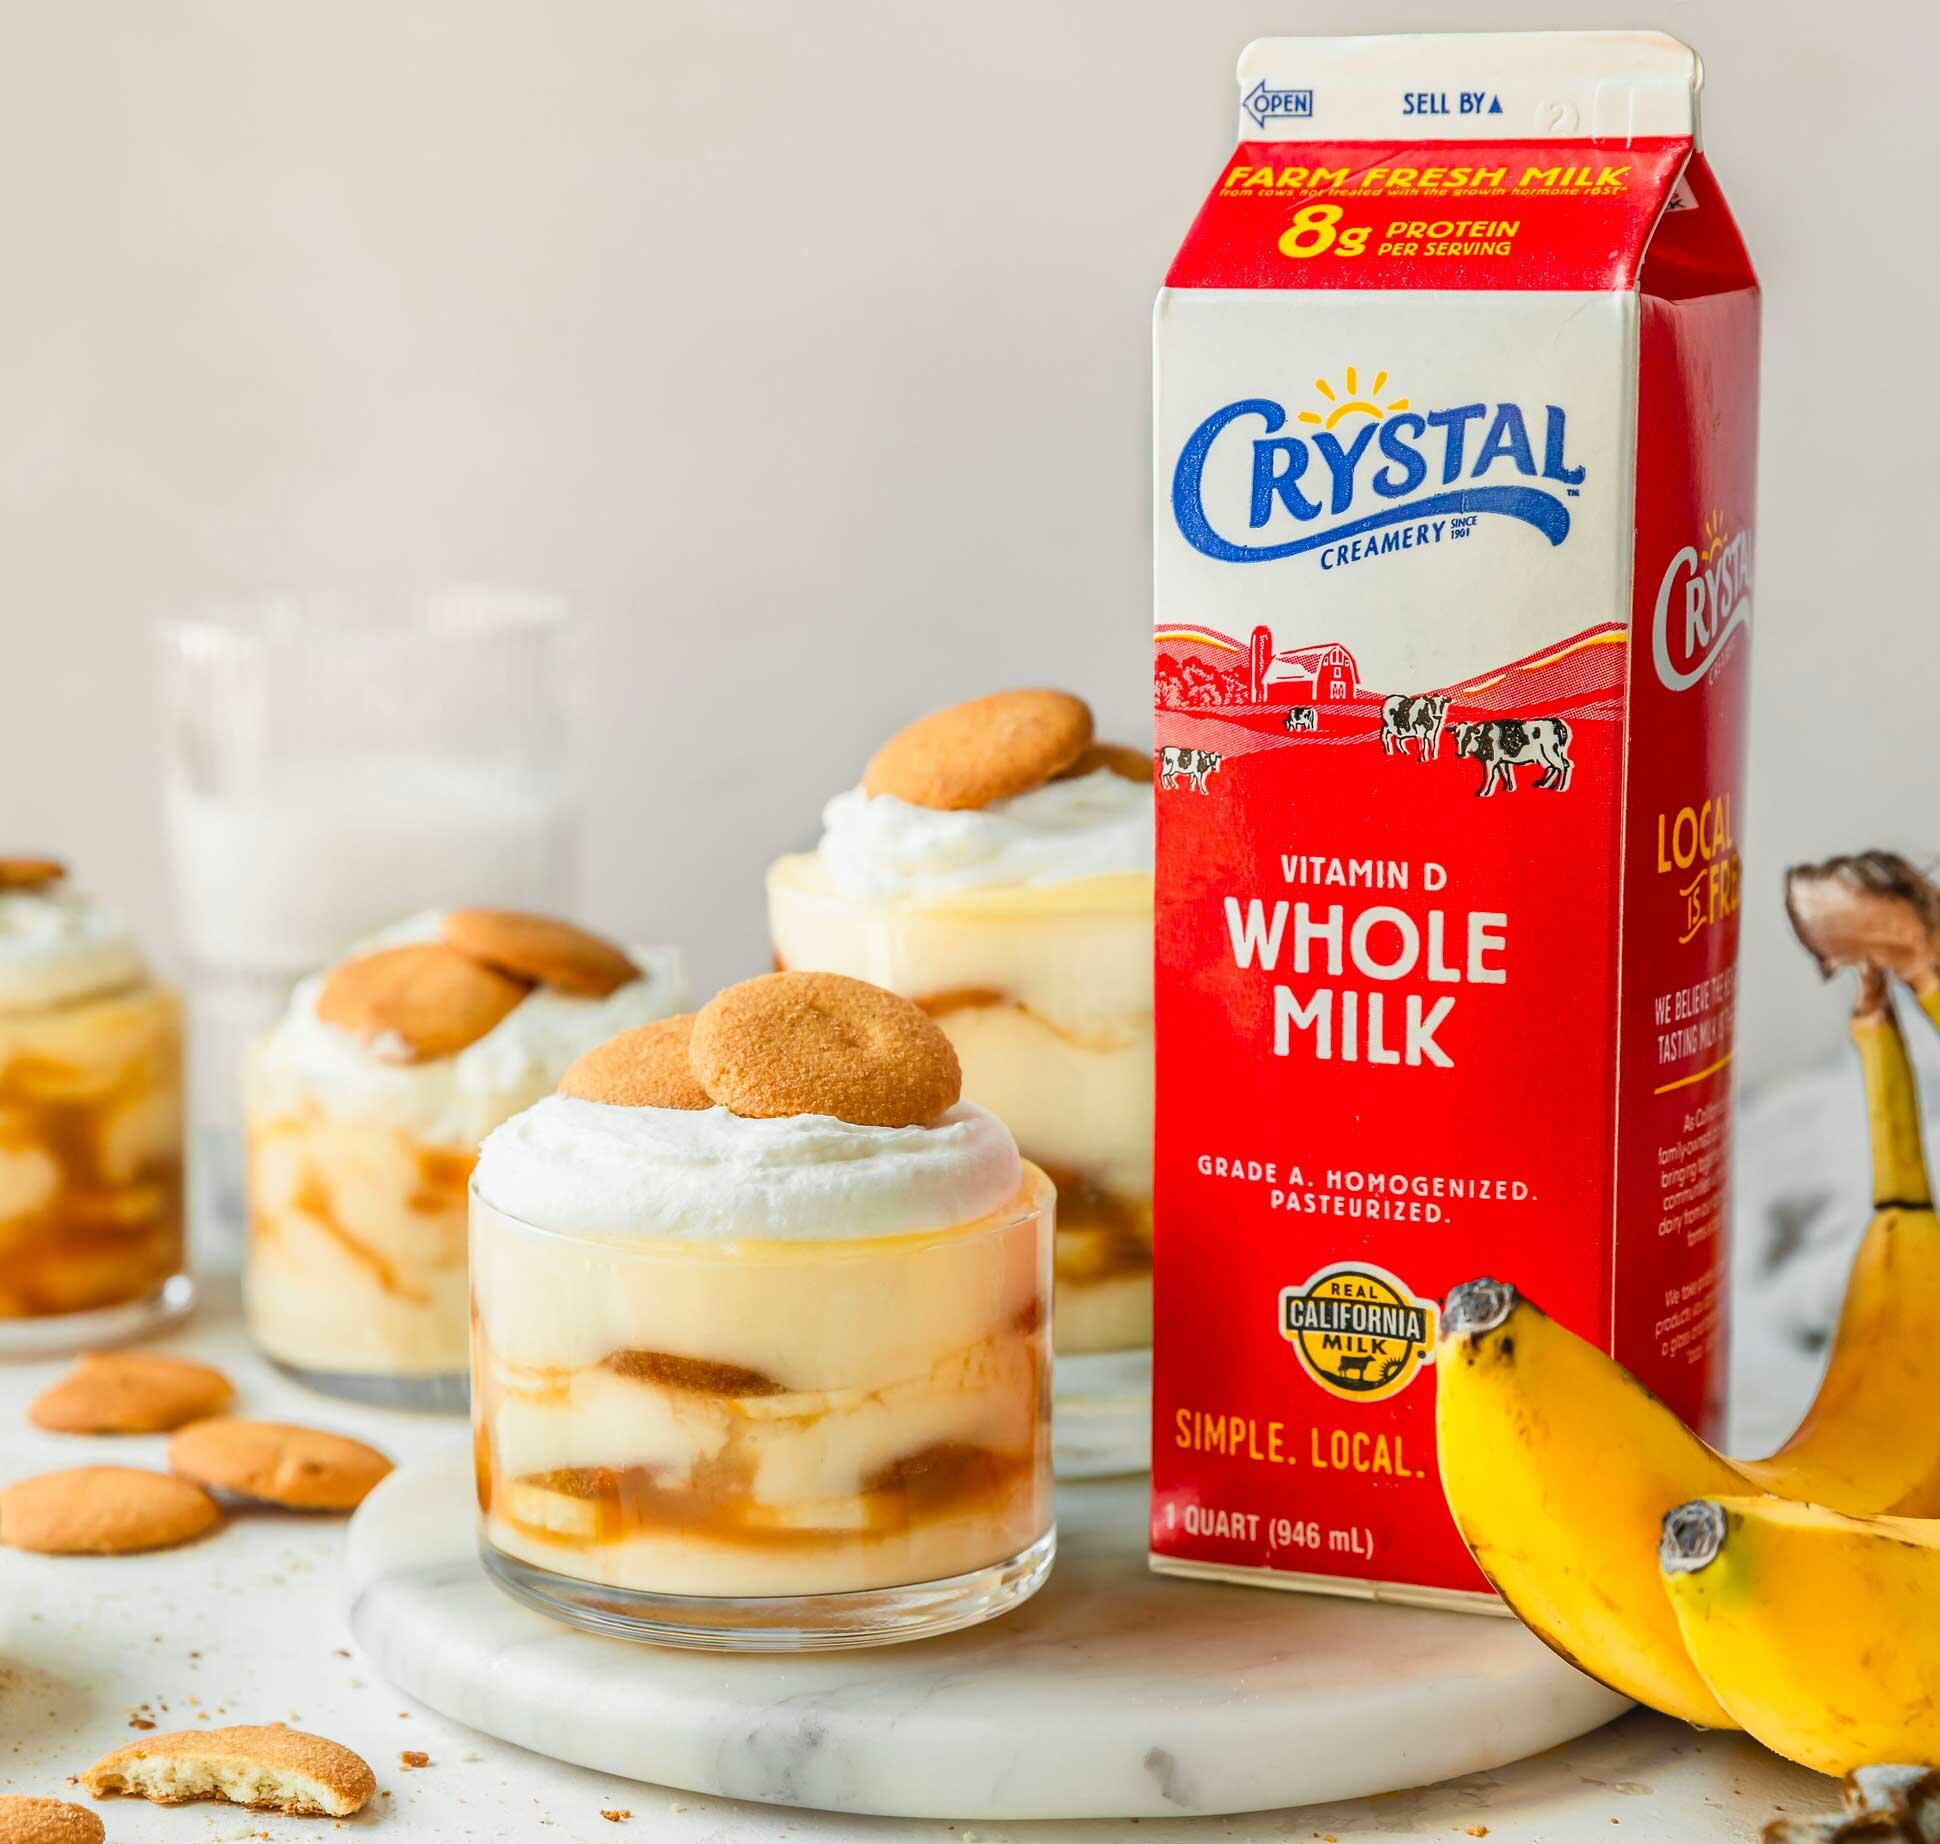
Southern banana pudding is already a masterpiece — adding a layer of caramel sauce running through it takes it somewhere even better. Layers of vanilla wafers, fresh banana slices, creamy pudding, whipped topping, and a drizzle of caramel all stacked in a trifle dish make for something that looks genuinely impressive with very little actual effort. Toss the banana slices in a bit of lemon juice before layering so they don't brown — I skipped this once and regretted it by hour three. Use store-bought caramel sauce from a jar (the kind near the ice cream toppings at Walmart or Kroger) and nobody will know or care that you didn't make it from scratch.
Ingredients
- 2 packages (3.4 oz each) instant vanilla pudding mix
- 3 cups cold whole milk
- 8 oz cream cheese, softened
- 1 cup powdered sugar
- 16 oz whipped topping (Cool Whip), divided
- 4 medium ripe bananas, sliced
- 1 tablespoon lemon juice
- 1 box (11 oz) Nilla Wafers
- ½ cup caramel sauce (store-bought), plus more for drizzling
Instructions
- Whisk the instant pudding mix with cold milk for 2 minutes until thick. Refrigerate for 5 minutes to set fully.
- Beat cream cheese and powdered sugar together until fluffy. Fold in 12 oz of the whipped topping (reserve the rest for the top), then fold in the set pudding until completely combined and smooth.
- Toss the banana slices with lemon juice to prevent browning, then set aside.
- Begin layering in a large trifle bowl or deep glass dish: start with a single layer of Nilla Wafers covering the bottom. Add a layer of banana slices, then a generous layer of the pudding mixture, then a drizzle of caramel sauce. Repeat the layers until you've used everything up.
- Finish the top with the remaining whipped topping, a final drizzle of caramel sauce, and a few crushed Nilla Wafers for texture.
- Cover and refrigerate for at least 4 hours — overnight is even better, as the wafers soften into a cake-like texture throughout the trifle.
4. Frozen Yogurt Bark with Mixed Berries

Frozen yogurt bark is one of those things that looks like you put in way more effort than you actually did. You spread yogurt on a sheet pan, scatter fruit on top, freeze it, and break it into pieces — that's genuinely all there is to it. Zainab calls it "yogurt pizza" and asks for it every time the temperature climbs above 90°F. I started making this when I had a big tub of Greek yogurt from Costco that needed using up, and now it's become a summer staple. The tartness of the yogurt against the sweet-jammy berries works really well, and freezing it makes everything taste more interesting than it has any right to be.
Ingredients
- 2 cups plain full-fat Greek yogurt
- 3 tablespoons honey (or maple syrup)
- 1 teaspoon vanilla extract
- ½ cup fresh strawberries, hulled and sliced thin
- ½ cup fresh blueberries
- ¼ cup fresh raspberries
- 2 tablespoons granola (optional, for crunch)
- 1 tablespoon mini chocolate chips (optional)
Instructions
- Line a large rimmed baking sheet or sheet pan with parchment paper. Make sure the parchment lies flat — wrinkles will give you uneven bark.
- Stir together the Greek yogurt, honey, and vanilla extract in a bowl until smooth and well combined.
- Spread the yogurt mixture onto the prepared baking sheet in an even layer about ¼ inch thick. Use the back of a spoon or an offset spatula to smooth it out.
- Scatter the strawberry slices, blueberries, and raspberries evenly across the surface. Press them in gently so they don't roll off when you break the bark later. Add granola and mini chocolate chips if using.
- Transfer the baking sheet to the freezer and freeze for at least 3 hours, or until the bark is completely solid. Don't rush this — if it's still soft in the middle it'll just fall apart when you try to break it.
- Lift the parchment out of the pan and break the bark into irregular pieces with your hands. Serve immediately or store the pieces in a zip-lock bag in the freezer for up to 2 weeks.
3. No-Bake Key Lime Pie Jars
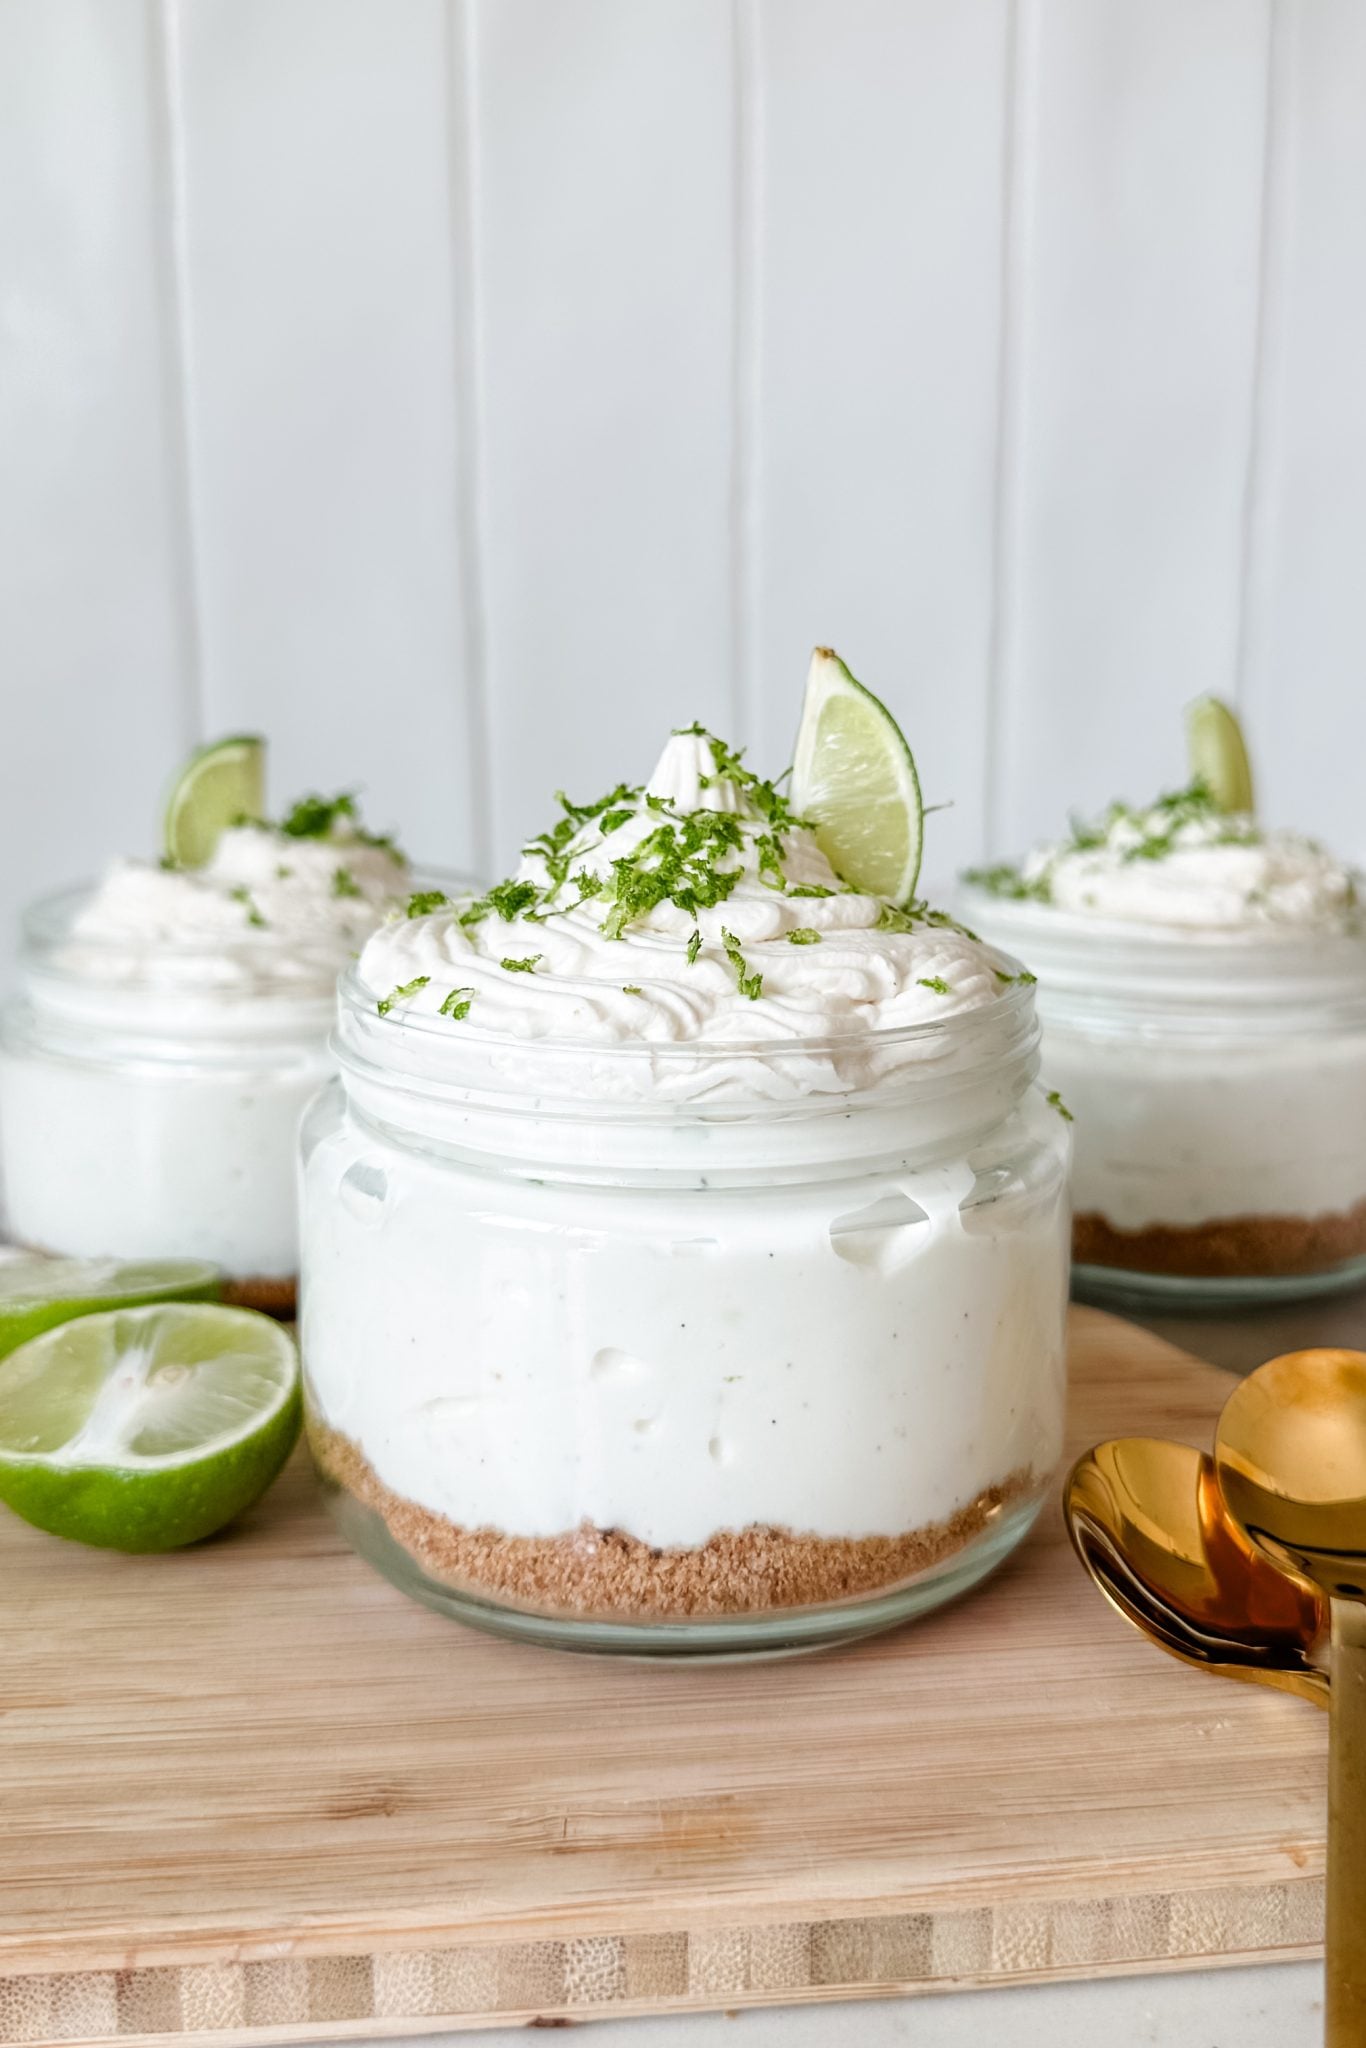
Key lime pie was something I had to learn entirely from scratch — growing up in Pakistan, we didn't have key limes or anything remotely like this dessert. The first time I made a traditional baked version, I honestly wasn't sure what I was aiming for. These jar versions skipped the oven entirely and got me where I wanted to be much faster. The filling is a simple mixture of cream cheese, sweetened condensed milk, and lime juice that sets up firm in the fridge without needing any heat at all. Building them in individual jars means no slicing, no serving mess, and you can make them the night before — which is exactly the kind of dessert a hot summer day calls for.
Ingredients
- 1½ cups graham cracker crumbs (about 10 full crackers)
- 4 tablespoons unsalted butter, melted
- 2 tablespoons granulated sugar
- 8 oz cream cheese, softened to room temperature
- 1 can (14 oz) sweetened condensed milk
- ½ cup fresh lime juice (about 4–5 regular limes, or key limes if you can find them)
- 1 tablespoon lime zest
- 1 cup heavy whipping cream
- 2 tablespoons powdered sugar
- Lime slices or zest for garnish
Instructions
- Mix the graham cracker crumbs, melted butter, and granulated sugar together in a bowl until the crumbs look like wet sand. Divide the mixture evenly among 6 to 8 small jars (8 oz mason jars work perfectly) and press it down firmly into the bottom with the back of a spoon.
- Beat the softened cream cheese with a hand mixer or vigorous stirring until completely smooth with no lumps — this matters, because lumpy cream cheese will give you a grainy filling. Mix in the sweetened condensed milk, lime juice, and lime zest until everything is combined and the filling looks creamy and pale yellow-green.
- Spoon or pipe the lime filling over the graham cracker crust in each jar, filling about two-thirds of the way up. Tap the jars gently on the counter to settle the filling.
- Refrigerate the jars for at least 4 hours, or overnight. The filling firms up significantly as it chills — don't skip the wait time.
- Just before serving, whip the heavy cream with powdered sugar until stiff peaks form. Dollop or pipe the whipped cream on top of each jar and finish with a thin lime slice or extra zest.
2. Chocolate Covered Strawberry Icebox Cake

Icebox cake is one of those recipes that genuinely gets better the longer it sits in the fridge, which makes it ideal for making a day ahead when you have people coming over and don't want to be scrambling in the kitchen. This version layers chocolate wafer cookies with whipped cream and fresh strawberries, so every slice tastes like a chocolate-covered strawberry in cake form. The key technique here is patience — the cookies need a full overnight rest to absorb the cream and soften into something that eats like cake. I cut this short once at four hours and the cookies were still too crunchy. Don't do that. Overnight is not optional, it's the whole point.
Ingredients
- 2 cups heavy whipping cream, cold
- 3 tablespoons powdered sugar
- 1 teaspoon vanilla extract
- 1 package (9 oz) chocolate wafer cookies (Nabisco Famous Chocolate Wafers work great)
- 2 cups fresh strawberries, hulled and sliced
- 4 oz semi-sweet chocolate, finely chopped (or ½ cup chocolate chips)
- ¼ cup heavy cream (for the chocolate drizzle)
- Extra strawberries for topping
Instructions
- Whip the cold heavy cream, powdered sugar, and vanilla extract together using a hand mixer until stiff peaks form. Keep it cold — if your kitchen is warm, chill your bowl in the freezer for 10 minutes before you start.
- Spread a thin layer of whipped cream on the bottom of a 9x13 inch baking dish. Lay down a single layer of chocolate wafer cookies, fitting them as close together as possible without overlapping.
- Spread a generous layer of whipped cream over the cookies, then scatter a layer of sliced strawberries across the cream. Repeat the layering — cookies, whipped cream, strawberries — until you run out of ingredients, finishing with a top layer of whipped cream.
- Cover the dish tightly with plastic wrap and refrigerate overnight, or for at least 8 hours. The cookies will absorb the cream and transform into soft, cake-like layers.
- Before serving, make the chocolate drizzle: heat ¼ cup heavy cream in a small saucepan or microwave until just steaming, pour it over the chopped chocolate, and stir until smooth. Let it cool for 5 minutes, then drizzle it over the top of the cake.
- Arrange fresh strawberries on top, slice into squares, and serve cold directly from the dish.
1. Creamy Nutella Mousse Dessert Cups
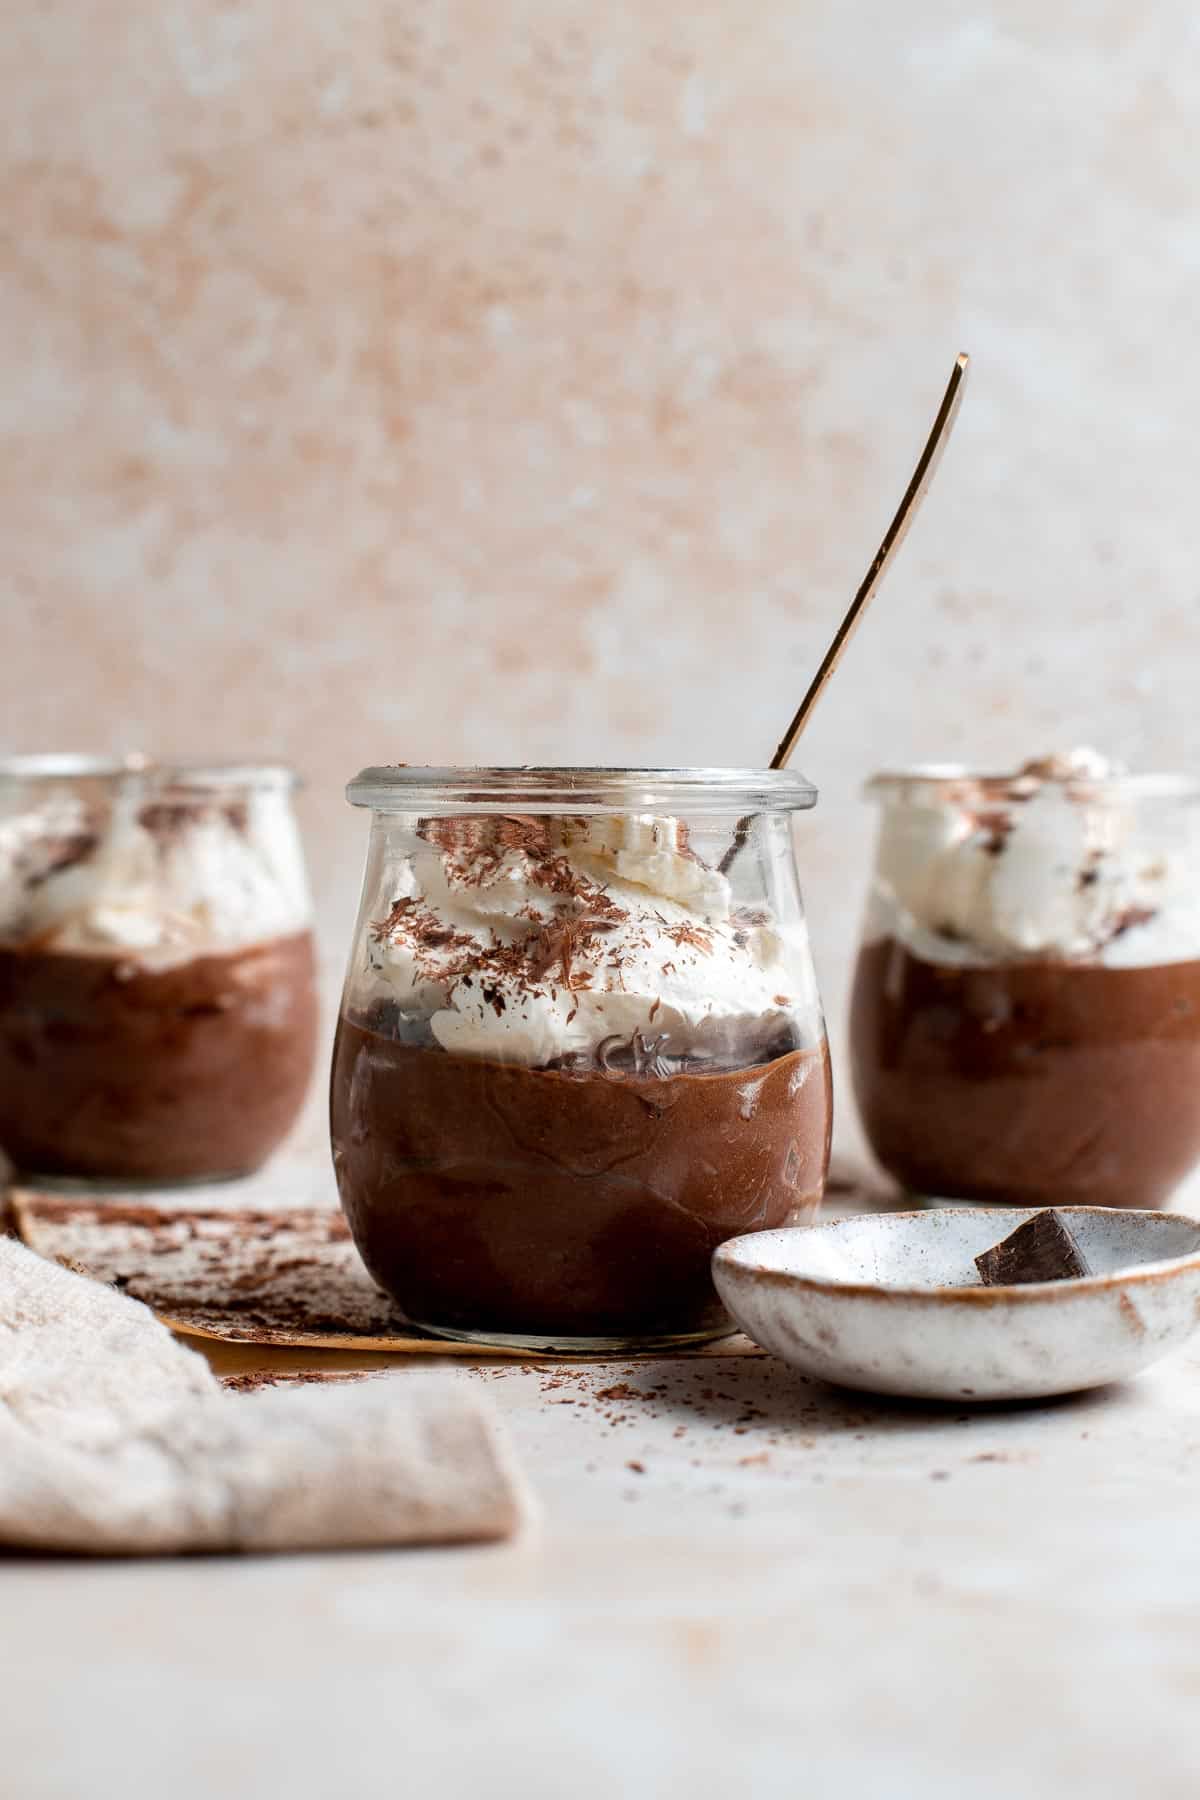
Saving the richest one for last felt right. Nutella mousse is what I make when I want something that feels genuinely indulgent but takes less than 20 minutes of active effort — and that's not an exaggeration. Folding whipped cream into Nutella creates this light, airy, intensely chocolatey mousse that sets up beautifully in individual cups after just a couple of hours in the fridge. My husband could eat this every week and never complain. Served in small glasses with a crushed hazelnut topping and a few chocolate shavings, it looks like something from a café window. It's the kind of dessert that makes people assume you know what you're doing, which I always appreciate.
Ingredients
- 1 cup Nutella (or any hazelnut chocolate spread)
- 8 oz cream cheese, softened to room temperature
- ¼ cup powdered sugar
- 1 teaspoon vanilla extract
- 1½ cups heavy whipping cream, cold
- 2 tablespoons powdered sugar (for the whipped cream)
- ¼ cup crushed toasted hazelnuts (optional but worth it)
- Chocolate shavings or cocoa powder for garnish
Instructions
- Beat the softened cream cheese with ¼ cup powdered sugar and vanilla extract until completely smooth and fluffy, about 2 minutes with a hand mixer. Add the Nutella and beat again until fully combined and the mixture looks uniform — no streaks.
- In a separate cold bowl, whip the heavy cream with 2 tablespoons powdered sugar until stiff peaks form. Don't overbeat it to the point of graininess — stop as soon as it holds its shape.
- Add about one-third of the whipped cream to the Nutella mixture and stir it in to lighten the base. Then gently fold in the remaining whipped cream in two additions, using a rubber spatula and a light hand. You want to keep as much air in the mousse as possible, so fold rather than stir.
- Spoon or pipe the mousse into individual serving glasses or cups — small stemless wine glasses, dessert cups, or even regular drinking glasses all work fine. Fill them about three-quarters of the way up.
- Cover each cup with plastic wrap and refrigerate for at least 2 hours to let the mousse firm up. They can sit in the fridge for up to 24 hours before serving, which makes them a great make-ahead dessert.
- Just before serving, top each cup with crushed toasted hazelnuts and a few chocolate shavings or a light dusting of cocoa powder. Serve cold.
These 20 no-bake summer desserts are what I reach for when it's 95°F outside and turning on the oven feels like a personal attack. A cold fridge and maybe 20 minutes of hands-on work — that's all most of these take. Some of them I've been making for years, some I only discovered recently, but every single one earns its place because it actually works and actually tastes good.
My advice: pick one or two to start, then rotate through the list as the summer goes on. The icebox cake and the mango cream pie disappear so fast in my house that I've learned to make a double batch the moment I know company is coming. If you're feeding kids, the chocolate peanut butter bars and the frozen yogurt bark are the ones they'll ask for on repeat. If you're hosting something a little more grown-up, the no-bake cheesecake and the lemon mousse cups look like you put in way more effort than you did.
Summer should taste good without making you miserable in the kitchen. I hope something here becomes your new go-to. 🍓🍋✨
Related Recipes
- Browse All Recipe Roundups on For Foodie Friends
- Easy Dessert Recipes for Every Season
- Quick Frozen Treats the Whole Family Will Love
- Summer Party Food Ideas That Come Together Fast
- Make-Ahead Desserts for Easy Entertaining
Frequently Asked Questions
Do no-bake desserts actually need to set in the fridge overnight?
Most of them benefit from at least 4 hours in the fridge, but overnight is almost always better. The texture sets more firmly, the flavors meld together, and honestly it's easier to slice cleanly the next day. If I'm making something for guests, I always try to prep it the evening before — one less thing to stress about on the day.
Can I make these no-bake desserts ahead of time?
Yes, and that's honestly one of the best things about them. Most no-bake desserts keep well in the fridge for 3 to 5 days, and several of them — like the frozen bark and the icebox cake — can go straight into the freezer for up to a month. Just cover them tightly so they don't pick up other fridge smells.
Which of these no-bake desserts is easiest for beginners?
The frozen yogurt bark and the chocolate peanut butter bars are where I'd start. They require almost no technique — mostly just melting, stirring, and waiting. Even Saad can make the bark himself at this point, which tells you everything you need to know about the difficulty level.
Can I substitute ingredients if I'm missing something?
Most of the time, yes. Heavy cream and whipping cream are largely interchangeable for these recipes. Graham crackers can be swapped for digestive biscuits if you're in the UK or Australia. Cream cheese works in place of mascarpone in a pinch. I always try to note substitutes in the individual recipes, but don't let one missing ingredient stop you — improvise and see what happens.
Are any of these no-bake desserts suitable for people who don't eat gelatin?
Quite a few of them, yes. Most of the mousse and cream-based desserts in this list use whipped cream or cream cheese for structure rather than gelatin, so they're naturally gelatin-free. For any recipe that does call for gelatin, agar-agar powder works as a plant-based substitute — use about the same amount and bloom it in water the same way.





Comments
No Comments