
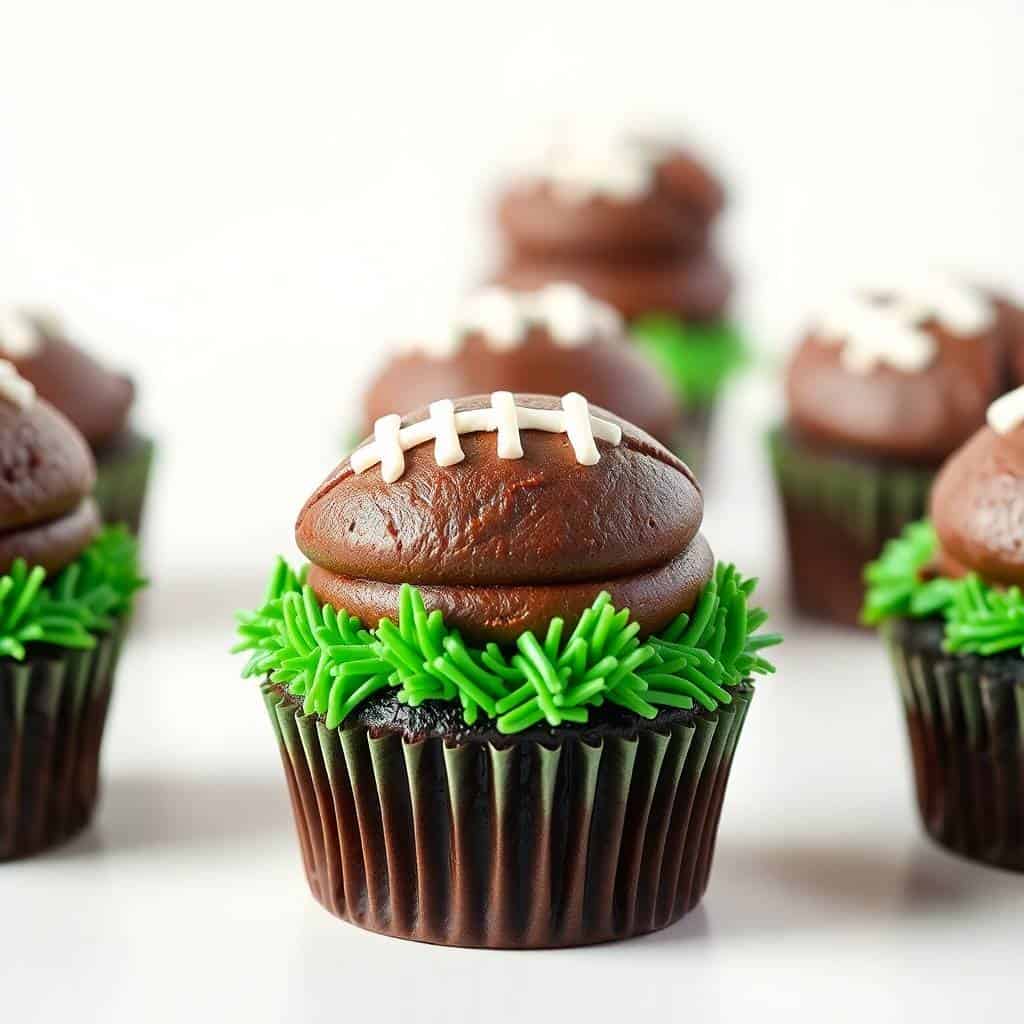
I made these football cupcakes for the first time two years ago when my husband's friends were coming over for a Sunday game, and I completely panicked because I had no idea what to bring to the table that felt festive but wasn't going to take me three hours to pull together. I remembered I had a box of chocolate cake mix in the pantry, some butter, and food coloring from Zainab's birthday cake a few weeks earlier — and that was enough. Forty-five minutes later I had a dozen cupcakes sitting on the counter that actually looked like a football field, and I won't lie, I was pretty proud of myself.
What makes these work is the combination of a deeply chocolatey base with a simple buttercream frosting tinted green, plus those little football laces piped on top with white decorating gel. The whole thing looks like it took serious skill, but it genuinely doesn't. The grass piping tip does most of the heavy lifting on the decorating side — I picked one up at Walmart for about $4 and it's been one of the most-used tools in my baking drawer ever since. If you've never tried grass piping before, it's actually really satisfying to do.
Zainab loves helping with the decorating part, which is the best thing about this recipe — the baking is simple enough that the fun part can be all hers. She takes the football laces very seriously and insists on doing every single one herself. My husband eats them faster than she can decorate them, which has caused some tension on game day.
One thing I want to set expectations on: the scratch version I've included in the ingredients section makes genuinely good chocolate cupcakes — better than box mix in my opinion — but the WPRM recipe card below uses a box of chocolate cake mix as a shortcut, which also works totally fine if you're short on time. I've done it both ways. Both are good. The decorating is the same either way, and that's honestly what people remember.
Why You'll Love This Recipe
- The chocolate base is genuinely good: I've made chocolate cupcakes from scratch dozens of times and this ratio — cocoa powder, buttermilk, a splash of hot water — consistently gives me a moist, tender crumb that doesn't dry out by day two. The hot water is the thing that makes the difference; it blooms the cocoa and deepens the chocolate flavor in a way that skipping it just doesn't. Even my mother-in-law, who is skeptical of anything I bake, asked for the recipe.
- The decorating is easier than it looks: If you've ever seen football cupcakes at a bakery and thought "I could never do that," I promise you can. A grass piping tip does 90% of the work. The football laces are just a few straight lines with white decorating gel. My first batch wasn't perfect — my laces looked a little wobbly — but they still looked clearly like footballs and everyone loved them. By the third cupcake I had the hang of it.
- You can make them the day before: Game day mornings are chaotic. I almost always bake these the night before, let them cool overnight, and do all the decorating a couple of hours before kickoff. The cupcakes actually taste better the next day once the crumb has had time to settle. Just store them unfrosted in an airtight container on the counter and you're set.
- They travel well: I've brought these to tailgates, potlucks, and a neighbor's Super Bowl party, and they survive the car ride every time. No cutting, no serving utensils, no plates required. Just pick one up and eat. I put them in a cupcake carrier I got from the dollar section at Target — nothing fancy, does the job perfectly.
- Kids can actually help with this one: Unlike a layered cake or something that requires precision, these cupcakes have a decorating step that's genuinely fun and forgiving for little hands. The grass piping tip is hard to mess up. I give Zainab her own piping bag and a few cupcakes to practice on, and she's completely occupied while I finish the rest. It makes baking feel like an activity, not a chore.
Ingredients
- 1 cup all-purpose flour
- ⅓ cup unsweetened cocoa powder
- ¾ teaspoon baking soda
- ½ teaspoon baking powder
- ¼ teaspoon salt
- ½ cup granulated sugar
- ½ cup brown sugar (packed)
- ½ cup vegetable oil
- 2 large eggs (room temperature)
- 1 teaspoon vanilla extract
- ½ cup buttermilk (room temperature — or ½ cup milk + ½ tablespoon lemon juice, let sit 5 minutes)
- ½ cup hot water
- 1 cup butter, softened (for frosting)
- 3 cups powdered sugar
- 2 tablespoons milk
- 1 teaspoon vanilla extract (for frosting)
- Green food coloring
- White decorating gel or white icing (for football laces)
- Chocolate-covered almonds or oval chocolate candies (for footballs)
- Brown cupcake liners
Directions
- Preheat and prep: Set your oven to 350°F (175°C) and line a 12-cup muffin tin with brown cupcake liners. The brown liners look like a football even before you decorate, which is a nice touch that costs nothing extra.
- Mix the dry ingredients: In a medium bowl, whisk together the flour, cocoa powder, baking soda, baking powder, and salt until evenly combined. Set this aside — you'll come back to it in a minute.
- Combine the wet ingredients: In a large bowl, beat both sugars with the oil, eggs, and vanilla until smooth. Add the buttermilk and stir to combine. This mixture will look glossy and slightly thick, which is exactly right.
- Bring it together: Gradually fold the dry ingredients into the wet mixture, stirring until just combined — don't overwork it. Then slowly pour in the hot water and stir until the batter is smooth. It'll look thinner than you expect; that's normal and that's what keeps them moist.
- Fill and bake: Spoon the batter into the liners, filling each about ⅔ full. Bake for 18–20 minutes, or until a toothpick inserted in the center comes out clean or with just a few moist crumbs. I start checking at 18 minutes because my oven runs warm.
- Cool completely: Let the cupcakes sit in the pan for 5 minutes, then transfer to a wire rack to cool all the way down. This is not optional — frosting warm cupcakes is a messy disaster. I learned that the hard way on my first batch when the buttercream slid right off.
- Make the frosting: Beat the softened butter until creamy, then gradually add the powdered sugar, milk, and vanilla. Beat until smooth and fluffy. Add green food coloring a few drops at a time until you hit the shade of green you want — I go for a brighter grass green rather than a deep forest green.
- Frost the cupcakes: Fit your piping bag with a grass tip (the one with lots of little holes — Wilton #233 is what I use) and pipe the green frosting over each cupcake in a back-and-forth motion. It'll look like turf, and it's genuinely satisfying.
- Add the football decorations: Place a chocolate-covered almond or oval chocolate candy in the center of each cupcake. Then use white decorating gel to pipe laces across the top — one horizontal line and two or three short vertical lines crossing it. Practice on a piece of parchment first if you're nervous; it takes about thirty seconds to get the feel for it.

Tips for Success
- Use room temperature eggs and buttermilk: Cold ingredients don't incorporate as smoothly into the batter, and you end up with little lumps that can affect the texture of the final cupcake. I just pull them out of the fridge about 20 minutes before I start baking. It's a tiny thing that makes a real difference in how the batter comes together.
- Don't overmix once the flour goes in: The moment I start folding in the dry ingredients, I stop as soon as I can't see any more flour streaks. Overmixing develops gluten and makes the cupcakes tough and dense rather than light and tender. A few lazy folds is all you need — the hot water at the end smooths everything out anyway.
- Cool completely before you touch the frosting: I've made the mistake of getting impatient here, and the frosting just melts and pools around the edges instead of sitting up nicely. If you're short on time, you can put the cupcakes in the fridge for 20 minutes to speed up the cooling — that works fine and doesn't affect the texture.
- Slightly chill your frosting before piping the grass: This one took me a few batches to figure out. Room temperature buttercream pipes fine, but if your kitchen is warm or you've been working with the frosting for a while, it can get soft and the grass texture loses definition. Stick the piping bag in the fridge for 10 minutes and it firms back up perfectly.
- Invest in a grass piping tip: You can find a Wilton #233 tip at Walmart or Michaels for around $2–$3, and it genuinely transforms the look of these cupcakes. Without it, you'd need to pipe individual blades of grass by hand, which would take forever. With it, you squeeze and pull up and the texture appears instantly. It's one of those tools that's worth having even if you only make these once a year.
Variations
- Red velvet base: Swap the chocolate cupcake base for a red velvet version if you want something a little different. The bright red crumb is a fun surprise when you bite into what looks like a football field from the outside. I've made a red velvet cake with cream cheese frosting that follows similar principles — you could adapt that into cupcakes and use it here.
- Team colors instead of grass green: If your team's colors aren't green, you can absolutely tint the frosting to match. Blue and orange, purple and gold, black and gold — whatever your household supports. Skip the grass tip and just frost smoothly, then add the football on top. It reads more as a themed cupcake than a field, which some people actually prefer.
- Filled cupcakes: Once the cupcakes are cooled, use a small spoon or apple corer to pull out a little pocket from the center, fill it with Nutella, chocolate ganache, or even caramel, and then replace the top piece before frosting. Nobody sees the filling until they bite in, which makes it a nice little surprise. My husband specifically requests the Nutella version.
- Mini cupcakes for a crowd: If you're feeding a bigger group, make mini cupcakes using a mini muffin tin. You'll get about 36 minis from this batter. Reduce the baking time to 10–12 minutes and check early. The decorating is fiddlier on the smaller surface but kids think the little footballs are adorable.
- Peppermint chocolate cupcakes: Add ¼ teaspoon of peppermint extract to the frosting instead of vanilla for a cool mint-chocolate combination. It sounds a little unusual but it's genuinely good — like a peppermint patty on top of a chocolate cupcake. Saad went through a phase where he requested this version every single time I made these.
Serving and Storage
Serving
Serve these at room temperature for the best frosting texture — cold buttercream can feel a bit stiff and waxy. If you've stored them in the fridge, pull them out about 30 minutes before serving and let them come up to room temperature. I usually arrange them on a large round platter in a cluster so the green "field" effect looks continuous across the whole thing. Alongside these, I sometimes put out something lighter like a winter fruit salad for anyone who wants something to balance the sweetness.
Storage
Frosted cupcakes keep in an airtight container at room temperature for up to 3 days — though in my house they're gone by the next morning. If you need to hold them longer, refrigerate for up to 5 days. Unfrosted cupcakes freeze well for up to 2 months: wrap each one individually in plastic wrap, then pop them in a zip-top bag. Thaw on the counter overnight and decorate the next day. Don't freeze frosted cupcakes — the green buttercream doesn't thaw gracefully and the laces get sad-looking.

Frequently Asked Questions
Can I make these cupcakes gluten-free?
Yes — swap the all-purpose flour for a 1:1 gluten-free baking flour blend like Bob's Red Mill or King Arthur's measure-for-measure flour. Make sure your cocoa powder and baking powder are also labeled gluten-free, since some brands process them in shared facilities. The texture will be very slightly different but still good.
What if I don't have buttermilk?
Make a quick substitute: pour ½ cup of regular milk into a small bowl, add ½ tablespoon of lemon juice or white vinegar, stir, and let it sit for 5 minutes. It'll curdle slightly and that's exactly what you want — it works the same way as real buttermilk in the batter. I do this regularly because I don't always have buttermilk on hand.
Can I use store-bought frosting instead of making my own?
Absolutely. A tub of vanilla frosting from Walmart or Aldi works fine — just tint it green with food coloring and pipe it on with a grass tip. Homemade buttercream pipes a little more cleanly and holds the grass texture better, but store-bought is totally respectable and saves you time. On busy game days I've gone both routes.
Can I freeze football cupcakes?
Freeze them unfrosted — not decorated. Wrap each cooled cupcake in plastic wrap, put them in a zip-top freezer bag, and they'll keep for up to 2 months. When you're ready to use them, thaw at room temperature overnight, then make your frosting fresh and decorate as normal. The cupcakes come out of the freezer tasting just as good as fresh-baked.
How do I get the football laces to look neat?
Use white decorating gel in the tube (Wilton makes a good one — it's at most grocery stores near the baking supplies) and keep your hand steady by resting your wrist on the edge of the cupcake while you pipe. One long horizontal line, then three short vertical lines crossing it. If you want to practice first, squeeze a few lines onto a sheet of parchment paper — takes about a minute and you'll feel much more confident on the actual cupcakes.

EASY FOOTBALL CUPCAKES
Ingredients
For the Cupcakes:
- 1 box chocolate cake mix plus ingredients listed on package
For the Frosting & Decoration:
- 1 cup butter softened
- 3 cups powdered sugar
- 2 tablespoons milk
- 1 teaspoon vanilla extract
- Green food coloring
- White decorating gel or icing for laces
- Chocolate-covered almonds or oval chocolate candies for footballs
Instructions
- Bake Cupcakes: Prepare chocolate cake mix as directed on package. Bake in lined muffin tins at 350°F (175°C) for 18–20 minutes. Cool completely.
- Make Frosting: Beat butter until creamy. Add powdered sugar, milk, and vanilla; beat until smooth. Tint with green food coloring.
- Frost Cupcakes: Use a grass piping tip to frost cupcakes with green ‘turf’ design.
- Decorate: Place a chocolate-covered almond on each cupcake. Pipe white icing lines to resemble football laces.
- Serve: Arrange on a platter for a festive game-day display.
Notes
- Make Ahead: Cupcakes can be baked a day ahead and decorated before serving.
- Flavor Variations: Try vanilla or red velvet cupcakes as the base.
- Serving Suggestions: Perfect for football parties, tailgates, or themed birthdays.
- Storage Tips: Store in an airtight container at room temperature for up to 2 days, or refrigerate up to 5 days.
These football cupcakes have genuinely become one of my go-to game day recipes — not because they're the most complicated thing I bake, but because they consistently make people happy in a way that's out of proportion to the effort involved. Every time I bring these somewhere, at least two people ask me how I made the frosting look like grass, and I enjoy explaining that it's just a $3 piping tip. That little moment of "oh, it's actually not that hard" is one of my favorite things about sharing food.
The chocolate base in the scratch version is one I come back to for other things too — the same batter makes a great sheet cake if you want to go bigger. And if you're in a baking mood that week, my peanut butter chocolate chip scones are another crowd-pleaser for a game day spread where you want something that can sit out for a few hours without losing anything.
I make a double batch almost every time now, because a single dozen disappears before halftime. If you're feeding a bigger crowd, double everything and use two muffin tins — the batter keeps fine while the first batch





Comments
No Comments