
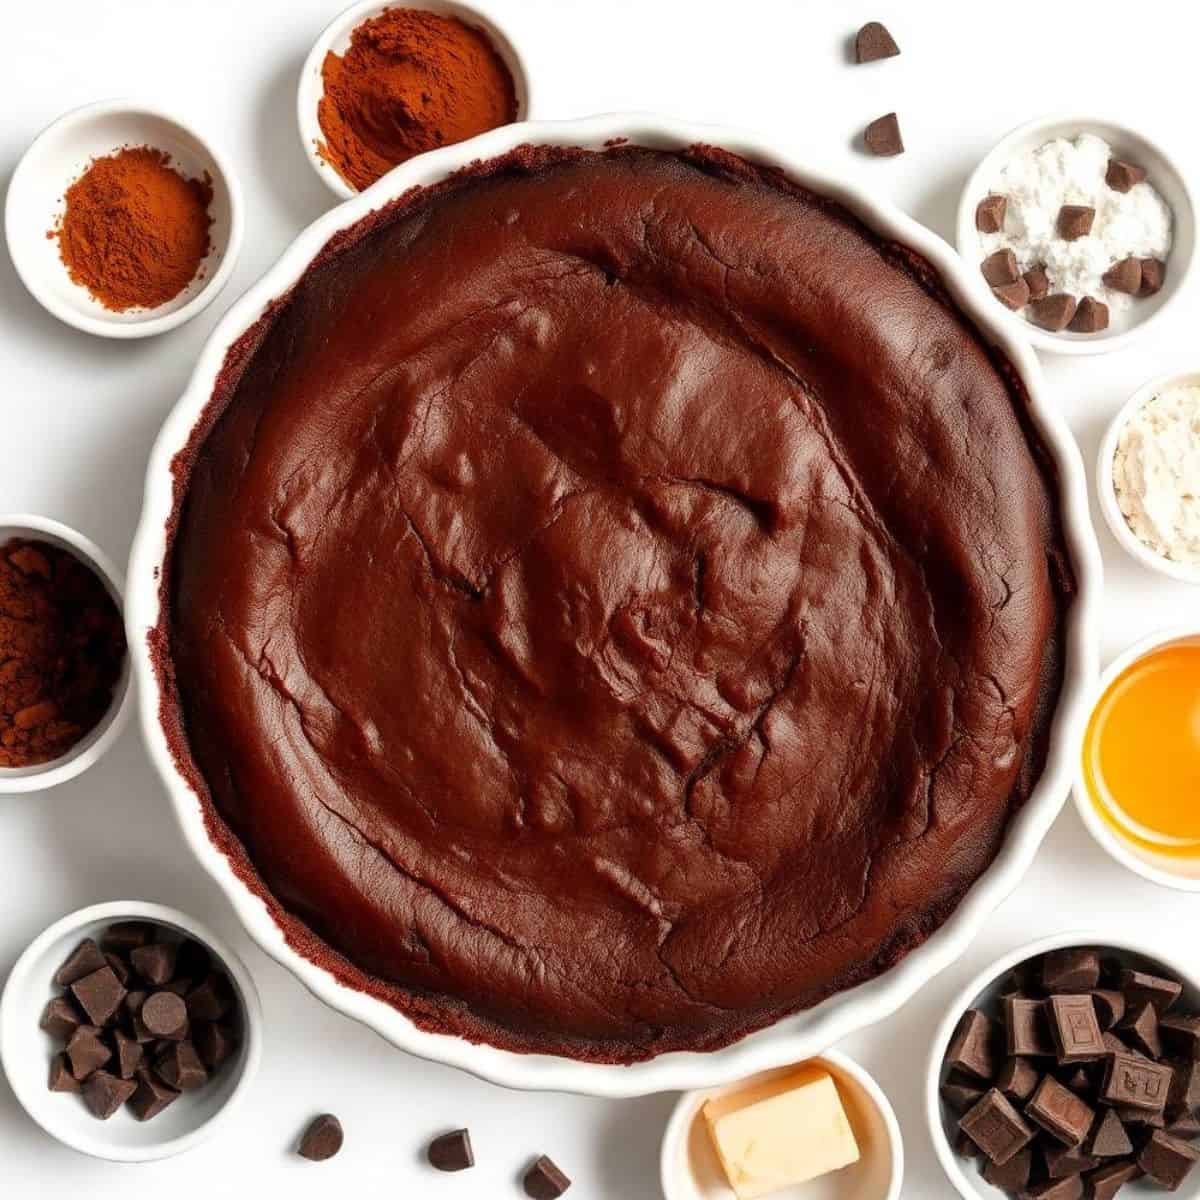
The dessert that solves the eternal brownie-versus-pie debate by simply combining the best of both — the one that delivers everything chocolate lovers want from a homemade brownie in a sliceable, dinner-party-ready format that holds its shape and earns compliments on presentation alone — is this gooey brownie pie: a deeply rich, fudgy chocolate brownie batter loaded with cocoa powder and semi-sweet chocolate chips, poured into a buttery pie crust and baked until the top is just set with that signature crackly finish, while the center stays soft, gooey, and almost molten. It is the dessert I bring to every potluck where I want to be remembered, the one that gets the most "can I have the recipe" requests, and the one that consistently disappears within minutes of being placed on the table.
What makes this pie genuinely worth baking — instead of just making a regular pan of brownies — is the textural and structural transformation that happens when brownie batter meets pie crust. The crust adds a buttery, slightly crisp structural bite that pure brownies cannot offer, the edges become deeply caramelized and chewy in a way that everyone fights over, and the center stays soft enough to require a fork. It is brownies elevated, brownies dressed up, brownies in a form that looks intentional and special rather than thrown together. The presentation alone makes it feel like a proper dessert worth slicing and serving on plates.
This post covers the full recipe in detail — the proper one-bowl mixing technique, the critical under-bake that delivers the gooey center, the cooling time that gives you clean slices, and seven variation ideas including espresso-infused, peanut butter swirl, salted caramel topped, and Mexican chocolate spiced versions. Find more chocolate dessert inspiration in my maraschino cherry chocolate chip cookies, my salted caramel butter bars, and my fluffy ricotta cookies dusted with powdered sugar.
Let's bake the fudgiest, most decadent chocolate pie your kitchen has ever produced!
WHY YOU WILL LOVE THIS RECIPE
- Intense, Layered Chocolate Flavor That Hits Every Note: This pie delivers chocolate on three distinct levels — the deep, slightly bitter cocoa flavor from real unsweetened cocoa powder in the batter, the rich melty pockets of semi-sweet chocolate chips folded throughout, and the buttery, slightly caramelized crust that grounds it all. The layering means every single bite delivers chocolate from multiple angles instead of one flat note, which is what separates a memorable chocolate dessert from a generic one. Chocolate lovers genuinely react to this pie in a way they don't react to standard brownies.
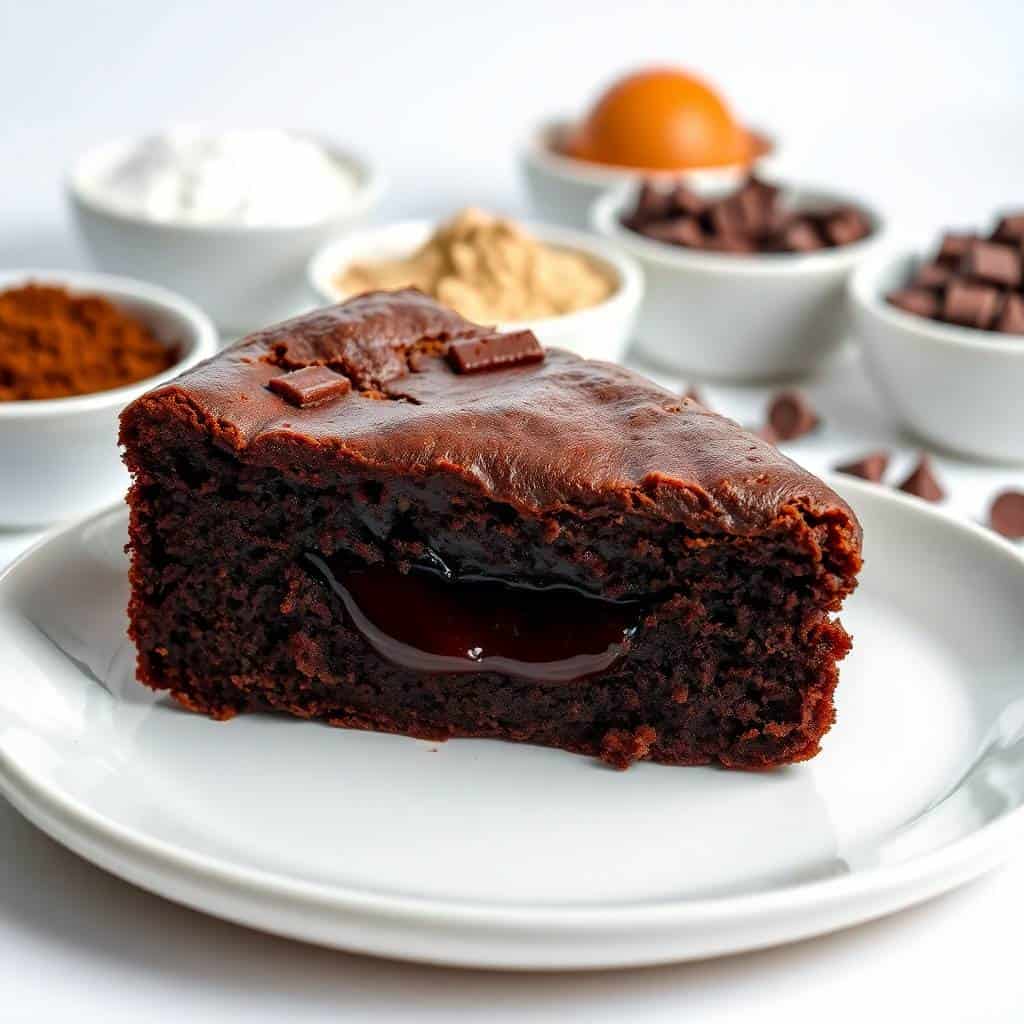
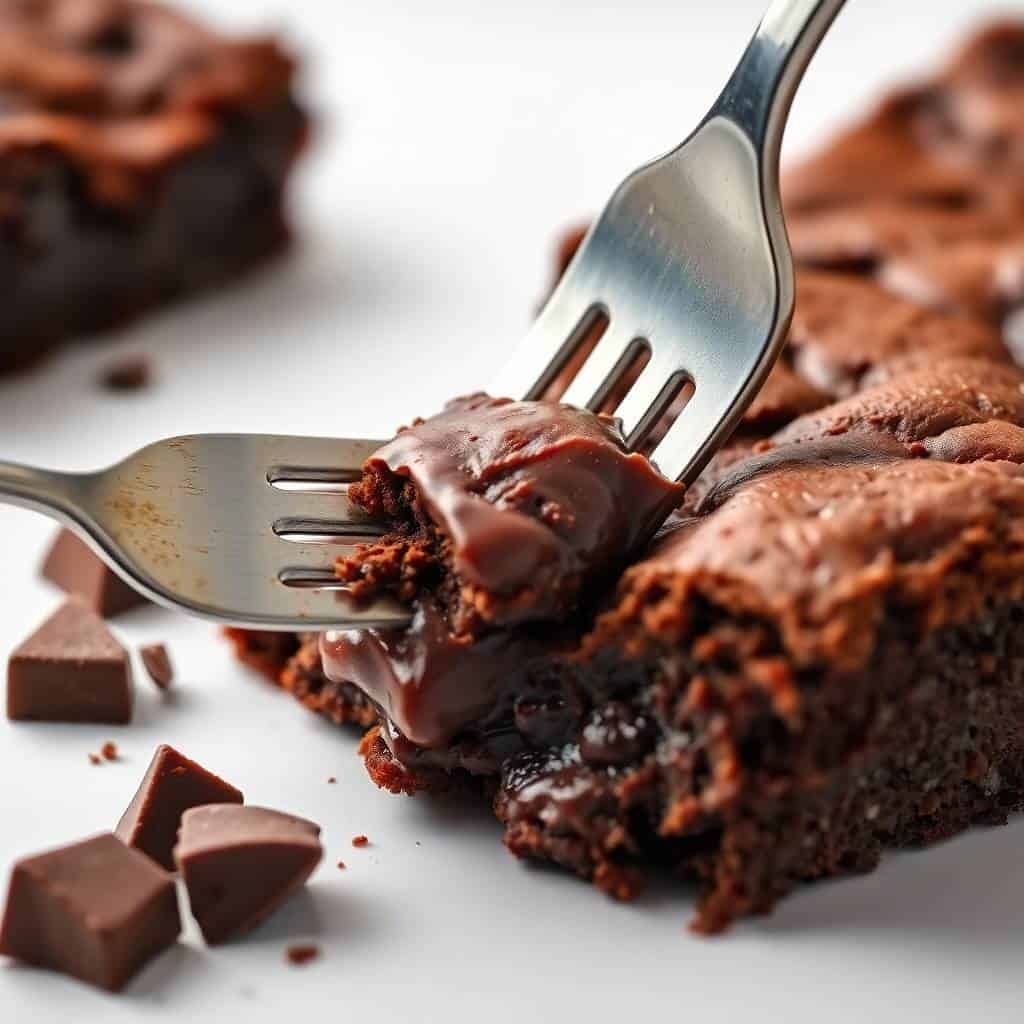
- Signature Fudgy, Gooey Center With a Crackly Top: The interior of this pie stays remarkably soft, almost molten, with a texture closer to chocolate lava cake than traditional brownies — and the top develops that distinctive crackly, papery surface that brownie enthusiasts genuinely love. This combination of crackly top and gooey middle is the holy grail of brownie texture, and the pie format actually delivers it more reliably than a regular pan of brownies because of the way the pie dish concentrates heat at the edges and shields the center.
- Buttery, Crisp Crust That Adds Crucial Structure: The pie crust does more than just hold the brownie batter — it adds a structural, slightly crisp, buttery contrast that prevents the dessert from feeling one-dimensional. Pure brownies are soft and chewy throughout; this pie gives you that same soft chewiness in the center with the satisfying snap of crisp pastry around the edges. It is the kind of textural contrast that makes a dessert feel more thoughtful and finished than a single-texture sweet ever could.
- Genuinely Easy — One Bowl, Pantry Ingredients, Minimal Steps: Despite how impressive the finished pie looks, this is a one-bowl recipe that requires zero special equipment, zero advanced technique, and only ingredients most baking households already have on hand. Melted butter, sugar, eggs, cocoa, flour, and chocolate chips whisked together and poured into a crust — that's the entire process. There is no creaming butter, no folding in egg whites, no double-boilers. If you have made boxed brownies, you can absolutely make this pie.
- Crowd-Pleaser for Every Age and Every Occasion: Chocolate is one of the most universally loved flavors in the world, and a properly made fudgy brownie pie is one of the most universally satisfying desserts. Kids love it for the gooey center and chocolate chip pockets; adults love it for the deep cocoa complexity and buttery crust. Serve it at a holiday dinner, a birthday celebration, a potluck, a casual weeknight dessert — there is genuinely no setting where this pie feels out of place. See my 17 best Mother's Day desserts for more crowd-pleasing dessert inspiration.
- Serves Beautifully Warm or Cold — Two Completely Different Experiences: This pie has the rare quality of being equally delicious at two completely different temperatures. Served warm straight from the oven (or gently reheated), it delivers that molten, lava-cake-style indulgence that pairs perfectly with a scoop of vanilla ice cream. Served chilled from the fridge, it firms up into clean, fudgy slices with a denser, more truffle-like texture that holds its shape on the plate. Both versions are genuinely excellent — you choose based on the occasion.
INGREDIENTS
- 1 prepared 9-inch pie crust (store-bought or homemade)
- 1 cup (2 sticks) unsalted butter, melted
- 1 cup granulated sugar
- 1 cup light brown sugar, packed
- 3 large eggs, at room temperature
- 1 tablespoon vanilla extract
- 1 cup all-purpose flour
- ¾ cup unsweetened cocoa powder
- ½ teaspoon salt
- 1 cup semi-sweet chocolate chips
- Optional: powdered sugar, for dusting
DIRECTIONS
- Step No.1: Preheat the oven and prepare the crust
Preheat your oven to 350°F (175°C). Place the pie crust into a 9-inch pie pan, pressing it gently into the bottom and up the sides, and trim or crimp the edges as desired. Set the prepared crust aside while you make the batter. If using homemade dough, this is also the time to chill the crust in the fridge for 10 minutes to firm up the butter and prevent shrinkage during baking.
- Step No.2: Combine the wet ingredients
In a large mixing bowl, whisk together the melted butter, granulated sugar, and brown sugar until smooth and glossy — about 1 minute of vigorous whisking. Add the eggs one at a time, whisking thoroughly after each addition to fully incorporate before adding the next. Whisk in the vanilla extract last. The mixture should look uniformly glossy and slightly thickened, with no streaks of butter or pockets of sugar visible.
- Step No.3: Add the dry ingredients
In a separate bowl, sift together the all-purpose flour, unsweetened cocoa powder, and salt. Sifting is genuinely important here — cocoa powder is notorious for forming stubborn lumps that won't break down once added to wet batter, and those lumps show up as bitter dry pockets in the finished pie. Gradually fold the sifted dry mixture into the wet mixture using a spatula, stopping the moment the batter looks uniformly combined with no flour streaks remaining.
- Step No.4: Fold in the chocolate chips
Gently fold the semi-sweet chocolate chips into the thick, glossy batter until they are evenly distributed throughout. The batter will be very thick at this point — closer to thick fudge than typical cake batter — which is exactly what you want. The thick consistency is what produces that fudgy, dense, melt-in-your-mouth texture in the finished pie.
- Step No.5: Fill the pie crust
Pour the brownie batter into the prepared pie crust and use a spatula to spread it evenly, making sure to reach the edges of the crust. The batter should fill the crust nearly to the top — it will rise slightly during baking but will not overflow significantly. Smooth the top with the back of the spatula for an even surface that bakes consistently across the whole pie.
- Step No.6: Bake to the perfect gooey center
Place the pie in the preheated oven and bake for 35–40 minutes, or until the top is set with that signature crackly finish but the center still looks slightly soft and underdone when you give the pan a gentle wiggle. This slight under-bake is the entire secret to the gooey texture — the pie continues to set significantly as it cools, and a fully firm-looking center in the oven will be dry and overcooked by the time it cools to room temperature.
- Step No.7: Cool, slice, and serve
Remove the pie from the oven and let it cool for at least 15–20 minutes before slicing — this rest period is what allows the filling to set just enough to slice without collapsing while still maintaining its gooey center. For warmer, more molten slices, serve immediately after the rest. For cleaner, fudgier slices that hold their shape, chill the pie for 1–2 hours in the refrigerator. Dust with powdered sugar just before serving if desired.
TIPS FOR SUCCESS
- Use Premium Cocoa Powder — It Genuinely Changes the Final Pie: Cocoa powder is the single most important flavor element in this recipe, and the quality difference between cheap and premium cocoa is enormous. Cheap cocoa tastes flat, slightly chalky, and one-dimensional; premium Dutch-process or high-quality natural cocoa delivers deep, complex, fruity, and caramelized notes that make this pie taste like it came from a high-end bakery. This is one ingredient where the extra few dollars are absolutely worth spending — you taste the difference in every single bite.
- Do Not Overbake — Pull the Pie When the Center Still Looks Underdone: This is the single most important rule for getting that signature gooey center, and it is the rule people violate most often because their instinct is to bake until the center looks fully set. Resist that instinct. The pie should come out of the oven with a slightly soft, slightly jiggly center that looks almost undercooked — it will continue setting for at least 20–30 minutes as it cools, and an underdone-looking pie at the end of bake time produces the perfect texture once cooled. A fully firm pie in the oven means a dry pie on the plate.
- Cool for at Least 15 Minutes Before Slicing — Patience Required: A pie sliced too soon will collapse in the middle and produce a beautiful first slice followed by a messy puddle for the rest. Even 15 minutes of rest time lets the filling set enough to slice cleanly while still maintaining the gooey center. For the cleanest possible slices, chill the pie for 1–2 hours in the fridge before slicing, then warm individual slices in the microwave for 15 seconds before serving if you want that warm gooey effect back.
- Always Use Room Temperature Eggs — Cold Eggs Seize the Butter: Cold eggs straight from the fridge will instantly cause the melted butter in the batter to seize, harden, and turn lumpy — leaving you with a broken, uneven batter that bakes into a strangely textured pie. Set your eggs out on the counter at least 30 minutes before you start baking. The resulting batter is smooth, glossy, and uniformly combined, which produces a significantly better final texture in the baked pie.
- Spread the Batter Evenly to Avoid Burnt Edges and Raw Centers: The brownie batter is thick enough that it won't naturally level itself, so spreading it evenly with a spatula is essential. Uneven batter creates uneven baking — thick spots stay raw while thin spots overcook and turn dry around the crust. Take an extra 30 seconds to spread the batter to a uniform thickness across the entire pie before it goes into the oven. The consistency of texture across every slice is worth the small effort.
- Use a Pie Crust Shield If Edges Brown Too Fast: The pie crust edges are exposed and will brown significantly faster than the brownie filling sets, especially in ovens with strong heating elements. If you notice the edges getting dark before the center is anywhere close to done, loosely cover just the edges with strips of foil or use a metal pie crust shield for the last 15–20 minutes of baking. This protects the crust from burning while allowing the center to finish cooking properly.
- Dust With Powdered Sugar Just Before Serving — Not Earlier: A light dusting of powdered sugar over the cooled pie adds a beautiful bakery-quality finish that transforms the presentation, but it absolutely must be added just before serving, not in advance. Powdered sugar dissolves into any moisture on the surface within 15–30 minutes, leaving you with a wet, splotchy surface instead of an elegant white dusting. Time the dusting to coincide with bringing the pie to the table.
VARIATIONS
- Nutty Crunch Brownie Pie: Fold ½ cup of chopped walnuts or pecans into the batter along with the chocolate chips for a delightful crunch and slight bitterness that balances the sweet, fudgy filling. Toasting the nuts first in a dry skillet for 3–4 minutes brings out their natural oils and intensifies their flavor significantly. This is the variation I make most often for adults — the nutty contrast elevates the pie from purely chocolate-focused to more complex and grown-up.
- Espresso-Infused Brownie Pie: Add 1 teaspoon of high-quality espresso powder to the dry ingredients before mixing. The espresso doesn't make the pie taste like coffee — it works as a flavor amplifier that deepens and intensifies the chocolate flavor in a way that's genuinely hard to describe but immediately noticeable in the first bite. This is one of those professional baking tricks that completely transforms a recipe with one tiny addition.
- Peanut Butter Swirl Brownie Pie: Drop 4 tablespoons of creamy peanut butter in dollops over the top of the batter once it's in the crust, then use a butter knife to swirl them through the surface in a marbled pattern. The peanut butter melts into ribbons during baking, creating beautiful visual contrast and rich, nutty pockets in every slice. The classic chocolate-peanut-butter combination is universally beloved and works perfectly here.
- Salted Caramel Topped Brownie Pie: Drizzle warm salted caramel sauce generously over the cooled pie before serving, and finish with a small sprinkle of flaky sea salt across the surface. The salty-sweet contrast against the deep chocolate flavor is genuinely extraordinary — one of the most successful flavor pairings in all of dessert baking. Inspired by my salted caramel butter bars, which use the same flavor principle.
- Gluten-Free Brownie Pie: Swap the all-purpose flour for a quality 1:1 gluten-free flour blend (King Arthur or Bob's Red Mill both work well), and use a gluten-free pie crust. The fudgy, dense texture of this pie actually holds up better than it does in many other gluten-free conversions because the chocolate and butter carry most of the structural work, not the flour. A great option for mixed-dietary gatherings.
- Mint Chocolate Brownie Pie: Add ½ teaspoon of pure peppermint extract to the batter and replace half of the semi-sweet chocolate chips with mint chocolate chips (or Andes mints chopped into pieces). The result is a festive, holiday-perfect variation that tastes like a chocolate-mint candy bar in pie form. This is my Christmas-week variation when I want the pie to feel more seasonal and special.
- Mexican Chocolate Spiced Brownie Pie: Add ½ teaspoon of ground cinnamon and a small pinch (¼ teaspoon) of cayenne pepper to the dry ingredients. The cinnamon adds warmth and complexity, while the cayenne provides a barely-detectable heat that builds slowly on the finish — the same way classic Mexican chocolate spices work. Unexpected, sophisticated, and genuinely memorable.
SERVING AND STORAGE
Serving
Serve warm slices with a generous scoop of vanilla ice cream or a swirl of homemade whipped cream for the ultimate comforting dessert experience — the cold creamy element against the warm gooey chocolate is one of the most universally appealing flavor and temperature contrasts in all of dessert. For a more elevated presentation, drizzle each slice with warm chocolate sauce or salted caramel and finish with a tiny pinch of flaky sea salt across the top. Best served immediately after slicing while the center is still slightly molten.
Storage
Cover the pie loosely and store at room temperature for up to 2 days, or refrigerate in an airtight container for up to 5 days. The pie firms up significantly in the fridge — to bring back that gooey, freshly-baked texture, warm individual slices in the microwave for 15–20 seconds before serving. For longer storage, wrap the cooled pie tightly in plastic wrap and foil and freeze for up to 2 months; thaw overnight in the refrigerator and warm individual slices before serving.
FAQ
Yes — bake it a day in advance and store it covered at room temperature for up to 2 days or in the refrigerator for up to 5 days. When ready to serve, warm individual slices in the microwave for 15–20 seconds to bring back that signature gooey, freshly-baked texture. The pie's flavor actually deepens slightly overnight as the chocolate flavors meld, making the day-after version arguably better than fresh-baked for serving guests.
Absolutely. Wrap the cooled pie tightly in two layers of plastic wrap followed by a layer of aluminum foil and freeze for up to 2 months. Thaw overnight in the refrigerator before serving, then warm individual slices in the microwave or a 300°F oven for 5 minutes to bring back the gooey texture. Frozen brownie pie holds its texture and flavor remarkably well — better than most baked desserts — which makes it an excellent make-ahead option for parties.
A standard butter-based pie crust is the classic choice — it crisps up beautifully against the fudgy filling and adds a buttery contrast that grounds the rich chocolate. Store-bought refrigerated pie crusts work perfectly well if you're short on time and produce excellent results. For an extra-chocolatey version, a chocolate cookie crust made from crushed chocolate sandwich cookies and melted butter is genuinely incredible. Avoid graham cracker crusts here — they don't have enough structure to hold up against the heavy filling.
Yes, the pie still works beautifully without the chocolate chips — though I do recommend keeping them in if possible. The chips add little pockets of melted chocolate throughout the pie that elevate the texture and provide bursts of intense chocolate flavor in every bite. Without them, the pie is more uniformly fudgy in texture and slightly less complex in flavor — still genuinely delicious, just a different kind of chocolate experience. Try adding chopped chocolate chunks instead for a more rustic version.
Overbaking is almost always the culprit — and it is the single most common mistake people make with this recipe. Pull the pie from the oven when the center still looks slightly soft, slightly jiggly, and almost underdone. The pie continues setting for at least 20–30 minutes after baking as the residual heat works through, and a pie that looks fully firm in the oven will be dry and crumbly once cooled. Trust the slight under-bake — it produces the perfect gooey texture every time.
Gooey brownie pie is the dessert that proves the simplest combinations can produce the most memorable results — brownie batter, a buttery pie crust, and a careful under-bake working together to deliver one of the most universally loved chocolate desserts in any baker's repertoire. Make it for a birthday celebration, a holiday dinner, a casual weeknight chocolate craving, or any occasion when you want a dessert that earns instant compliments and disappears within minutes.
Try the espresso-infused version for the deepest chocolate flavor, the peanut butter swirl for the classic flavor combination, and the salted caramel topped version for the most indulgent presentation. Pair with my maraschino cherry chocolate chip cookies, my salted caramel butter bars, my fluffy ricotta cookies dusted with powdered sugar, and my 17 best Mother's Day desserts for the complete chocolate dessert collection. 🥧🍫🍦✨
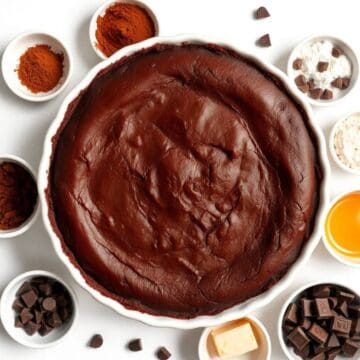
GOOEY BROWNIE PIE
Ingredients
- 1 cup unsalted butter melted
- 1 ½ cups granulated sugar
- ¾ cup cocoa powder
- 3 large eggs
- 1 teaspoon vanilla extract
- 1 cup all-purpose flour
- ½ teaspoon salt
- ½ cup chocolate chips optional
Instructions
- Preheat Oven: Preheat the oven to 350°F (175°C). Grease a 9-inch pie dish and set aside.
- Mix Wet Ingredients: In a large bowl, combine melted butter, sugar, eggs, and vanilla extract. Whisk until smooth.
- Add Dry Ingredients: Sift in flour, cocoa powder, and salt. Stir until just combined. Fold in chocolate chips if desired.
- Bake: Pour batter into the prepared pie dish. Bake for 30–35 minutes or until the edges are set but the center remains slightly gooey.
- Cool and Serve: Allow the pie to cool for 10 minutes before slicing. Serve warm or at room temperature.
Notes
- Make Ahead: Prepare the batter in advance and refrigerate for up to 24 hours before baking.
- Customizing the Flavor: Add a swirl of caramel or peanut butter for a decadent twist.
- Serving Suggestions: Serve with vanilla ice cream, whipped cream, or a drizzle of chocolate sauce for extra indulgence.





Comments
No Comments