
Zainab asked for something sweet at 3:30 on a Tuesday and I had exactly zero snacks ready. I spotted the granola bag on the shelf, a jar of peanut butter, and figured I'd try something. Twenty minutes later I was pulling these little cups out of the fridge, and I genuinely did not expect them to be as good as they were. That was maybe four months ago. I've made them at least a dozen times since.
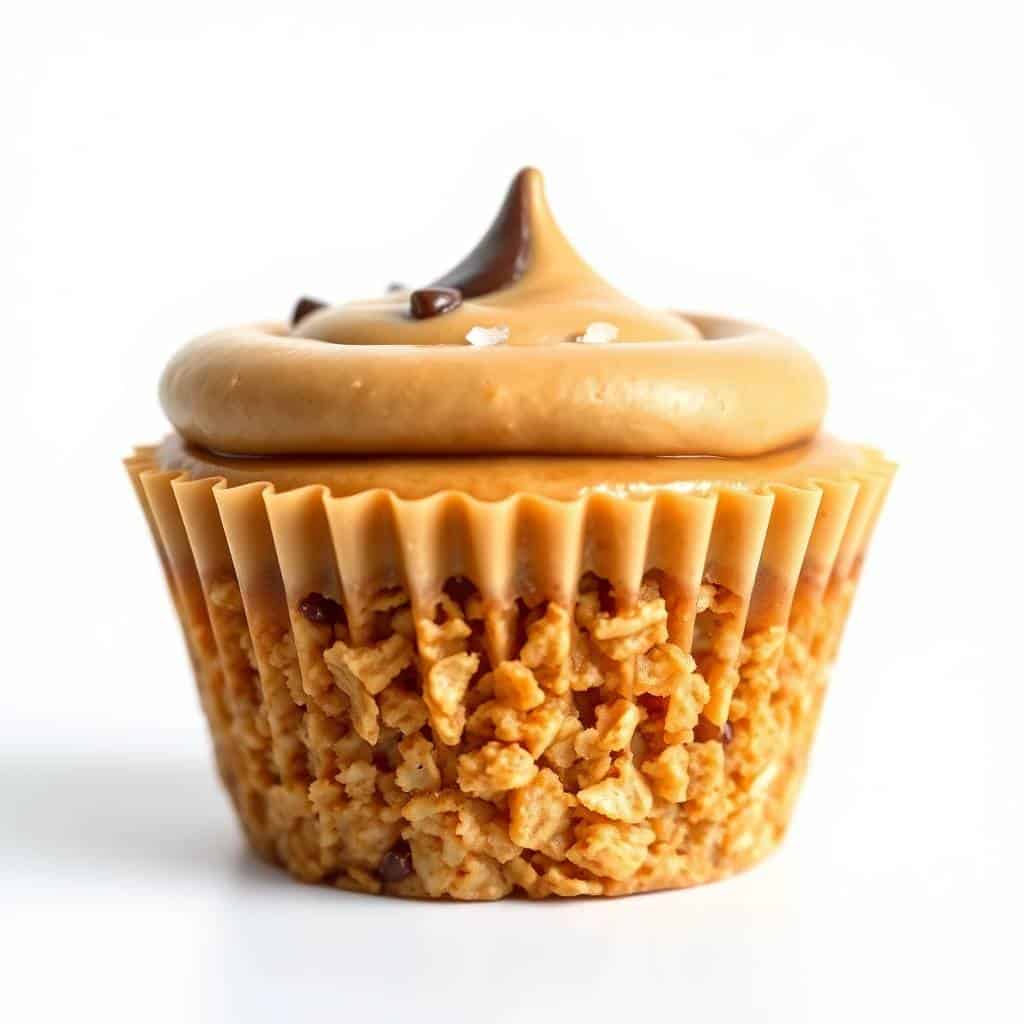
What makes these actually work — and not just fall apart the second you touch them — is the two-layer approach. The granola base gets coated in a warm peanut butter and honey mixture that binds everything together when it cools in the fridge. The first time I made them I just plopped plain peanut butter on top, and while the flavor was fine, it looked messy and didn't set into anything you could pick up cleanly. The sweetened peanut butter topping — just peanut butter, powdered sugar, and a splash of milk — is what turns these from a loose pile of granola into something that actually holds its shape and feels like a real treat.
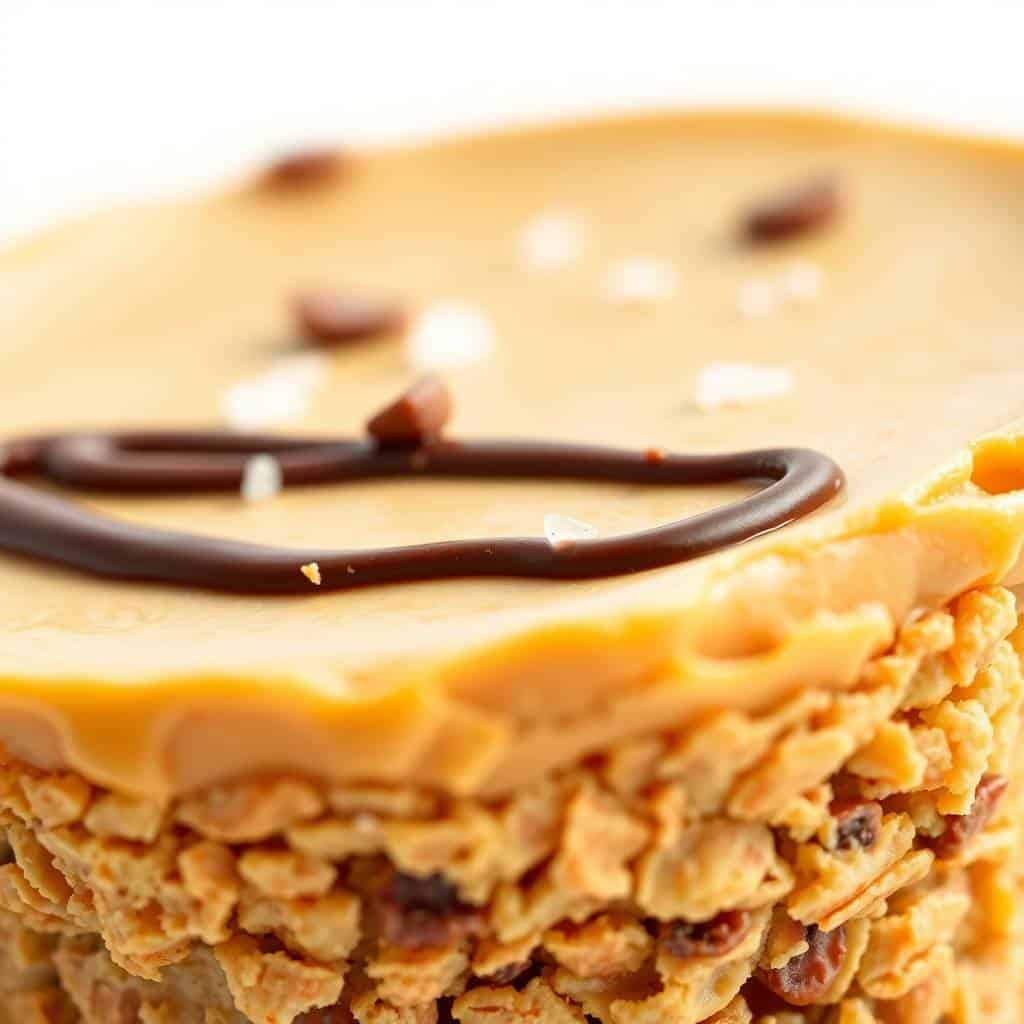
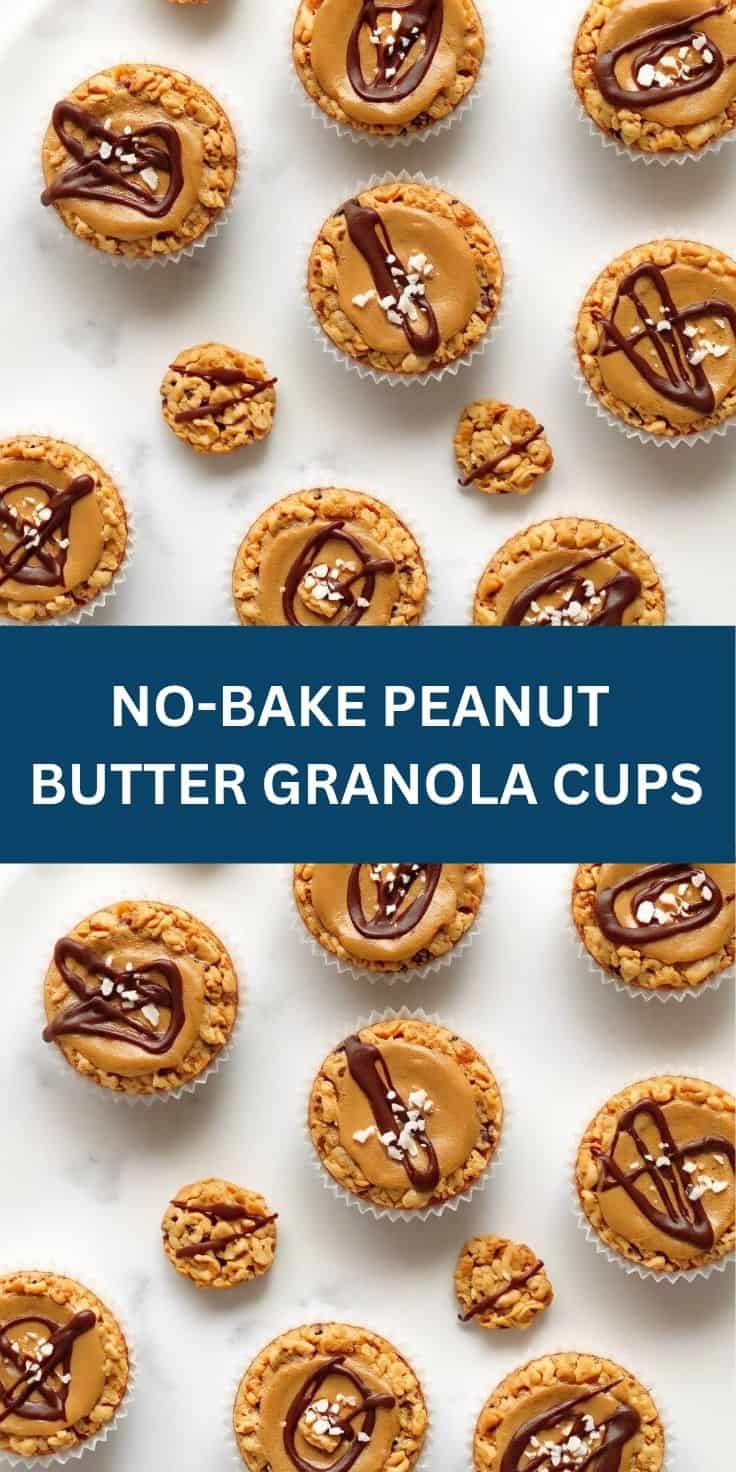
Zainab likes hers with mini chocolate chips pressed in while the topping is still soft. My husband skips the chips and asks for a drizzle of dark chocolate instead. I make a double batch on Sundays because one batch doesn't survive until Tuesday — I've tested this theory more than once. If you're someone who likes no-bake fridge-set snacks, my strawberry rhubarb cheesecake bars use the same principle and are worth keeping in your back pocket too.
One thing I want to be upfront about: you really do need a mini muffin tin here. I tried making these in a regular 12-cup muffin tin once and the cups were too thick, the ratio of base to topping was off, and they took forever to set. A mini muffin tin runs under $10 at Walmart — mine is nothing special and it does the job fine. Also don't skip the paper liners. Even in a non-stick pan, that granola base wants to cling.
Why You'll Love This Recipe
- No oven involved, ever: I make these all through summer when turning on the oven feels like a mistake. Everything happens on your countertop and in the fridge — no preheating, no watching a timer, no standing over hot pans. On the hottest days of the year this is the only kind of snack I'm willing to make, and these always come through.
- They actually hold together: A lot of no-bake granola recipes fall apart the moment you pick them up. These don't, because the peanut butter and honey mixture gets warmed before it hits the granola, which coats everything and bonds it properly when it cools. Press the base down firmly, give it a full 30 to 60 minutes in the fridge, and you'll get cups that hold their shape when you peel back the liner.
- Works with whatever granola you already have: I've made these with the big Costco honey almond granola, with the plain oat granola from Aldi, and once with a bag that was two days from going stale. They all worked out fine. The one thing to avoid is granola with massive clusters that won't press down into the cup — just break up any big pieces before you mix them in.
- Genuinely good for meal prep: I make a batch Sunday evening and they last in the fridge all week in an airtight container. They're ready to grab on the way out the door, which is honestly more than I can say for most things I try to prep ahead. The texture even improves slightly after day two — the base firms up a little more and everything holds together better.
- Easy to adapt for allergies or preferences: The base recipe is straightforward, but I've topped these with everything from mini chocolate chips to a drizzle of melted chocolate to flaky sea salt. You can swap peanut butter for almond butter or sunflower seed butter if you're working around a nut allergy — the recipe handles that swap without needing any other adjustments.
Ingredients
- For the Granola Base:
- 1 ½ cups granola (store-bought or homemade — any kind you like)
- ½ cup creamy peanut butter (natural or conventional)
- ¼ cup honey or maple syrup
- 2 tablespoons unsalted butter, melted (or coconut oil for dairy-free)
- For the Peanut Butter Topping:
- ½ cup creamy peanut butter
- 2 tablespoons powdered sugar (confectioners' sugar)
- 1 tablespoon milk (any kind — dairy or non-dairy both work)
- Pinch of salt (optional, but I always add it)
- Optional Garnish:
- Mini chocolate chips
- Chopped peanuts
- Drizzle of melted dark chocolate
Directions
- Line your muffin tin: Line a 12-cup mini muffin tin with paper liners. Don't skip this — the granola base sticks, even in non-stick pans, and the liners make it easy to pop the cups out cleanly once they've set.
- Make the granola base: In a medium microwave-safe bowl, combine the ½ cup peanut butter, honey or maple syrup, and melted butter. Microwave for 30 to 60 seconds, stirring once partway through, until the mixture is genuinely warm and runny — not just softened. Add the granola and stir until every piece is coated; you want it sticky and uniform, not dry or clumpy.
- Fill and press the base: Divide the granola mixture evenly among the 12 lined cups. Press it down firmly using the back of a spoon or your thumb, pushing up the sides slightly to form a little cup shape. The firmer you press, the better it holds — this step matters more than it seems. Refrigerate while you make the topping.
- Make the peanut butter topping: In a small bowl, stir together the ½ cup peanut butter, powdered sugar, and milk until smooth. If it's too thick to spoon easily, add another teaspoon of milk. If it's too loose, add a tiny pinch more powdered sugar. Add the pinch of salt — it cuts through the sweetness in the best way.
- Fill the cups: Spoon the peanut butter topping evenly over each granola base, smoothing the top with the back of your spoon. Don't overfill — you want it level with or just slightly below the top of the liner so it sets flat and looks clean.
- Add toppings: If you're using mini chocolate chips, chopped peanuts, or a drizzle of melted chocolate, add them now before chilling. The topping is still soft at this point and the garnishes will stick as everything sets.
- Chill until set: Return the muffin tin to the refrigerator for at least 30 minutes to 1 hour, until the cups are fully firm. Once set, remove from the tin and peel off the liners just before serving.
Tips for Success
- Get the base mixture genuinely warm before adding granola: This is the step I messed up on my first attempt. The peanut butter, honey, and butter need to be liquid and pourable — not just slightly soft. If the mixture is still stiff when you stir in the granola, the coating won't be even and the cups will crumble when you try to press them. I give mine a full 45 seconds in the microwave and stir well before adding anything.
- Press the base harder than feels necessary: My first batch crumbled the moment I peeled the liner because I didn't press firmly enough. Use your thumb to really compact the mixture around the edges and into the bottom of each cup. If the granola starts sticking to your fingers, wet them slightly with water — that stops it immediately and makes pressing much easier.
- Don't rush the chill time: I know 30 minutes feels long when the kids are standing in the kitchen watching the fridge, but pulling them out too early means the topping is still soft and the whole thing falls apart in your hand. I set a timer and leave the kitchen. An hour is even better if you have it.
- Adjust topping sweetness to your granola: If you're using a very sweet honey-roasted granola (like the Trader Joe's vanilla one), dial the powdered sugar back to just 1 tablespoon in the topping. If you're using plain or lightly sweetened granola from Aldi, the full 2 tablespoons gives a nice balance. I've learned this from making these with a few different granola brands and the difference is noticeable.
- Use a mini muffin tin, not a regular one: Regular muffin cups make these too thick and the base-to-topping ratio gets completely off. Mini muffin tins are inexpensive — I got mine for under $10 at Walmart — and they give you the right two-bite size where everything is proportional and the cups actually hold together.
Variations
- Dark chocolate layer in the middle: Melt about ¼ cup of dark chocolate chips with half a teaspoon of coconut oil and spoon a thin layer over the chilled granola base before adding the peanut butter topping. Let it set for 5 minutes first so it doesn't mix into the topping. This is the version my husband requests every time — he says it tastes like a Reese's cup but better. I'm not going to argue with him on that one.
- Almond butter swap: Replace the peanut butter in both the base and the topping with almond butter for a slightly nuttier, less sweet flavor. No other adjustments needed — the recipe works exactly the same way. If you're in the UK, Meridian almond butter is easy to find at most supermarkets and does the job well.
- Nut-free version: Swap all the peanut butter for sunflower seed butter — SunButter is the brand I see most often at Walmart and Target — and use a nut-free granola. The flavor is a little earthier, but the texture and set are identical to the original. This is a good option if you're making these for a school event where nuts aren't allowed.
- Coconut and dried fruit base: Stir 2 tablespoons of shredded coconut and a small handful of chopped dried cranberries into the granola mixture before pressing. It adds a chewy, fruity element that works really well against the creamy topping. I make this version around the holidays — something about the cranberry and coconut combination makes it feel more festive without any extra effort.
- Protein boost version: Mix one scoop of unflavored or vanilla protein powder into the peanut butter topping along with the powdered sugar. You'll likely need an extra teaspoon of milk since protein powder thickens the mixture. This is my version when I want something that keeps me full until lunch rather than just tiding me over for an hour. If you're after a baked option in a similar snack-treat territory, my coffee cookies with espresso are worth a look.
Serving and Storage
Serving
Serve these straight from the fridge — they're designed to be eaten cold. The topping softens fairly quickly at room temperature, especially in a warm kitchen, so I don't put them out for more than 20 to 30 minutes before they start losing their firmness. On hot days I'll set them on a plate over a small tray of ice if I'm putting them out for guests. They work as an after-school snack, a light dessert, or a grab-and-go breakfast alongside some fruit or a boiled egg. They're not a substitute for a full breakfast on their own, but paired with something protein-heavy they do the job well.
Storage
Store in an airtight container in the refrigerator for up to one week. I stack mine in two layers with a piece of parchment paper between layers so the tops don't get marked up or stick together. These do not freeze well — the granola base goes soft and crumbly when it thaws, and the peanut butter topping gets a grainy texture that isn't pleasant. Since the recipe comes together in under 30 minutes, freezing really isn't worth it. If you're meal prepping for the week, a double batch takes maybe 10 extra minutes and keeps just as well as a single one.
Frequently Asked Questions
Can I use crunchy peanut butter instead of creamy?
Yes, you can. The base will have a bit more texture and the topping will be slightly less smooth, but it works. Just make sure the peanut butter is genuinely warm when you mix it into the granola — crunchy peanut butter is usually stiffer and needs more heat to become pourable. I'd stick to creamy for the topping if you want it to look neat on top.
My granola mixture is too crumbly — what do I do?
Add another tablespoon of honey or maple syrup, or an extra spoonful of peanut butter, and stir again. The mixture should feel sticky and hold together when you squeeze a little between your fingers. If it's still falling apart after pressing, it needs more binder. This usually happens when the peanut butter mixture wasn't warm enough before you added the granola, or when the granola itself is very dry and dense.
Can I make these without a muffin tin?
Yes — press the granola mixture into a parchment-lined 8x8 inch square pan, chill it, then spoon the peanut butter topping over the whole thing and chill again until fully set. Once firm, cut into bars or squares. They won't look like cups, but the flavor is identical and this is actually a faster method if you're making a big batch for the week.
How long do these keep, and can I freeze them?
They keep well in the fridge for up to one week in an airtight container. I don't recommend freezing them — the granola base goes soft when it thaws and the peanut butter topping gets a grainy texture. Since they take less than 30 minutes to put together, making them fresh is genuinely the better option.
Can I make these dairy-free?
Easily. Swap the 2 tablespoons of butter in the base for coconut oil — it works exactly the same way. For the topping, use any non-dairy milk: oat milk, almond milk, and coconut milk all work well. Just check that your granola doesn't contain milk powder or whey, since some store-bought granolas do. With those two swaps the whole recipe is naturally dairy-free.
NO-BAKE PEANUT BUTTER GRANOLA CUPS
Ingredients
For the Granola Base:
- 1 ½ cups granola your favorite kind, store-bought or homemade
- ½ cup creamy peanut butter natural or conventional, adjust to your preference
- ¼ cup honey or maple syrup for binding and sweetness
- 2 tablespoons unsalted butter melted (or coconut oil for dairy-free)
For the Peanut Butter Topping:
- ½ cup creamy peanut butter
- 2 tablespoons powdered sugar confectioners' sugar
- 1 tablespoon milk any kind, dairy or non-dairy
Optional: Pinch of salt
- Optional Garnish/Add-ins:
- Mini chocolate chips
- Chopped peanuts
- A drizzle of melted chocolate
Instructions
- Prepare the Muffin Tin: Line a 12-cup mini muffin tin with paper liners. This makes it much easier to remove the cups.
Make the Granola Base:
- In a medium microwave-safe bowl, combine ½ cup peanut butter, honey (or maple syrup), and melted butter (or coconut oil).
- Microwave for 30-60 seconds, or gently heat on the stovetop, until the mixture is warm and runny enough to stir smoothly.
- Add the granola to the wet mixture and stir well until the granola is completely coated.
- Evenly divide the granola mixture among the 12 mini muffin cups. Press down firmly with the back of a spoon or your fingers to create a compact base.
- Place the muffin tin in the refrigerator while you prepare the topping.
Prepare the Peanut Butter Topping:
- In a small bowl, combine ½ cup peanut butter, powdered sugar, and milk.
- Stir well until the mixture is smooth and creamy. If it's too thick, add another teaspoon of milk; if too thin, add a bit more powdered sugar. Add an optional pinch of salt to balance the sweetness.
Assemble the Cups:
- Spoon the peanut butter topping evenly over the granola bases in each muffin cup. Smooth the top with the back of a spoon.
- If desired, sprinkle with mini chocolate chips, chopped peanuts, or drizzle with melted chocolate.
- Chill: Return the muffin tin to the refrigerator for at least 30 minutes to 1 hour, or until the cups are firm and set.
- Serve and Store: Once firm, carefully remove the cups from the muffin tin. Peel off the paper liners just before serving. Store any leftover cups in an airtight container in the refrigerator for up to 1 week.
Notes
- Granola Choice: Any type of granola works here! For a gluten-free version, ensure your granola and oats are certified gluten-free.
- Peanut Butter: Natural runny peanut butter works great for the base, while a slightly thicker, no-stir peanut butter might be easier for the topping, but either will work with adjustments.
- Sweetener: Adjust the amount of honey or maple syrup based on the sweetness of your granola and personal preference.
- Chocolate Layer: Add a thin layer of melted chocolate between the granola base and the peanut butter topping for an extra treat.
- Protein Boost: Stir a scoop of unflavored or vanilla protein powder into the peanut butter topping mixture for added protein.
- Nut-Free: For a nut-free version, substitute sunflower seed butter (like SunButter) for peanut butter and ensure your granola is nut-free.





Comments
No Comments