
The first time I made this for Fourth of July, I poured all three layers too fast and ended up with a murky purple situation. Beautiful in theory, absolutely not in the glass. But I kept at it, figured out the freezing trick, and now this is the one my kids specifically request every summer — not just for the holiday, but honestly any time they spot strawberries and blueberries in the fridge at the same time.
What makes this smoothie actually work is patience between the layers. I know that sounds annoying when you just want a quick breakfast, but two minutes in the freezer between each pour is genuinely the difference between a gorgeous red-white-blue glass and a sad swirly mess. The layers stay because the thickness is right and the brief chill sets each one before you add the next. That's the whole secret — no fancy tools, no special ingredients.
Zainab loves this. Like, aggressively loves it. She calls it the "flag drink" and will absolutely tell guests about it in full detail before they've even sat down. I usually double the batch because two glasses disappear before I've even cleaned the blender. My husband drinks his fast and doesn't really appreciate the layers, but the kids treat it like something precious and sip slowly to preserve them as long as possible.
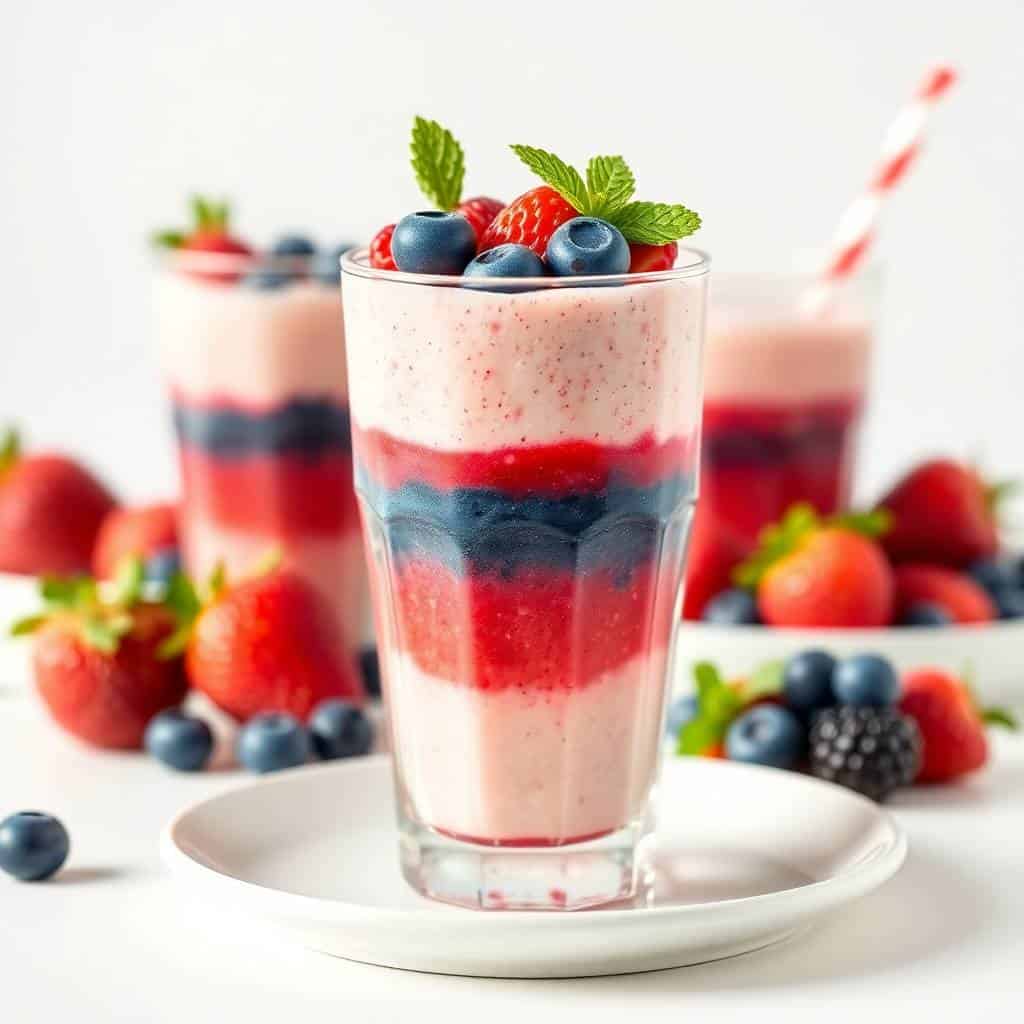
This isn't a smoothie that works well with shortcuts. The layers need to be thick — if yours keep blending together, your smoothies are probably too thin. Use frozen fruit, add banana if needed, and don't skip the freeze step between layers. I also make sure to have tall clear glasses on hand because half the fun is seeing the red, white, and blue sitting clean in the glass. If you're planning a big spread alongside this — we usually do something like our American Apple Hand Pies — this smoothie is an easy way to tie the patriotic theme together without much effort.
Why You'll Love This Recipe
- The layers actually stay separated: When you get the technique right — thick blends, brief freezing between pours — the red, white, and blue sit clean and distinct in the glass. It looks like you put way more effort into it than you did. I've served this to guests who genuinely thought I'd bought something special from a smoothie bar.
- Kids will actually drink it: My kids are not always cooperative about breakfast, but the visual novelty of this one works every time. They want to see the layers, they want to stir it (I tell them not to), and they drink every drop. The flavors are mild enough that even picky eaters usually go for it.
- No refined sugar needed: Ripe strawberries and blueberries bring enough sweetness on their own most of the time. I taste each layer before adding any honey. If the fruit is good, I skip it entirely. That said, if your blueberries are on the tart side, a small drizzle of honey in that layer helps balance things out.
- Works with frozen fruit year-round: I make this in February sometimes when Zainab asks for it and fresh berries aren't worth the price. Frozen strawberries and blueberries from Walmart or Costco work great — they actually help thicken the layers better than fresh, and you don't need to add ice.
- The blender is the only equipment you need: No special tools, no layering syringes, no fancy kitchen gadgets. A regular blender, a spoon, and a clear glass is all it takes. I use the same $20 blender I've had for five years and it does the job every time.
Ingredients
- 1 cup strawberries, hulled (fresh or frozen)
- 1 cup blueberries (fresh or frozen)
- ½ cup lemon-flavored yogurt (or plain yogurt + a squeeze of fresh lemon juice)
- ½ banana (optional, for thickness and creaminess in the white layer)
- ¼ cup milk, oat milk, or orange juice — divided across layers for blending
- 1 tablespoon honey or maple syrup (optional, taste first)
- Ice cubes (optional — skip if using frozen fruit)
- Fresh berries and festive straws for garnish (optional)
Directions
- Step 1: Blend the red layer. Add strawberries, a small splash of milk or juice, and honey (if using) to your blender. Blend until completely smooth and thick — it should hold its shape on a spoon. Pour carefully into the bottom of a clear glass, then put the glass in the freezer for about 2 minutes while you prep the next layer.
- Step 2: Make the white layer. Rinse your blender quickly, then blend the yogurt and banana together until smooth and creamy. Gently spoon this over the red layer — use the back of a spoon to slow the pour and protect the red layer underneath. Return the glass to the freezer for another 2 minutes.
- Step 3: Prepare the blue layer. Blend blueberries with a splash of milk and honey if your blueberries are tart. Blend until smooth and thick. Carefully spoon over the white layer, again using the back of a spoon. The cold layers underneath help the blueberry layer sit on top without sinking in.
- Step 4: Check your thickness. If any layer seems too thin and is bleeding into the one below, add a bit more frozen fruit or banana and re-blend. Thin smoothie layers don't hold — thickness is what keeps everything separate.
- Step 5: Garnish and serve immediately. Add a few fresh strawberries and blueberries on top, a festive straw, or whatever you have on hand. Serve right away — the layers start to slowly blend together over time, so don't let it sit.
Tips for Success
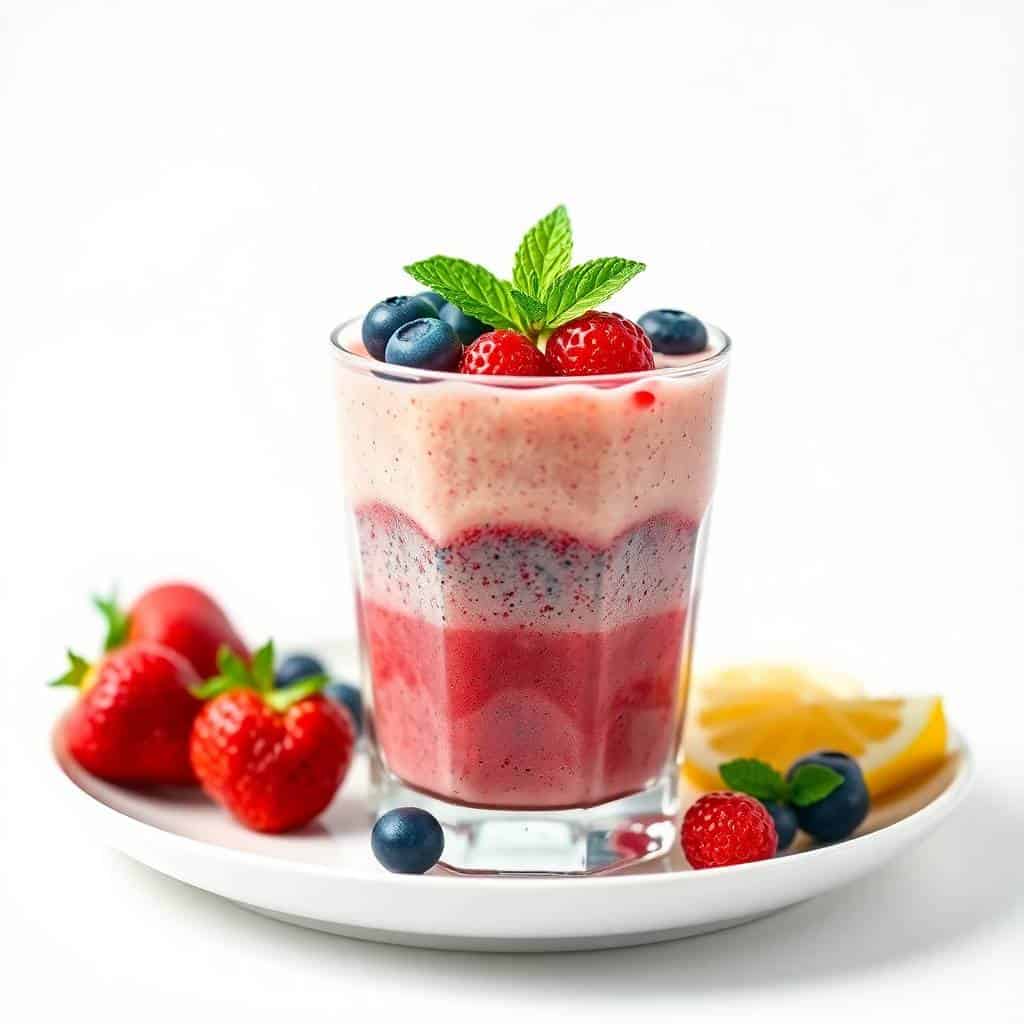
- Freeze between every layer, not just once: I skipped the freeze on my second batch thinking it was optional and the layers bled together immediately. Two minutes is all it takes — just enough for the surface to firm up so the next layer rests on top instead of sinking in. Don't skip this, especially in a warm kitchen.
- Thick is better than thin every time: The biggest reason layers fail is that the smoothie is too runny. If you can pour it like water, it's going to mix. You want something that holds its shape for a second before it settles. Frozen fruit, banana, and full-fat yogurt all help with this — thin juice-based layers don't work well.
- Pour over the back of a spoon: This is the same trick bartenders use for layered drinks. Hold a spoon just above the surface of your current layer and pour the next one slowly over the back of the spoon. It disperses the liquid gently instead of letting it plunge straight through. It genuinely makes a visual difference.
- Taste each layer before sweetening: Good ripe berries in summer don't need any honey at all. I taste the blended layer before I pour it every time — if it's already sweet, I skip the honey. If the blueberries are sharp and tart (which happens with out-of-season frozen ones), I add just a small drizzle. You don't want all three layers tasting identically sweet.
- Use tall, narrow glasses: The taller and narrower the glass, the more distinct the layers look. A wide short glass makes the layers look thin and the whole effect is less impressive. I use regular tall drinking glasses — nothing fancy — but the shape matters more than you'd think.
Variations
- Dairy-free version: Swap the yogurt for coconut yogurt and use oat milk or coconut milk for blending. The white layer ends up with a subtle coconut flavor that actually works really well with the lemon. I've made this version for a friend who can't have dairy and she asked for the recipe twice.
- Add a protein boost: Stir a scoop of vanilla protein powder into the white layer before blending. It thickens it nicely and makes the whole thing more filling — good if this is breakfast and you need it to carry you through the morning. Unflavored protein powder works too if you don't want anything too sweet.
- Smoothie bowl version: Use less liquid in all three layers to make them very thick, then serve in a wide bowl instead of a glass. Top with sliced strawberries, blueberries, granola, and a drizzle of honey. It becomes more of a breakfast bowl than a drink — the kids love this version on weekend mornings.
- Frozen popsicle version: Pour the layers into popsicle molds in the same order, letting each layer freeze fully (about an hour) before adding the next. It takes patience but the result is a red-white-blue popsicle that's genuinely impressive and way better than anything store-bought. We do this the night before a party.
- Raspberry swap for the red layer: If your strawberries aren't great, use raspberries instead. They blend into a deeper, brighter red that looks even more vivid in the glass. Raspberries have more tartness so you might want a small drizzle of honey in that layer, but the color payoff is worth it.
Serving and Storage
Serving
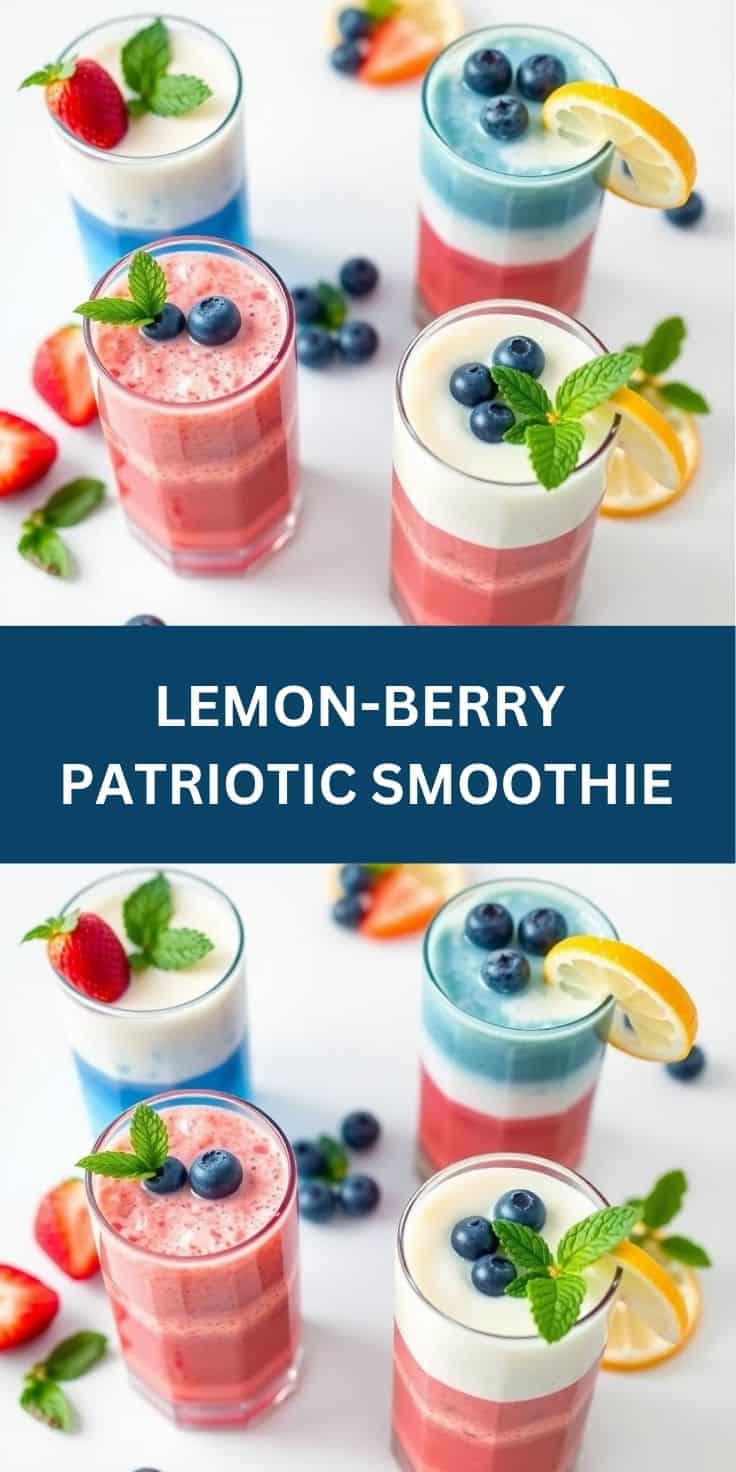
Serve immediately in tall clear glasses so the layers are visible. I usually set the glass down gently and let people see it for a moment before handing over a straw — half the joy is the visual. Add a few fresh berries on top or a festive straw if you're serving this at a Fourth of July party. It also looks lovely in wide-mouth mason jars if you're doing a more casual outdoor gathering. In Pakistan we'd serve drinks like this in cut-glass tumblers, but mason jars are honestly just as pretty and easier to hold outside.
Storage
This one doesn't store well once assembled — the layers will slowly mix together in the fridge and within an hour you've got a purple smoothie, which is still delicious but not the point. If you want to prep ahead, blend each layer separately and store them in small airtight containers or jars in the fridge for up to 24 hours. When you're ready to serve, re-stir each one (they may separate slightly), then layer and freeze between pours as usual. Don't freeze the assembled drink — it just turns into an uneven slush.
Frequently Asked Questions
Can I use frozen berries instead of fresh?
Yes, and I actually prefer frozen most of the time. Frozen berries make the layers thicker automatically, which helps them stay separate. They also keep the smoothie cold without needing ice cubes, which can water things down if you add too many. The bags from Costco or Walmart work perfectly — no need to buy fresh unless you're garnishing the top.
Why do my layers keep blending together?
Almost always because the smoothie layers are too thin, or you skipped the freeze step between pours. Make sure each blended layer is thick enough to hold its shape briefly on a spoon. Then freeze the glass for 2 minutes after each pour before adding the next layer. Pouring over the back of a spoon also helps slow the pour so it doesn't punch through the layer below.
What if I don't have lemon yogurt?
Plain yogurt works fine — just add a squeeze of fresh lemon juice and a little lemon zest if you have it. The lemon flavor is subtle in the white layer anyway; it mostly just cuts through the richness of the yogurt. Greek yogurt is a good choice here because it's thicker, which helps with layering.
Can I make this smoothie ahead of time?
Blend and store each layer separately in the fridge for up to 24 hours, then assemble just before serving. Once assembled, the layers start to slowly merge — within about an hour you lose the distinct separation. So for a party, I prep the three layers the night before in separate jars, then do the quick assembly right before guests arrive.
Is this safe for toddlers?
Yes, with one note: skip the honey if you're serving it to a child under 12 months old. Honey isn't recommended for babies under one year. For older toddlers, the smoothie is completely fine as written — the berries, yogurt, and banana are all toddler-friendly ingredients. You can also thin the texture slightly with extra milk if your little one isn't ready for thick smoothies.
LEMON-BERRY PATRIOTIC SMOOTHIE
Ingredients
- 1 cup frozen mixed berries blueberries, strawberries, raspberries
- 1 banana
- ½ cup plain Greek yogurt
- ½ cup orange juice
- 2 tablespoons fresh lemon juice
- 1 tablespoon honey or maple syrup optional
- Ice cubes optional
Instructions
Combine Ingredients:
- Add frozen berries, banana, Greek yogurt, orange juice, lemon juice, and honey to a blender.
Blend:
- Blend until smooth and creamy. Add ice cubes for a thicker texture if desired.
Serve:
- Pour into glasses and serve immediately.
Notes
- Make Ahead: Prepare and store in the fridge for up to 24 hours; stir well before serving.
- Variations: Substitute coconut yogurt for a dairy-free option or add spinach for extra greens.
- Serving Suggestions: Great for breakfast, snacks, or patriotic celebrations.
- Allergy-Friendly: Can be made dairy-free with alternatives.
I make this smoothie every summer, and every summer I'm glad I figured out the layering technique instead of giving up after that first purple disaster. It's one of those things that looks way harder than it is — once you know the thickness-and-freeze trick, it genuinely comes together in about ten minutes and the payoff is a glass that looks like you spent an hour on it.
On days when we're doing a bigger spread — maybe our Coconut Cream Pie for dessert or the kids are begging for something special — this smoothie is the easiest way to make breakfast feel like part of the celebration. It fits the holiday theme without requiring any real extra effort, which matters when you're also trying to get everything else on the table.
If you try it, I really do recommend making a double batch. One glass per person sounds right until you see everyone eyeing the second half of someone else's. I've learned to just blend more from the start. And if your layers aren't perfect the first time — mine weren't either. You'll get it on the second try. 🍓💙🤍
If you liked this, you'll probably enjoy these too:
- American Apple Hand Pies (The Best Flaky Homemade Portable Dessert)
- Coconut Cream Pie
- Mexican Pizza with Crispy Tortillas (Under 30-Minute Weeknight Dinner)
- Garlic Parmesan Chicken Meatloaves
- Honey Garlic Steak Bites

Comments
No Comments