
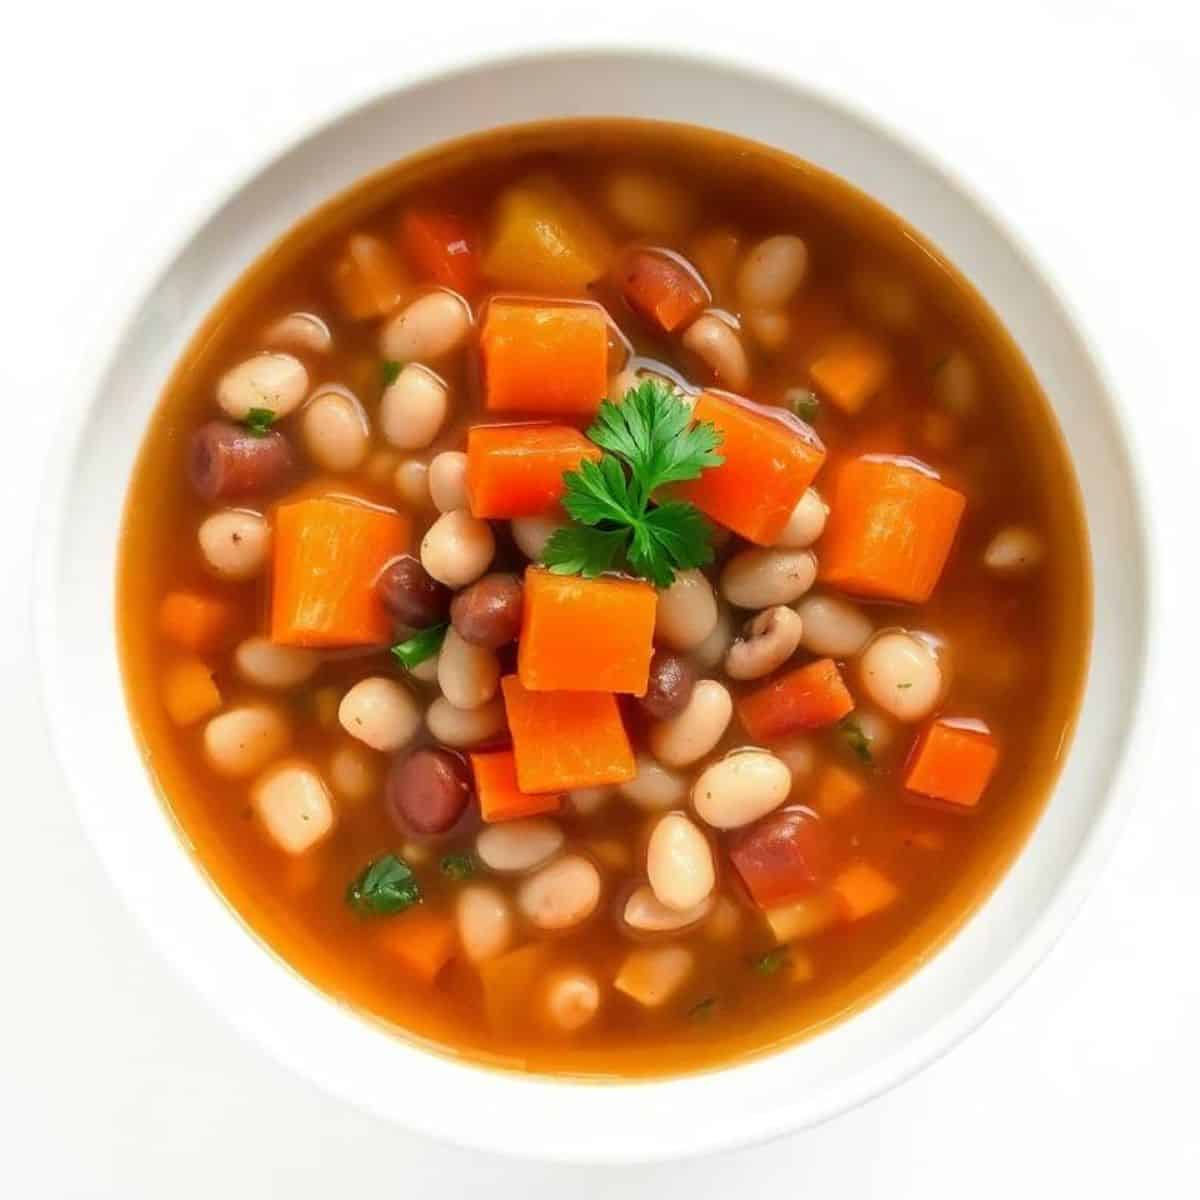
The soup I make more than any other during the cold months — the one that costs almost nothing to produce, fills the kitchen with the most comforting aroma of slow-simmered vegetables and herbs, and feeds a hungry family from a single pot with almost no hands-on effort — is a deeply satisfying bowl of bean soup: mixed beans and diced vegetables simmered low and slow in a rich, herb-seasoned broth until the beans are perfectly tender, the broth is full-bodied and glossy, and the entire pot is more satisfying than it has any right to be given how simple the ingredients are. This is the soup I keep coming back to because it genuinely gets better every time I make it and better every day it sits in the refrigerator.
What makes bean soup genuinely great rather than ordinary is patience with the simmer — 45–60 minutes of low, gentle heat allows the beans to absorb the herbs and broth flavors completely, allows the vegetables to soften without losing their structure, and allows the starch that naturally leaches from the beans to thicken the broth into the silky, full-bodied liquid that makes a spoonful of bean soup so satisfying. Rushing a bean soup with high heat produces thin broth and beans that taste of canned liquid rather than of the herbs and aromatics they were simmered with. The slow simmer is the entire recipe.
This post covers the classic mixed bean soup in full detail, plus seven variations including a smoky sausage version, a loaded vegetable version, a spicy version, an Italian-style version, a Southwestern version, an Instant Pot version, and a creamy coconut curry version. Every version freezes perfectly and tastes better on day two. Find more soup inspiration in our ham and bean soup, our white bean and rosemary soup, and our Tuscan white bean soup.
Let's make the most comforting pot of bean soup your kitchen has ever produced!
WHY YOU WILL LOVE THIS RECIPE
- One of the Most Budget-Friendly Dinners Available: Canned beans, canned tomatoes, broth, and a handful of vegetables and dried herbs — these are the ingredients that make bean soup, and they are among the least expensive food items available in any supermarket. A pot of bean soup that feeds six adults costs a fraction of any other comparable dinner option, which makes it the recipe I reach for at the end of the month when the grocery budget needs to stretch, and the recipe I make in double batches when I am cooking for a crowd without a generous entertaining budget. The low cost does not translate to low satisfaction — this is genuinely one of the most filling and satisfying soups I make.
- Genuinely Better the Next Day — the Ultimate Meal Prep Soup: Bean soup is one of the rare dishes that is objectively, measurably better after a night in the refrigerator than it is on the day it is made. The overnight rest allows the beans to fully absorb the herb-and-broth flavors, allows the starch from the beans to further thicken the liquid into a more substantial broth, and allows every individual ingredient to meld into a unified, complex flavor that fresh-made soup cannot achieve. I always make bean soup the day before I plan to serve it specifically because I know the day-two version will be significantly better than the day-one version.
- Naturally Gluten-Free, Dairy-Free, and Easily Vegan: Bean soup as written is naturally gluten-free (no flour, no pasta, no grains) and naturally dairy-free. Using vegetable broth instead of chicken broth makes it fully vegan and plant-based without any further modification. This makes it one of the most genuinely inclusive dinner options available — it can be served to almost any guest regardless of their dietary restrictions, allergies, or lifestyle choices without requiring a separate preparation. I serve this at gatherings specifically because I can guarantee that every person at the table can eat it without concern.
- Freezer-Friendly — Cook Once, Eat for Months: Bean soup freezes perfectly — cool completely, portion into individual or family-sized freezer containers, and freeze for up to 3 months. The beans hold their texture well through freezing and thawing, and the broth defrosts smoothly without any quality loss. I regularly make a triple batch specifically for the freezer — having containers of homemade bean soup in the freezer means a complete, nutritious, homemade dinner is always 10 minutes of reheating away, regardless of how busy the week has been. See our best freezer meals for more make-ahead inspiration.
- Completely Customizable to Whatever Is in Your Pantry: Bean soup is one of the most forgiving and adaptable recipes in existence — it accepts virtually any combination of beans (navy, pinto, black, kidney, cannellini, chickpeas, or a mix), any combination of vegetables (carrots, celery, potatoes, zucchini, spinach, kale, green beans), and any combination of herbs and spices (thyme, rosemary, oregano, cumin, smoked paprika, bay leaves). The framework is the same regardless of what goes in it, and the result is consistently satisfying. I have never made this soup with exactly the same combination of ingredients twice and it has never once been disappointing.
- Blending a Portion Creates Instant Creaminess Without Any Dairy: One of my favorite techniques for bean soup is removing approximately 1–2 cups of the cooked soup, blending it completely smooth with an immersion blender or in a standard blender, and stirring it back into the pot. The blended beans instantly thicken the broth to a silky, creamy consistency that feels rich and luxurious without any cream, butter, or dairy whatsoever. This technique produces the most satisfying texture and the most visually appealing bowl of bean soup and it costs nothing — just 2 minutes of blending and stirring transforms the broth from thin to velvety.
- One Pot, Minimal Cleanup, Maximum Satisfaction: Every component of this soup — the sautéed aromatics, the broth, the beans, the tomatoes, the greens — all comes together in a single pot. There are no separate preparation vessels beyond a cutting board and a knife, no multi-step cooking processes requiring different equipment, and no complex timing to manage. The soup essentially cooks itself after the first 10 minutes of active preparation, leaving you free to do anything else while it simmers. For weeknights when time and energy are limited, one-pot bean soup is the answer that consistently delivers. See our healthy one-pot dinner recipes for more one-pot ideas.
INGREDIENTS
- 2 tablespoons olive oil
- 1 medium onion, chopped
- 3 cloves garlic, minced
- 2 carrots, sliced
- 2 celery stalks, chopped
- 1 can (14.5 oz) diced tomatoes
- 1 teaspoon dried thyme
- 1 teaspoon dried oregano
- ½ teaspoon smoked paprika
- Salt and black pepper, to taste
- 6 cups vegetable or chicken broth
- 2 cans (15 oz each) mixed beans, drained and rinsed
- 1 bay leaf
- 2 cups chopped spinach or kale (optional)
- Juice of ½ lemon (optional, for brightness at the end)
- Fresh parsley, chopped (for garnish)
DIRECTIONS
- Step No.1: Sauté the aromatics
Heat the olive oil in a large, heavy-bottomed pot or Dutch oven over medium heat until it shimmers. Add the chopped onion, sliced carrots, and chopped celery and cook, stirring occasionally, for 5–7 minutes until the vegetables have softened and the onion is translucent and just beginning to develop a light golden color at the edges. Add the minced garlic and cook for 1 minute more, stirring continuously — garlic burns quickly and burnt garlic will make the entire pot of soup bitter. The aromatic base is the foundation of the soup's flavor; taking the full 7 minutes to properly soften and develop the vegetables produces a noticeably richer broth than a rushed 3-minute sauté.
- Step No.2: Season the base
Add the dried thyme, dried oregano, smoked paprika, a generous pinch of salt, and several grinds of black pepper directly to the softened vegetables. Stir continuously for 30–60 seconds, "toasting" the dried herbs and spices in the oil and vegetable residue at the bottom of the pot — this brief toasting step releases the essential oils in the dried herbs and amplifies their flavor dramatically compared to adding them directly to liquid. The bottom of the pot should smell intensely fragrant and herby at the end of this step.
- Step No.3: Add the broth, beans, and tomatoes
Pour in the broth, drained and rinsed beans, diced tomatoes (with their juice), and the bay leaf. Stir well to combine everything, scraping up any herb bits or browned vegetable residue stuck to the bottom of the pot — those browned bits are concentrated flavor and dissolving them into the broth is important. Bring the mixture to a full boil over medium-high heat, then immediately reduce the heat to low.
- Step No.4: Simmer low and slow
With the heat on low, cover the pot partially (leave a small gap for steam to escape) and simmer for 45–60 minutes, stirring occasionally. The partial cover allows some liquid to evaporate and the broth to concentrate slightly in flavor and body; a fully covered pot keeps too much liquid in and produces a thin, watery broth. During the simmer, the beans will begin to release their starch into the liquid, gradually thickening it — by 45 minutes the broth should be noticeably richer and fuller-bodied than when it started. For a creamier texture, use the back of a wooden spoon or a potato masher to gently crush approximately ¼ of the beans against the side of the pot during the final 10 minutes of simmering — this releases more starch and produces a thick, creamy consistency without blending.
- Step No.5: Finish and serve
Remove and discard the bay leaf. If using spinach or kale, stir it into the hot soup now — the residual heat will wilt spinach in 1–2 minutes; kale needs 4–5 minutes over low heat. Add the lemon juice if using — a small amount of acid added at the very end of cooking brightens every other flavor in the pot and makes the soup taste fresher and more vibrant than it does without it. Taste and adjust the salt and pepper one final time — soup often needs a final salt adjustment at the end of cooking as the flavors have concentrated during the simmer. Ladle into warm bowls and garnish generously with freshly chopped parsley. Serve with crusty bread alongside for dipping.
TIPS FOR SUCCESS
- Use a Mix of Bean Varieties for the Best Flavor and Texture: A single type of bean produces a one-dimensional soup — a mix of two or three varieties produces a more interesting textural range and more complex flavor. Kidney beans are meaty and substantial; cannellini beans are creamy and mild; black beans are earthy and slightly firm; chickpeas add nutty depth. A combination of kidney and cannellini is my personal favorite — the two beans have complementary textures and flavors that produce a balanced, interesting soup. Any combination works; variety is the key.
- Always Rinse Canned Beans Thoroughly: The liquid that canned beans are packed in is starchy and slightly metallic in flavor and will muddy the broth if poured directly into the soup. Drain and rinse the beans under cold running water for 30–60 seconds until the water runs clear — this removes the packing liquid, reduces the sodium content significantly, and ensures the bean flavor is clean and the broth is clear rather than cloudy. This 60-second step makes a meaningful difference in the quality of the finished soup.
- Season in Layers — Not All at Once at the End: The most common bean soup mistake is under-seasoning throughout and then trying to correct it all at the very end with a large addition of salt. Seasoning in layers — a pinch with the aromatics, another adjustment after adding the broth, and a final tasting adjustment at the end — produces a soup where the seasoning is integrated throughout every element rather than sitting on the surface. Each layer of seasoning should be slightly less than enough — the flavors concentrate during the long simmer, and a correctly seasoned soup at 15 minutes often becomes perfectly seasoned by 45 minutes without any additional salt.
- Add Acid at the Very End: Lemon juice, vinegar, or any acidic ingredient should be added at the very end of cooking — just before serving. Acid added early in the cooking process can toughen the bean skins and prevent them from softening properly; acid added at the end brightens every flavor in the bowl without interfering with the cooking process. Even ½ teaspoon of apple cider vinegar or a small squeeze of lemon juice at the end transforms a flat, one-dimensional bean soup into something that tastes vivid and complex.
- Use Homemade or Low-Sodium Broth: The broth is the backbone of bean soup — it provides the liquid in which everything else cooks and the base flavor that everything else builds on. High-sodium store-bought broth can make the finished soup unpleasantly salty, particularly after the 45–60 minutes of simmering that concentrates the flavors. Low-sodium broth or homemade broth gives you complete control over the salt level and produces a cleaner, more balanced finished soup. If using regular sodium broth, be especially conservative with added salt throughout and taste carefully before any final seasoning adjustment.
VARIATIONS
- Smoky Sausage Bean Soup: Add 8 oz of sliced smoked sausage or kielbasa to the pot along with the aromatics, browning the slices in the olive oil for 2–3 minutes before adding the vegetables. The rendered fat from the sausage flavors the entire soup base and the sliced sausage provides pockets of smoky, meaty richness throughout every bowl. This is the most hearty, most satisfying version of bean soup and the one I make when I need a soup that serves as a genuinely complete and filling dinner. See our sausage tortellini soup for another hearty sausage soup idea.
- Loaded Vegetable Bean Soup: Add 1 cup of diced potato, 1 cup of chopped green beans, and 2 cups of chopped kale or spinach to the soup along with the beans. The potato adds body and starchiness that thickens the broth naturally; the green beans add a fresh, slightly vegetal note; and the greens add nutrition and color that makes every bowl visually vibrant. This is the version I make when I want the soup to function as a complete nutritionally rounded meal without requiring any accompaniments. See our vegetarian dinner recipes for more plant-forward ideas.
- Spicy Bean Soup: Add ½ teaspoon of cayenne pepper and 1 diced jalapeño (seeds included for maximum heat) to the aromatics, and increase the smoked paprika to 1 teaspoon. The heat from the cayenne and jalapeño builds slowly through the simmer and produces a soup that is genuinely warming in the most satisfying cold-weather way — the kind of spice that heats you from the inside out without being overwhelming. Finish with a dash of hot sauce before serving for an extra kick. Find more spicy inspiration in our spicy red lentil curry.
- Italian-Style Bean Soup: Use cannellini beans exclusively, replace the smoked paprika with Italian seasoning, add a Parmesan rind to the pot during simmering (remove before serving), and finish with a drizzle of good extra-virgin olive oil and freshly grated Parmesan over each bowl. The Parmesan rind is one of the most underused ingredients in Italian cooking — it dissolves slowly during simmering and infuses the broth with deep, nutty, umami-rich cheese flavor that transforms the soup entirely. This is the most elegant version of bean soup and the one I serve to guests. See our Tuscan white bean soup for a similar direction.
- Southwestern Bean Soup: Use black beans and pinto beans, replace the thyme and oregano with 1 teaspoon each of cumin and chili powder, add 1 cup of frozen or fresh corn along with the beans, and garnish each bowl with diced avocado, fresh cilantro, and a squeeze of lime. This is a genuinely vibrant, colorful, and deeply flavorful variation that feels completely different from the classic version while using the identical one-pot technique. See our street corn chicken chili for a similar flavor profile in a different format.
- Instant Pot Bean Soup: Use the sauté function to cook the aromatics and toast the spices exactly as directed. Add the broth, beans, tomatoes, and bay leaf. Seal and cook on High Pressure for 15 minutes, then allow a natural pressure release for 10 minutes before manually releasing any remaining pressure. The total active cooking time is dramatically reduced while the flavor is virtually identical to the stovetop version — the pressure cooking actually does an excellent job of infusing the beans with the herb and broth flavors in a fraction of the time. See our healthy Instant Pot recipes for more pressure cooker ideas.
- Creamy Coconut Curry Bean Soup: Replace the smoked paprika and thyme with 1 tablespoon of curry powder and ½ teaspoon of turmeric. Replace 2 cups of the broth with 1 can (13.5 oz) of full-fat coconut milk, stirring it in during the final 15 minutes of simmering. The coconut milk produces a beautifully creamy, tropical broth that carries the curry spices in the most satisfying way. This is the most exotic and most unexpected version of bean soup and consistently the one that generates the most enthusiastic requests for the recipe. See our creamy coconut sauce recipe for more coconut inspiration.
SERVING AND STORAGE
Serving
Serve bean soup hot, ladled into warm bowls and garnished with freshly chopped parsley, a drizzle of good olive oil, and an extra crack of black pepper. Pair with our garlic bread rolls, our cheesy bread, or crusty sourdough for dipping — bread and bean soup is one of the most satisfying complete meal combinations in all of comfort food cooking. For a more substantial meal, serve alongside a simple green salad dressed with our lemon vinaigrette.
Storage
Store cooled bean soup in airtight containers in the refrigerator for up to 4 days — the flavor improves significantly over the first 24 hours and the soup is at its absolute best on day two. Reheat gently on the stovetop over medium-low heat, adding a small splash of broth or water if the soup has thickened too much during refrigeration. For freezer storage, cool completely and portion into freezer-safe containers for up to 3 months. Thaw overnight in the refrigerator and reheat as above. The soup may need a slightly larger splash of liquid added when reheating from frozen as the beans continue to absorb liquid during freezer storage.
FAQ
Yes — dried beans produce an even better-tasting soup than canned beans since you control the cooking liquid and they absorb the broth flavors more deeply during the long simmer. Soak dried beans overnight in cold water (8–12 hours), drain and rinse, then add to the soup raw along with the broth and simmer for 60–90 minutes until completely tender. The exact cooking time varies by bean variety — smaller beans like navy or black beans cook in 60 minutes; larger beans like kidney or cannellini may need 90 minutes or slightly longer. Check for tenderness before finishing the soup.
Yes — bean soup as written in this recipe is fully vegan when made with vegetable broth. All other ingredients (beans, tomatoes, vegetables, olive oil, herbs) are plant-based. The chicken broth option makes it not vegan but simply substituting vegetable broth keeps it completely plant-based without any other modification. The finished vegan version is genuinely as flavorful and as satisfying as the chicken broth version — vegetable broth with properly developed aromatics produces an excellent soup base.
Yes — sauté the aromatics (onion, carrot, celery, garlic) in a skillet first to develop their flavor, then transfer to the slow cooker. Add all remaining ingredients, stir, and cook on Low for 6–7 hours or on High for 3–4 hours. The slow cooker version develops excellent flavor and requires virtually no attention after the initial sauté step. The beans will be fully tender and the broth richly flavored after the full cooking time. Stir in the spinach or kale during the final 30 minutes of cooking on Low.
A mix of kidney beans, cannellini beans, and black beans provides the most interesting variety of texture and flavor. Kidney beans are substantial and meaty; cannellini are creamy and mild; black beans are earthy and firm. Chickpeas (garbanzo beans) add a nutty dimension and hold their shape well through the long simmer. Navy beans and pinto beans are also excellent choices. The most important thing is using fully cooked beans (whether canned or pre-cooked dried) — undercooked beans will never soften properly in the acidic tomato broth.
Remove 1–2 cups of the cooked soup, blend it completely smooth using an immersion blender or standard blender, and stir the blended portion back into the pot. The blended beans instantly thicken and enrich the broth to a silky, creamy consistency without any cream, butter, or dairy. Alternatively, use the back of a wooden spoon or a potato masher to crush approximately ¼ of the beans directly in the pot — this releases starch and produces a thicker, creamier broth while maintaining some texture. Both techniques are equally effective and produce genuinely excellent results.
Bean soup is the recipe that proves great food does not require expensive ingredients or complicated technique — a few pantry staples, a heavy pot, low heat, and patience produce one of the most genuinely satisfying bowls of comfort food available at any price point. Make it the day before, refrigerate overnight, and serve it tomorrow — you will immediately understand why this is the soup I come back to more than any other.
Try the smoky sausage version for the heartiest dinner, the Italian style for your most elegant bowl, and the coconut curry version when you want something completely unexpected and utterly spectacular. Pair with our ham and bean soup, our Tuscan white bean soup, our garlic bread rolls, and our fall soup recipes for the complete cozy dinner spread. 🫘🥣✨
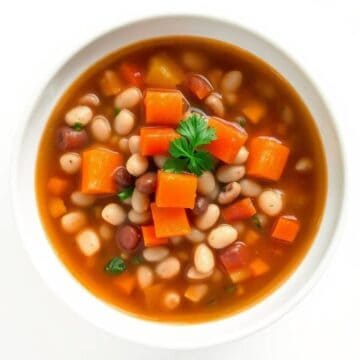
BEAN SOUP
Ingredients
- 2 tablespoons olive oil
- 1 onion chopped
- 3 cloves garlic minced
- 2 carrots sliced
- 2 celery stalks chopped
- 1 15 oz can diced tomatoes
- 1 teaspoon dried thyme
- 1 teaspoon dried oregano
- ½ teaspoon smoked paprika optional
- 6 cups vegetable or chicken broth
- 2 15 oz cans mixed beans (or any combination), drained and rinsed
- Salt and pepper to taste
- 2 cups chopped spinach or kale optional
- Juice of ½ lemon optional, for brightness
Instructions
Sauté Vegetables:
- Heat olive oil in a large pot over medium heat. Add onion, garlic, carrots, and celery. Cook for 5–7 minutes until softened.
Add Seasonings & Broth:
- Stir in tomatoes, thyme, oregano, paprika, and broth. Bring to a boil.
Add Beans & Simmer:
- Add the beans, reduce heat, and simmer uncovered for 45–60 minutes, until vegetables are tender and flavours are developed.
Finish Soup:
- Stir in spinach or kale (if using) and cook for 5 more minutes. Add lemon juice and season with salt and pepper to taste.
Serve:
- Ladle into bowls and serve warm with crusty bread.
Notes
- Make Ahead: Flavours improve the next day—great for meal prep.
- Variations: Add diced potatoes, ham, or pasta for a heartier soup.
- Serving Suggestions: Serve with cornbread, crackers, or salad.
- Allergy-Friendly: Naturally gluten-free and dairy-free.





Comments
No Comments