
I've made a lot of peanut butter desserts in my time — cookies, bars, no-bake bites — but this cake is the one that made my kids go completely quiet at the table. That kind of quiet. The focused, eyes-down, fork-moving quiet. I knew right then I'd be making it again.
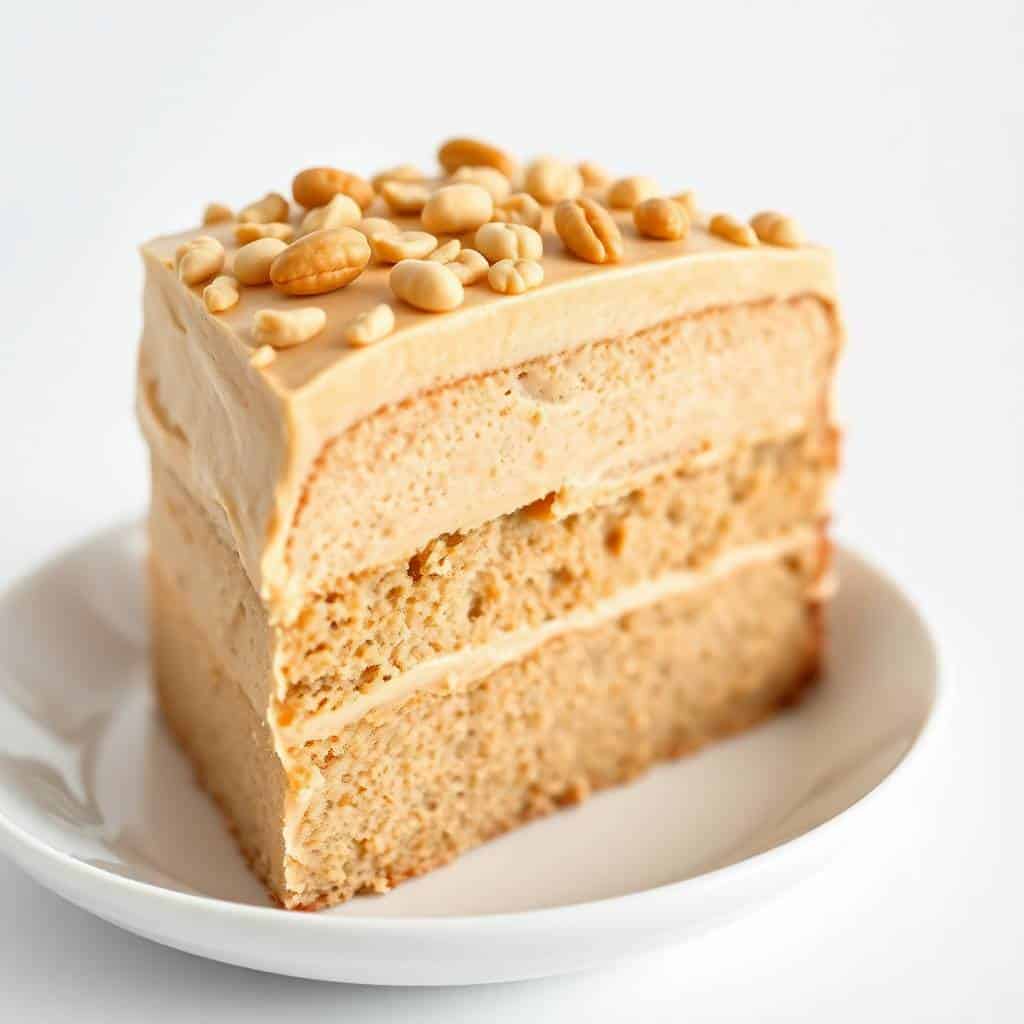
What I love about this cake is that the peanut butter isn't an afterthought — it's in both the cake and the frosting, so every single bite has that deep, nutty richness. The crumb is soft and a little dense in the best way, and the frosting is thick and spreadable without being grainy or too sweet. I use regular creamy peanut butter from the grocery store (Jif or Skippy, whatever's on sale at Walmart), not the natural drippy kind — more on that in the tips.
I made this for Zainab's birthday last year instead of ordering a cake and honestly it was one of the better decisions I've made. She wanted something with peanut butter, I wanted something I could actually make without stress, and this hit both. My husband, who usually isn't big on American-style desserts, had two slices. That told me everything. If you like caramel and nuts in your bakes, my Caramel Pecan Upside-Down Cake with Cinnamon is another one worth trying — but this peanut butter cake has become the birthday request in our house.
One thing to set expectations: this is a two-layer round cake, so you will need two 9-inch cake pans. Make sure your butter and eggs are fully at room temperature before you start — I rushed this once and the batter looked slightly curdled. It baked fine, but I don't want that mild panic for you. Give yourself about an hour and a half from start to finish, including cooling time. Don't try to frost it warm. I've been there.
Why You'll Love This Recipe
- Peanut butter in every layer: The cake batter itself has a full cup of peanut butter in it, and then you pile on a frosting that's also peanut butter-forward. It's not subtle, and that's exactly the point. If you're someone who scrapes peanut butter straight from the jar, this cake was made for you. There's no moment where the peanut butter flavor fades out — it follows you through every bite.
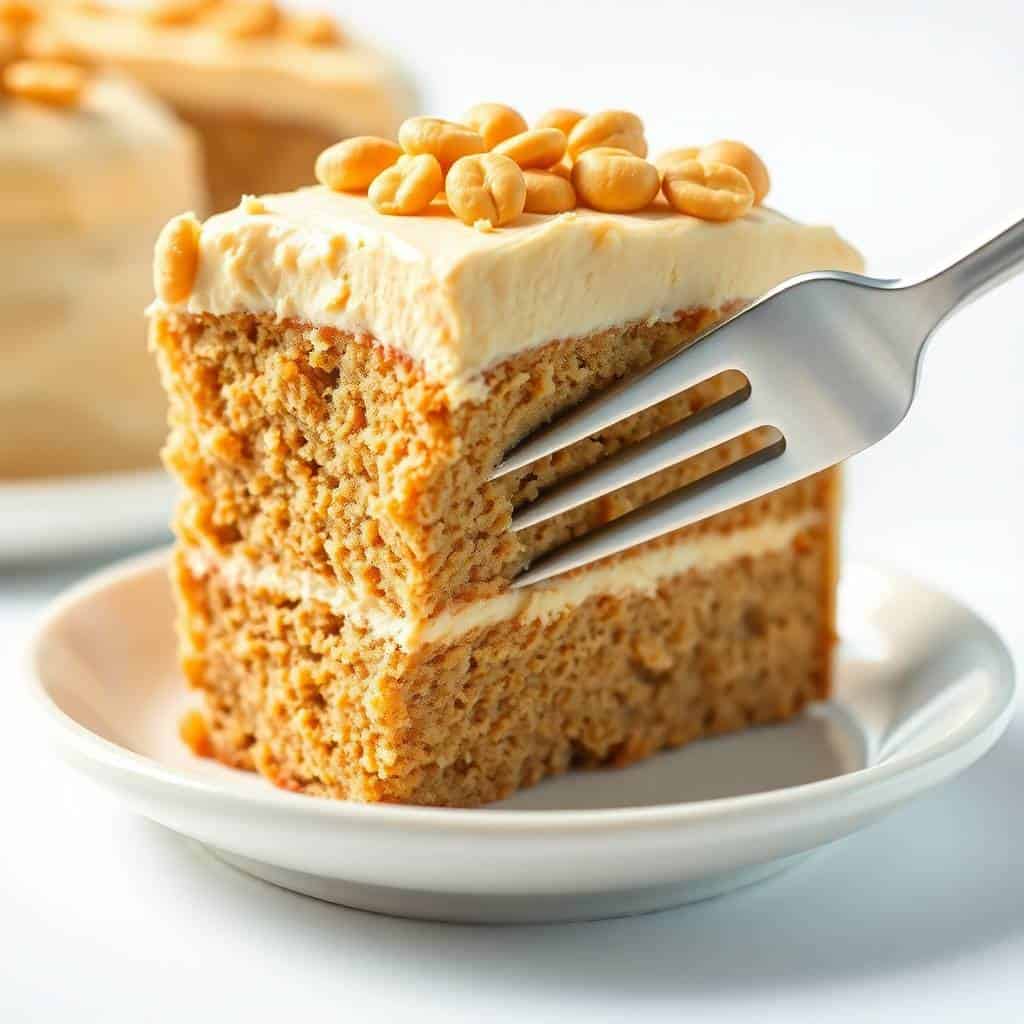
- Soft, tender crumb without fuss: The buttermilk in the batter makes a real difference here — the cake stays moist for days, which is something I genuinely appreciate because I'm not always serving this on day one. I've had slices straight from the fridge on day three and they were still soft. No dry edges, no crumbling when you cut it.
- A frosting that actually holds its shape: I've made cream cheese frostings that slide off in summer and buttercreams that are too stiff to spread smoothly. This peanut butter frosting sits right in the middle — thick enough to pile on without drooping, soft enough to swipe across easily. I add the heavy cream one tablespoon at a time until it's exactly the consistency I want, which takes maybe 30 extra seconds.
- No stand mixer required: I don't own a stand mixer. I use a hand mixer I bought years ago for about $20, and it handles this batter completely fine. If you don't even have a hand mixer, a wooden spoon and some elbow grease will work for the cake batter — the frosting is a bit harder to get fluffy by hand, but doable if you're patient.
- Keeps well and can be made ahead: I often bake the layers the night before and frost the next morning. The unfrosted cakes can sit wrapped at room temperature overnight, which takes one stressful step out of the day-of. Once frosted, the cake holds well in the fridge for up to five days — though in my house it's never lasted that long.
Ingredients
- For the Cake:
- 2 cups all-purpose flour
- 1 ½ teaspoons baking powder
- ½ teaspoon baking soda
- ¼ teaspoon salt
- 1 cup creamy peanut butter (Jif or Skippy — not natural/drippy)
- 1 cup unsalted butter, softened to room temperature
- 1 ½ cups granulated sugar
- 3 large eggs, room temperature
- 1 teaspoon vanilla extract
- 1 cup buttermilk (room temperature — see tip below if you don't have it)
- For the Frosting:
- 1 cup creamy peanut butter
- ½ cup unsalted butter, softened
- 3 cups powdered sugar
- 2–3 tablespoons heavy cream or milk (added gradually)
- 1 teaspoon vanilla extract
Directions
- Preheat and prep your pans: Set your oven to 350°F (175°C). Grease two 9-inch round cake pans and dust lightly with flour, tapping out any excess. I also cut a round of parchment for the bottom of each pan — makes getting the layers out so much easier.
- Whisk your dry ingredients: In a medium bowl, whisk together the flour, baking powder, baking soda, and salt. Set it aside. This only takes a minute but it makes sure the leaveners are evenly distributed before you mix everything together.
- Cream the butter, peanut butter, and sugar: In a large bowl, beat the softened butter and peanut butter together on medium speed until smooth and combined — about 2 minutes. Add the sugar and keep beating until the mixture is a bit lighter in color and noticeably fluffy, another 2–3 minutes. Don't rush this step; it's what gives the cake its lift.
- Add eggs and vanilla: Add the eggs one at a time, beating well after each one. Then mix in the vanilla. The batter should look smooth and cohesive at this point — if it looks slightly curdled, your eggs might have been too cold, but it'll come together once you add the flour.
- Alternate dry ingredients and buttermilk: Add the flour mixture in three additions, alternating with the buttermilk (start and end with flour). Mix on low speed and stop as soon as everything is combined. Overmixing is the main thing that makes a cake tough, so once you don't see flour streaks, stop.
- Bake: Divide the batter evenly between your two prepared pans and smooth the tops. Bake for 30–35 minutes, until a toothpick inserted in the center comes out clean. My oven runs a little hot so I start checking at 28 minutes. Let the cakes cool in the pans for 10 minutes, then turn out onto a wire rack to cool completely.
- Make the frosting: Beat the peanut butter and butter together until smooth. Add the powdered sugar gradually, mixing on low at first so it doesn't puff everywhere. Add vanilla, then the cream one tablespoon at a time until the frosting is thick but spreadable. Beat on medium-high for about a minute to get it fluffy.
- Assemble: Place one cooled cake layer on your serving plate. Spread a generous layer of frosting on top. Add the second layer, then frost the top and sides. I use an offset spatula, but a butter knife works fine if that's what you have.
Tips for Success
- Don't use natural peanut butter: I know it seems like the healthier or more "real" choice, but the oil separation in natural peanut butter can make the cake greasy and the frosting grainy. I tried it once thinking it would be fine and the frosting broke — it looked oily and separated no matter how much I beat it. Stick with a stabilized creamy peanut butter like Jif or Skippy for consistent results.
- Room temperature everything: Cold butter won't cream properly, cold eggs can cause the batter to curdle slightly, and cold buttermilk can make the batter seize. I pull everything out of the fridge about 45 minutes before I start baking. If I forget (and I do forget), I microwave the butter in 5-second bursts and set the eggs in a bowl of warm water for 10 minutes.
- No buttermilk? Make your own: Measure 1 cup of regular whole milk, take out 1 tablespoon, and replace it with 1 tablespoon of white vinegar or lemon juice. Stir and let it sit for 5 minutes — it'll curdle slightly and that's exactly what you want. Works perfectly in this recipe, and I've used this trick more times than I can count.
- Cool the cake fully before frosting — no shortcuts: I know it's tempting. The cake smells incredible and you just want to get to the part where it looks finished. But frosting a warm cake means the butter in the frosting melts, it slides off the sides, and you end up with a sad puddle instead of a nice layer. Let it cool on a rack for at least an hour. If you're impatient, stick the layers in the fridge for 20 minutes once they're at room temperature.
- If the frosting feels too soft, refrigerate it briefly: Sometimes in a warm kitchen the frosting can get a bit loose. Just pop the bowl in the fridge for 10–15 minutes, then beat it again for 30 seconds. It'll firm right back up. Alternatively, if it feels too stiff to spread, add another tablespoon of cream and mix it in.
Variations
- Chocolate peanut butter swirl: Before baking, melt about ¼ cup of chocolate chips and drop spoonfuls onto the top of the batter in each pan. Drag a toothpick through it in a figure-eight motion to get a marbled effect. The chocolate and peanut butter bake into each other and it looks genuinely impressive for basically no extra effort. My Chocolate Chip Peanut Butter Cups use a similar flavor combo if you're in that mood.
- Add chopped roasted peanuts: Fold ½ cup of roughly chopped salted roasted peanuts into the batter right before you pour it into the pans. The little bits of crunch throughout the soft cake are really good. You can also press them into the frosting on the outside — press a small handful around the sides of the assembled cake while the frosting is still soft.
- Peanut butter and jelly layer: This one is for the kids. Spread a thin layer of strawberry or grape jam on the bottom cake layer before you add the frosting layer between the two cakes. It adds a little fruit sweetness that cuts through the richness perfectly. Zainab thinks this version is the best one — she's not wrong.
- Salted caramel drizzle: After frosting the assembled cake, drizzle store-bought salted caramel sauce over the top and let it run down the sides a bit. The salt in the caramel plays off the peanut butter in a really satisfying way — it makes the whole thing taste more complex than it actually is. Trader Joe's has a good jarred salted caramel if you're near one.
- Peanut butter banana: Mash one very ripe banana and fold it into the cake batter along with the wet ingredients. It adds a subtle sweetness and keeps the cake even more moist. The banana flavor is background — you mostly taste peanut butter — but it rounds out the richness nicely. This is a good version to make when you've got bananas sitting on the counter that are past their prime.
Serving and Storage
Serving
I serve this at room temperature — the frosting is creamier and the crumb is softer that way. If it's been in the fridge, let it sit out for 20–30 minutes before cutting. A cold glass of milk is the classic pairing, and I won't argue with that. For something more indulgent, a small scoop of vanilla ice cream on the side works really well — the cold ice cream against the room-temperature cake is a good combination. If you want to do a proper dessert spread, this cake alongside something like my Best Flourless Chocolate Cake covers both the peanut butter crowd and the chocolate purists.
Storage
Once frosted, cover the cake with a cake dome or press plastic wrap gently against the cut surfaces to prevent drying. It keeps at room temperature for up to 2 days. In the fridge, it'll stay good for up to 5 days — just bring it to room temperature before serving. If you want to freeze it, wrap the unfrosted cake layers individually in plastic wrap and then in foil, and freeze for up to 2 months. Thaw overnight in the fridge, bring to room temperature, then frost as usual. The frosting itself can also be made ahead and refrigerated for up to 3 days — just re-beat it with a splash of cream to loosen before spreading.
Frequently Asked Questions
Can I use natural peanut butter in this recipe?
I'd really recommend sticking with a stabilized creamy peanut butter like Jif or Skippy. Natural peanut butter has oil separation that can make the cake greasy and cause the frosting to break — I tested it and the frosting looked curdled and oily no matter how long I beat it. If you only have natural peanut butter, stir it very thoroughly first and make sure it's at room temperature, but just know the texture might not be as reliable.
Can I make this cake a day ahead?
Yes, and honestly I prefer it that way. Bake the layers the day before, wrap them in plastic wrap once fully cooled, and leave them at room temperature overnight. Make the frosting fresh the next day and assemble then — the layers will be easy to handle and the whole process feels less rushed. You can also freeze the baked, unfrosted layers for up to 2 months if you're planning even further ahead.
I don't have buttermilk — what can I use instead?
The easiest swap is to measure 1 cup of whole milk, remove 1 tablespoon, and stir in 1 tablespoon of white vinegar or lemon juice. Let it sit for about 5 minutes until it looks slightly curdled — that's your DIY buttermilk. It works just as well in this cake as the real thing. I've done this probably a dozen times and haven't noticed any difference in the final result.
Can I freeze the frosted cake?
You can freeze individual slices — place them on a sheet pan uncovered for about an hour to firm up the frosting, then wrap each slice in plastic wrap and store in a zip-lock bag for up to 6 weeks. Thaw in the fridge overnight and bring to room temperature before eating. Freezing the whole assembled cake works too, though the frosting surface can get a little uneven after thawing. I usually just freeze the unfrosted layers separately to avoid that.
My frosting turned out too stiff — how do I fix it?
Add one tablespoon of heavy cream or milk at a time and beat on medium speed until it loosens to the consistency you want. It doesn't take much — usually one or two tablespoons does it. If the frosting is too soft and won't hold its shape, refrigerate it for 10–15 minutes and then beat it again briefly before spreading. Temperature makes a big difference with peanut butter frosting.
Final Thoughts
This is the kind of cake I go back to because I know exactly what I'm going to get: a soft, nutty, properly rich cake with a frosting that tastes like the filling of a peanut butter cup. It's not trying to be anything other than what it is, and I appreciate that. I've made it for birthdays, I've made it on random Sundays when I wanted something to bake, and I've made half a batch just to have cake in the house for the week.
If you're the kind of baker who likes projects, the chocolate swirl variation or the salted caramel drizzle version are worth trying — but honestly the base recipe is good enough to stand completely on its own. I've served this to guests who don't even particularly love peanut butter and they still had seconds. That's a good sign. And if you're in a baking streak and want something with a different texture and flavor profile, my Cinnamon Roll Monkey Bread is another crowd favorite around here.
Make it once and you'll understand why it keeps coming up in rotation. It's reliable in the best way — nothing fancy, nothing complicated, just a really good peanut butter cake. 🥜🎂
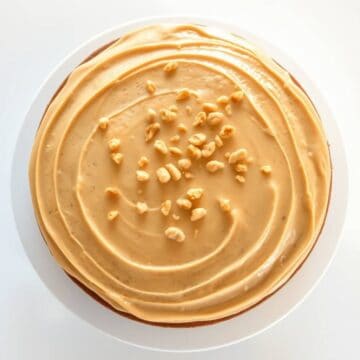
PEANUT BUTTER CAKE WITH PEANUT BUTTER FROSTING
Ingredients
For the Cake:
- 2 cups all-purpose flour
- 1 ½ teaspoons baking powder
- ½ teaspoon baking soda
- ¼ teaspoon salt
- 1 cup creamy peanut butter
- 1 cup unsalted butter softened
- 1 ½ cups granulated sugar
- 3 large eggs
- 1 teaspoon vanilla extract
- 1 cup buttermilk
For the Frosting:
- 1 cup creamy peanut butter
- ½ cup unsalted butter softened
- 3 cups powdered sugar
- 2 –3 tablespoons heavy cream or milk
- 1 teaspoon vanilla extract
Instructions
Preheat Oven:
- Preheat oven to 350°F (175°C). Grease and flour two 9-inch round cake pans.
Prepare Cake Batter:
- In a bowl, whisk together flour, baking powder, baking soda, and salt. In a separate large bowl, beat peanut butter, butter, and sugar until creamy. Add eggs one at a time, beating well. Mix in vanilla. Alternately add dry ingredients and buttermilk, beginning and ending with dry ingredients. Mix until smooth.
Bake:
- Divide batter evenly between prepared pans. Bake 30–35 minutes or until a toothpick inserted in the center comes out clean. Cool completely before frosting.
Make Frosting:
- Beat peanut butter and butter until smooth. Gradually add powdered sugar, then vanilla and enough cream to reach spreading consistency.
Assemble:
- Frost the cooled cakes with peanut butter frosting. Layer and cover the sides.
Notes
- Make Ahead: Cake and frosting can be made a day ahead and refrigerated.
- Variations: Add chopped peanuts or chocolate chips for texture.
- Serving Suggestions: Serve with a glass of milk or coffee.
- Allergy-Friendly: Contains peanuts, dairy, and gluten.





Comments
No Comments