
I'll be honest with you — macarons scared me for years. I'd see them in bakery windows and think, that's not something I can make at home. Then one December I decided to try, and my first batch came out flat, cracked, and stuck to the parchment. I threw the whole tray in the bin and didn't try again for three weeks. But I did try again, and now these peppermint macarons are something I make every holiday season without much stress.
What makes these work is slowing down through two specific steps: sifting the almond flour properly and not rushing the resting time before baking. The first time I skipped the rest because I was impatient, and my shells had zero feet — just sad little blobs. Thirty to forty-five minutes of resting feels like a lot, but it's what gives you that classic macaron look with the little ruffled edge at the bottom. Once I learned to just leave them alone, everything clicked.
These show up at every holiday spread I put together now. I pack them into small boxes alongside my Christmas cookie bars and they always get comments. Zainab helps me with the piping — she's slow and inconsistent, which means some of our macarons come out slightly different sizes, but honestly they still taste exactly the same. We make a full batch and I double it around Christmas because one batch disappears before I can gift any of it.
This isn't a recipe you rush through. But it's also not as impossible as people make it sound. If you follow the steps carefully and resist the urge to open the oven early, you'll get shells with feet, a slight crunch on the outside, and a chewy interior that pairs beautifully with the peppermint buttercream. Plan to make them the day before you need them — chilling overnight is genuinely worth it.
Why You'll Love This Recipe
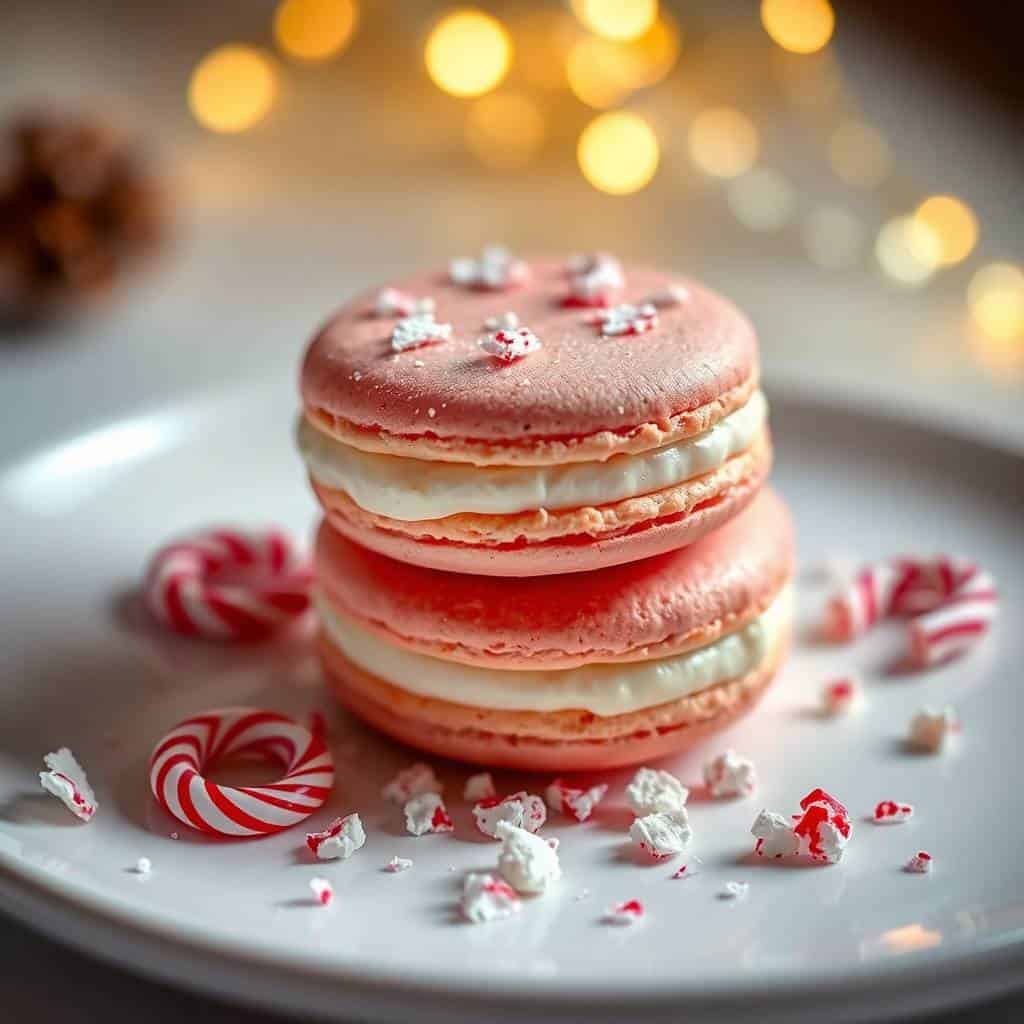
- They look incredibly impressive for the effort: I know that sounds backward, but once you get the technique down, these macarons look like they came from a proper patisserie. The red-swirled shells with the little feet and the pale pink peppermint filling make them the kind of thing people photograph before they eat. Nobody needs to know you made them in a regular home kitchen with a hand mixer and a piping bag from the dollar store.
- The peppermint flavour is actually balanced: I was worried these would taste like toothpaste, but 1 teaspoon of peppermint extract in the buttercream and half a teaspoon in the shells gives you that cool, clean mint flavour without it being overwhelming. It tastes festive, not medicinal. The sweetness of the almond shell and the richness of the butter balance it out really well.
- Naturally gluten-free: The shells are made entirely with almond flour and powdered sugar, so they're gluten-free without any substitutions needed. I don't follow a gluten-free diet myself, but this comes up every time I bring these to a gathering — someone always asks, and I'm glad to be able to say yes. Just make sure your powdered sugar and peppermint extract are certified GF if that matters to your guests.
- They're made for gifting: Their small size means you can pack 8–10 into a small box or tin and they look like a proper gift. I layer them between sheets of parchment in a cookie tin, and they hold up well for a couple of days at room temperature or longer in the fridge. During the holidays I make two double batches specifically for gifting.
- A genuine baking project that teaches you something: I don't say this about many recipes, but making macarons actually made me a better baker. You learn to read meringue consistency, you learn what "lava-like" batter actually looks like, you learn to trust the resting process. The first batch might not be perfect — mine definitely wasn't — but by the second or third time, you'll know exactly what to look for.
Ingredients
- For the Macaron Shells:
- 1 cup (100g) almond flour, blanched and finely ground
- 1¾ cups (200g) powdered sugar
- 3 large egg whites, room temperature
- ¼ cup (50g) granulated sugar
- ¼ teaspoon cream of tartar
- ½ teaspoon peppermint extract
- Red gel food colouring (optional — a tiny amount goes a long way)
- For the Peppermint Buttercream Filling:
- ½ cup (115g) unsalted butter, softened
- 1½ cups (180g) powdered sugar
- 1 teaspoon peppermint extract
- 1–2 tablespoons heavy cream or milk
- Pinch of salt
- Optional Toppings:
- Crushed peppermint candies or candy canes
- Red sanding sugar or edible glitter
Directions
- Prepare your baking sheets: Line two baking sheets with parchment paper or silicone mats. Fit a piping bag with a round tip (about ½ inch) and set it upright in a tall glass so it's ready to fill. Having everything set up before you start makes the whole process feel much calmer.
- Sift the dry ingredients: Sift the almond flour and powdered sugar together into a large bowl, and discard anything that doesn't pass through. This step feels tedious but it matters — any lumps in the almond flour will show up as bumps on your shells. I sift mine twice just to be safe.
- Whip the meringue: In a very clean, dry bowl, beat the egg whites with cream of tartar until foamy. Gradually add the granulated sugar while beating, and continue until you have stiff, glossy peaks. The bowl should be able to be turned upside down without the meringue moving. Add the peppermint extract and a small amount of red gel food colouring here if using, and fold gently just to incorporate.
- Fold in the dry ingredients (macaronage): Add the sifted almond flour mixture to the meringue all at once. Using a spatula, fold in a wide sweeping motion — scraping around the bowl and pressing down through the centre. You're looking for a batter that falls off the spatula in a thick, slow ribbon and settles back into the bowl within about 10 seconds. This is the step I got wrong the most. Underfolded batter gives you lumpy shells; overfolded batter gives you flat ones. Stop when it just flows like lava.
- Pipe and rest: Transfer the batter to your piping bag and pipe 1-inch rounds onto the prepared sheets, leaving space between each one. Hold the bag straight down and pull up quickly to avoid peaks. Tap the baking sheets firmly on the counter several times to release any air bubbles. Then — and this is critical — let them sit uncovered at room temperature for 30 to 60 minutes until the tops are completely dry to the touch and don't stick to your finger.
- Bake: Preheat your oven to 300°F (150°C). Bake one sheet at a time on the middle rack for 14 to 16 minutes. Don't open the oven door during baking. They're done when they lift cleanly off the parchment and have firm bottoms. Let them cool completely on the baking sheet before attempting to remove them.
- Make the peppermint buttercream: Beat the softened butter until pale and creamy, about 2 minutes. Add the powdered sugar in two additions, then add the peppermint extract, cream, and salt. Beat until smooth and fluffy. If it's too thick, add a little more cream. If it's too loose, add a bit more powdered sugar.
- Assemble: Match up shell pairs by size. Pipe a small mound of buttercream onto the flat side of one shell and gently press the other shell on top, twisting slightly to spread the filling to the edges. If you're using crushed candy canes, press them onto the exposed filling around the edges before the buttercream sets. Refrigerate assembled macarons for at least a few hours — overnight is better — before serving.

Tips for Success
- Sift the almond flour twice, not once: The first time I made macarons I sifted once quickly and ended up with shells that had little bumps on the surface. The second time I sifted twice and they were noticeably smoother. Almond flour has a tendency to clump, and any unground bits that make it through will affect the texture of the shell. It takes three extra minutes and it's worth it every time.
- Use room temperature egg whites — and separate them yourself: Cold egg whites don't whip as well and you won't get the same volume or stability in your meringue. I take my eggs out of the fridge about an hour before I start. I also separate them myself rather than using carton egg whites — you get better results with fresh whites. If you have time, some bakers age their egg whites overnight uncovered in the fridge, which gives even better stability. I've done it both ways and both work, but aged whites are slightly more forgiving.
- Don't rush the resting time: I know it's tempting to put them straight in the oven. I did this my first time and got cracked, footless shells. The skin that forms during resting is what forces the batter to rise upward and form those little feet instead of cracking. Touch the top of a piped macaron gently — if batter sticks to your finger, they need more time. In humid weather, they can take up to 90 minutes to form a proper skin.
- Bake one sheet at a time: I tried baking two sheets at once to save time and the bottom sheet came out underdone while the top sheet was overbaked. Every oven is different, but one sheet on the middle rack consistently gives me the most even results. It adds time to the process, but these cookies are already a project — this isn't where you want to cut corners.
- Let the assembled macarons rest in the fridge overnight: This is called "maturing" and it genuinely changes the texture. Freshly assembled macarons are slightly crisp and dry. After a night in the fridge, the filling softens the shells slightly from the inside and you get that characteristic chew that makes a macaron feel like a proper macaron rather than a meringue sandwich. I know it's hard to wait. It's worth it.
Variations
- Chocolate ganache filling: Instead of peppermint buttercream, fill the shells with a dark chocolate ganache — just equal parts heavy cream and good dark chocolate, melted together and cooled until spreadable. The combination of chocolate and peppermint shells is honestly incredible, and it's how I make these for my husband who always wants something a little less sweet. Let the ganache firm up in the fridge before filling so it doesn't ooze out the sides.
- White chocolate peppermint filling: Melt ½ cup of white chocolate chips with 2 tablespoons of heavy cream, let it cool, then beat in softened butter and a small amount of peppermint extract. It's richer and creamier than the standard buttercream, and the white chocolate adds a slight vanilla note that plays nicely against the mint. This version is Zainab's favourite by far.
- Crushed candy cane shells: Before the shells go into the oven, scatter a small pinch of finely crushed candy canes over the top of each piped round. They melt slightly during baking and give you a hint of extra mint and a pretty sparkle on the surface. Don't add too much or it can affect how the skin forms — a light dusting is enough.
- Red and green swirled shells: Use a toothpick or skewer to draw thin lines of red and green gel food colouring down the inside of your piping bag before filling it with batter. When you pipe, the batter picks up the colour in swirls. It's a small extra step and the effect looks really festive — especially if you're packing them as gifts alongside something like eggnog French toast for a holiday brunch box.
- Mini macarons: Pipe the batter into half-inch rounds instead of one-inch rounds. Baking time drops to about 10 to 12 minutes. Mini macarons are great for party platters where you want bite-sized options, and they look really charming alongside other small holiday treats. Just be aware that the smaller size means the folding consistency matters even more — thin batter spreads too much at this size.
Serving and Storage
Serving
Take the macarons out of the fridge about 10 to 15 minutes before serving. They're good cold, but at room temperature the filling is softer and the shells have better texture. I serve them on a small plate or tiered stand at the table, and stack a few in a small cellophane bag tied with ribbon when I'm gifting them. If you're setting up a holiday dessert table, these look beautiful next to something like a cranberry pepper jelly on crackers — the red colour tones match perfectly.
Storage
Store assembled macarons in an airtight container in the fridge for up to 5 days. They actually get better on day 2 and 3 as the filling continues to soften the shells. For longer storage, freeze unfilled shells in a single layer, then stack with parchment between layers in a zip-top bag. They keep frozen for up to 1 month. Thaw shells at room temperature for 20 minutes before filling. I don't recommend freezing filled macarons — the buttercream can separate and the texture suffers.

Frequently Asked Questions
Why did my macarons crack on top?
The two most common reasons are that the shells didn't rest long enough before baking, or the oven temperature was too high. The skin that forms during resting is what keeps the shell intact when the heat hits it — without that skin, steam escapes through the top and cracks it open. Check that your oven is actually running at 300°F with an oven thermometer, because many ovens run hotter than the dial says.
Can I use peppermint oil instead of peppermint extract?
You can, but peppermint oil is much more concentrated than extract — start with just one small drop and taste as you go. I've accidentally added too much oil before and the filling tasted sharp and overwhelming rather than fresh and minty. Stick with extract if you have it; it's easier to control.
Do I need a piping bag, or can I use something else?
A real piping bag gives you the most control and the most consistent size, but in a pinch a zip-top freezer bag with a small corner snipped off works fine. I've used that method when I ran out of disposable piping bags, and honestly the shells came out fine. The key is cutting a consistent opening — if the hole is too big, your rounds will spread too much before they set.
How do I know when the macarons are done baking?
Give one a gentle nudge at the 14-minute mark. A done macaron will feel set and will lift cleanly off the parchment without the bottom sticking. The feet should look well-developed and slightly ruffled. If the shell wobbles or sticks, give it another minute or two. Let them cool completely on the tray before you try to remove them — pulling them off while warm almost always tears the bottom.
Can I skip the food colouring entirely?
Yes, absolutely. The colouring is purely decorative and has no effect on flavour or texture. Natural, uncoloured peppermint macarons are still lovely — they're a pale cream colour with the pinkish buttercream peeking out. If you want colour without artificial dye, a tiny bit of beet powder gives a soft pink without altering the flavour much.

PEPPERMINT MACARONS
Ingredients
For the Macaron Shells:
- 1 cup powdered sugar
- ¾ cup almond flour blanched, finely ground
- 2 large egg whites room temperature
- ¼ cup granulated sugar
- ¼ teaspoon cream of tartar
- Red gel food coloring optional
For the Peppermint Buttercream Filling:
- ½ cup unsalted butter softened
- 1½ cups powdered sugar
- 1 teaspoon peppermint extract
- 1 –2 tablespoons heavy cream or milk
Instructions
Prepare Baking Sheets:
- Line baking sheets with parchment paper or silicone mats. Set aside.
Sift Dry Ingredients:
- Sift almond flour and powdered sugar together. Discard any large bits. Set aside.
Make Meringue:
- Beat egg whites until foamy. Add cream of tartar. Gradually beat in granulated sugar until stiff peaks form. Add a drop of red gel food coloring if desired.
Fold in Dry Ingredients:
- Gently fold dry mixture into meringue until batter flows like lava and forms ribbons. Do not overmix.
Pipe and Rest:
- Transfer to a piping bag and pipe 1-inch circles onto prepared sheets. Tap trays to release air bubbles. Let rest 30–45 minutes until tops are dry to the touch.
Bake:
- Bake at 300°F (150°C) for 14–15 minutes. Cool completely on the trays.
Make Filling:
- Beat butter until fluffy. Add powdered sugar, peppermint extract, and cream. Mix until smooth.
Assemble Macarons:
- Pipe filling on half the shells and sandwich with the remaining halves. Chill 24 hours for best texture.
Notes
Customisations: Sprinkle crushed candy canes on the filling before sandwiching for crunch.
Serving Suggestions: Serve with hot cocoa, coffee, or as part of a holiday dessert spread.
Storage Tips: Store in an airtight container in the fridge for up to 5 days or freeze for longer.
These peppermint macarons have become one of the things I actually look forward to making in December. Not because they're quick — they're not — but because the whole process forces me to slow down and pay attention, which is actually kind of nice in the middle of the holiday rush. When a batch comes out right, with the little feet and the smooth tops and the soft minty filling, it genuinely feels like an accomplishment.
If this is your first time making macarons, don't be discouraged if the first batch isn't what you pictured. My first batch was a disaster and my second was only slightly better





Comments
No Comments