
Saad asked for these three weeks in a row before I finally wrote down exactly what I was doing. He'd come home from school, smell the garlic butter hitting the oven, and just plant himself at the kitchen table and wait. That's when you know a recipe is worth keeping.
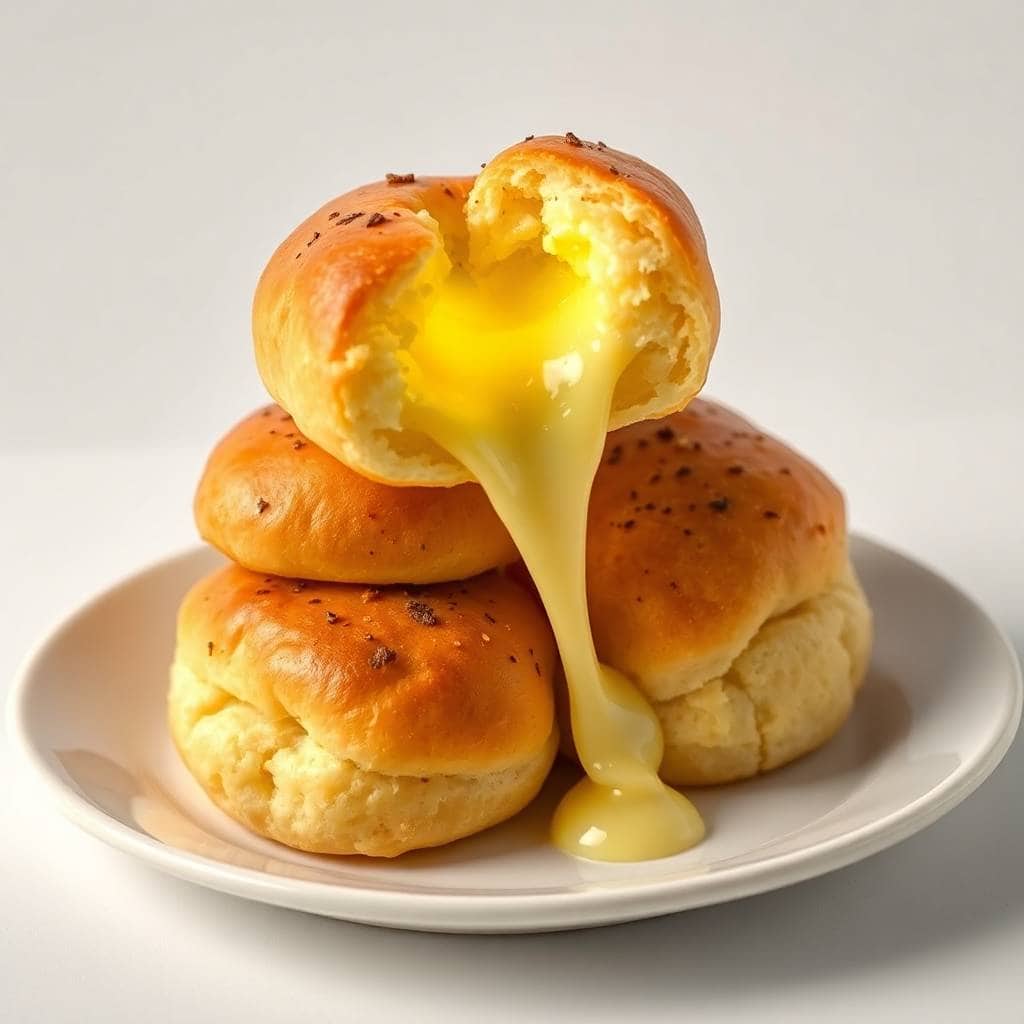
What I love about these garlic butter cheese bombs is that they're made with a quick no-yeast dough — flour, baking powder, salt, an egg — so you're not waiting around for anything to rise. The filling is a mix of mozzarella, cream cheese, and Parmesan with a little garlic stirred in. You seal the cheese inside the dough, brush the tops with garlic butter, bake for about 15 minutes, then brush them again right when they come out. That second brush is what makes the crust taste like something from an actual bakery.
I make these most often when we have people coming over for a casual dinner — the kind of night where I want something impressive on the table without spending two hours in the kitchen. They disappear faster than anything else I put out. If you're planning a game night or a potluck, these and my ham and cheese sliders together is a genuinely good combo — both pull-apart, both crowd-friendly, both done in under 30 minutes.
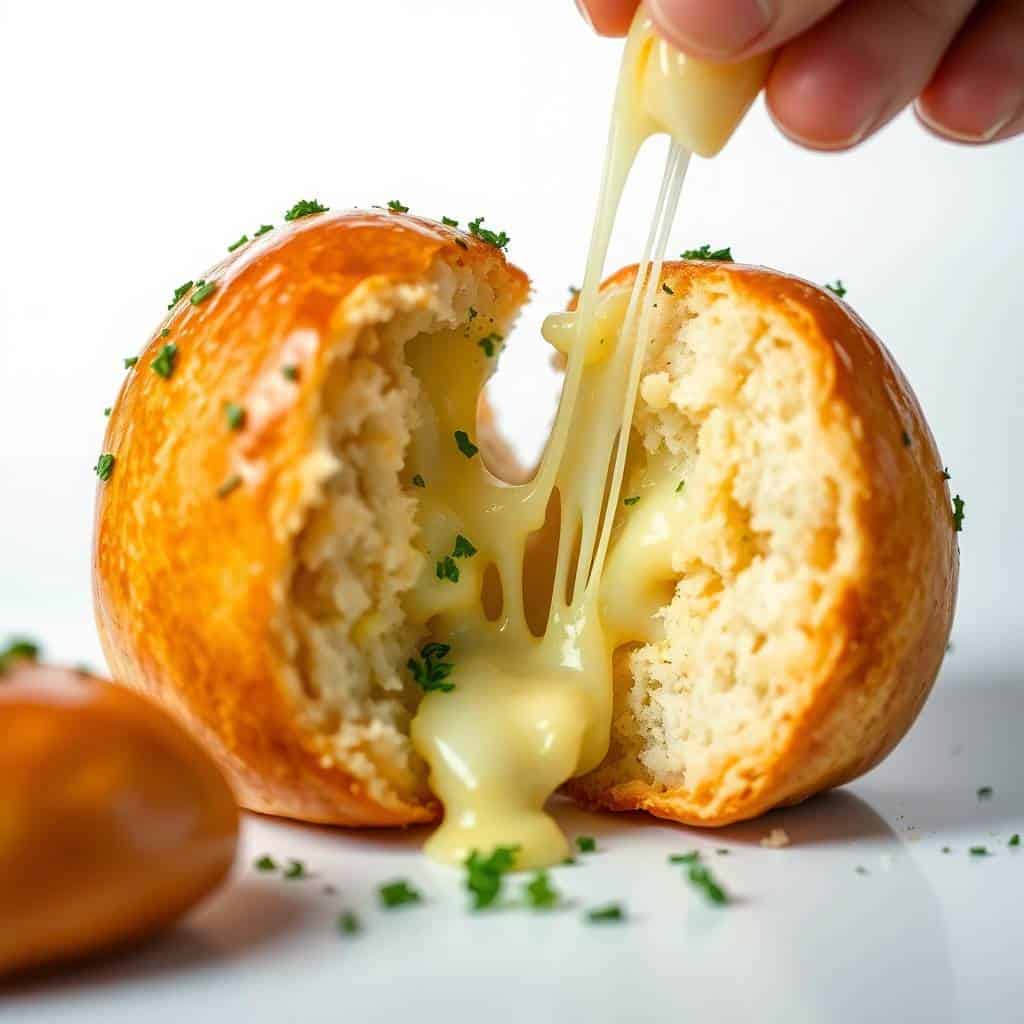
One thing I'll warn you about upfront: seal those dough balls tightly. The first time I made these, I was too casual about pinching the edges shut, and half of them leaked cheese onto the baking sheet. Still tasted fine, but the whole point is the gooey cheese pull when you bite in. Press those seams firmly and make sure there's no gap anywhere.
Why You'll Love This Recipe
- No yeast, no waiting: This dough uses baking powder instead of yeast, which means no proofing time and no planning ahead. I can decide to make these at 5pm and have them on the table by 5:30. That's not something you can say about most bread recipes, and it's honestly why I keep coming back to this one on busy nights.
- Three-cheese filling that actually stays gooey: Using cream cheese alongside the mozzarella and Parmesan is the thing that makes the filling so rich and melty rather than just stringy. The cream cheese holds everything together while the mozzarella stretches and the Parmesan adds a little sharpness. I tried it with just mozzarella once — it was fine, but the three-cheese version is noticeably better.
- Double garlic butter coating: Brushing the tops before AND after baking is not optional in my kitchen. The pre-bake brush helps them brown beautifully. The post-bake brush soaks into the hot crust and gives you that glossy, garlicky finish that makes everyone reach for seconds before they've finished their first one.
- Genuinely quick to put together: From mixing the dough to pulling them out of the oven is about 35 minutes total. The dough comes together in a few minutes of mixing, the filling is just stirring things in a bowl, and shaping goes fast once you get a rhythm going. This isn't a weekend project — it's a Tuesday-night appetizer.
- No special equipment at all: I don't use a stand mixer for this. I use a bowl, a fork to mix the dough, and my hands to shape. A regular sheet pan lined with parchment is all you need. Nothing fancy, nothing expensive — just basic kitchen tools that anyone has.
Ingredients
- 2 cups all-purpose flour
- 1 teaspoon baking powder
- ½ teaspoon salt
- 1 cup shredded mozzarella cheese
- 4 tablespoons unsalted butter, melted
- 3 cloves garlic, minced
- ½ cup cream cheese, softened (let it sit out 15 minutes before using — cold cream cheese clumps)
- ½ cup grated Parmesan cheese
- 1 large egg
- 2 tablespoons chopped fresh parsley (optional, but I always add it)
Directions
- Preheat and mix the dough: Preheat your oven to 375°F (190°C). In a large bowl, whisk together the flour, baking powder, and salt. Add the egg and mix with a fork until the dough starts to come together, then use your hands to knead it briefly — just until it's smooth and not sticky. If it feels dry, add a teaspoon of water at a time. Don't overwork it or the dough gets tough.
- Make the filling: In a separate bowl, combine the mozzarella, cream cheese, Parmesan, and half of your minced garlic. Stir it together until it's well mixed. This is the moment to taste it — I sometimes add a small pinch of salt here if the cheeses need it.
- Make the garlic butter: Mix your melted butter with the remaining minced garlic in a small bowl. Set it aside — you'll use it twice.
- Shape the cheese bombs: Divide the dough into 16 roughly equal pieces. Flatten each piece in your palm into a small disc about 3 inches across. Put a heaping teaspoon of cheese filling in the center, then pull the edges of the dough up and around the filling, pressing firmly to seal. Roll gently between your palms into a ball. Press those seams — don't just pinch lightly. Any gap and the cheese will escape.
- Brush and bake: Place the sealed dough balls on a parchment-lined baking sheet with a little space between each one. Brush generously with garlic butter — get the tops and the sides. Bake for 15 to 18 minutes until they're golden brown on top.
- Second brush and serve: Pull them out of the oven and immediately brush again with the remaining garlic butter. Sprinkle with chopped parsley if you're using it. Serve warm — don't let them sit too long or the cheese firms up inside.
Tips for Success
- Seal the dough properly — seriously: I can't stress this enough because I ruined half my first batch by being sloppy about it. After you bring the dough edges together, pinch them firmly, then press the seam flat against the ball and roll it in your palms. You want zero cracks. If you can see the cheese through the dough at all, press it closed again before baking.
- Let the cream cheese soften before you make the filling: Cold cream cheese doesn't blend smoothly with the other cheeses — it stays lumpy, and those lumps don't melt the same way inside the dough. I take mine out of the fridge about 15 minutes before I start. It makes the filling noticeably smoother and easier to spoon.
- Don't overfill: More filling sounds better but it makes sealing nearly impossible. A heaping teaspoon is the right amount — it's enough to get that gooey center without the dough splitting open under the pressure. I went too generous once and had cheese bubbling out of cracks all over the tray.
- Watch the oven in the last few minutes: These go from golden to overdone faster than you'd expect. At 15 minutes, check them — you want a deep golden brown on top but the dough should still feel slightly soft when you press it gently. If you bake them too long, the outside gets hard and the cheese inside turns rubbery instead of melty.
- Use parchment paper, not just a greased tray: Even with greasing, any cheese that leaks will burn onto the pan and be nearly impossible to scrub off. Parchment makes cleanup a non-event and stops the bottoms from over-browning before the tops are done. A standard sheet from any grocery store works — I buy the Costco roll and it lasts forever.
Variations
- Pizza bombs: Tuck a small piece of pepperoni into the cheese filling before sealing. My kids call these "pizza pockets" and they're even more popular at parties than the plain version. You can also add a tiny smear of pizza sauce inside if you want, but keep the amount small or the dough gets soggy.
- Spicy version: Add a pinch of red chili flakes to the garlic butter, or mix a few thin jalapeño slices into the cheese filling. My husband does both and adds extra chili on top before baking. It turns these into something completely different — still cheesy and garlicky but with a real kick.
- Different cheese combinations: The three-cheese filling in this recipe is my go-to, but cheddar and cream cheese is also really good — it tastes more like a loaded baked potato. Pepper jack gives you a little heat without adding jalapeños. Gouda melts beautifully and has a slightly smoky flavor that works well with the garlic butter.
- Parmesan crust on top: Before baking, sprinkle a small pinch of finely grated Parmesan on top of each ball after brushing with garlic butter. It bakes into a slightly crispy, salty crust that adds a really nice texture contrast. This is the version I make when guests are coming over — it looks more finished.
- Gluten-free: I haven't tested this extensively, but a 1:1 gluten-free flour blend works reasonably well here since there's no yeast involved and the dough doesn't need to develop gluten structure. The texture will be slightly different — a little more crumbly — but the cheese filling carries it. Use dairy-free cream cheese if you also need this to be dairy-free, though I won't pretend it tastes identical.
Serving and Storage
Serving
Serve these warm, straight from the oven, within about 15 minutes of baking. That's when the cheese inside is perfectly molten and the garlic butter crust is at its best. I put them out with a small bowl of marinara sauce for dipping — something like Rao's from the grocery store works fine if you don't have time to make your own. Ranch dip is also popular if you have kids at the table. For a bigger spread, I'll put these out alongside a creamy fizzy punch for the kids and something heartier like my slow cooker Mississippi chicken for the main course.
Storage
Leftovers (if you have any) keep in an airtight container in the fridge for up to 3 days. Reheat in the oven at 350°F for about 5 to 7 minutes rather than the microwave — the microwave makes the dough chewy and the cheese sort of grainy. You can also freeze them unbaked: shape and seal all the bombs, place them on a baking sheet to freeze solid, then transfer to a zip-lock bag. They keep frozen for up to a month. Bake from frozen at 375°F and add about 5 to 7 extra minutes to the baking time.

Frequently Asked Questions
Can I make the dough ahead of time?
Yes — wrap it tightly in plastic wrap and refrigerate overnight. When you're ready to bake, let it sit at room temperature for about 20 minutes before shaping so it's easier to work with. I've done this the night before a party and it works well. Don't refrigerate the shaped bombs for too long though, or the dough can start to get a little dense.
Why did my cheese leak out during baking?
Almost always it's a sealing issue — there's a gap somewhere in the dough that opens up as the cheese melts and expands. Make sure you're pressing the seam firmly closed and rolling the ball between your palms to reinforce it. Also check that you're not overfilling — a heaping teaspoon of filling is plenty. If your filling is very wet or loose, chill it in the fridge for 10 minutes before using, which helps it hold together while you shape the bombs.
Can I freeze these before baking?
Yes, and this is actually my preferred make-ahead method. Shape and seal all 16 bombs, freeze them on a lined baking sheet until solid (about 2 hours), then transfer to a freezer bag. They keep for up to a month. When you're ready to bake, go straight from frozen into a 375°F oven and add 5 to 7 minutes to the baking time. Brush with garlic butter before and after just like the fresh version.
What can I substitute for cream cheese?
Ricotta works reasonably well — it gives a slightly lighter filling. You can also use just mozzarella and Parmesan without any soft cheese, though the filling won't be quite as creamy. If you're dairy-free, most grocery stores carry dairy-free cream cheese alternatives (Violife is one I've seen at Walmart and Whole Foods) and dairy-free mozzarella shreds that melt okay, though I'll be honest — the flavor isn't identical.
How do I reheat leftovers without the dough going rubbery?
The oven is your friend here. Put them on a baking sheet at 350°F for 5 to 7 minutes. The outside crisps back up a little and the cheese gets melty again. The microwave technically works but it turns the dough chewy and soft in a way that doesn't do these justice. If I'm reheating just one or two for myself, I sometimes use a small toaster oven — same result, less waiting for the big oven to preheat.
These garlic butter cheese bombs have become the one thing I know I can make for any gathering and people will ask me about them. I make a double batch now without thinking — one batch for the table, one to freeze for the next time someone stops by unexpectedly. They're the kind of thing that looks like you put in more effort than you actually did, which I fully appreciate on a weeknight.
What I keep coming back to is how the no-yeast dough makes this actually achievable on a regular basis. There's no waiting, no worrying about whether the yeast is active, no temperature-checking. Just mix, fill, bake, eat. I've made more complicated bread recipes with a fraction of the satisfaction this one gives me.
If you're building out a spread for a party or game night, these pair really well with my ham and cheese sliders — both are pull-apart, both are done fast, and together they cover the whole table without wearing you out before the guests arrive. For something sweet to finish, the NYC red velvet cookies are another crowd request in my house.
Make them once and you'll understand why Saad kept asking for them on repeat. That first bite with the cheese still molten inside — there's really nothing to say except go make them. 🧀🧄✨

HOMEMADE GARLIC BUTTER CHEESE BOMBS
Ingredients
- 2 cups all-purpose flour
- 1 teaspoon baking powder
- ½ teaspoon salt
- 1 cup shredded mozzarella cheese
- 4 tablespoons unsalted butter melted
- 3 cloves garlic minced
- ½ cup cream cheese softened
- ½ cup grated Parmesan cheese
- 1 large egg
- 2 tablespoons chopped fresh parsley optional
Instructions
Prepare Dough:
- Preheat oven to 375°F (190°C). In a large bowl, mix flour, baking powder, and salt.
Make Filling:
- In another bowl, combine mozzarella, cream cheese, Parmesan, and half the minced garlic.
Form Cheese Bombs:
- Roll dough into 16 equal pieces. Flatten each piece, place a spoonful of cheese filling in the center, then pinch edges to seal.
Prepare Garlic Butter:
- Mix melted butter with remaining garlic.
Bake:
- Place cheese bombs on a parchment-lined baking sheet. Brush tops with garlic butter. Bake for 15–18 minutes or until golden brown.
Garnish:
- Brush with more garlic butter and sprinkle chopped parsley before serving.
Notes
Prepare cheese bombs and freeze unbaked for up to 1 month. Bake directly from frozen, adding extra baking time. Custom Flavors:
Add cooked bacon bits or herbs like rosemary for extra flavour. Serving Suggestions:
Serve warm with marinara sauce or ranch dip. Allergy-Friendly Options:
Use gluten-free flour and dairy-free cheese for allergy-friendly versions. Storage Tips:
Store leftovers in an airtight container and reheat in the oven.
If you liked these, here are a few more recipes worth bookmarking:




Comments
No Comments