
Saad asked me to make these three weeks in a row before I finally slowed down long enough to write the recipe out properly. He'd come home from school, open the pantry, and ask if we had peanut butter — not because he wanted a sandwich, but because he was hoping I'd make these cookie cups again. That's how I knew this one was worth documenting.
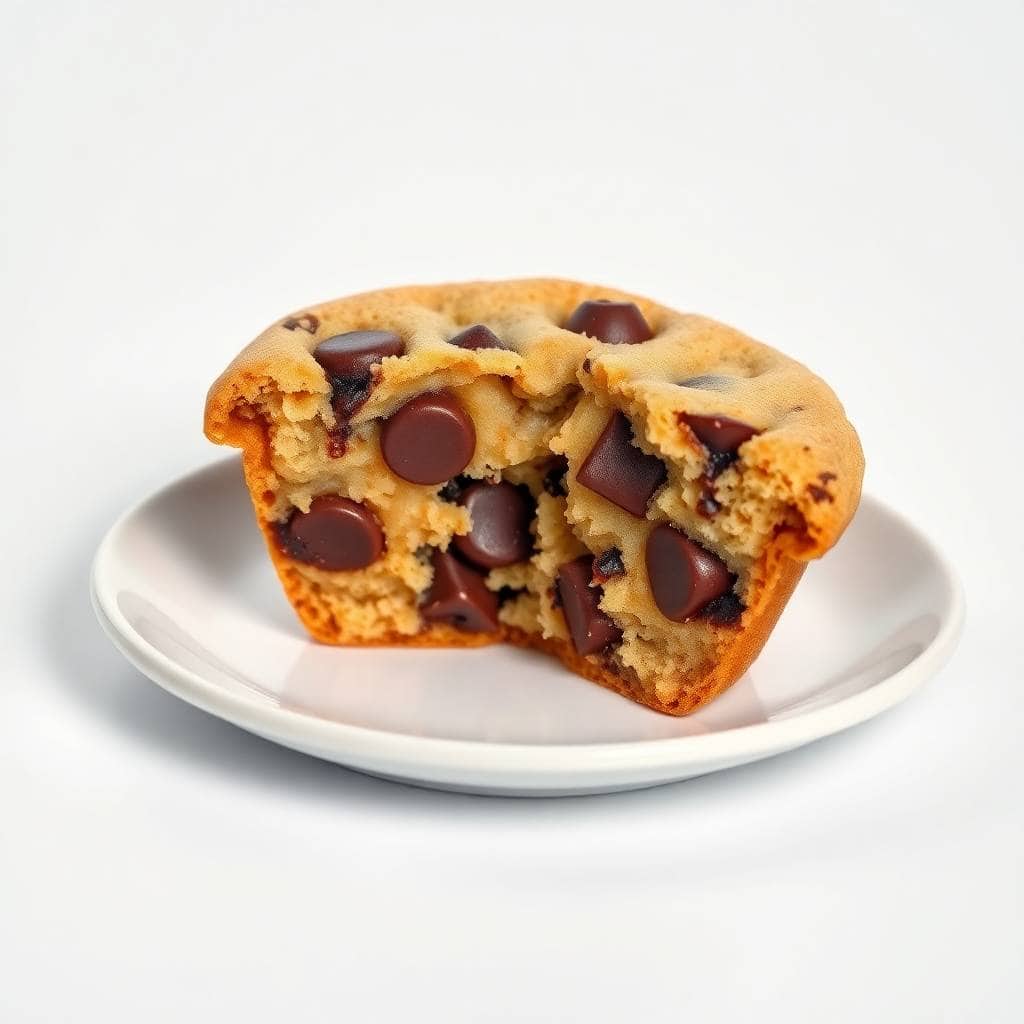
What makes these different from a regular peanut butter cookie is the muffin tin. Baking them in a standard or mini muffin pan gives the dough walls to climb, so the edges turn golden and slightly crisp while the center stays soft and almost fudgy. It's the same dough you'd use for a flat cookie, but the shape changes everything about how it eats. I press a few chocolate chips into the top right before baking so they go a little melty and look intentional — which matters when you're handing them out at a school event and want them to look like you tried.
I make these on nights when I realize I promised something for the next day and haven't started. The dough comes together in one bowl, no chilling required, and they're out of the oven in about 12 minutes. My husband eats them with his evening tea, Saad wants them still warm from the pan, and Zainab prefers hers the next morning with a cold glass of milk. So these rarely last past day two in our house. If you're looking for something quick that works at room temperature for a party or a bake sale, this is what I'd make. And if you're after something equally fast but savory to balance out dessert night, my air fryer chicken tenders take about the same amount of time.
One thing to know before you start: use processed creamy peanut butter here, not the natural kind. I tried natural peanut butter the second time I made these and the dough was oily and slightly grainy — the cups didn't hold their shape the way they should. Jif or Skippy (or any similar store brand from Walmart or Costco) gives you the texture you're looking for. That's not a preference, it's just how the recipe works.
Why You'll Love This Recipe
- Done in 20 minutes start to finish: I timed it once just to check — from pulling out the butter to pulling the pan from the oven, it's right around 20 minutes. That's not an exaggeration. There's no chill time, no complicated steps, and only one main mixing bowl to wash. On nights when I have nothing planned for dessert, this is the first thing I think of.
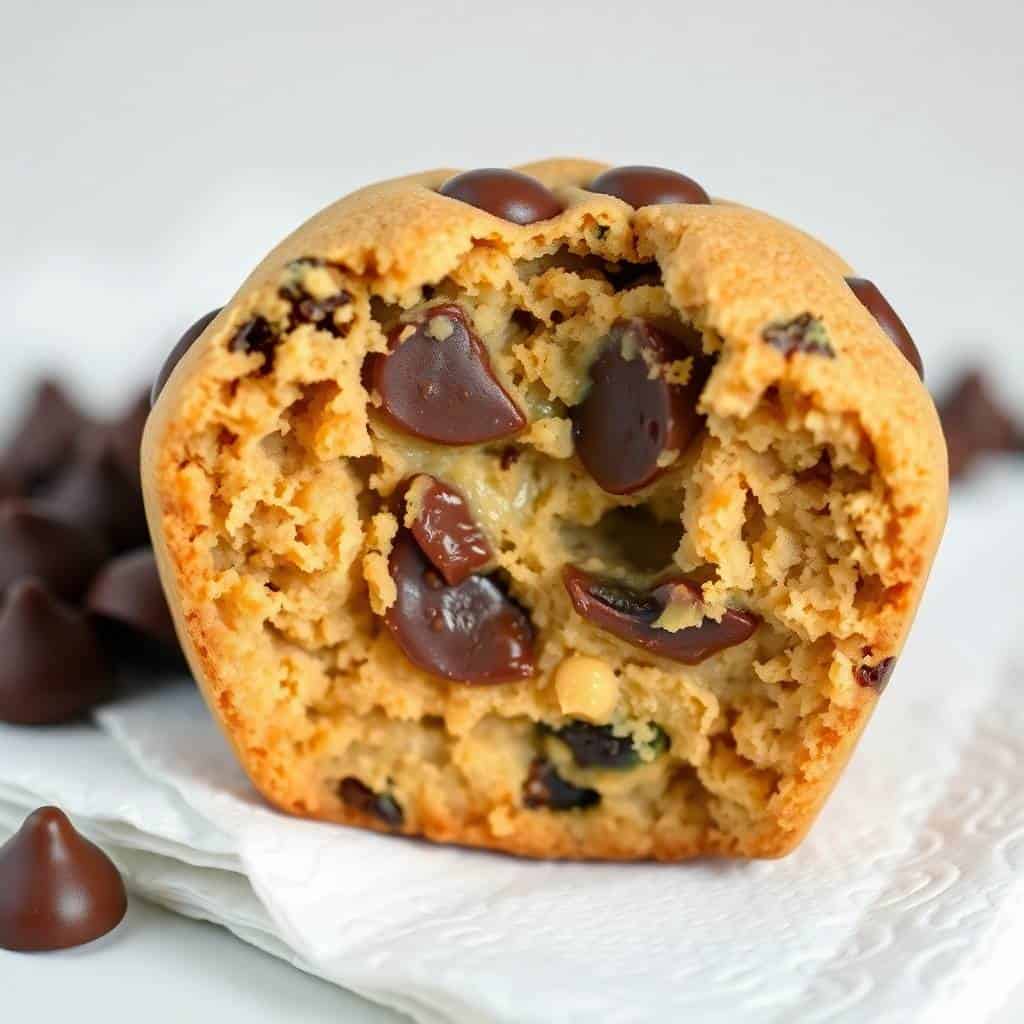
- Soft center, slightly crisp edge: The muffin tin does something a flat cookie can't — it creates a little cup shape where the center stays dense and chewy while the edges brown up nicely. If you like your cookies on the underbaked side (I do), pull these at 10 minutes. If you want more structure, go to 12. Either way, they firm up as they cool.
- All pantry ingredients: Peanut butter, butter, two sugars, an egg, vanilla, flour, baking soda, salt, and chocolate chips. I've never had to make a special trip to the store for this recipe — if I have peanut butter in the house (and I always do), I can make these. If you're regularly out of one of these basics, it might be worth stocking up at Costco or Walmart where you can buy in bulk.
- Good for baking with kids: This is genuinely a recipe where younger kids can help without things going sideways. The dough is sturdy enough to handle, the scooping step is satisfying, and pressing the chocolate chips in at the end is the kind of task a six-year-old will take very seriously. Zainab likes being in charge of that part.
- No stand mixer needed: I mix this with a wooden spoon and a regular large bowl. The butter just needs to be soft enough to blend — if it's actually at room temperature, a spoon handles it fine. I don't own a $400 stand mixer and I've made these more times than I can count.
Ingredients
- 1 cup creamy peanut butter (processed, like Jif or Skippy — not natural)
- ½ cup unsalted butter, softened to room temperature
- ½ cup granulated sugar
- ½ cup packed brown sugar
- 1 large egg
- 1 teaspoon vanilla extract
- 1¼ cups all-purpose flour
- ½ teaspoon baking soda
- ¼ teaspoon salt
- 1 cup mini or semi-sweet chocolate chips (mini chips distribute better; semi-sweet chips on top look nicer)
Directions
- Preheat the oven: Set your oven to 350°F (175°C) and grease a 12-cup standard muffin tin well, or use paper liners if you prefer easy removal. I usually just grease with a little butter or cooking spray and haven't had issues.
- Cream the butter and sugars: In a large bowl, beat together the peanut butter, softened butter, granulated sugar, and brown sugar until it's smooth and creamy. With a wooden spoon this takes about 2 minutes of mixing — you want it fully combined with no butter lumps visible.
- Add egg and vanilla: Mix in the egg and vanilla extract until the batter looks smooth and slightly glossy. This step only takes about 30 seconds — don't overthink it.
- Add the dry ingredients: Stir in the flour, baking soda, and salt. Mix until just combined — the moment you don't see dry flour anymore, stop. Overmixing at this stage makes the cups tough, which is the main mistake I see people make with cookie dough.
- Fold in chocolate chips: Add the chocolate chips and fold them in gently with the spoon. If you're using mini chips, mix them through the dough. If you're using regular semi-sweet chips, save about a quarter cup to press into the tops so they look good coming out of the oven.
- Portion into the muffin tin: Scoop the dough into the muffin cups, filling each about three-quarters full. I use a regular ice cream scoop for this — it keeps things even. Press the dough down slightly so it fills out the bottom of the cup rather than sitting in a ball.
- Bake: Bake for 10–12 minutes until the edges are golden and the centers look set but not dry. They'll still look slightly underdone in the middle — that's exactly right. They firm up as they cool.
- Cool before removing: Let the cookie cups sit in the pan for at least 10 minutes before trying to remove them. I've rushed this step and had two cups crumble on me. The wait is worth it. Transfer to a wire rack to cool the rest of the way.
Tips for Success
- Butter must actually be soft, not melted: Cold butter won't cream properly and you'll end up with lumpy dough. Melted butter makes the cups spread too flat and lose that cup shape entirely. I learned this the hard way on my first batch — I was impatient and microwaved the butter for too long. Leave it out on the counter for 30 to 45 minutes before you start, or cut it into small cubes to speed up the process.
- Don't overfill the cups: Three-quarters full is the right amount. If you overfill, the dough rises over the edge and you lose the cup shape — you just get a regular cookie that happens to be sitting in a muffin tin. I fill mine with an ice cream scoop and then use my finger to press the dough flat at the bottom, which helps it bake evenly.
- Pull them out while they still look slightly underdone: The edges should be golden but the center should look just barely set. If you wait until the center looks fully baked in the oven, they'll be dry and crumbly once they cool. Cookies and cookie cups always continue cooking in the hot pan after you take them out — factor that in.
- Grease the tin generously: Even with a nonstick muffin tin, I still grease each cup. Cookie dough has sugar in it, and sugar caramelizes and sticks. A light spray of cooking oil or a quick wipe with a buttered paper towel takes 30 seconds and saves you from leaving half your cookie cup stuck to the tin.
- Use mini chocolate chips inside the dough: If you use full-size chips inside the dough, you get big uneven pockets of chocolate and the dough between them can be a bit bland. Mini chips distribute better so you get chocolate in every single bite. Save the full-size or semi-sweet chips for pressing into the tops if you want that visual payoff.
Variations
- Hidden chocolate center: Press a Hershey's Kiss or a small square of dark chocolate into the center of each cup right when they come out of the oven, while the dough is still soft. It sinks in slightly and creates a melty center. This is the version I make for Eid and people always ask what's inside. It also makes the cups look bakery-level without any extra effort.
- Sea salt on top: A tiny pinch of flaky sea salt (Maldon is good if you have it, or any flaky salt from the baking aisle) sprinkled on right before baking makes these taste more complex. The salt cuts through the sweetness and makes the chocolate flavor pop. My husband prefers this version over the plain one.
- Crunchy peanut butter swap: Swap the creamy peanut butter for crunchy (same amount, same process) and you get little peanut pieces throughout the dough. I like this version for adults — it adds texture. Saad doesn't like it because he notices the pieces, but my husband loves it. Make sure it's still a processed crunchy peanut butter, not natural.
- Chopped nuts in the dough: Add ½ cup of roughly chopped walnuts or pecans when you fold in the chocolate chips. This gives every bite a bit of crunch alongside the soft cookie. I've also done a mix of walnuts and dark chocolate chips instead of milk chocolate for a more grown-up flavor profile.
- Nutella swirl: Drop about half a teaspoon of Nutella into the center of each portioned cup before baking and swirl it in lightly with a toothpick. It creates a marbled effect and the Nutella gets slightly caramelized in the oven. This isn't traditional in any way — it's just something I tried once when Zainab asked for "chocolate and more chocolate" and it stuck.
Serving and Storage
Serving
These are best eaten warm — about 15 minutes out of the oven when the chocolate is still slightly soft. Serve them with a cold glass of milk or a scoop of vanilla ice cream if you want to make them feel more like a proper dessert. They also work well on a cookie tray alongside other baked goods for a party or bake sale — the cup shape makes them easy to pick up without crumbling. If you're putting together a full spread for a gathering, my marinated cheese appetizer with salami and pickles makes a good savory contrast on the same table.
Storage
Store cooled cookie cups in an airtight container at room temperature for up to 3 days. They don't need to be refrigerated unless your kitchen runs very warm. If you want them to last longer, refrigerate for up to a week — just let them come to room temperature before eating or warm them in the microwave for 10 seconds. To freeze: place cooled cups in a single layer in a freezer-safe container (or bag with layers separated by parchment) and freeze for up to 2 months. Thaw at room temperature for about an hour before serving. The texture holds up well from frozen, which is why I often make a double batch and freeze half.

Frequently Asked Questions
Can I use natural peanut butter instead of processed?
I'd skip it for this recipe. Natural peanut butter has more oil and less stabilizer, which makes the dough oilier and softer than it should be — the cups tend to spread and not hold their shape properly. Stick with Jif, Skippy, or any standard creamy peanut butter from the grocery store. If natural is all you have, chill the dough for 30 minutes before baking and it helps a bit, but the texture still won't be quite the same.
Do I need to chill the dough before baking?
No, you don't have to. I bake these immediately and they hold their shape fine. That said, if you make the dough ahead of time and refrigerate it (up to 24 hours), the flavor deepens a little — the brown sugar gets more pronounced. Just let the dough sit at room temperature for about 10 minutes before scooping so it's not too stiff to work with.
Can I bake these in a mini muffin tin instead?
Yes, and they come out really cute that way — one or two bites each. Reduce the baking time to 8–9 minutes and start checking at 8. Mini cups overbake fast because there's less dough mass to stay soft. Grease the mini tin well since smaller cups are harder to release cleanly.
Can I freeze these after baking?
Yes, they freeze really well. Let them cool completely, then layer them in a freezer-safe container with parchment paper between layers. They keep for up to 2 months. Thaw at room temperature for an hour, or microwave one for about 15 seconds if you want it warm. The texture after freezing is close to fresh-baked, which is why I usually make a double batch and freeze half.
How do I know when the cookie cups are done baking?
Look at the edges — they should be golden brown and pulling slightly away from the sides of the tin. The center should look set but still slightly soft when you gently press it. They'll feel underdone, but that's correct. They continue to cook in the hot pan for a few minutes after you take them out of the oven, so if they look fully done in there, they'll be overdone by the time you eat them.

PEANUT BUTTER CHOCOLATE CHIP COOKIE CUPS
Ingredients
- 1 cup creamy peanut butter
- ½ cup unsalted butter softened
- ½ cup granulated sugar
- ½ cup packed brown sugar
- 1 large egg
- 1 teaspoon vanilla extract
- 1 cup all-purpose flour
- ½ teaspoon baking soda
- ¼ teaspoon salt
- 1 cup semi-sweet chocolate chips
Instructions
Preheat Oven:
- Preheat oven to 350°F (175°C). Grease a mini muffin pan.
Make the Dough:
- In a large bowl, beat peanut butter, butter, granulated sugar, and brown sugar until creamy. Add egg and vanilla, mixing well. Stir in flour, baking soda, and salt until combined.
Shape and Fill:
- Scoop tablespoon-sized balls of dough into the mini muffin cups. Press a few chocolate chips into the centre of each.
Bake:
- Bake for 12–14 minutes until edges are lightly golden. Allow to cool in the pan for 5 minutes before removing.
Serve:
- Enjoy warm or at room temperature.
Notes
Customisations: Add chopped peanuts or drizzle with melted peanut butter for extra texture.
Serving Suggestions: Perfect alongside a glass of milk or coffee.
Storage Tips: Store in an airtight container at room temperature for up to 3 days.
These cookie cups have become one of those recipes I don't even need to look up anymore — the ingredients are memorized, the timing is memorized, and I know exactly what they're supposed to look like when they're ready. That doesn't happen with a lot of recipes. It happens when something works consistently enough that you stop second-guessing it.
What I like most is that they're one of those things where the effort-to-result ratio is genuinely in your favor. Twenty minutes, one bowl, a muffin tin, and you have something that looks and tastes like you spent real time on them. I've brought these to school events, made them for last-minute guests, and packed them in lunch boxes. They've held up in every situation. If you're in the mood for something savory later in the week, my beef sliders follow the same logic — straightforward, crowd-feeding, no drama.
If you try the hidden Hershey's Kiss variation, take them out at exactly 10 minutes — the chocolate inside will be perfectly melted and the outside will be just set. That's the version Saad considers non-negotiable for his birthday. I've already been informed.
I hope these become a regular in your rotation too. Write the recipe on a sticky note and put it on your fridge — you'll be glad it's there on a random Tuesday when someone asks for something sweet. 🍪🥜✨
If you liked this recipe, here are a few more from the site you might enjoy:
- Air Fryer Chicken Tenders (Crispy, Juicy, and Ready in 15 Minutes)
- Beef Sliders
-
{"@context":"https://schema.org","@type":"Article","headline":"PEANUT BUTTER CHOCOLATE CHIP COOKIE CUPS","description":"Soft peanut butter cookie cups with gooey chocolate chips. Quick and easy dessert perfect for snacks, parties, or gifting.","datePublished":"2025-06-16T16:34:22+00:00","dateModified":"2026-05-03T21:16:43+00:00","author":{"@type":"Person","name":"Sana Umer","url":"https://forfoodiefriends.com/about/","description":"Self-taught home cook with 10+ years of kitchen experience. Mom of two who develops every recipe in her own kitchen.","jobTitle":"Recipe Developer & Food Blogger","image":"https://forfoodiefriends.com/wp-content/uploads/sana-umer-author-photo.jpg"},"publisher":{"@type":"Organization","name":"For Foodie Friends","url":"https://forfoodiefriends.com/","logo":{"@type":"ImageObject","url":"https://forfoodiefriends.com/wp-content/uploads/forfoodiefriends-logo.png"}},"mainEntityOfPage":{"@type":"WebPage","@id":"https://forfoodiefriends.com/peanut-butter-chocolate-chip-cookie-cups/"},"image":"https://forfoodiefriends.com/wp-content/uploads/2025/06/PEANUT-BUTTER-CHOCOLATE-CHIP-COOKIE-CUPS-1.jpg"}






Comments
No Comments