
I made these for the first time on a Saturday morning when I had a package of King's Hawaiian rolls sitting on my counter and absolutely no motivation to make real dough. My husband had been asking for sticky buns for weeks, and I kept putting it off because honestly, the whole "let the dough rise for two hours" thing was not happening on a busy weekend. Then it hit me — the rolls are already soft, already slightly sweet, already the right size. Why not just pour caramel over them and call it done?
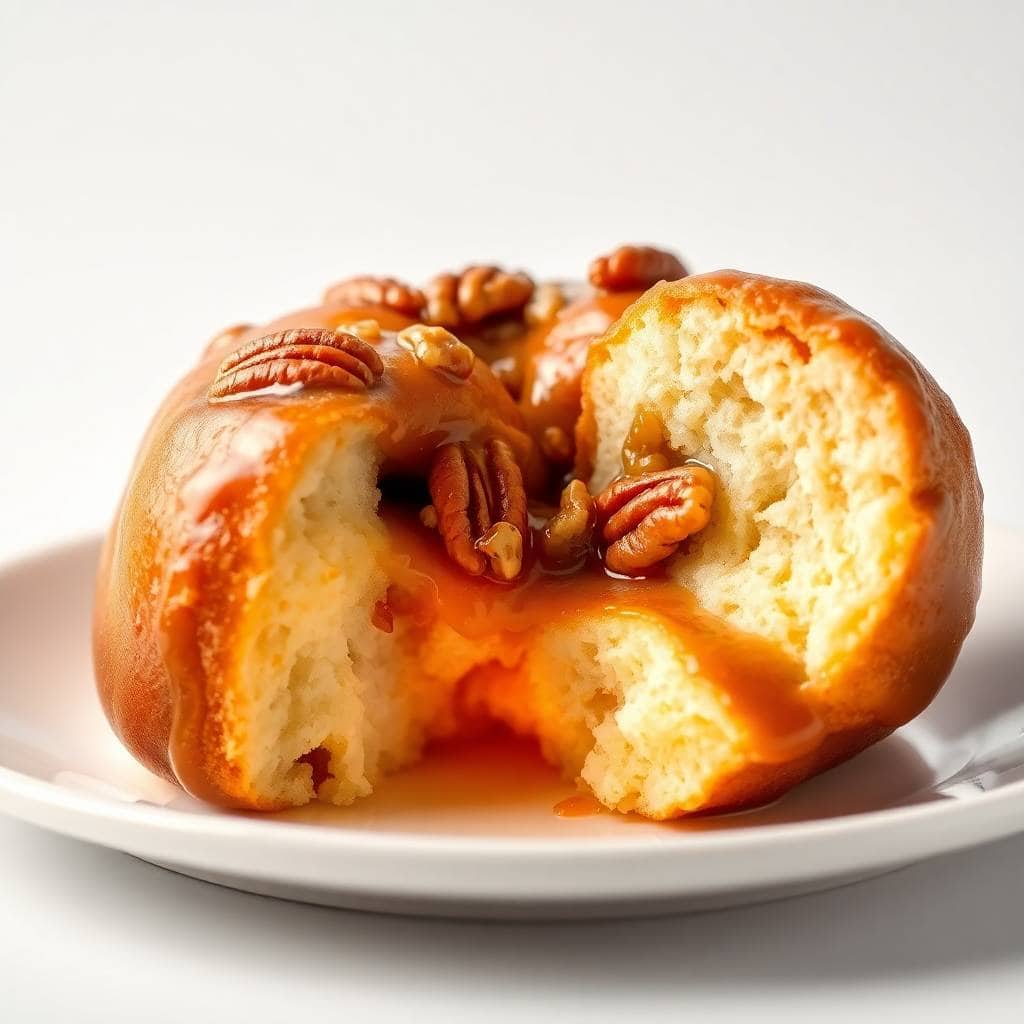
What came out of that oven was genuinely one of the better brunch things I've made. The caramel soaks into the bottom of the rolls while they bake, and when you flip the pan over, the whole thing comes out in this pull-apart, gooey, golden situation that looks like you spent way more time than you did. The brown sugar and butter sauce is simple — just five ingredients in a small saucepan — but it gets deep and rich and slightly toasty, especially if you add the pinch of salt I mention in the tips.
My kids were sold immediately. Zainab pulled apart three rolls before I even had a chance to get plates. My husband ate his with a cup of tea and declared it "better than a bakery," which is high praise from someone who normally only says that about my Red Velvet Cake Balls. I now make a double batch because one 9x13 pan disappears before anyone has a chance to save leftovers.
One thing to know going in: you do have to flip the pan, and the first time I did it I was nervous. But it works. Just let it cool for five minutes — not more, not less — so the caramel has a chance to set slightly without gluing itself to the pan. Have your serving plate ready before you flip, and do it in one confident move. You've got this.
Why You'll Love This Recipe
- No dough, no waiting: The whole point of this recipe is that you skip the part everyone dreads. Hawaiian rolls are already proofed, already baked, already soft — you're just building a caramel situation around them. From opening the package to pulling the pan from the oven is about 30 minutes total, which means this works even on a morning when you have things to do.
- The caramel goes everywhere it should: Because the rolls sit directly on top of the caramel sauce as it bakes, the bottom of every roll soaks it up. When you invert the pan, that caramel drips down over everything. It's not a drizzle-on-top situation — it's fully integrated, which is what makes these actually taste like sticky buns and not just rolls with syrup poured over them.
- Make-ahead friendly for actual brunch hosting: If you're having people over, you can assemble the whole thing the night before — caramel in the dish, rolls pressed in — and refrigerate it uncovered overnight. In the morning, pull it out while the oven preheats, then bake. Your guests think you woke up at 6am. You did not.
- One pan, one small saucepan, done: I'm not exaggerating when I say cleanup is minimal. The caramel sauce comes together in a small saucepan, everything goes into one baking dish, and once the buns are inverted onto a plate, the dish just needs a soak. On weekday brunch or holiday mornings when the kitchen is already chaotic, that matters.
- You can take it in a lot of directions: The base recipe is straightforward — butter, brown sugar, cinnamon, vanilla, and pecans — but I've made a maple version, an apple version, and a chocolate-drizzle version at this point. The rolls are a blank canvas and the caramel base stays the same regardless of what you add to it.
Ingredients
- 12 Hawaiian sweet rolls (one standard package — King's Hawaiian is what I use)
- ½ cup unsalted butter
- ¾ cup brown sugar, packed
- 1 tablespoon ground cinnamon
- 1 teaspoon vanilla extract
- ½ cup chopped pecans or walnuts (optional, but I always add them)
- Pinch of flaky salt (not in the original, but trust me on this one)
Directions
- Step 1: Preheat and prep your pan. Set your oven to 350°F (175°C) and grease a 9x13-inch baking dish well — I use butter directly on the dish because I find it releases better than cooking spray for sticky caramel. Line with parchment if you want extra insurance on the flip.
- Step 2: Make the caramel sauce. In a small saucepan over medium heat, melt the butter completely. Stir in the brown sugar and cinnamon and keep stirring until the sugar dissolves and the mixture is smooth and glossy, about 2–3 minutes. Pull it off the heat and stir in the vanilla extract. It will smell incredible at this point.
- Step 3: Build the base. Pour half the caramel sauce into your prepared baking dish and spread it evenly across the bottom. Scatter the chopped nuts over the caramel if you're using them — they'll toast a bit against the bottom of the pan and get extra good.
- Step 4: Add the rolls. Slice the Hawaiian rolls in half horizontally (keep the whole sheet together if you can — it's easier). Place the bottom halves cut-side down onto the caramel base in a single layer. Drizzle the remaining caramel sauce over the tops, then press the roll tops over everything.
- Step 5: Bake. Bake for 18–20 minutes until the rolls are golden on top and you can see the caramel bubbling up around the edges of the pan. Your kitchen will smell like a bakery.
- Step 6: Flip and serve. Let the pan cool for exactly 5 minutes — set a timer. Then place your serving plate upside-down over the baking dish and flip the whole thing in one confident move. Lift the dish away and let the caramel drip down over the rolls. Serve immediately while everything is still warm and gooey.
Tips for Success
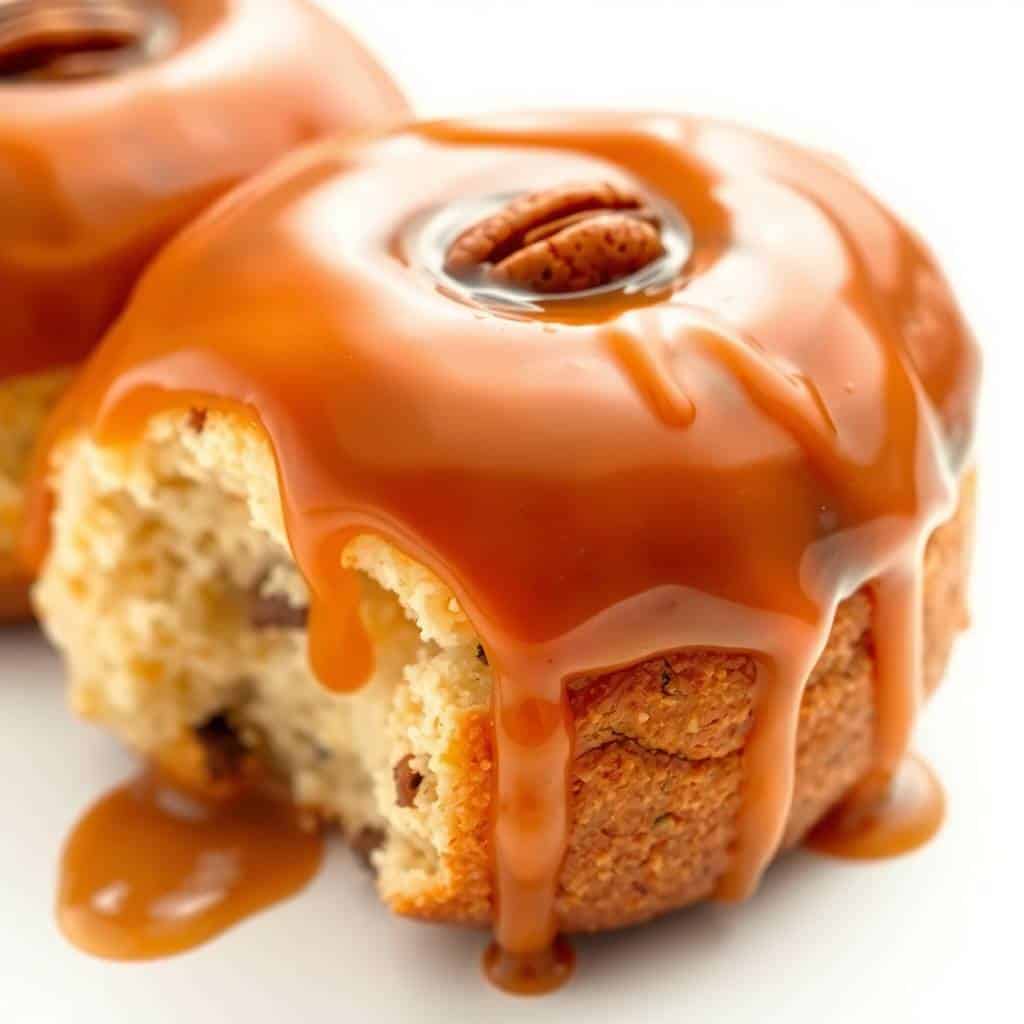
- Add a pinch of salt to the caramel: I didn't do this the first time and the whole thing tasted just slightly too sweet — like it was missing something but I couldn't name it. A pinch of flaky salt stirred into the sauce, or sprinkled over the top after flipping, fixes this completely. It makes the caramel taste more complex and less one-note.
- Don't skip the 5-minute rest before flipping: If you flip the pan straight out of the oven, the caramel is too liquid and it runs off the rolls instead of coating them. If you wait too long, it starts to set and sticks to the dish. Five minutes is genuinely the right window. I've tested both extremes and they both disappoint.
- Toast your nuts first if you have time: Spread the pecans or walnuts on a dry skillet over medium heat for 3–4 minutes, shaking the pan occasionally, until they smell nutty. It deepens the flavor noticeably and makes the whole bun taste more intentional. I skip this on rushed mornings and it's still good, but when I do toast them, it's better.
- Use fresh rolls, not ones that have been sitting open: I tried this once with a package of rolls that had been open in the fridge for two days, and they got a bit dry after baking instead of soft and pillowy. Hawaiian rolls from a sealed fresh package are much more forgiving — they absorb the caramel without going either soggy or tough.
- If making ahead, pull the dish from the fridge 20 minutes before baking: Going from refrigerator-cold to a 350°F oven can make the baking uneven — I've had the tops turn golden while the caramel underneath was still barely warm. A short rest on the counter lets everything come up to room temperature a bit and bakes more evenly. You may need to add 3–4 minutes to the bake time either way.
Variations
- Maple brown sugar version: Swap the vanilla extract for ½ teaspoon of maple extract, or replace 1 tablespoon of the butter with real maple syrup stirred in at the end. The caramel gets this woodsy, almost autumnal depth that works really well. I made this version in the fall alongside my Oven-Roasted Butternut Squash for a weekend brunch spread and it fit right in.
- Apple pie filling version: Layer about ½ cup of thinly sliced apples tossed with a bit of cinnamon and brown sugar between the roll bottoms and tops before baking. The apples soften and almost jam-like against the caramel. My kids love this version — it's like a cinnamon roll and an apple crumble had a very easy baby.
- Cream cheese glaze finish: Whisk together 2 ounces of softened cream cheese, ½ cup powdered sugar, and 2 tablespoons of milk until smooth, then drizzle it over the buns right after you flip them. It melts slightly over the warm caramel in a way that's just genuinely excessive in the best possible way. This is the version I make when I'm trying to impress someone.
- Nut-free with dried fruit: For anyone avoiding nuts, swap the pecans for ¼ cup of dried cranberries or raisins scattered over the caramel base. The dried fruit plumps up a bit in the oven and adds little pockets of chewiness. It reads as more of a holiday brunch version to me — especially with the cranberries.
- Chocolate drizzle finish: After flipping, drizzle about 2 tablespoons of melted semi-sweet chocolate chips over the top. The chocolate sets slightly against the warm caramel and creates these thin, crackly ribbons across the buns. My husband prefers this version above all others, which I did not predict.
Serving and Storage
Serving
These are best served warm, right after flipping — that's when the caramel is still glossy and the rolls are soft all the way through. I put the inverted plate directly on the table and let everyone pull their own. No slicing required. If you want to make a full brunch spread out of it, these go well with something savory on the side — eggs, fruit, or even a simple salad. For a drink pairing, the Shamrock Shake copycat is a fun option if you're doing a weekend treat situation with kids.
Storage
Store leftovers in an airtight container at room temperature for up to 2 days. They reheat well — 20 seconds in the microwave gets them back to warm and soft. For longer storage, refrigerate for up to 5 days, but the rolls do firm up a bit in the fridge so always reheat before eating. You can also freeze baked leftovers in a zip-lock bag for up to 1 month; thaw at room temperature and warm in a 300°F oven for about 8 minutes.
Frequently Asked Questions
Can I assemble these the night before and bake them in the morning?
Yes, and honestly this is my preferred method when I'm making them for guests. Put the caramel in the dish, press the rolls in, cover with plastic wrap, and refrigerate overnight. In the morning, pull it out while the oven preheats and let it sit on the counter for about 20 minutes, then bake. You might need an extra 3–4 minutes in the oven since it's starting cold.
Do I have to flip the pan? Can I just serve them right-side up?
Technically no, you don't have to flip — but the whole point of the caramel pooling at the bottom is that it becomes the top when inverted. If you skip the flip, the tops of the rolls stay dry and the caramel stays underneath where nobody sees it. You can spoon some of the sauce back up over the rolls if you really don't want to flip, but the classic flip is what makes these look like proper sticky buns.
Can I freeze these after baking?
Yes. Let them cool completely first, then wrap individual portions (or the whole batch) tightly in plastic wrap and place in a freezer bag. They'll keep for about a month. To reheat, thaw at room temperature for a couple hours, then warm in a 300°F oven for 8–10 minutes. They won't be quite as gooey as fresh, but they're still really good.
Can I use white sugar instead of brown sugar?
You can, but I wouldn't. Brown sugar has molasses in it, which is exactly what gives the caramel that deep, almost toffee-like flavor and the dark color. White sugar will still make a sauce, but it'll taste noticeably lighter and more one-dimensional. If you're out of brown sugar, you can make your own by mixing 1 cup of white sugar with 1 tablespoon of molasses.
What other nuts can I use besides pecans?
Walnuts work really well and are usually cheaper than pecans. Almonds (slivered or roughly chopped) are great too. Macadamia nuts are amazing if you can find them and want to lean into the Hawaiian theme. And if you're nut-free, just skip them entirely — the buns are completely good without. I've served them nut-free when Zainab's friend with a nut allergy came over and no one missed them.
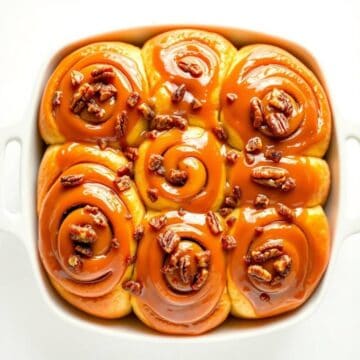
HAWAIIAN ROLLS STICKY BUNS
Ingredients
- 12 Hawaiian rolls slider size, sliced in half horizontally
- ½ cup unsalted butter
- ¾ cup brown sugar packed
- 1 tablespoon ground cinnamon
- ½ cup chopped pecans or walnuts optional
- 1 teaspoon vanilla extract
Instructions
Prepare caramel sauce:
- In a small saucepan, melt butter over medium heat. Stir in brown sugar and cinnamon. Cook for 2–3 minutes until sugar dissolves and caramel is smooth. Remove from heat and stir in vanilla extract.
Assemble buns:
- Preheat oven to 350°F (175°C). In a greased 9x13-inch baking dish, pour half of the caramel sauce and spread evenly. Place the bottom halves of the Hawaiian rolls in a single layer. Sprinkle nuts over the rolls if using. Drizzle remaining caramel sauce over the tops.
Top with roll tops:
- Place the top halves of the rolls over the caramel, pressing down gently.
Bake:
- Bake for 18–20 minutes until buns are warm and caramel bubbly.
Serve:
- Let cool 5 minutes. Invert onto a serving plate so the sticky caramel is on top. Serve warm.
Notes
- Make Ahead: Prepare the caramel sauce and assemble the buns the night before. Refrigerate and bake fresh in the morning.
- Nuts: Feel free to omit nuts or swap for your favorite, like almonds or macadamia nuts.
- Glaze Option: Drizzle with cream cheese glaze or icing for extra sweetness.
- Storage: Store leftovers in an airtight container at room temperature for up to 2 days. Reheat gently before serving.
I keep coming back to this recipe because it genuinely solves a problem I have every weekend — the kids want something special for breakfast, I don't want to spend an hour in the kitchen before my coffee has kicked in, and whatever I make needs to feel like an occasion even on a regular Saturday. These sticky buns check all of that. The fact that they look impressive when you flip them onto the plate doesn't hurt either.
If you're planning a brunch and want something that requires almost no effort but reads as a centerpiece dish, this is it. I've served it alongside scrambled eggs and fresh fruit and the sticky buns were what people talked about afterward. Not the eggs. Always the sticky buns. For a full sweet-leaning spread, these also pair well next to my Angel Chicken Rice if you're doing a bigger table — the savory-sweet contrast is a good one.
This isn't a complicated recipe and I'm not pretending it is. It's a shortcut that works — one package of Hawaiian rolls, a simple caramel sauce, and about 30 minutes. The result tastes like something that took much longer. That's the whole appeal, and it's why I've made this at least a dozen times since that first accidental Saturday morning experiment. 🍯✨
If you're in a sweet-treat mood, here are a few other things I've been making lately:





Comments
No Comments