
Saad asked for ice cream pops three weeks in a row before I finally sat down and figured out a version I could make at home without any special equipment. The store-bought ones are fine, but they're expensive for what they are — and once I realized how simple these are to put together, I couldn't justify buying them anymore.
The whole thing is really just softened vanilla ice cream folded with mini chocolate chips, spooned into molds, and frozen. That's it. What makes the difference is using mini chips instead of regular ones — they distribute through every bite without sinking to the bottom or creating hard chunks in the middle. I learned that after my first batch had all the chocolate clumped at one end.
I make these ahead on weekends and keep a batch in the freezer. My husband grabs one after dinner, Saad and Zainab take them as after-school snacks, and on hot days they disappear faster than I can make them. If you're planning for a party or a gathering, double the batch — six pops will not be enough.
You don't need popsicle molds either, though they make things easier. Small paper cups work just as well — I used those the first few times. If you want something a little more indulgent to serve as dessert, my Banana Pudding Crunch Cheesecake is another no-fuss freezer-friendly option that my family loves equally. But for something you can make in 10 minutes of active time and have ready by tomorrow — these pops are it.
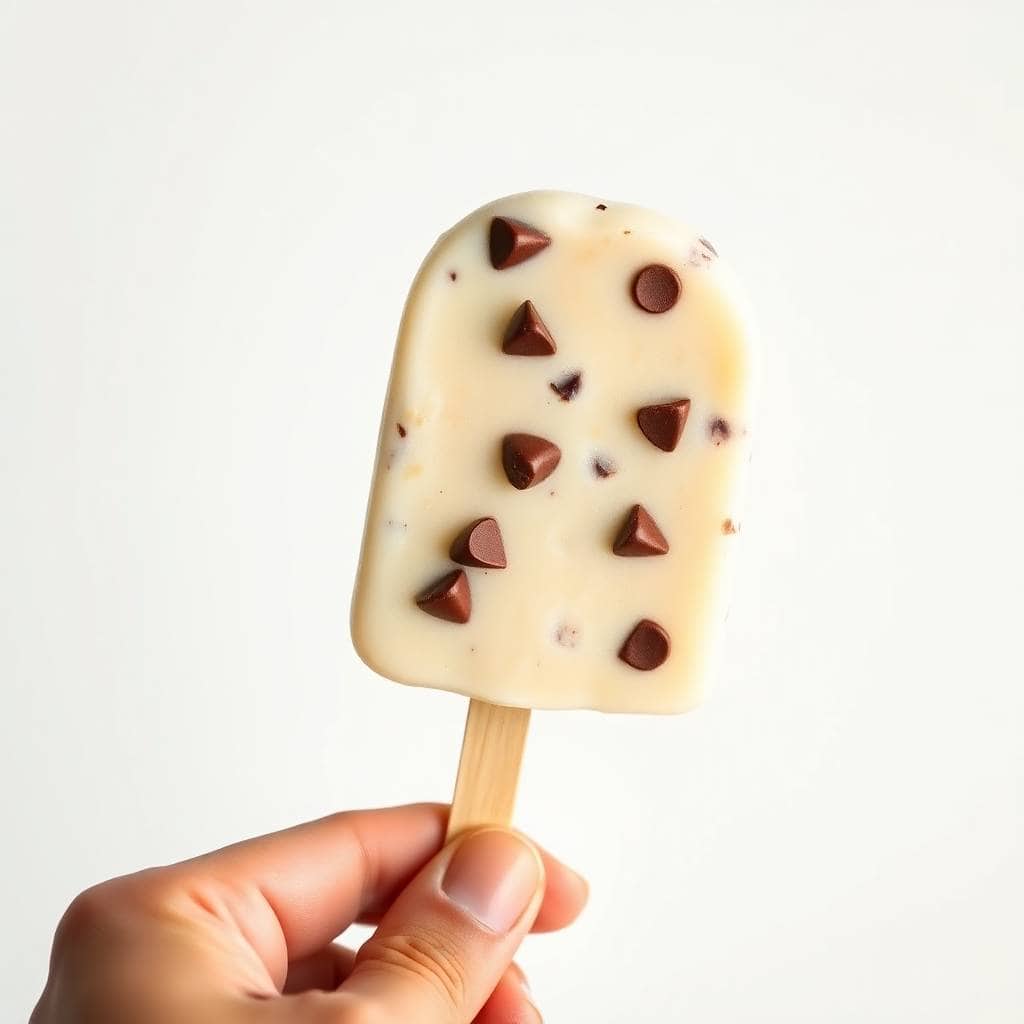
Why You'll Love This Recipe
- Only two real ingredients: Vanilla ice cream and mini chocolate chips — that's the core of this recipe. Everything else is optional. I like that I can make these at 9pm on a Tuesday with whatever's already in my freezer, no special grocery run required.
- Kids can help make them: Saad has been helping me make these since he was seven. Folding the chips into softened ice cream, spooning it into cups, poking in the sticks — there's nothing dangerous and nothing complicated. It's one of those rare kitchen tasks where kids actually stay interested the whole way through.
- No molds needed: If you don't own popsicle molds, paper cups from the dollar store work perfectly. Fill them, cover the top with a small square of foil, poke the stick through the foil — the foil holds the stick upright while it freezes. I did this for months before I bought actual molds.
- Make-ahead friendly: I make a double batch every couple of weeks because a single batch of six disappears in one afternoon at my house. They keep well in the freezer for up to two weeks if you wrap them properly, though honestly they never last that long here.
- Easy to customize: Once you have the base down, you can go in a dozen directions — mint extract, crushed cookies, dipped in melted chocolate, rolled in sprinkles. I've done all of these. The peanut butter chip version is currently Zainab's favorite.
Ingredients
- 2 cups vanilla ice cream, softened (about 10 minutes at room temperature)
- ½ cup mini chocolate chips
- 6 popsicle sticks
- Optional: melted chocolate or sprinkles for dipping/decorating
Directions
- Step 1: Soften the ice cream — Let the vanilla ice cream sit at room temperature for about 5–10 minutes until it's soft enough to stir without tearing. You want it pliable but not melted — if it's fully liquid the chips will just sink to the bottom.
- Step 2: Fold in the chocolate chips — Add the mini chocolate chips to the softened ice cream and fold gently with a spatula or wooden spoon. Don't stir aggressively — you want the chips distributed evenly without completely deflating the ice cream's texture.
- Step 3: Fill the molds — Spoon the mixture evenly into 6 popsicle molds or small paper cups, filling each about ¾ of the way. Leave a little room at the top — the mixture expands slightly as it freezes and you don't want it overflowing.
- Step 4: Insert the sticks — Place a popsicle stick into the center of each mold. If the ice cream is too soft and the stick won't stay upright, freeze for 20–30 minutes first, then push the sticks in. If using paper cups, press a small square of foil over the top and poke the stick through — it holds the stick straight without any fuss.
- Step 5: Freeze until firm — Place the molds in the freezer for at least 4 hours, or overnight if you can wait. I usually make these after dinner and we have them ready the next afternoon.
- Step 6: Unmold and serve — Run the outside of the molds briefly under warm water for 5–10 seconds to loosen. Pull the pops out gently. If using paper cups, just peel the cup away. Serve immediately or keep in the freezer wrapped in plastic wrap until ready.

Tips for Success
- Use mini chips, not regular: I made the mistake of using regular-sized chocolate chips my first time. They're too heavy — they sink before the pop freezes and you end up with a clump of chocolate at the bottom and nothing at the top. Mini chips stay suspended throughout the pop much better.
- Don't let the ice cream get too soft: There's a window between "too stiff to stir" and "fully melted soup." Aim for soft-serve consistency — it should hold its shape when you spoon it but give easily when pressed. If it gets too liquidy, pop the bowl in the freezer for 5 minutes before filling the molds.
- Wrap individually before storing: Once your pops are fully frozen, wrap each one in plastic wrap before putting them in an airtight container or zip-lock bag. This prevents freezer burn and stops them from sticking together. I skip this step sometimes when I'm lazy and regret it every time.
- Decorate fast: If you're dipping in melted chocolate or rolling in sprinkles, do it immediately after unmolding while the pops are still icy cold. The toppings stick better to a cold surface, and if you wait even a couple minutes the outside starts to soften and things slide off.
- The warm water trick takes practice: A few seconds under the tap is all you need — too long and the outside of the pop starts to melt. I hold the mold horizontally under a thin stream of warm (not hot) water and rotate it once. Then it slides right out.
Variations
- Peanut Butter Chip Pops: Swap the mini chocolate chips for peanut butter chips, or swirl 2 tablespoons of creamy peanut butter into the softened ice cream before folding. Zainab requests this version more than the original at this point. It tastes like a frozen Reese's.
- Mint Chocolate Chip: Add ½ teaspoon of pure mint extract to the softened ice cream and stir before folding in the chips. A tiny drop of green food coloring makes it look exactly like the classic. This is my husband's preferred version — he grew up eating mint chip ice cream and says this tastes just like it.
- Cookies and Cream: Replace the mini chips with ½ cup of crushed chocolate sandwich cookies (Oreos work perfectly). The cookies soften slightly when frozen into the ice cream, giving you that classic cookies-and-cream texture. This is a great way to use up the last few cookies from a broken pack.
- Double Chocolate: Mix 1–2 tablespoons of unsweetened cocoa powder into the softened ice cream first, then fold in dark chocolate chips. The base becomes richer and more intensely chocolatey. I made this for a birthday once and it went faster than anything else on the table.
- Dairy-Free Version: Use a coconut milk or almond milk-based vanilla ice cream — most Walmart and Trader Joe's locations carry a few options. The texture is slightly different (a little icier), but it still works well. Pair with dairy-free chocolate chips if you need it fully dairy-free.
Serving and Storage
Serving
Serve straight from the freezer — these pops don't need any thawing time. If you've dipped them in chocolate, let them sit for 30 seconds after unmolding before serving so the chocolate shell firms up fully. They're good on their own, but if you want to make them feel a little more special for guests, serve alongside some Candied Orange Slices — the citrus cuts through the richness nicely.
Storage
Wrap each finished pop individually in plastic wrap, then store in a zip-lock freezer bag or an airtight container. They'll keep well for up to 2 weeks. After that, ice crystals start forming on the outside and the texture gets a bit grainy. Keep them toward the back of the freezer where the temperature is most consistent — the door area causes too much fluctuation.

Frequently Asked Questions
Can I use homemade ice cream instead of store-bought?
Yes, homemade ice cream works fine as long as it's soft enough to fold without tearing. Let it sit at room temperature for a few minutes if it's just come out of the churn or the freezer. The only thing to watch is that very high-fat homemade ice creams can be harder to get out of molds — run a little extra warm water over the outside when unmolding.
What if I don't have popsicle molds?
Small paper cups — the 3 oz or 5 oz kind — work perfectly. Fill them, lay a small square of foil across the top, and poke your stick through the foil. The foil holds the stick centered and upright while everything freezes. When you're ready to eat, just peel the paper cup away. I did this for a full year before I bought actual molds.
How long do these ice cream pops last in the freezer?
Up to 2 weeks if wrapped well. After that the texture starts to get icy and a bit grainy around the edges. The flavor is still fine, but the creaminess suffers. Wrapping each pop individually in plastic wrap before storing makes a noticeable difference in how long they stay good.
Can I add other mix-ins besides chocolate chips?
Absolutely — crushed cookies, sprinkles, chopped nuts, freeze-dried fruit, peanut butter chips, shredded coconut. The rule I follow is to keep mix-ins small and fairly dry. Anything too wet (like fresh fruit) can create icy pockets in the pop. Freeze-dried strawberries or raspberries work much better than fresh.
How do I prevent ice crystals from forming on the pops?
Two things help most: wrapping each pop tightly in plastic wrap, and storing them toward the back of the freezer rather than the door. Temperature swings — every time the freezer door opens — are what cause ice crystals to form. If your freezer runs warm or you open it frequently, eat these within the first week for best texture.
CHOCOLATE CHIP ICE CREAM POPS
Ingredients
- 2 cups vanilla ice cream softened
- ½ cup mini chocolate chips
- 6 popsicle sticks
- Optional: melted chocolate or sprinkles for decoration
Instructions
Soften ice cream:
- Let the vanilla ice cream sit at room temperature for about 5 minutes until soft enough to stir.
Mix chocolate chips:
- Gently fold the mini chocolate chips into the softened ice cream.
Fill molds:
- Spoon the ice cream mixture evenly into 6 popsicle molds or small paper cups.
Insert sticks:
- Insert a popsicle stick into each mold or cup.
Freeze:
- Place the molds in the freezer for at least 4 hours or until fully frozen.
Serve:
- To unmold, run warm water over the outside of the molds for a few seconds. Enjoy immediately!
Notes
- For a dairy-free version, use coconut milk or almond milk-based ice cream.
- Add crushed nuts or swirl in caramel sauce for extra flavor.
- These pops are great for parties and easy to customize with your favorite ice cream flavors.
- Store leftover pops in the freezer in an airtight container for up to 1 week.
These chocolate chip ice cream pops have become one of those recipes I make on autopilot. Ten minutes of actual work, four hours of freezer time, and I have a batch ready to go whenever someone opens the freezer looking for something cold. That's a pretty good deal as far as homemade desserts go.
What I like most is that the base recipe is solid on its own but also genuinely flexible. I've made the mint version, the peanut butter chip version, the cookies-and-cream version — they all work because the method is the same. Once you've made one batch you'll start thinking of your own combinations. My next experiment is folding in a swirl of strawberry buttercream for a strawberry shortcake pop. I'll report back.
If you're making these for kids, let them help with the scooping and stick-inserting — it keeps them invested in eating something they made themselves, which is half the battle in my house. And if you're making them for adults, the double chocolate version with dark chips is the one to go with.
Make a batch this weekend. You'll be glad you have them in the freezer by Monday. 🍦❄️🍫
If you liked these, here are a few more recipes from my kitchen you might enjoy:
- Banana Pudding Crunch Cheesecake — another no-fuss freezer-friendly dessert that always gets asked about
- Candied Orange Slices (Glossy, Chewy & Gift-Worthy) — great for decorating desserts or gifting
- Strawberry Buttercream Frosting (Made with Real Fruit, No Dyes) — real strawberry flavor, no artificial anything
- Bacon Spinach Pinwheels — when you need a savory party snack to go alongside the sweet stuff
- Tomato Basil Bruschetta (Crispy Party Appetizer in 20 Minutes) — another crowd-friendly make-ahead option for gatherings





Comments
No Comments