
I made my first batch of candied orange slices three years ago, the week before Christmas, mostly because I had a pile of oranges sitting on the counter and I wanted something pretty to put on top of a cake. They came out sticky, unevenly cooked, and honestly a bit sad-looking. But I ate every single one standing at the kitchen counter and immediately started a second batch.
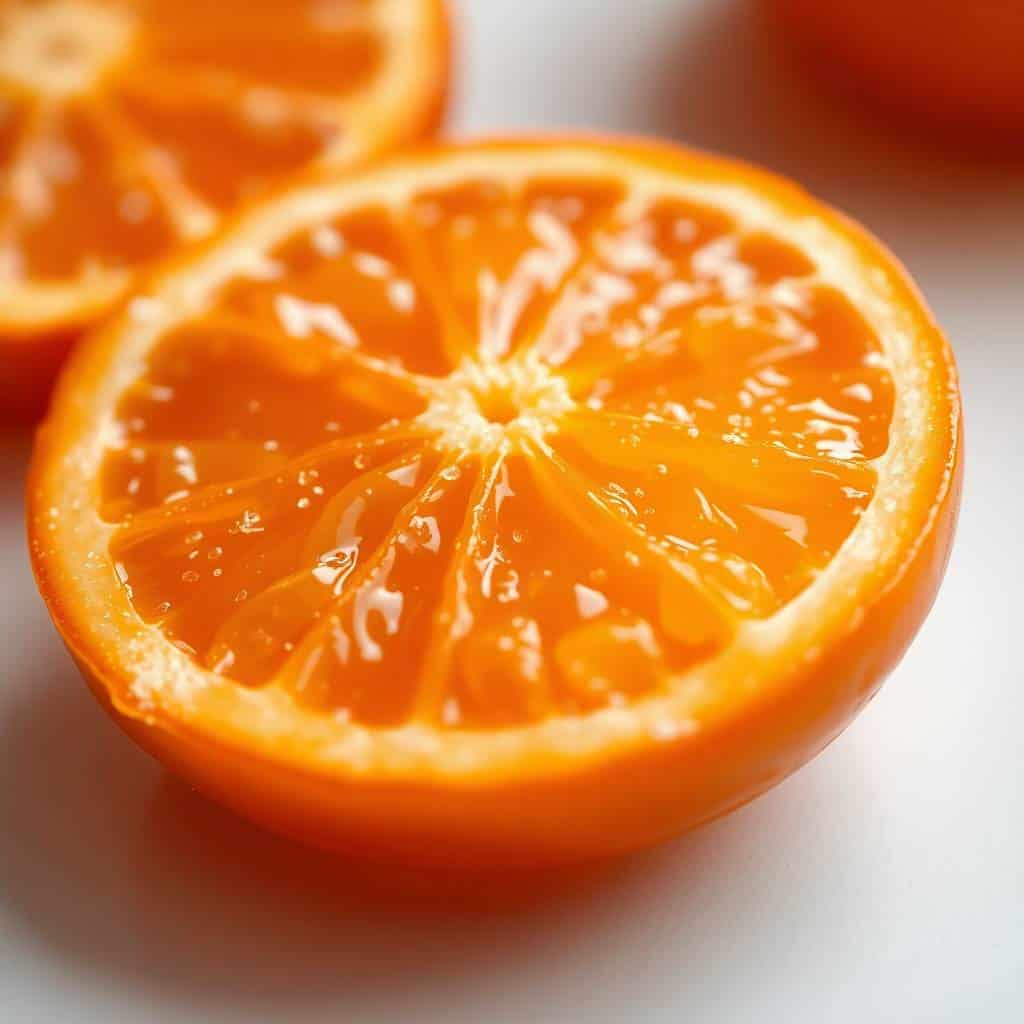
What I've figured out since then is that this recipe is almost entirely about patience and low heat. The first time I rushed it — kept the heat a little too high because I was in a hurry — and the syrup started to caramelize before the orange rinds went translucent. The slices were chewy but the color was off and the bitterness came through too sharp. When I slowed down and let them simmer gently for the full 45 to 60 minutes, everything changed. The rinds softened, the white pith turned almost see-through, and the slices looked like little stained-glass windows. That's the version I kept making.
My daughter Zainab loves these laid on top of chocolate cake — she calls them "the orange decorations" and gets very upset if I skip them. I also make a big batch every December to pack into small jars with a ribbon, which is genuinely one of the easiest homemade gifts I've put together. They look impressive without being difficult, which is my favorite kind of recipe. If you're looking for another edible gift idea, my Baci di Dama Italian Cookies go beautifully in a box alongside these.
You only need three ingredients: oranges, sugar, and water. The optional sugar coating at the end is worth doing if you want that sparkly finish, especially for gifting. Give yourself at least 6 to 8 hours of drying time after cooking — I usually make them the night before I need them and let them sit on the rack overnight.

Why You'll Love This Recipe
- Three ingredients, no special tools: I don't own a candy thermometer and I've never needed one for this recipe. All you need is a wide skillet, a slotted spoon, and a wire rack — tools most people already have. The whole process happens on the stovetop, low and slow, and there's nothing complicated about it.
- They look far more impressive than the effort involved: People always assume these took a lot of skill when they see them on a cake or in a jar. The translucent, glossy finish is just what happens when you simmer thin citrus slices in syrup long enough — it's not technique, it's time. I've set them on top of my German Chocolate Cupcakes and gotten more compliments on the garnish than the actual cupcake.
- Make-ahead and gift-ready: These keep for up to two weeks at room temperature in an airtight container, which makes them genuinely useful for holiday prep. I usually make a double batch in early December — one for baking, one for gifting. They actually improve after the first day once the sugar sets properly.
- Genuinely versatile: I've used these on cakes, floated them in sparkling water and cocktails, chopped them up to stir into cookie dough, and eaten them straight as a snack. The sweet-tangy balance with that slight bitterness from the peel makes them interesting in a way that plain sugar candy isn't.
- Works with whatever citrus you have: The same method works for lemons, limes, blood oranges, and grapefruit. I've done a mixed citrus batch for a holiday platter and it looked absolutely beautiful — different colors, different levels of bitterness, all on one tray.
Ingredients
- 2 medium oranges, thinly sliced (navel or Valencia both work well)
- 1 ½ cups granulated sugar
- 1 cup water
- Additional granulated sugar for coating (optional, but recommended for gifting)
Directions
- Prepare the oranges: Wash the oranges well and slice them into thin, even rounds — about ⅛ inch thick. Remove any seeds you spot. Even slices matter here because thick ones won't cook at the same rate as thin ones, and you'll end up with a mixed bag of textures.
- Make the sugar syrup: Combine the water and sugar in a wide skillet or saucepan over medium heat. Stir until the sugar dissolves completely, then bring to a gentle simmer. You want the syrup hot enough to cook the oranges but not so hot that it starts browning.
- Simmer the slices: Lay the orange slices in a single layer in the syrup. Reduce the heat to low and simmer gently for 45 to 60 minutes, turning the slices occasionally with tongs or a fork. You're waiting for the rinds to go translucent — that's how you know they're done. Don't rush this step.
- Transfer to a wire rack: Carefully lift the slices out with a slotted spoon or tongs and place them on a wire rack set over a sheet of parchment paper. Let them dry for 6 to 8 hours, or overnight. The air needs to circulate underneath, which is why the rack matters — don't just lay them on paper or they'll stick.
- Optional sugar coating: Once the slices are still slightly tacky but no longer wet, sprinkle or roll them lightly in granulated sugar for a sparkly finish. If they've dried too much and the sugar won't stick, a very light brush of the leftover syrup helps.
Tips for Success
- Low heat is non-negotiable: I burned my first batch because I kept nudging the heat up, thinking it would go faster. It didn't — the syrup just started darkening and the slices turned bitter. Keep it at a true gentle simmer: small bubbles, not a rolling boil. If you see the syrup turning golden, take the pan off the heat for a minute and lower the burner before you put it back.
- Slice as thin and even as you can: I use my regular chef's knife and go slowly. If you have a mandoline, great — but I've gotten perfectly good results without one. Aim for ⅛ inch. Thicker slices take longer and the pith stays bitter. Thinner slices cook more evenly and go beautifully translucent.
- Don't skip the wire rack: The first time I made these, I set the slices on parchment paper directly, thinking it would be fine. They stuck completely and I had to peel them off in pieces. A wire rack lets air circulate underneath so they dry properly from both sides and don't glue themselves down.
- Give them real drying time: Six to eight hours is the minimum. Overnight is better. I know it's tempting to check on them every hour and declare them done, but if they're still soft and sticky in the center they haven't finished drying. The texture firms up as they cool and the sugar sets — be patient with this step.
- Save the leftover syrup: Don't pour it down the drain. The citrus-infused syrup left in your pan is excellent stirred into sparkling water, brushed on a cake before frosting, or used to sweeten iced tea. It keeps in a jar in the fridge for about two weeks.
Variations
- Spiced syrup: Drop a cinnamon stick and two or three whole cloves into the syrup before you add the oranges. The slices pick up the warm spice as they cook, which makes them feel very festive. I do this version specifically for holiday gift jars — the smell while they're simmering is incredible.
- Chocolate-dipped: Once the slices are fully dried, dip the bottom half in melted dark chocolate and set them on parchment to harden. This is genuinely one of the best things I've made for holiday platters. The bitter chocolate, the sweet-tangy orange, the chewy texture — it works. They pair especially well alongside my Amish Apple Fritter Bread on a dessert table.
- Blood orange: Blood oranges give you a deep ruby color that looks stunning — especially on white frosted cakes. The flavor is slightly less sweet and a bit more complex than navel oranges. I make these when I can find blood oranges in January and February and they disappear faster than any other version.
- Mixed citrus platter: Candy a mix of oranges, lemons, and limes in the same batch (cook separately if their sizes differ significantly, since thinner lime slices cook faster). Arrange them all on a platter and the color range — from pale yellow to bright orange — looks like something from a fancy bakery. I've done this for Eid gatherings and it's always the first thing people reach for.
- Vanilla syrup: Add a split vanilla pod to the simmering syrup. It adds a soft, floral sweetness that makes the slices taste almost like candy. This version is nice floating in a glass of sparkling water or used to garnish a simple vanilla cake.
Serving and Storage
Serving
Use candied orange slices as a cake or cupcake topper, a garnish for cocktails and mocktails, or a snack on their own. They float beautifully in a glass of sparkling water or a citrusy drink. I've also chopped them up and stirred them into shortbread dough or mixed them into a cheese board — the sweetness plays well against sharp aged cheese. If you're serving them with drinks, try them alongside a minty something like my Shamrock Mint Milkshake — the contrast is really nice.
Storage
Store fully dried slices in an airtight container at room temperature for up to two weeks. Separate layers with parchment paper so they don't stick together. If your kitchen is warm or humid, the fridge is safer — they'll keep for up to a month refrigerated and the texture stays firm. Don't store them before they're fully dry, or they'll get sticky and clump together in the container.

Frequently Asked Questions
Can I use any type of orange for this?
Yes — navel, Valencia, and blood oranges all work well. Navel oranges are the easiest to find and give you that classic bright orange color. Blood oranges are more dramatic-looking with a deeper red color and slightly more complex flavor. Avoid very thick-skinned varieties if you can, since the pith takes longer to soften and can stay bitter.
How long do candied orange slices actually last?
Stored in an airtight container with parchment between the layers, they keep well for up to two weeks at room temperature. If your kitchen runs warm or humid, refrigerate them — they'll last up to a month that way. The key is making sure they're fully dried before you store them. If there's any tackiness left, give them more drying time on the rack first.
Can I candy lemons, limes, or grapefruit the same way?
Absolutely, the same method works for all citrus. Lemon and lime slices are thinner so they may cook a bit faster — start checking around the 35-minute mark. Grapefruit is thicker and may need the full 60 minutes or slightly longer. The bitterness level varies by fruit, but the syrup balances it out well in all cases.
Do I need to peel the oranges before slicing?
No — you slice the whole orange, peel and all. The peel is part of what makes these interesting: it softens during the long simmer, the white pith goes from bitter and tough to tender and almost sweet, and the outer rind takes on a slightly chewy candied texture. Peeling them first would just give you plain sugar-coated fruit slices, which is a different thing entirely.
My syrup started turning golden — did I ruin the batch?
Not necessarily, but pull the pan off the heat immediately and lower your burner. A lightly golden syrup is fine and actually adds a mild caramel note. If it's gone dark amber, the slices may taste more bitter and the presentation won't be as clean. I've salvaged lightly-browned batches by removing the slices right away and rinsing the pan — the slices themselves were still good, just a slightly darker color.

CANDIED ORANGE SLICES
Ingredients
- 2 medium oranges thinly sliced
- 1 ½ cups granulated sugar
- 1 cup water
- Additional sugar for coating optional
Instructions
Prepare the Oranges:
- Wash oranges thoroughly and slice into thin, even rounds (about ⅛ inch thick). Remove any seeds.
Make Sugar Syrup:
- In a large skillet or saucepan, combine 1 cup water and 1 ½ cups sugar. Bring to a simmer over medium heat, stirring until sugar dissolves.
Simmer the Slices:
- Add orange slices in a single layer. Reduce heat to low and simmer gently for 45–60 minutes, turning occasionally, until rinds are translucent.
Cool and Dry:
- Carefully transfer slices to a wire rack. Let them dry for 6–8 hours or overnight. Optional: coat in additional sugar once dry for extra sparkle.
Notes
Store in an airtight container at room temperature for up to 2 weeks. Separate layers with parchment. Uses:
Perfect for cake toppers, cocktail garnishes, or gift packaging. Flavour Twist:
Add a cinnamon stick or vanilla pod to the syrup for extra flavour.
I make these at least twice a year — once in December for gifting, and once whenever I need something beautiful to put on a cake without a lot of effort. They've become one of those recipes I rely on precisely because they look like they took skill when really they just took time. The hardest part is remembering to start them the night before.
If you've never candied citrus before, this is an easy place to start. The ingredient list is as short as it gets, and the process teaches you something real about how sugar behaves — which makes other candy and baking projects feel less mysterious afterward. Once you've done oranges, try a mixed batch with lemons and limes. Once you've done that, dip them in chocolate and see what happens.
I hope you give these a go — especially if you're heading into a season where you want something homemade and thoughtful to give or serve. They pack up beautifully in a small jar, they hold up well, and they make any dessert table look like you put in more thought than you actually did. That's my kind of recipe. 🍊✨
If you liked this, here are a few more recipes from my kitchen you might enjoy:
- Irresistible German Chocolate Cupcakes — a great base for a candied orange topper
- Baci di Dama Italian Cookies — another elegant edible gift that packs up beautifully
- Amish Apple Fritter Bread with Vanilla Glaze — no mixer needed, easy and impressive
- Shamrock Mint Milkshake — try floating a candied slice on top for a citrusy twist





Comments
No Comments