
I made these peppermint brownies for the first time last December, the week before Eid ul-Adha happened to overlap with my kids' school winter fair, and I needed something that looked festive without requiring three hours in the kitchen. The crushed candy canes on top do all the visual work — people genuinely think you spent way more effort than you did.
What makes these work is the balance between the cocoa and the peppermint extract. I've had mint-chocolate things that taste like toothpaste — too much extract, not enough chocolate underneath. Here the chocolate is the star and the mint is the supporting note. I use just ½ teaspoon of peppermint extract and it's enough. The first time I made this I accidentally grabbed a full teaspoon and the brownies tasted like mouthwash. So measure carefully on that one.
Zainab became obsessed with these after the first batch. She's my pickier eater but she asked for them three weekends in a row, which in this house is basically a standing ovation. My husband eats them slightly warm with a cup of tea, which honestly is the move. If you like chocolate desserts with some texture and crunch, also check out my Chocolate Fudge Dessert Pizza — it scratches a similar itch.
One thing to set expectations on: these are fudgy brownies, not cakey ones. The center should look slightly underdone when you pull them from the oven — that's correct. They'll firm up as they cool. If your toothpick comes out completely clean, you've gone a few minutes too far. I learned that the hard way in batch two.
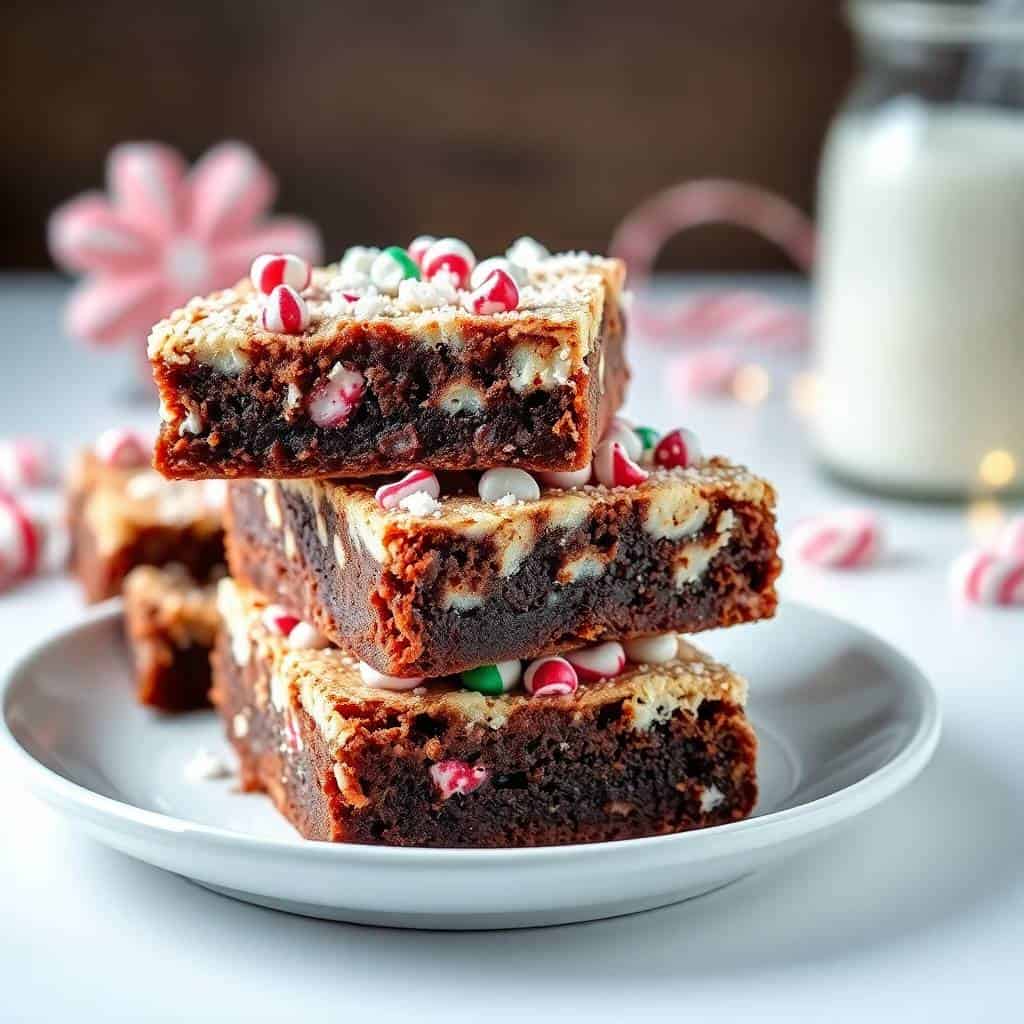
Why You'll Love This Recipe
- One bowl, no fuss: I don't pull out my stand mixer for these — I don't own one. A large mixing bowl, a whisk, and a wooden spoon handle everything. The batter comes together in about ten minutes and goes straight into the pan. On a busy school night I've made these while simultaneously helping with homework.
- That fudgy center: There's a real difference between a brownie that's fudgy and one that's just underbaked. The ratio of butter to flour here gives you that dense, almost gooey middle that holds its shape when you cut it. The chocolate chips folded into the batter help too — they melt and add extra richness in little pockets.
- The candy cane crunch on top: It's not just decoration. The crushed candy canes add a texture contrast against the soft brownie underneath, and they partially melt into the surface during baking so you get these little crackly peppermint patches. I bag up a few candy canes from Walmart right after Christmas when they're deeply discounted and use them all winter.
- They keep well: I've made a double batch before a school event and stored them for three days at room temperature without any dryness. The key is an airtight container. They might actually be better on day two once everything has settled and the flavors have had time to meld.
- Good for gifting: These cut into neat squares (once fully cooled), stack well in a tin, and travel without falling apart. Last December I boxed up a batch alongside my Minty Snowball Cookies as neighbor gifts and both were gone by the same evening.
Ingredients
- ½ cup unsalted butter, melted
- 1 cup granulated sugar
- 2 large eggs
- 1 teaspoon vanilla extract
- ½ teaspoon peppermint extract (pure, not artificial — it makes a difference)
- ⅓ cup unsweetened cocoa powder
- ½ cup all-purpose flour
- ¼ teaspoon salt
- ½ teaspoon baking powder
- ½ cup chocolate chips (semi-sweet works best, but whatever you have)
- ¼ cup crushed candy canes or peppermint candies, for topping
Directions
- Step 1: Preheat and prep your pan. Heat your oven to 350°F (175°C). Line an 8×8-inch baking pan with parchment paper, leaving a little overhang on the sides so you can lift the whole slab out cleanly. This is worth doing — brownies stuck to the pan are a heartbreak.
- Step 2: Mix the wet ingredients. In a large bowl, whisk together the melted butter and sugar until combined and slightly glossy. Add both eggs, the vanilla extract, and the peppermint extract. Whisk until the mixture looks smooth and uniform, about a minute of mixing.
- Step 3: Add the dry ingredients. Add the cocoa powder, flour, salt, and baking powder directly into the wet mixture. Switch to a spatula or wooden spoon and stir until just combined — don't overmix or the brownies will turn cakey. Stop as soon as you don't see dry streaks.
- Step 4: Fold in the chocolate chips. Gently fold in the chocolate chips. They'll melt slightly during baking and create little fudgy pockets throughout the brownie.
- Step 5: Pour and top. Spread the batter evenly into your prepared pan. Sprinkle the crushed candy canes over the top. Try to distribute them somewhat evenly so every square gets some crunch.
- Step 6: Bake. Bake for 30–35 minutes. Start checking at 28 minutes — insert a toothpick in the center and you want it to come out with moist crumbs, not wet batter and not completely clean. Clean means overbaked. Pull them out when there's still a little resistance.
- Step 7: Cool completely before cutting. I know it's hard to wait but this step matters. The brownies continue setting as they cool. If you cut them warm they'll crumble and fall apart. Give them at least an hour, or pop the pan in the fridge for 30 minutes to speed things up.
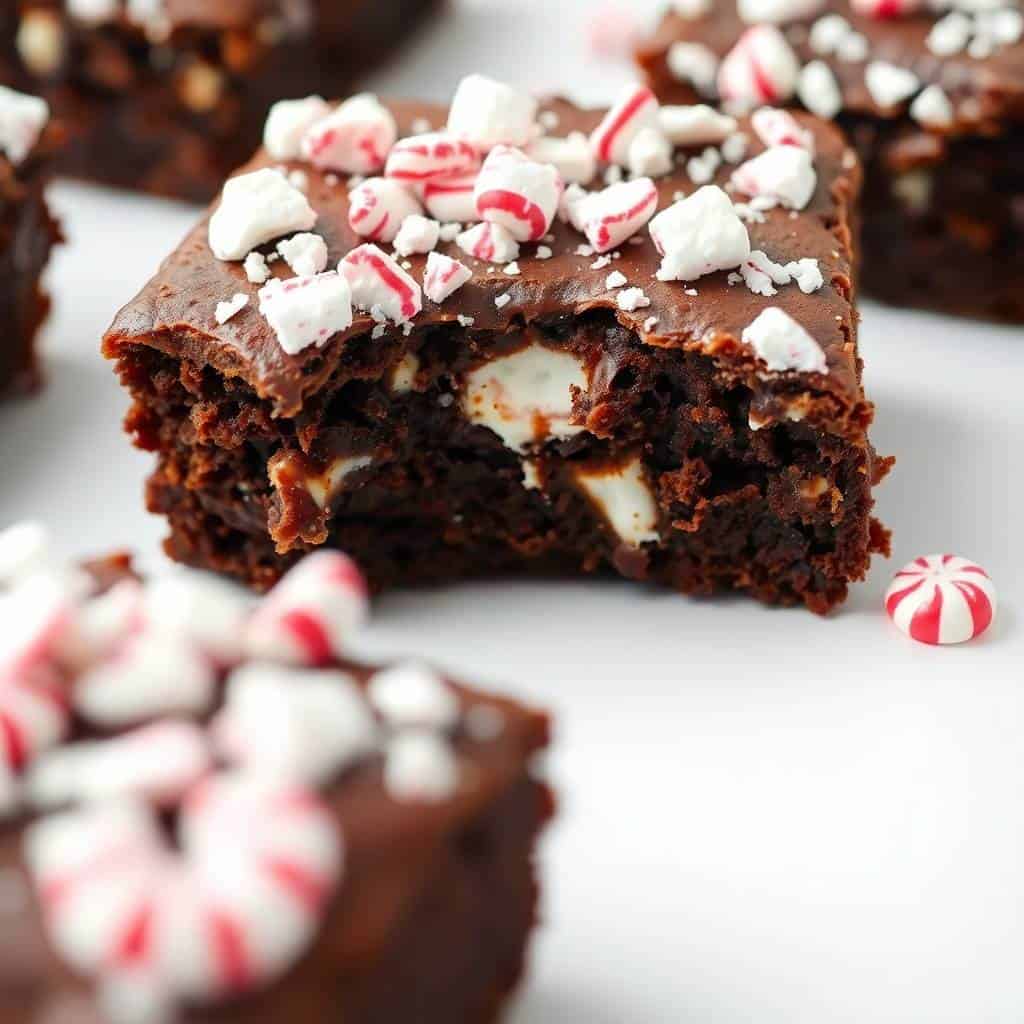
Tips for Success
- Use pure peppermint extract, not mint extract: These are different things and it matters. Mint extract often has spearmint in it, which reads more like chewing gum. Peppermint extract is sharper and cleaner and works much better with chocolate. McCormick pure peppermint extract is easy to find at most grocery stores and it's what I use.
- Don't skip the parchment: I've skipped it when I was in a rush and regretted it every time. Even a well-greased pan can stick with the sugar in this recipe. Parchment lets you lift the entire brownie slab out of the pan, which makes cutting much cleaner and means no broken corners.
- Crush your candy canes finely: Big chunks of candy cane are hard to bite through and they don't distribute evenly. I put mine in a zip-lock bag and roll over them with a rolling pin until they're mostly fine crumbs with a few slightly larger pieces. That mix of textures is nicer than all-big-chunks.
- Don't overbake: This is the one thing that ruins brownies most often. At 350°F the edges will look set and slightly pulling away from the pan while the center still looks a little soft — that's exactly where you want it. The carry-over heat finishes the job. I set a timer for 28 minutes and check every 2 minutes after that rather than just trusting the 35-minute mark blindly.
- Use good cocoa powder: The cocoa is doing most of the heavy lifting here flavor-wise. Dutch-process cocoa gives you a deeper, smoother chocolate flavor — Hershey's Special Dark is widely available at Walmart and Costco and it works beautifully. Standard natural cocoa works too, just slightly more acidic in flavor.
Variations
- White chocolate drizzle: Once the brownies have fully cooled, melt a handful of white chocolate chips in the microwave in 30-second bursts, then drizzle over the top with a spoon. It looks bakery-level and takes about three minutes. I do this when I'm bringing these somewhere and want them to look extra put-together.
- Peppermint frosting layer: Spread a thin layer of peppermint buttercream over the cooled brownies before adding the candy cane topping. It makes them richer and more of a layered dessert. My husband prefers this version — he likes anything that adds more sweetness. Beat ½ cup softened butter with 1½ cups powdered sugar, a splash of milk, and ¼ teaspoon peppermint extract until fluffy.
- Mint chocolate chips instead of candy canes: If you can't find candy canes (or it's not the season), swap in Andes mint baking chips or Nestlé mint chocolate chips. They fold right into the batter and give you mint flavor from the inside out rather than just on top. This is my year-round version when I'm not planning ahead.
- Gluten-free version: I've made these with a 1:1 gluten-free flour blend (Bob's Red Mill works well) for a friend with celiac and they came out almost identically fudgy. The texture was maybe very slightly denser but honestly you'd only notice if you were comparing them side by side. Use the same quantities.
- Extra chocolate layer: Press a layer of chocolate chips flat on top of the batter before adding the candy canes — they'll melt into a thin chocolate layer during baking. This version is not for the faint of heart but it's been requested at every gathering I've brought it to. If you like this kind of thing, my Valentine's Puppy Chow is the same energy — full chocolate chaos, fully worth it.
Serving and Storage
Serving
Serve at room temperature for the cleanest slices, or slightly warm if you want the chocolate to be extra gooey. Warm brownies with a scoop of vanilla ice cream is genuinely hard to beat. I also serve them plain alongside tea or coffee — they're rich enough that they don't need anything extra. If you're putting together a holiday dessert spread, these pair well with the Polar Bear Cookies for a matching winter theme.
Storage
Store in an airtight container at room temperature for up to 4 days. Keep them away from humid spots in the kitchen — moisture makes the candy cane topping sticky and soft. For longer storage, refrigerate for up to a week (bring to room temp before eating) or freeze individual squares wrapped in plastic wrap and sealed in a freezer bag for up to 2 months. Thaw overnight on the counter.
Frequently Asked Questions
Can I use peppermint oil instead of peppermint extract?
Yes, but peppermint oil is significantly more concentrated than extract. Use about ¼ teaspoon of oil in place of the ½ teaspoon of extract — and even then, taste the batter before baking if you're unsure. Too much and it'll overpower everything. I prefer extract because it's easier to control.
How do I keep brownies fudgy and not cakey?
The two main culprits for cakey brownies are too much flour and overbaking. This recipe uses only ½ cup of flour for a reason — keep it exactly as written. Pull the brownies when the toothpick still has moist crumbs on it, not when it comes out clean. Let them cool fully before cutting; cutting warm brownies makes them look underdone even when they're not.
Can I freeze these brownies?
Absolutely. Let them cool completely, cut into squares, wrap each one individually in plastic wrap, then store in a zip-lock freezer bag. They'll keep for up to 2 months. Thaw overnight at room temperature. I usually freeze half a batch when I make these so I have something ready for unexpected guests.
What can I use instead of crushed candy canes?
Crushed peppermint hard candies work exactly the same way. Andes mint baking chips are great folded into the batter if you want mint flavor throughout rather than just on top. If you skip the peppermint topping entirely and reduce the extract slightly, you get a really solid straight chocolate brownie — nothing wrong with that.
Can I double this recipe for a larger batch?
Yes — double all the ingredients and use a 9×13-inch pan instead of the 8×8. The bake time will be similar but check at 30 minutes since the batter is shallower in the larger pan. I make a double batch whenever these are going to a gathering because one 8×8 pan disappears in about twenty minutes.
FUDGY PEPPERMINT BROWNIES
Ingredients
- ½ cup unsalted butter melted
- 1 cup granulated sugar
- 2 large eggs
- 1 teaspoon vanilla extract
- ½ teaspoon peppermint extract
- ⅓ cup unsweetened cocoa powder
- ½ cup all-purpose flour
- ¼ teaspoon salt
- ½ teaspoon baking powder
- ½ cup chocolate chips
- ¼ cup crushed candy canes for topping
Instructions
Preheat the Oven:
- Preheat oven to 350°F (175°C). Line an 8×8-inch baking pan with parchment paper or lightly grease.
Mix Wet Ingredients:
- In a large bowl, whisk together melted butter and sugar. Add eggs, vanilla extract, and peppermint extract; mix until combined.
Add Dry Ingredients:
- Stir in cocoa powder, flour, salt, and baking powder. Mix until smooth and well combined.
Add Chocolate Chips:
- Fold in chocolate chips for extra fudginess.
Bake:
- Pour the batter into the prepared pan. Smooth the top and sprinkle with crushed candy canes.
Cool and Slice:
- Bake for 30–35 minutes, or until a toothpick comes out with moist crumbs. Cool completely before slicing into squares.
Notes
- Make Ahead: Brownies stay fresh for up to 4 days in an airtight container or can be frozen for up to 2 months.
- Customizing the Flavor: Top with a drizzle of white chocolate or use mint chocolate chips for an extra peppermint twist.
- Serving Suggestions: Serve warm with vanilla ice cream or wrap individually for homemade holiday gifts.
- Allergy-Friendly Options: Use dairy-free butter and chocolate to make them suitable for a dairy-free diet.
- Storage Tips: Store in a sealed container at room temperature. Avoid humid environments to keep candy canes crisp.
These brownies have become one of those recipes I come back to every year without having to think about it. They're on the table at every winter gathering now, and I've started making a batch in November just to have something in the freezer for when people drop by unexpectedly. The candy cane topping is festive enough for a holiday table but honestly the brownies are good any time of year with just the mint flavor — the candy cane is optional decoration, not the whole point.
What I like most about this recipe is how forgiving it is once you understand the two rules: don't overmeasure the peppermint extract, and don't overbake. Everything else is pretty hard to get wrong. The batter is thick and comes together fast, and the result looks like something that took serious effort even when it didn't.
If you make these, let them cool all the way before you cut them — I know I've said this twice already but it's the step people most often skip and then wonder why their brownies fell apart. Put them in the fridge for half an hour if you're impatient. Worth it. 🍫❄️
If you liked these, here are a few more recipes from my kitchen that you might want to try next:
- Minty Snowball Cookies — a great pairing for a holiday cookie box
- Chocolate Fudge Dessert Pizza — for when you want chocolate in a completely different format
- Polar Bear Cookies — adorable winter cookies that kids love to help decorate
- Valentine's Puppy Chow — another no-bake chocolate treat that travels well
- Blueberry Croissant French Toast Bake — for the morning after a holiday baking session when you want something that feels special without much work





Comments
No Comments