
I made these brownies for the first time on a Tuesday night when I had a box mix in the pantry, a jar of peanut butter, and two kids demanding dessert. I wasn't planning anything fancy — I just started layering things and hoping for the best. What came out of that oven stopped everyone mid-conversation. My husband ate two squares before dinner was even cleared from the table.
The combination here is a from-scratch brownie base — properly fudgy, not cakey — with a simple peanut butter and powdered sugar layer spread on top, then studded with chocolate chips and peanut butter chips. It sounds almost too basic, but the contrast between the dense chocolate base and the slightly sweet, salty peanut butter layer is what makes it work. I've tried making this with Jif, with natural peanut butter, and with the store-brand stuff from Walmart. Jif gives the smoothest layer. Natural peanut butter is a bit oily and separates when you spread it, so I'd skip that one.
Zainab asks for these whenever she has a friend coming over. Saad prefers my Strawberry Crunch on most days, but even he can't resist these when they're sitting on the counter. I make a full 8x8 pan and it's gone by the next morning — so if you're planning to share, double the recipe and use a 9x13.
One thing worth knowing before you start: let the brownies cool completely before you touch the peanut butter layer. I know it's hard to wait. The first time I made these, I spread the peanut butter on while the brownies were still warm and everything turned into a melted mess — still tasted good, but looked terrible. Give it at least an hour, or pop the pan in the fridge to speed things up.
Why You'll Love This Recipe
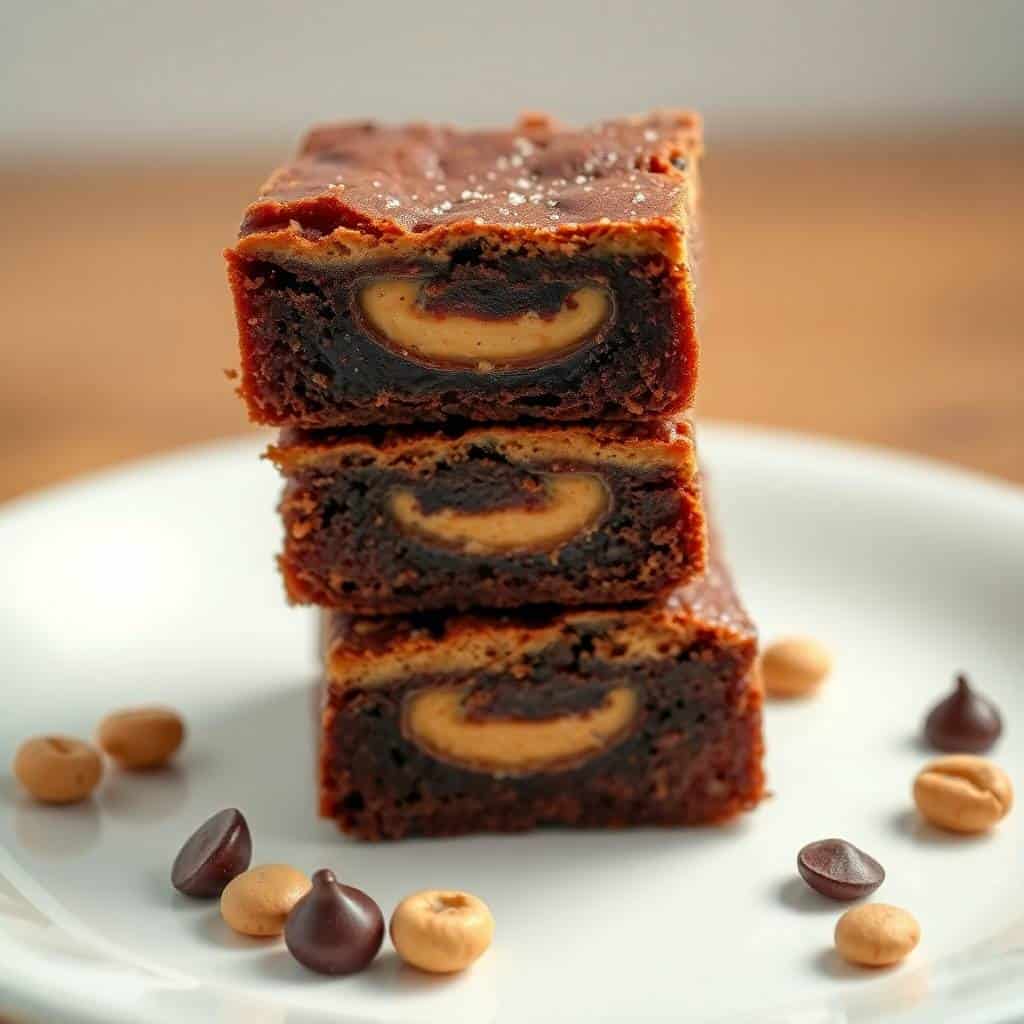
- The brownie base is genuinely fudgy: I tested this with both a box mix and from scratch, and settled on the from-scratch version because you can control the texture. The ratio of butter to flour here is intentionally low on flour, which gives you that dense, slightly underdone-feeling center that everyone fights over. If you accidentally overbake it — which I did on my second attempt — you'll get a cake-y brownie, not a fudgy one. Watch the oven and pull it out when the toothpick has a few moist crumbs.
- The peanut butter layer comes together in two minutes: Mix peanut butter with powdered sugar and that's it — no cooking, no melting, no fuss. It spreads like frosting and sets up firm enough to slice cleanly. I've made peanut butter fudge from scratch before and it's a whole project. This version gives you the same satisfaction with a fraction of the effort.
- Everything is from a regular grocery store: Butter, sugar, eggs, cocoa powder, flour, peanut butter, chocolate chips — you can get all of this at any Walmart, Aldi, or Kroger. No specialty ingredients, no online ordering. The most unusual thing on the list might be the peanut butter chips, and even those are usually in the baking aisle next to the chocolate chips.
- They actually get better the next day: I don't know the science behind it, but these brownies taste noticeably richer and fudgier after sitting overnight. The peanut butter layer firms up and the chocolate flavor deepens. If you can make them the night before, do it. I almost never manage to wait that long, but when I do, I'm always glad I did.
- No mixer needed: This entire recipe comes together with a bowl, a spatula, and a whisk. I don't have a stand mixer and I don't use a hand mixer for this either. Everything is just stirred together by hand. The batter is thick enough that you won't overwork it easily, which is actually good — overmixing brownie batter develops the gluten and makes it tough.
Ingredients
- ½ cup unsalted butter, melted
- 1 cup granulated sugar
- 2 large eggs
- 1 teaspoon vanilla extract
- ⅓ cup unsweetened cocoa powder
- ½ cup all-purpose flour
- ¼ teaspoon salt
- ¼ teaspoon baking powder
- ½ cup creamy peanut butter (Jif or similar — not natural/oily)
- ½ cup powdered sugar
- ½ cup chocolate chips
- ¼ cup peanut butter chips (optional but worth it)
Directions
- Preheat and prep your pan: Heat the oven to 350°F (175°C). Line an 8x8-inch baking pan with parchment paper, leaving some overhang on the sides so you can lift the whole slab out cleanly later. Give the parchment a quick spray of cooking oil too — parchment alone sometimes sticks with chocolatey batters.
- Make the brownie batter: In a large bowl, whisk the melted butter and sugar together until combined. Add the eggs and vanilla and beat it well — you want the mixture to look slightly glossy. Stir in the cocoa powder, flour, salt, and baking powder until just combined. Don't overmix once the flour goes in.
- Layer with peanut butter and bake: Pour half the brownie batter into your prepared pan and spread it out. Drop spoonfuls of the peanut butter over the batter — no need to be precise. Pour the remaining batter on top, then use a butter knife to gently swirl the peanut butter into the batter. Don't go crazy with the swirling — five or six slow passes is enough. Bake for 25–30 minutes, until a toothpick inserted in the center comes out with a few moist crumbs (not wet batter).
- Cool completely: This is the part where patience matters. Set the pan on a wire rack and let it cool for at least an hour before you do anything else. I usually make these after lunch and wait until the kids get home from school to add the topping. If you're in a rush, 30 minutes in the fridge will do it.
- Make the peanut butter topping: In a small bowl, stir together the remaining ½ cup peanut butter and the powdered sugar until smooth and stiff. It should be thick enough to spread without sliding. Spread it evenly over the cooled brownie base with a spatula.
- Add the chips and set: Scatter the chocolate chips and peanut butter chips over the peanut butter layer and press them in gently so they stick. Let everything sit for about 15 minutes at room temperature (or 10 minutes in the fridge) to firm up before cutting. Lift the slab out using the parchment overhang and slice into squares on a cutting board.
Tips for Success
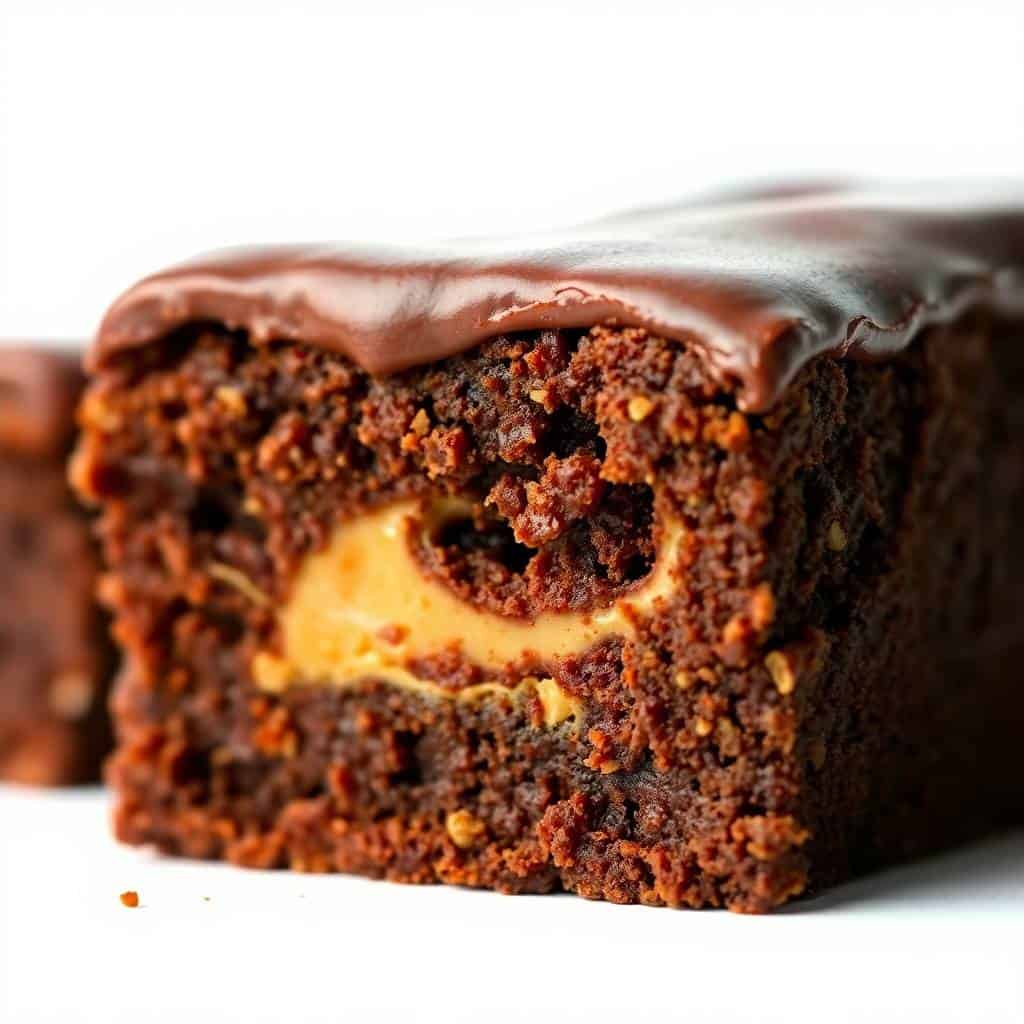
- Don't overbake the brownie base: This is the most common mistake I've made with brownies in general. The toothpick test is your guide — moist crumbs are good, wet batter means it needs more time, but a clean toothpick means you've gone too far. The brownies will continue cooking from residual heat after you pull them from the oven, so pull them when they look just barely done in the center.
- Use the right peanut butter: I learned the hard way that natural peanut butter (the kind where the oil separates at the top) does not work for the topping layer. It's too oily, it won't hold its shape, and the texture is wrong. Use a regular commercial peanut butter like Jif, Skippy, or the store-brand equivalent. For the swirl inside the brownie batter, either type works fine since it bakes in.
- Cool the brownies before adding the peanut butter layer: I know I said this already but it deserves repeating because I ignored my own advice on a rushed afternoon and deeply regretted it. Warm brownies + peanut butter topping = a pool of greasy, sweet liquid that soaks into the brownie and doesn't set. Wait for room temperature at minimum, or go straight into the fridge to cool if you're impatient.
- Chill before slicing: Even after the peanut butter layer has set at room temperature, I get much cleaner cuts if I refrigerate the whole pan for about 15 minutes first. The peanut butter firms up and doesn't drag when the knife goes through. Run a warm knife (just hold it under hot water for a few seconds and dry it) for the cleanest edges if you care about presentation.
- Measure your flour correctly: I spoon flour into the measuring cup and level it off — I don't scoop straight from the bag. Scooping packs extra flour in and you'll end up with a drier, cake-like brownie instead of a fudgy one. It's a small thing but it makes a real difference with brownies specifically, because the flour ratio is already kept low on purpose.
Variations
- Add salted caramel on top: Drizzle a few tablespoons of store-bought salted caramel sauce over the peanut butter and chips layer before it sets. The salt cuts through the sweetness in a really good way. I did this version for a dinner with friends and everyone thought I'd worked way harder than I had.
- Use almond butter instead: If peanut butter isn't an option (allergies, or you just don't have it), almond butter works in the topping layer too. The flavor is milder and slightly less sweet, which honestly pairs nicely with the intense cocoa in the base. I'd stick to commercial almond butter here for the same reason — natural varieties are too oily.
- Make it gluten-free: Swap the all-purpose flour for a 1:1 gluten-free flour blend (Bob's Red Mill or King Arthur both work). I've made this once for a friend with a gluten sensitivity and the texture came out nearly identical — maybe very slightly more dense, but you'd have to compare them side by side to notice. Check that your chocolate chips are also gluten-free if this matters to you.
- Serve warm with ice cream: Cut the brownies into larger squares and microwave them for 15–20 seconds, then top with a scoop of vanilla ice cream. This is how my husband likes his. The peanut butter layer softens just slightly and the chocolate chips get a little melty — it becomes a completely different kind of dessert.
- Add crushed pretzels on top: Instead of (or alongside) the peanut butter chips, press a handful of crushed pretzels into the peanut butter layer. The crunch and extra salt make the sweet-salty thing even more pronounced. This is actually my favorite version — if you like that sweet-salty combination, try it at least once.
Serving and Storage
Serving
These are good at room temperature or slightly chilled — both work. At room temperature the peanut butter layer is softer and creamier. Straight from the fridge it's firmer and the chocolate flavor is more concentrated. I usually serve them at room temperature because I'm too impatient to wait for them to come to temperature from the fridge. Pair with a glass of cold milk, or go the full dessert route and add vanilla ice cream like I mentioned above. If you're bringing these to a gathering, cut them into smaller squares — they're rich enough that a small piece is actually satisfying. I usually get 16 squares from an 8x8 pan when I'm serving a group, or 9 larger pieces for just the family.
Storage
Store in an airtight container at room temperature for up to 3 days — the peanut butter layer stays set and the brownie stays moist. For longer storage, refrigerate them and they'll keep for up to a week. The cold actually makes the fudgy texture even better, in my opinion. To freeze, wrap individual squares tightly in plastic wrap and put them in a freezer-safe bag. They'll keep for up to 2 months. Thaw at room temperature for about 30 minutes or microwave for 15–20 seconds. I usually have a few frozen squares stashed away for those nights when I need something sweet and don't want to bake anything.
Frequently Asked Questions
Can I make these ahead of time?
Yes, and honestly I'd encourage it. These brownies taste better the next day once the peanut butter layer has fully set and the chocolate flavor has had time to deepen. Bake them the night before, add the peanut butter topping once cool, and store covered at room temperature. They'll be ready to slice and serve the next day with no extra work.
Can I freeze peanut butter chocolate brownies?
Yes. Wrap individual squares in plastic wrap, put them in a freezer-safe zip bag, and freeze for up to 2 months. Thaw at room temperature for about 30 minutes or microwave for 15–20 seconds. The texture holds up really well — I've frozen and thawed these multiple times with no noticeable difference.
Can I use crunchy peanut butter?
For the peanut butter topping layer, I'd stick with creamy — it spreads more evenly and sets up with a cleaner texture. For the swirl inside the brownie batter, crunchy works fine and adds small bits of peanut throughout the brownie. If you only have crunchy on hand and want to use it for the topping, it'll still taste good, just with a slightly uneven texture.
What can I use instead of peanut butter?
Almond butter and sunflower seed butter (SunButter) both work as substitutes. Cashew butter is good too — it has a mild, slightly sweet flavor that pairs nicely with chocolate. Avoid natural-style nut butters where the oil separates; they don't hold their shape in the topping layer. Stick to commercial-style spreadable nut butters for best results.
Why did my peanut butter layer turn greasy or runny?
Two likely reasons: either you spread it onto brownies that were still warm, or you used natural peanut butter. Warm brownies melt the peanut butter before it can set. Natural peanut butter has too much free oil and won't firm up properly. Make sure the brownies are fully cooled (room temperature or chilled) and use a commercial peanut butter like Jif or Skippy, and you won't have this problem.
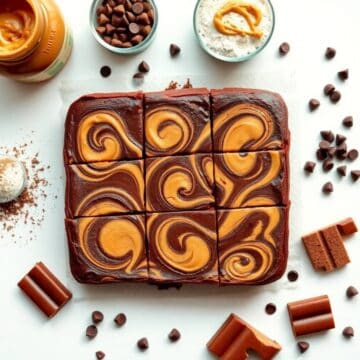
PEANUT BUTTER CHOCOLATE FUDGE BROWNIES
Ingredients
- ½ cup unsalted butter melted
- 1 cup granulated sugar
- 2 large eggs
- 1 teaspoon vanilla extract
- ⅓ cup unsweetened cocoa powder
- ½ cup all-purpose flour
- ¼ teaspoon salt
- ¼ teaspoon baking powder
- ½ cup creamy peanut butter
Instructions
Preheat Oven:
- Preheat oven to 350°F (175°C). Grease or line an 8x8-inch baking pan with parchment paper.
Make Brownie Batter:
- In a large bowl, mix melted butter and sugar until smooth. Add eggs and vanilla extract; beat well. Stir in cocoa powder, flour, salt, and baking powder until just combined.
Layer with Peanut Butter:
- Pour half the brownie batter into the pan. Drop spoonfuls of peanut butter over the batter. Pour the remaining batter on top. Use a knife to gently swirl the peanut butter into the batter.
Bake:
- Bake for 25-30 minutes or until a toothpick inserted comes out with a few moist crumbs.
Cool and Serve:
- Allow brownies to cool completely before cutting into squares. Enjoy!
Notes
- Make Ahead: Store brownies in an airtight container at room temperature for up to 3 days.
- Variation: Use chunky peanut butter for added texture.
- Serving Suggestion: Serve with a scoop of vanilla ice cream for a delicious dessert.
- Storage: Refrigerate leftovers to keep peanut butter swirls fresh.
I've made a lot of brownies over the years — some from scratch, some from a box, some good, some completely wrong — and this peanut butter version has quietly become the one I go back to most. It's not complicated. It doesn't require anything fancy. It's just a really solid brownie with a peanut butter layer that makes it feel like more of an event than a Tuesday night dessert.
If you're baking for someone who loves the sweet-salty combination, this is the recipe to make. The peanut butter chips on top are optional but I'd encourage you to use them — the little pops of peanut butter flavor against the chocolate chips are exactly what makes this feel thought-through rather than thrown together. It's one of those desserts where people ask you for the recipe and are a little surprised at how straightforward it actually is.
If you're in a baking mood this week, my Hawaiian Pineapple Coconut Dream Cake is another one that looks impressive for the effort involved — very different flavor profile, but the same kind of satisfying to make. And if you need something savory to balance out all this dessert talk, my French Dip Sliders are always a good call.
Make these once and I'm pretty sure they'll end up in your regular rotation. Mine included. 🍫🥜





Comments
No Comments