
Saad asked for these three weeks in a row before I finally wrote down the recipe. He kept calling them "the peanut butter chocolate ones" and every time I'd make a batch, they'd be gone before I even got to photograph them. Six ingredients. One bowl. No mixer. That's the whole situation.
What I love about this recipe is that it's genuinely that simple — no flour, no butter, no complicated steps. The peanut butter does all the heavy lifting. You mix everything together in one bowl, roll the dough into balls, bake for under 10 minutes, and then press a Hershey's Kiss into each one while it's still warm. That's it. I've made batches at 10pm when I remembered I promised Saad cookies for school the next morning, and they still came out right.
I usually make these around the holidays, but honestly there's no reason to wait. My husband likes them with his afternoon tea. Zainab prefers hers with a cold glass of milk. And if you've made my Cake Mix Sugar Cookies before, you already know I'm a fan of low-effort cookie recipes that still look impressive on a plate.
One thing to know before you start: the cookies look underdone when they come out of the oven. That's normal. They'll firm up as they cool, and if you overbake them trying to get them to look done, they'll come out hard instead of that soft, slightly fudgy texture you're going for. Pull them at the 9-minute mark the first time and see how they feel after cooling.
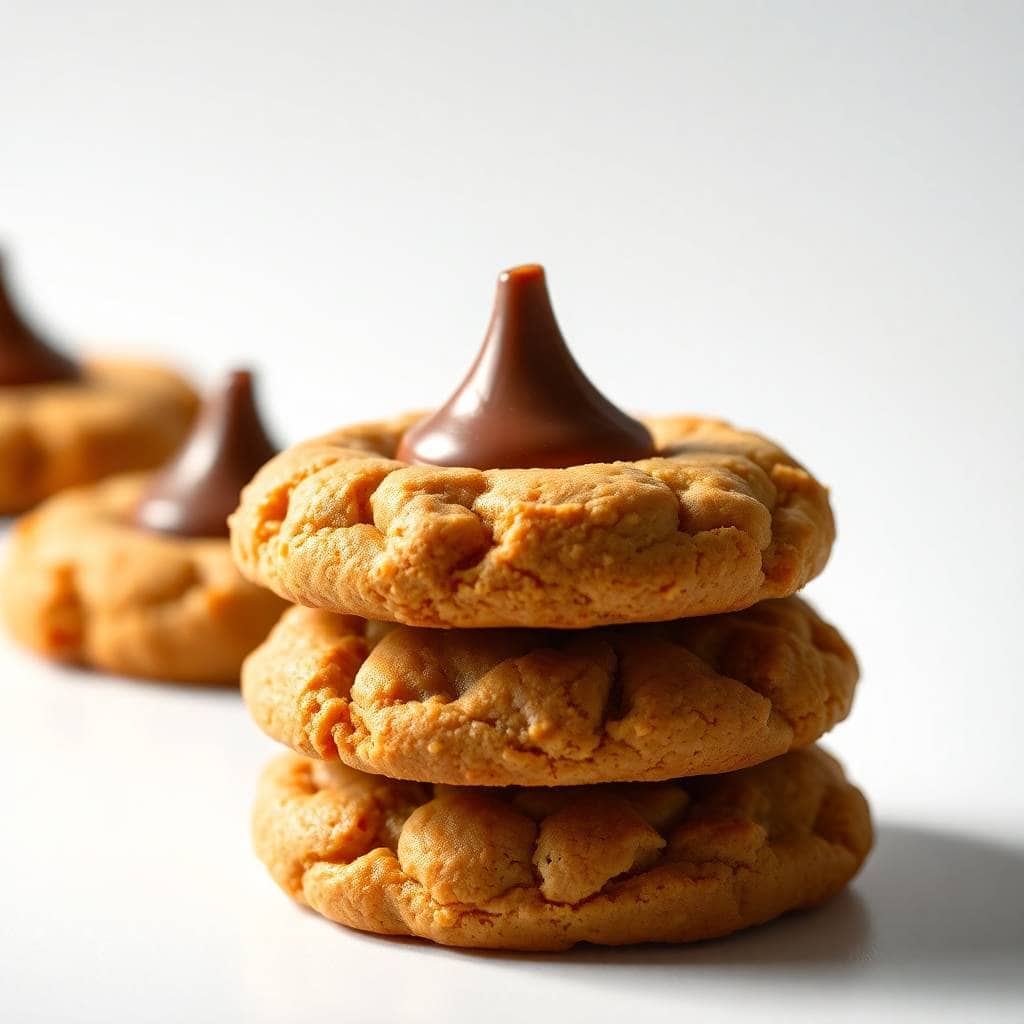
Why You'll Love This Recipe
- Only six ingredients: I don't mean "six ingredients plus ten pantry staples." I mean six things, full stop — peanut butter, sugar, egg, vanilla, baking soda, and a bag of Hershey's Kisses. No flour. No butter. I've made these when my pantry was nearly empty and they still worked perfectly.
- No mixer needed: I mix these with a wooden spoon and it takes maybe three minutes. The dough comes together quickly and there's nothing here that requires an electric mixer or stand mixer. One bowl, one spoon, and your hands for rolling. That's it.
- Ready in under 30 minutes: From mixing bowl to cooling rack, we're talking about 25 minutes total. I've made these after dinner while cleaning up the kitchen and had fresh cookies by the time I was done. The bake time is only 8-10 minutes, and you don't need to chill the dough unless it's sticking to your hands.
- Great for gifting or baking with kids: The pressing-the-Kiss step is weirdly satisfying and kids love doing it. Zainab has helped me make these a few times and she takes the pressing job very seriously. They also stack well in a tin or bag, so they travel well as gifts.
- Naturally gluten-free: Since there's no flour in the dough at all, these are naturally gluten-free. I'm not someone who bakes specifically for dietary restrictions, but it's a genuinely useful thing to know if you're baking for a group and someone can't have gluten.
Ingredients
- 1 cup peanut butter (smooth or crunchy — I use Jif smooth, but use what you have)
- 1 cup granulated sugar
- 1 large egg
- 1 teaspoon vanilla extract
- ¼ teaspoon baking soda
- 24 Hershey's Kisses, unwrapped (milk chocolate is classic, but dark chocolate works great too)
Directions
- Step 1: Preheat the oven — Set your oven to 350°F (175°C) and line a baking sheet with parchment paper. If you don't have parchment, a lightly greased baking sheet works fine — these cookies don't stick badly.
- Step 2: Mix the dough — In a medium bowl, combine the peanut butter, sugar, egg, vanilla extract, and baking soda. Stir with a wooden spoon until everything is fully mixed and the dough is smooth. It'll look a bit thick and dense — that's right.
- Step 3: Roll into balls — Scoop about a tablespoon of dough and roll it between your palms into a smooth ball. Place on your prepared baking sheet about 2 inches apart. This batch makes roughly 24 cookies depending on how big you roll them.
- Step 4: Bake — Bake for 8-10 minutes, until the edges are just barely set and lightly golden. The centers will still look soft — don't panic. Pull them out now. They will firm up.
- Step 5: Press the Kisses — While the cookies are still warm (immediately out of the oven), press one unwrapped Hershey's Kiss into the center of each cookie. Press gently but firmly — enough that it sits in the cookie, not just on top of it. The cookie will crack slightly around the edges, which is part of the look.
- Step 6: Cool before moving — Let the cookies sit on the baking sheet for 5 minutes before transferring to a wire rack. The chocolate Kiss will be soft and melty right after pressing — give it time to set before stacking.
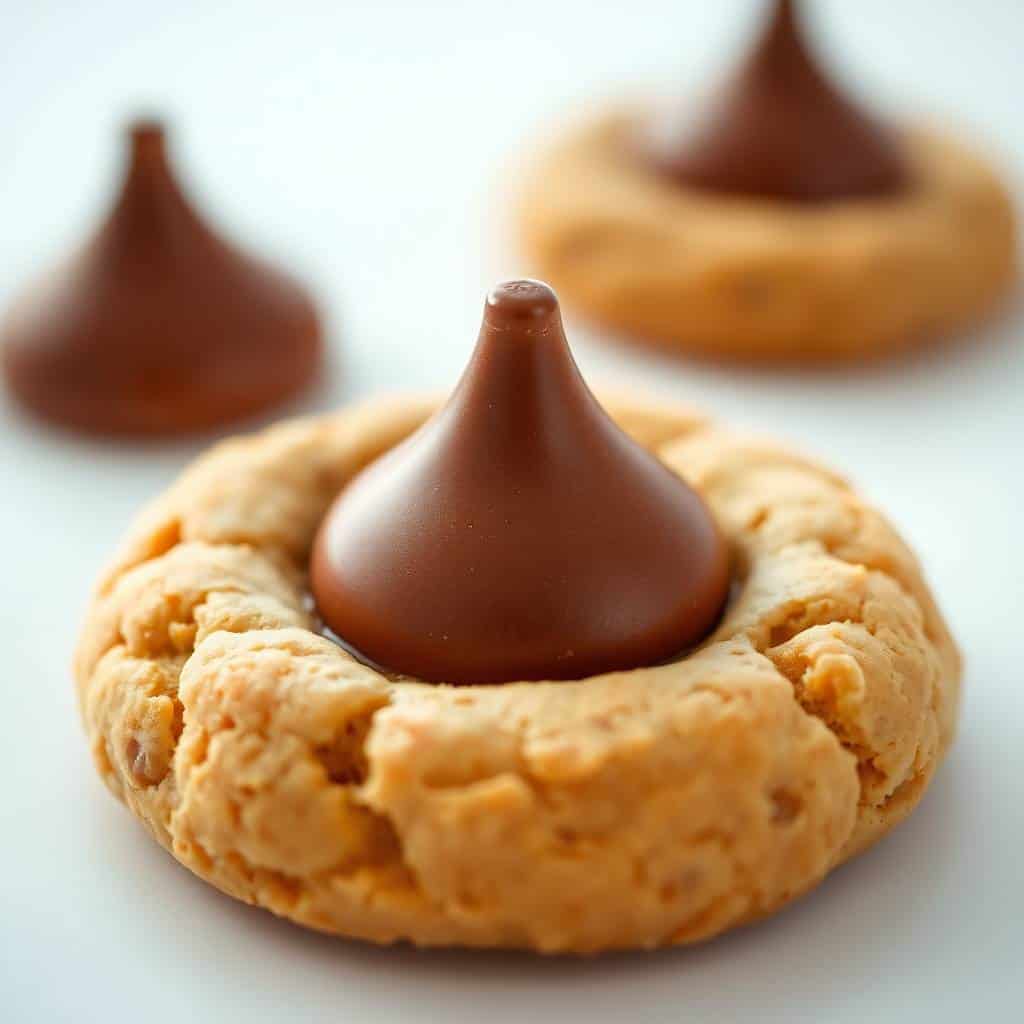
Tips for Success
- Unwrap the Kisses before you start baking: I learned this the hard way. I had 24 cookies sitting hot on the sheet and was scrambling to unwrap Kisses while they cooled. By the time I got to the last few, the cookies had firmed up too much and the Kisses sat on top instead of pressing in. Unwrap them all before the cookies go in the oven — set them in a little bowl next to your baking sheet.
- Don't overbake: These cookies need to come out looking slightly underdone. If the centers look fully set in the oven, they'll be hard once cool. The 8-9 minute mark is your friend. I bake mine at exactly 9 minutes and they come out soft and chewy every time.
- Use room temperature peanut butter: Cold peanut butter from the fridge makes the dough stiff and harder to mix. I just leave the jar on the counter while I'm preheating the oven and that's enough. Natural peanut butter with separated oil can work, but stir it really well first — the oil needs to be fully incorporated or the dough gets greasy and falls apart.
- If the dough is sticky, chill it briefly: Some peanut butters are oilier than others and the dough can feel too soft to roll neatly. Pop it in the fridge for 15 minutes and it'll be much easier to handle. I've never needed to do this with Jif, but I have with some natural brands.
- Make a double batch: I always double this recipe because one batch disappears in about a day in my house. Doubling is easy — just use a larger bowl. The dough takes about the same amount of effort and you end up with 48 cookies instead of 24, which is actually the right amount.
Variations
- Dark chocolate Kisses: Swap the milk chocolate Kisses for dark chocolate ones. The slightly bitter chocolate against the sweet peanut butter cookie is genuinely better in my opinion. My husband prefers these — he finds the milk chocolate version a bit too sweet. Lindt makes a dark chocolate version if you want something a little fancier than Hershey's.
- Crunchy peanut butter: Use crunchy peanut butter instead of smooth for little bits of peanut throughout the cookie. It changes the texture in a good way — you get a bit of crunch in what's otherwise a very soft cookie. Saad actually prefers this version.
- Almond butter swap: Almond butter works in place of peanut butter if you want a milder, slightly nuttier flavor. The texture of the cookie changes a little — it's a touch drier — so I'd add a tiny splash of milk (a teaspoon) if the dough feels too stiff. This isn't the classic version, but it's a nice change.
- Add mini chocolate chips: Mix ¼ cup of mini chocolate chips into the dough before rolling. This gives you chocolate in every bite, not just from the Kiss on top. If you're making these for a bake sale or holiday tray, the extra chocolate makes them look more generous and festive. Check out my Strawberry Frosted Matcha Cookies if you want something even more visually dramatic for a cookie platter.
- Roll in sugar before baking: Roll each dough ball in a little granulated sugar or coarse sugar before baking. It gives the outside of the cookie a slight crunch and makes them look more polished. Some people also use cinnamon sugar, which adds a warm note to the whole cookie.
Serving and Storage
Serving
These are best the day they're baked — the cookie is soft, the chocolate still has a slight give to it, and the contrast between the two is exactly right. We eat them at room temperature. My husband has them with tea, Saad and Zainab want them with cold milk, and honestly both are correct. If you're putting together a cookie platter for the holidays or a party, these pair nicely with something like my Cake Mix Sugar Cookies since they're a different flavor and texture but take about the same amount of effort.
Storage
Store cooled cookies in an airtight container at room temperature for up to 5 days. I usually layer them between sheets of parchment paper so the Kisses don't knock into each other. They're actually fine at day 3 and 4 — if anything the texture evens out a bit. You can also freeze unbaked dough balls on a sheet pan, then transfer to a zip-top bag and freeze for up to 3 months. Bake straight from frozen at 350°F and add 2-3 minutes to the bake time. The baked cookies freeze well too — just thaw at room temperature for about 20 minutes.

Frequently Asked Questions
Can I make the dough ahead of time?
Yes — the dough keeps well in the fridge for up to 3 days. Just wrap it tightly in plastic wrap or keep it in an airtight container. When you're ready to bake, let it sit at room temperature for about 10 minutes so it's easier to roll into balls.
Can I use almond butter instead of peanut butter?
You can. The flavor will be milder and slightly different, but the cookie structure works the same way. Almond butter tends to make a slightly drier dough, so if it feels crumbly, add a teaspoon of water or milk and mix it in. The end result is good, just not quite the same as the classic peanut butter version.
Do I have to chill the dough before rolling?
Not usually. With most standard peanut butters like Jif or Skippy, the dough rolls just fine at room temperature. If you're using a natural peanut butter that's on the oilier side, or if your kitchen is very warm, chilling the dough for 15 minutes makes it easier to handle. It's not a required step, just a helpful one when needed.
Can I freeze these cookies after baking?
Yes, they freeze really well. Let the cookies cool completely and make sure the chocolate Kisses have fully set before freezing. Store in a freezer-safe bag or container for up to 3 months. Thaw at room temperature for 20-30 minutes. I'd separate layers with parchment paper so the Kisses don't break off during storage.
Why did my cookies come out hard instead of soft?
They were overbaked. This is the most common mistake with this recipe, and I've done it myself. Because these cookies have no flour, they go from underdone to overdone faster than you'd expect. Pull them out when the edges look just barely set and the centers still look a little underdone. They'll firm up to the right texture as they cool. Nine minutes at 350°F is usually the sweet spot.

6 INGREDIENT PEANUT BUTTER KISS COOKIES
Ingredients
- 1 cup peanut butter smooth or chunky
- 1 cup granulated sugar
- 1 large egg
- 1 teaspoon vanilla extract
- ¼ teaspoon baking soda
- 24 milk chocolate Kisses unwrapped
Instructions
Preheat the Oven:
- Preheat the oven to 350°F (175°C). Line a baking sheet with parchment paper or a silicone mat.
Make the Dough:
- In a large bowl, mix peanut butter, sugar, egg, vanilla extract, and baking soda until well combined.
Shape the Cookies:
- Scoop tablespoon-sized portions of dough and roll into balls. Place them on the prepared baking sheet, spaced about 2 inches apart.
Bake:
- Bake for 8–10 minutes, or until the edges are lightly golden.
Top with Kisses:
- Remove the cookies from the oven and immediately press a chocolate Kiss into the center of each cookie. Allow the cookies to cool on the baking sheet for 5 minutes before transferring to a wire rack to cool completely.
Notes
- Make Ahead: The dough can be made ahead and stored in the fridge for up to 3 days.
- Customization Tip: Use dark chocolate Kisses for a richer flavor or swap peanut butter for almond butter for a different taste.
- Serving Suggestions: Serve these cookies at holiday parties or gift them in a cute jar for friends and family.
- Storage Tips: Store the cookies in an airtight container at room temperature for up to 1 week.
This is one of those recipes I keep coming back to not because it's fancy but because it actually works every single time. Six ingredients, no mixer, no complicated technique — and the cookies look like you put in way more effort than you did. I've brought these to school events, made them for Eid, and baked them on a random Tuesday night. They always land the same way: people eat three before they think about it.
The only real skill involved is pulling them out of the oven at the right moment and having the Kisses unwrapped and ready to go. Everything else is just mixing and rolling. If you want to build out a cookie platter, these sit nicely next to something with a different flavor profile — my Strawberry Frosted Matcha Cookies are a completely different look and taste, and the two together make a platter that actually has some variety to it.
If you try these, I hope your household reacts the way mine does — which is to say the plate empties before you've finished washing the bowl. 🍪🤎
If you liked these, here are a few more recipes worth trying:
- Cake Mix Sugar Cookies (Soft, Chewy, and Done in 30 Minutes)
- Strawberry Frosted Matcha Cookies
- Chili Cheese Nachos
- Cajun Cream Cheese Chicken Pasta Bake (Creamy, Spicy Casserole)
- Loaded Steak Quesadillas





Comments
No Comments