
I first made this cheesecake crescent rolls casserole on a Saturday morning when I had two cans of crescent dough sitting in the fridge and absolutely no plan. I'd seen something like it floating around online and thought — okay, cream cheese, sugar, crescent dough, how hard can this be? It came out of the oven golden and puffed and my kitchen smelled like a bakery. Zainab wandered in from her room asking what I was making before it had even finished cooling.
What I like about this recipe is how honest it is. There's no pretending it's complicated — it's essentially a cheesecake filling sandwiched between two layers of buttery crescent dough, baked until golden. The top gets this slightly crisp, caramelized quality from the butter and cinnamon sugar, and the inside stays creamy and rich. It's the kind of thing you can pull together before anyone else in the house is even awake. If you're looking for something in a similar make-ahead spirit, my Magic in the Middles cookies follow the same idea — simple ingredients doing something that feels much fancier than it actually is.
This has become my go-to for lazy weekend brunches. My husband eats it warm with a drizzle of honey. Zainab wants powdered sugar on top. I've also made it for Eid morning when I needed something sweet that could serve a crowd without me standing in the kitchen for an hour. I've made it probably eight or nine times now and it hasn't failed me yet.
One thing to know going in: use full-fat cream cheese, and let it sit out for at least 20 minutes before you start. I tried rushing it once with cold cream cheese straight from the fridge and ended up with lumpy filling that never fully smoothed out. Room temperature makes all the difference here.
Why You'll Love This Recipe
- It comes together in under 40 minutes: From pulling ingredients out of the fridge to setting it on the table, this takes me about 35 minutes total — and most of that is oven time. I'm not exaggerating when I say the active prep is maybe 10 minutes. On weekend mornings when I don't want to think hard, this is what I reach for.
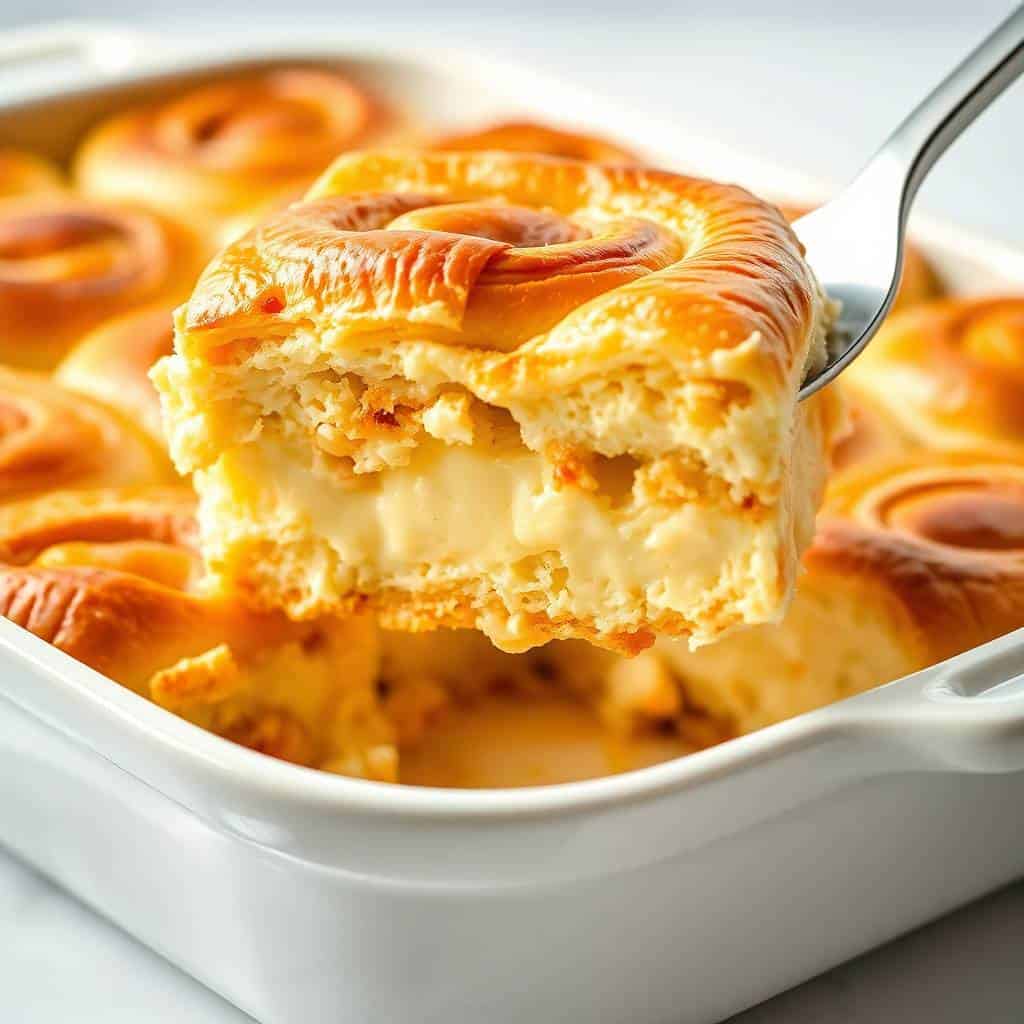
- The filling tastes like actual cheesecake: I was skeptical the first time — I figured it would taste like sweetened cream cheese inside bread. It doesn't. Once it bakes, the filling sets into something genuinely creamy and smooth, almost custardy. The flavor is mild and rich without being heavy, which is why it works for breakfast just as well as dessert.
- One pan, no special equipment: I don't own a stand mixer. I use a hand mixer for the cream cheese filling and it works perfectly. You just need a 9x13-inch baking dish, a bowl, and a spatula. If your hand mixer is broken, you can beat the filling by hand — it takes a couple of extra minutes but softened cream cheese mixes easily with a wooden spoon.
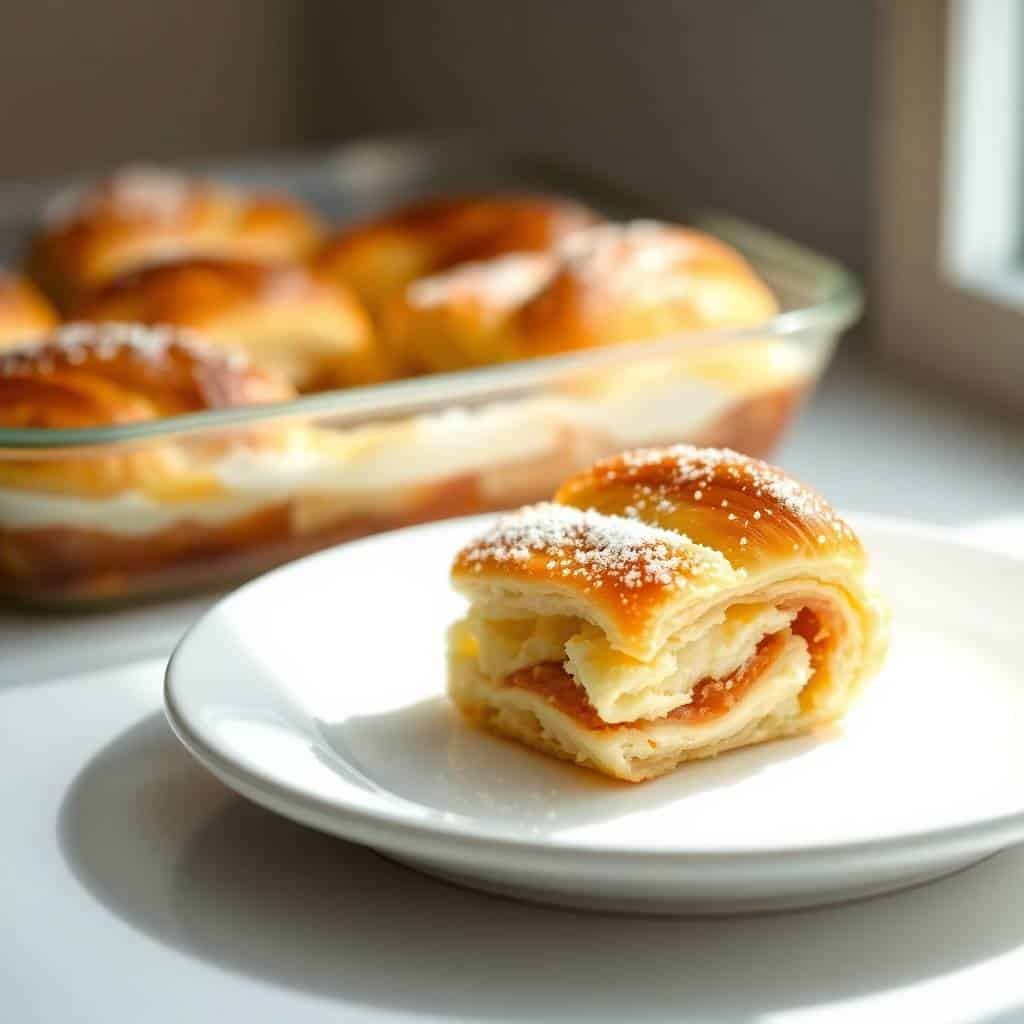
- It's easy to customize: I've added a thin layer of raspberry jam between the filling and the top dough — that version disappeared faster than any other. You can add fresh fruit, a drizzle of caramel, or cinnamon sugar on top. The base recipe is neutral enough that it takes well to almost anything you add.
- It makes a generous batch: A 9x13 dish gives you 12 decent squares, which is enough for a family brunch with leftovers. I usually make a double batch around the holidays because one pan goes at the table and the second goes to whoever shows up later asking if there's anything left.
Ingredients
- 2 (8-ounce) cans refrigerated crescent roll dough
- 2 (8-ounce) packages cream cheese, softened to room temperature
- 1 cup granulated sugar
- 1 teaspoon vanilla extract
- ¼ cup (½ stick) unsalted butter, melted
- 1 tablespoon cinnamon sugar (optional, for topping — or mix 1 teaspoon cinnamon with 2 teaspoons sugar)
Directions
- Preheat and prep the dish: Preheat your oven to 350°F (175°C). Lightly grease a 9x13-inch baking dish with cooking spray or a thin coat of butter. Get this ready before you open the dough cans — crescent dough starts to warm up and get sticky fast once it's out.
- Press in the first dough layer: Unroll one can of crescent dough and press it into the bottom of the baking dish. Pinch all the seams together firmly so you have one solid, even sheet of dough. If it tears, just press it back together — it doesn't need to be perfect.
- Make the cheesecake filling: In a large bowl, beat the softened cream cheese, granulated sugar, and vanilla extract together with a hand mixer until completely smooth. This takes about 2 minutes. Make sure there are no lumps — lumps in the filling mean the cream cheese was still cold.
- Spread the filling: Pour the cream cheese filling over the first layer of dough and spread it out evenly with a spatula, getting it all the way to the edges. Don't rush this — an even layer means every square gets the same amount of filling.
- Add the top dough layer: Unroll the second can of crescent dough and carefully lay it over the filling. Pinch the seams together again. It's okay if it doesn't cover every inch perfectly — the dough puffs up in the oven and fills in the gaps.
- Add the butter and cinnamon sugar: Brush the melted butter evenly over the top of the dough, then sprinkle with cinnamon sugar if you're using it. This is what gives the top that golden, slightly caramelized finish.
- Bake: Bake for 25 to 30 minutes, until the top is deep golden brown. Start checking at the 25-minute mark — ovens vary and this can catch quickly toward the end. The edges should look set and the center shouldn't jiggle.
- Cool before cutting: Let it cool in the pan for at least 10 minutes before slicing into squares. If you cut it too early, the filling runs. I know it's tempting, but give it those 10 minutes.
Tips for Success
- Room temperature cream cheese is non-negotiable: I've tried to shortcut this twice and both times I ended up with a grainy filling with white lumps that never fully incorporated. Take the cream cheese out at least 20 minutes before you start, ideally 30. If you forget, cut it into small cubes and let it sit — it softens faster that way.
- Pinch those seams properly: Crescent dough has perforations built in, and if you don't press them together well, the filling will seep through during baking. Take an extra minute to really seal both layers — run your finger firmly along each seam. The bottom layer especially needs to be solid so the filling doesn't hit the pan directly.
- Don't skip the 10-minute rest: Right out of the oven the filling is still liquid. I cut into it too early my first time and it poured out everywhere — it tasted fine but looked like a mess. Give it 10 minutes minimum, closer to 15 if you want clean squares.
- Watch the color, not just the clock: My oven runs a little hot, so mine is often done at 24 minutes. Yours might need the full 30. What you're looking for is an even golden-brown color across the top — not pale yellow (underdone) and not dark brown at the edges. If the edges are browning faster than the center, tent loosely with foil for the last few minutes.
- Use full-fat cream cheese: I've tried this with reduced-fat cream cheese once and the filling was noticeably less creamy and had a slightly rubbery texture after baking. The fat is what gives it that smooth, rich quality. This isn't a light recipe — full-fat is the way to go.
Variations
- Raspberry jam layer: Spread about 3 tablespoons of raspberry or strawberry jam over the cheesecake filling before laying down the top dough. The jam melts into the filling while it bakes and you get this fruity, slightly tart layer running through the middle. This is my favorite version — my husband specifically requests it now. It also pairs beautifully with a berry smoothie bowl if you're doing a full brunch spread.
- Chocolate drizzle finish: Melt about ¼ cup of chocolate chips with a teaspoon of coconut oil and drizzle it over the casserole after it comes out of the oven. Let it set for 5 minutes before cutting. This turns it firmly into dessert territory — Zainab always asks for extra chocolate on hers.
- Peach preserves version: Swap the jam layer for canned peach preserves or finely diced fresh peaches tossed in a little sugar and cinnamon. This gives the whole thing a warm, summery flavor. In Pakistan we'd probably add a pinch of cardamom to the peach layer — it sounds unusual but it really works.
- Caramel and pecan topping: Brush the top dough with butter, then scatter ¼ cup of roughly chopped pecans over it before baking. When it comes out, drizzle with store-bought caramel sauce. This is the version I make when I want it to feel more like a dessert than a brunch item — it's closer to a pecan sticky bun than a cheesecake at that point.
- Lemon cheesecake version: Add 1 tablespoon of fresh lemon juice and 1 teaspoon of lemon zest to the cream cheese filling. Skip the cinnamon sugar on top and dust with powdered sugar after baking instead. This version tastes brighter and lighter, which I like in the warmer months. If you enjoy citrus-forward baked things, check out my Italian cannoli-inspired thumbprint cookies — similar creamy filling energy, different format.
Serving and Storage
Serving
Serve it warm, cut into squares. I usually dust the top with powdered sugar right before serving — it melts in a minute so don't do it too far in advance. My husband drizzles honey over his; Zainab prefers a spoon of jam on the side. For brunch, I set it out with fresh fruit alongside. For dessert, a small scoop of vanilla ice cream on top is honestly hard to beat. It also works at room temperature if you're serving it a few hours after baking — the filling firms up a bit but stays creamy.
Storage
Cover the baking dish tightly with plastic wrap or transfer squares to an airtight container and refrigerate for up to 4 days. To reheat, microwave individual squares for 20 to 30 seconds — don't go longer or the dough gets tough. You can also warm them in a 300°F oven for about 8 minutes if you want the top to crisp back up slightly. I don't recommend freezing after baking — the cream cheese filling gets watery when thawed. If you want to prep ahead, assemble the whole thing (unbaked), cover, and refrigerate overnight, then bake fresh in the morning. That's the method I use for holiday mornings.
Frequently Asked Questions
Can I make this the night before?
Yes, and I actually prefer it that way for early mornings. Assemble the whole casserole — both dough layers, filling, butter, and cinnamon sugar — cover the dish tightly with plastic wrap and refrigerate overnight. In the morning, pull it out while the oven preheats and bake as directed. It might need an extra 3 to 5 minutes since it's going in cold.
Can I freeze the baked casserole?
I wouldn't freeze it after baking. Cream cheese fillings tend to release moisture when thawed and the texture gets grainy and watery. If you want to freeze it, freeze it unbaked — assemble, wrap tightly, and freeze for up to 1 month. Thaw overnight in the fridge, then bake from cold, adding about 5 to 8 extra minutes to the bake time.
Can I substitute the crescent roll dough with something else?
Puff pastry works well if that's what you have — the texture is slightly more flaky and the layers are more defined. It's also a bit more forgiving with seams since it's a solid sheet. Phyllo dough is too thin and delicate here; skip that one. Crescent roll dough from Pillsbury is what I use, and it's easy to find at Walmart or any grocery store.
How do I make this dairy-free?
Use a plant-based cream cheese — Violife and Kite Hill both work reasonably well. Replace the butter with vegan butter or coconut oil. The texture of the filling will be slightly softer and it may take an extra couple of minutes to set, so watch it in the oven rather than going purely by time. I haven't tested this version myself so I can't guarantee exact results, but I've had readers tell me it works fine.
Why is my filling lumpy?
Almost always because the cream cheese was too cold. This is the most common issue with this recipe and I've made the same mistake myself. Cold cream cheese doesn't blend smoothly no matter how long you beat it — you just break it into lumps. Let it sit out at room temperature for 20 to 30 minutes before mixing. If you're in a hurry, unwrap it and microwave in 10-second bursts until it's soft to the touch but not melted.
CHEESECAKE CRESCENT ROLLS CASSEROLE
Ingredients
For the Casserole:
- 2 8-ounce cans refrigerated crescent roll dough
- 2 8-ounce packages cream cheese, softened
- 1 cup granulated sugar
- 1 teaspoon vanilla extract
- ¼ cup butter melted
- 1 tablespoon cinnamon sugar optional topping
Instructions
Preheat the Oven:
- Preheat your oven to 350°F (175°C). Lightly grease a 9x13-inch baking dish.
Prepare the First Layer:
- Unroll one can of crescent dough and press it into the bottom of the prepared dish. Pinch seams together to form a solid layer.
Make the Cheesecake Filling:
- In a large bowl, beat the cream cheese, granulated sugar, and vanilla extract until smooth and creamy.
Assemble the Casserole:
- Spread the cheesecake filling evenly over the crescent dough layer. Unroll the second can of dough and carefully place it over the filling, again pinching seams together.
Add Topping:
- Brush the top with melted butter and sprinkle with cinnamon sugar if desired.
Bake:
- Bake for 25–30 minutes, or until golden brown. Let cool for at least 10 minutes before slicing into squares.
Notes
Prepare the casserole the night before and refrigerate. Bake fresh in the morning for best taste. Customizing the Flavor:
Add a layer of fruit preserves (like raspberry or strawberry) between the cheesecake and the top dough for a fruity twist. Serving Suggestions:
Serve warm with a drizzle of honey, chocolate sauce, or a dusting of powdered sugar. Allergy-Friendly Options:
For a dairy-free version, use plant-based cream cheese and crescent roll alternatives. Storage Tips:
Store leftovers in an airtight container in the refrigerator for up to 4 days. Reheat gently in the microwave or oven.
This is one of those recipes I keep coming back to because it requires almost nothing from me and somehow still feels special on the table. On the mornings when I have people coming over and I don't want to be in the kitchen for an hour, this is what I make. It slices cleanly once it's cooled, it looks genuinely nice dusted with powdered sugar, and every single time someone tries it for the first time they ask me for the recipe.
What I appreciate most is that it works at different points in a meal. I've served it as a brunch centerpiece, as an after-dinner dessert with ice cream, and once I sliced it cold the next morning and Zainab ate two pieces before school. Cold leftovers are genuinely good — the filling firms up overnight into something almost like cheesecake bars. That's not an accident, it's just what this recipe does.
If you're in a baking mood after making this, my Black Forest Swiss Roll is another one that looks impressive but is more manageable than it seems. And if you want something completely different on the savory side to round out a brunch table, my Cowboy Queso is always the first bowl to empty at any gathering I've hosted.





Comments
No Comments