
Saad asked me to make these three weeks in a row before I finally wrote the recipe down properly. He calls them "the chocolate ones with the salty stuff on top" and will eat four in a sitting if I let him. I started making salted caramel truffles a couple of years ago as holiday gifts, and somewhere along the way they became a year-round fixture in my fridge.
What I love about this recipe is that it looks like something from a fancy chocolate shop but the whole process is genuinely straightforward. You're melting, stirring, chilling, and dipping — that's it. No candy thermometer, no stand mixer, no double boiler unless you want one. I make these with a regular saucepan, a fork for dipping, and a sheet pan lined with parchment paper.
I make a double batch every December because one batch disappears before I've even had a chance to box them up for gifting. My husband eats them straight from the fridge — he prefers them cold when the chocolate shell has a proper snap. Zainab likes them at room temperature when the caramel center is a little softer. So honestly, both ways work.
One thing I'll warn you about upfront: the chilling steps are not optional. The first time I rushed the freeze and tried to dip warm caramel balls — they fell apart in the chocolate. Twenty minutes in the freezer between rolling and dipping makes the whole thing manageable. If you're looking for more no-fuss desserts, my Andes Mint Mini Cheesecakes follow a similar simple-but-impressive formula.
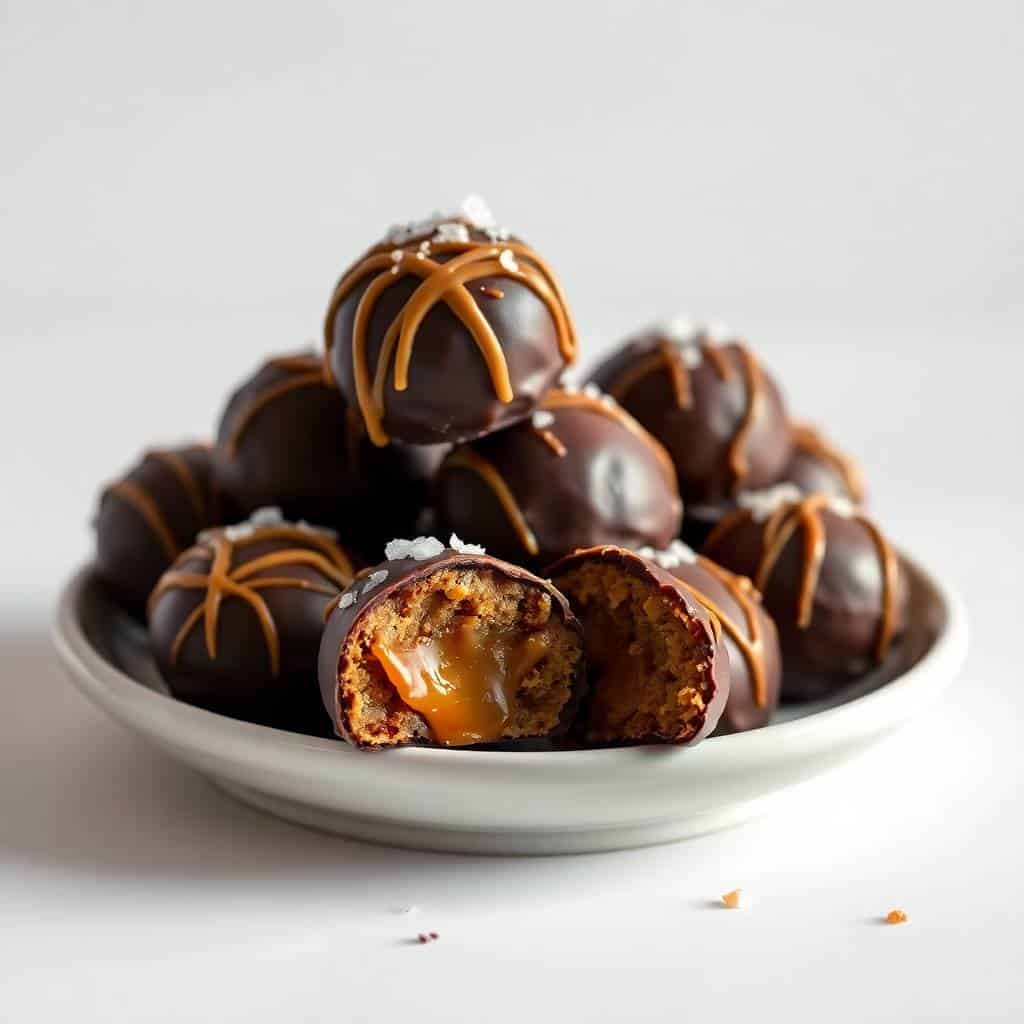
Why You'll Love This Recipe
- No special equipment needed: I don't own a candy thermometer or a dipping tool. A fork does the job just fine for coating the truffles, and a regular saucepan handles the caramel. If you can boil water and stir, you have all the skills this recipe requires.
- Real caramel, made from scratch: This isn't a recipe that relies on unwrapping store-bought caramel candies. You're making actual caramel from sugar, butter, and cream, which gives the center a depth of flavor that the shortcut version just can't match. It sounds intimidating but once you've done it once, it's one of the most satisfying things to make.
- Make-ahead friendly: I usually make these the day before I need them, or even two days ahead. The caramel can sit in the fridge for up to three days before you roll and dip, which means you can break the process up over different days if that's easier for your schedule.
- They look genuinely impressive: I've given these as gifts in little boxes lined with tissue paper and every single person has assumed they came from a chocolatier. The flaky salt on top does a lot of visual work. Nobody needs to know you made them in 45 minutes of active kitchen time.
- Freezer-friendly in bulk: Once they're fully set and chocolate-dipped, these freeze well for up to three months. I layer them between sheets of parchment in a container and pull them out as needed. They thaw in about 15 minutes at room temperature.
Ingredients
- 1 cup granulated sugar
- 6 tablespoons unsalted butter, cubed
- ½ cup heavy cream
- 1 teaspoon vanilla extract
- ¼ teaspoon fine sea salt, plus more for topping
- 8 oz semi-sweet chocolate, chopped (or chocolate chips work fine)
- 1 tablespoon coconut oil or vegetable oil (helps the chocolate coat smoothly)
- Flaky sea salt, for finishing (Maldon is what I use — any flaky salt works)
Directions
- Step 1: Make the caramel. Pour the sugar into a heavy-bottomed saucepan over medium heat. Stir constantly as it melts — it'll go lumpy before it smooths out, which is normal. Once it turns amber (think the color of iced tea), add the butter and stir until it melts in. Slowly pour in the heavy cream — it will bubble aggressively, so stand back a little. Stir in the vanilla and fine sea salt, then let the caramel cool for about 10 minutes in the pan before transferring.
- Step 2: Chill until firm. Pour the caramel into a bowl and refrigerate for at least 1 hour. You need it firm enough to scoop and hold a shape — if it's still pourable, give it another 30 minutes. I usually make this the evening before and let it chill overnight.
- Step 3: Roll into balls. Scoop out about 1 tablespoon of chilled caramel and roll it quickly between your palms into a rough ball. Place it on a parchment-lined tray. Work fast — the warmth of your hands softens the caramel quickly. Once all the balls are rolled, put the tray in the freezer for 20 to 30 minutes. This step is what makes dipping possible.
- Step 4: Melt the chocolate. In a microwave-safe bowl, combine the chopped chocolate and oil. Microwave in 30-second bursts, stirring between each one, until the chocolate is fully melted and smooth. Don't rush this — overheated chocolate goes grainy and dull. Three or four short bursts is usually all it takes.
- Step 5: Dip each truffle. Take the caramel balls straight from the freezer and dip them one at a time into the melted chocolate using a fork. Let the excess chocolate drip off, then set each one back on the parchment-lined tray. Work in small batches so the caramel centers stay cold.
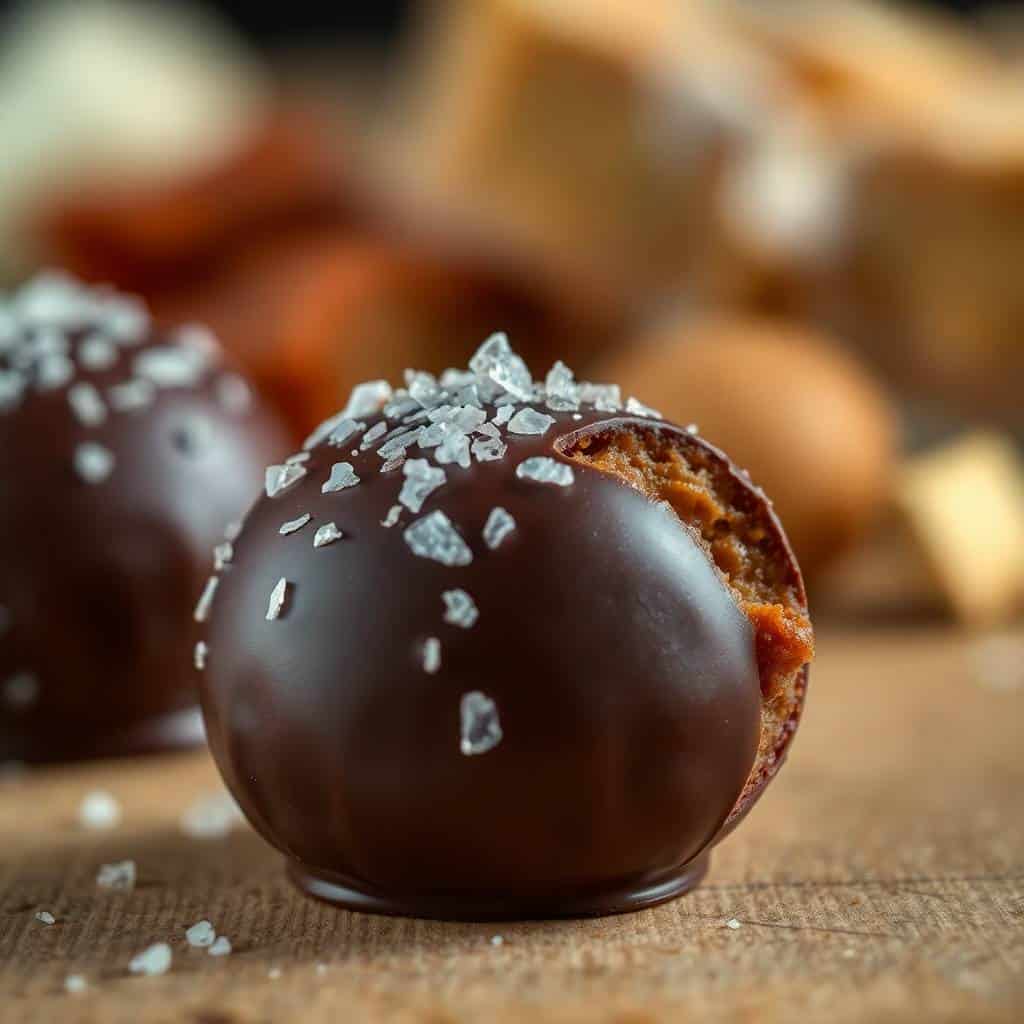
- Step 6: Salt and set. Before the chocolate hardens, immediately sprinkle each truffle with a pinch of flaky sea salt. Then either let them set at room temperature (about 30 minutes) or slide the tray into the fridge to firm up faster. Once the chocolate is fully set, they're ready.
Tips for Success
- Don't skip the freeze before dipping: I learned this the hard way on my very first batch. Room-temperature caramel balls dissolve into the warm chocolate and you end up with a lumpy, streaky mess. Twenty minutes in the freezer makes them firm enough to hold their shape through the whole dipping process. If they start to soften while you're working, just pop them back in for 10 more minutes.
- Watch the caramel color carefully: There's a narrow window between perfect amber caramel and burnt caramel. If it smells bitter or looks too dark (more brown than golden), it's gone too far and will taste bitter in the finished truffles. Pull it off the heat as soon as it reaches a medium amber — it'll continue cooking slightly from the residual heat of the pan.
- Keep your hands cool when rolling: If your kitchen is warm or your hands run hot, the caramel will stick to your palms and the balls won't hold their shape. Rinse your hands under cold water, dry them, and work quickly. Alternatively, lightly grease your palms with a tiny bit of butter or neutral oil — it helps more than you'd think.
- Add the flaky salt the moment the truffle hits the tray: Chocolate sets faster than you think, especially in a cool kitchen. If you wait even a minute too long, the salt won't stick and will just slide off when you pick them up. I keep my salt pinched between my fingers and sprinkle as soon as each truffle is placed on the parchment.
- Use oil in the chocolate: Adding a tablespoon of coconut oil or vegetable oil to the melting chocolate gives you a thinner, glossier coating that drips off cleanly. Without it, the chocolate tends to be too thick and clumps around the truffle unevenly. It also makes the finished shell slightly less brittle when you bite in.
Variations
- Espresso caramel: Stir ½ teaspoon of instant espresso powder into the caramel along with the vanilla. It doesn't make them taste like coffee exactly — it just deepens the caramel flavor in a way that's hard to put your finger on. My husband discovered this version by accident when I left the espresso powder on the counter and he added it, and now he requests it every time.
- White chocolate dip: Swap the semi-sweet chocolate for white chocolate and the look completely changes — they come out pale and elegant and the sweetness level goes up noticeably. White chocolate is trickier to melt without seizing, so go slow with the microwave bursts and add a full tablespoon of oil to keep it fluid.
- Nutty coating: After dipping in chocolate and before it sets, roll or press the truffles in finely chopped toasted pecans, almonds, or pistachios. The pistachios give a beautiful green contrast against the dark chocolate. I find this works better than sprinkling — gently pressing the nuts into the chocolate while it's still wet makes them actually stick.
- Spiced caramel: Add ¼ teaspoon of cinnamon and a tiny pinch of cayenne to the caramel when you add the vanilla. This is actually a flavor combination I first encountered in Mexican hot chocolate, and it works beautifully in caramel — warm, slightly smoky, and with just enough heat at the back of the throat. Not spicy, just interesting.
- Pretzel crunch: Crush a small handful of pretzels finely and press them onto the top of each truffle right after dipping. The salt from the pretzels replaces the flaky salt and adds a satisfying crunch that Saad goes absolutely wild for. Use small pretzels from any grocery store — the kind that come in the big snack bags work perfectly.
Serving and Storage
Serving
I like these best at room temperature, pulled from the fridge about 15 minutes before serving. The caramel center softens just enough that you get a clean bite without the shell cracking apart. They're good on a dessert tray alongside something like my Strawberry Banana Pudding if you're putting together a spread. For gifts, I layer them in a small tin or box with parchment paper between each layer so they don't stick together.
Storage
Store in an airtight container in the fridge for up to 2 weeks. For longer storage, freeze them in a single layer first until solid, then transfer to a freezer bag or container with parchment between layers — they keep well for up to 3 months. Thaw at room temperature for 15 to 20 minutes before serving. The caramel can be made and refrigerated up to 3 days before you roll and dip, which makes the whole project very manageable if you're prepping for an event.

Frequently Asked Questions
Can I make these truffles ahead of time?
Yes, and I'd actually recommend it. The caramel can be made and chilled up to 3 days in advance, and fully dipped truffles keep well in the fridge for up to 2 weeks or in the freezer for up to 3 months. Making them a day or two before you need them takes all the pressure off.
My caramel seized up and went hard and grainy — what happened?
This happens when the sugar crystallizes, usually from stirring too much early on or from sugar crystals on the sides of the pan falling back in. If it happens, add a tablespoon of water and heat it gently over low heat while stirring — it often comes back together. To prevent it, don't stir once the sugar starts melting unevenly; just swirl the pan gently instead.
What chocolate works best for dipping?
Semi-sweet or dark chocolate (60–70% cacao) gives the best balance against the sweet caramel. Milk chocolate works but the finished truffle ends up very sweet. I've used both chocolate bars chopped up and standard chocolate chips — both melt fine with the oil added. Whatever you use, buy something you'd enjoy eating on its own.
Can I use store-bought caramel instead of making it from scratch?
You can use soft caramel candies (the kind sold in bags at Walmart or any grocery store) melted with a splash of heavy cream — this is a quicker shortcut and the truffles will still be good. But I honestly think the from-scratch version has a noticeably better flavor, and making caramel once or twice takes away the mystery of it. It's worth trying at least once.
Do I have to use flaky salt on top?
No, but it does a lot of work both visually and flavor-wise. If you don't have flaky salt, a very light sprinkle of regular coarse salt works. You could also skip the salt entirely and finish with a drizzle of contrasting chocolate, some finely crushed nuts, or just leave them plain. The truffles are still good without the salt — the topping is a finish, not a structural requirement.

SALTED CARAMEL TRUFFLES
Ingredients
- 1 cup granulated sugar
- 6 tablespoons unsalted butter cubed
- ½ cup heavy cream
- 1 teaspoon vanilla extract
- ¼ teaspoon sea salt plus more for topping
- 8 oz semi-sweet chocolate chopped
- 1 tablespoon coconut oil or vegetable oil for smooth coating
Instructions
Make the Caramel:
- In a heavy saucepan, heat sugar over medium heat, stirring constantly until it melts and turns amber. Add butter and stir until melted. Slowly add cream (mixture will bubble), then stir in vanilla and salt. Let cool.
Chill the Mixture:
- Transfer caramel to a bowl and refrigerate until firm, about 1 hour.
Shape the Truffles:
- Scoop and roll caramel into 1-inch balls. Place on a parchment-lined tray and freeze for 15–20 minutes.
Melt the Chocolate:
- Melt chocolate with oil in a microwave-safe bowl in 30-second bursts, stirring until smooth.
Dip and Finish:
- Dip each caramel ball in chocolate, place on parchment paper, and sprinkle lightly with sea salt. Let set at room temperature or chill until firm.
Notes
These truffles have become one of my most-made recipes, and I think it's because they sit at that rare intersection of looking impressive and actually being manageable to make on a regular basis. The from-scratch caramel is the part that makes them worth it — it takes maybe 10 minutes of active attention and the result is completely different from anything you'd get from a bag of wrapped candies.
Every December I make at least two batches — one for home and one to give away. I box them up in small kraft paper boxes from the dollar store with a square of parchment inside and they look genuinely lovely. People always ask where I bought them, and I always enjoy saying I made them. The secret





Comments
No Comments