
Zainab calls these "the mint ones" and she's been asking for them every December since I first made them two years ago. That's really all the endorsement I need. These peppermint cheesecake cookies are soft, a little tangy from the cream cheese that goes right into the dough, and they have that cool peppermint flavor that makes everything feel properly festive without being overwhelming.
What I like about this recipe is that the cream cheese isn't just a filling — it goes into the dough itself, which gives the cookies a slightly denser, almost shortbread-like texture that holds up really well. The crushed candy canes on top add crunch and a little extra mint without you needing to do anything fancy. I use a regular baking sheet, a hand mixer, and a wooden spoon. No stand mixer required.
I make these during the first week of December, usually alongside my Cranberry Orange Scones when I'm doing a big holiday baking session. I'll double the batch and keep half in the freezer so we're not scrambling on Christmas Eve. My husband takes them to work and they're usually gone by 10am, which tells me people outside my family like them too.
One thing to know going in: don't skip cooling the cookies completely before you stack or store them. The first time I made these I was impatient — packaged them too warm — and they stuck together. Annoying, but fixable. Give them at least 20 minutes on the rack and you'll be fine.

Why You'll Love This Recipe
- Cream cheese in the dough (not just the filling): Most cheesecake cookie recipes put the cream cheese filling in the center and leave the dough plain. This version works the cream cheese right into the dough, which changes the texture completely — softer, slightly richer, with a little tang that balances the sweetness. It's a small difference that makes a big one in how the cookie actually tastes.
- The mint flavor is noticeable but not medicine-y: Half a teaspoon of peppermint extract is enough to flavor the whole batch without making them taste like toothpaste. A lot of peppermint recipes go heavy-handed with the extract and it's too much. This amount is right — you get the coolness, not the chemical punch.
- One bowl, minimal cleanup: The wet and dry ingredients come together in one large bowl and the whole prep takes maybe 20 minutes. I'm not spending Christmas Day elbow-deep in dishes. This is one I can fit in between other things — school pickup, wrapping presents, whatever's happening that week.
- They travel and gift well: These cookies hold their shape and stay soft for days. I put them in a tin lined with parchment and they look genuinely pretty, especially with the red candy cane bits on top. If you're doing a cookie exchange or bringing something to a holiday gathering, these show up looking like you put in more effort than you did.
- You can make them ahead without stress: The dough can be made a day in advance and kept covered in the fridge. I usually mix the dough the night before, refrigerate it, and bake fresh in the morning. Cookies straight from a slightly chilled dough also spread less, which means they keep their shape better. That's a tip I figured out by accident the second time I made these.
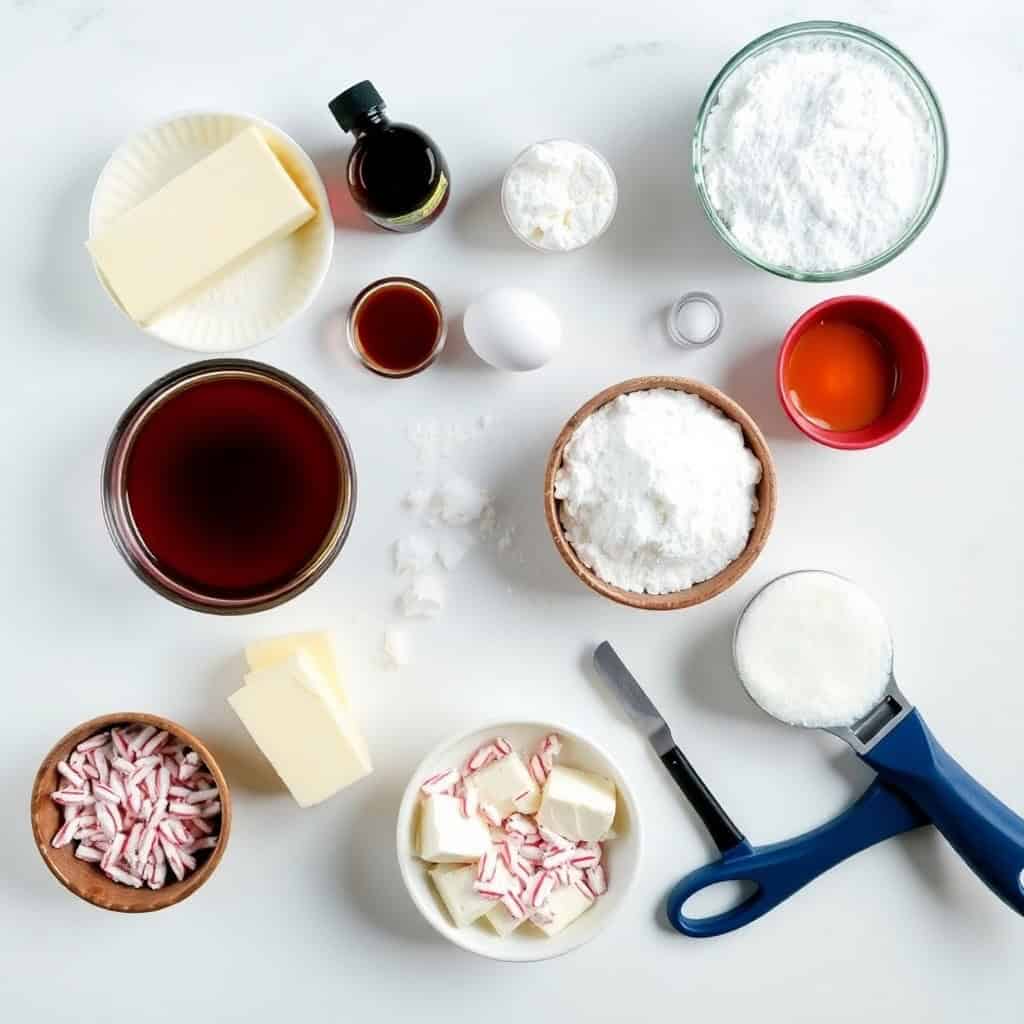
Ingredients
- ½ cup unsalted butter, softened
- 4 oz cream cheese, softened (the block kind, not whipped)
- 1 cup granulated sugar
- 1 large egg
- 1 teaspoon vanilla extract
- ½ teaspoon peppermint extract (pure, not imitation if you can find it)
- 2 cups all-purpose flour
- ½ teaspoon baking powder
- ¼ teaspoon salt
- ½ cup crushed candy canes (about 6-8 standard candy canes)
Directions
- Preheat and prep: Heat your oven to 350°F (175°C) and line a baking sheet with parchment paper. I use a regular sheet pan from Walmart — nothing fancy. The parchment keeps the bottoms from over-browning and makes cleanup a lot easier.
- Beat the wet ingredients: In a large bowl, beat the softened butter, cream cheese, and sugar together until light and fluffy — about 2-3 minutes with a hand mixer. Both the butter and cream cheese need to be genuinely soft (not cold from the fridge) or you'll end up with lumps. Add the egg, vanilla extract, and peppermint extract and mix until everything is smooth.
- Add the dry ingredients: Add the flour, baking powder, and salt directly to the wet ingredients. Mix until just combined — stop as soon as you don't see streaks of flour. Overmixing makes the cookies tough, and these are worth treating gently.
- Scoop and shape: Use a tablespoon or a small cookie scoop to portion the dough onto your lined baking sheet. Flatten each ball slightly with your palm — they won't spread much on their own. Leave about 2 inches between each cookie. Sprinkle the crushed candy canes generously on top, pressing them in lightly so they stick.
- Bake and cool: Bake for 10-12 minutes, until the edges look set and just barely starting to turn golden. The centers will still look slightly underdone — that's what you want. They firm up as they cool. Leave them on the baking sheet for 5 minutes before moving to a rack. Cool completely before stacking or storing.

Tips for Success
- Soften the cream cheese properly: Cold cream cheese doesn't blend into the butter — it stays in chunks and you end up with an uneven dough. Pull it out of the fridge at least 30 minutes before you start. I leave it on the counter while I measure everything else out. If you're in a hurry, unwrap it and microwave it for 10-12 seconds. Don't go longer or it'll start to melt.
- Crush the candy canes in a bag: Put the candy canes in a zip-lock bag and bash them with a rolling pin or the back of a heavy spoon. You want mostly small pieces with a few larger shards for texture — not a fine powder. The powder just disappears into the cookie and you lose the crunch. This is my favorite part to let Zainab help with, honestly.
- Don't overbake: I pulled these out too late on my second batch and they were fine but noticeably drier. The cookies should look like they're barely done when they come out — soft in the center, just set at the edges. The carryover heat finishes them on the pan. Trust the process and take them out at 10-11 minutes if your oven runs warm.
- Chill the dough if it gets too soft: In a warm kitchen, the dough can get sticky and hard to scoop neatly. If that happens, cover the bowl and refrigerate for 20-30 minutes. Slightly chilled dough scoops cleaner and holds its shape better in the oven. I actually prefer to make the dough the evening before and bake fresh the next morning for this exact reason.
- Use pure peppermint extract, not imitation: This is one of those cases where the extract quality actually matters. Imitation peppermint can taste sharp and artificial. Pure extract gives you a cleaner, cooler flavor. McCormick's pure peppermint extract is easy to find at most grocery stores including Walmart and Target, and it makes a difference here.

Variations
- Chocolate drizzle on top: Melt about ¼ cup of dark or semi-sweet chocolate chips and drizzle it over the cooled cookies with a spoon. The combination of chocolate and peppermint is hard to argue with. I do this version when I'm bringing these somewhere and want them to look more dressed up. It takes an extra five minutes and makes them look significantly more impressive.
- White chocolate chips in the dough: Fold in ½ cup of white chocolate chips after mixing the dough. White chocolate and peppermint is a classic combination — a little sweeter but really good. My husband prefers this version. I sometimes do half the batch plain and half with white chocolate so everyone gets what they want.
- Gluten-free version: Swap the all-purpose flour for a 1:1 gluten-free flour blend (Bob's Red Mill or King Arthur both work well). The texture is slightly different — a little more delicate — but the flavor holds up fine. I'd recommend chilling the dough for 30 minutes before baking if you go this route, since GF dough tends to be softer.
- Red and white swirl dough: Divide the dough in half, add 4-5 drops of red gel food coloring to one half, and very gently swirl them together when scooping. Don't overmix or the colors muddy. The result is a marbled pink-and-white cookie that looks really fun for a Christmas cookie plate. Zainab specifically requested this version last year.
- Mini cookie bites: Use a teaspoon instead of a tablespoon to scoop smaller portions and reduce baking time to 8-9 minutes. These are great for a cookie exchange where you want to make more pieces from the same batch, or for a holiday appetizer spread alongside something savory like my Rudolph Christmas Cheese Ball. One batch makes roughly double the number of cookies this way.
Serving and Storage
Serving
These are best at room temperature, served the same day or the day after baking. The candy cane topping is still crunchy, the cookie is soft, and the cream cheese flavor in the dough comes through clearly. I serve them on a plate with hot cocoa or a cup of chai — my family gets the chai version because that's what we drink at home. For a full holiday dessert spread, they pair well next to something citrusy like my Cranberry Orange Scones.
Storage
Store in an airtight container at room temperature for up to 3 days, or in the fridge for up to 5 days. The cookies stay soft in the fridge but the candy cane topping will soften and lose some crunch after a day or two — still tastes good, just different texture. To freeze, layer cooled cookies between sheets of parchment in a zip-lock bag and freeze for up to a month. Thaw at room temperature for about 30 minutes before serving. The dough also freezes well — scoop it into balls, freeze on a sheet, then transfer to a bag. Bake from frozen at 350°F for 13-14 minutes.

Frequently Asked Questions
Can I make the dough ahead of time?
Yes, and I'd actually encourage it. Make the dough the night before, cover the bowl tightly, and refrigerate overnight. Chilled dough scoops more neatly and the cookies spread less in the oven, which means they come out slightly thicker. Just let the bowl sit on the counter for 10 minutes before scooping if the dough is very firm.
Can I use candy canes in the dough instead of just on top?
You can fold about ¼ cup of finely crushed candy canes into the dough before scooping. Keep the rest for the topping. One thing to know: candy cane pieces inside the dough can make the cookies a little sticky if they sit out for too long, because the sugar in candy canes absorbs moisture. Storing them in an airtight container helps with this.
How do I stop the cookies from spreading too thin?
Two things help: make sure your butter and cream cheese are softened but not warm or melted, and chill the dough for at least 20 minutes before baking if your kitchen is warm. I also avoid using a dark baking pan — dark pans absorb more heat and the bottoms cook faster than the tops, which can cause spreading. A light-colored aluminum sheet pan works best.
Can I freeze these cookies after baking?
Absolutely. Let them cool completely, then layer between sheets of parchment in an airtight container or zip-lock bag. They freeze well for up to a month. The candy cane topping will be slightly softer after freezing and thawing, but the cookie itself holds up really well. I make a double batch in early December specifically so I have some stashed in the freezer for the rest of the month.
What can I use if I don't have peppermint extract?
If you genuinely can't find peppermint extract, you can increase the crushed candy canes to ¾ cup and skip the extract — the candy canes will carry the mint flavor on their own, though it'll be milder. You could also use the cookies as a base cheesecake-dough recipe and swap in a different extract entirely: almond, lemon, or orange all work well with cream cheese. It won't be a peppermint cookie anymore, but it'll still be a good cookie.

PEPPERMINT CHEESECAKE COOKIES
Ingredients
- ½ cup unsalted butter softened
- 4 oz cream cheese softened
- 1 cup granulated sugar
- 1 large egg
- 1 teaspoon vanilla extract
- ½ teaspoon peppermint extract
- 2 cups all-purpose flour
- ½ teaspoon baking powder
- ¼ teaspoon salt
- ½ cup crushed candy canes
Instructions
- Step 1: Preheat Oven – Preheat oven to 350°F (175°C) and line a baking sheet with parchment paper.
- Step 2: Mix Wet Ingredients – Beat butter, cream cheese, and sugar until light and fluffy. Add egg, vanilla, and peppermint extract.
- Step 3: Add Dry Ingredients – Mix in flour, baking powder, and salt until combined.
- Step 4: Shape Cookies – Scoop dough onto the baking sheet and flatten slightly. Sprinkle with crushed candy canes.
- Step 5: Bake and Cool – Bake for 10-12 minutes until edges are set. Cool completely before serving.
Notes
- Make Ahead: Store in an airtight container for up to 5 days.
- Customizing the Flavor: Add white chocolate chips for extra sweetness.
- Serving Suggestions: Pair with hot cocoa for a festive treat.
- Allergy-Friendly Options: Use gluten-free flour for a gluten-free version.
- Storage Tips: Keep at room temperature or refrigerate for longer freshness.
These are the cookies I come back to every December without fail. They're not complicated, they don't require special equipment, and they look genuinely festive without any extra effort beyond the candy cane topping. The cream cheese in the dough is what sets them apart from a regular sugar cookie — it gives them a density and a subtle tang that makes them more interesting to eat.
If you're planning a full holiday baking day, these fit in well alongside something like my Raspberry Cinnamon Rolls with Lemon Glaze — both can be prepped the night before and baked fresh in the morning. And if you need a savory counterpoint on the same table, the Rudolph Christmas Cheese Ball is always a good idea this time of year.
I hope you make a batch and stash half in the freezer like I do, because December goes fast and it's nice to have something good already handled. 🍪❄️
If you liked these, here are a few more recipes worth your time:
- Cranberry Orange Scones — great for holiday mornings, pairs beautifully with tea or coffee
- Raspberry Cinnamon Rolls with Lemon Glaze — fluffy, make-ahead friendly, and the lemon glaze is really something
- Rudolph Christmas Cheese Ball — the savory thing you need on every holiday snack table
- French Onion Beef and Noodles — for the night after all the holiday baking when you need a real dinner fast





Comments
No Comments