
I made these for the first time on a rainy Thursday afternoon when I had half a box of Rice Krispies sitting on the counter going slightly stale. I wasn't expecting much — I just didn't want to waste the cereal. But when I pulled that first tray out of the oven, I stood at the counter eating four cookies before I even thought about letting them cool. The crunch from the cereal inside a soft, chewy chocolate chip cookie is the kind of thing that makes you do a double-take.
What I like about this recipe is that it doesn't reinvent the chocolate chip cookie — it just makes it more interesting. The base is a classic cookie dough: butter, two kinds of sugar, eggs, vanilla, flour. The Rice Krispies go in at the end, stirred gently so they don't crush down to nothing. You still get that familiar chewy bite, but then there's this light, airy crunch running through it that you don't expect. It's a small thing that makes a real difference.
Saad asked me to make these three weeks in a row after the first batch. My husband ate them with his evening chai and said they reminded him of a crispy chocolate bar someone had folded into cookie dough. My daughter Zainab prefers my almond flour cookies — she's going through a phase — but even she had two of these and didn't complain. That's a win in my house.
One thing to know going in: chilling the dough makes a real difference here. I skipped it the first time because I was impatient, and the cookies spread thin and the Rice Krispies kind of disappeared into the edges. Thirty minutes in the fridge (or even overnight) gives you puffier cookies with the cereal actually holding its texture inside. I'll remind you again in the tips section, but I wanted to say it upfront so you don't skip it like I did.
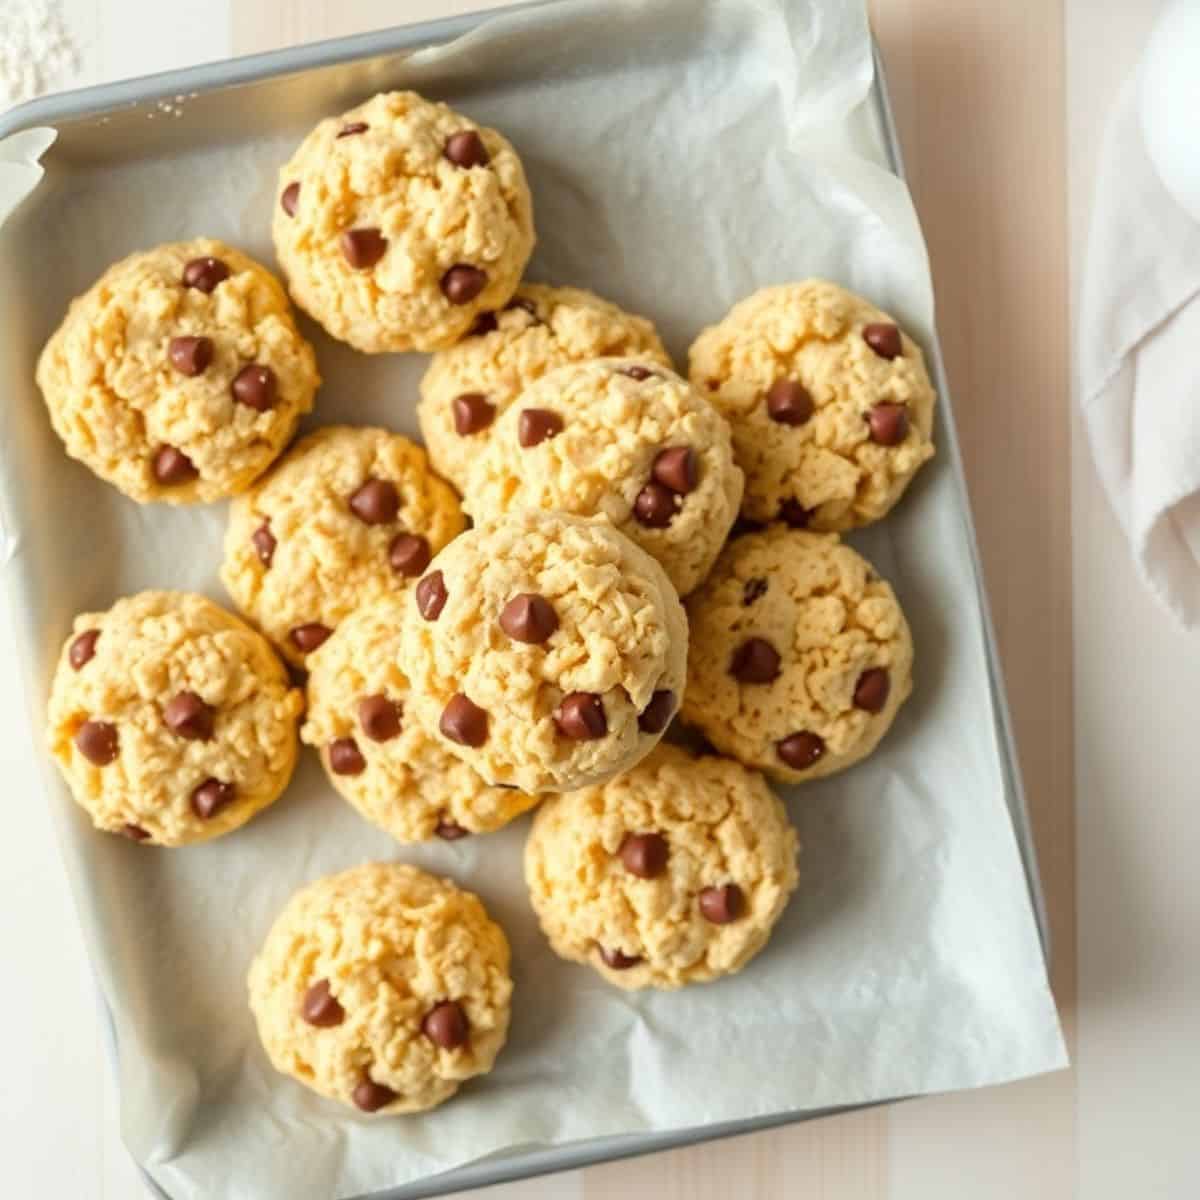
Why You'll Love This Recipe
- That crunch is genuinely surprising: Even when you know the Rice Krispies are in there, that first bite still catches you off guard in the best way. The cereal stays light and airy inside the cookie — it doesn't turn soggy or chewy. It's a completely different texture from nuts or oats, and it works so well with melted chocolate chips.
- The cookie itself stays chewy: The cereal adds crunch but it doesn't dry out the dough or make the cookie crumbly. You get the soft, pull-apart chew of a classic chocolate chip cookie and then the crisp hits a second later. I've made these a dozen times now and they've been consistently chewy every single time, as long as I don't overbake them.
- One bowl, no fancy equipment: I don't own a stand mixer and I've never needed one for this recipe. A large bowl, a wooden spoon, and some elbow grease for the butter-sugar creaming stage is genuinely all it takes. The whole prep (not including chill time) is maybe 20 minutes, and then the oven does the rest.
- Kids go absolutely wild for them: Something about the texture makes kids pay attention. Saad has described them as "crunchy cookies that are also soft" which is exactly right. They pack well in a lunchbox, they hold together without crumbling, and they don't melt into a mess the way some cookies do. These have become my go-to for school bake sales.
- The ingredients are all pantry staples: No specialty items, no trips to a particular grocery store. Butter, sugar, eggs, flour, baking soda, vanilla, chocolate chips, and a box of Rice Krispies — you can get all of this at Walmart or Aldi in one trip. I usually have everything on hand already, which means I can make these on a whim when the kids need an after-school snack.
Ingredients
- 1 cup (2 sticks) unsalted butter, softened
- ¾ cup granulated sugar
- ¾ cup packed brown sugar
- 2 large eggs
- 1 teaspoon vanilla extract
- 2¼ cups all-purpose flour
- 1 teaspoon baking soda
- ½ teaspoon salt
- 1 cup semi-sweet chocolate chips
- 2 cups Rice Krispies cereal (regular, not flavored)
Directions
- Cream the butter and sugars: In a large bowl, beat the softened butter, granulated sugar, and brown sugar together until the mixture looks pale and creamy — about 2-3 minutes of vigorous stirring by hand. This step builds the structure of the cookie, so don't rush it. Cold butter won't cream properly, so make sure yours has been sitting at room temperature for at least 30 minutes.
- Add the eggs and vanilla: Beat in the eggs one at a time, mixing well after each one. Then stir in the vanilla. The dough will look smooth and glossy at this point.
- Whisk the dry ingredients: In a separate bowl, whisk together the flour, baking soda, and salt. Doing this in a separate bowl makes sure the baking soda distributes evenly — if you dump it straight in, you can get bitter pockets in the cookie.
- Combine wet and dry: Gradually add the dry ingredients into the wet, mixing until just combined. Stop as soon as you don't see streaks of flour anymore. Overmixing develops gluten and makes the cookies tough — this is a mistake I made early on and it took me a while to figure out why my cookies were dense.
- Fold in the chocolate chips and Rice Krispies: Add the chocolate chips and Rice Krispies cereal and fold them in gently with a wooden spoon or spatula. Be gentle here — you want the cereal to stay as intact as possible so it keeps its crunch during baking.
- Chill the dough: Cover the bowl and refrigerate for at least 30 minutes. This step is optional in the sense that the cookies will still bake without it, but they'll spread thinner and the cereal texture gets lost. I chill mine for an hour when I have time, or overnight for the best results.
- Preheat the oven: Heat your oven to 375°F (190°C) and line two baking sheets with parchment paper. I get mine from Costco in bulk — a regular sheet pan from any store works fine.
- Bake the cookies: Drop rounded tablespoons of dough onto the prepared baking sheets, leaving about 2 inches between each one. Bake for 10-12 minutes, until the edges are golden brown but the centers still look slightly underdone. They firm up as they cool — if you wait until the centers look fully set in the oven, they'll be overdone by the time they cool.
- Cool before moving: Let the cookies sit on the baking sheet for 5 minutes before transferring to a wire rack. Moving them too soon while they're hot means they'll fall apart. I've done it. Patience is worth it here.
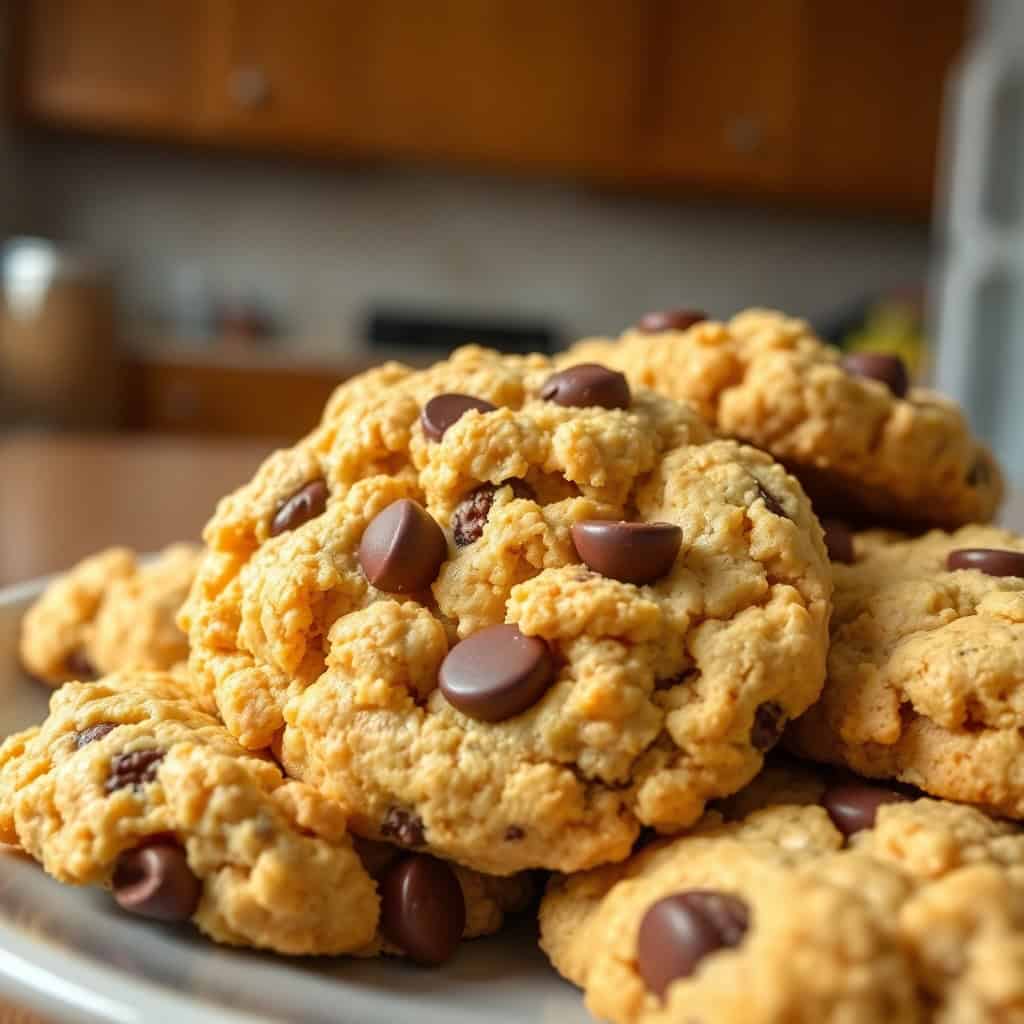
Tips for Success
- Butter must be soft, not melted: I learned this one early. When I've used melted butter — even accidentally just a little too warm — the cookies spread flat and the Rice Krispies end up crispy on the outside instead of inside. Softened butter should indent when you press it with your finger but not collapse completely. If you forgot to take it out ahead of time, cut it into small cubes and let it sit for 20 minutes instead of microwaving it.
- Don't crush the cereal when you fold it in: Rice Krispies are fragile. If you stir too aggressively at the end, they break down into fine dusty pieces that don't give you any crunch. Use a wide spatula and fold from the bottom of the bowl up, turning a few times just until the cereal is distributed. That's enough.
- Measure the flour with the spoon-and-level method: Scooping your measuring cup directly into the flour bag packs in more than you need, and too much flour makes the cookies dry and crumbly. Instead, spoon the flour into the cup and level it off with a knife. It makes a noticeable difference in the final texture.
- Pull them out while the centers look underdone: This feels wrong every single time, but trust it. Cookies continue cooking on the hot baking sheet after you take them out of the oven. If the edges are golden and the center looks just barely set, they're done. I overbaked my first two batches of these because I was nervous about the centers — don't do that.
- Chill the dough, even for just 30 minutes: I keep saying this because it matters. The cold dough holds its shape in the oven, which means thicker cookies and better cereal texture throughout. If you're in a real hurry, you can skip it — but if you have the time, use it. I usually make the dough in the afternoon and bake after dinner.
Variations
- White chocolate chips: Swap the semi-sweet chocolate chips for white chocolate chips. The sweetness level goes up noticeably, so I sometimes add an extra pinch of salt to balance it. My husband actually prefers this version — he says it tastes like a vanilla cookie with crunch, which apparently is his thing.
- Dark chocolate and sea salt: Use dark chocolate chips (70% cocoa or higher) instead of semi-sweet, and sprinkle a little flaky sea salt on top right before baking. This version is less kid-friendly but more adult-friendly — I make it when I want something with the cookie, not just the snack.
- Add chopped nuts: A half cup of roughly chopped pecans or walnuts stirred in with the cereal gives you crunch from two different directions — the airy crispiness of the Rice Krispies and the denser bite of the nut. If you're baking for someone with a nut allergy, obviously skip this one, but otherwise it's a good combination.
- Cinnamon spice version: Add 1 teaspoon of ground cinnamon and ¼ teaspoon of nutmeg to the dry ingredients. This makes the whole cookie smell like fall when it bakes, and it works really well if you use milk chocolate chips instead of semi-sweet. It's not traditional, but it's cozy in the best way.
- Cookie dough brownie mashup: If you love the combination of chocolate cookie and fudgy chocolate, check out my chocolate chip cookie dough brownie bites for a different take. You can also press this Rice Krispie cookie dough into a brownie pan and bake as bars — cut them into squares instead of scooping rounds. They take about 18-20 minutes at the same temperature.
Serving and Storage
Serving
These cookies are best at room temperature, a few hours after they've cooled completely. Right out of the oven they're fragile and the cereal is at its most pronounced crunch — that's when I eat two and tell myself it's quality control. By the next day the crunch softens slightly but the cookie itself stays chewy and holds together well. In my house we eat these plain, but a glass of cold milk makes them noticeably better. My husband has them with chai and it works.
Storage
Store cooled cookies in an airtight container at room temperature for up to 5 days. Make sure they're fully cooled before you seal the container — trapping steam inside will make them go soft faster. If you want to freeze them, the baked cookies freeze well in a zip-lock bag for up to 2 months; just pull them out and let them come to room temperature for about 20 minutes. You can also freeze the raw dough balls — scoop them onto a sheet pan, freeze until solid, then transfer to a freezer bag. Bake straight from frozen at 375°F, adding 2-3 extra minutes to the baking time.

Frequently Asked Questions
Can I freeze the cookie dough ahead of time?
Yes, and I do this often. Scoop the dough into balls and freeze them on a lined baking sheet until solid, then transfer to a freezer bag. They'll keep for up to 2 months. When you're ready to bake, go straight from frozen at 375°F and add about 2-3 extra minutes to the baking time. I usually have a bag of these in the freezer for when Saad has friends over unexpectedly.
How do I know when the cookies are done baking?
The edges should be golden brown and the centers should still look slightly soft and underdone when you pull them out. They'll firm up as they cool on the hot pan — this is not a sign they're undercooked. If you wait until the centers look fully baked in the oven, you'll end up with cookies that are overdone by the time they cool. I've overbaked these twice and they turn dry and crumbly rather than chewy.
Will the Rice Krispies go soggy inside the cookie?
They soften slightly over time, which is normal. Right after baking the crunch is at its best. By day two or three they're less crunchy but still noticeably textured — not soggy, just a bit more subtle. If you want maximum crunch, eat them the same day. Storing them in an airtight container helps slow down the softening.
My cookies spread too flat — what went wrong?
Usually this comes down to one of two things: butter that was too warm (or melted), or skipping the chill step. Warm butter means the fat spreads out in the oven before the cookie sets, which flattens everything. Make sure your butter is softened but still cool to the touch, and chill the dough for at least 30 minutes before baking. If you're in a warm kitchen, even chilling between baking batches helps.
Can I use a different cereal instead of Rice Krispies?
You can experiment, though the texture will be different. Corn Flakes give you a slightly coarser crunch and a faint corn flavor that actually works well. Puffed rice cereal (the generic store brand) works just as well as name-brand Rice Krispies. Avoid anything heavily sweetened or flavored — those tend to make the cookies taste off in a way that's hard to pin down. Stick to plain, simple puffed grain cereals and you'll be fine.

RICE KRISPIE CHOCOLATE CHIP COOKIES
Ingredients
- 1 cup (2 sticks) unsalted butter, softened
- ¾ cup granulated sugar
- ¾ cup packed brown sugar
- 2 large eggs
- 1 teaspoon vanilla extract
- 2 ¼ cups all-purpose flour
- 1 teaspoon baking soda
- ½ teaspoon salt
- 1 cup semi-sweet chocolate chips
- 2 cups Rice Krispies cereal
Instructions
- Cream butter and sugars: In a large bowl, cream together the softened butter, granulated sugar, and brown sugar until light and fluffy.
- Add eggs and vanilla: Beat in the eggs one at a time, then stir in the vanilla extract.
- Combine dry ingredients: In a separate bowl, whisk together the flour, baking soda, and salt.
- Combine wet and dry ingredients: Gradually add the dry ingredients to the wet ingredients, mixing until just combined. Do not overmix.
- Add chocolate chips and Rice Krispies: Stir in the chocolate chips and Rice Krispies cereal.
- Chill dough (optional): Cover the dough and refrigerate for at least 30 minutes. This will help prevent the cookies from spreading too much during baking.
- Preheat oven: Preheat oven to 375°F (190°C). Line baking sheets with parchment paper.
- Bake cookies: Drop rounded tablespoons of cookie dough onto the prepared baking sheets, leaving some space between each cookie. Bake for 10-12 minutes, or until the edges are golden brown.
- Cool: Let the cookies cool on the baking sheets for a few minutes before transferring them to a wire rack to cool completely.
Notes
- Rice Krispies: Use regular Rice Krispies cereal, not the flavored varieties.
- Chocolate Chips: You can use milk chocolate, semi-sweet chocolate, or dark chocolate chips.
- Chilling: Chilling the dough is optional, but it helps to prevent the cookies from spreading too much during baking.
- Baking Time: Baking times may vary slightly depending on your oven. Keep an eye on the cookies and remove them when the edges are golden brown.
A Few Final Thoughts
I've made a lot of cookie recipes over the years — some from scratch, some from boxes my mother sent me in packages before I figured out how to make things myself. This one has quietly become one of my regulars, not because it's complicated or impressive-looking, but because it consistently makes people stop mid-conversation and ask what's in it. The answer is always funnier than they expect: Rice Krispies. That's it.
I make a double batch almost every time now because a single batch disappears within a day in my house. I keep half the dough balls in the freezer so I can bake fresh cookies on nights when everyone wants something sweet but I don't want to start from scratch. If you're someone who loves having baked goods on hand without doing all the work every time, the frozen dough trick is genuinely life-changing. And if you're in the mood for something a little more indulgent and chocolatey, my marshmallow-surprise hot cocoa cookies are worth trying alongside these.
For anyone looking for a no-bake option on the days when turning on the oven feels like too much, my no-bake peanut butter granola cups scratch a similar itch — crunchy, sweet, and done in minutes. But when I want something warm out of the oven with mel





Comments
No Comments