
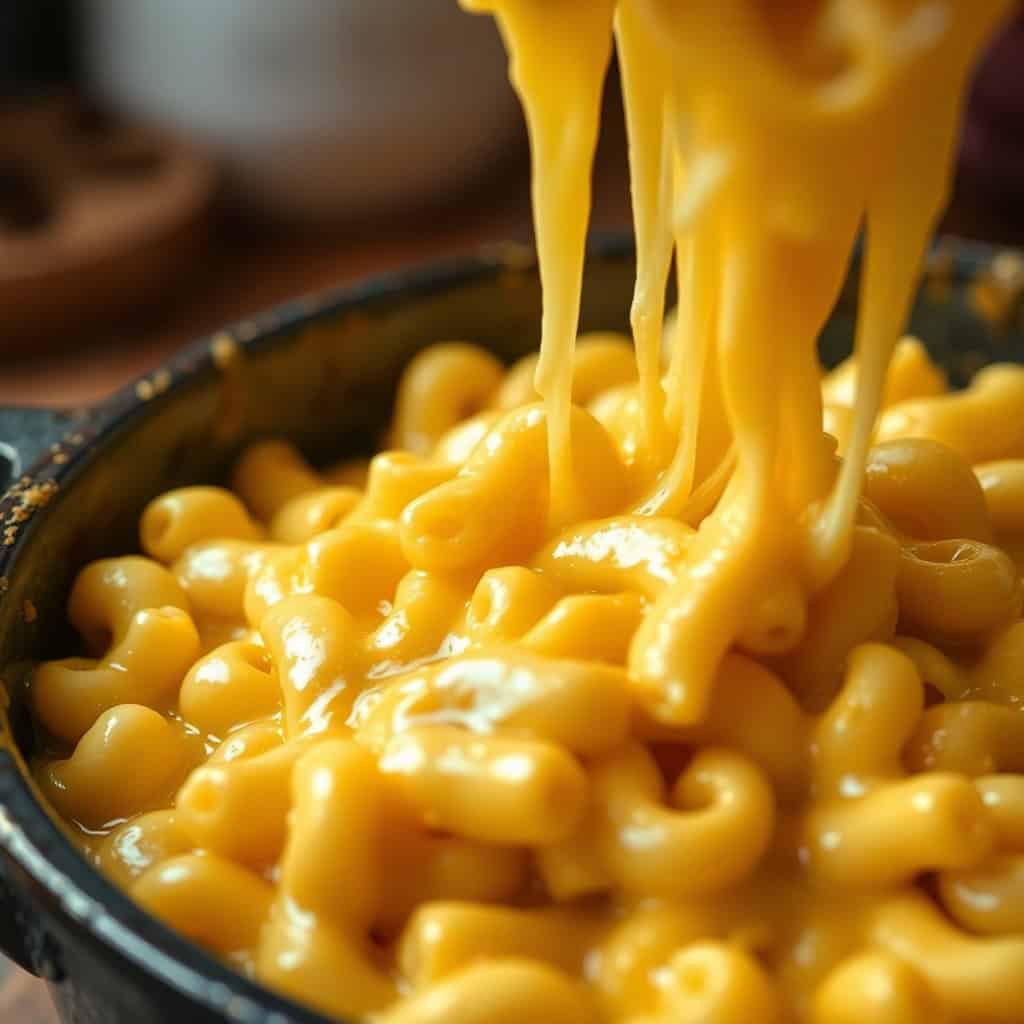
I didn't believe a one-pot mac and cheese could actually work until I tried it on a Tuesday night when I had absolutely zero energy to wash extra dishes. No separate pot for the pasta, no making a roux in another pan — everything just goes in together and comes out creamy and cheesy and genuinely good. I've made this probably two dozen times now and it's become one of those recipes I don't even have to think about anymore.
What makes this work is the starchy liquid the pasta cooks in. Because the macaroni absorbs the broth and milk as it cooks, it releases starch that naturally thickens everything into a sauce. You're not adding flour or making a separate béchamel — the pasta does the work for you. The dry mustard is non-negotiable for me; it adds a sharpness that keeps the dish from tasting flat, even though you can't taste the mustard itself.
This is Zainab's most-requested dinner. She asks for it at least twice a month, and honestly I'm not complaining because it's on the table in 30 minutes and the cleanup is one pot and a spoon. I also make it as a side dish when I'm doing something like mini tater tot cheeseburgers — it pairs perfectly with anything the kids already love.
One thing to set expectations on: this is stovetop mac and cheese, not baked, so it's saucy and creamy rather than firm and scoopable. If you let it sit too long before serving it'll start to thicken up. Serve it right away — I mean right away, like, bowls on the table before you stir in the cheese. It's worth the hustle.
Why You'll Love This Recipe
- One pot, one mess: Everything goes in together — pasta, broth, milk, butter, seasoning — and the whole thing cooks in one pot. I genuinely only wash one pot and a wooden spoon after making this. On weeknights when I'm already tired, that matters more than I can explain.
- No roux, no stress: Traditional mac and cheese starts with a roux — butter and flour cooked together before you add milk. I've broken plenty of cheese sauces that way. This recipe skips that entirely. The starchy pasta water does the thickening for you, and the result is a sauce that's smooth and clings to every piece of pasta.
- Done in 30 minutes: From cold pot to bowls on the table, this takes about 30 minutes. I time it while helping with homework, and it's always ready before anyone starts complaining they're hungry. That's the real test in my house.
- Works as a main or a side: Some nights this is dinner, full stop. Other nights I serve it alongside something else — grilled chicken, a simple salad, or even next to my creamy bacon pasta when I'm feeding a crowd and need two filling things on the table. It's flexible in a way I really appreciate.
- Kids actually eat it: I know that sounds obvious for mac and cheese, but I mean they eat it without negotiation, without picking things out, without asking what the yellow stuff is. When Zainab eats something without commentary, I consider it a win.
Ingredients
- 1 pound elbow macaroni
- 4 cups low-sodium chicken broth (or vegetable broth)
- 1 cup whole milk or 2% milk
- ½ cup heavy cream (optional, but makes it noticeably richer)
- 4 tablespoons unsalted butter, cut into pieces
- 1 teaspoon dry mustard
- ½ teaspoon salt
- ¼ teaspoon black pepper
- 4 cups shredded cheddar cheese (or a mix of cheddar, Monterey Jack, Gruyere, or Colby)
- Optional toppings: breadcrumbs, cooked bacon crumbles, chopped chives or green onions
Directions
- Combine everything in the pot: In a large pot or Dutch oven, combine the macaroni, chicken broth, milk, heavy cream (if using), butter, dry mustard, salt, and pepper. Don't worry about the butter not being melted yet — it'll melt as the liquid heats up. Give it one stir to mix everything loosely.
- Bring to a boil, then simmer: Bring the mixture to a boil over medium-high heat, stirring occasionally so the pasta doesn't clump at the bottom. Once it's boiling, reduce the heat to medium-low and simmer uncovered for 15–20 minutes, stirring every few minutes. You're looking for the pasta to be al dente and most of the liquid absorbed into a thick, creamy sauce.
- Add the cheese off the heat: Remove the pot completely from the heat before adding your cheese. This is important — if the pot is still over a flame, the cheese can seize up and go grainy. Stir in the shredded cheese a handful at a time, letting each addition melt before adding more. Keep stirring until the sauce is smooth and coats everything evenly.
- Serve immediately: Get your bowls ready before this step because mac and cheese waits for no one. Spoon it out right away and add any toppings you like — bacon crumbles, a handful of chives, or toasted breadcrumbs if you want a little crunch.

Tips for Success
- Grate your own cheese: I learned this the hard way. The first few times I made this, I used the pre-shredded bags from the store and the sauce came out slightly grainy and didn't melt as smoothly. Pre-shredded cheese has an anti-caking coating that interferes with melting. A block of cheddar from Walmart or Trader Joe's and a box grater takes five extra minutes and makes a real difference in the final texture.
- Take the pot off the heat before adding cheese: I cannot stress this enough. The residual heat from the pasta and liquid is enough to melt the cheese gently. If you add cheese while the pot is still on the burner, the proteins in the cheese tighten up, the fats separate, and you end up with a greasy, grainy mess instead of a silky sauce. Pull the pot off completely, wait 30 seconds, then start stirring in the cheese.
- Use a large enough pot: This seems obvious but I've tried to make it in a medium saucepan before because I didn't want to wash the big pot. Big mistake — the liquid bubbles up and spills over, and the pasta doesn't have room to cook evenly. Use a pot that holds at least 5–6 quarts. A Dutch oven works great if you have one.
- Stir during cooking but not constantly: You want to stir every few minutes to keep the pasta from sticking to the bottom and to make sure it cooks evenly in the liquid. But stirring too constantly keeps the liquid from reducing properly. I set a timer and stir every 3–4 minutes — that's enough.
- Taste before serving and adjust: The saltiness of your broth will vary depending on the brand, so don't just go by the recipe measurements alone. I always taste before serving and often add a little more salt or an extra pinch of dry mustard. The mustard especially — it punches up the cheesy flavor without making it taste mustardy at all.
Variations
- Add vegetables: Broccoli florets, frozen peas, or a big handful of spinach all work well in here. I add them in the last 3–4 minutes of simmering so they don't turn to mush. Frozen peas especially — they just need 2 minutes and they're done. My kids eat more vegetables this way than any other method I've tried.
- Add protein: Stir in cooked bacon crumbles, shredded rotisserie chicken, or diced ham right at the end with the cheese. This turns a side dish into a full dinner. I keep a bag of pre-cooked bacon from Costco in the fridge for exactly this kind of situation.
- Spicy version: Add ¼ teaspoon of red pepper flakes into the pot at the start, or stir in a teaspoon of hot sauce with the cheese at the end. My husband always adds hot sauce to his bowl anyway, so sometimes I just leave a bottle on the table and let him do it himself.
- Baked version: If you want that golden, bubbly top, pour the finished mac and cheese into a buttered baking dish, top with a handful of extra shredded cheese and some panko breadcrumbs, and bake at 375°F (190°C) for about 15 minutes until the top is golden. It's a bit more work but the contrast of the crispy top and creamy inside is really good.
- Cheese swaps: Sharp cheddar is my default but I've made this with a half-cheddar, half-Gruyere mix and it was noticeably more complex and interesting. Pepper Jack gives it heat. Colby melts beautifully and has a mild flavor the kids love. This isn't an authentic Southern mac and cheese — it's my everyday version, and I adjust the cheese based on what's in my fridge.
Serving and Storage
Serving
Serve this immediately after stirring in the cheese — that's when it's at its creamiest. It goes well on its own as a main dish, or alongside something simple like grilled chicken or a green salad. If I'm doing a bigger spread, I'll serve it next to something like chicken cordon bleu stromboli and let everyone fill their plates. For toppings, toasted breadcrumbs add a nice crunch, and a handful of chopped chives or green onions adds freshness that cuts through the richness.
Storage
Store leftovers in an airtight container in the refrigerator for up to 3 days. When reheating, add a splash of milk or broth — maybe 2–3 tablespoons per cup of leftovers — and warm it slowly over medium-low heat, stirring as it heats. The pasta absorbs the sauce as it sits, so without that extra liquid it'll be thick and clumpy. Microwave works too, just cover the bowl loosely and stop to stir halfway through. I don't recommend freezing this — the pasta goes mushy and the cheese sauce separates in a way that's hard to fix.
Frequently Asked Questions
Can I use a different pasta shape?
Yes, short pasta shapes work well here — shells, rotini, cavatappi, or penne all work. The cooking time may vary slightly depending on the shape and thickness, so start checking for doneness a couple minutes early. I'd avoid long pasta like spaghetti; it doesn't cook evenly in this method.
Why did my mac and cheese turn out grainy?
This almost always happens for one of two reasons: the cheese was added while the pot was still on the heat, or pre-shredded cheese was used. Both cause the proteins and fats in the cheese to separate. Take the pot fully off the heat, let it sit 30 seconds, then add freshly grated cheese in batches and stir slowly. That usually solves it.
Can I make this ahead of time?
This is really best served fresh — the sauce thickens a lot as it sits. If you need to prep ahead, you can cook the pasta in the broth and milk mixture, then refrigerate it separately and stir in the cheese when you're reheating. Add extra milk or broth when warming it up to loosen the sauce back to the right consistency.
Can I use water instead of broth?
You can, but the flavor will be noticeably more bland. The broth is doing a lot of seasoning work here without you having to add much extra salt. If you only have water, add a little extra salt and maybe a quarter teaspoon more dry mustard to compensate. Vegetable broth works just as well as chicken broth if you want to keep this vegetarian.
Can I freeze leftover mac and cheese?
I don't recommend it. The pasta absorbs moisture as it freezes and thaws, and the cheese sauce tends to separate and turn grainy. The texture after freezing is genuinely not good. This keeps well in the fridge for 3 days though, so just refrigerate what you have and reheat with a splash of milk.

ONE POT CREAMY MAC AND CHEESE RECIPE
Ingredients
- 1 pound elbow macaroni
- 4 cups low-sodium chicken broth or vegetable broth
- 1 cup milk (whole milk or 2% recommended for creaminess)
- ½ cup heavy cream (optional, for extra richness)
- 4 tablespoons (½ stick) unsalted butter, cut into pieces
- 1 teaspoon dry mustard
- ½ teaspoon salt
- ¼ teaspoon black pepper
- 4 cups shredded cheddar cheese (or a mix of cheddar and other cheeses like Monterey Jack, Gruyere, or Colby)
- Optional toppings: breadcrumbs, cooked bacon crumbles, chopped chives or green onions
Instructions
- Combine ingredients: In a large pot or Dutch oven, combine the macaroni, chicken broth (or vegetable broth), milk, heavy cream (if using), butter, dry mustard, salt, and pepper.
- Cook the macaroni: Bring the mixture to a boil over medium-high heat, then reduce the heat to medium-low and simmer, uncovered, stirring occasionally, until the macaroni is cooked al dente and most of the liquid has been absorbed, about 15-20 minutes.
- Add the cheese: Remove the pot from the heat. Stir in the shredded cheese until it is melted and the sauce is smooth and creamy. Continue stirring until the cheese is completely incorporated.
- Serve: Serve the mac and cheese immediately. Top with breadcrumbs, cooked bacon crumbles, or chopped chives/green onions, if desired.
Notes
- Broth vs. Water: Using broth instead of water adds more flavor to the mac and cheese.
- Milk and Cream: Using whole milk and heavy cream will result in a richer and creamier mac and cheese. You can adjust the amount of milk and cream to your preference.
- Cheese: Use a good quality cheese that melts well. Pre-shredded cheese often contains cellulose that can prevent it from melting smoothly. Freshly grated cheese is always best.
- Seasoning: Taste and adjust the seasonings as needed. You might want to add more salt, pepper, or dry mustard.
This is the kind of recipe I keep coming back to because it asks almost nothing from me and still delivers. One pot, 30 minutes, ingredients I always have — that's really it. On nights when I have no plan and no energy, this is what happens in my kitchen and nobody complains.
I've made fancier mac and cheese with a proper roux and three kinds of cheese and a breadcrumb crust, and yes, that version is special. But this one is the one I actually make on a regular basis. It doesn't need to be fancy to be genuinely satisfying. If you want something to round out dessert, my soft and chewy raspberry sugar cookies are what we usually end the meal with when Zainab gets a say in the menu.
If you try this, the most important thing is to get your bowls ready before you stir in the cheese. Serve it immediately. That window where it's perfectly saucy and coats every piece of pasta — that's the moment. Don't miss it by standing at the counter scrolling your phone. Ask me how I know. 🧀🍝✨
If you liked this, here are a few more recipes from my kitchen you might want to try next:
- Creamy Bacon Pasta (Rich, Garlicky & Ready in 25 Minutes) — another weeknight pasta that comes together fast with pantry staples
- Mini Tater Tot Cheeseburgers — serve these alongside mac and cheese for a dinner the kids will actually get excited about
- Chicken Cordon Bleu Stromboli — cheesy, filling, and great for feeding a group
- Meatloaf Grilled Cheese — a comfort food mashup that works better than it has any right to
- Soft and Chewy Raspberry Sugar Cookies — for when you need something sweet after a cheesy dinner





Comments
No Comments