
I started making these ham and cheese pinwheels on a whim one afternoon when Zainab came home from school starving and I had nothing quick to put together. One tube of crescent roll dough, some deli ham, a few slices of Swiss — done in under 30 minutes. She ate four of them before I could even plate the rest.
What I like about this recipe is how unfussy it is. You don't need to make dough from scratch, you don't need any special tools, and the whole thing comes together on one sheet pan. The crescent dough bakes up golden and a little flaky, the ham gets slightly crispy at the edges, and the cheese melts into every layer. I brush the tops with garlic butter before baking, which makes the whole kitchen smell incredible.
These have become my go-to when we have people over for a casual afternoon or when I need a snack that disappears fast. My husband usually grabs two before they're even cool, and I've started making a double batch because one batch genuinely isn't enough for our household. If you're feeding a crowd, plan accordingly.
One thing to note: don't skip the parchment paper. The first time I made these, I greased the pan directly and a few of them stuck and tore apart when I tried to lift them. Parchment is non-negotiable. Also, if you're looking for something to serve alongside these, my Cheddar Bay Sausage Balls are another easy party bite that pairs really well with a tray of these pinwheels.
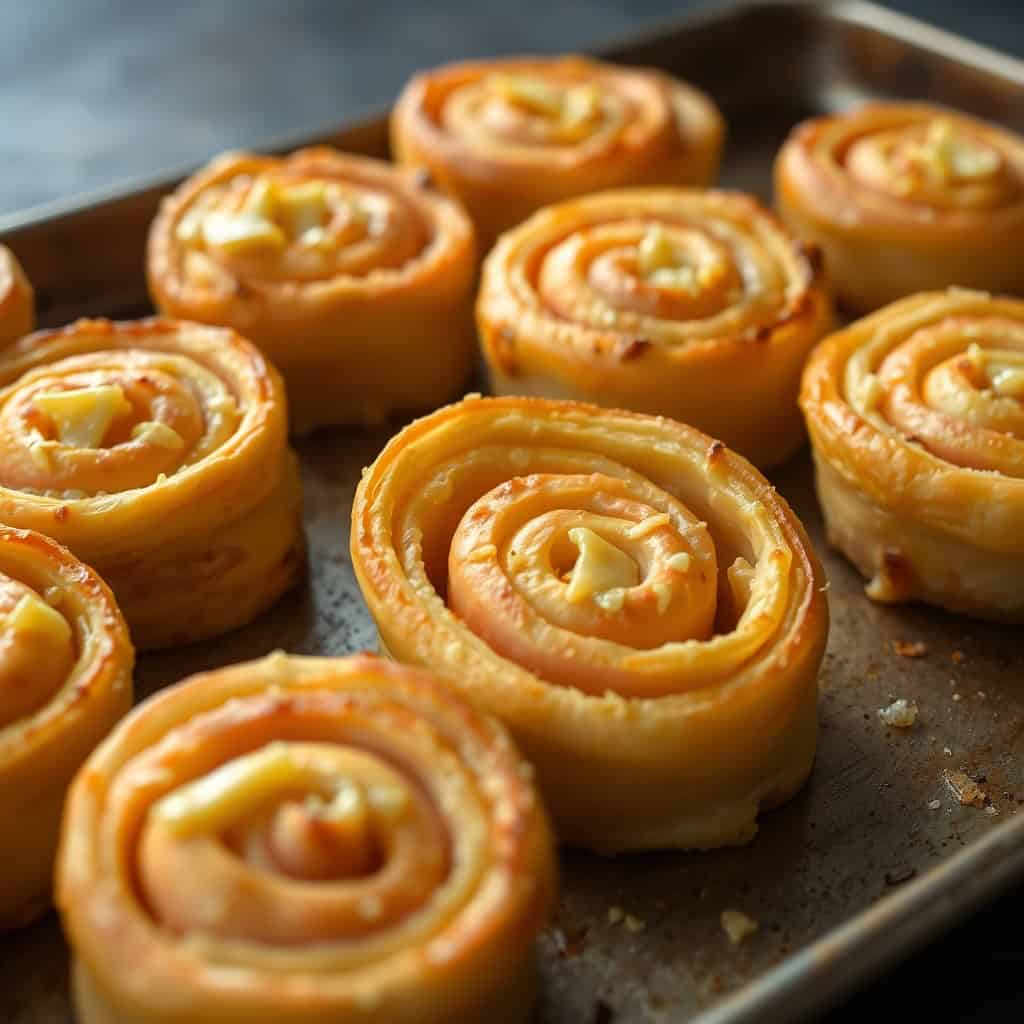
Why You'll Love This Recipe
- Ready in 30 minutes flat: From the moment I pull the dough out of the fridge to when they come out of the oven, it's about 30 minutes. The actual hands-on time is maybe 10 minutes — the oven does the rest. On weeknights or chaotic afternoons, that matters a lot to me.
- Kids actually eat them: Ham and cheese is one of those combinations that just works for kids. Zainab requests these regularly, and even when I've swapped the cheese or added a little mustard, she hasn't complained once. They're easy to hold, not too messy, and cool down quickly enough that kids aren't waiting forever.
- One pan, almost no cleanup: Everything bakes on a single sheet pan lined with parchment, which means cleanup takes about two minutes. I do not enjoy washing dishes, so recipes like this one earn a permanent spot in my rotation for that reason alone.
- Easy to customize: I've made these with cheddar, Swiss, mozzarella, and once with a pepper jack that my husband loved. The deli ham can be swapped for turkey if that's what you have. The base recipe is flexible enough that you can work with whatever's already in your fridge.
- Good warm or at room temperature: I've served these straight from the oven and I've also served them an hour later when they'd cooled down, and they hold up surprisingly well either way. The texture softens a bit as they cool, but the flavor stays good — which is helpful when you're setting out a snack spread ahead of time.
Ingredients
- 1 package refrigerated crescent roll dough (8 rolls — Pillsbury from Walmart works great)
- 8 slices deli ham
- 8 slices Swiss cheese (or cheddar, mozzarella, whatever you have)
- 2 tablespoons Dijon mustard
- 2 tablespoons butter, melted
- 1 teaspoon garlic powder
- 1 teaspoon dried parsley
Directions
- Preheat the oven: Set your oven to 375°F (190°C) and line a baking sheet with parchment paper. I learned the hard way that skipping the parchment means losing half your pinwheels to the pan — don't skip it.
- Prepare the dough: Unroll the crescent roll dough and separate it into triangles. If the seams are pulling apart, pinch them back together gently. You want each triangle to be its own clean piece.
- Add the filling: Spread a thin layer of Dijon mustard over each triangle, then lay a slice of ham on top, followed by a slice of cheese. Don't pile the filling too thick — if you overfill them, they'll burst open in the oven and make a mess.
- Roll and shape: Starting from the wide end of each triangle, roll it up toward the tip, keeping it fairly snug. Place each rolled pinwheel on the prepared baking sheet with a little space between them so the heat can circulate.
- Brush with butter: Mix the melted butter with the garlic powder and dried parsley, then brush it generously over the tops of each pinwheel. This is what gives them that golden, savory finish — don't skip it.
- Bake: Bake for 10–12 minutes, until the tops are golden brown and the cheese is visibly melted. Ovens vary, so start checking at the 10-minute mark. Pull them out when they look golden — they firm up a little as they cool.
- Cool slightly and serve: Let them sit for 2–3 minutes before serving. They're very hot right out of the oven and the cheese needs a moment to settle.

Tips for Success
- Don't overfill the triangles: I did this my first few times because more filling sounds better, right? It's not. When there's too much ham or cheese packed in, the pinwheels split open while baking and you end up with a mess on the pan. One slice of ham, one slice of cheese — that's all you need per roll.
- Use cold dough straight from the fridge: If the crescent dough warms up too much before you work with it, it gets sticky and hard to handle. I take it out of the fridge and work with it immediately. If it starts sticking to the counter, pop it back in the fridge for 5 minutes.
- Watch the oven in the last two minutes: Crescent dough can go from golden to overdone quickly, especially depending on your oven. I check mine at the 10-minute mark every single time. The bottoms should be lightly golden, not dark brown.
- The garlic butter brush is not optional (in my opinion): Some recipes skip this step, but I think it makes a real difference. The garlic powder and parsley in the melted butter give the tops a savory, slightly herby crust that makes these taste much more put-together than they actually are. Takes 30 seconds and is absolutely worth it.
- Use good deli ham, not the rubbery packaged stuff: I get mine sliced at the deli counter when I can — the texture is noticeably better once baked. That said, I've also used packaged ham from Aldi in a pinch and it still worked fine. Just avoid anything pre-shaved or too thin, because it tends to disappear into the dough.
Variations
- Turkey and cheddar: Swap the ham for turkey slices and use sharp cheddar instead of Swiss. This is a slightly lighter version and works really well if you have leftover deli turkey in the fridge. My husband actually prefers this combination — he says the cheddar has more bite than the Swiss.
- Spicy version: Add a few thin slices of pickled jalapeño or a small drizzle of hot sauce over the ham before rolling. I made this version for a get-together once and they were the first ones to disappear. If you want something else spicy on your snack table, my Slow Cooker Buffalo Chicken Chili is a good pairing.
- Vegetarian: Skip the ham and layer on baby spinach, thinly sliced mushrooms, and crumbled goat cheese or ricotta. You'll want to pat the spinach dry first so it doesn't make the dough soggy. This version takes a bit more prep but it's genuinely good — not just a ham substitute, it stands on its own.
- Herb and cream cheese: Spread a thin layer of softened cream cheese (instead of or alongside the mustard) before adding the ham and cheese. Then sprinkle dried thyme or rosemary over the top. This makes them a little richer and feels a bit more elevated if you're serving these at a brunch or as a proper appetizer.
Serving and Storage
Serving
These are best served warm, about 2–3 minutes out of the oven. I usually put them out on a wooden board with a small bowl of honey mustard or Dijon on the side for dipping. They work well as an appetizer, an afternoon snack, or even a light lunch alongside a simple salad. If I'm putting together a bigger spread, I'll set these next to a pitcher of Dreamsicle Orange Punch — the kids love that combination.
Storage
Store leftovers in an airtight container in the fridge for up to 3 days. To reheat, put them in the oven at 350°F (175°C) for about 5–7 minutes — this brings the crispiness back. The microwave works in a pinch but does make them a bit soft. You can also freeze them after baking: lay them flat in a single layer to freeze, then transfer to a freezer bag. They keep for up to 2 months. Reheat from frozen at 350°F for about 12–15 minutes.
Frequently Asked Questions
Can I make these pinwheels ahead of time?
Yes — you can assemble them, place them on the parchment-lined baking sheet, and refrigerate for up to an hour before baking. I wouldn't go much longer than that because the dough can get a little soggy if it sits with the filling for too long. Just pull them out of the fridge and bake when you're ready.
Can I use puff pastry instead of crescent roll dough?
You can, and the puff pastry version is actually what I made first. The texture is flakier and a little more delicate, and the bake time goes up to about 12–15 minutes at 400°F. The crescent roll version is easier to handle and holds its shape better, which is why that's what I usually reach for. Both work.
How do I keep the pinwheels from unrolling while baking?
Two things help: rolling them tight from the start, and making sure you don't overfill them. The tip of the crescent triangle should be pressed gently against the roll when you place them on the pan — that slight pressure helps it stay in place while baking. If they do unroll a little, they'll still taste fine, they just won't look as neat.
Can I freeze these before baking instead of after?
I haven't had great results freezing them before baking — the crescent dough doesn't thaw evenly and tends to come out gummy in the middle. I recommend baking them first, letting them cool completely, then freezing. Reheat from frozen at 350°F for about 12–15 minutes and they come back nicely.
What dipping sauce works best with these?
Honey mustard is my first choice — the sweetness cuts through the savory filling really well. Dijon on its own also works, and my husband likes them with a little ranch. Marinara is another option if you've gone with a mozzarella filling. Honestly, they're good without any sauce too.

BAKED HAM AND CHEESE PINWHEELS
Ingredients
- 1 package refrigerated crescent roll dough (8 rolls)
- 8 slices deli ham
- 8 slices Swiss cheese (or your choice of cheese)
- 2 tablespoon Dijon mustard
- 2 tablespoon butter, melted
- 1 teaspoon garlic powder
- 1 teaspoon dried parsley
Instructions
- Preheat the Oven: Preheat the oven to 375°F (190°C) and line a baking sheet with parchment paper or lightly grease it.
- Prepare the Dough: Unroll the crescent roll dough and separate the triangles. Place them on the prepared baking sheet, pinching the seams together if necessary.
- Add Ham and Cheese: Spread a thin layer of Dijon mustard over each crescent triangle. Place a slice of ham and a slice of cheese on each triangle.
- Roll and Shape: Carefully roll each crescent triangle from the wide end to the tip, forming pinwheels.
- Brush with Butter: Brush the tops of the pinwheels with melted butter, and sprinkle with garlic powder and dried parsley.
- Bake: Bake for 10-12 minutes, or until the pinwheels are golden brown and the cheese is melted.
- Serve: Allow to cool for a few minutes before serving. Enjoy these warm, cheesy pinwheels as a savory snack or appetizer!
Notes
- Make Ahead: You can assemble the pinwheels and refrigerate them for up to 1 hour before baking. Simply bake when ready to serve.
- Customizing the Flavor: Try substituting the ham with turkey or chicken, or use a blend of different cheeses such as cheddar or mozzarella for variety.
- Serving Suggestions: Serve warm as an appetizer, snack, or light meal. Pair with a side of mustard or ranch dressing for dipping.
- Storage Tips: Store leftover pinwheels in an airtight container in the refrigerator for up to 3 days. Reheat in the oven or microwave before serving.
This is the kind of recipe I come back to again and again because it asks almost nothing of me and the result is always good. Thirty minutes, one pan, seven ingredients — and I end up with something that actually gets eaten. That's the bar in my house, and these clear it every time.
I make these most often when I have people coming over and I want something out on the table quickly while I finish cooking the main thing. They buy me time and nobody's standing around hungry. If I'm doing a bigger spread, I'll usually also have something sweet ready to go — my Fudgy Pecan Brownies or the Cinnamon Cheesecake Cookies both work well to round out a snack table.
If you do make these, the garlic butter brush on top is the step I'd least want you to skip. It's a small thing but it's what makes these taste like you put more effort in than you actually did. Make the double batch. You'll be glad you did. 🧀✨
If you liked this recipe, these are worth a look too:
- Cheddar Bay Sausage Balls — another easy appetizer that disappears fast at any gathering
- Crockpot Ham, Green Beans and Potatoes — a hearty Southern-style dinner if you have ham to use up
- Slow Cooker Buffalo Chicken Chili — spicy, creamy, and great for feeding a crowd
- Dreamsicle Orange Punch — the drink I serve with these when the kids are around
- Fudgy Pecan Brownies — for when you need something sweet after all that savory





Comments
No Comments