
I made cake pops for the first time when Zainab had a school birthday party and I wanted to bring something that looked a little more special than a sheet cake. I had no idea what I was doing. The sticks kept falling out, the coating was lumpy, and the first batch looked like something from a cautionary tale. But by the third try, I had it figured out — and now I make these every few months because honestly, they're one of those things that look impressive but come together from a box of cake mix and half a can of frosting.
What makes this recipe work is the frosting ratio. Most people add too much and end up with a sticky mess that won't hold its shape. I start with ½ cup, mix it in, and check the texture before adding more. You want the mixture to feel like firm Play-Doh — it should hold a ball shape without cracking, but it shouldn't be wet or sticky. That one detail makes the difference between cake pops that look put-together and ones that fall apart in the coating.
Zainab asks for these whenever there's any kind of celebration — birthday, school event, Eid, you name it. My husband thinks they're too sweet, but he eats three every time I make them, so I don't take that complaint seriously. I usually make a full batch of 25-28 pops and they're gone by the next afternoon. If you want something for a party dessert table, these pair really nicely alongside something like dark chocolate and strawberry cupcakes — the two together look like you put in way more effort than you actually did.
One thing to set expectations on: you'll need about 30 minutes for the cake to cool completely, and another 30 for the coated pops to set. Don't rush either of those. I learned the hard way that warm cake turns the frosting into soup, and coating cake pops before they're chilled means the sticks slide right out. Plan for about 2 hours start to finish, and you'll have no stress.

Why You'll Love This Recipe
- Starts with a box mix: There's no shame in it — I use a standard box mix every single time and no one has ever complained. Any flavor works: vanilla, chocolate, funfetti, lemon. The cake is just the base; the frosting and coating are where the character comes from. It keeps the prep time short and the ingredient list completely manageable.
- Totally customizable coating and decoration: White chocolate coating with pink sprinkles for a birthday, dark chocolate with gold dust for something fancier, red candy melts for the holidays — the same basic recipe becomes a completely different treat depending on what you dip and decorate with. I keep a few different bags of candy melts in the pantry so I can switch things up depending on the occasion.
- Kids can actually help: Zainab rolls the cake balls while I handle the melted coating — the hot chocolate part isn't for small hands, but everything else is perfectly kid-appropriate. Rolling the balls is satisfying and mess-tolerant. She takes it seriously, which means I get help and she feels proud of what she made. That's a win on both sides.
- Make-ahead friendly: I always make these the day before I need them. The pops set up overnight in the fridge, the coating gets a little firmer, and they travel better when they're cold. The day of the party, I just pull them out and arrange them on a stand. No last-minute scrambling in the kitchen while guests arrive.
- The leftovers hold up really well: Unlike a layer cake that gets sad after two days, cake pops stay moist inside that coating for almost a week in the fridge. I've eaten a leftover cake pop at 7am while packing school bags and I have no regrets about it. They're just as good on day 4 as day 1.
Ingredients
- 1 box of cake mix, any flavor (plus whatever the box calls for: eggs, oil, water)
- ½ cup frosting, store-bought or homemade (cream cheese, vanilla, or chocolate all work)
- 1 cup candy melts or chocolate (for coating — white, milk, or dark)
- 1 tablespoon vegetable oil (optional, for thinning the coating if it gets too thick)
- Lollipop sticks or cake pop sticks (20-30, depending on how big you roll them)
- Sprinkles, colored sugar, or edible glitter for decorating (optional, but Zainab considers it mandatory)
Directions
- Bake the Cake: Prepare and bake the cake mix according to the box instructions in a 9x13-inch pan. Once it's done, let it cool completely on the counter — I usually give it a full hour. Crumbling a warm cake into frosting is how you end up with a wet, sticky mess that won't form proper balls.
- Crumble the Cake: Once the cake is fully cooled, use your hands or a fork to break it into fine crumbs in a large bowl. You want it to look like coarse breadcrumbs with no large chunks. The finer you go here, the smoother your cake balls will be.
- Mix in the Frosting: Add about ½ cup of frosting to the crumbled cake and mix well. The texture should feel like firm, moldable dough — not wet, not crumbly. If it's still too dry and cracking when you try to press it together, add one more tablespoon of frosting at a time. Stop before it gets sticky.
- Roll the Cake Balls: Scoop about 1 tablespoon of the mixture and roll it between your palms into a smooth ball, roughly 1 inch in diameter. Place the balls on a parchment-lined baking sheet. When you've rolled all of them, put the tray in the freezer for 15-20 minutes so they firm up — this makes the dipping step much easier.
- Dip the Sticks: Melt a small amount of candy melts or chocolate (just a few tablespoons is enough). Dip the tip of each lollipop stick about ½ inch into the melted coating, then insert it halfway into each chilled cake ball. This little bit of coating acts like glue and keeps the stick from sliding out once you dip the whole thing. Let them sit for 5 minutes to set.
- Coat the Cake Pops: Melt the rest of your candy melts or chocolate until smooth. If the coating seems too thick, stir in 1 tablespoon of vegetable oil. Dip each cake pop into the coating, swirling it gently until completely covered, then lift it straight up and let the excess drip off. Don't tap the stick — just hold it still and let gravity do the work.
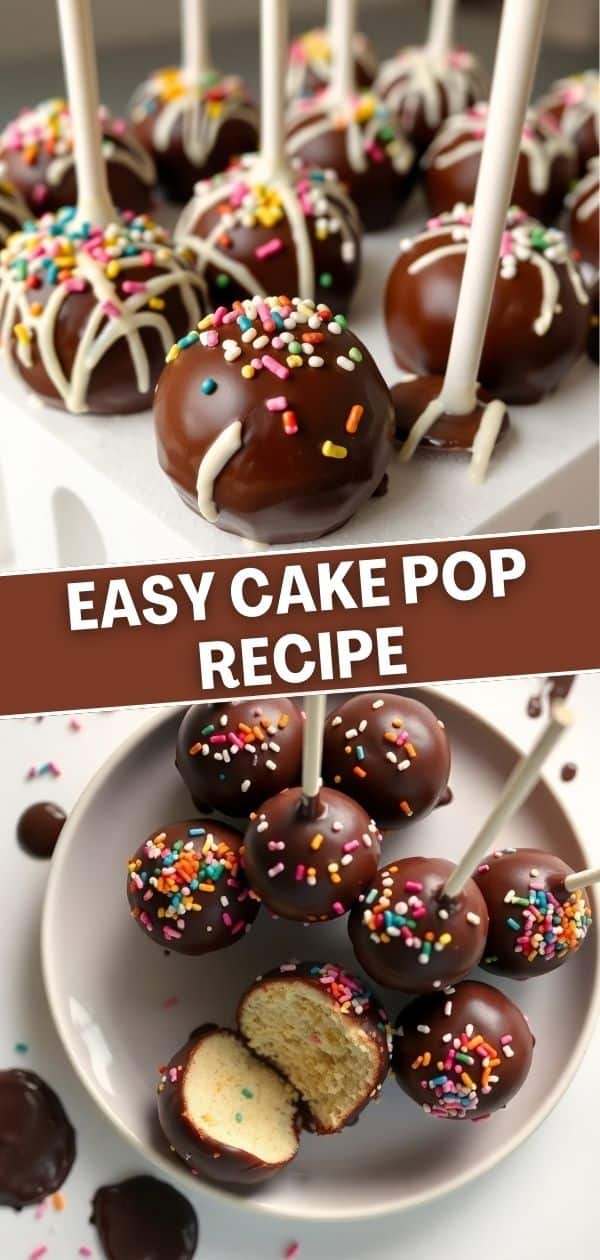
- Decorate: While the coating is still wet, add your sprinkles, colored sugar, or edible glitter. Once the coating sets (about 2 minutes), you can't add anything — it hardens fast. Work quickly on 3-4 pops at a time rather than dipping the whole batch and trying to decorate all at once.
- Let Set: Stand the finished cake pops upright in a Styrofoam block, a cake pop stand, or a tall glass filled with rice or sugar. Let them set completely for about 30 minutes at room temperature, or pop them in the fridge to speed things up. Once the coating is fully hard, they're ready.
Tips for Success
- Don't skip the freezer step: I ignored this the first time and my cake balls were soft and warm when I went to dip them. The coating hit them and immediately started to set unevenly, and a few of them slid right off the sticks into the bowl of chocolate. It was a disaster. Fifteen minutes in the freezer makes the balls firm enough to handle properly — it's not optional, even if it feels like an extra step.
- Watch your frosting amount carefully: Too little and the balls crack and fall apart. Too much and the mixture is wet and sticky and the pops won't hold their shape after dipping. I start with ½ cup and check the consistency before adding more. Pinch a small amount and press it — if it holds together cleanly without sticking to your fingers, you're good.
- Keep your coating warm and fluid: Candy melts cool and thicken quickly. I work in small batches and re-melt in 15-second microwave intervals as needed. If the coating gets too thick to dip smoothly, a teaspoon of vegetable oil stirred in will thin it right out. Don't add water — it'll cause the chocolate to seize and become grainy and unusable.
- Use a deep, narrow container for dipping: If you melt your coating in a wide, shallow bowl, you'll have to tilt the cake pop to submerge it fully and you'll end up with drag marks and air bubbles. I pour my melted coating into a tall, narrow mug or a deep jar so I can dip straight down and pull straight up cleanly. The coating goes on in one smooth motion and it looks so much better.
- Double coat for a cleaner finish: One layer of coating works, but if you want that polished look — the kind that looks like you bought them from a bakery — let the first coat set completely, then dip again. The second coat fills in any thin spots or air bubbles. I do this for anything I'm bringing to a party or giving as a gift. For a regular weeknight treat, one coat is just fine.
Variations
- Chocolate Cake Pops: Use a chocolate cake mix with chocolate frosting and dip in dark chocolate coating. Roll in crushed Oreos or mini chocolate chips right after dipping while the coating is still wet. This is my husband's preferred version — he finally stopped saying cake pops are too sweet when I started making these.
- Red Velvet Cake Pops: Swap in a red velvet cake mix and cream cheese frosting. Dip in white candy melts so the red interior peeks through if one cracks. These are visually stunning and the cream cheese frosting gives them a tangy flavor that balances the sweetness of the coating. I make these at Christmastime.
- Funfetti Birthday Cake Pops: Use a funfetti cake mix with vanilla frosting and roll the formed balls in extra rainbow sprinkles before chilling. Then dip in white chocolate for a double layer of sprinkle color. This is Zainab's request every single year for her birthday — she stands at the counter and adds the sprinkles herself.
- Peanut Butter Cake Pops: Mix 2 tablespoons of creamy peanut butter into the frosting before combining with the crumbled cake. Use a yellow or chocolate cake mix as the base, and dip in milk chocolate coating. The peanut butter keeps the mixture moist and adds a richness that makes these taste far more from-scratch than they are.
- Vegan Cake Pops: Use a vegan cake mix (check the label — many standard mixes are accidentally vegan), prepare it with flax eggs and plant-based milk, and use dairy-free frosting. Dip in dairy-free dark chocolate thinned with coconut oil instead of vegetable oil. I haven't made these myself, but a reader mentioned it works well and I tried it once for a guest — it came out fine.
Serving and Storage
Serving
I stand mine up in a Styrofoam block covered in tissue paper for parties — it looks like a real display and costs almost nothing. You can also arrange them flat on a tray lined with parchment, or stick them into a small pumpkin, a block of floral foam, or a jar of sugar or rice if you don't have a dedicated stand. Serve at room temperature so the coating isn't rock-hard straight from the fridge. Take them out about 20 minutes before you want to serve them. If you're building a party dessert table, these look great next to blueberry pie cookies — the different heights and colors make the whole table pop.
Storage
Store finished cake pops in an airtight container in the refrigerator for up to 1 week. Don't stack them directly on top of each other — the coating will crack and stick. I lay them horizontally with a piece of parchment between layers, or stand them upright in a tall container. To freeze, wrap each pop individually in plastic wrap and place in a zip-lock freezer bag. They'll keep for up to 2 months. Thaw in the fridge overnight, then bring to room temperature before serving. Don't thaw in the microwave — the coating melts unevenly.
Frequently Asked Questions
Can I use homemade cake instead of a box mix?
Yes, absolutely. Any cake works — vanilla, chocolate, banana, whatever you have. Just make sure it's cooled completely before you crumble it. A freshly baked homemade cake sometimes holds more moisture than a box mix, so start with less frosting and add more only if the mixture is too dry to hold together.
How do I stop the sticks from falling out while dipping?
Two things help: dip the tip of each stick in melted coating before inserting it into the cake ball, and make sure the balls are properly chilled before you dip them. The melted coating acts like glue once it sets around the stick. If your balls are warm when you dip, the stick won't have anything solid to grip and it'll slide out. I learned this after losing several pops into the chocolate bowl.
Can I freeze the cake balls before coating them?
Yes, and this is actually a useful strategy if you want to split the work across two days. Freeze the uncoated balls on a parchment-lined sheet, then transfer to a freezer bag once solid. When you're ready to coat, let them sit at room temperature for just 5 minutes — you want them cold and firm, not fully thawed. Dip and decorate as usual.
Can I use chocolate chips instead of candy melts?
You can, but the texture will be thicker and less smooth. Chocolate chips are formulated to hold their shape, so they don't melt as fluidly as candy melts. Stir in 1 tablespoon of vegetable oil per cup of chips to thin the coating out. It won't be quite as glossy as candy melts, but it tastes better — real chocolate always does.
How far in advance can I make these?
I routinely make them the day before I need them and they're perfect. You can make them up to 3 days ahead if you store them properly in the fridge. The coating actually firms up nicely overnight and the inside stays moist. I wouldn't go beyond 5 days in the fridge — they're still safe but the texture starts to get a little dense.
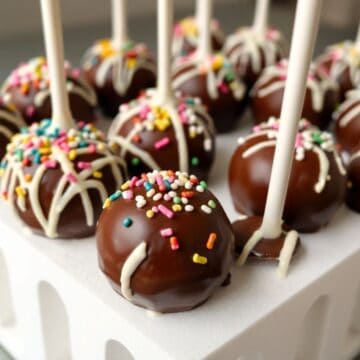
EASY CAKE POP RECIPE
Ingredients
- 1 box of cake mix (any flavor)
- ½ cup frosting (store-bought or homemade)
- 1 cup chocolate or candy melts (for coating)
- 1 tablespoon vegetable oil (optional, for thinning coating)
- Lollipop sticks
Instructions
- Bake the Cake: Prepare the cake mix according to the package instructions. Bake and let it cool completely.
- Crumble the Cake: Once the cake has cooled, crumble it into small pieces using your hands or a fork.
- Mix with Frosting: In a large bowl, mix the crumbled cake with frosting until it sticks together but isn’t too wet. Start with about ½ cup of frosting and add more if needed.
- Form Cake Balls: Scoop small portions of the cake mixture and roll them into balls, about 1 inch in diameter.
- Insert Lollipop Sticks: Melt a little bit of chocolate or candy melts. Dip the end of each lollipop stick into the melted coating, then insert it into the center of each cake ball. This helps the stick stay in place.
- Coat the Cake Pops: Melt your candy melts or chocolate according to the package instructions. Dip each cake pop into the melted coating, swirling to coat it evenly.
- Decorate (Optional): Add sprinkles, colored sugar, or drizzle with contrasting melted chocolate if desired.
- Let Set: Place the cake pops in a Styrofoam block or stand to let them set and harden for about 30 minutes.
- Serve: Enjoy your homemade cake pops!
Notes
- Make Ahead: Cake pops can be made in advance and stored in an airtight container in the refrigerator for up to 1 week.
- Customizing the Flavor: Mix in chocolate chips, sprinkles, or flavored extracts like vanilla or almond to your cake mix for added variety.
- Serving Suggestions: Cake pops make great treats for birthdays, parties, or as a fun snack. Serve them on a cake pop stand or as individual treats for guests.
- Storage Tips: Store cake pops in an airtight container in the refrigerator for up to 1 week or freeze for up to 2 months.
These cake pops have become my go-to whenever I need something that looks like it took more effort than it did. A box of cake mix, half a can of frosting, a bag of candy melts — and you come out the other side with something that genuinely makes people stop and reach for one. The first time I brought these to Zainab's school event, three parents asked me for the recipe. I almost felt guilty telling them how simple it was.
The thing I keep coming back to is how much you can change with just the coating and decoration. The base recipe is always the same, but white chocolate with pastel sprinkles feels completely different from dark chocolate with gold dust. I make them at Eid, at birthdays, at school events, and they always feel appropriate because I can just change the colors to match. It's one of those recipes where the basic technique is the skill, and once you have it, the variations are endless.
If you're planning a party spread and want something savory alongside these, my chicken sliders always disappear just as fast — people love having something sweet and something savory to rotate between. And if you want another dessert option that looks impressive but doesn't stress you out, the dark chocolate and strawberry cupcakes are worth making alongside these for a full dessert table. Pull out the cake pops, make a pot of tea, and call it a celebration. 🍭🎉
If you liked this recipe, you'll probably like these too:
- Dark Chocolate and Strawberry Cupcakes — another dessert that looks fancy but comes together without fuss
- Blueberry Pie Cookies — great for a party






Comments
No Comments