
Side dishes are the part of dinner I think about most. Not the main. The main is usually decided by what's in the fridge or what my husband requested — but the sides? That's where I get to be creative. A plain roasted chicken becomes a whole meal when you put crispy smashed potatoes or garlic sesame green beans next to it. A simple grilled steak feels like a proper dinner when there's something interesting alongside it. I've spent years figuring out which sides are actually worth the effort, and this list is everything I've landed on.
A good dinner side dish should do one of three things: add something the main is missing (a crunch, an acid, a richness), come together without asking you to babysit it, or be impressive enough that people ask for the recipe separately. The best ones on this list do all three. I look for sides that work with different cuisines too — because my dinner table doesn't belong to just one country. We do Pakistani mains with roasted vegetables, American burgers with couscous salad, pasta nights with nothing but a good garlic bread. You can read more about how I build weeknight dinners in my easy weeknight dinner ideas post.
This list covers a lot of ground — roasted vegetables like broccoli, eggplant, and three different versions of Brussels sprouts, potato dishes from cottage cheese mashed potatoes to twice baked potato casserole, lighter options like zucchini quinoa salad and couscous tabbouleh, and a few that surprised me completely like Egyptian rice with vermicelli and garlic Parmesan butternut squash fries. There's also a Polish green bean dish with buttery breadcrumbs that Saad keeps asking me to make again. If you're looking for more vegetable-forward ideas, my roasted vegetable recipes roundup is worth a look too, and for potato lovers specifically, check out easy potato recipes.
There are 36 recipes here, so pick based on what your main needs tonight — or honestly, just pick whichever one you can't stop staring at.
Top 36 Dinner Side Dish Recipes
35. Garlic Herb and Cheese Bread
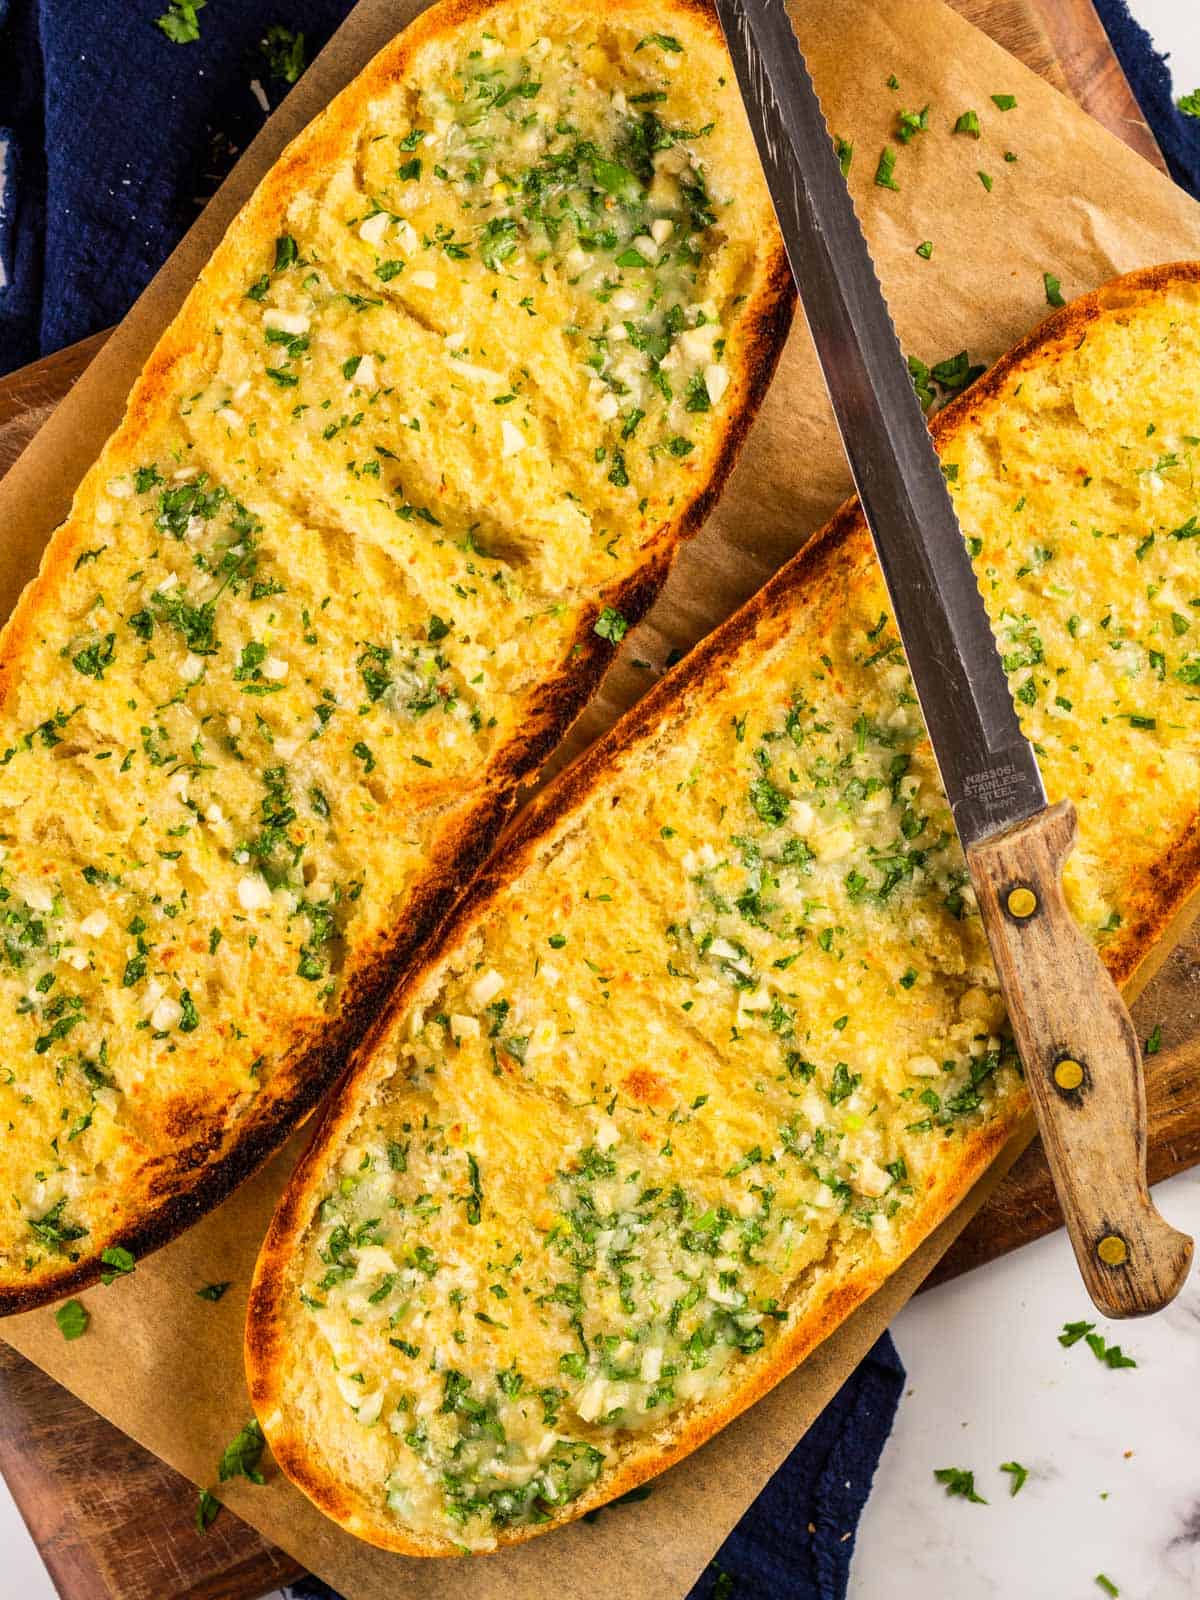
Garlic herb cheese bread is one of those sides that disappears before the main course even hits the table. I've made something very close to this dozens of times — crusty bread slathered with garlic butter, loaded with herbs, and finished with a generous layer of melted cheese. It's the kind of thing everyone hovers around the oven waiting for. The key is using good crusty Italian or French bread and not being shy with the garlic — this is not the time to hold back.
Ingredients
- 1 loaf Italian or French bread, halved lengthwise
- 6 tablespoons unsalted butter, softened
- 4 cloves garlic, minced
- 1 teaspoon dried Italian seasoning
- 2 tablespoons fresh parsley, finely chopped (or 1 teaspoon dried)
- ¼ teaspoon salt
- 1 cup shredded mozzarella cheese
- ¼ cup grated Parmesan cheese
Instructions
- Preheat your oven to 375°F. Line a baking sheet with foil.
- Mix the softened butter, minced garlic, Italian seasoning, parsley, and salt together in a small bowl until combined.
- Spread the garlic butter mixture evenly over both cut halves of the bread, going all the way to the edges.
- Top with shredded mozzarella and a sprinkle of Parmesan, then place on the prepared baking sheet.
- Bake for 12-15 minutes until the cheese is melted and bubbly, then broil for 1-2 minutes to get the top golden. Watch it — broilers work fast.
- Slice and serve immediately.
Tips
- Tip: Make sure your butter is fully softened before mixing — cold butter won't spread evenly and you'll end up with clumps of garlic sitting in one spot.
- Tip: For extra flavor, add a pinch of red pepper flakes to the butter mixture if your family handles a little heat.
- Tip: You can assemble this up to a few hours ahead and keep it wrapped in foil in the fridge — just pop it in the oven when you're ready.
34. Roasted Broccoli and Cauliflower
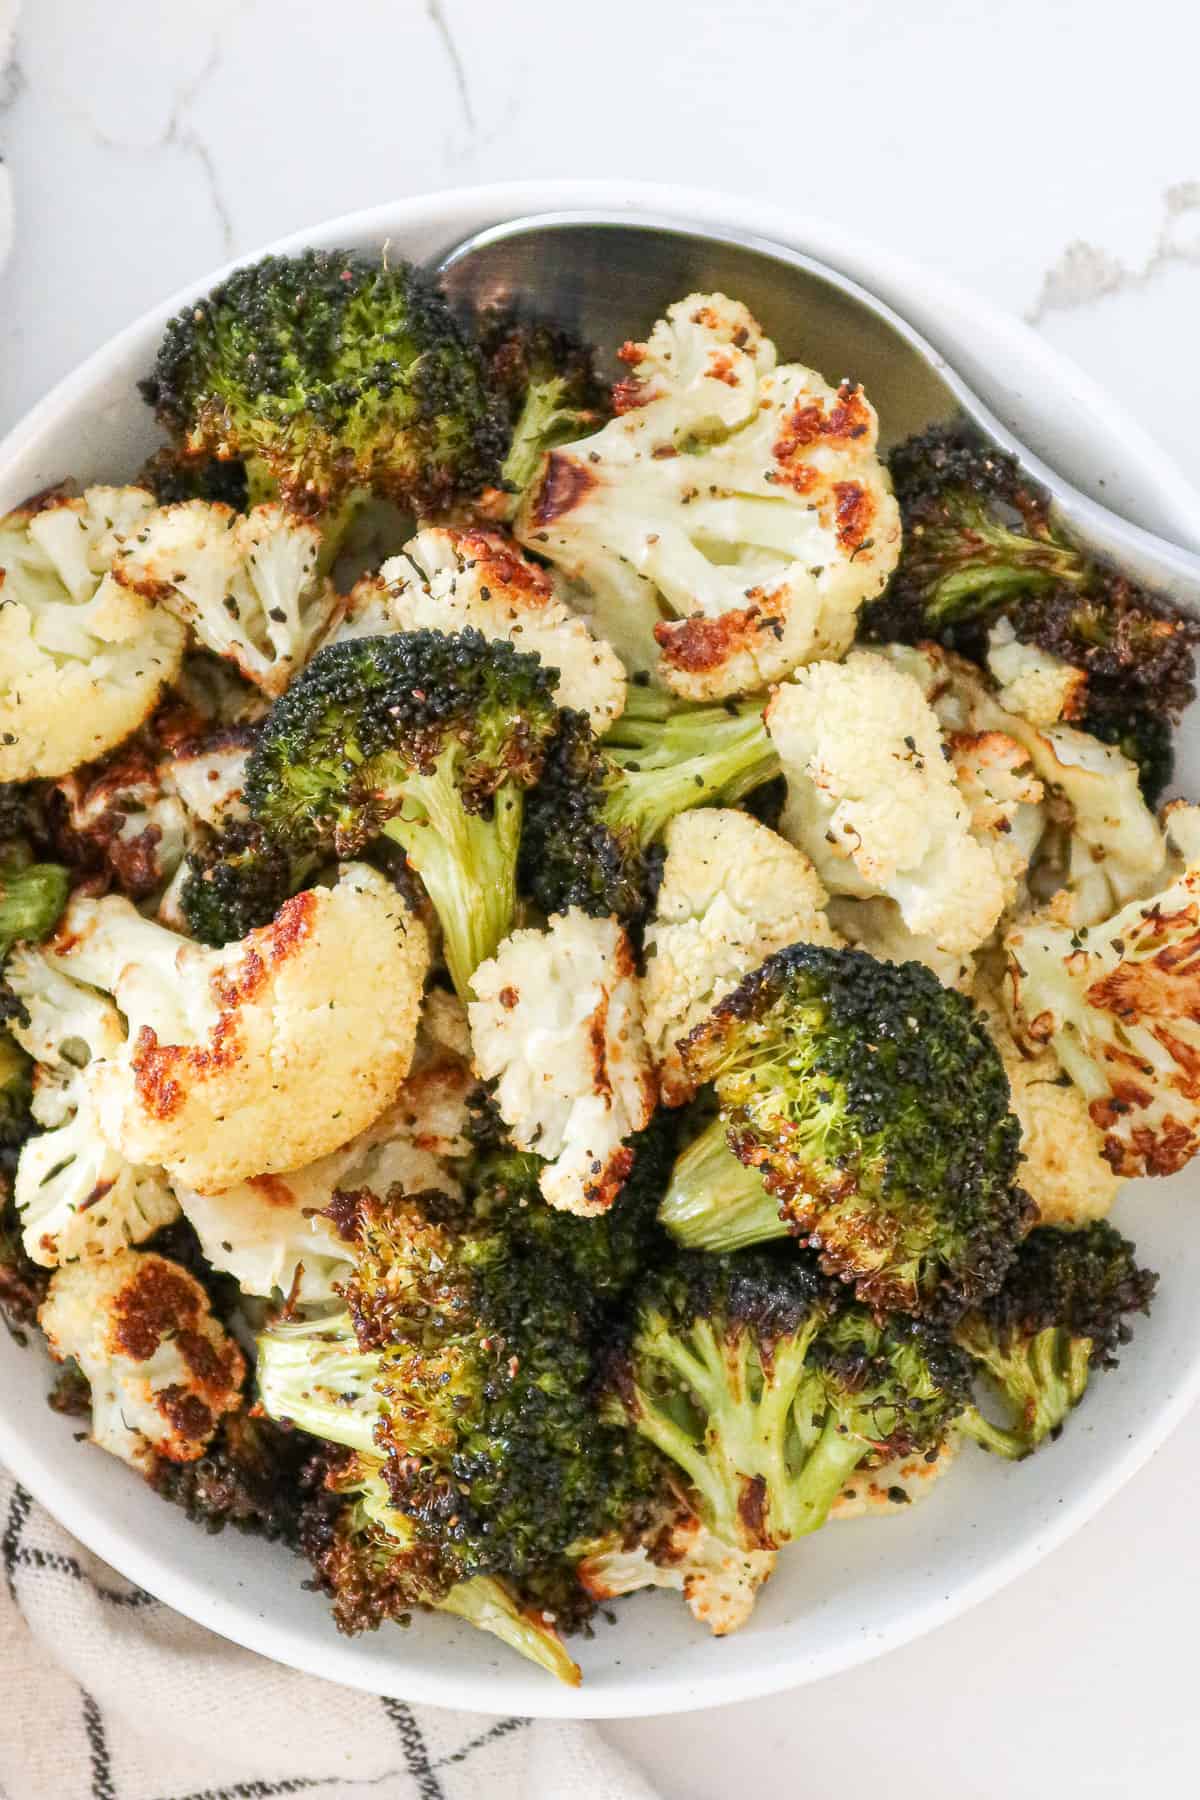
Roasting broccoli and cauliflower together is one of those things I wish someone had told me about years earlier. I used to steam both vegetables and wonder why nobody wanted seconds — roasting completely changes them. The edges go crispy and slightly caramelized, the centers stay tender, and the whole tray gets eaten every single time. It's genuinely one of the easiest sides in my weekly rotation and it goes with almost everything.
Ingredients
- 3 cups broccoli florets
- 3 cups cauliflower florets
- 3 tablespoons olive oil
- 1 teaspoon garlic powder
- ½ teaspoon onion powder
- ½ teaspoon smoked paprika
- ¾ teaspoon salt
- ¼ teaspoon black pepper
- 2 tablespoons grated Parmesan (optional, for finishing)
Instructions
- Preheat your oven to 425°F. Higher heat is what gives you those crispy edges, so don't go lower.
- Toss the broccoli and cauliflower florets on a large sheet pan with olive oil, garlic powder, onion powder, paprika, salt, and pepper. Make sure everything is coated evenly.
- Spread the vegetables in a single layer. Crowding the pan will steam them instead of roast them — use two sheet pans if you have to.
- Roast for 20-25 minutes, flipping halfway through, until the edges are golden and crispy.
- Remove from the oven, sprinkle with Parmesan if using, and serve right away.
Tips
- Tip: Pat the florets dry before tossing with oil — any moisture will make them steam in the oven rather than roast, and you'll lose that crispiness.
- Tip: Cut the florets roughly the same size so they cook evenly — very large pieces will take longer and smaller ones will burn before the rest are done.
- Tip: A squeeze of lemon over the finished vegetables right before serving lifts the whole dish and cuts through the richness of the oil.
33. Roasted Frozen Brussels Sprouts
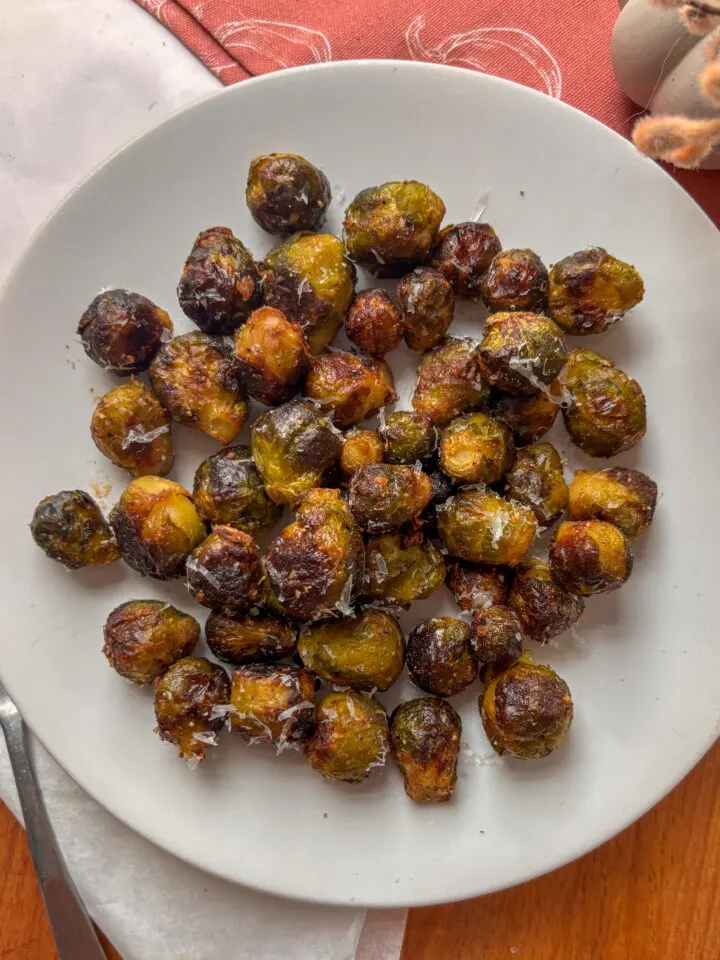
I used to think you had to buy fresh Brussels sprouts for them to turn out well. Turns out that's not true at all. Frozen sprouts, roasted at high heat, come out crispy on the outside and tender in the middle — and they take zero prep work beyond tossing them in oil and seasoning. I keep a bag in the freezer specifically for nights when I need a vegetable side with no planning involved. This one has saved dinner more times than I can count.
Ingredients
- 1 lb frozen Brussels sprouts (do not thaw)
- 2 tablespoons olive oil
- ½ teaspoon garlic powder
- ½ teaspoon onion powder
- ¾ teaspoon salt
- ¼ teaspoon black pepper
- 1 tablespoon balsamic vinegar (optional, for drizzling after)
Instructions
- Preheat oven to 425°F. Line a sheet pan with foil or parchment.
- Place the frozen Brussels sprouts directly on the pan — no thawing needed. Drizzle with olive oil and sprinkle on the garlic powder, onion powder, salt, and pepper. Toss everything together right on the pan.
- Spread them in a single layer, cut-side down if they have a flat side, and roast for 25-30 minutes.
- Flip them at the 20-minute mark and continue roasting until the outer leaves are crispy and darkened at the edges.
- Drizzle with balsamic vinegar right before serving if you like — it adds a nice sweet-tangy finish.
Tips
- Tip: Roasting from frozen actually works in your favor here — as the ice evaporates in the oven, the sprouts steam slightly inside before the outside crisps up, giving you that tender center.
- Tip: Don't crowd the pan — give each sprout some space. If they're too close together, you'll end up with soft, sad sprouts instead of crispy ones.
- Tip: A sprinkle of grated Parmesan in the last 5 minutes of roasting takes these from good to genuinely hard to stop eating.
32. Greek Fries
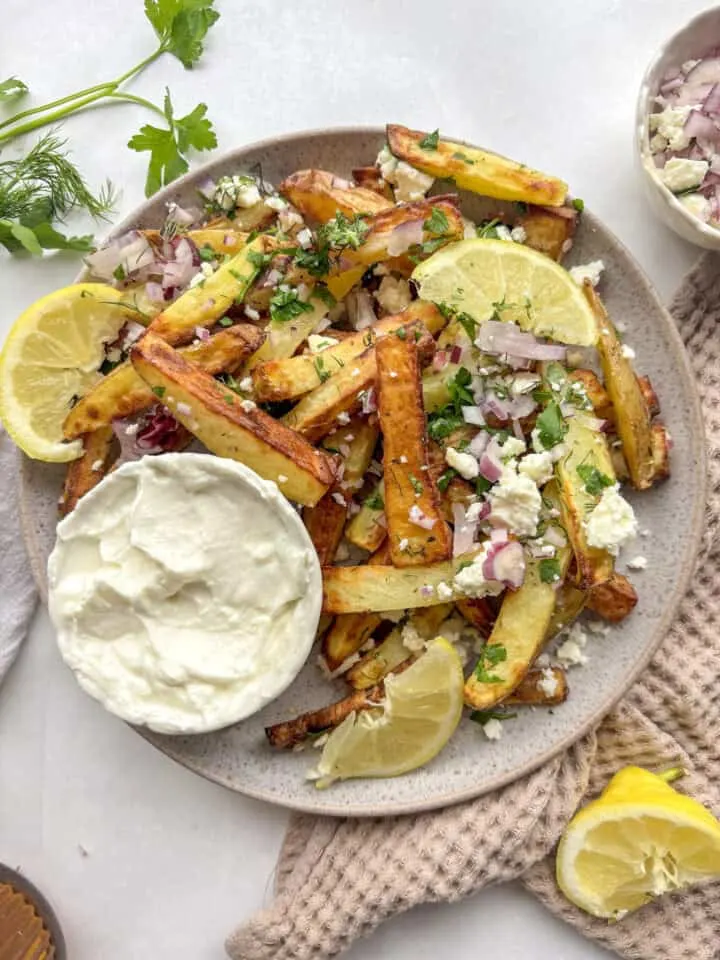
Greek fries are regular fries' more interesting cousin. You take crispy oven-baked fries and toss them with olive oil, dried oregano, a squeeze of lemon, and a generous crumble of feta — and suddenly you have a side dish that feels like it belongs in a restaurant. Saad picked these over regular fries the first time I made them, which honestly surprised me. They pair beautifully with grilled chicken or lamb, but I've also served them alongside burgers and they work just as well.
Ingredients
- 2 lbs russet potatoes, cut into ½-inch fry strips (or 1 bag frozen fries as a shortcut)
- 3 tablespoons olive oil
- 1 teaspoon dried oregano
- ½ teaspoon garlic powder
- ¾ teaspoon salt
- ¼ teaspoon black pepper
- ½ cup crumbled feta cheese
- Juice of ½ lemon
- 2 tablespoons fresh parsley, roughly chopped
Instructions
- Preheat oven to 425°F. If using fresh potatoes, soak the cut strips in cold water for 30 minutes, then drain and pat completely dry — this step is what gets you crispy fries rather than soggy ones.
- Toss the potatoes (or frozen fries) with olive oil, oregano, garlic powder, salt, and pepper on a large sheet pan. Spread in a single layer.
- Roast for 30-35 minutes for fresh potatoes (or follow package times for frozen), flipping once halfway through, until golden and crispy.
- Remove from the oven and immediately squeeze lemon juice over the hot fries, then scatter the crumbled feta and chopped parsley on top.
- Serve right away — the feta softens slightly against the hot fries and it's best eaten immediately.
Tips
- Tip: If you're short on time, a bag of frozen fries from Walmart or Costco works perfectly here — the Greek toppings do all the heavy lifting.
- Tip: Block feta that you crumble yourself tastes noticeably better than pre-crumbled — it's creamier and less dry, and it matters on a dish this simple.
- Tip: A small bowl of tzatziki on the side for dipping turns this from a side dish into something people genuinely get excited about.
27. Smashed Fingerling Potatoes
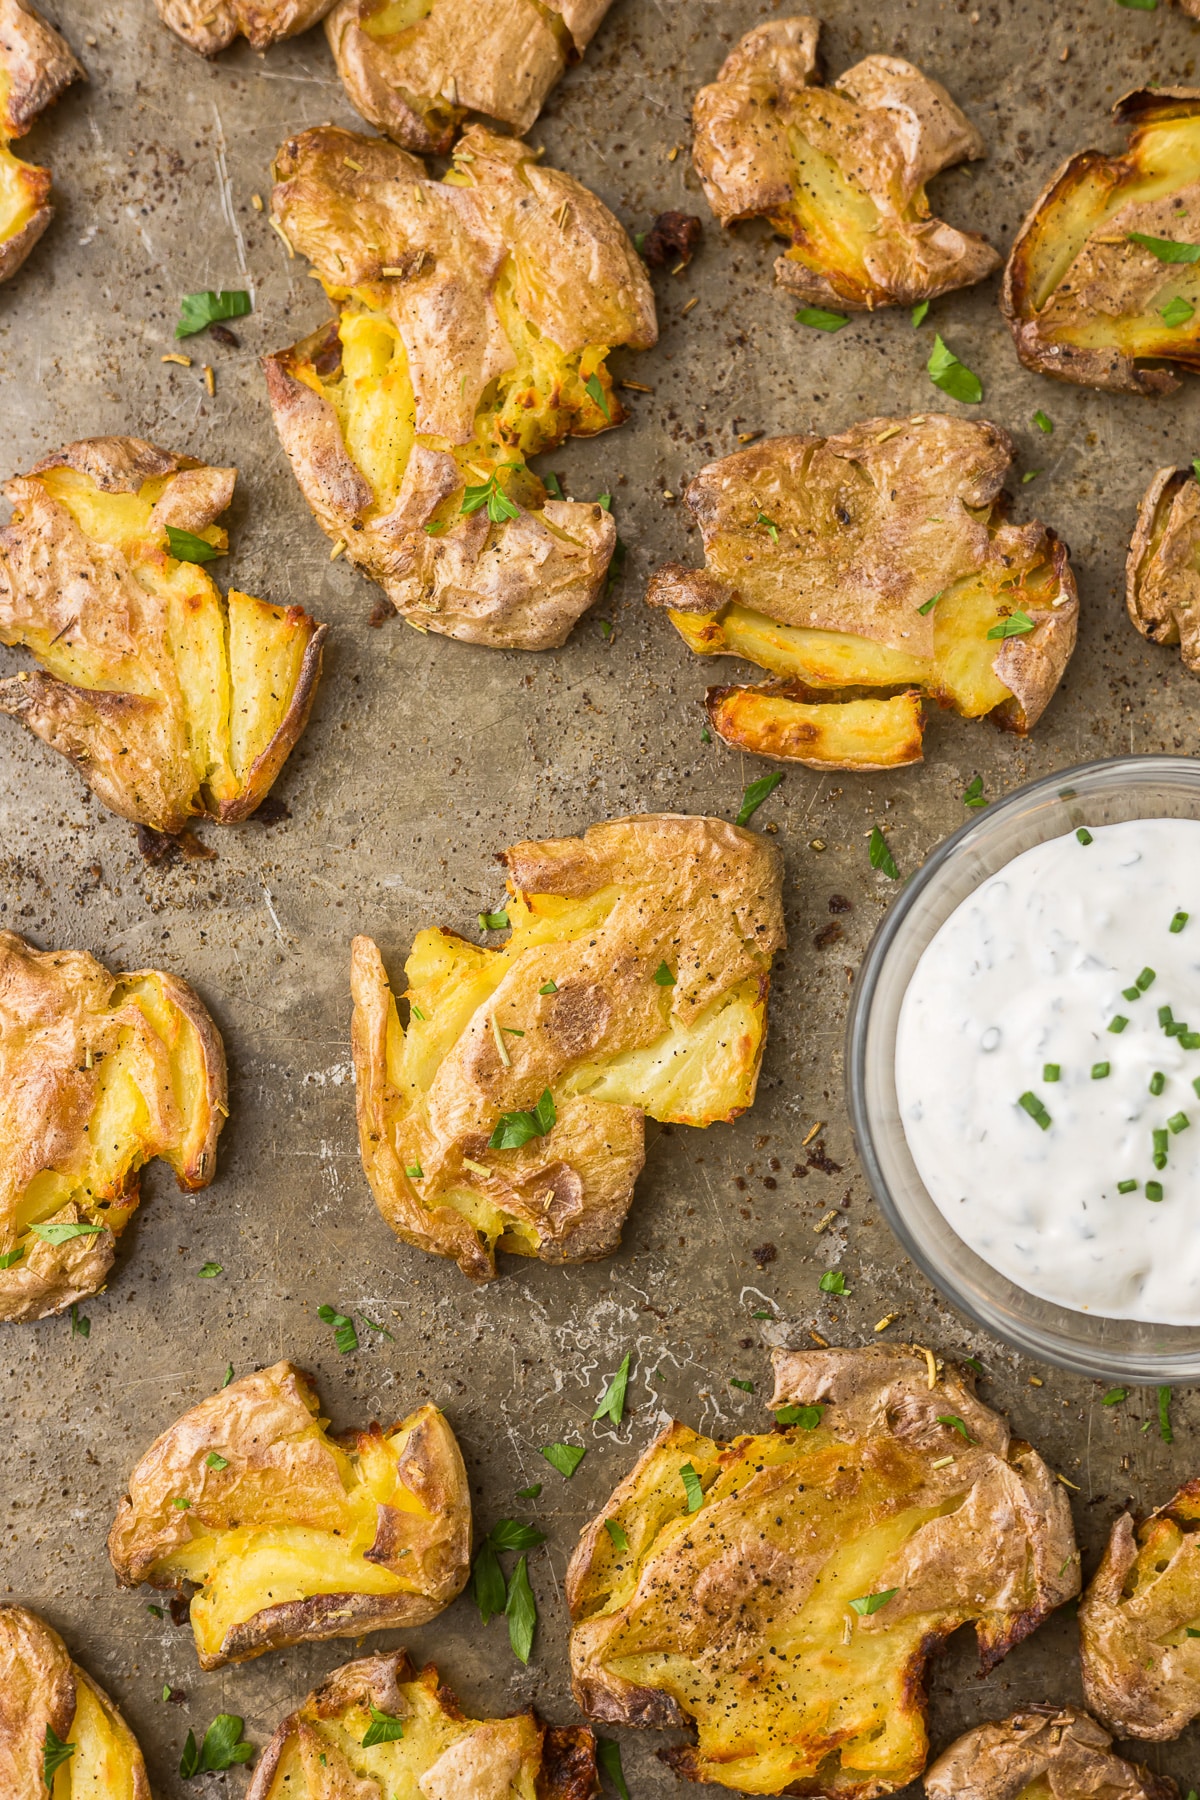
Fingerling potatoes don't get nearly enough credit. You boil them until tender, smash them flat on a sheet pan, then roast them at high heat until the edges turn impossibly crispy — and what comes out is this thing that's somehow creamy in the middle and shatteringly crunchy on the outside at the same time. I started making these on nights when I needed something interesting alongside a plain roast chicken, and now they show up on the table more often than regular roasted potatoes do. The herb and butter finish at the end is what ties it all together — don't skip that part.
Ingredients
- 1½ lbs fingerling potatoes, scrubbed
- 3 tablespoons olive oil, divided
- 1 teaspoon kosher salt
- ½ teaspoon black pepper
- ½ teaspoon garlic powder
- 2 tablespoons unsalted butter, melted
- 2 teaspoons fresh thyme leaves (or ½ teaspoon dried)
- 2 tablespoons fresh parsley, chopped, for serving
Instructions
- Preheat your oven to 425°F. Place the fingerling potatoes in a large pot, cover with cold salted water, and bring to a boil. Cook for 15–18 minutes until fork-tender, then drain and let them steam-dry for a few minutes.
- Arrange the potatoes on a sheet pan and drizzle with 2 tablespoons of olive oil. Use the bottom of a glass or a flat spatula to firmly smash each potato to about ½-inch thick — they'll crack and spread, which is exactly what you want.
- Drizzle with the remaining tablespoon of olive oil and season with salt, pepper, and garlic powder. Roast for 25–30 minutes, flipping once halfway through, until deeply golden and crispy on the edges.
- Remove from the oven and immediately drizzle with melted butter and scatter the thyme over the top. Toss gently, then finish with fresh parsley before serving.
Tips
- Tip: The drier the potatoes before smashing, the crispier they'll get in the oven — let them sit in the colander for a full 5 minutes after draining.
- Tip: Can't find fingerlings? Small baby Yukon Golds work just as well here — same method, same result.
- Tip: For extra crispiness, don't crowd the pan — give each smashed potato its own space so the heat can circulate around it.
28. Roasted Sweet Potato Slices
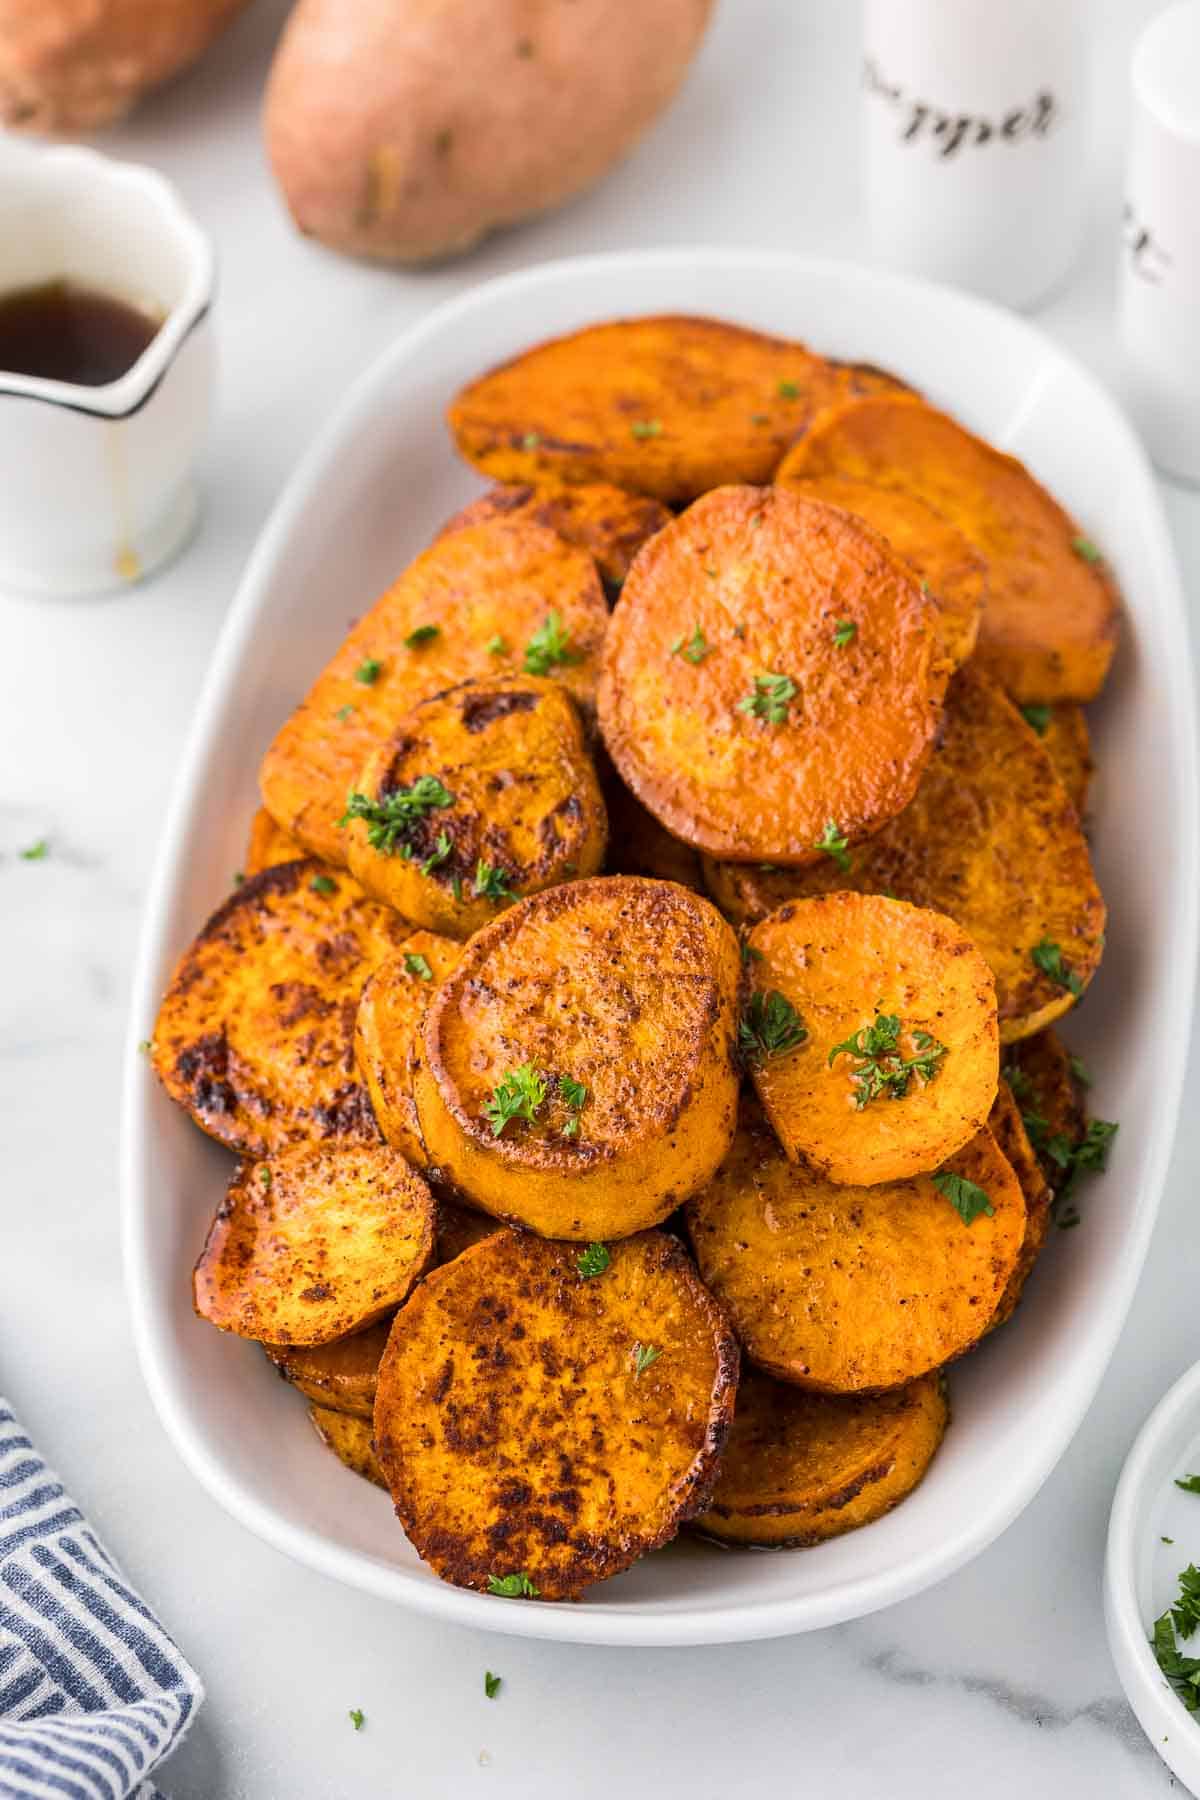
Sweet potatoes are one of those ingredients I always have sitting in my pantry because they work with almost anything — grilled chicken, lamb chops, even just alongside a simple dal. Slicing them into rounds instead of cubing means more surface area touching the hot pan, which means more caramelization on the edges and a deeper, almost nutty sweetness. The seasoning here is intentionally simple: olive oil, smoked paprika, cumin, salt. That's really all they need. Saad ate half the pan before dinner was even plated — I've learned to make a double batch.
Ingredients
- 2 large sweet potatoes (about 1½ lbs total), scrubbed
- 3 tablespoons olive oil
- 1 teaspoon smoked paprika
- ½ teaspoon ground cumin
- ¾ teaspoon kosher salt
- ¼ teaspoon black pepper
- 1 tablespoon fresh parsley or cilantro, chopped, for garnish (optional)
Instructions
- Preheat your oven to 425°F and line two sheet pans with parchment. Slice the sweet potatoes into ¼-inch rounds — no need to peel them, the skin crisps up nicely.
- In a large bowl, toss the slices with olive oil, smoked paprika, cumin, salt, and pepper until every piece is well coated. Spread them in a single layer across both sheet pans — overlap as little as possible.
- Roast for 20 minutes, then flip each slice and roast for another 10–15 minutes until the edges are caramelized and slightly crispy. The thinner slices will be done first, so keep an eye on those.
- Transfer to a serving platter and scatter fresh parsley or cilantro over the top if you like. Serve immediately while they're still warm.
Tips
- Tip: Keep the slices as even in thickness as you can — uneven slices mean some burn while others stay underdone. A mandoline makes this effortless if you have one.
- Tip: If you want a sweeter finish, drizzle a little honey or maple syrup over the slices in the last 5 minutes of roasting.
- Tip: Leftovers reheat well in a 400°F oven for 5–7 minutes — the microwave makes them soft and sad, so use the oven if you can.
29. Gratin Dauphinois (Scalloped Potatoes)
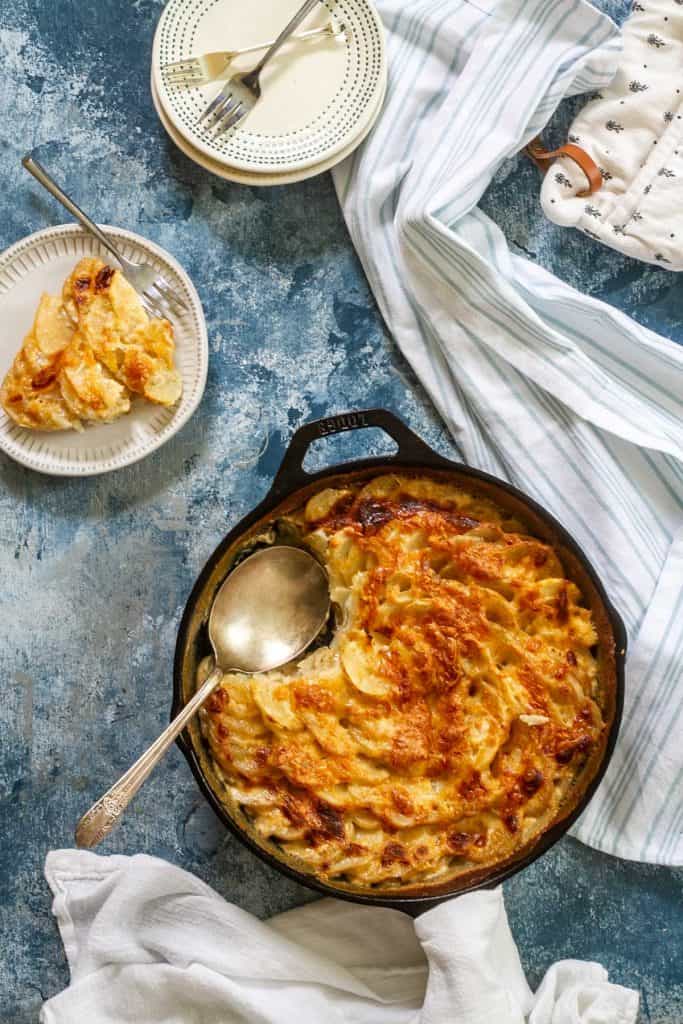
I'll be honest — this isn't something I grew up eating. In Pakistan, potatoes show up in curries and parathas, not baked in cream with Gruyère. But the first time I made a French-style potato dish for a dinner party, I understood immediately why it's considered a classic. Gratin Dauphinois is layers of thinly sliced potatoes cooked slowly in cream and garlic until everything collapses into this silky, rich, golden-topped gratin. It's not a weeknight dish — it takes time in the oven — but for a Sunday roast or a holiday table, nothing else comes close. The key is slicing the potatoes thin enough that they cook through completely and absorb all that cream.
Ingredients
- 2 lbs Yukon Gold potatoes, peeled and sliced ⅛-inch thin
- 2 cups heavy cream
- 2 garlic cloves, minced
- 1 teaspoon kosher salt
- ¼ teaspoon black pepper
- ¼ teaspoon freshly grated nutmeg
- 1 tablespoon unsalted butter, for greasing the dish
- ¾ cup Gruyère cheese, grated (or Swiss cheese as a substitute)
Instructions
- Preheat your oven to 325°F. Rub a 9x13-inch baking dish generously with butter. In a large saucepan over medium heat, combine the cream, garlic, salt, pepper, and nutmeg. Warm until just steaming — don't let it boil.
- Add the sliced potatoes directly to the warm cream and stir gently to separate the layers and coat every slice. Let them sit in the cream for 5 minutes — this starts the cooking process and helps the starch thicken the sauce.
- Transfer the potato and cream mixture to the prepared baking dish, spreading the slices into an even layer. Press them down gently with a spatula so everything is submerged in cream.
- Scatter the grated Gruyère evenly over the top. Cover tightly with foil and bake for 45 minutes, then remove the foil and bake for another 25–30 minutes until the top is deeply golden and a knife slides through the potatoes with zero resistance.
- Let it rest for 10 minutes before serving — this helps the cream set so it doesn't run all over the plate when you scoop it.
Tips
- Tip: A mandoline is the easiest way to get uniformly thin slices — if you don't have one, just use a sharp knife and take your time. Uneven slices mean uneven cooking.
- Tip: Traditional Gratin Dauphinois uses no cheese at all — the cream and potato starch do all the work. The cheese on top is a popular addition, but feel free to leave it off for a more classic result.
- Tip: This dish reheats beautifully the next day — the flavors deepen overnight and the texture is even better after a night in the fridge. Cover and reheat at 325°F for 20 minutes.
30. Perfect Oven Roasted Eggplant
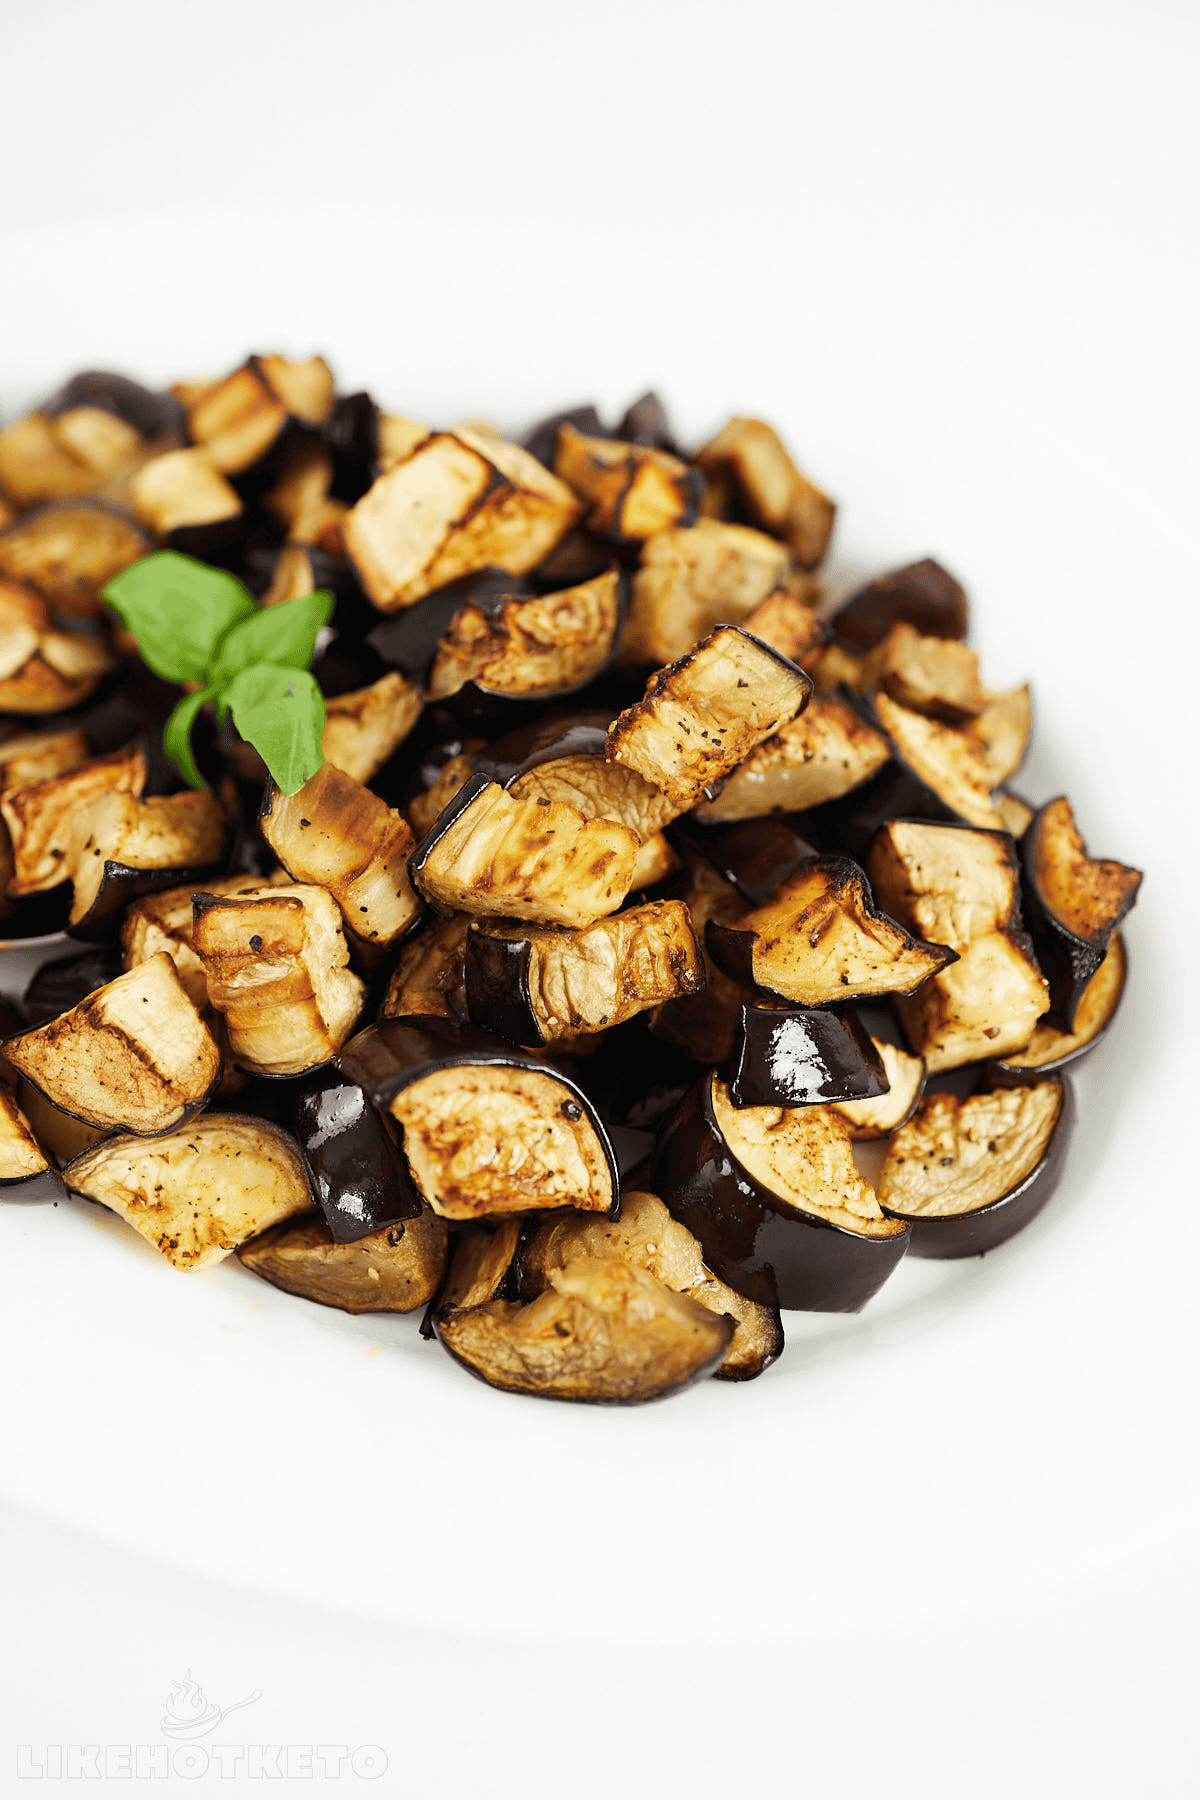
Eggplant has a reputation for being tricky, and honestly — it is, a little. The first time I tried roasting it, I crowded the pan and ended up with steamed, soggy pieces that had no color and no flavor. The fix is simple: give every slice space, use a hot oven, and salt it beforehand to pull out moisture. Done right, roasted eggplant gets this beautiful caramelized surface with edges that almost crisp up, while the inside turns buttery soft. It works as a side dish on its own, but I also use it as a base for other things — layered into sandwiches, stirred into pasta, or just eaten straight from the pan with a fork while I'm cooking the rest of dinner.
Ingredients
- 2 medium eggplants (about 1½ lbs total)
- 1½ teaspoons kosher salt, plus more for drawing out moisture
- 3 tablespoons olive oil
- 1 teaspoon smoked paprika
- ½ teaspoon garlic powder
- ½ teaspoon dried oregano
- ¼ teaspoon black pepper
Instructions
- Slice the eggplants into ½-inch rounds or half-moons. Lay them in a single layer on a clean kitchen towel or paper towels, sprinkle generously with salt on both sides, and let them sit for 20–30 minutes. Pat dry thoroughly — this step removes excess moisture and is what stands between you and soggy eggplant.
- Preheat your oven to 425°F and line two sheet pans with parchment. In a large bowl, toss the dried eggplant slices with olive oil, smoked paprika, garlic powder, oregano, salt, and pepper until well coated.
- Spread the slices in a single layer across both pans — do not overlap. Roast for 20 minutes, then flip each piece and roast for another 15–20 minutes until deeply golden brown and slightly caramelized on both sides.
- Serve immediately, or let cool slightly and use in whatever you're making. A drizzle of tahini or a squeeze of lemon over the top right before serving is a nice touch.
Tips
- Tip: The salting and drying step is non-negotiable if you want properly roasted eggplant — skipping it is the single most common mistake, and it's what leads to the mushy result most people have experienced.
- Tip: Eggplant absorbs oil like a sponge — toss it thoroughly in the bowl rather than drizzling over it on the pan, so you get even coverage without using more oil than you need.
- Tip: Leftovers keep well in the fridge for up to 3 days and are great cold in wraps or stirred into a simple tomato pasta sauce.
31. Crispy Air Fryer Brussels Sprouts
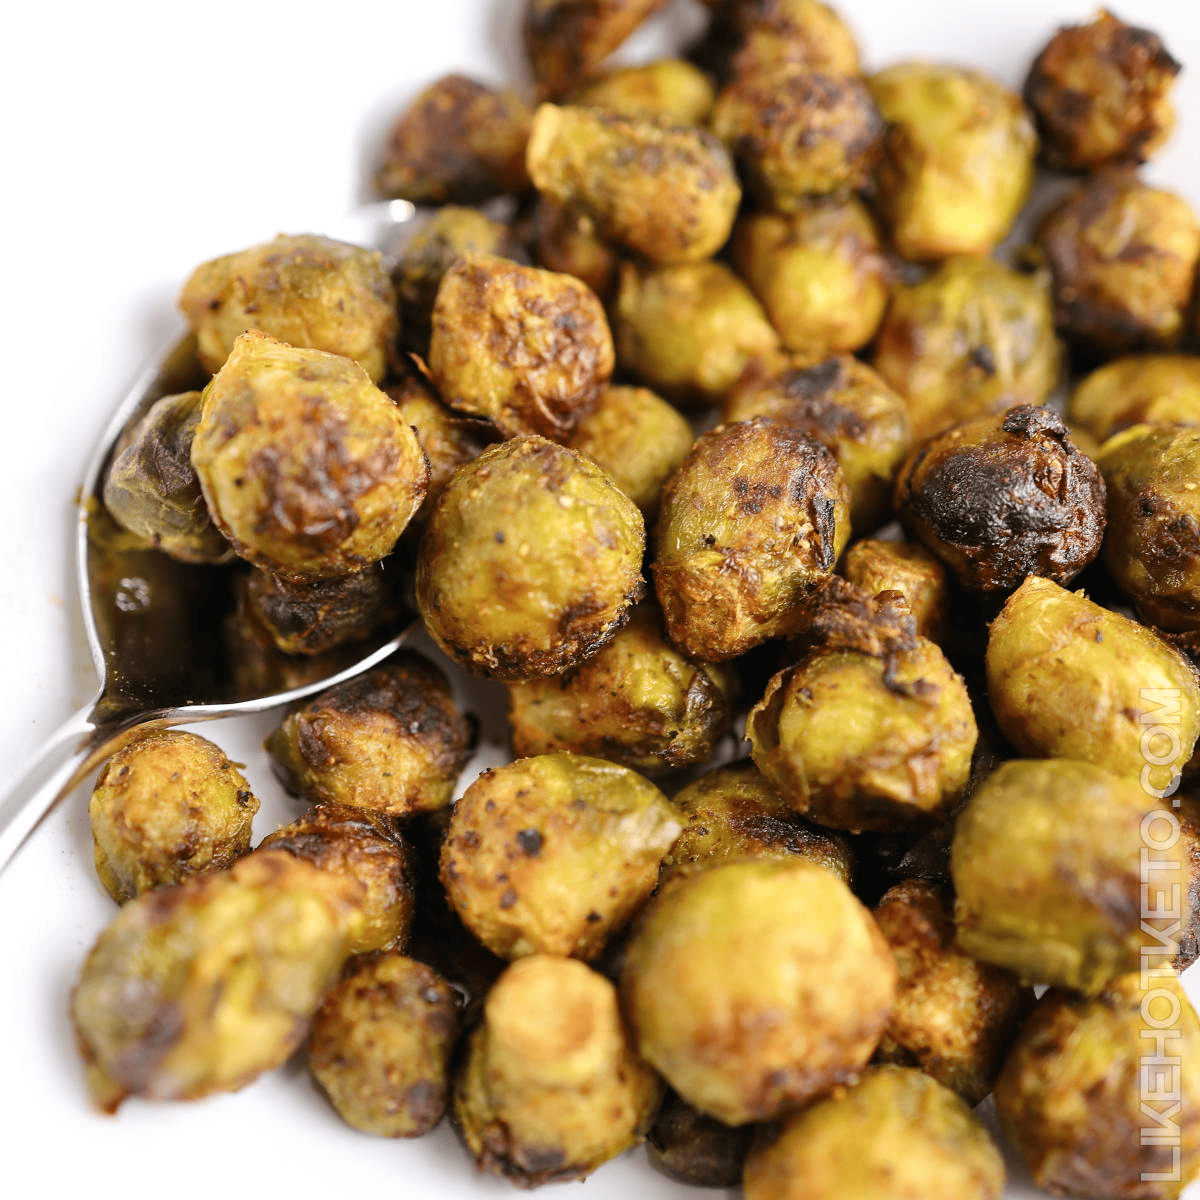
Brussels sprouts are one of those vegetables where the cooking method makes or breaks them completely. Boiled or steamed — forget it. But in the air fryer, they turn into something genuinely craveable: the outer leaves get almost chip-like and crispy while the center stays tender, and the natural sugars caramelize in a way the oven takes twice as long to achieve. I season mine simply — olive oil, salt, garlic powder, a little balsamic at the end — because the Brussels sprouts themselves do the heavy lifting when they're cooked right. These take about 15 minutes start to finish, which makes them my go-to when I need a vegetable side that won't keep dinner waiting.
Ingredients
- 1 lb Brussels sprouts, trimmed and halved through the stem
- 2 tablespoons olive oil
- ¾ teaspoon kosher salt
- ¼ teaspoon black pepper
- ½ teaspoon garlic powder
- 1 tablespoon balsamic vinegar
- Optional: 1 tablespoon grated Parmesan for serving
Instructions
- Preheat your air fryer to 375°F for 3 minutes. While it heats up, toss the halved Brussels sprouts in a bowl with olive oil, salt, pepper, and garlic powder until every cut surface is coated.
- Arrange the sprouts in the air fryer basket cut-side down in a single layer — work in batches if needed. Crowding the basket is what kills the crispiness, so don't rush this part.
- Air fry for 10 minutes, then shake the basket and cook for another 4–5 minutes until the outer leaves are deeply browned and crispy and the cut sides are caramelized.
- Transfer to a serving bowl and immediately drizzle the balsamic vinegar over the top — it will sizzle slightly on the hot sprouts. Toss to coat and finish with Parmesan if you like. Serve right away.
Tips
- Tip: Place the sprouts cut-side down at the start — that flat caramelized surface is the best part, and it only happens if it's in direct contact with the hot basket.
- Tip: Don't add the balsamic before air frying — it burns. Drizzle it on right at the end while everything is still hot so it coats the sprouts without scorching.
- Tip: No air fryer? Roast at 450°F on a sheet pan for 20–25 minutes, flipping once — you'll get similar results, just with a bit longer wait.
22. Maple Bacon Brussels Sprouts
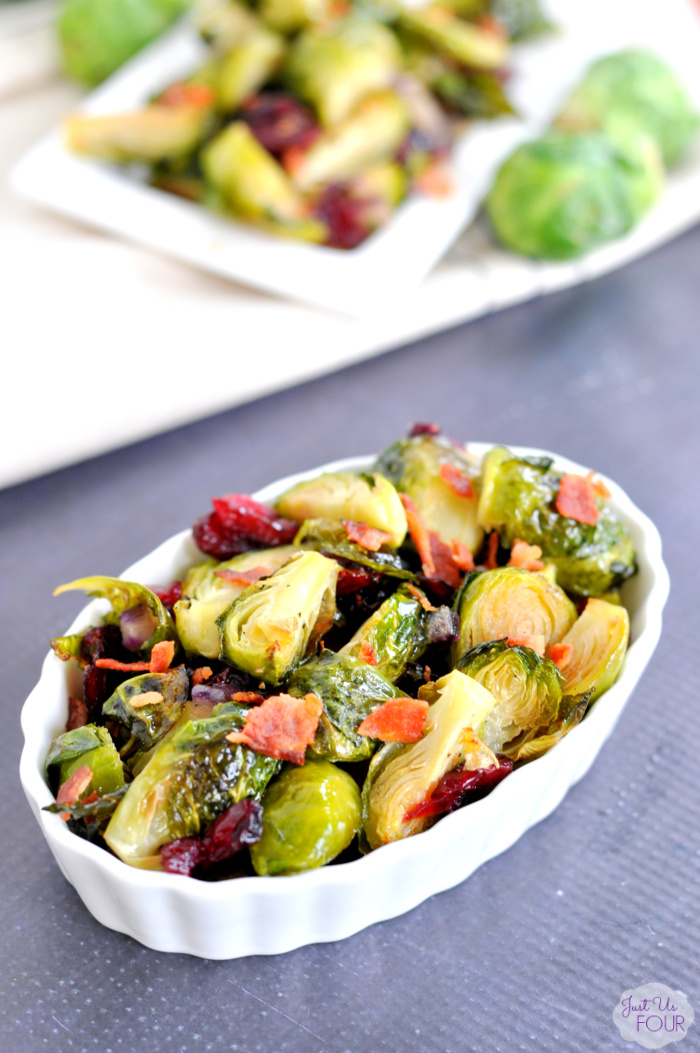
If you know someone who claims they hate Brussels sprouts, make them this first. The combination of crispy bacon and a sweet maple glaze does something to these little guys that I genuinely cannot explain — they go from bitter and sad to caramelized and almost addictive. I started making this version a couple of years ago when I had leftover bacon from breakfast and didn't want to waste it, and now it's the only Brussels sprouts recipe my husband will actually request. It comes together in under 30 minutes and works beautifully next to roast chicken or a simple grilled steak.
Ingredients
- 1½ lbs Brussels sprouts, trimmed and halved
- 5 strips thick-cut bacon, chopped into small pieces
- 3 tablespoons pure maple syrup
- 1 tablespoon olive oil
- ½ teaspoon garlic powder
- ½ teaspoon salt
- ¼ teaspoon black pepper
- Pinch of red pepper flakes (optional, but I always add it)
Instructions
- Preheat your oven to 400°F. Line a large sheet pan with foil — the maple syrup will burn onto the pan otherwise, trust me on this one.
- Toss the halved Brussels sprouts and chopped bacon together with the olive oil, garlic powder, salt, pepper, and red pepper flakes. Spread everything in a single layer on the prepared sheet pan, cut side down where possible.
- Roast for 20 minutes, until the sprouts are starting to brown and the bacon is crisping up around the edges.
- Drizzle the maple syrup over everything, toss gently, and return to the oven for another 5–8 minutes until the glaze is caramelized and sticky. Watch it closely in this last stretch — maple syrup goes from perfect to burnt fast.
- Serve immediately while everything is still crispy.
Tips
- Tip: Don't crowd the pan — if the sprouts are piled on top of each other they'll steam instead of roast, and you'll miss that caramelized edge entirely. Use two pans if you need to.
- Tip: Turkey bacon works if you don't eat pork — the maple glaze still does most of the heavy lifting flavor-wise.
- Tip: Add the maple syrup only in the last few minutes of roasting, never at the start — it burns before the sprouts have time to cook through.
23. Egyptian Rice with Vermicelli (Roz bel Shareya)

This one felt familiar the first time I made it — in Pakistan we have our own versions of rice cooked with toasted vermicelli, so Roz bel Shareya felt like a cousin I hadn't met yet. The technique is simple: you toast thin vermicelli noodles in butter until they're golden and nutty, then cook them together with long-grain rice in seasoned broth. What comes out is fluffy, fragrant, and savory in a way that plain steamed rice just isn't. It pairs beautifully with anything saucy — stews, braised meats, even a good dal. I make a double batch because it disappears fast and reheats perfectly the next day.
Ingredients
- 1½ cups long-grain white rice (basmati works great here)
- ½ cup vermicelli noodles, broken into roughly 1-inch pieces
- 2 tablespoons unsalted butter (or ghee for richer flavor)
- 2¾ cups chicken broth (or water with 1 teaspoon salt)
- 1 teaspoon salt
- ¼ teaspoon white pepper (or black pepper)
Instructions
- Rinse the rice under cold water until the water runs clear, then let it soak for 15–20 minutes. Drain well before using.
- Melt the butter in a medium saucepan over medium heat. Add the broken vermicelli and stir constantly for 3–4 minutes until the pieces are deep golden brown. Don't walk away — they go from golden to burnt very quickly.
- Add the drained rice to the pot and stir to coat it in the butter, cooking for about 1 minute.
- Pour in the chicken broth, add salt and pepper, and bring to a boil. Once boiling, reduce heat to the lowest setting, cover tightly, and cook for 18 minutes without lifting the lid.
- Remove from heat and let sit covered for 5 more minutes. Fluff with a fork and serve.
Tips
- Tip: The vermicelli should be genuinely dark golden — not just lightly toasted. That deep color is where the nutty flavor comes from, so don't rush this step.
- Tip: Can't find vermicelli at your regular grocery store? Break up thin angel hair pasta into small pieces — it works just as well.
- Tip: Using ghee instead of butter gives this a noticeably richer, more aromatic result — if you have it in your pantry, use it.
24. Spicy Noodle Spring Rolls (Vietnamese-Style)

I'll be honest — the first time I worked with rice paper wrappers I made a complete mess. Half of them tore, the rest stuck together, and I was ready to give up and just serve the noodles in a bowl. But the second attempt went much smoother once I figured out the dipping technique, and now these spring rolls are something I genuinely enjoy putting together. They're fresh, light, and have a real kick from the spicy noodle filling — a nice contrast to the heavier, richer sides on this list. As a dinner side dish, they work especially well alongside grilled proteins or a simple soup.
Ingredients
- 8 rice paper wrappers (found in the Asian foods aisle at most large grocery stores)
- 3 oz thin rice noodles (vermicelli style), cooked and cooled
- 1 cup shredded purple cabbage
- 1 medium carrot, julienned or grated
- ½ cucumber, cut into thin matchsticks
- 2 tablespoons sriracha
- 1 tablespoon soy sauce
- 1 tablespoon sesame oil
- Fresh mint or cilantro leaves, for filling
- Sweet chili sauce or peanut sauce, for dipping
Instructions
- Cook the rice noodles according to package directions, rinse under cold water, and drain well. Toss with sriracha, soy sauce, and sesame oil. Set aside.
- Prepare all your vegetables and have them ready in separate piles before you start rolling — once the rice paper is wet, you need to work quickly.
- Fill a wide, shallow bowl with warm water. Dip one rice paper wrapper in for about 10–15 seconds until it just starts to soften — it should still feel slightly firm. Lay it flat on a clean damp towel.
- In the lower third of the wrapper, layer a small handful of noodles, some cabbage, carrot, cucumber, and a few herb leaves. Don't overfill or it won't roll closed.
- Fold the bottom edge up over the filling, fold in the sides, then roll tightly upward to seal. Repeat with remaining wrappers. Serve with dipping sauce on the side.
Tips
- Tip: Don't soak the rice paper too long — a slightly underhydrated wrapper continues softening as you roll and holds together better than one that's been in the water too long and turns mushy.
- Tip: These are best eaten within an hour of rolling — if they sit too long they dry out and the wrappers toughen. Cover with a damp cloth if you're not serving immediately.
- Tip: For less heat, swap the sriracha for hoisin sauce in the noodle toss — still flavorful, just milder and slightly sweeter.
25. Parmigiana di Zucchine (Zucchini Parmigiana)

Think of this as eggplant Parmesan's lighter, slightly underrated sibling. Thin slices of zucchini are layered with marinara sauce and melted cheese — mozzarella and Parmesan both — then baked until everything is bubbling and golden on top. This isn't my version of an authentic Italian recipe, it's a home-cook adaptation, but it tastes genuinely good and comes together with ingredients you can find at any Walmart or Aldi. I love it as a side dish because it's substantial enough to feel like something, but it doesn't compete with the main. Zainab picks out the zucchini and eats mainly the cheese layer, which honestly, same.
Ingredients
- 3 medium zucchini, sliced into ¼-inch rounds
- 1½ cups marinara sauce (jarred is fine)
- 1½ cups shredded mozzarella cheese
- ½ cup grated Parmesan cheese
- 2 tablespoons olive oil
- ½ teaspoon garlic powder
- Salt and black pepper to taste
- Fresh basil leaves, for finishing (optional but worth it)
Instructions
- Preheat oven to 400°F. Lay the zucchini slices on a paper towel-lined surface, sprinkle lightly with salt, and let sit for 10 minutes to draw out moisture. Pat dry — this step keeps the dish from turning watery.
- Brush both sides of the zucchini slices with olive oil and season with garlic powder and black pepper. Arrange on a sheet pan and roast for 15 minutes, flipping halfway, until slightly softened and lightly golden.
- In a baking dish, spread a thin layer of marinara on the bottom. Layer half the roasted zucchini slices over the sauce, then spoon more marinara on top, and scatter half the mozzarella and Parmesan over it.
- Repeat with the remaining zucchini, sauce, and cheeses. Bake uncovered at 400°F for 20–25 minutes until the cheese is melted, bubbly, and starting to brown at the edges.
- Let it rest for 5 minutes before serving. Top with fresh basil if you have it.
Tips
- Tip: Pre-roasting the zucchini before layering is what separates a watery, disappointing result from a properly set, sliceable dish — don't skip it.
- Tip: For a crispier cheese top, switch your oven to broil for the last 2–3 minutes — just keep an eye on it.
- Tip: Leftovers reheat well in the oven at 350°F for about 10 minutes — the microwave makes the cheese rubbery, so the oven is worth it.
26. Brussels Sprouts Gratin
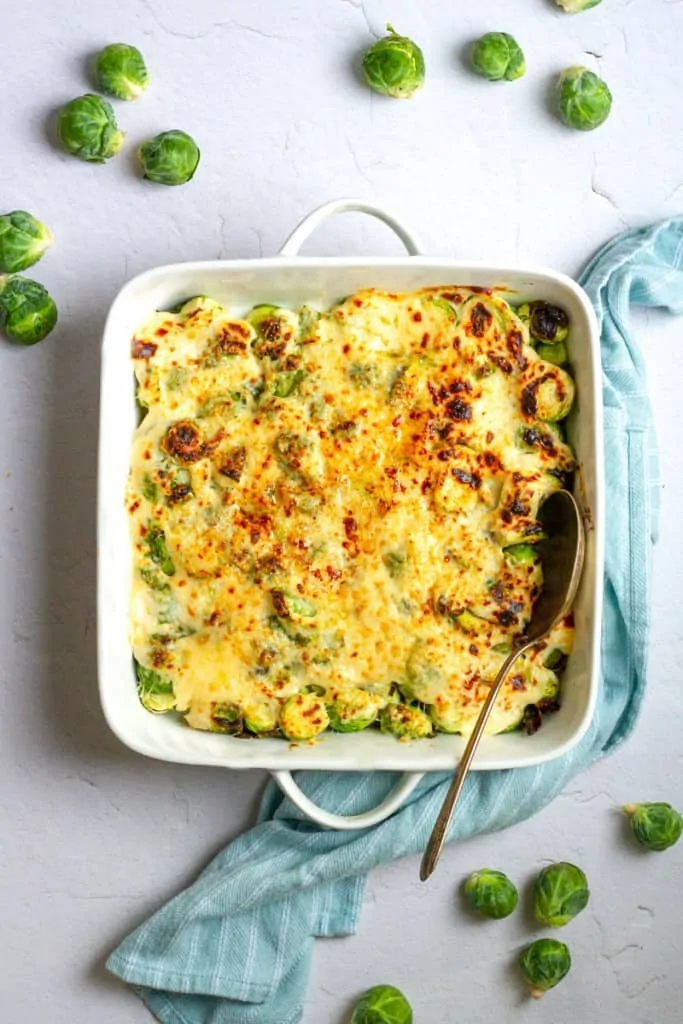
This is what happens when Brussels sprouts stop being a vegetable side and become something closer to a cheesy baked casserole — and honestly, that's exactly why it works. Halved sprouts are nestled into a rich, garlicky cream sauce, blanketed in Gruyère (or sharp cheddar if that's what you have), and baked until the top is golden and bubbling. It's the kind of gratin that earns its place next to roast beef at a Sunday dinner or holds its own as the centerpiece vegetable at a holiday table. The first time I made a gratin-style dish with Brussels sprouts I was skeptical — I'd only ever roasted them — but this converted me completely.
Ingredients
- 1½ lbs Brussels sprouts, trimmed and halved
- 2 tablespoons unsalted butter
- 3 garlic cloves, minced
- 1 cup heavy cream
- ½ teaspoon Dijon mustard
- ½ teaspoon salt
- ¼ teaspoon black pepper
- ¼ teaspoon nutmeg
- 1½ cups shredded Gruyère cheese (or sharp white cheddar)
- ¼ cup grated Parmesan
- ¼ cup panko breadcrumbs (for topping)
Instructions
- Preheat oven to 375°F. Bring a large pot of salted water to a boil. Blanch the Brussels sprouts for 3 minutes, then drain and pat dry. This partially cooks them so they don't stay raw in the center once baked.
- In a small saucepan over medium heat, melt the butter and sauté the garlic for about 1 minute until fragrant. Add the heavy cream, Dijon mustard, salt, pepper, and nutmeg. Stir and simmer gently for 3–4 minutes until slightly thickened.
- Arrange the blanched Brussels sprouts in a single layer in a greased baking dish. Pour the cream sauce evenly over the top.
- Scatter the shredded Gruyère over the sprouts, then mix the Parmesan and panko together and sprinkle that on top for a crispy crust.
- Bake uncovered for 25–30 minutes until the top is deep golden brown and the cream is bubbling around the edges. Let rest for 5 minutes before serving.
Tips
- Tip: Let your shredded cheese sit out for 10–15 minutes before using — cold cheese straight from the fridge doesn't melt as evenly into the sauce.
- Tip: Gruyère is the classic choice here and worth finding at a Trader Joe's or Costco cheese section if you can — it has a nuttiness that pairs perfectly with the sprouts. But sharp cheddar makes a perfectly good substitute.
- Tip: You can assemble this gratin a few hours ahead and refrigerate it unbaked — just add 5 extra minutes to the bake time if going in cold from the fridge.
21. Zucchini Quinoa Salad
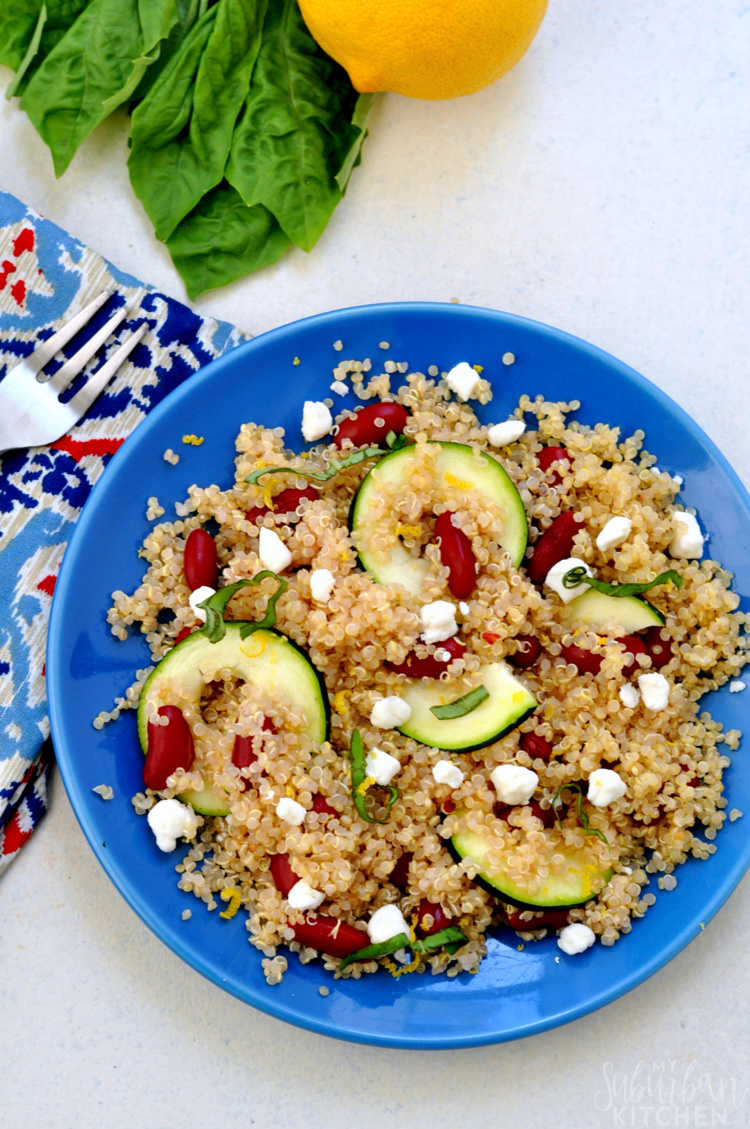
This is the salad I reach for when I want something that feels substantial but still light enough to sit next to a heavy main. Quinoa gives it real staying power — it's not just a token grain thrown in for looks — and the zucchini stays bright and slightly crisp if you don't overcook it. I dress it with lemon juice, olive oil, and fresh herbs, and it holds up beautifully even after sitting in the fridge for a couple of hours, which means it's one of the few salads I can actually prep ahead. Works alongside grilled chicken, roasted lamb, or honestly just on its own for lunch.
Ingredients
- 1 cup quinoa, rinsed
- 2 cups water or vegetable broth
- 2 medium zucchini, diced
- 3 tablespoons olive oil, divided
- 2 tablespoons fresh lemon juice
- 1 garlic clove, minced
- ¼ cup fresh parsley, chopped
- ¼ cup fresh mint, chopped (or skip if you don't have it)
- Salt and black pepper to taste
- ¼ cup crumbled feta cheese (optional)
Instructions
- Cook the quinoa in water or broth according to package directions (usually bring to a boil, reduce heat, cover and simmer 15 minutes). Fluff with a fork and let it cool slightly.
- Heat 1 tablespoon of olive oil in a skillet over medium-high heat. Add the diced zucchini and sauté for 3–4 minutes until just tender but not mushy. Season with salt and pepper. Remove from heat and let cool.
- In a small bowl, whisk together the remaining 2 tablespoons olive oil, lemon juice, minced garlic, salt, and pepper to make the dressing.
- In a large bowl, combine the cooled quinoa and sautéed zucchini. Pour the dressing over and toss well. Fold in the parsley, mint, and feta if using.
- Taste and adjust seasoning. Serve at room temperature or chilled.
Tips
- Tip: Let the quinoa cool before combining — hot quinoa will wilt the herbs and make everything a bit soggy.
- Tip: Cooking the quinoa in vegetable broth instead of water adds a lot more flavor with zero extra effort.
- Tip: This keeps well in the fridge for up to 2 days — just give it a fresh squeeze of lemon before serving to brighten it back up.
20. Cheesy Potatoes Au Gratin
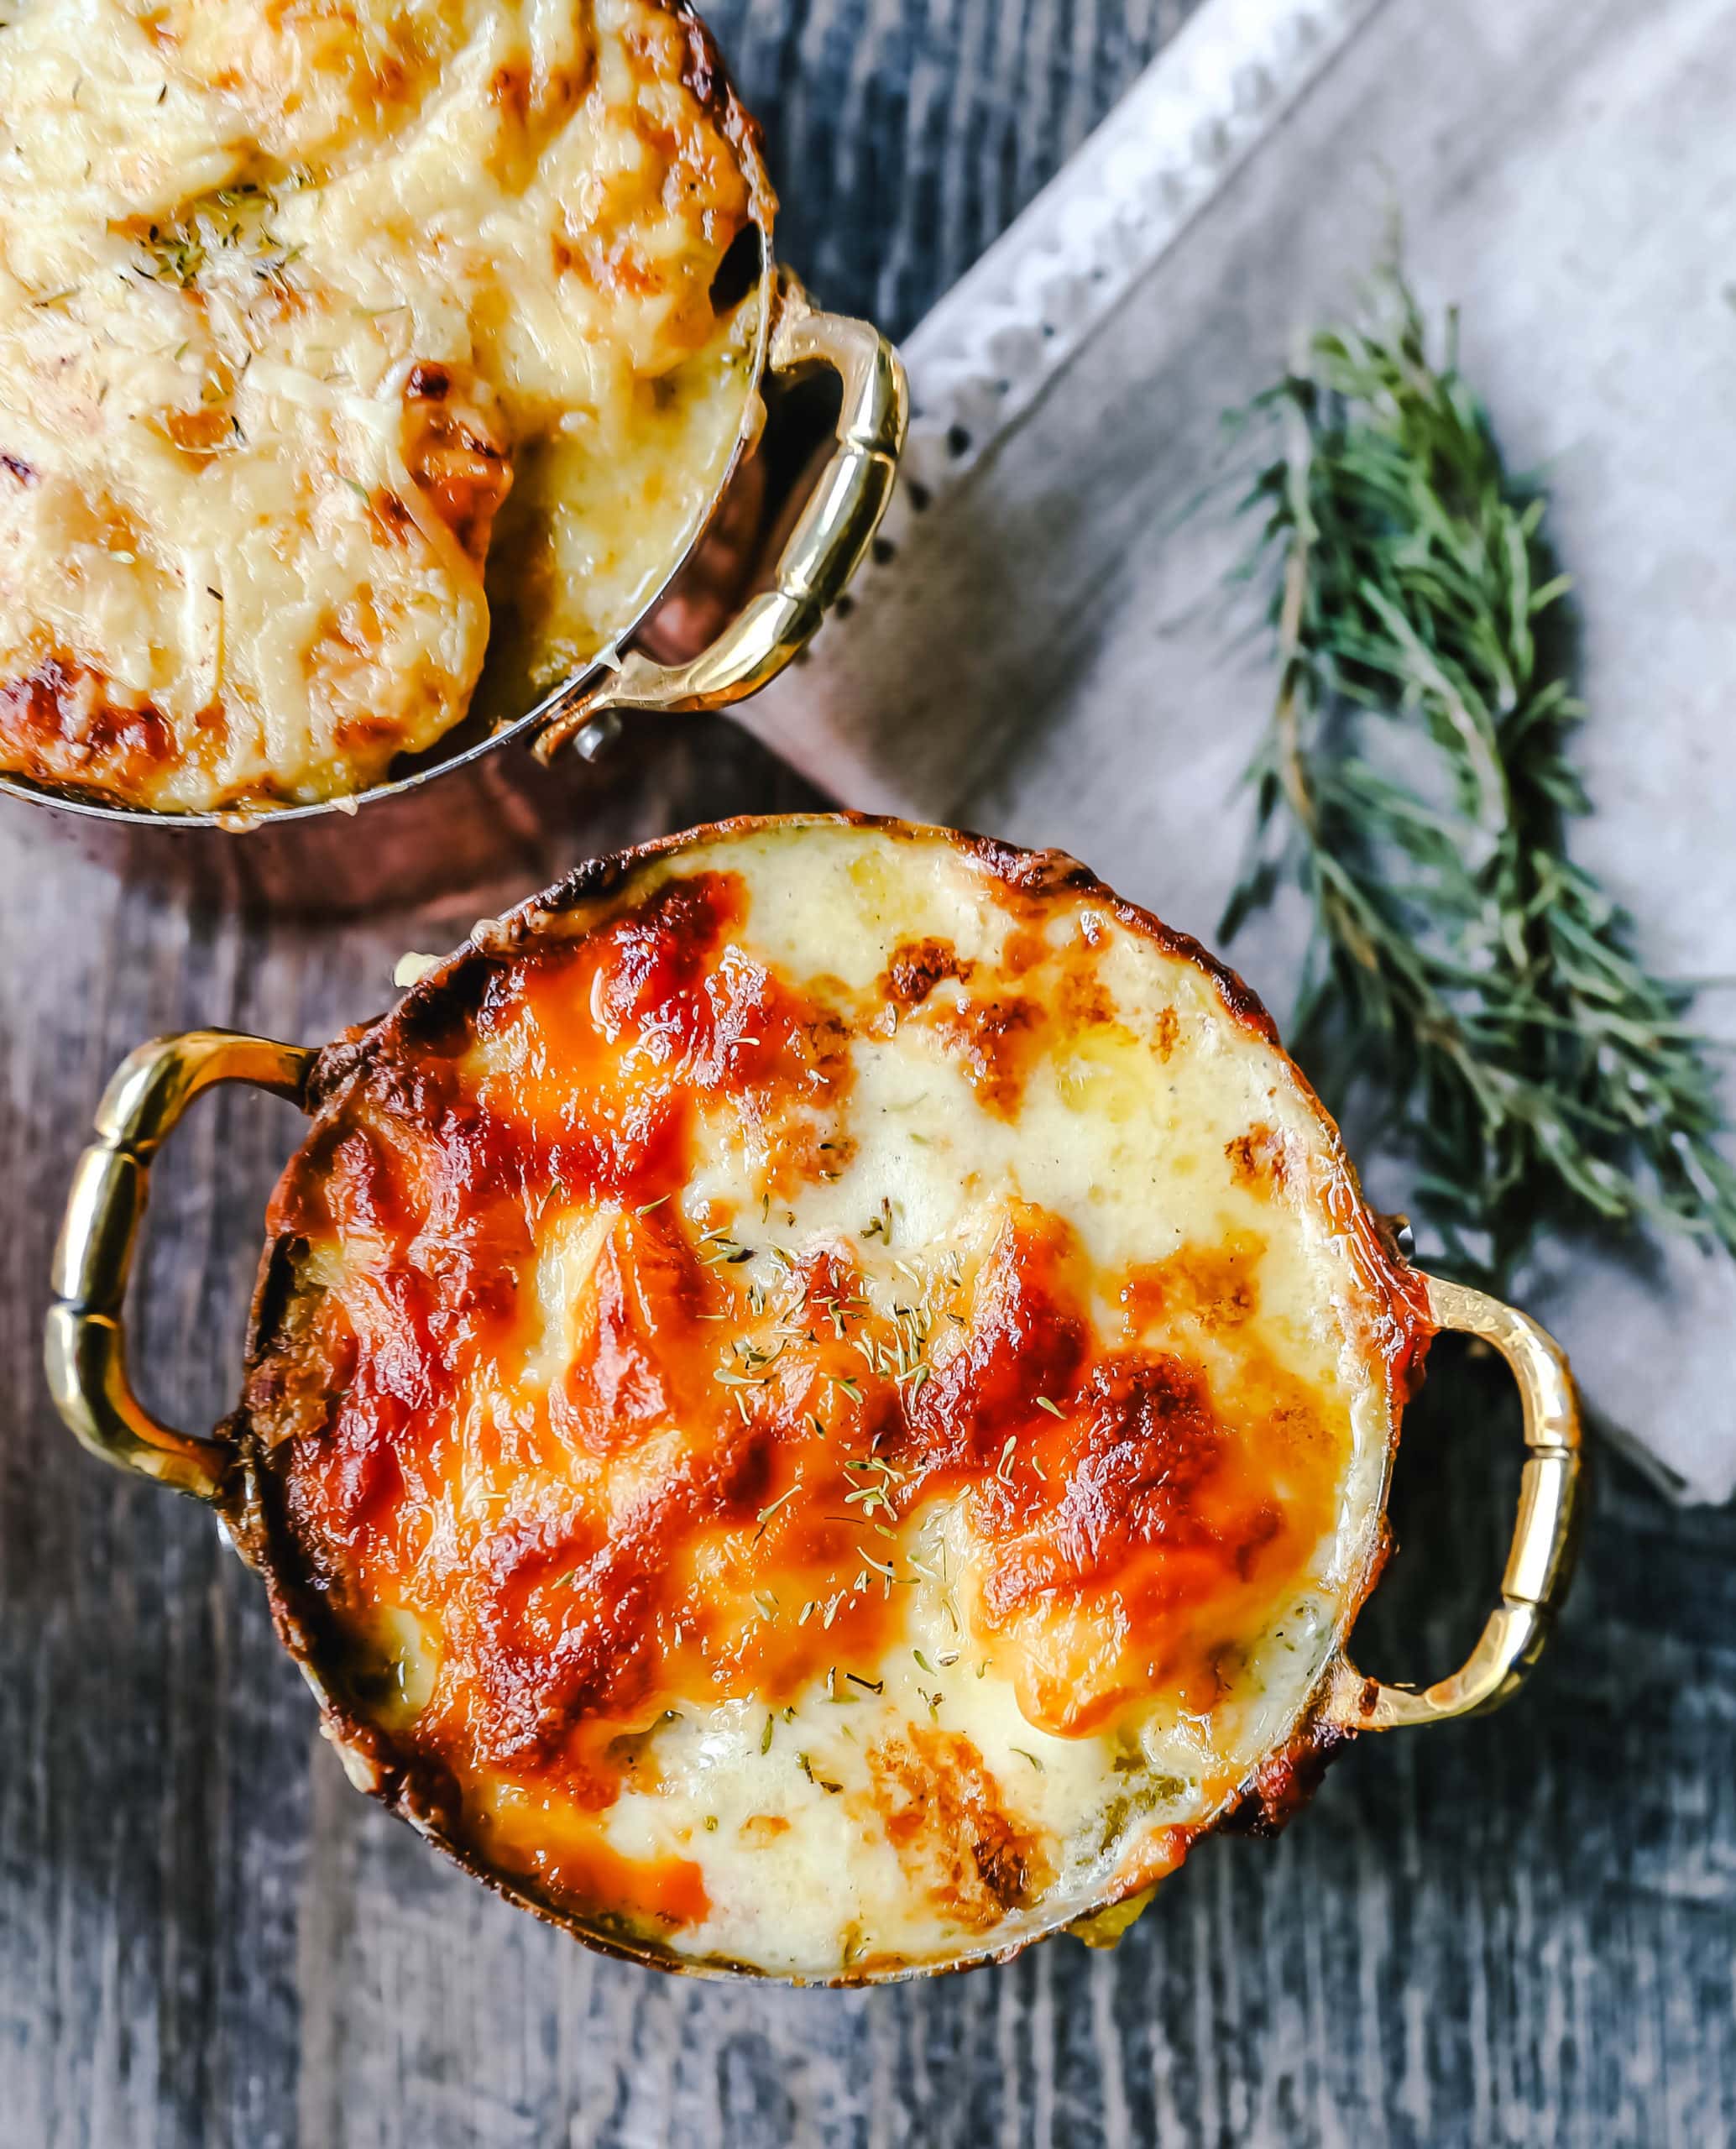
Potatoes au gratin is one of those sides that makes any dinner feel like a proper occasion — even a Tuesday. Thinly sliced potatoes layered with a creamy, cheesy sauce and baked until the top turns golden and bubbly — it's rich, it's indulgent, and it disappears fast. I make this when we're having roasted chicken or a simple beef roast, and my husband has never once left any on the plate. The key is slicing the potatoes thin enough that they cook through properly, and using a sharp cheddar so the flavor actually comes through rather than getting lost in all that cream.
Ingredients
- 2 lbs Yukon Gold potatoes, peeled and thinly sliced (about ⅛ inch)
- 2 tablespoons unsalted butter
- 2 tablespoons all-purpose flour
- 1½ cups whole milk
- ½ cup heavy cream
- 2 garlic cloves, minced
- 1½ cups sharp cheddar cheese, shredded (divided)
- ½ teaspoon salt
- ¼ teaspoon black pepper
- Pinch of nutmeg (optional but good)
Instructions
- Preheat your oven to 375°F. Grease a 9x13 inch baking dish with butter.
- Melt butter in a saucepan over medium heat. Add garlic and cook 30 seconds. Whisk in flour and cook for 1 minute. Slowly pour in the milk and cream, whisking constantly until the sauce thickens, about 4–5 minutes. Remove from heat and stir in 1 cup of the cheddar. Season with salt, pepper, and nutmeg.
- Layer half the potato slices in the prepared baking dish. Pour half the cheese sauce over them. Repeat with the remaining potatoes and sauce. Sprinkle the remaining ½ cup cheddar on top.
- Cover tightly with foil and bake for 45 minutes. Remove the foil and bake another 20–25 minutes until the top is golden and bubbling and the potatoes are completely tender when pierced with a knife.
- Let it rest for 10 minutes before serving — this helps the layers set so it slices cleanly.
Tips
- Tip: Slice the potatoes as evenly as possible so they cook at the same rate — a mandoline makes this easy, but a sharp knife and patience works too.
- Tip: Shred the cheese yourself from a block — pre-shredded cheese has anti-caking coatings that stop it from melting as smoothly.
- Tip: You can assemble this the night before, refrigerate it unbaked, and pop it in the oven when you need it — great for dinner parties.
19. Garlic Sesame Green Beans
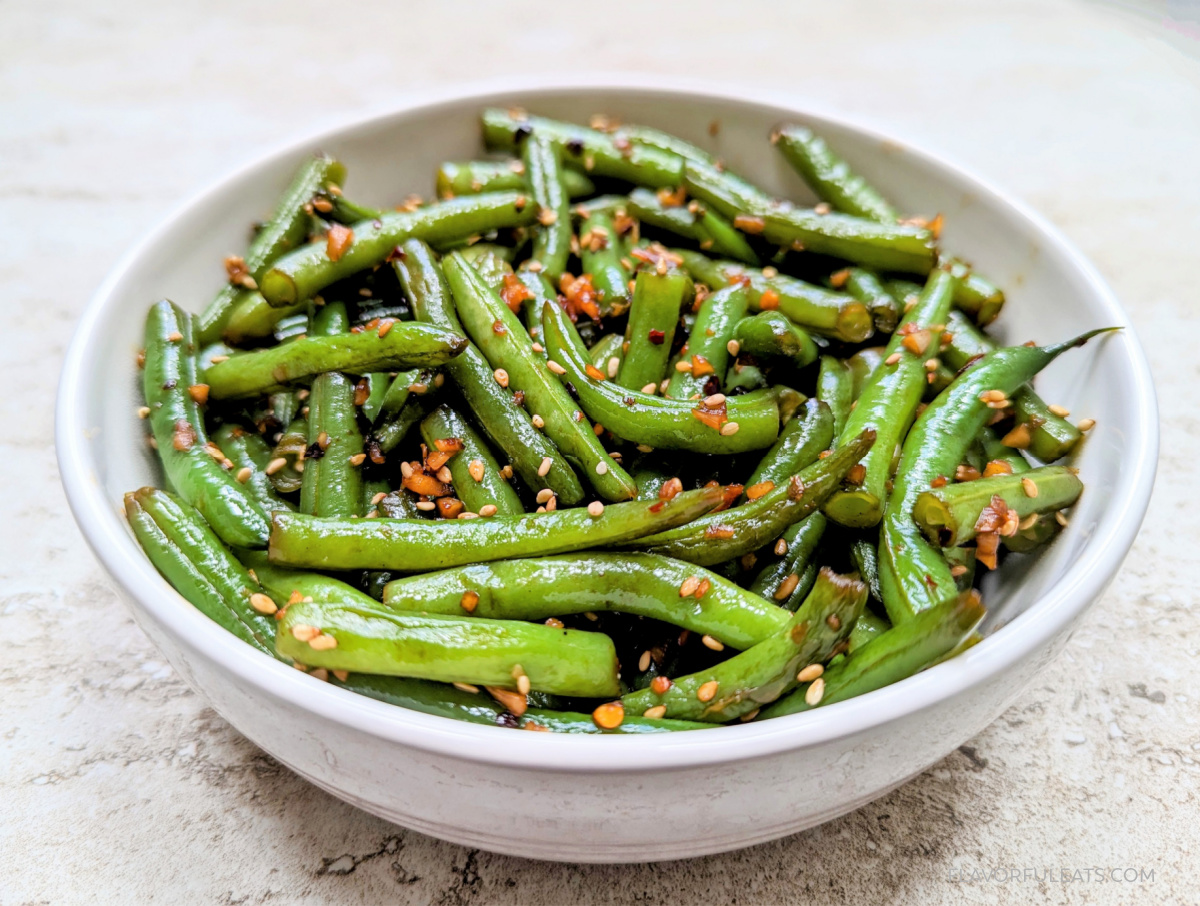
Green beans don't have to be boring, and this recipe is proof. A quick sauté with garlic and a finish of sesame oil turns a vegetable most kids push to the side into something that actually gets eaten. I make these when I'm doing any kind of Asian-inspired dinner — stir-fries, dumplings, noodle dishes — but honestly they hold their own next to a simple roast too. The whole thing comes together in under 15 minutes, which puts it in a category I deeply appreciate on weeknights.
Ingredients
- 1 lb fresh green beans, trimmed
- 1 tablespoon neutral oil (vegetable or avocado)
- 4 garlic cloves, minced
- 1 tablespoon soy sauce
- 1 teaspoon sesame oil
- 1 teaspoon rice vinegar
- ½ teaspoon red pepper flakes (optional)
- 1 tablespoon sesame seeds, for garnish
Instructions
- Blanch the green beans in boiling salted water for 2 minutes, then drain and immediately transfer to a bowl of ice water to stop the cooking. Drain again and pat dry. This keeps them bright green and slightly crisp.
- Heat the neutral oil in a large skillet or wok over high heat. Add the green beans and stir-fry for 2–3 minutes until they start to blister slightly on the outside.
- Add the minced garlic and stir-fry for another 30–60 seconds — watch it closely so it doesn't burn.
- Add the soy sauce, rice vinegar, and red pepper flakes if using. Toss everything together and cook for 1 more minute.
- Remove from heat and drizzle the sesame oil over the top — adding it at the end preserves its nutty aroma. Garnish with sesame seeds and serve immediately.
Tips
- Tip: Don't skip the blanch-and-ice-water step — it's what keeps the beans vivid green instead of turning army-drab in the pan.
- Tip: Make sure the beans are fully dry before they hit the hot pan, otherwise they'll steam instead of sear and you lose that nice blistered texture.
- Tip: Frozen green beans work in a pinch — just thaw and dry them thoroughly before stir-frying.
18. Cottage Cheese Mashed Potatoes
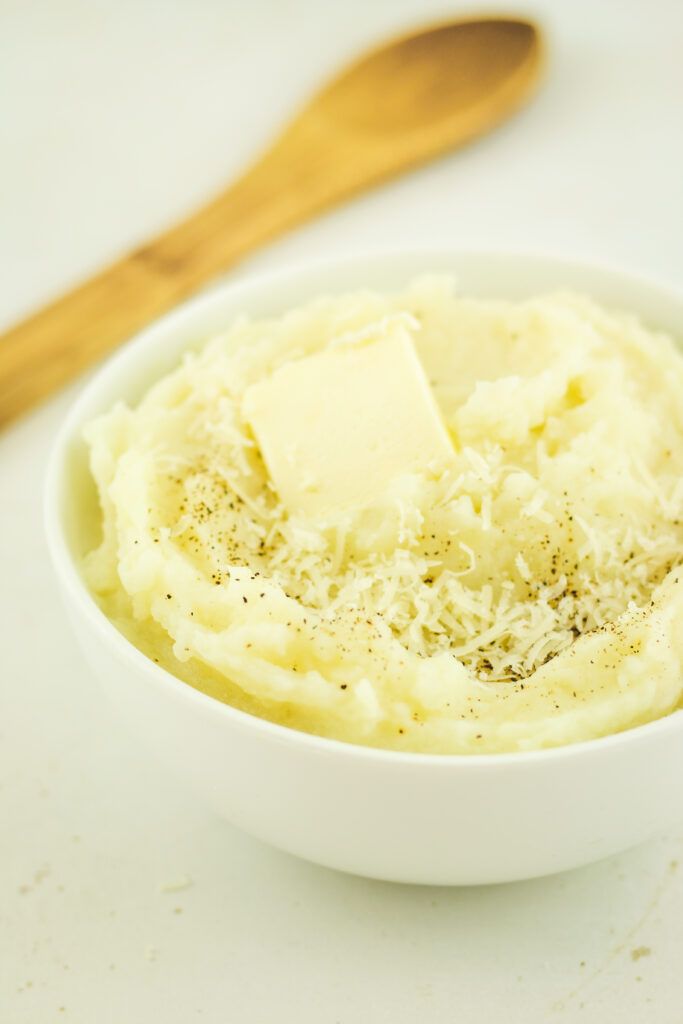
I was skeptical about this one when I first heard it, but cottage cheese in mashed potatoes genuinely works. It makes them creamier than butter and milk alone would, and it adds a very subtle tang that I actually prefer now. You also get a decent protein bump, which matters when you're trying to make a side dish that does more than just fill space on the plate. Saad had no idea there was cottage cheese in it until I told him — and even then he kept eating, so that's the real review.
Ingredients
- 2 lbs Russet or Yukon Gold potatoes, peeled and cubed
- ¾ cup full-fat cottage cheese
- 2 tablespoons unsalted butter
- ¼ cup warm milk (add more to adjust consistency)
- 1 teaspoon salt, plus more to taste
- ¼ teaspoon white pepper (or black pepper)
- 2 garlic cloves, minced or pressed (optional)
- Chives or parsley to garnish
Instructions
- Place cubed potatoes in a large pot, cover with cold salted water, and bring to a boil. Cook for 15–18 minutes until completely tender when pierced with a fork. Drain well.
- Blend the cottage cheese in a blender or with an immersion blender until completely smooth — this takes about 30 seconds and eliminates any lumpy texture.
- Return the drained potatoes to the pot. Add the butter and mash until the butter is melted and mostly smooth.
- Stir in the blended cottage cheese, warm milk, garlic if using, salt, and pepper. Mix until creamy and smooth, adding more warm milk a tablespoon at a time if needed to reach your preferred consistency.
- Taste and adjust seasoning. Serve topped with chives or parsley and an extra pat of butter if you like.
Tips
- Tip: Blending the cottage cheese smooth before adding it is non-negotiable — skipping this step leaves white lumps in your mash that look odd and put people off.
- Tip: Use warm milk, not cold — cold milk cools the potatoes down fast and makes them gluey when you mix.
- Tip: Don't over-mash once you've added the cottage cheese — too much mixing makes mashed potatoes gummy regardless of what's in them.
17. Cottage Cheese Mac and Cheese
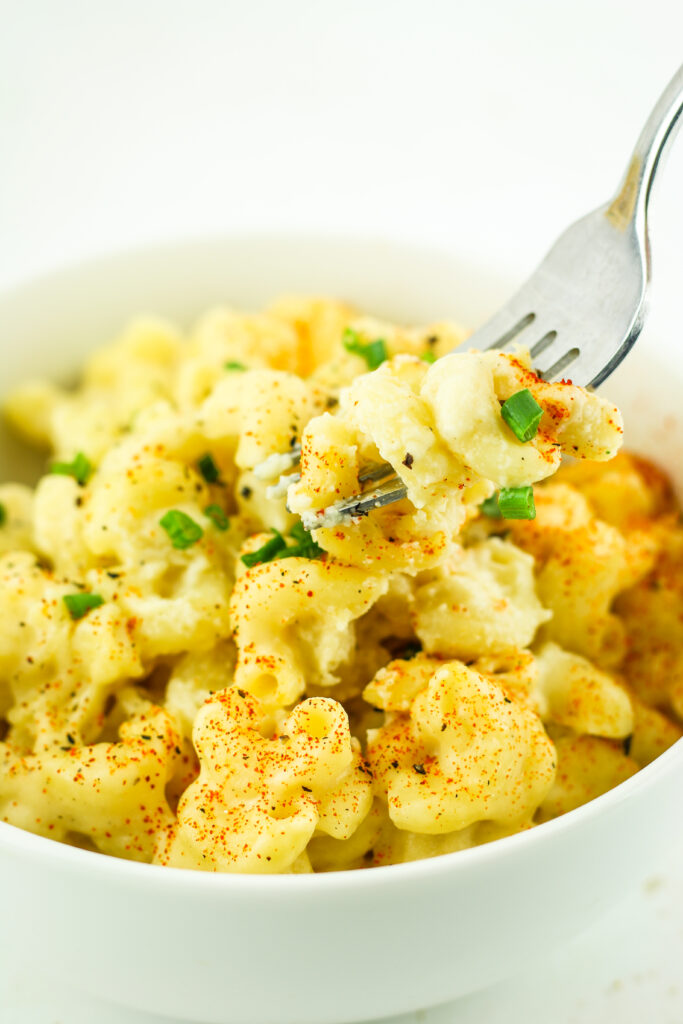
Mac and cheese as a dinner side dish is a completely legitimate choice and I won't hear otherwise. This version swaps some of the heavy cream for blended cottage cheese, which sounds like a compromise but actually makes the sauce silkier and a little lighter without losing any of the richness you want. The cheddar is still very much present and doing its job — the cottage cheese just works quietly in the background adding creaminess and a tiny bit of tang. This isn't the box stuff, but it comes together almost as fast and it's a side my kids never complain about.
Ingredients
- 8 oz elbow macaroni (or any short pasta)
- 1 cup full-fat cottage cheese
- 1 cup sharp cheddar cheese, shredded
- ½ cup whole milk
- 1 tablespoon butter
- ½ teaspoon garlic powder
- ½ teaspoon onion powder
- ½ teaspoon dry mustard powder
- Salt and black pepper to taste
- Pinch of paprika for serving (optional)
Instructions
- Cook the macaroni in well-salted boiling water according to package directions until just al dente. Reserve ¼ cup pasta water, then drain.
- While the pasta cooks, blend the cottage cheese with the milk until completely smooth — use a blender or immersion blender. This step is what makes the sauce creamy rather than grainy.
- In the same pot you cooked the pasta, melt the butter over medium-low heat. Pour in the blended cottage cheese mixture and stir until warmed through, about 2 minutes.
- Add the shredded cheddar, garlic powder, onion powder, and mustard powder. Stir until the cheese is fully melted and the sauce is smooth. If the sauce is too thick, add reserved pasta water a tablespoon at a time.
- Add the drained macaroni back to the pot and stir to coat every piece. Season with salt and pepper, dust with paprika if you like, and serve immediately.
Tips
- Tip: Keep the heat on medium-low when making the sauce — too high and the cottage cheese can separate and turn grainy.
- Tip: The dry mustard powder isn't optional in my version — it adds a background sharpness that makes the cheese flavor pop without tasting like mustard.
- Tip: This thickens up as it sits, so serve it right away or add a splash of warm milk to loosen it if you're making it slightly ahead.
12. Skillet Mexican Street Corn
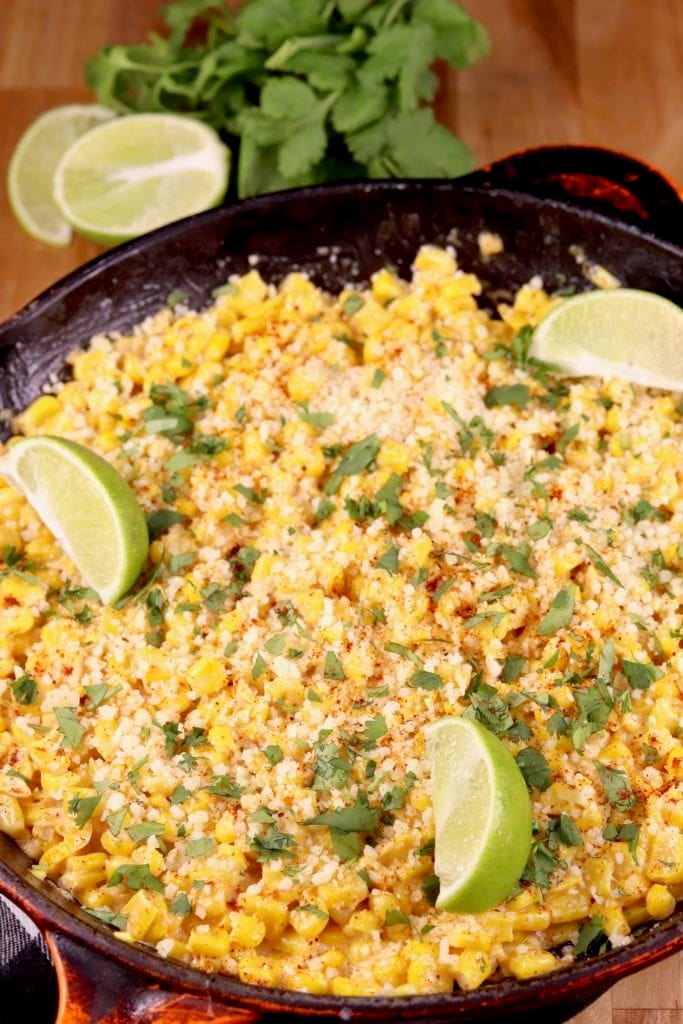
Elote in a skillet — this is one of those sides that disappears before everything else on the table. I made it the first time to go alongside tacos and my husband asked if there was more. There wasn't, so now I always make a double batch. The combo of charred sweet corn, creamy mayo, lime juice, and chili powder hits every note — smoky, tangy, a little spicy. You don't need cotija cheese if you can't find it; crumbled feta from Walmart works just fine and tastes almost identical.
Ingredients
- 4 cups corn kernels (fresh, frozen, or cut from about 5 ears of corn)
- 1 tablespoon butter
- 3 tablespoons mayonnaise
- 2 tablespoons sour cream
- ¼ cup cotija cheese, crumbled (or feta as a substitute)
- 1 teaspoon chili powder
- ¼ teaspoon cayenne pepper (optional, for extra heat)
- Juice of 1 lime
- 2 tablespoons fresh cilantro, chopped
- Salt and pepper to taste
Instructions
- Melt butter in a large skillet over medium-high heat. Add corn in a single layer and let it sit undisturbed for 2-3 minutes to get some char on the kernels — this is what makes it taste like real street corn.
- Stir the corn and cook for another 3-4 minutes, stirring occasionally, until the corn is cooked through and has good color in spots. Season with salt and pepper.
- Remove from heat and stir in the mayonnaise, sour cream, chili powder, and cayenne. Mix until the corn is well coated.
- Squeeze lime juice over the top, scatter the cotija cheese and cilantro, and serve straight from the skillet while it's hot.
Tips
- Tip: Frozen corn works great here — just pat it dry with a paper towel first so it chars instead of steams.
- Tip: Don't crowd the skillet. If your pan is small, cook the corn in two batches so it actually chars rather than sweating in its own moisture.
- Tip: Add the mayo and sour cream off the heat — if the pan is too hot, the sauce can split and get oily instead of creamy.
13. Baked Stuffed Tomatoes
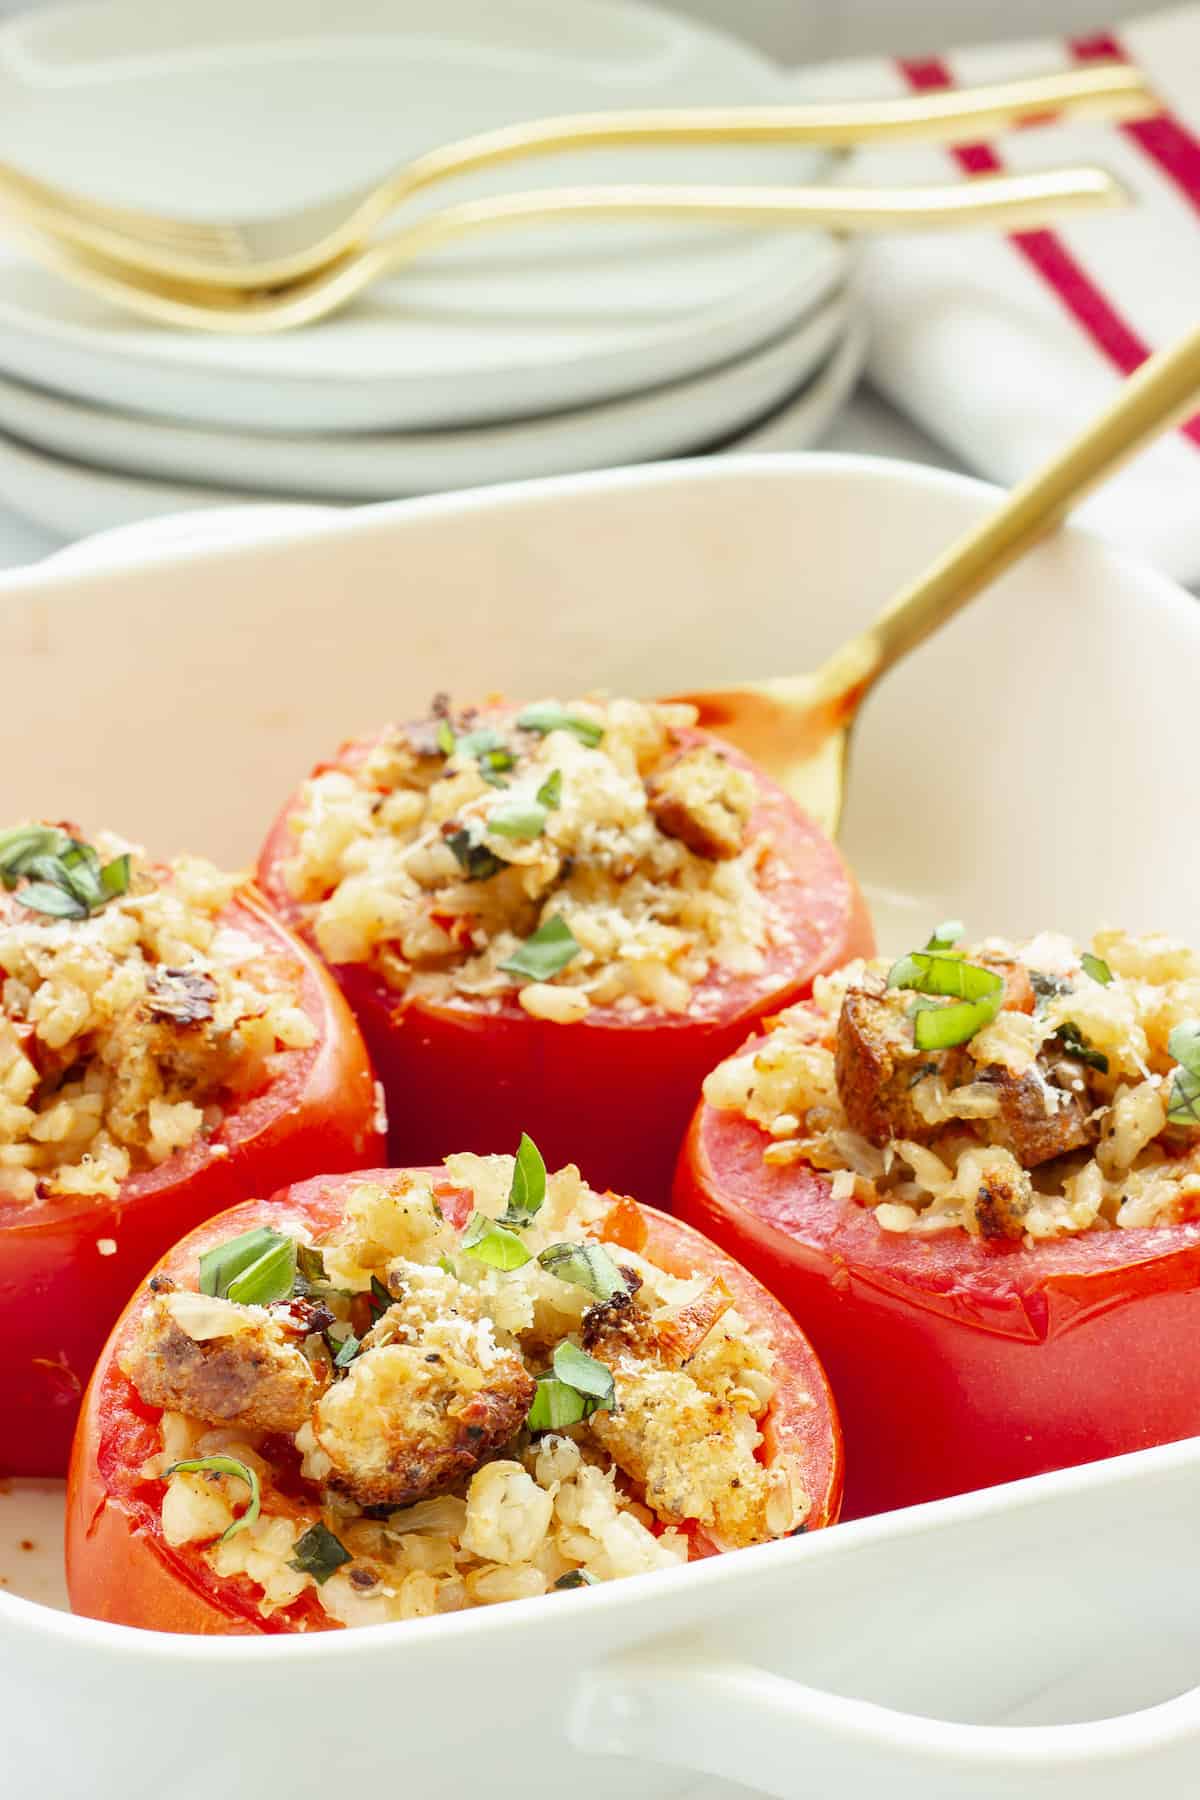
This one looks like you put in a lot of effort when you really didn't. Large tomatoes hollowed out and filled with a savory mix of breadcrumbs, Parmesan, garlic, and herbs, then baked until the tops are golden and the tomatoes are just soft enough to hold their shape. I serve these as a side with grilled chicken or alongside pasta, and they always get commented on. The trick is not overbaking them — you want them tender, not collapsed into mush.
Ingredients
- 4 large, firm tomatoes
- ½ cup plain breadcrumbs (panko works too, for more crunch)
- ⅓ cup grated Parmesan cheese
- 2 cloves garlic, minced
- 2 tablespoons fresh parsley, finely chopped
- 1 teaspoon dried oregano
- 3 tablespoons olive oil, divided
- Salt and black pepper to taste
Instructions
- Preheat oven to 375°F. Slice the tops off the tomatoes and use a small spoon to scoop out the pulp and seeds. Roughly chop the pulp and set aside. Sprinkle the inside of each tomato lightly with salt and place cut-side down on a paper towel for 10 minutes to drain excess liquid.
- In a bowl, combine breadcrumbs, Parmesan, garlic, parsley, oregano, 2 tablespoons of the olive oil, and the reserved chopped tomato pulp. Season with salt and pepper and mix well.
- Place the tomatoes cut-side up in a baking dish. Spoon the breadcrumb mixture into each tomato, pressing gently to fill. Drizzle with the remaining tablespoon of olive oil.
- Bake for 20-25 minutes until the tops are golden brown and the tomatoes are tender but still holding their shape. Serve warm.
Tips
- Tip: The draining step matters — skipping it leaves you with watery tomatoes that won't hold the filling properly.
- Tip: Roma tomatoes are too small for this — go for large beefsteak or vine tomatoes so you have enough room for a generous filling.
- Tip: You can prep these a few hours ahead and refrigerate them unbaked — just add 5 minutes to the baking time if they go in cold from the fridge.
14. Couscous Tabbouleh – Middle Eastern Salad

Traditional tabbouleh uses bulgur wheat, which isn't always easy to find at a regular grocery store — so this couscous version is genuinely useful. Couscous soaks up the lemon dressing beautifully and the result is still fresh, herby, and light. I'll be upfront: this isn't strictly authentic tabbouleh, it's a very practical version that tastes great. It pairs well with grilled meats or as part of a mezze-style spread, and it holds up in the fridge overnight, which means it actually works as a make-ahead side.
Ingredients
- 1 cup couscous, uncooked
- 1 cup boiling water or vegetable broth
- 1 cup fresh flat-leaf parsley, finely chopped
- ¼ cup fresh mint leaves, chopped
- 2 medium tomatoes, seeded and diced small
- ½ English cucumber, diced small
- 3 green onions, thinly sliced
- 3 tablespoons olive oil
- Juice of 2 lemons (about ¼ cup)
- ½ teaspoon salt, or to taste
Instructions
- Place couscous in a heatproof bowl. Pour boiling water or broth over it, add a pinch of salt, stir once, then cover tightly with a plate or plastic wrap. Let sit for 5 minutes, then fluff with a fork and spread it out to cool completely — putting warm couscous on the vegetables will wilt everything.
- While the couscous cools, prep your vegetables and herbs. Seed the tomatoes before dicing so the salad doesn't get watery.
- In a small bowl, whisk together olive oil, lemon juice, and salt to make the dressing.
- Combine cooled couscous, parsley, mint, tomatoes, cucumber, and green onions in a large bowl. Pour the dressing over and toss well. Taste and adjust lemon and salt — tabbouleh should be quite lemony.
- Refrigerate for at least 30 minutes before serving to let the flavors come together. Serve cold or at room temperature.
Tips
- Tip: Use vegetable broth instead of plain water to cook the couscous — it adds a little extra flavor that makes a difference in a simple salad like this.
- Tip: Don't skimp on the parsley — it should be the dominant ingredient here, not an afterthought. That's what makes it feel like tabbouleh and not just a couscous salad.
- Tip: This keeps well in the fridge for up to 2 days. If it looks dry the next day, just add a squeeze of lemon and a drizzle of olive oil before serving.
15. Easy Oven Roasted Celeriac (Celery Root)
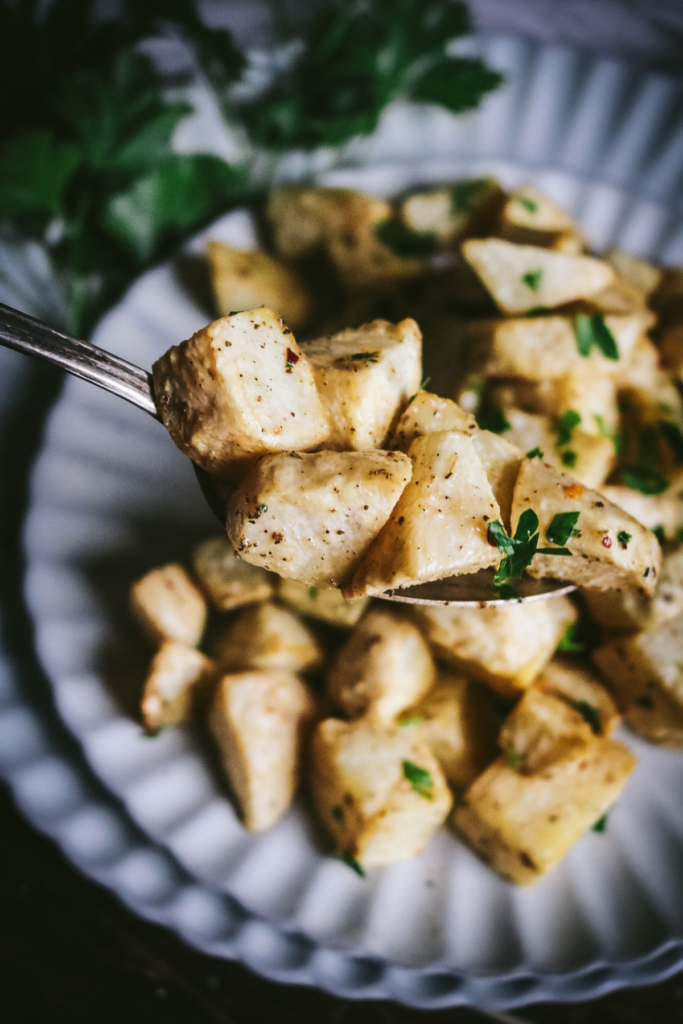
Celeriac looks intimidating — it's an ugly, knobby root vegetable and most people walk right past it at the store. But roasted in the oven with olive oil and herbs, it turns nutty, slightly sweet, and genuinely delicious. It's also a solid low-carb alternative to roasted potatoes if you're trying to keep things lighter. I found it at Trader Joe's during fall and have been making it ever since. If you've never cooked with celery root before, this simple preparation is exactly where to start.
Ingredients
- 1 large celeriac (celery root), about 1½ lbs
- 3 tablespoons olive oil
- 1 teaspoon garlic powder
- 1 teaspoon dried thyme (or fresh if you have it)
- ½ teaspoon smoked paprika
- ¾ teaspoon salt
- ¼ teaspoon black pepper
- Fresh parsley to garnish (optional)
Instructions
- Preheat oven to 400°F. Peel the celeriac using a sharp knife — the skin is too thick and rough for a vegetable peeler. Cut it into roughly 1-inch cubes.
- Toss the celeriac cubes with olive oil, garlic powder, thyme, smoked paprika, salt, and pepper in a large bowl until evenly coated.
- Spread in a single layer on a sheet pan — don't pile them on top of each other or they'll steam instead of roast. Roast for 35-40 minutes, flipping halfway through, until the edges are golden and caramelized.
- Taste for salt, scatter fresh parsley on top if using, and serve hot.
Tips
- Tip: Use a chef's knife to peel celeriac — work your way around the outside cutting downward. A peeler won't get through the tough outer layer.
- Tip: Celeriac browns faster than potatoes, so check it at the 30-minute mark. If the edges are already deep golden, pull it out early.
- Tip: Leftovers reheat well in a dry skillet over medium heat — the oven dries them out too much the second time around.
16. Roasted Honeypatch Squash with Hot Honey & Feta Cheese

Sweet roasted squash drizzled with hot honey and finished with crumbled feta — this one sounds fancy but it genuinely comes together with minimal effort. The hot honey does all the work: it adds heat, sweetness, and a glossy finish that makes the dish look like something from a restaurant. If you can't find honeypatch squash specifically, butternut squash works identically here. Zainab thought it was too spicy, but my husband went back for seconds — so it depends on your crowd. Use Mike's Hot Honey from most grocery stores or make a quick version by warming regular honey with a pinch of red pepper flakes.
Ingredients
- 1 medium honeypatch or butternut squash (about 2 lbs), peeled and cut into 1-inch cubes
- 2 tablespoons olive oil
- ½ teaspoon salt
- ¼ teaspoon black pepper
- ½ teaspoon garlic powder
- 3 tablespoons hot honey (store-bought or homemade: warm 3 tablespoons honey with ¼ teaspoon red pepper flakes)
- ⅓ cup feta cheese, crumbled
- Fresh thyme or rosemary to garnish (optional)
Instructions
- Preheat oven to 425°F. Toss the squash cubes with olive oil, salt, pepper, and garlic powder. Spread on a sheet pan in a single layer — crowding the pan leads to steaming, not roasting.
- Roast for 25-30 minutes, flipping once halfway through, until the squash is tender inside and caramelized on the edges.
- Remove from the oven and immediately drizzle the hot honey over the squash while it's still hot — it absorbs into the squash rather than just sitting on top.
- Transfer to a serving platter, scatter the crumbled feta over the top, add fresh herbs if using, and serve right away.
Tips
- Tip: Add the feta after the squash comes out of the oven, never before — baked feta melts into the squash and loses that salty crumble you want as a contrast.
- Tip: For a milder version, use regular honey and add just a tiny pinch of red pepper flakes — you get the warmth without the full heat.
- Tip: Pre-cut butternut squash from Costco or Trader Joe's saves real time here — skip the peeling and cubing entirely and go straight to seasoning.
7. 3 Bean Baked Beans
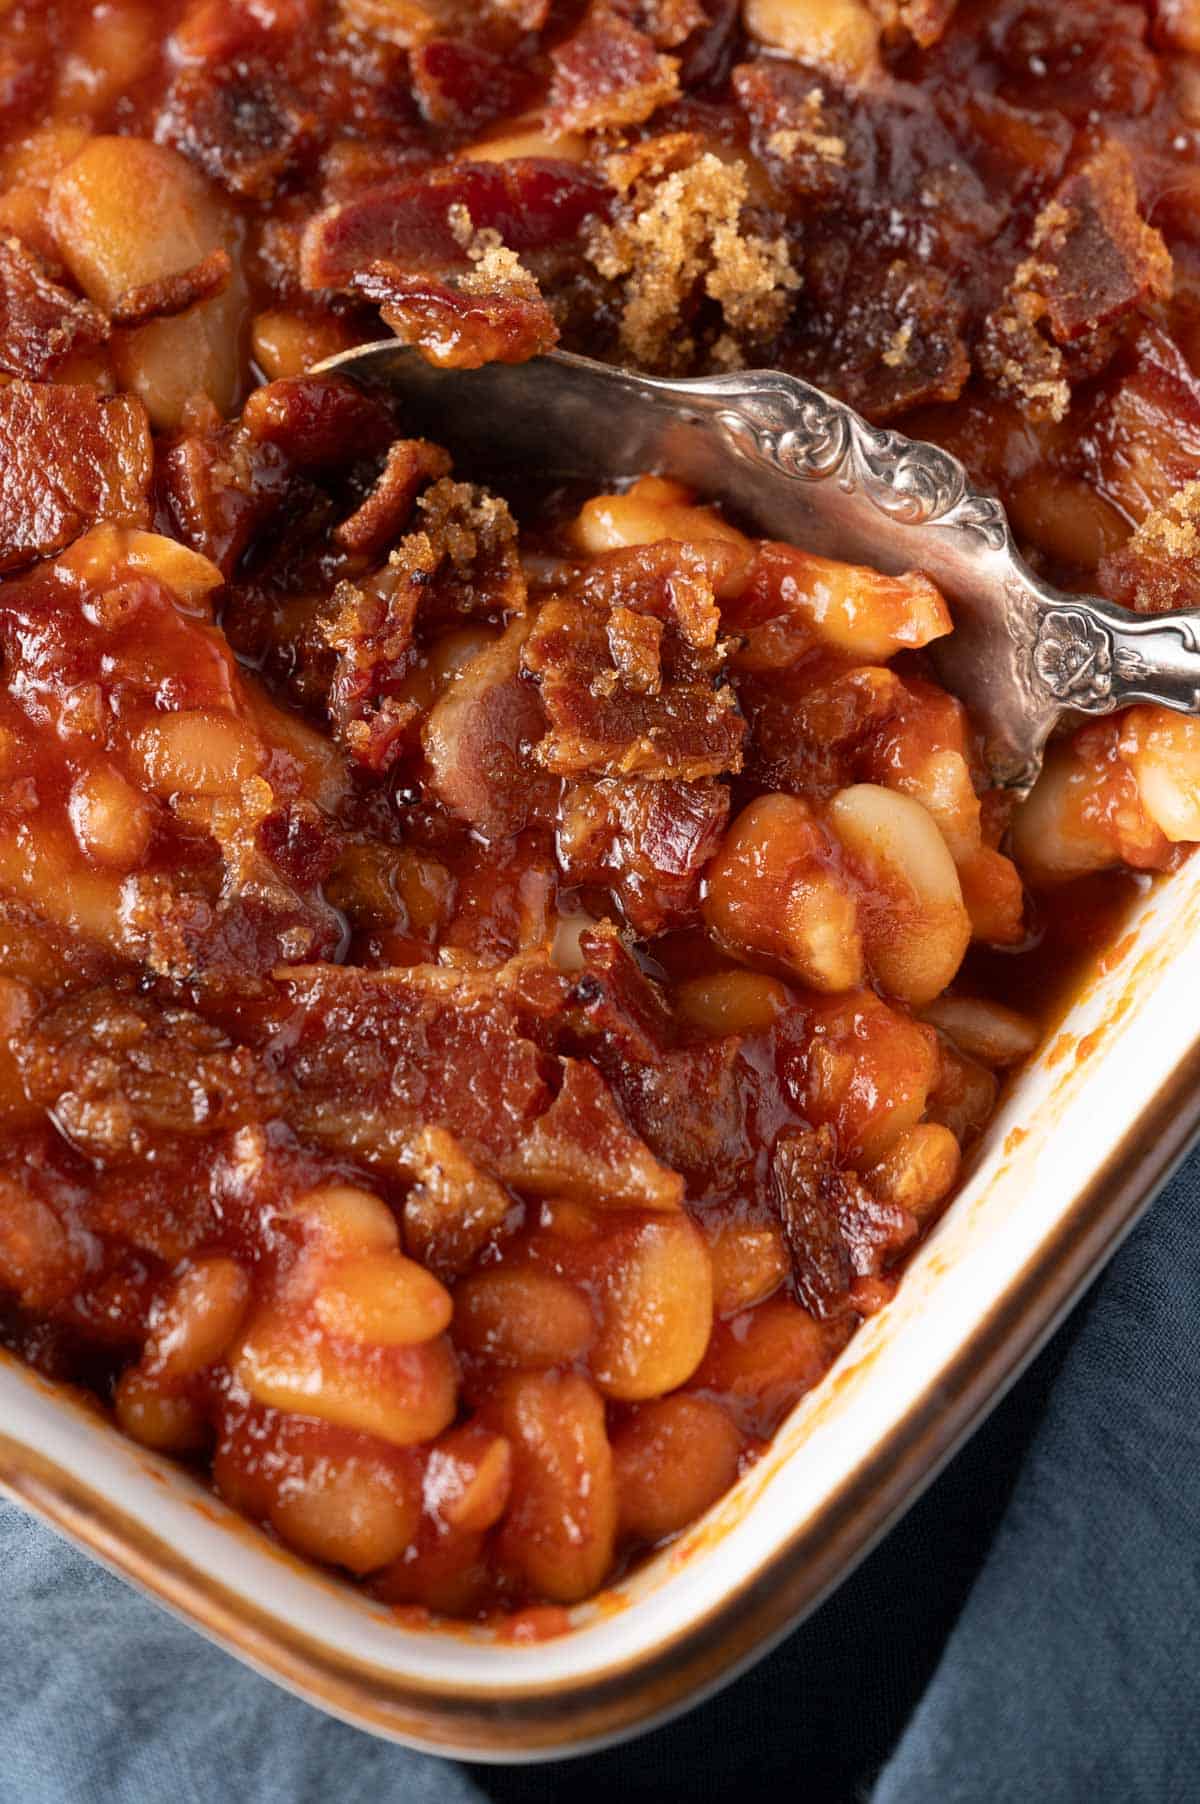
Baked beans are one of those sides I underestimated for years — I thought they were just a BBQ thing, or something you opened from a can. Then I made a proper homemade version with three kinds of beans and I genuinely couldn't stop eating them straight from the pot. The combination of brown sugar, molasses, and smoky spices gives you this deep, sticky, savory-sweet sauce that canned beans can never touch. This goes with grilled chicken, burgers, hot dogs — honestly it goes with everything.
Ingredients
- 1 can (15 oz) navy beans, drained and rinsed
- 1 can (15 oz) kidney beans, drained and rinsed
- 1 can (15 oz) pinto beans, drained and rinsed
- 6 slices bacon, chopped
- 1 small yellow onion, diced
- ½ cup ketchup
- ¼ cup brown sugar, packed
- 2 tablespoons molasses
- 1 tablespoon yellow mustard
- 1 teaspoon Worcestershire sauce
- ½ teaspoon smoked paprika
- Salt and black pepper to taste
Instructions
- Preheat your oven to 325°F. In a large oven-safe skillet or Dutch oven, cook the chopped bacon over medium heat until crispy. Remove bacon and set aside, leaving about 2 tablespoons of the bacon fat in the pan.
- Add the diced onion to the same pan and cook over medium heat for about 5 minutes until softened and starting to turn golden.
- Stir in the ketchup, brown sugar, molasses, mustard, Worcestershire sauce, and smoked paprika. Mix well and let it bubble for 1-2 minutes so the flavors come together.
- Add all three beans and the cooked bacon back into the pan. Stir everything together, then taste and adjust salt and pepper.
- Cover and bake for 45 minutes, then uncover and bake another 15 minutes so the sauce thickens and gets slightly sticky on top. Serve hot.
Tips
- Tip: No Dutch oven? Just use any oven-safe pot with a lid, or transfer everything to a covered baking dish before it goes in the oven.
- Tip: These reheat beautifully the next day — the sauce thickens even more overnight, so leftovers are arguably better than the first serving.
- Tip: To make this vegetarian, skip the bacon and add a teaspoon of liquid smoke instead — you still get that deep smoky flavor.
8. Maple and Herb Roasted Delicata Squash

Delicata squash is one of those ingredients I kept seeing at the grocery store for years before I finally bought one. The best part — and the reason it earns a spot here — is that you don't have to peel it. The skin is thin and edible, which saves so much time. Maple syrup and fresh herbs take the natural sweetness of the squash somewhere really special — a little caramelized, a little savory, completely satisfying. It looks impressive on the table and takes almost no effort to put together.
Ingredients
- 2 medium delicata squash, halved lengthwise, seeded, and sliced into ½-inch half-moons
- 2 tablespoons olive oil
- 2 tablespoons pure maple syrup
- 1 teaspoon fresh thyme leaves (or ½ teaspoon dried)
- 1 teaspoon fresh rosemary, finely chopped (or ½ teaspoon dried)
- ½ teaspoon garlic powder
- ½ teaspoon salt
- ¼ teaspoon black pepper
- Flaky sea salt for finishing (optional)
Instructions
- Preheat oven to 425°F and line a large sheet pan with parchment paper. Slice the delicata squash in half lengthwise, scoop out the seeds with a spoon, then cut into ½-inch half-moon pieces — no peeling needed.
- In a large bowl, whisk together the olive oil, maple syrup, thyme, rosemary, garlic powder, salt, and pepper. Add the squash slices and toss until every piece is well coated.
- Spread the squash in a single layer on the prepared sheet pan — don't crowd them or they'll steam instead of roast.
- Roast for 20-25 minutes, flipping halfway through, until the edges are caramelized and the squash is tender when pierced with a fork.
- Transfer to a serving plate and finish with a pinch of flaky sea salt if you have it. Serve immediately.
Tips
- Tip: Don't skip flipping halfway — that's what gets you the golden caramelized color on both sides instead of just the bottom.
- Tip: No maple syrup at home? Honey works here too, though the flavor will be a little lighter and less complex.
- Tip: Delicata squash is usually available at Trader Joe's and Whole Foods in the fall — if you can't find it, this same preparation works beautifully with butternut squash cut into thin slices.
9. Autumn Roasted Delicata Squash

This one is the simpler, more weeknight-friendly version of roasted delicata squash — just olive oil, salt, and the oven doing its thing. Sometimes that's exactly what dinner needs alongside something already bold and saucy. The squash gets tender inside and lightly crisp on the edges, and the natural sweetness that comes out during roasting is enough to make it feel like a proper side dish without any fuss. I made this three times in one October because it's that easy to put together.
Ingredients
- 2 delicata squash, halved lengthwise, seeded, sliced into ½-inch half-moons
- 2 tablespoons olive oil
- ½ teaspoon salt
- ¼ teaspoon black pepper
- ¼ teaspoon cinnamon (optional, but really good)
- ¼ teaspoon garlic powder
Instructions
- Preheat oven to 425°F and line a sheet pan with parchment. Prep the squash — slice in half, scoop out seeds, then cut into half-moon pieces about ½ inch thick. The skin is edible, so no peeling required.
- Toss the squash pieces with olive oil, salt, pepper, garlic powder, and cinnamon if using. Make sure every piece gets coated.
- Spread in a single layer on the sheet pan, leaving space between pieces so they roast rather than steam.
- Roast for 20-25 minutes, flipping once at the halfway point, until golden and fork-tender. Serve right away.
Tips
- Tip: A small pinch of cinnamon sounds odd but it genuinely enhances the natural sweetness of the squash without making it taste like dessert — worth trying at least once.
- Tip: If your squash pieces are browning too fast before they're tender, loosely tent the pan with foil for the last 5 minutes.
- Tip: This stores well in the fridge for up to 3 days and reheats in a 400°F oven for about 8 minutes to crisp back up.
10. Easy Sheet Pan Brussels Sprouts with Sausage and Honey
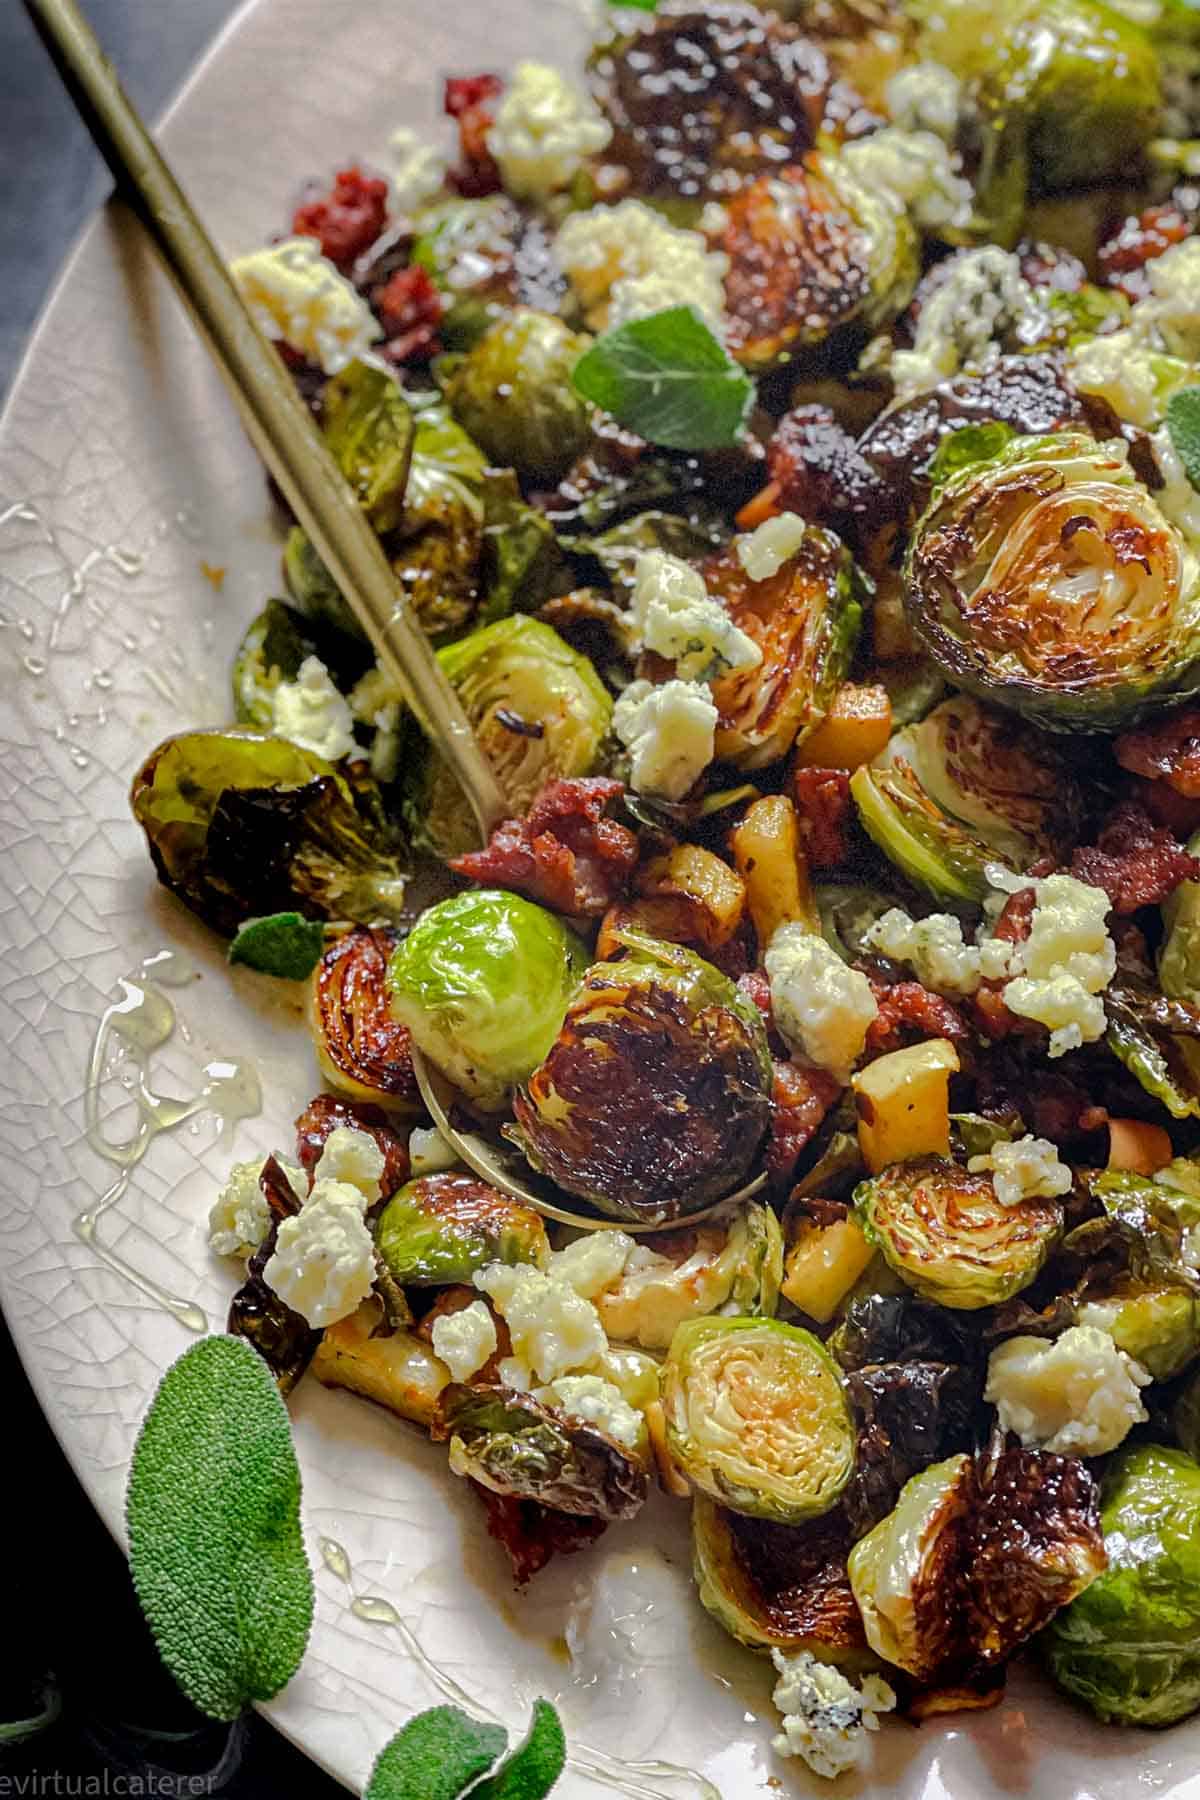
Brussels sprouts have a reputation problem that this recipe completely fixes. Roasting them at high heat with sliced sausage means the sprouts get deeply caramelized on the cut side while the sausage renders out and gets a little crispy around the edges — and then honey goes over all of it right at the end. That savory-sweet finish is what pulls everything together. This is technically a side dish but I've served it as a main more than once when I didn't have the energy to cook something else alongside it.
Ingredients
- 1 lb Brussels sprouts, trimmed and halved
- 12 oz smoked sausage (kielbasa or Italian sausage), sliced into ¼-inch rounds
- 3 tablespoons olive oil
- ½ teaspoon garlic powder
- ½ teaspoon onion powder
- ½ teaspoon salt
- ¼ teaspoon black pepper
- ¼ teaspoon red pepper flakes (optional)
- 2 tablespoons honey
- 1 tablespoon balsamic vinegar (optional but adds depth)
Instructions
- Preheat oven to 425°F and line a large sheet pan with parchment or foil. Trim and halve the Brussels sprouts, then place them on the pan along with the sliced sausage.
- Drizzle the olive oil over everything and sprinkle with garlic powder, onion powder, salt, pepper, and red pepper flakes if using. Toss directly on the pan, then spread into a single layer with the Brussels sprouts cut-side down — that contact with the hot pan is what gives you the golden color.
- Roast for 20 minutes without disturbing. Then flip everything and roast another 10-15 minutes until the sprouts are tender and caramelized and the sausage has some color on it.
- Remove from oven and immediately drizzle honey (and balsamic if using) over the top. Toss gently on the pan and serve hot.
Tips
- Tip: Place the Brussels sprouts cut-side down at the start — this is the most important step for getting that deep golden caramelization rather than just steamed-looking sprouts.
- Tip: Add the honey after the pan comes out of the oven, not before — honey burns quickly at high heat and you'll lose the sweetness and end up with a bitter coating instead.
- Tip: Kielbasa from Walmart or Costco works perfectly here — it's already fully cooked so you're just roasting for flavor and texture, not worrying about cooking it through.
11. Crunchy Caesar Salad with Smashed Croutons

A Caesar salad is only as good as its croutons, and smashed croutons are something I wish I'd known about years ago. Instead of cutting bread into neat cubes, you tear it into rough pieces and then literally smash them — the jagged, uneven surface area means they toast up with more crunch and soak up the dressing differently than a standard cube does. The homemade Caesar dressing takes about 3 minutes to whisk together and tastes so much better than anything from a bottle. Zainab requests this salad specifically when we're having pasta for dinner.
Ingredients
- 2 large heads romaine lettuce, chopped or torn
- 3 cups torn crusty bread (sourdough or ciabatta), roughly smashed
- 3 tablespoons olive oil (for croutons)
- ½ teaspoon garlic powder (for croutons)
- ½ cup freshly grated Parmesan cheese, divided
- ⅓ cup mayonnaise
- 2 tablespoons fresh lemon juice
- 1 teaspoon Worcestershire sauce
- 1 teaspoon Dijon mustard
- 1 small garlic clove, finely grated or minced
- Salt and black pepper to taste
Instructions
- Preheat oven to 400°F. Tear the bread into rough chunks, then use the bottom of a heavy mug or measuring cup to smash each piece so it flattens and splinters — those irregular edges are what you want. Toss with olive oil, garlic powder, and a pinch of salt.
- Spread smashed croutons on a sheet pan and bake for 12-15 minutes, tossing once halfway, until deeply golden and crunchy throughout. Remove and let cool slightly.
- While the croutons bake, make the dressing: whisk together the mayonnaise, lemon juice, Worcestershire, Dijon, grated garlic, and ¼ cup of the Parmesan. Season generously with salt and pepper. Taste and adjust — it should be tangy, savory, and a little rich.
- Place chopped romaine in a large bowl. Drizzle most of the dressing over and toss well to coat every leaf.
- Top with smashed croutons, the remaining Parmesan, and a few extra cracks of black pepper. Serve immediately so the croutons stay crunchy.
Tips
- Tip: Dress the salad right before serving — romaine wilts fast once it meets dressing, and you'll lose all that crunch you worked for.
- Tip: Day-old bread makes much better croutons than fresh — it's already a bit dry so it crisps faster and more evenly in the oven.
- Tip: If you want to skip anchovy paste but still get that deep savory flavor, the Worcestershire sauce does most of the heavy lifting here — don't leave it out.
31. Twice Baked Potato Casserole
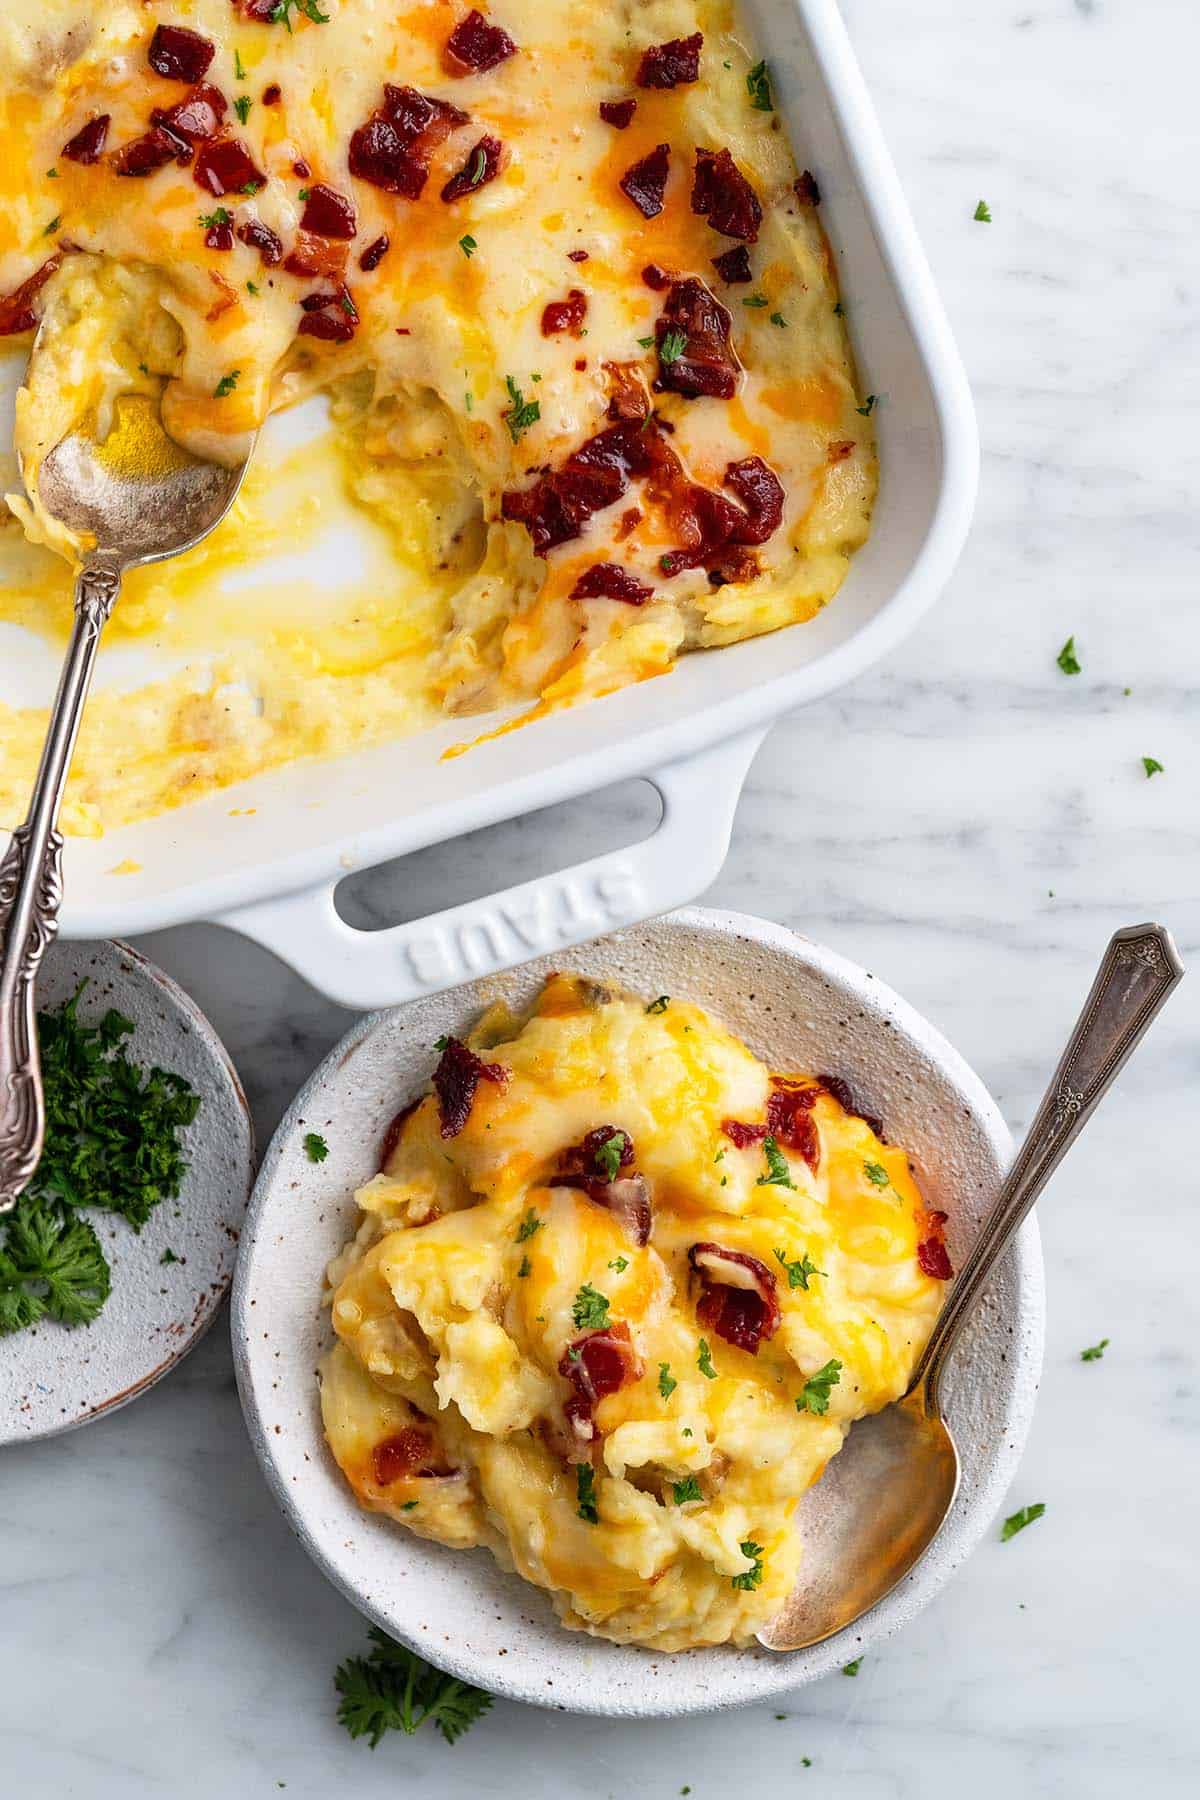
This is everything you love about a loaded twice-baked potato but in casserole form, which honestly makes it about ten times easier to serve a crowd. You get creamy mashed potatoes baked until the top gets slightly crispy, with sharp cheddar melted through, bacon crumbled on top, and chives scattered over everything. It's the kind of side dish that disappears at potlucks before you even get a chance to take a serving yourself. I also love that you can assemble it the day before and just bake it when you need it — that alone puts it on my regular rotation during busy weeks.
Ingredients
- 3 lbs russet potatoes, peeled and cubed
- 4 tablespoons unsalted butter
- ½ cup sour cream
- ½ cup whole milk (or heavy cream for extra richness)
- 1 teaspoon garlic powder
- Salt and black pepper to taste
- 1½ cups shredded sharp cheddar cheese, divided
- 6 strips bacon, cooked and crumbled
- 3 tablespoons fresh chives, chopped
Instructions
- Preheat your oven to 375°F. Boil the cubed potatoes in salted water for about 15 minutes until fork-tender, then drain well.
- Mash the potatoes with butter, sour cream, milk, garlic powder, salt, and pepper until smooth and creamy. Fold in 1 cup of the cheddar and half the crumbled bacon.
- Spread the mashed potato mixture into a greased 9x13-inch baking dish. Top with the remaining ½ cup cheddar and the rest of the bacon.
- Bake uncovered for 25–30 minutes until the cheese is melted and the edges are bubbling. Let it rest 5 minutes before serving, then scatter chives over the top.
Tips
- Tip: Assemble the casserole up to 24 hours ahead and refrigerate unbaked — just add 10 extra minutes to the bake time if it's going in cold.
- Tip: For extra crispiness on top, switch to the broiler for the last 2–3 minutes — watch it closely though, it goes from golden to burnt fast.
- Tip: If you want to skip bacon, swap in caramelized onions for a vegetarian version that's still deeply savory.
32. Fasolka Szparagowa (Polish Green Beans with Buttery Bread Crumb Topping)
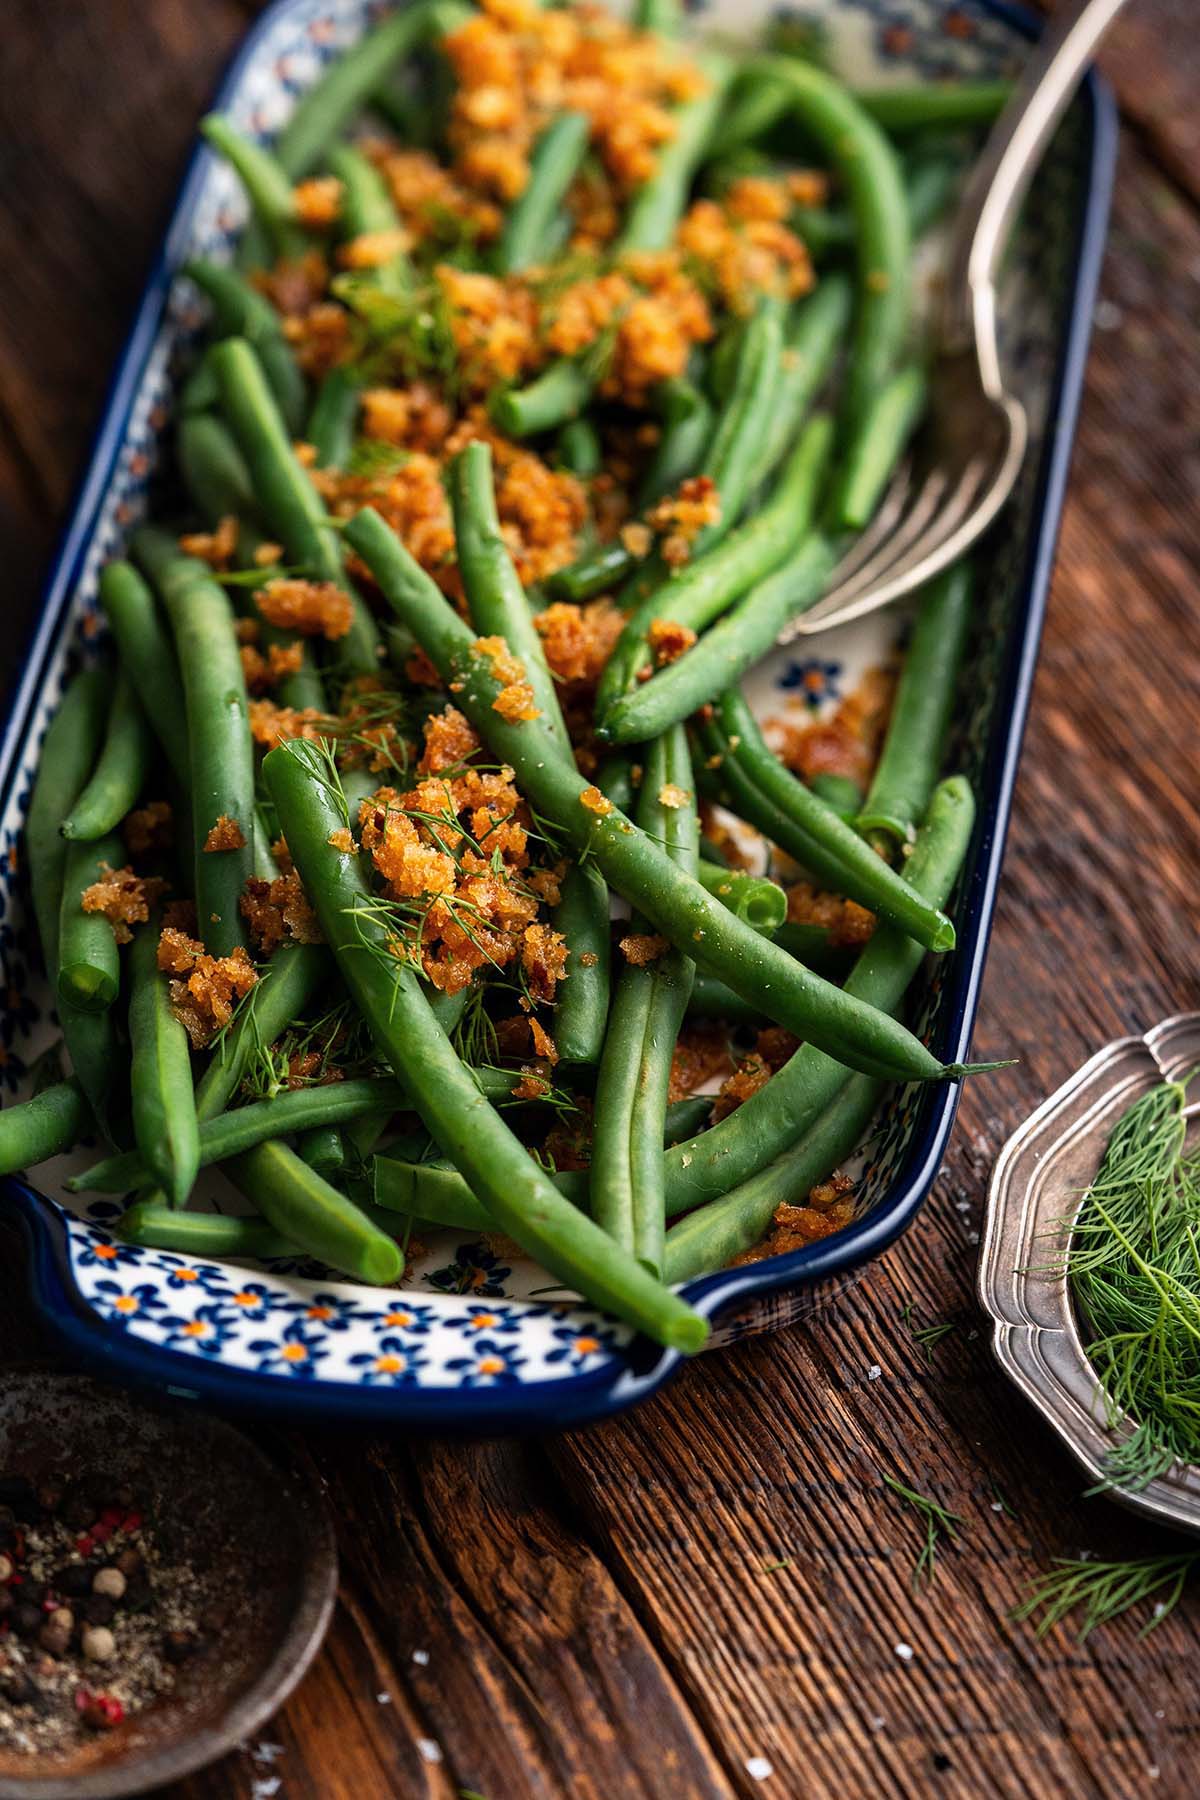
I had never heard of fasolka szparagowa until I stumbled on it while looking for ways to make green beans more interesting than just steaming them with salt. The concept is simple — blanched green beans tossed with breadcrumbs toasted in a generous amount of butter — but the result is so much better than it sounds. The crumbs get golden and nutty, they cling to every bean, and you end up with something that feels both rustic and a little elegant at the same time. It's the kind of side dish that quietly becomes the most talked-about thing on the table.
Ingredients
- 1 lb fresh green beans, ends trimmed
- Salt for blanching water
- 4 tablespoons unsalted butter
- ½ cup plain dry breadcrumbs
- 1 small garlic clove, minced (optional but recommended)
- Salt and black pepper to taste
- 1 tablespoon fresh parsley, chopped (optional, for serving)
Instructions
- Bring a large pot of salted water to a boil. Add the green beans and blanch for 4–5 minutes until just tender but still with a little snap. Drain and set aside.
- In a wide skillet over medium heat, melt the butter. Add the breadcrumbs and garlic if using, and stir constantly for 3–4 minutes until the crumbs are golden and smell nutty. Keep a close eye — they turn fast.
- Add the drained green beans to the skillet and toss well so the buttery crumbs coat every bean. Season generously with salt and black pepper.
- Transfer to a serving platter and scatter parsley over the top if using. Serve immediately while the crumbs are still crispy.
Tips
- Tip: Don't let the beans sit too long after tossing — the crumbs soften quickly, so serve right away for the best texture contrast.
- Tip: Frozen green beans work in a pinch — thaw and pat them very dry before adding to the skillet or the crumbs will steam instead of stay crispy.
- Tip: A squeeze of lemon juice right before serving brightens the whole dish and cuts through the richness of the butter beautifully.
33. Jiffy Cornbread Casserole
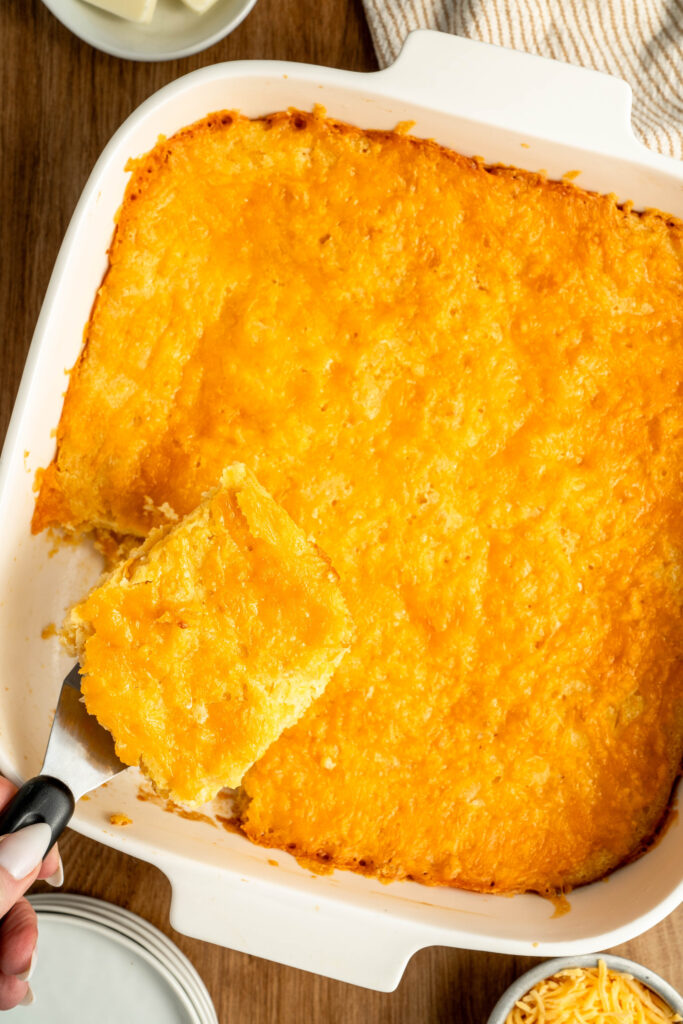
Five ingredients, one bowl, one dish — that's the entire pitch for this cornbread casserole and honestly it doesn't need a longer sales pitch than that. You mix a box of Jiffy corn muffin mix with canned corn, creamed corn, sour cream, and butter, pour it into a baking dish, and out comes something that's somewhere between cornbread and a corn pudding in the best possible way. It's soft in the middle, slightly golden on the edges, and just sweet enough to balance savory mains like pulled pork or roast chicken. Saad thought it was a dessert the first time I made it — he wasn't entirely wrong.
Ingredients
- 1 box (8.5 oz) Jiffy Corn Muffin Mix
- 1 can (15 oz) whole kernel corn, drained
- 1 can (14.75 oz) cream-style corn
- 1 cup sour cream
- ½ cup (1 stick) unsalted butter, melted
- 1 cup shredded cheddar cheese (optional, for a cheesy version)
Instructions
- Preheat your oven to 350°F and grease a 9x13-inch baking dish.
- In a large bowl, stir together the Jiffy mix, both cans of corn, sour cream, and melted butter until just combined. Fold in the cheddar if using. Don't overmix — a few lumps are fine.
- Pour the batter into the prepared dish and spread it evenly. Bake for 45–55 minutes until the center is set and the top is lightly golden. A toothpick inserted in the middle should come out clean.
- Let it rest for 10 minutes before cutting and serving — it firms up as it cools and slices much more cleanly.
Tips
- Tip: If you can't find Jiffy mix at your local store, any 8.5 oz box of corn muffin mix works — the Marie Callender brand is a solid substitute.
- Tip: For a less sweet version, reduce the creamed corn by half and add an extra handful of shredded cheddar to balance the flavor.
- Tip: This reheats really well — cover with foil and warm at 325°F for 15 minutes the next day and it's just as good as fresh.
34. Scalloped Corn Casserole
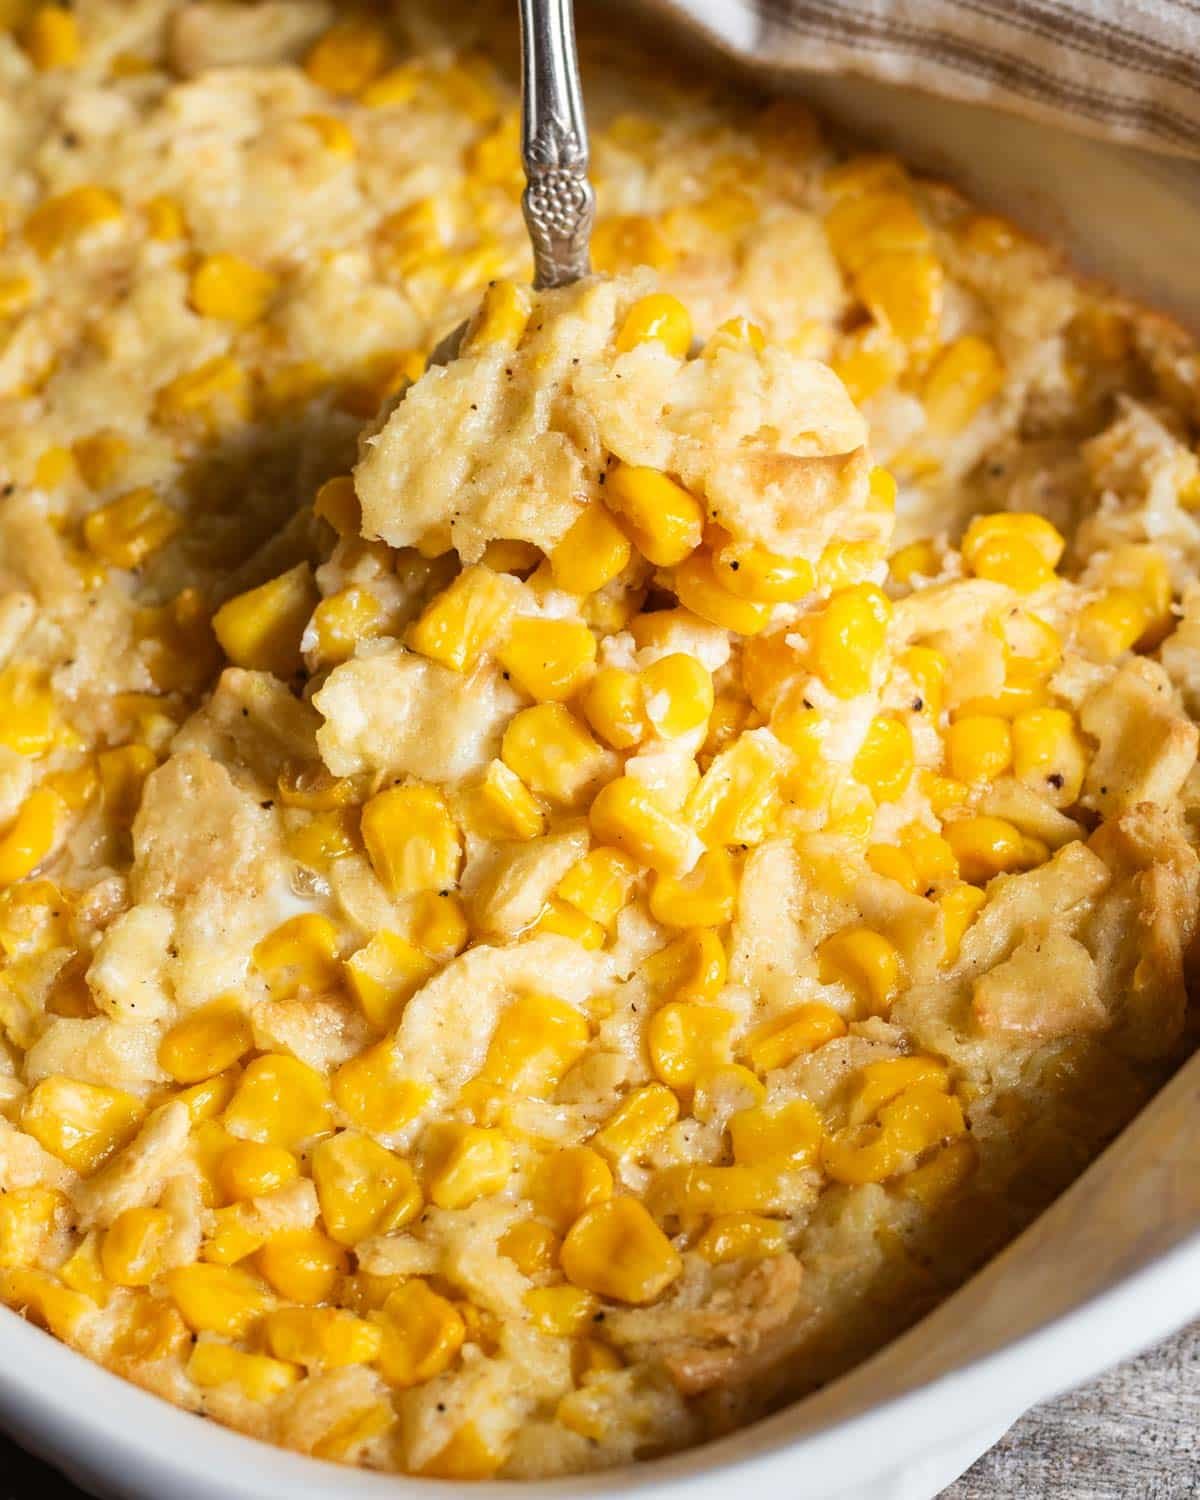
Think of scalloped corn as a creamy corn pudding that bakes up with golden edges and a custardy center — it sits somewhere between a soufflé and a gratin and manages to be more approachable than either of those things. Sweet corn kernels are folded into a simple egg and cream mixture with a little butter and crackers for texture, then baked until the top is set and just catching color. It pairs especially well with roast meats and holiday spreads where you want something that feels substantial but not heavy. I first tried a version of this at a church potluck years ago and spent the rest of the evening trying to figure out what was in it.
Ingredients
- 2 cans (15 oz each) whole kernel corn, drained
- 1 can (14.75 oz) cream-style corn
- 2 large eggs, beaten
- ½ cup heavy cream (or whole milk)
- 3 tablespoons unsalted butter, melted
- 1 tablespoon granulated sugar
- ½ teaspoon salt
- ¼ teaspoon black pepper
- 1 cup crushed butter crackers (like Ritz), divided
Instructions
- Preheat the oven to 350°F and grease a 2-quart baking dish.
- In a large bowl, combine both kinds of corn, beaten eggs, cream, melted butter, sugar, salt, and pepper. Stir in ¾ cup of the crushed crackers and mix until evenly combined.
- Pour the mixture into the prepared baking dish. Scatter the remaining ¼ cup of crushed crackers evenly over the top.
- Bake uncovered for 45–50 minutes until the center is just set and the top is lightly golden. It should jiggle slightly in the center but not look liquid. Cool for 5 minutes before serving.
Tips
- Tip: If using fresh or frozen corn instead of canned, add an extra pinch of salt since canned corn already carries sodium that seasons the dish.
- Tip: A sprinkle of shredded cheddar over the cracker topping before baking turns this into a cheesier, more indulgent version — worth trying at least once.
- Tip: Don't overbake — pulling it out when the center still has a very slight wobble gives you that creamy custard texture instead of something dry and rubbery.
35. Simple Roasted Acorn Squash with Tahini Sauce
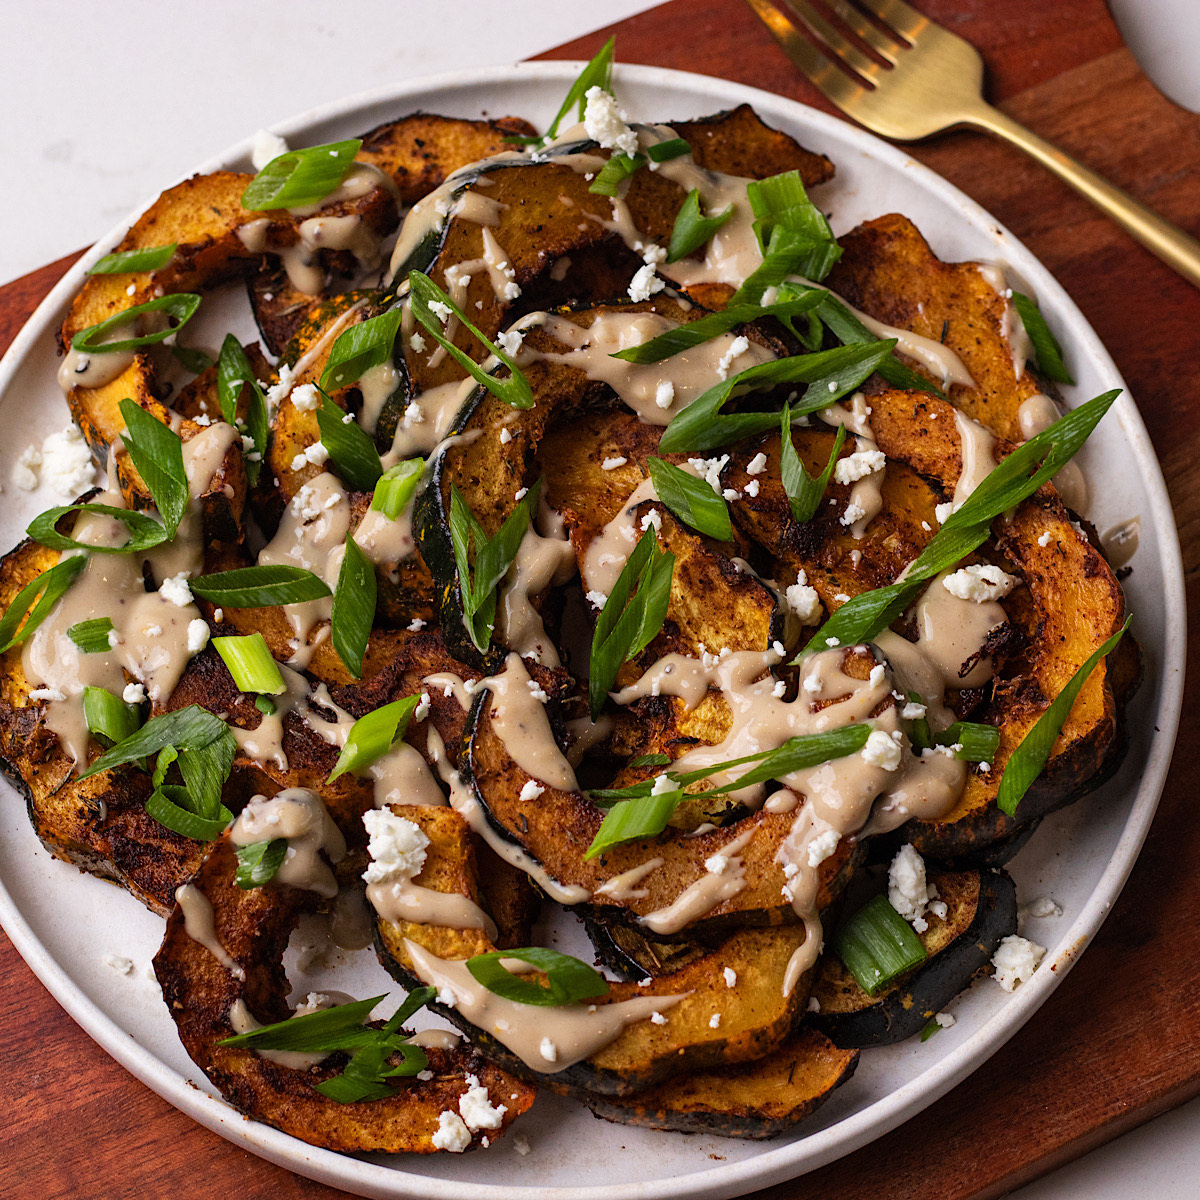
Acorn squash was completely new to me when I moved to cooking more American seasonal recipes — in Pakistan we'd use pumpkin or butternut but acorn squash wasn't something I grew up with. Once I tried roasting it with just olive oil and a little salt and pairing it with a drizzle of tahini sauce, it immediately made sense. The squash gets caramelized and slightly sweet in the oven, and the tahini — nutty, slightly bitter, a little garlicky — cuts right through that sweetness and makes the whole thing feel more complex than a 30-minute side dish has any right to. It's vegetarian, it's beautiful on a plate, and it works with everything from roast chicken to a holiday spread.
Ingredients
- 1 large acorn squash, halved and seeds removed, sliced into ½-inch wedges
- 2 tablespoons olive oil
- ½ teaspoon salt
- ¼ teaspoon black pepper
- ¼ teaspoon smoked paprika (optional)
- 3 tablespoons tahini
- 2 tablespoons fresh lemon juice
- 1 small garlic clove, grated
- 2–3 tablespoons warm water (to thin the sauce)
- Fresh parsley or pomegranate seeds for serving (optional)
Instructions
- Preheat your oven to 400°F. Arrange the acorn squash wedges on a sheet pan in a single layer. Drizzle with olive oil, sprinkle with salt, pepper, and smoked paprika if using, and toss to coat evenly.
- Roast for 25–30 minutes, flipping once halfway through, until the squash is tender and the cut sides are golden and caramelized.
- While the squash roasts, whisk together the tahini, lemon juice, and grated garlic. Add warm water one tablespoon at a time until the sauce is pourable and smooth. Taste and adjust salt as needed.
- Arrange the roasted squash on a serving platter, drizzle the tahini sauce generously over the top, and finish with fresh parsley or pomegranate seeds if you have them. Serve warm.
Tips
- Tip: Acorn squash skin is edible once roasted and soft — no need to peel it before or after cooking, which saves a lot of effort with a notoriously hard-to-cut vegetable.
- Tip: If your tahini is very thick straight from the jar, it will seize up when you first add the lemon juice — keep whisking and adding water gradually and it will smooth out.
- Tip: Butternut squash works as a direct substitute here if you can't find acorn squash — cut it into similar-sized pieces and roast the same way.
35. Garlic Parmesan Butternut Squash Fries

I started making these when Zainab went through a phase of refusing regular fries — she said they were "too greasy." I wasn't going to argue, so I tried butternut squash instead, and honestly? I think I prefer these now. The squash gets these slightly crispy edges in the oven while staying tender inside, and the garlic Parmesan coating makes them taste indulgent without actually being heavy. They're the kind of side dish that disappears before the main course even hits the table.
Ingredients
- 1 medium butternut squash (about 2 lbs), peeled and cut into fry-shaped sticks
- 2 tablespoons olive oil
- 3 cloves garlic, minced (or ½ teaspoon garlic powder if you're in a rush)
- ⅓ cup finely grated Parmesan cheese
- ½ teaspoon smoked paprika
- ½ teaspoon salt
- ¼ teaspoon black pepper
- 2 tablespoons fresh parsley, chopped (optional, for finishing)
Instructions
- Preheat your oven to 425°F and line a large sheet pan (or two smaller ones) with parchment paper. Giving the fries enough space is the difference between crispy and steamed — don't crowd them.
- In a large bowl, toss the butternut squash sticks with olive oil, minced garlic, smoked paprika, salt, and pepper until everything is evenly coated.
- Spread the fries in a single layer on the prepared sheet pan. Sprinkle half the Parmesan over the top before they go in the oven.
- Roast for 20 minutes, then flip the fries carefully and sprinkle the remaining Parmesan over them. Return to the oven for another 10–15 minutes until the edges are golden and slightly crisp.
- Remove from the oven, scatter fresh parsley on top if using, and serve immediately. These are best eaten hot — they soften as they cool.
Tips
- Tip: Cut your squash sticks as uniformly as possible — about ½ inch thick — so they roast evenly. Thicker ones will still be soft in the middle when the thinner ones are done.
- Tip: Pre-cut butternut squash from Costco or Walmart works perfectly here and saves a lot of peeling time. Just cut the chunks into fry shapes and you're good to go.
- Tip: For extra crispiness, pat the squash sticks dry with a paper towel before tossing in oil — any surface moisture is the enemy of a crispy edge in the oven.
Thirty-six side dishes later and I still don't think I've run out of ideas — that's just how it goes when sides are your secret weapon. The main dish gets all the credit, but honestly, in my house, it's the roasted potatoes or the garlicky green beans that people reach for seconds of. That's the whole point of this list: to give you options that actually pull their weight at the table, whether you're feeding four on a Tuesday or twelve on a holiday weekend.
I make a double batch of at least three of these every week because they disappear before I've even plated the main. My advice — pick one or two that feel new to you, make them once, and they'll become part of your regular rotation before you know it. The ones my family keeps requesting are the crispy smashed potatoes, the honey-glazed carrots, and whatever cucumber salad I throw together last minute. Saad has never once complained when there are three sides and a simple main. That's a win I'll take every time.
Whatever you're cooking this week, I hope something from this list makes your dinner feel a little more complete. Side dishes don't have to be an afterthought — they can be the whole reason people clean their plates. 🍽️ ✨
More Recipes You Might Like
- Easy Weeknight Dinner Recipes — simple mains that pair perfectly with any side on this list
- Best Potato Recipes — if the potato sides in this post caught your eye, this one goes deeper
- Easy Salad Recipes — fresh salads that work as sides for almost any meal
- Vegetable Side Dishes — more veggie-forward sides when you want to keep things light
- Holiday Dinner Recipes — full holiday menus where these sides will fit right in
Frequently Asked Questions
Which side dishes on this list can I make ahead of time?
Most of the grain-based sides, roasted vegetables, and slaws actually improve overnight as the flavors settle. I usually prep them the evening before, refrigerate them covered, and just reheat or pull them out before dinner. The only ones I'd make fresh are anything that's supposed to be crispy — smashed potatoes, fritters, that sort of thing — because they lose their texture once they sit.
How do I choose the right side dish to go with my main?
I think about contrast first — if the main is rich and heavy (a braised meat, a creamy pasta), I want a side that's fresh or acidic to balance it. If the main is simple and lean (grilled chicken, baked fish), then something hearty and comforting on the side makes sense. And honestly, when in doubt, roasted potatoes go with everything. That's just a fact.
How many side dishes should I serve for a dinner party?
For a regular family dinner I pick one, maybe two. For a dinner party or holiday meal I go with three — usually one starchy side, one vegetable, and one salad or something bright and fresh. That combination covers enough variety that every guest finds something they love, without you spending your whole day in the kitchen.
Are any of these side dishes vegetarian or vegan-friendly?
A good chunk of them are, yes. Most roasted vegetable sides, grain salads, and slaws are naturally vegetarian, and many are vegan with very small swaps — like using olive oil instead of butter, or skipping the cheese. I've noted substitutions in the recipes themselves where it matters. It's worth scanning the ingredients list before you start if you're cooking for someone with dietary restrictions.
What's the easiest side dish on this list for a beginner cook?
Roasted vegetables, hands down. Chop, toss with oil, salt, and pepper, roast at 400°F until they're golden at the edges — that's the whole method. Once you get the basic timing down for different vegetables (broccoli is faster, root vegetables take longer), you can apply it to almost anything in your fridge. It's the side dish I started with and still make at least twice a week.
Share This Post!
If this list helped you figure out what to make tonight — or saved you from serving plain rice again — pin it or share it with someone who'd find it useful. 📌🍽️
View More Recipes here Recipe Roundups





Comments
No Comments