
It's summer vacation for everyone, and the pool is the only place you want to be! If you are throwing a pool party, you need to look at our collection of easy pool party foods!
We made sure to include the easiest recipes on the internet! But, be warned, they are easy and delicious.
These recipes are quick to make and perfect for your next poolside party! We included everything from quick fruit snacks to vegan recipes so no one feels left out.
All these pool party snack ideas are pantry-friendly, so you don't have to spend a long time preparing and can enjoy yourself with your guests.
So sit back, relax, and enjoy the summer as your guests enjoy the pool party food!
Top Pool Party Food Ideas for a Splashing Good Time
31. Double Chocolate Madeleines

A famous French cake taken to the next level — light, fluffy cocoa sponge studded with chocolate chips, baked in the classic shell-shaped madeleine pan until crisp on the outside and perfectly moist and soft within. An elegant sweet snack best enjoyed with coffee or tea. A wonderful addition to our best chocolate desserts.
Ingredients:
- 2 eggs, at room temperature
- ½ cup sugar
- ½ cup all-purpose flour
- 3 tablespoons cocoa powder
- ½ teaspoon baking powder
- Pinch of salt
- ½ cup butter, melted and cooled, plus extra for greasing the pan
- 1 teaspoon vanilla extract
- ½ cup chocolate chips
- Extra cocoa powder, for dusting the pan
Instructions:
- Beat the eggs and sugar together with an electric mixer for 3–4 minutes until pale, thick, and ribbony — this aeration is what creates the light, fluffy madeleine texture. Beat in the vanilla.
- Sift together the flour, cocoa powder, baking powder, and salt. Gently fold into the egg mixture in two additions. Drizzle in the melted, cooled butter and fold until just combined. Fold in the chocolate chips. Refrigerate the batter for 1 hour — this rest is essential for the characteristic madeleine hump.
- Preheat oven to 375°F. Grease the madeleine pan generously with butter and dust with cocoa powder. Fill each shell cavity three-quarters full — do not overfill.
- Bake for 10–12 minutes until the edges are set, the top has a distinct hump, and a toothpick inserted in the centre comes out clean. Cool 2 minutes in the pan then turn out onto a wire rack. Best eaten warm within a few hours of baking.
30. Healthy Watermelon Fries
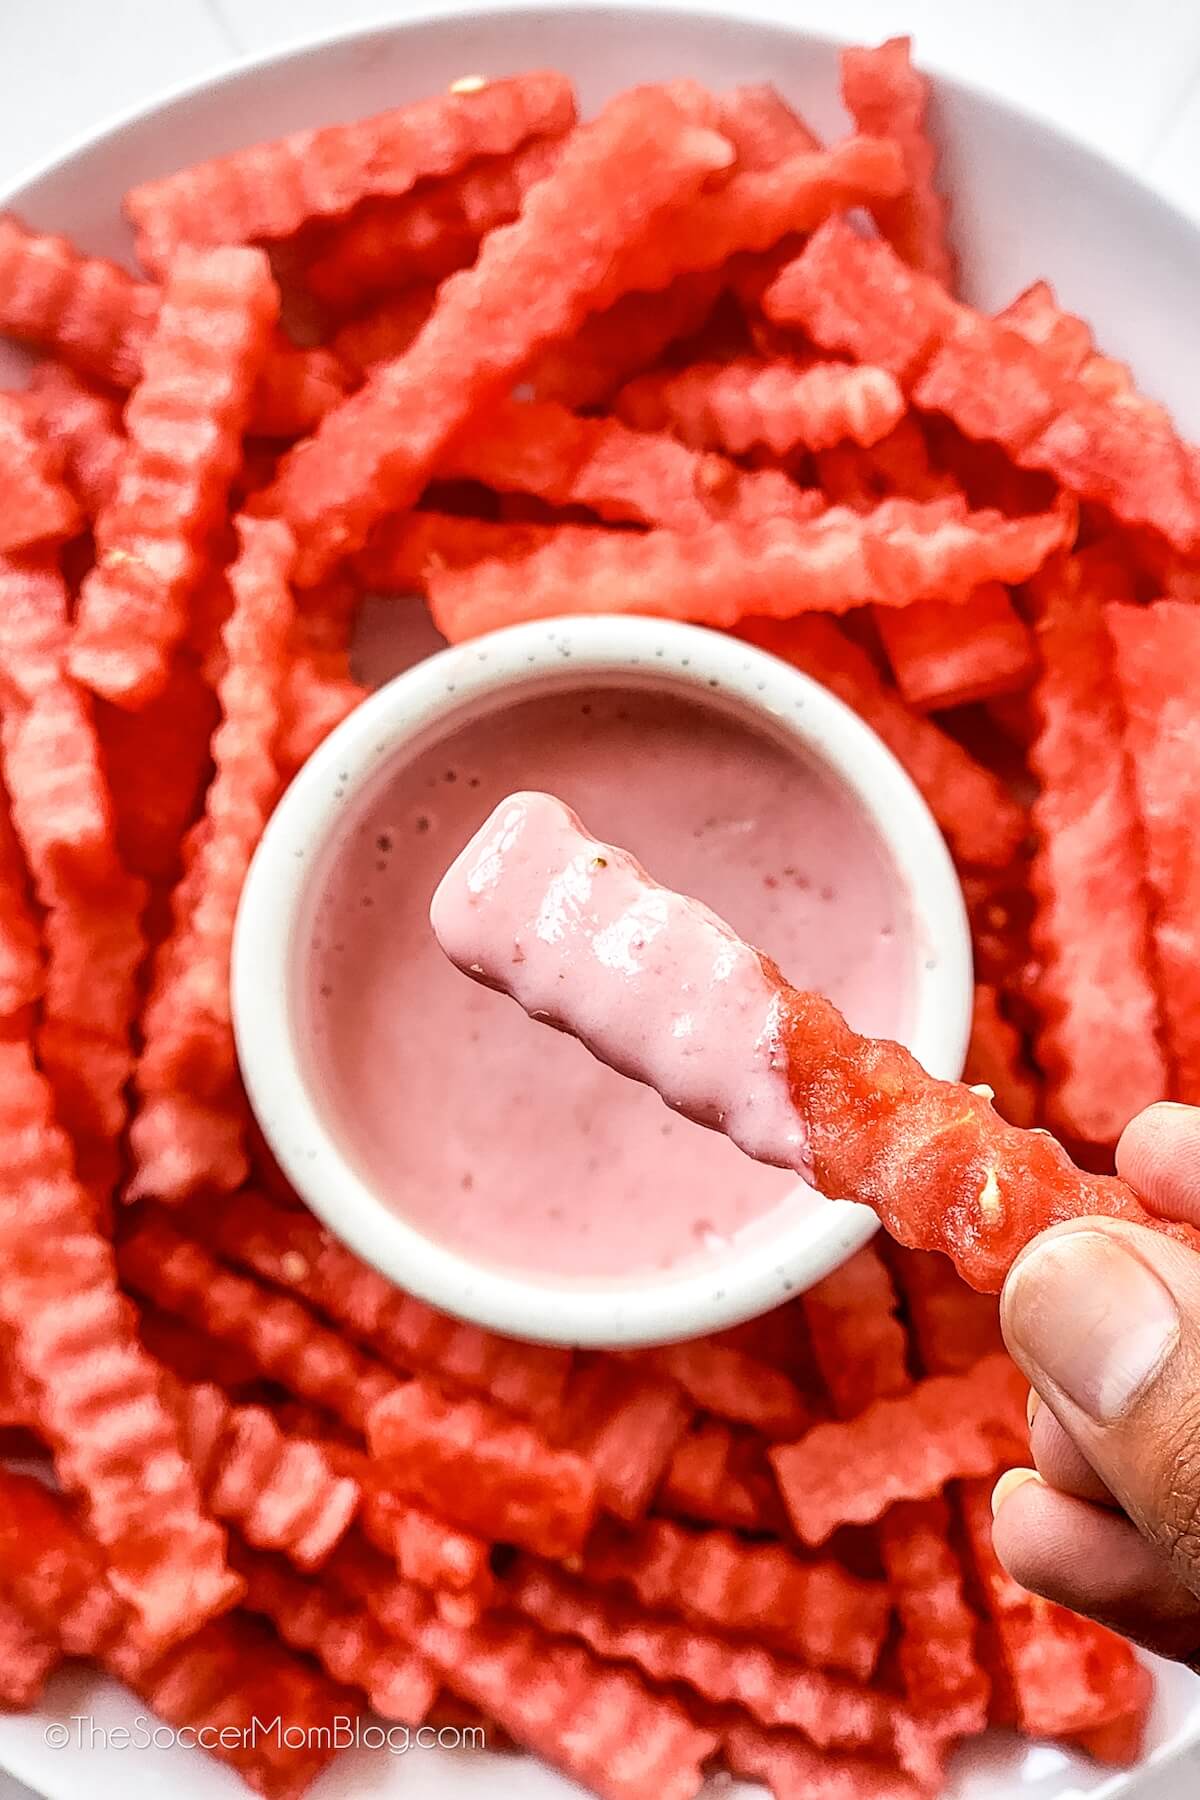
A fun, nutritious, and completely refreshing twist on fries — ripe watermelon cut into fry-shaped sticks with a hint of sea salt, cinnamon, or chilli powder for a sweet, juicy snack with a surprising flavour contrast. Perfect for summer occasions or a light, healthy treat. A wonderful addition to our best summer snacks.
Ingredients:
- ½ seedless watermelon, rind removed
- Flaky sea salt
- Optional seasonings: pinch of cinnamon, chilli powder, Tajin, or lime zest
- Fresh mint and lime wedges, for serving
- Optional dipping sauce: Greek yogurt with honey and lime zest
Instructions:
- Cut the watermelon into rectangular slices about 1 inch thick. Stand each slice upright and cut into fry-shaped sticks, roughly the size of a thick potato fry.
- Arrange the watermelon fries on a serving tray or board in a single layer.
- Season immediately before serving — sprinkle with flaky sea salt and your choice of cinnamon, chilli powder, Tajin, or lime zest. Serve immediately as the seasoning draws out moisture over time.
- Serve with fresh mint, lime wedges, and a dipping sauce of Greek yogurt blended with honey and lime zest if desired. Best enjoyed the same day they are cut.
29. Easy Watermelon Pudding Cups
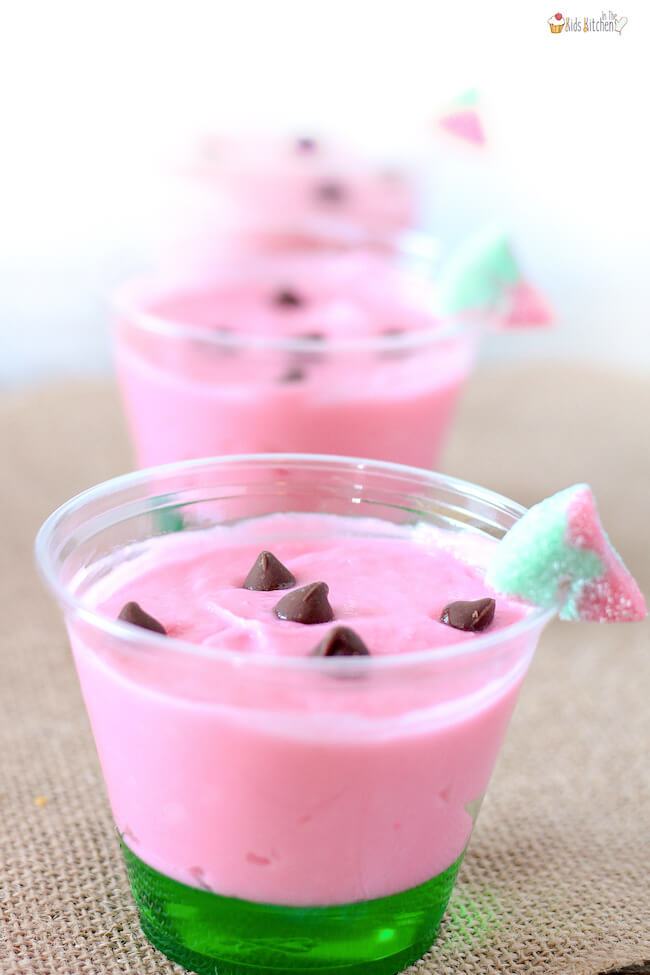
A light, colourful, and completely summer-appropriate dessert — vanilla pudding flavoured with watermelon and spooned into cups with fresh diced watermelon, topped with whipped cream and fresh mint. Fun to make and completely refreshing. A wonderful addition to our best summer desserts.
Ingredients:
- 1 (3.4 oz) box vanilla instant pudding mix
- 2 cups cold milk (or coconut milk for dairy-free)
- ½ cup watermelon, pureed and strained
- 1–2 drops red or pink food colouring (optional, for a vibrant colour)
- 1 cup fresh watermelon, diced small
- Whipped cream and fresh mint leaves, for topping
- Mini chocolate chips or dark chocolate shavings (optional, for "watermelon seeds" decoration)
Instructions:
- Whisk together the instant pudding mix, cold milk, and watermelon puree until smooth and beginning to thicken — about 2 minutes. Add food colouring if using for a vibrant pink colour.
- Fold in half the diced watermelon. Spoon the pudding mixture into individual serving cups, filling about two-thirds full.
- Refrigerate for at least 30 minutes until fully set and firm.
- Top each cup with the remaining diced fresh watermelon, a swirl of whipped cream, fresh mint leaves, and mini chocolate chips for a playful watermelon seed look. Serve chilled.
28. Homemade Gluten-Free Allergy-Free Uncrustables (Vegan)

A healthy, portable, and allergy-friendly alternative to the store-bought classic — gluten-free bread rounds filled with peanut butter, jam, or sunflower seed butter, crimped and sealed to keep every bit of filling inside. Better than the original and perfect for lunchboxes or the workplace. A wonderful addition to our best healthy snacks.
Ingredients:
- 8 slices gluten-free sandwich bread
- ⅓ cup peanut butter or sunflower seed butter (for nut-free version)
- ⅓ cup jam or jelly of choice (strawberry, grape, or raspberry work best)
- A round cookie cutter or large glass (about 3 inches diameter)
- A fork, for crimping the edges
Instructions:
- Lay out the bread slices. Use the cookie cutter or glass to cut circles from each slice — you should get one circle per slice of bread.
- Spread peanut butter on one circle and jam on the matching circle, spreading to within ¼ inch of the edge.
- Press the two circles together firmly, peanut butter side to jam side. Press the edges together with your fingers first to seal.
- Use a fork to crimp all the way around the edge — press firmly so the filling cannot escape. Wrap individually in plastic or beeswax wrap for lunchboxes. These can be made ahead and stored in the refrigerator for 3 days or frozen for 1 month.
27. Chocolate Covered Pineapple

Juicy pineapple pieces enrobed in a thick, glossy layer of melted chocolate — the tropical sweetness of the fruit and the richness of the chocolate create one of the best flavour combinations imaginable. Perfect for finishing a meal or adorning a fancy event table. A wonderful addition to our best chocolate treats.
Ingredients:
- 1 fresh pineapple, peeled and cut into 1-inch chunks or rings
- 2 cups good-quality dark or milk chocolate, chopped
- 1 tablespoon coconut oil (for a glossy, snappable chocolate coating)
- Optional toppings: rainbow sprinkles, toasted coconut flakes, crushed pistachios, or sea salt flakes
- Parchment paper-lined baking sheet
Instructions:
- Pat the pineapple pieces completely dry with paper towels — excess moisture causes the chocolate to seize. If time allows, leave the cut pineapple on a rack for 30 minutes to air-dry further.
- Melt the chocolate and coconut oil together in a heatproof bowl set over a saucepan of barely simmering water, stirring until completely smooth and glossy. Alternatively microwave in 30-second bursts, stirring between each, until melted. Let cool slightly.
- Dip each pineapple piece into the chocolate, letting excess drip off. Place on the parchment-lined baking sheet. Immediately scatter any toppings over before the chocolate sets.
- Refrigerate for 20–30 minutes until the chocolate is completely set. Serve at room temperature for the best flavour and texture.
26. Buffalo Chicken Sliders
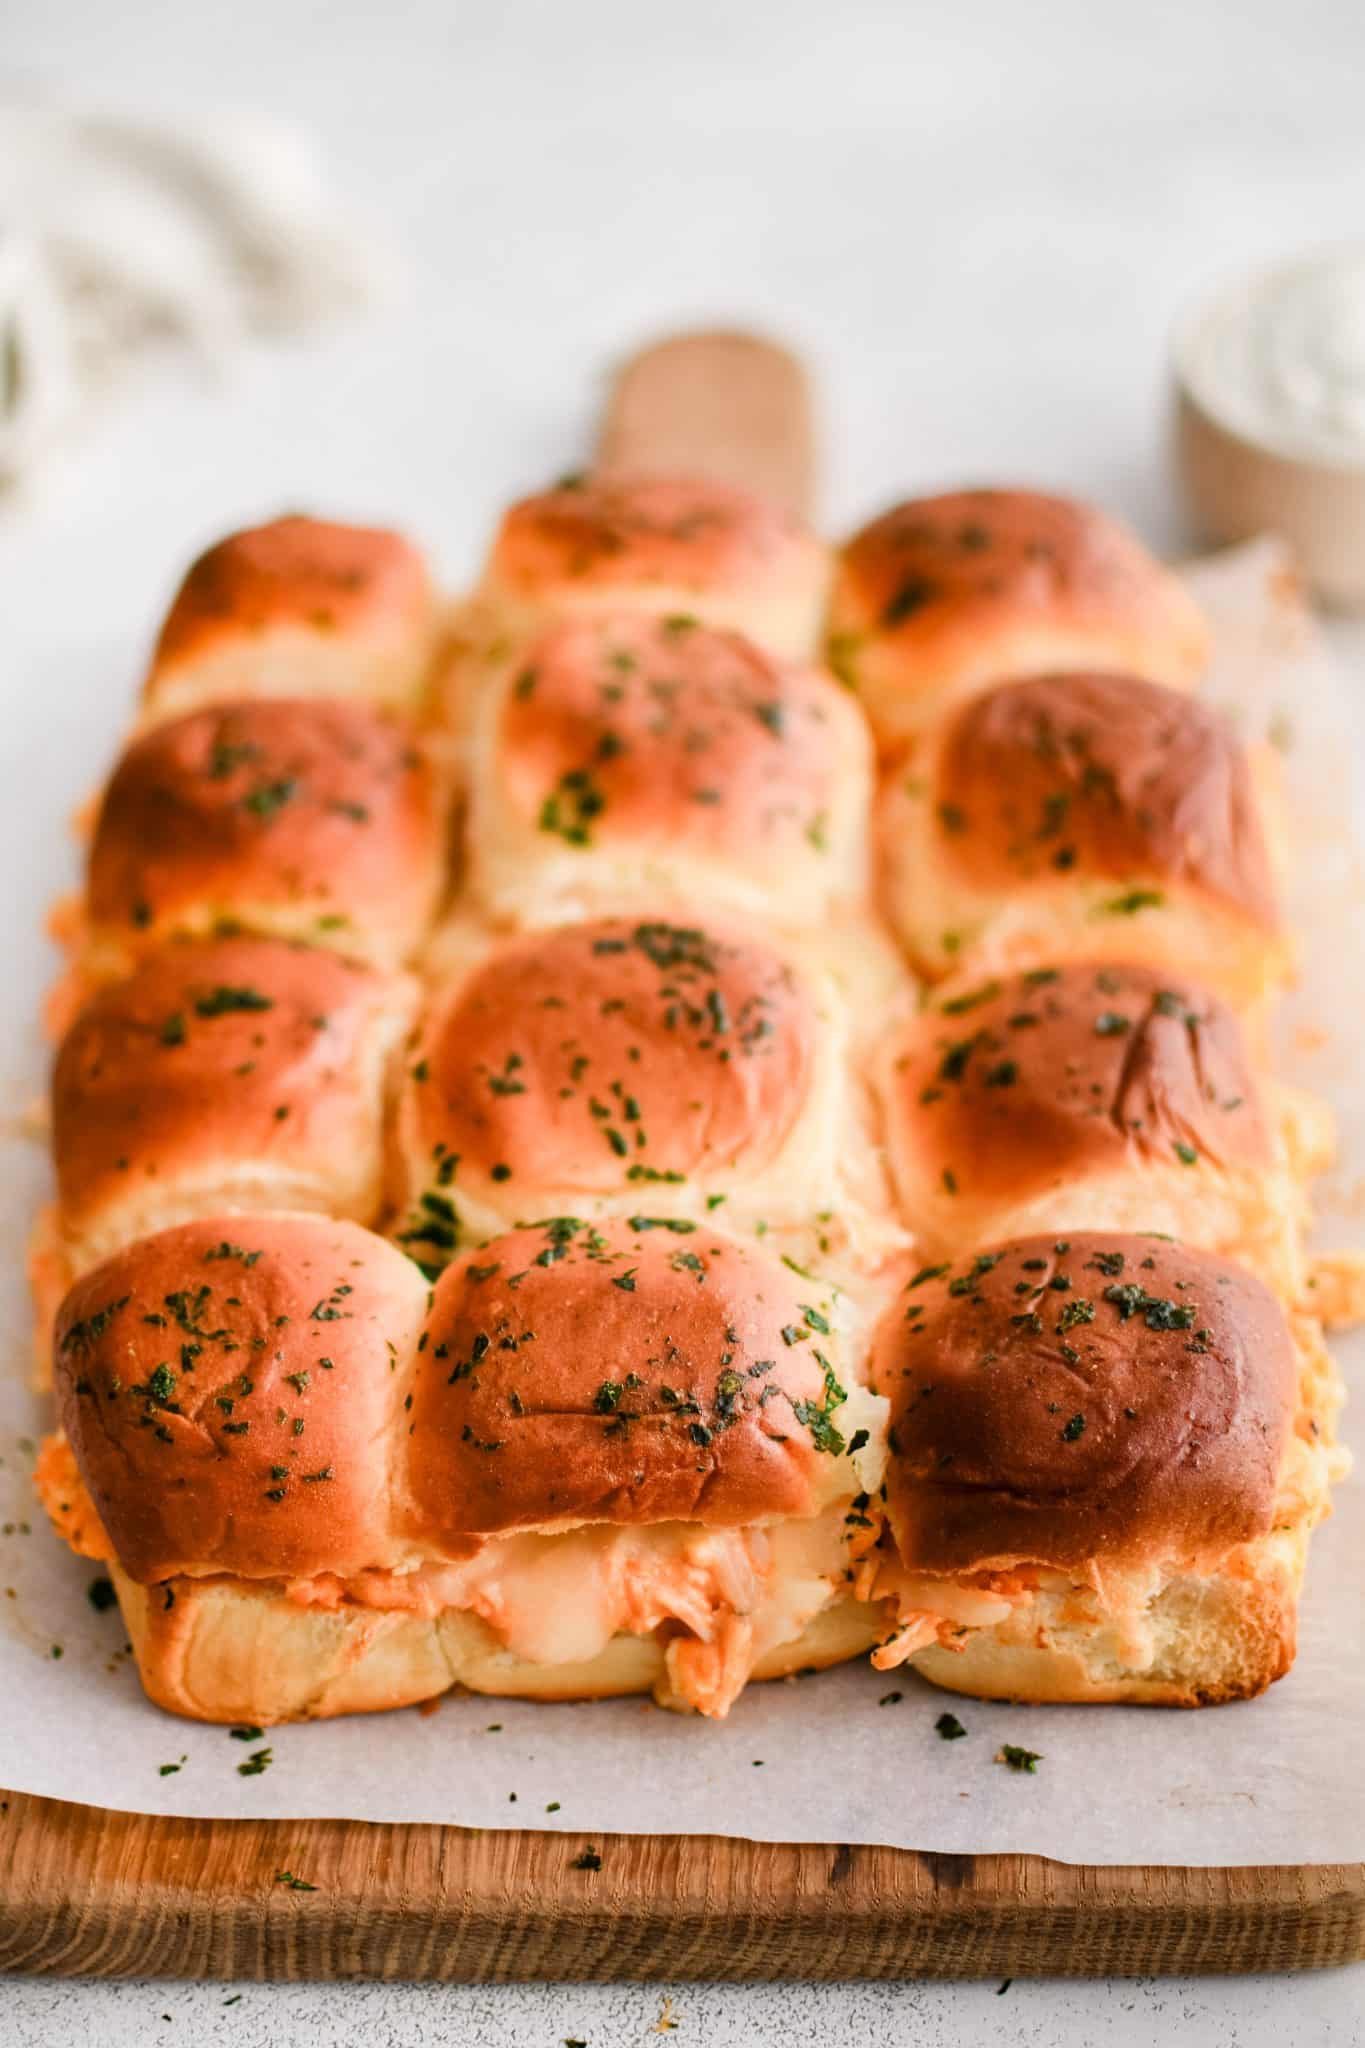
Spicy, filling, and completely irresistible — pulled or shredded chicken smothered in bold buffalo sauce and tossed with ranch or blue cheese dressing, piled onto toasted slider buns for a perfect party, game day, or casual dinner appetizer. A wonderful addition to our best chicken sandwich recipes.
Ingredients:
- 2 cups cooked chicken, shredded (rotisserie is ideal)
- ⅓ cup buffalo sauce
- ¼ cup ranch or blue cheese dressing, plus extra for serving
- 12 small slider buns
- 6 slices provolone or cheddar cheese
- 2 tablespoons butter, melted
- ½ teaspoon garlic powder
- Celery sticks and extra buffalo sauce, for serving
Instructions:
- Preheat oven to 350°F. Combine the shredded chicken with buffalo sauce and ranch dressing. Toss until the chicken is completely coated and the flavours are well combined. Taste and add more buffalo sauce to increase heat if desired.
- Split the slider buns and place the bottoms in a greased baking dish. Divide the buffalo chicken mixture evenly among the buns. Place a slice of cheese over each.
- Place the bun tops on. Mix the melted butter with garlic powder and brush generously over all the tops.
- Cover with foil and bake 12 minutes. Uncover and bake 8 more minutes until the buns are toasted and the cheese is melted. Serve with extra ranch or blue cheese dressing and celery sticks.
25. Fresh Watermelon Bites with Whipped Feta

A superb and beautifully elegant summer cheese appetizer — ripe watermelon cubes served with a silky, tangy whipped feta made from feta cheese and Greek yogurt. The sweet-salty combination is completely extraordinary. Easy to assemble and perfect for summer parties. A wonderful addition to our best summer appetizers.
Ingredients:
- 4 cups seedless watermelon, cut into 1.5-inch cubes
- Whipped feta: 6 oz feta cheese + 3 tablespoons Greek yogurt or cream cheese + 1 tablespoon olive oil + 1 tablespoon lemon juice + 1 clove garlic (optional) + pinch of pepper — blend until completely smooth and velvety
- Fresh mint leaves
- Drizzle of good honey
- Flaky sea salt
- Optional: toasted pine nuts or crushed pistachios
Instructions:
- Make the whipped feta: blend the feta, Greek yogurt, olive oil, lemon juice, and garlic in a food processor until completely smooth, creamy, and velvety — about 2 minutes of blending. Season with pepper. Refrigerate until serving.
- Pat the watermelon cubes dry with paper towels. Arrange on a serving platter.
- Either spoon a small dollop of whipped feta onto each watermelon cube, or spread the whipped feta on a platter and arrange the watermelon cubes on top.
- Drizzle honey over everything. Scatter fresh mint leaves, flaky sea salt, and toasted pine nuts or pistachios if using. Serve immediately.
24. Chipotle Queso Blanco
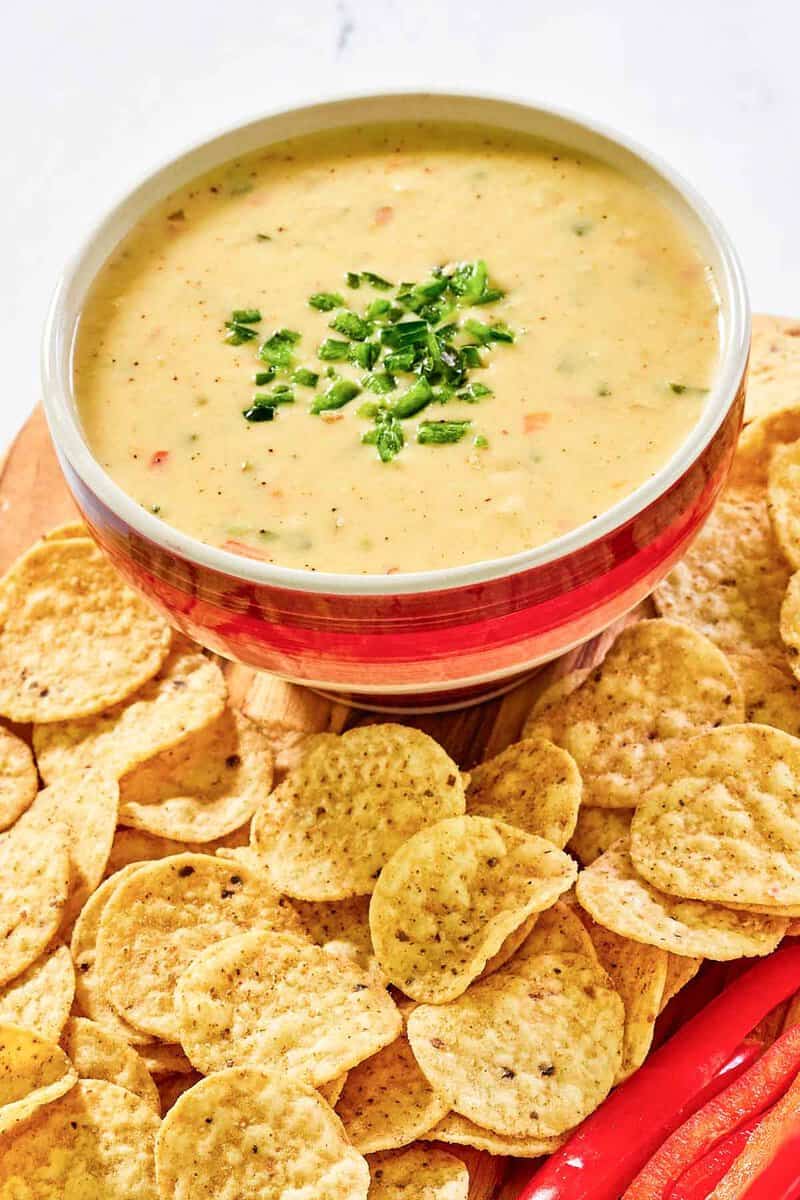
A creamy, dreamy, smoky cheese dip that elevates every chip it touches — white cheeses melted with chipotle pepper, sautéed onions, garlic, and cumin into a silky, flavourful queso with the unmistakable smokiness of Chipotle's famous version. A wonderful addition to our best Mexican recipes.
Ingredients:
- 8 oz Monterey Jack cheese, freshly shredded
- 4 oz white cheddar cheese, freshly shredded
- ½ cup whole milk or heavy cream
- 1 chipotle pepper in adobo sauce, very finely minced, plus 1 teaspoon adobo sauce
- ½ white onion, very finely diced
- 2 cloves garlic, minced
- ½ teaspoon cumin
- 1 tablespoon butter
- Salt, to taste
- Tortilla chips, for serving
Instructions:
- Melt the butter in a small saucepan over medium heat. Sauté the onion for 4 minutes until softened and translucent. Add the garlic and cumin and cook 1 minute.
- Reduce heat to low. Add the milk or cream and bring to a gentle simmer — do not boil.
- Add the shredded cheeses a handful at a time, stirring constantly between each addition until completely melted before adding the next. Never rush this step — gentle heat and slow addition prevents the cheese from breaking.
- Stir in the minced chipotle pepper and adobo sauce. Season with salt. Serve immediately in a warm bowl with tortilla chips. If the dip thickens on standing, stir in a splash of warm milk to loosen.
23. Spicy Seasoned Pretzels
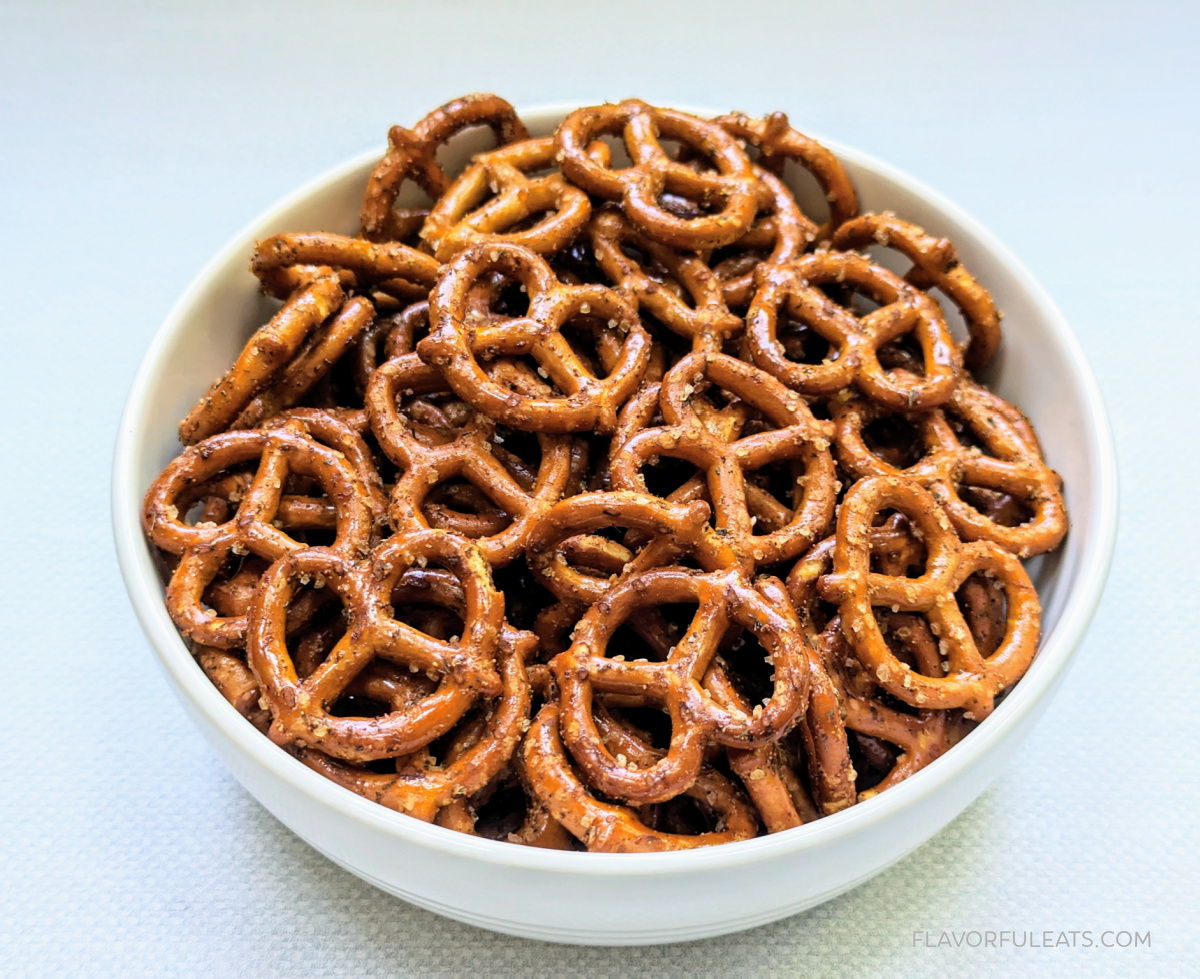
A bold and completely addictive snack — plain pretzels coated in a spiced mixture of paprika, cayenne, garlic, and onion, then baked until the seasoning is deeply toasted and flavourful. A wonderful upgrade for anyone craving a complete change from plain pretzels. A wonderful addition to our best party snacks.
Ingredients:
- 1 (10 oz) bag mini pretzels or pretzel twists
- 3 tablespoons olive oil or melted butter
- 1 teaspoon smoked paprika
- ½ teaspoon cayenne pepper (adjust to preferred heat)
- 1 teaspoon garlic powder
- 1 teaspoon onion powder
- ½ teaspoon dried oregano
- ½ teaspoon salt
- ½ teaspoon sugar (balances the heat)
Instructions:
- Preheat oven to 275°F. Combine all the spices and salt in a small bowl. Spread the pretzels in a single even layer on a large rimmed baking sheet.
- Drizzle the olive oil or melted butter over the pretzels. Toss thoroughly so every pretzel is evenly coated in fat.
- Sprinkle the spice mixture evenly over the oiled pretzels. Toss again until every pretzel is generously and evenly coated in spices.
- Bake for 25–30 minutes, stirring once halfway, until the spices are toasted and deeply fragrant and the pretzels are dry and crispy. Cool completely before eating — they crisp up further as they cool. Store in an airtight container for up to 1 week.
22. Vegan Peaches and Cream
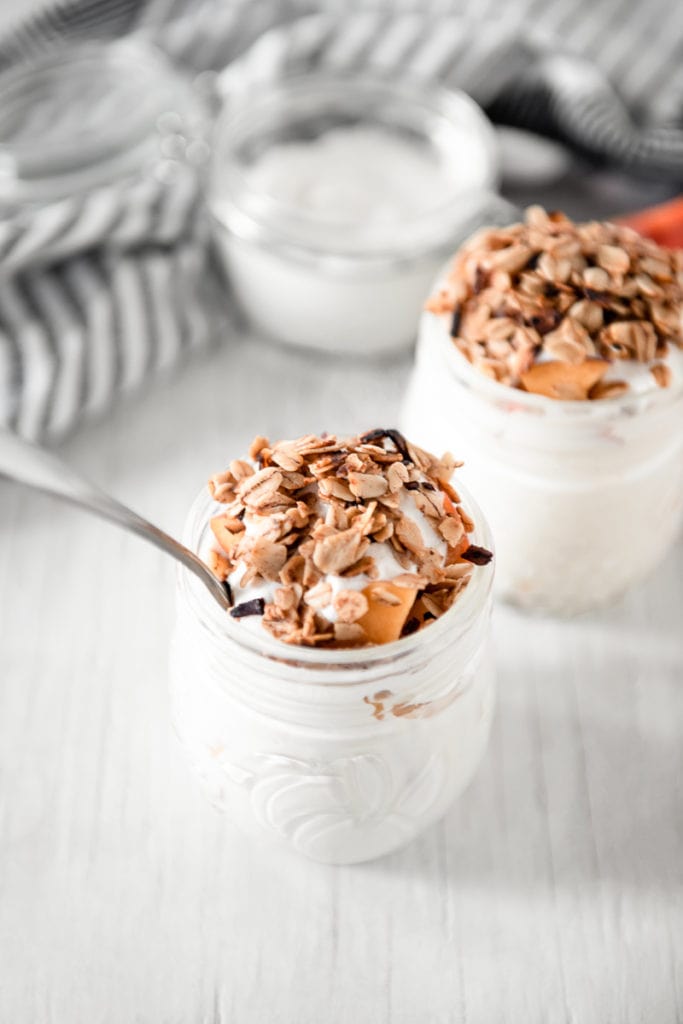
A beautiful dairy-free summer dessert focusing on the natural sweetness of ripe peaches — peaches cooked or pureed to bring out their gorgeous natural sweetness, served with a rich, silky coconut cream that creates a completely dairy-free peaches and cream experience. A wonderful addition to our best summer desserts.
Ingredients:
- 4 ripe peaches, halved and stones removed
- 1 tablespoon coconut sugar or maple syrup
- 1 teaspoon vanilla extract
- Pinch of cinnamon
- Vegan cream: 1 (13.5 oz) can full-fat coconut milk, refrigerated overnight + 1 tablespoon maple syrup + ½ teaspoon vanilla — scoop out the solid cream, whip until fluffy. Alternatively use cashew yogurt or thick non-dairy yogurt.
- Fresh mint and extra maple syrup, for serving
Instructions:
- Make the coconut cream: open the refrigerated coconut milk and scoop out the solid cream that has risen to the top. Beat with a mixer for 2–3 minutes until fluffy. Add maple syrup and vanilla. Refrigerate until serving.
- Slice the peaches. For a more intense flavour, cook the peach halves cut-side down in a dry skillet over medium-high heat for 3–4 minutes until caramelised and golden. Or use ripe raw peaches for a fresher taste.
- Toss the peaches with coconut sugar, vanilla, and cinnamon.
- Spoon the peaches into serving bowls or glasses. Top generously with the whipped coconut cream. Garnish with fresh mint and a drizzle of maple syrup. Serve immediately.
21. Everything Bagel Pigs in a Blanket

A simple yet completely irresistible twist on the classic — mini hot dogs wrapped in crescent roll dough and rolled in everything bagel seasoning with sesame seeds, poppy seeds, garlic, and onion flakes, baked until deeply golden and crispy. A wonderful addition to our best party snacks.
Ingredients:
- 1 (8 oz) can crescent roll dough
- 24 mini cocktail hot dogs or lil smokies
- 2 tablespoons everything bagel seasoning
- 1 egg, beaten (for egg wash)
- Mustard and ketchup, for dipping
Instructions:
- Preheat oven to 375°F. Unroll the crescent dough and separate into triangles. Cut each triangle into 3 smaller triangles — you need one small triangle per hot dog.
- Starting at the wide end, wrap each mini hot dog tightly in a small triangle of dough, rolling towards the pointed end. The dough should encase most of the hot dog with the ends peeking out.
- Place on a parchment-lined baking sheet. Brush the tops with beaten egg wash — this is what helps the everything bagel seasoning adhere. Sprinkle generously with everything bagel seasoning.
- Bake for 12–15 minutes until the dough is deeply golden brown and crispy. Serve immediately with mustard and ketchup for dipping.
20. Grilled Jalapeño Poppers
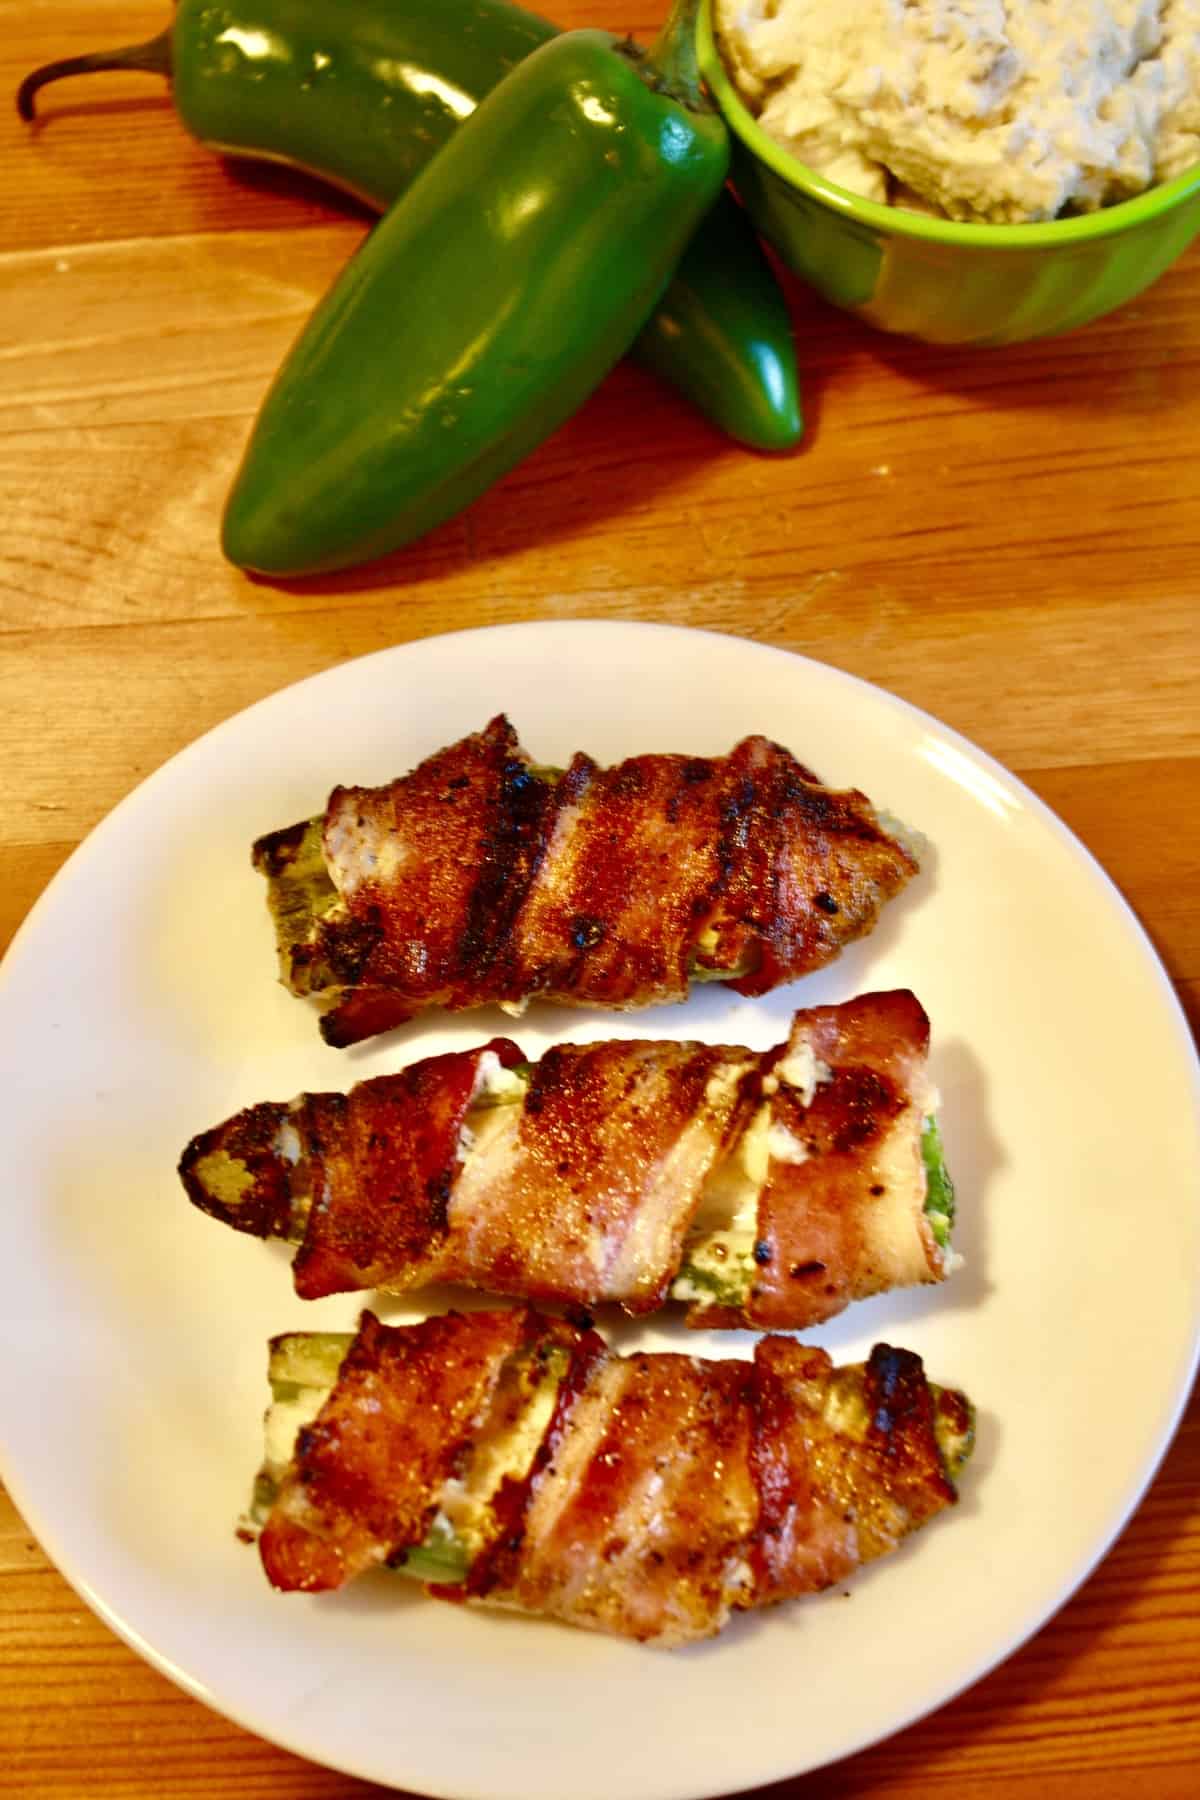
A classic BBQ and party appetizer with a smoky, spicy, cheesy kick — fresh jalapeños halved and filled with a creamy cheese filling, wrapped in bacon, and grilled until the pepper is tender, the cheese is melting, and the bacon is crispy. A wonderful addition to our best grilling recipes.
Ingredients:
- 12 large fresh jalapeños, halved lengthwise and seeds removed
- 8 oz cream cheese, softened
- 1 cup sharp cheddar cheese, shredded
- 1 teaspoon garlic powder
- ½ teaspoon smoked paprika
- Salt and pepper, to taste
- 12 strips thin-cut bacon, halved
- Toothpicks, for securing
- Ranch or sour cream, for serving
Instructions:
- Mix the softened cream cheese, shredded cheddar, garlic powder, smoked paprika, salt, and pepper until smooth and well combined. Taste and adjust seasoning.
- Fill each jalapeño half generously with the cheese mixture, mounding it slightly. Wrap each filled jalapeño with a half strip of bacon, securing with a toothpick if needed.
- Grill over medium heat for 15–20 minutes, turning occasionally, until the bacon is crispy, the pepper is tender, and the cheese is melted and slightly bubbly. For the crispiest bacon, finish over higher heat for the last 2 minutes.
- Remove toothpicks before serving. Serve immediately with ranch or sour cream for dipping.
19. Pretzel Dogs

A wonderfully satisfying combination — hot dogs wrapped in soft, salty pretzel dough and given the traditional baking soda bath that creates the distinctive chewy, golden pretzel exterior. Great for snacks, pre-game appetisers, or family dinner. A wonderful addition to our best party snack recipes.
Ingredients:
- 8 full-size hot dogs
- Pretzel dough: 1½ cups warm water + 2¼ teaspoons active dry yeast + 1 tablespoon honey + 3½ cups all-purpose flour + 1 teaspoon salt + 2 tablespoons butter (melted) — combine and knead 8 minutes until smooth
- Baking soda bath: 8 cups water + ½ cup baking soda — bring to a boil
- 1 egg, beaten (for egg wash)
- Coarse pretzel salt, for topping
- Mustard, for serving
Instructions:
- Make and knead the pretzel dough. Cover and let rise for 1 hour until doubled. Divide into 8 equal portions. Roll each portion into a long rope about 18 inches long.
- Starting at one end of the hot dog, tightly spiral the dough rope around the entire hot dog, pressing the ends to secure. Let the wrapped dogs rest 10 minutes while you prepare the baking soda bath. Preheat oven to 425°F.
- Bring the water and baking soda to a rolling boil. Carefully lower each pretzel dog into the bath for 30 seconds. Remove with a slotted spoon and place on a parchment-lined baking sheet.
- Brush with beaten egg wash and sprinkle generously with coarse pretzel salt. Bake for 18–22 minutes until deeply golden brown. Serve immediately with mustard.
18. Perfectly Crispy Air Fryer Potato Chips
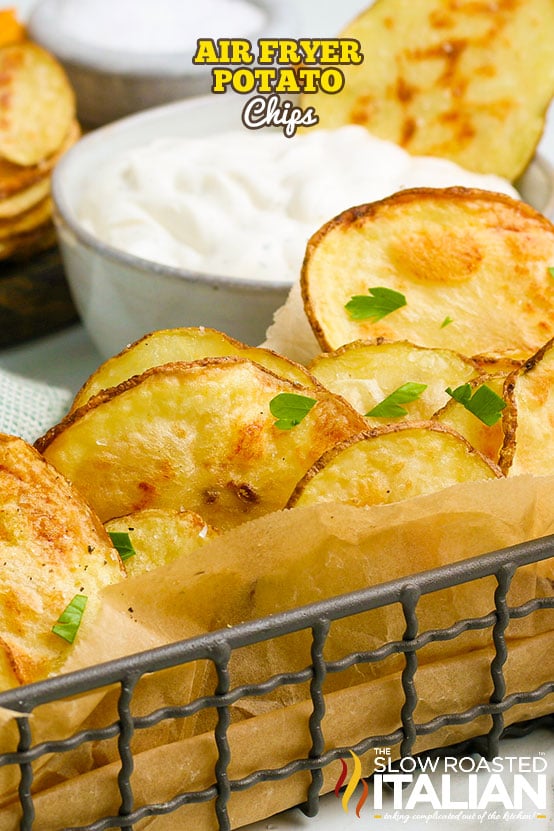
A healthier version of fried chips with all the crispy satisfaction — thin potato or sweet potato slices seasoned to taste and air-fried to a perfectly golden, crunchy result with a fraction of the oil. Great as a snack, side dish, or party food. A wonderful addition to our best healthy snack recipes.
Ingredients:
- 2 large russet potatoes or sweet potatoes, scrubbed clean
- 1 tablespoon olive oil
- 1 teaspoon smoked paprika
- ½ teaspoon garlic powder
- ½ teaspoon onion powder
- Salt and pepper, to taste
- Optional: herbs, chilli powder, or parmesan for flavour variations
Instructions:
- Slice the potatoes as thin as possible — a mandoline set to 1–2mm is ideal for even, paper-thin slices. Thicker slices will not crisp properly. Soak the sliced potatoes in cold water for 20 minutes to remove excess starch. Drain and pat completely dry with paper towels — completely dry potato = crispy chip.
- Toss the dried potato slices with olive oil, smoked paprika, garlic powder, onion powder, salt, and pepper until every slice is evenly coated.
- Preheat air fryer to 350°F. Add potato slices in a single layer — do not overlap. Work in batches. Air fry for 15–20 minutes, shaking the basket every 5 minutes, until golden and crispy.
- Spread on a wire rack immediately after cooking — they continue to crisp as they cool. Season with additional salt if needed. Best eaten within a few hours of making.
17. Summertime Gluten-Free Party Mix
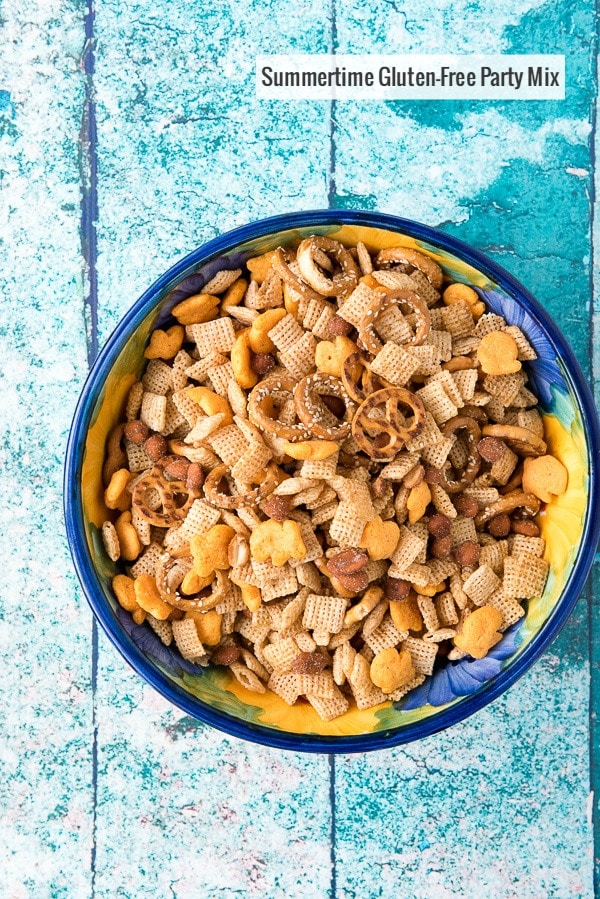
A vibrant, crunchy, and completely irresistible gluten-free party mix — gluten-free pretzels, crispy rice cereal, nuts, and popcorn seasoned with herbs, spices, and a touch of honey, baked until toasted and deeply flavourful. Perfect for picnics, barbecues, and any celebratory event. A wonderful addition to our best gluten-free snacks.
Ingredients:
- 2 cups gluten-free mini pretzels
- 2 cups crispy rice cereal (gluten-free certified)
- 1 cup mixed nuts (pecans, almonds, cashews)
- 2 cups plain popcorn
- 3 tablespoons butter, melted
- 1 tablespoon honey
- 1 teaspoon Worcestershire sauce (gluten-free)
- 1 teaspoon garlic powder
- 1 teaspoon smoked paprika
- ½ teaspoon dried thyme
- ½ teaspoon onion powder
- Salt, to taste
Instructions:
- Preheat oven to 250°F. Combine the pretzels, rice cereal, mixed nuts, and popcorn in a large bowl.
- Whisk together the melted butter, honey, Worcestershire sauce, garlic powder, smoked paprika, thyme, onion powder, and salt until completely combined.
- Pour the seasoned butter mixture over the party mix and toss thoroughly until every piece is evenly coated.
- Spread in a single even layer on a large lined baking sheet. Bake for 1 hour, stirring every 20 minutes, until the mix is toasted, golden, and fragrant. Cool completely before eating — it crisps up fully as it cools. Store in an airtight container for up to 2 weeks.
16. Watermelon Popsicles
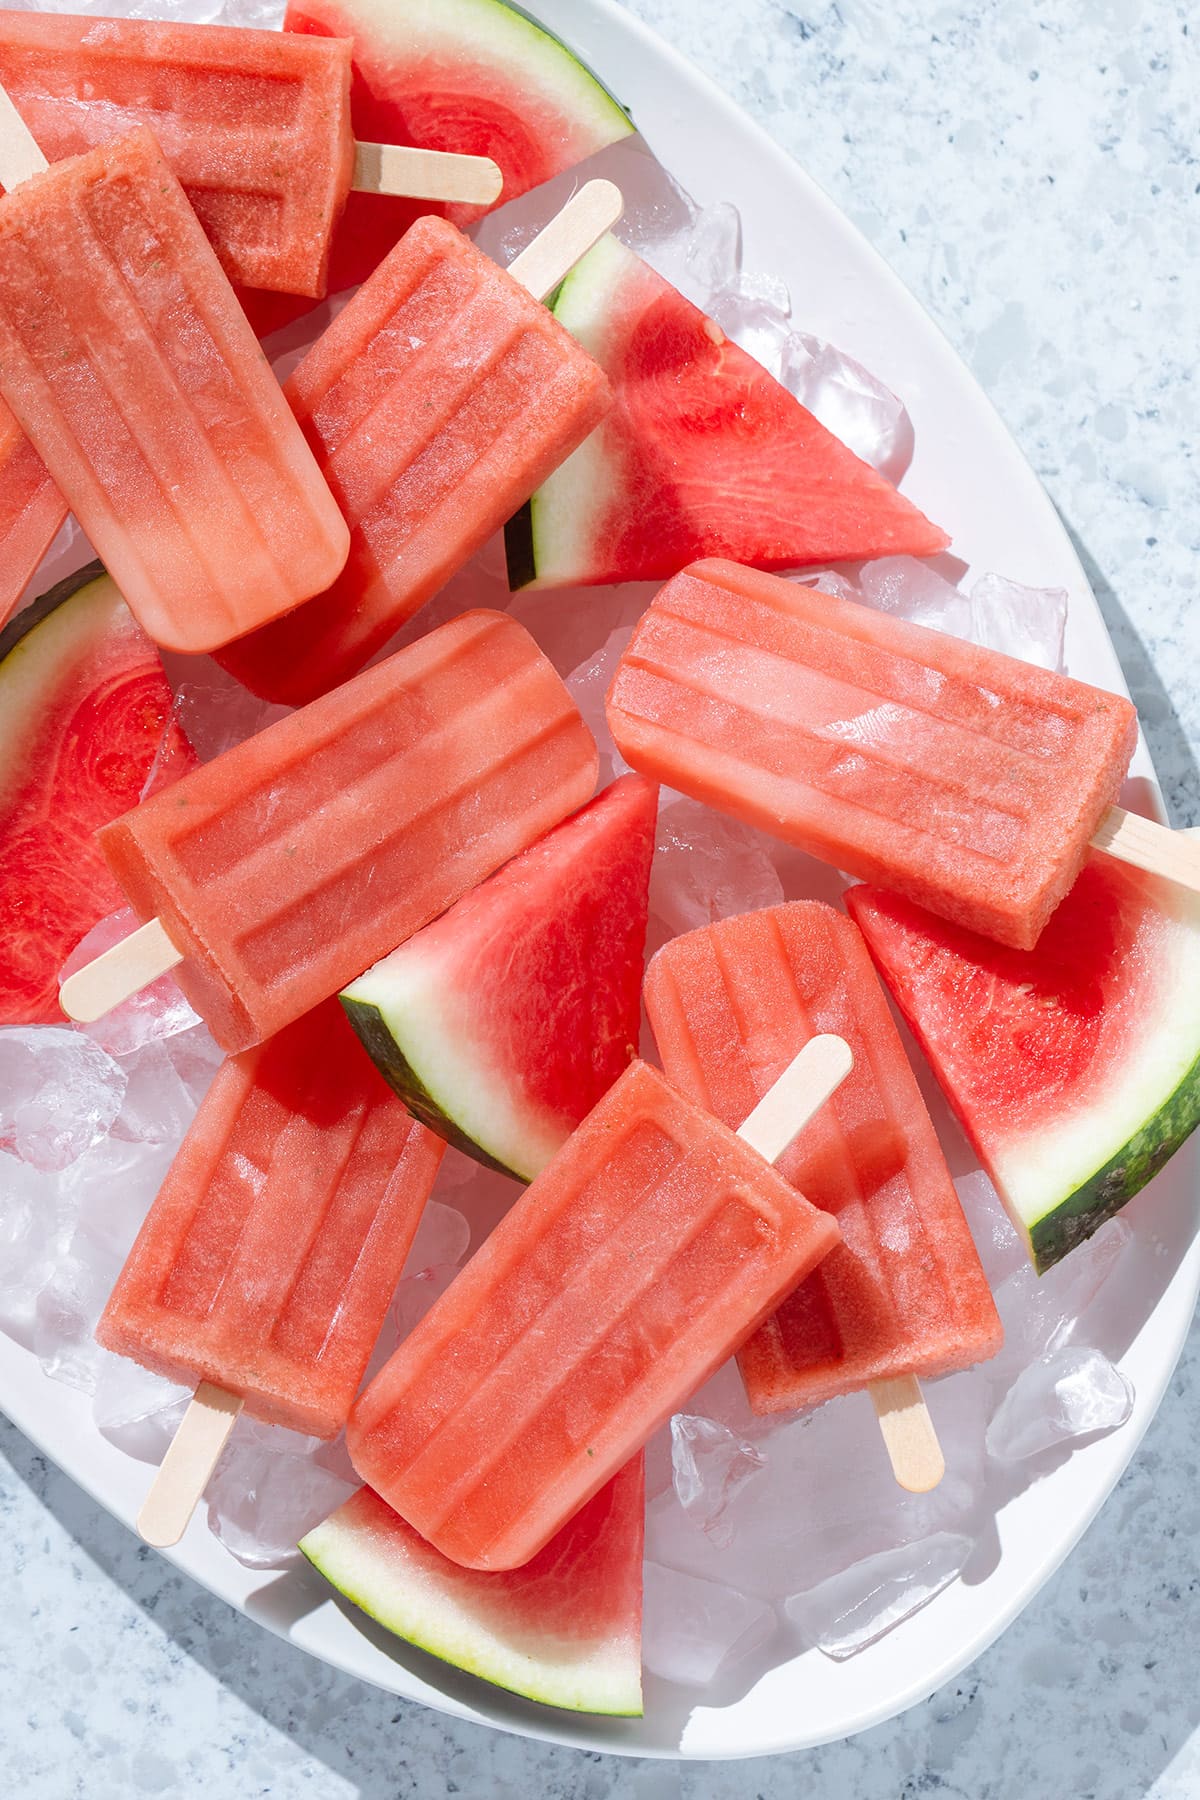
An iconic frozen summer treat — blended watermelon and lime poured into popsicle molds and frozen into the most refreshing, naturally sweet, and beautifully coloured popsicles imaginable. Simple to prepare and completely perfect for summer and picnics. A wonderful addition to our best summer desserts.
Ingredients:
- 4 cups seedless watermelon, cubed
- Juice of 2 limes
- 1–2 tablespoons honey or agave (adjust to sweetness of the watermelon)
- Pinch of salt (enhances the watermelon flavour)
- Optional: fresh mint leaves or small watermelon chunks to add to the molds before freezing
- Popsicle molds and sticks
Instructions:
- Blend the watermelon cubes until completely smooth. Add lime juice, honey, and salt. Blend again briefly and taste — adjust sweetness and lime to your preference.
- If you want chunky popsicles, add a few small watermelon pieces or mint leaves to the bottom of each mold before pouring in the blended mixture.
- Pour the watermelon mixture into the popsicle molds, leaving a small gap at the top for expansion. Insert the popsicle sticks.
- Freeze for at least 4–6 hours until completely solid — overnight is ideal. To unmold, run warm water over the outside of the molds for 10–15 seconds until the popsicles release easily.
15. Mini Pizza Bites
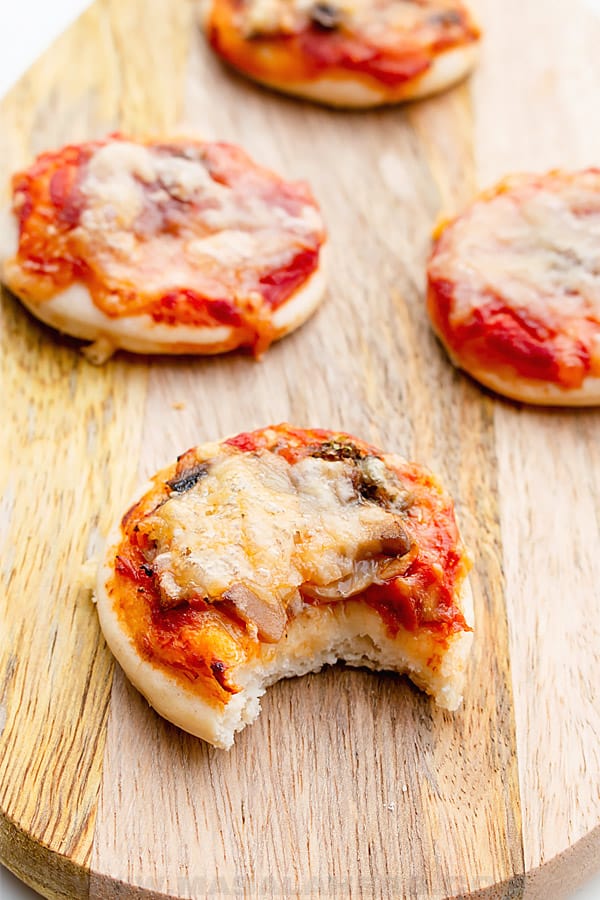
A delicious appetiser and completely fun party snack — small rounds of pizza dough smothered in marinara sauce, melted cheese, and your favourite toppings, baked until perfectly golden and crispy. Easy to customise for a crowd. A wonderful addition to our best party snack recipes.
Ingredients:
- 1 lb store-bought pizza dough, at room temperature
- ½ cup marinara sauce
- 1½ cups mozzarella, shredded
- 2 tablespoons olive oil
- 1 teaspoon Italian seasoning
- 1 clove garlic, minced
- Toppings of choice: pepperoni, sliced olives, mushrooms, diced peppers, or fresh basil
- Grated parmesan and red pepper flakes, for finishing
Instructions:
- Preheat oven to 425°F. Roll out the pizza dough on a floured surface to ¼-inch thickness. Use a 3-inch round cookie cutter or glass to cut as many circles as possible from the dough. Re-roll the scraps and cut more rounds.
- Place the rounds on a parchment-lined baking sheet. Combine the olive oil and garlic and brush lightly over each round. Prick the centre of each with a fork to prevent excessive puffing.
- Spread a teaspoon of marinara on each round. Scatter mozzarella over the sauce. Add your choice of toppings. Sprinkle with Italian seasoning.
- Bake for 12–15 minutes until the edges are golden and the cheese is melted and bubbling. Finish with grated parmesan and red pepper flakes. Serve immediately.
14. Adorable Mermaid Charcuterie Board

A completely spectacular and themed food display perfect for mermaid birthdays, beach parties, and ocean-themed events — a beautiful arrangement of sea-themed snacks, colourful fruits, seafood, and treats designed to look like an ocean scene. As gorgeous to look at as it is to eat. A wonderful addition to our best party snack ideas.
Ingredients:
- Assorted blue and teal foods: blue cheese, blueberries, blue grapes, blue corn tortilla chips
- Seafood: cooked shrimp arranged in a wave pattern, crab-shaped crackers, fish-shaped snacks
- Fruits: watermelon cut into fish or star shapes, kiwi, green grapes
- Cheese: cream cheese shaped into a mermaid tail, provolone rounds cut into shells
- Dips: blue-tinted ranch or hummus, coral-coloured salmon cream cheese
- Decorations: star-shaped fruit, edible glitter, seashell-shaped chocolates, gummy fish
- Crackers and bread: oyster crackers, seaweed crackers, blue corn chips
Instructions:
- Start with a large, wide board or platter. Place small bowls for dips in different areas of the board — these anchor the arrangement and prevent foods from sliding together.
- Arrange the larger items first — shrimp in a curved wave, fruit cut into ocean shapes, and cheese blocks. These establish the structure of the board.
- Fill in the spaces with smaller items: blueberries, grapes, crackers, and chips. Cluster similar colours together to create the visual effect of ocean waves and sandy shores.
- Add the decorative elements last: edible glitter sprinkled across the blue sections, gummy fish tucked between items, and seashell chocolates placed strategically. Label the different items if serving at a children's party.
13. Rice Crispy Treats with Marshmallow Fluff
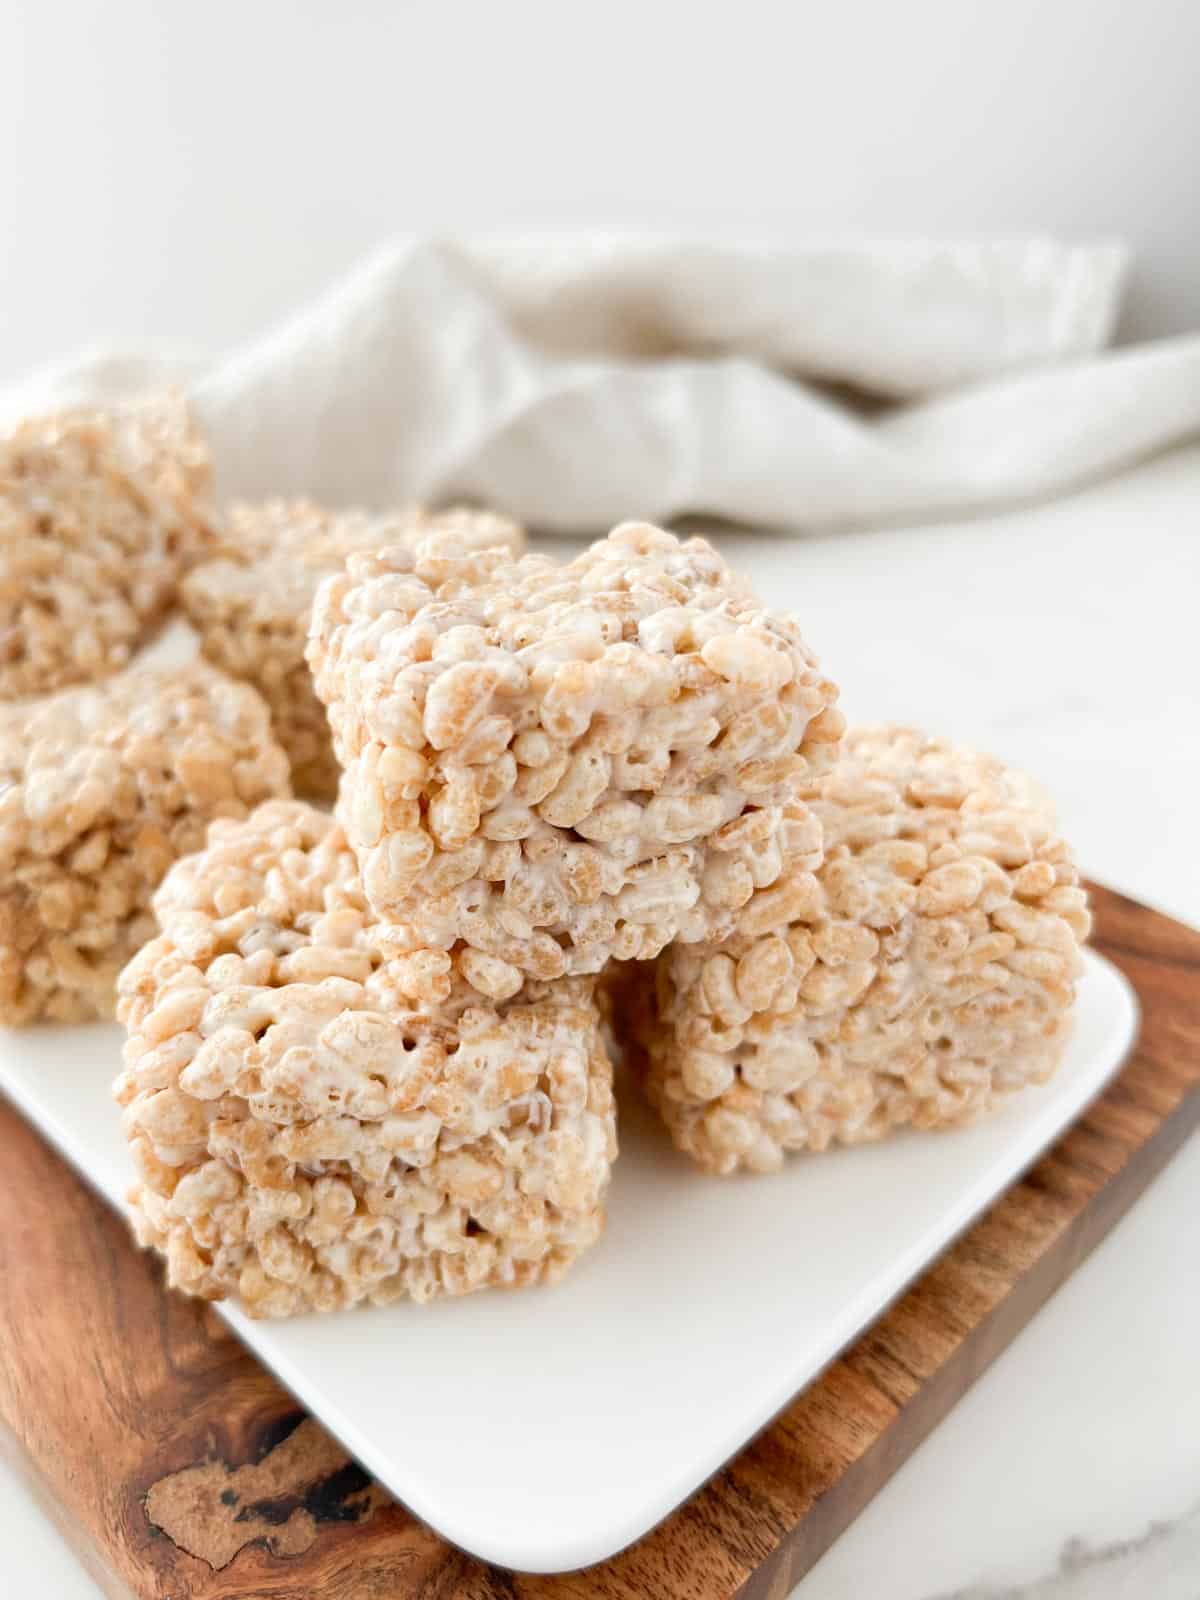
The ultimate rice crispy treat — the addition of marshmallow fluff alongside the melted marshmallows creates an extraordinarily soft, gooey, and chewy texture that is far superior to the standard recipe. Perfect as a post-meal treat, grab-and-go snack, or lunchbox addition. A wonderful addition to our best no-bake snack recipes.
Ingredients:
- 6 cups crispy rice cereal
- 3 cups mini marshmallows
- 1 (7 oz) jar marshmallow fluff
- 4 tablespoons butter
- 1 teaspoon vanilla extract
- Pinch of salt
- Optional: ½ cup rainbow sprinkles, chocolate chips, or crushed Oreos folded in at the end
Instructions:
- Grease a 9x13 baking dish with butter. Melt the butter in a large saucepan over medium-low heat. Add the mini marshmallows and stir constantly until completely melted and smooth.
- Remove from heat. Add the marshmallow fluff and vanilla extract. Stir vigorously until fully incorporated. The fluff adds an extraordinary extra level of gooeyness and chew.
- Add the crispy rice cereal and any optional add-ins. Stir quickly with a rubber spatula until the cereal is completely and evenly coated in the marshmallow mixture.
- Press the mixture into the prepared baking dish using buttered hands or a buttered spatula — press firmly but not so hard that you crush the cereal. Cool completely at room temperature for at least 1 hour before cutting into squares. Store covered at room temperature.
12. Blue Ocean Cups (Mermaid Jello Cups)

An eye-catching and completely playful dessert perfect for mermaid-themed parties — blue and turquoise Jello layered in clear cups to resemble the ocean, decorated with edible glitter and gummy sea creatures. A bright, fun, and joyful treat that delights children and adults alike. A wonderful addition to our best party desserts.
Ingredients:
- 1 (3 oz) box blue Jello (Berry Blue)
- 1 (3 oz) box teal or turquoise Jello (Blue Raspberry Lemonade or lime works well tinted with blue food colouring)
- 4 cups boiling water, divided
- 4 cups cold water, divided
- Edible blue and silver glitter
- Gummy fish, sharks, or other sea creature candies
- Whipped cream, for topping (optional)
- Clear plastic cups
Instructions:
- Prepare the blue Jello: dissolve the powder in 1 cup boiling water then add 1 cup cold water. Stir in a pinch of edible glitter. Pour about 1 inch of blue Jello into the bottom of each cup. Refrigerate for 45 minutes until partially set but still slightly wobbly — not fully firm.
- Place 2–3 gummy sea creatures into each cup on top of the partially set blue layer.
- Prepare the teal Jello: dissolve in 1 cup boiling water, add 1 cup cold water, and let cool until barely warm. Carefully pour over the gummy creatures to create the second ocean layer. Refrigerate for 2 hours until fully set.
- Before serving, sprinkle edible glitter over the surface of each cup for an oceanic sparkle. Top with a small swirl of whipped cream if desired and add a gummy sea creature on top as decoration.
11. Tempeh Chips
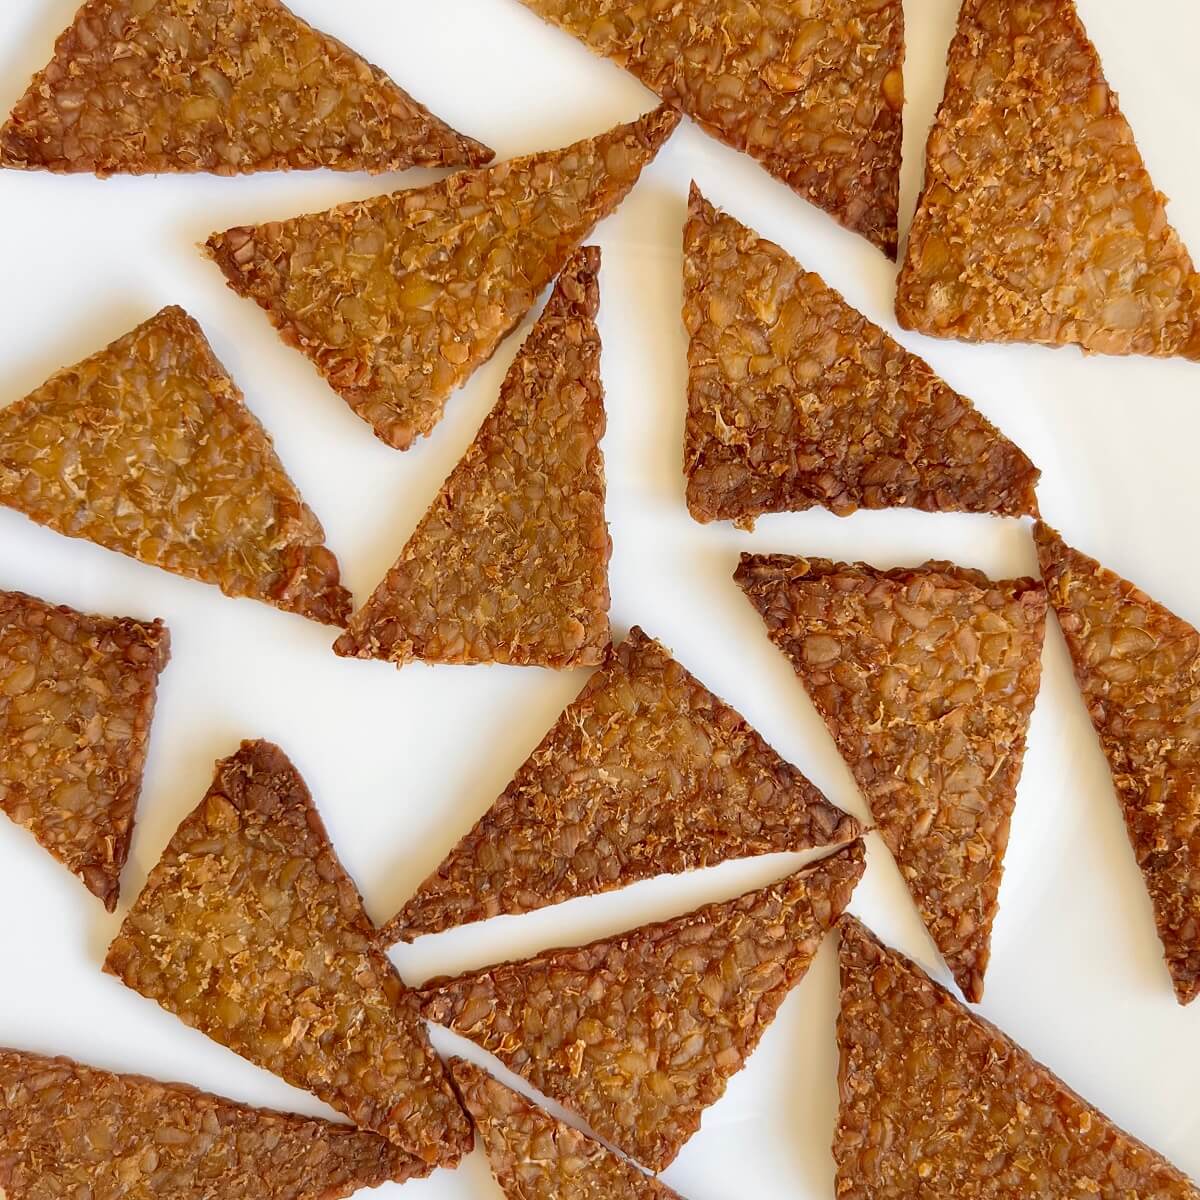
A delicious, crispy, and nutritionally superior alternative to potato chips — tempeh sliced into thin rounds and baked with your preferred spices until perfectly crunchy. Great for scooping hummus, salsa, or other dips, or simply snacking straight from the bowl. A wonderful addition to our best healthy snack recipes.
Ingredients:
- 8 oz block tempeh, sliced as thin as possible (2–3mm)
- 2 tablespoons soy sauce or tamari
- 1 tablespoon olive oil
- 1 teaspoon smoked paprika
- ½ teaspoon garlic powder
- ½ teaspoon onion powder
- Pinch of cayenne (optional)
- Hummus, salsa, or guacamole, for serving
Instructions:
- Preheat oven to 350°F. Slice the tempeh as thinly and evenly as possible — a sharp knife and steady hand or a mandoline gives the best results. Thinner slices crisp more effectively.
- Combine the soy sauce, olive oil, smoked paprika, garlic powder, onion powder, and cayenne in a bowl. Toss the tempeh slices in the marinade until every piece is evenly coated.
- Arrange in a single layer on parchment-lined baking sheets with space between each slice. Bake for 20–25 minutes, flipping once halfway, until the chips are golden, firm, and beginning to crisp at the edges.
- Cool completely on the baking sheet — they continue to crisp dramatically as they cool. Serve with hummus, salsa, or as a standalone snack. Store in an airtight container for up to 3 days.
10. Homemade Root Beer Float Ice Cream Bars
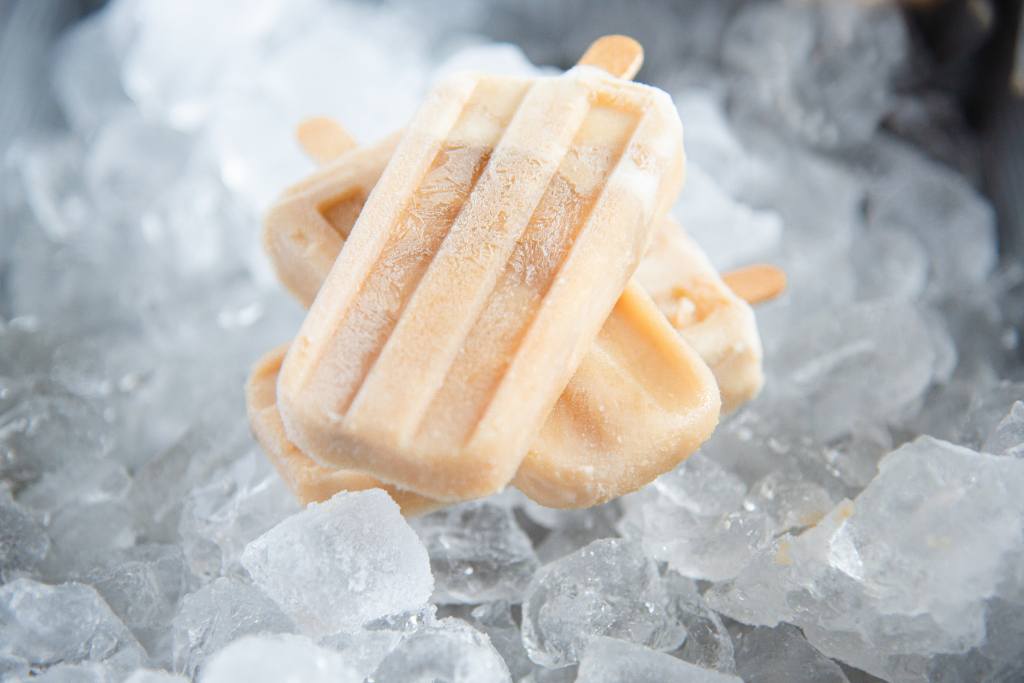
The nostalgic flavours of a classic summer root beer float frozen into a portable ice cream bar — a rich vanilla ice cream layer with a root beer-flavoured frozen layer for a light, creamy, childhood-evoking frozen treat. A wonderful addition to our best summer desserts.
Ingredients:
- 2 cups vanilla ice cream, softened
- 1 cup root beer, left to go flat (no bubbles)
- ½ cup heavy cream
- 2 tablespoons sugar
- 1 teaspoon vanilla extract
- Ice cream bar molds and sticks
Instructions:
- Make the root beer layer: combine the flat root beer, heavy cream, sugar, and vanilla extract. Stir until the sugar dissolves. Pour into the bottom of each ice cream bar mold, filling about a third of the way. Freeze for 2 hours until solid.
- Soften the vanilla ice cream slightly at room temperature for 5 minutes until spreadable. Spoon the softened ice cream over the frozen root beer layer, filling the molds to the top.
- Insert the ice cream bar sticks. Freeze for at least 4 hours or overnight until completely solid throughout.
- To unmold, run warm water over the outside of the molds for 15–20 seconds until the bars release. Serve immediately and enjoy the beautiful two-tone root beer float appearance.
9. Protein-Packed Cottage Cheese Ice Cream Bars

A healthier, protein-rich alternative to conventional ice cream bars — cottage cheese blended until silky smooth, sweetened with honey, and frozen before being coated in chocolate for a creamy, high-protein frozen treat topped with fresh fruit. A wonderful addition to our best healthy snack recipes.
Ingredients:
- 2 cups full-fat cottage cheese
- 3 tablespoons honey or maple syrup
- 1 teaspoon vanilla extract
- Pinch of salt
- Chocolate coating: 1½ cups dark chocolate chips + 1 tablespoon coconut oil — melt together
- Fresh fruit of choice (strawberries, blueberries, or raspberries) for topping
- Ice cream bar molds and sticks
Instructions:
- Blend the cottage cheese, honey, vanilla, and salt in a food processor or blender for 3–4 minutes until completely smooth with no curds visible. The mixture should be silky and thick.
- Pour the blended cottage cheese mixture into ice cream bar molds. Insert sticks. Freeze for at least 6 hours until completely solid.
- Melt the chocolate and coconut oil together until smooth. Let cool slightly. Unmold the frozen bars and quickly dip each in the chocolate coating, letting excess drip off. Place on a parchment-lined tray and immediately press fruit pieces onto the chocolate before it sets.
- Return to the freezer for 15 minutes until the chocolate coating is completely set. Store in the freezer for up to 2 weeks.
8. Easy S'mores Snack Mix

All the beloved flavours of a classic campfire s'more in a crunchy, portable, and completely irresistible snack mix — graham cracker pieces, mini marshmallows, and chocolate chips combined into a sweet treat perfect for celebrating with family and friends. A wonderful addition to our best easy snack recipes.
Ingredients:
- 2 cups graham cracker pieces, broken into bite-sized pieces
- 1 cup mini marshmallows
- 1 cup chocolate chips (semi-sweet or milk chocolate)
- 1 cup Golden Grahams cereal (optional, adds extra crunch)
- 2 tablespoons butter, melted
- 1 tablespoon honey
- Pinch of salt
Instructions:
- Combine the graham cracker pieces, Golden Grahams cereal if using, melted butter, honey, and salt in a large bowl. Toss until the crackers are lightly coated.
- Spread on a parchment-lined baking sheet and toast in a 300°F oven for 8–10 minutes until slightly golden and fragrant. Cool completely.
- Once the toasted cracker mixture is fully cooled, transfer to a large bowl. Add the chocolate chips and mini marshmallows.
- Toss gently to combine. Serve immediately or store in an airtight container at room temperature for up to 5 days. For a gift or to-go version, pack in individual snack bags.
7. Quick Olive Hummus

A wonderfully tangy, salty, and fluffy hummus with a unique twist — chickpeas, tahini, and olive oil blended with a generous amount of chopped olives for a briny, savoury dip that goes beautifully with pita chips, fresh vegetables, or as a sandwich spread. A wonderful addition to our best appetizer dip recipes.
Ingredients:
- 1 (15 oz) can chickpeas, drained and rinsed (reserve the liquid)
- 3 tablespoons tahini
- 3 tablespoons good extra-virgin olive oil, plus extra for serving
- Juice of 1 lemon
- 2 cloves garlic
- ½ cup Kalamata olives, pitted (plus extra for garnish)
- 3–4 tablespoons aquafaba (reserved chickpea liquid) — for fluffiness
- Salt, to taste
- Smoked paprika and fresh parsley, for garnish
Instructions:
- The secret to the fluffiest hummus is blending the tahini and lemon juice first: blend them together alone for 1 minute until pale and creamy. This aeration step is what makes hummus silky rather than dense.
- Add the garlic and blend 30 seconds. Add the drained chickpeas, olive oil, and salt. Blend for 2–3 minutes, adding aquafaba one tablespoon at a time until the hummus reaches a perfectly smooth, light, and fluffy consistency.
- Add the pitted Kalamata olives and pulse a few times — you want them roughly chopped and distributed throughout but not completely blended. Taste and adjust salt and lemon.
- Spread into a shallow bowl, creating a well in the centre. Drizzle with olive oil, add extra olive halves, a sprinkle of smoked paprika, and fresh parsley. Serve with pita chips and fresh vegetables.
6. Zucchini Pizza Bites
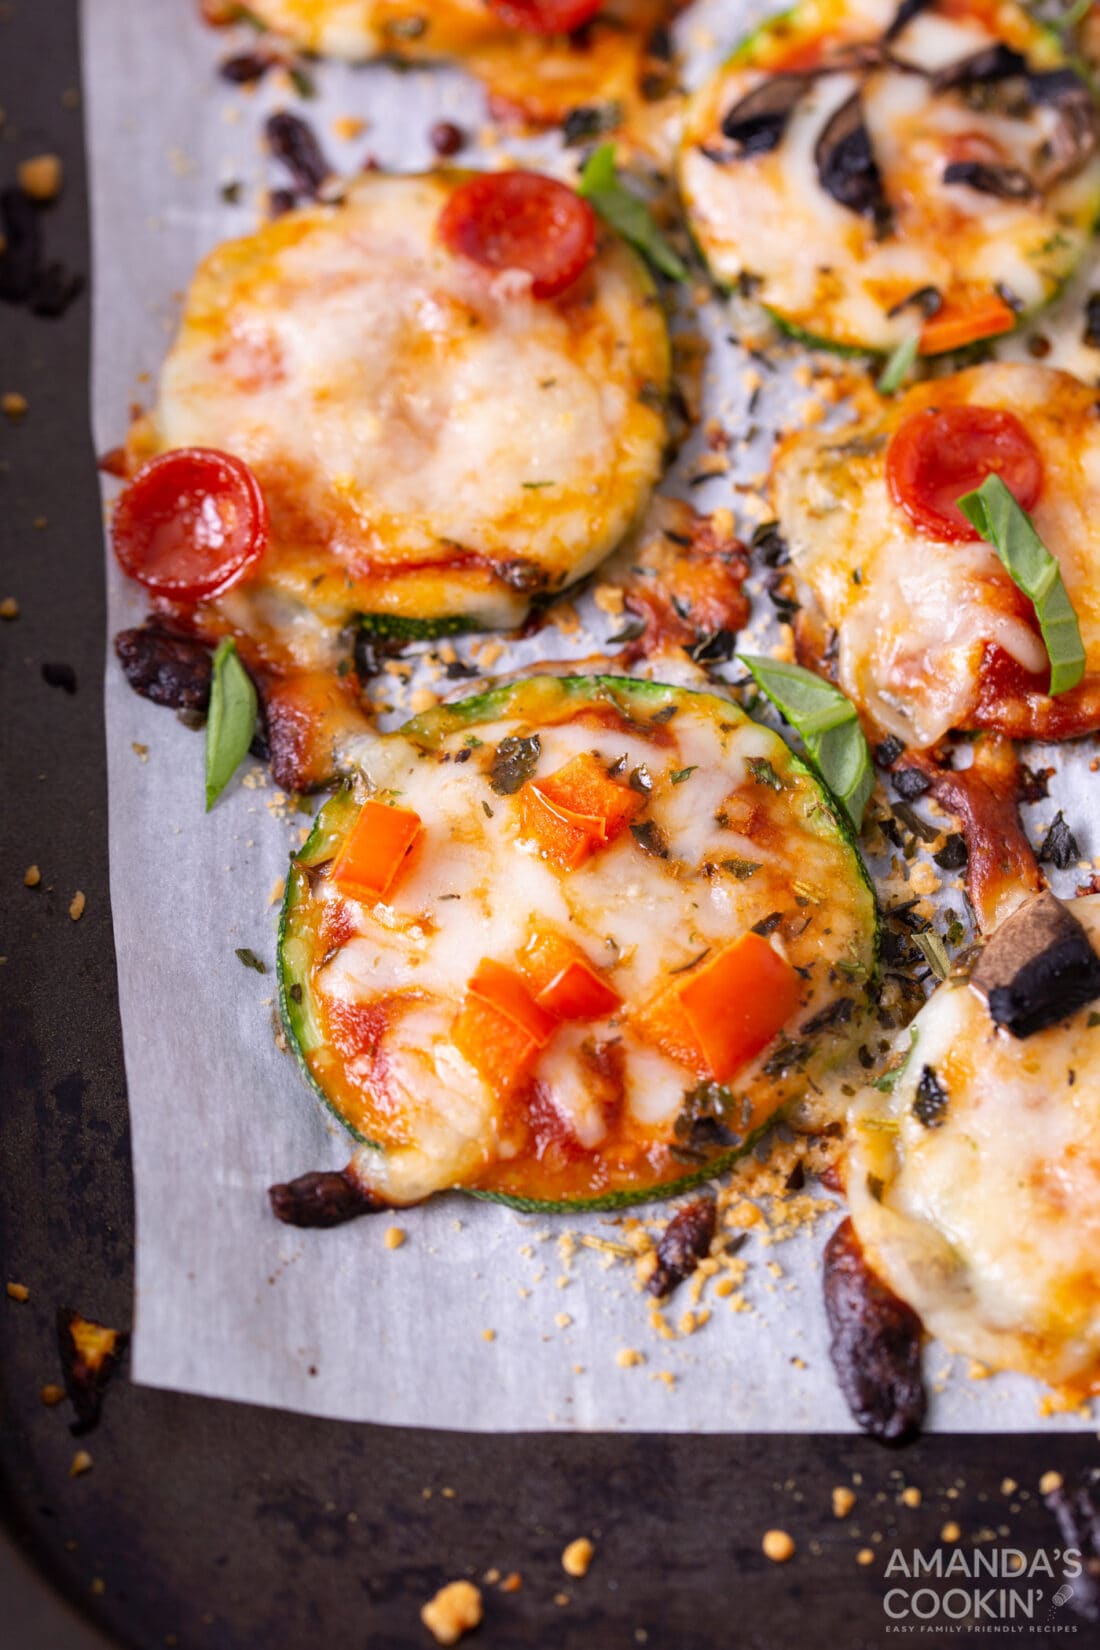
A healthier, lower-carb take on pizza that is completely child-friendly — zucchini rounds topped with marinara sauce, melted cheese, and your choice of toppings, baked until perfectly golden. A wonderful snack or appetiser for those following a lower-carb diet. A wonderful addition to our best healthy snack recipes.
Ingredients:
- 2 large zucchini, sliced into ½-inch rounds
- ½ cup marinara sauce
- 1½ cups mozzarella, shredded
- 1 teaspoon Italian seasoning
- ½ teaspoon garlic powder
- Salt and pepper, to taste
- Topping options: mini pepperoni, sliced olives, diced bell peppers, mushrooms, or fresh basil
- Grated parmesan and red pepper flakes, for finishing
Instructions:
- Preheat oven to 425°F. Arrange the zucchini rounds in a single layer on a parchment-lined baking sheet. Pat the tops dry with paper towels — removing moisture prevents the bites from becoming watery.
- Season each round with a pinch of garlic powder, Italian seasoning, salt, and pepper. Roast for 8 minutes so the zucchini starts to cook and release some moisture before adding toppings.
- Remove from the oven. Spoon a teaspoon of marinara onto each round. Top with shredded mozzarella and your choice of toppings.
- Return to the oven and bake for 8–10 more minutes until the cheese is melted and golden. Finish with grated parmesan and red pepper flakes. Serve immediately.
5. Microwave Fudge

A completely effortless way to enjoy homemade fudge without any stovetop boiling — chocolate and sweetened condensed milk melted together in the microwave until smooth, enriched with optional nuts or marshmallows, then refrigerated until firm. Rich, creamy, and deeply satisfying. A wonderful addition to our best quick dessert recipes.
Ingredients:
- 2 cups good-quality semi-sweet chocolate chips
- 1 (14 oz) can sweetened condensed milk
- 2 tablespoons butter
- 1 teaspoon vanilla extract
- Pinch of salt
- Optional add-ins: ½ cup chopped walnuts or pecans, ½ cup mini marshmallows, ½ cup crushed pretzels, or a swirl of peanut butter
Instructions:
- Line an 8x8 baking pan with parchment paper, leaving overhang on all sides for easy lifting.
- Combine the chocolate chips, sweetened condensed milk, and butter in a large microwave-safe bowl. Microwave on HIGH for 1 minute. Stir well. Microwave in 30-second bursts, stirring between each, until completely smooth and glossy — about 2–3 minutes total. Do not overheat.
- Remove from the microwave. Stir in the vanilla, salt, and any optional add-ins until thoroughly combined. Work quickly as the fudge begins to thicken fast.
- Pour into the prepared pan and spread evenly. Refrigerate for at least 2 hours until completely firm. Lift out using the parchment overhang and cut into squares with a sharp, warm knife. Store in an airtight container in the refrigerator for up to 2 weeks.
4. Peanut Butter Rice Krispie Treats

A wonderfully upgraded Rice Krispie treat — the addition of creamy peanut butter to the classic recipe creates a soft, sweet, and deeply nutty treat with a satisfying chew that elevates a simple childhood favourite into something genuinely special. A wonderful addition to our best no-bake snack recipes.
Ingredients:
- 6 cups crispy rice cereal
- 4 cups mini marshmallows
- ½ cup creamy peanut butter
- 4 tablespoons butter
- 1 teaspoon vanilla extract
- Pinch of salt
- Optional: ½ cup chocolate chips or a drizzle of melted chocolate on top
Instructions:
- Grease a 9x13 pan with butter. Melt the butter in a large pot over medium-low heat. Add the mini marshmallows and stir continuously until completely melted.
- Remove from heat. Add the peanut butter and vanilla extract. Stir vigorously until the peanut butter is fully incorporated into the melted marshmallow — the mixture should be smooth, glossy, and fragrant.
- Add the crispy rice cereal and salt. Fold quickly until every piece of cereal is completely coated. Fold in chocolate chips if using at this point.
- Press firmly into the prepared pan using buttered hands. Cool completely at room temperature for at least 1 hour before cutting. Drizzle melted chocolate over the top before cutting if desired. Cut into squares and store covered at room temperature.
3. Nutty Buddies
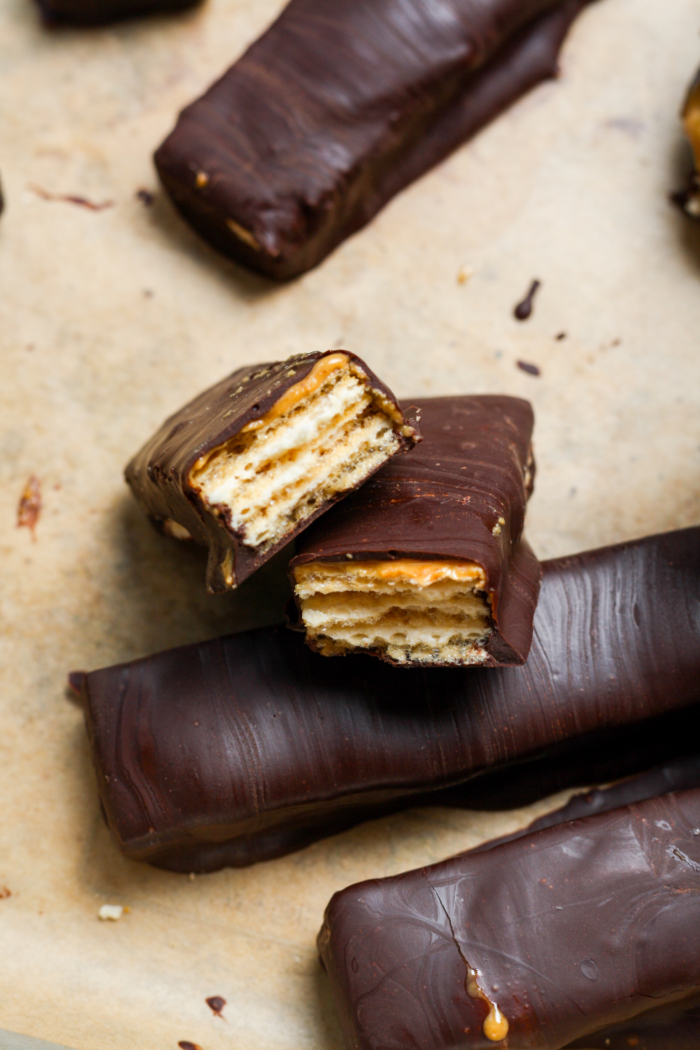
Perfect munching moments — nut-based bites with a neat crisp texture and a deep, rich chocolate coating that creates an irresistible combination of nutty crunch and sweet chocolate. Simple to make and wonderful for satisfying a sweet tooth or sharing with family and friends. A wonderful addition to our best easy no-bake treats.
Ingredients:
- 1 cup peanut butter or almond butter
- ½ cup powdered sugar
- ½ cup crispy rice cereal or crushed graham crackers
- ½ cup chopped peanuts or almonds
- 1 teaspoon vanilla extract
- Pinch of salt
- 1½ cups dark or milk chocolate chips
- 1 tablespoon coconut oil
Instructions:
- Combine the peanut butter, powdered sugar, crispy rice cereal or crushed graham crackers, chopped nuts, vanilla, and salt in a bowl. Mix until a thick, pliable dough forms that holds its shape when pressed.
- Roll the mixture into 1-inch balls or press into small rectangular bars. Place on a parchment-lined baking sheet. Freeze for 15 minutes until firm.
- Melt the chocolate chips and coconut oil together until smooth. Dip each chilled nutty buddy in the chocolate, letting excess drip off. Return to the parchment-lined sheet.
- Refrigerate for 20 minutes until the chocolate is completely set. Store in an airtight container in the refrigerator for up to 1 week.
2. 5-Minute Cheese Snack Mix
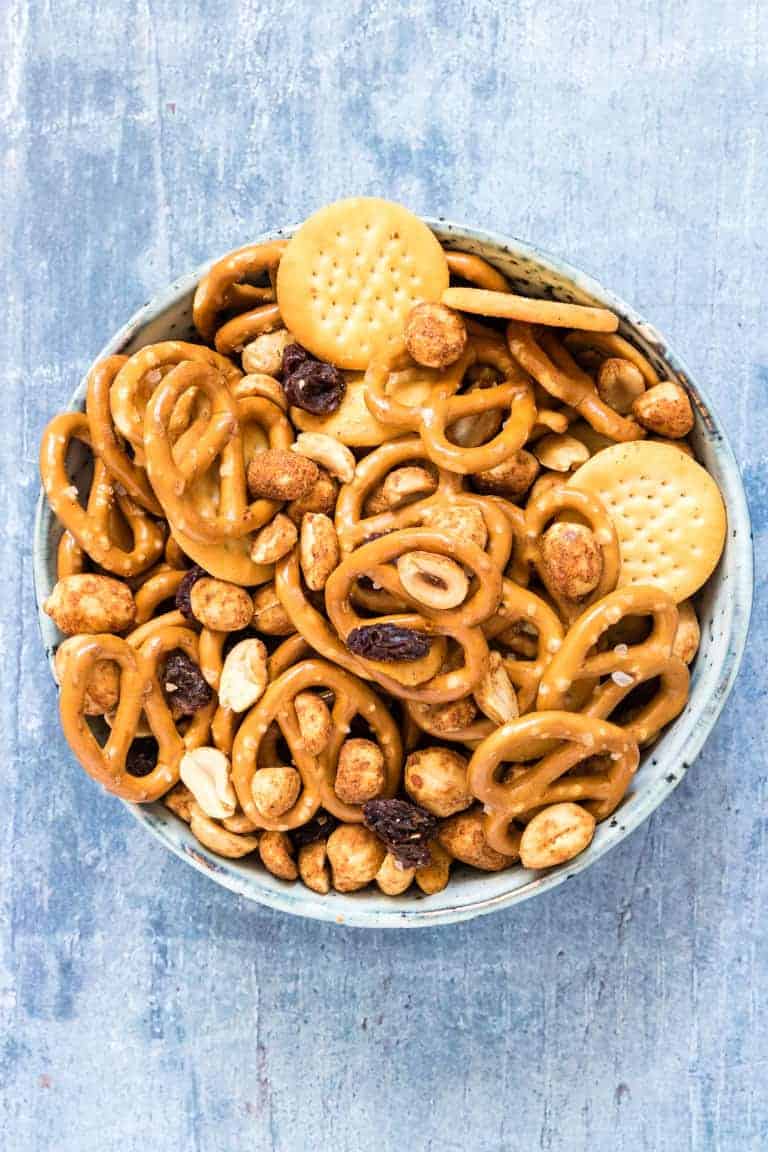
The simplest and most satisfying snack mix imaginable — colourful crackers, cheeses, and nuts combined with bold seasonings in just 5 minutes. Perfect for busy weekdays, unexpected guests, or any time a satisfying, no-fuss snack is needed. A wonderful addition to our best easy party snack recipes.
Ingredients:
- 1 cup cheese crackers (Cheez-Its or similar)
- 1 cup butter crackers (Ritz or similar)
- 1 cup mixed nuts (cashews, almonds, pecans)
- 1 cup pretzels
- ½ cup sharp cheddar cubes or parmesan crisps
- 1 tablespoon olive oil or melted butter
- ½ teaspoon garlic powder
- ½ teaspoon smoked paprika
- ½ teaspoon dried herbs (thyme or Italian seasoning)
- Salt, to taste
Instructions:
- Combine all the crackers, nuts, pretzels, and cheese cubes or crisps in a large bowl.
- Drizzle the olive oil or melted butter over everything. Add the garlic powder, smoked paprika, and dried herbs. Toss thoroughly until every piece is evenly seasoned.
- Taste and adjust seasoning — add more smoked paprika for smokiness, more garlic for boldness, or a pinch of cayenne for heat.
- Serve immediately in a bowl or individual portions. This mix requires no cooking and is ready in under 5 minutes. For a longer-lasting version, spread on a baking sheet and toast at 300°F for 15 minutes until the seasonings are baked on.
1. Vegan Baked Taquitos

A perfect healthier alternative to deep-fried taquitos — corn tortillas filled with a mildly spiced black bean, corn, and bell pepper mixture, tightly rolled and baked until perfectly crispy. Ideal for a quick evening meal or an unpretentious party snack. A wonderful addition to our best Mexican recipes.
Ingredients:
- 12 small corn tortillas
- 1 (15 oz) can black beans, drained and roughly mashed
- 1 cup frozen corn, thawed
- 1 red bell pepper, very finely diced
- ½ cup salsa
- 1 teaspoon cumin
- 1 teaspoon chilli powder
- ½ teaspoon garlic powder
- ½ teaspoon smoked paprika
- Salt and pepper, to taste
- 2 tablespoons olive oil, for brushing
- Salsa, guacamole, and vegan sour cream, for dipping
Instructions:
- Preheat oven to 425°F. Combine the mashed black beans, corn, diced bell pepper, salsa, cumin, chilli powder, garlic powder, and smoked paprika. Season generously with salt and pepper. Taste and adjust spices.
- Warm the corn tortillas in the microwave under a damp paper towel for 30–45 seconds until pliable — cold tortillas crack when rolled. Work with 3–4 at a time to keep them warm.
- Spoon 2 tablespoons of filling along one edge of each tortilla. Roll tightly and place seam-side down on a parchment-lined baking sheet. Brush the tops generously with olive oil — this is what creates the crispy exterior.
- Bake for 18–22 minutes until the taquitos are deeply golden and the ends are crispy. Serve immediately with salsa, guacamole, and vegan sour cream for dipping.
FAQs
What are the best snacks to make ahead for parties?
The best make-ahead party snacks are those that actually improve with resting time or can be fully prepared and stored without losing quality. The spicy seasoned pretzels and gluten-free party mix in this roundup are both ideal for making ahead — they can be baked and stored in airtight containers for up to 2 weeks and the flavours deepen significantly after the first day as the seasonings penetrate the snacks. Microwave fudge and nutty buddies can be made several days in advance and refrigerated. The olive hummus improves significantly after a few hours in the refrigerator as the garlic and lemon meld into the chickpeas. Watermelon popsicles and cottage cheese ice cream bars must be made ahead by necessity — they require overnight freezing. For the hot party foods like the buffalo chicken sliders, jalapeño poppers, and everything bagel pigs in a blanket, the best approach is to prepare all the components ahead of time and complete the final baking just before serving so they are hot and fresh.
What are the healthiest snacks for kids and adults in this roundup?
The snacks in this roundup span a wide range of nutritional profiles, so there is something for every preference. For genuinely nutrient-dense options, the tempeh chips provide significant plant-based protein and probiotics from the fermented tempeh. The vegan baked taquitos pack fibre and protein from the black beans. The watermelon-based recipes — fries, popsicles, and pudding cups — are high in water content and natural sugars while being very low in fat. The cottage cheese ice cream bars are protein-rich with significantly fewer calories than conventional ice cream bars. The olive hummus provides healthy fats from olive oil and protein from chickpeas. The zucchini pizza bites offer a lower-carbohydrate alternative to traditional pizza. For the sweet treats in the roundup, the homemade gluten-free uncrustables are a significantly better alternative to processed store versions, especially for children with allergies. The chocolate covered pineapple and peanut butter Rice Krispie treats sit in the moderate indulgence category — still better than most commercial snacks because they contain no artificial preservatives.
How do I keep snacks crispy after baking?
Maintaining crispiness in baked snacks requires understanding why they go soft in the first place — moisture is the enemy. When baked snacks are placed in sealed containers or bags while still warm, the residual steam condenses and makes the surface soft. The single most important step is cooling completely on a wire rack before storing — never seal warm baked snacks. For snacks like the air fryer chips, seasoned pretzels, tempeh chips, and vegan taquitos, a wire rack rather than a paper towel is preferable because paper towels trap steam and actually cause softening. Once completely cool, store in airtight containers at room temperature — any trapped humidity will cause softening over time, so ensure the container is fully dry. For maximum crispiness recovery, spread any softened baked snacks on a baking sheet and reheat at 300°F for 5–8 minutes. Adding a small food-safe silica gel packet to the storage container absorbs moisture and extends crispiness significantly.
Share This Post!
If you loved these snack recipes, share this post with every food lover in your life! Pin it, share it on Facebook, or send it to whoever needs a new favourite party snack, after-school treat, or summer indulgence. 🍕🌊🍫





Comments
No Comments