
Russian food doesn't get nearly enough attention in the home cooking world, and I say that as someone who came to it completely by accident. A few years ago, my husband brought home a cookbook from a secondhand shop — one of those battered Soviet-era translations with yellowed pages — and I started flipping through it out of curiosity. Traditional Russian cooking turned out to be everything I didn't expect: hearty, deeply flavored, rooted in the same slow-braised, layered logic I grew up with in Pakistan. The dumplings, the stuffed pastries, the fermented and pickled things — it all made sense to me in a way I hadn't anticipated.
What makes a Russian recipe worth making at home comes down to a few things for me. It has to be buildable with ingredients you can find at a regular grocery store — no obscure imports required. It has to have that quality of food that genuinely fills people up and keeps them warm, because so much of traditional Russian cuisine was designed for exactly that purpose. And it has to reward the effort you put in, whether that's a slow simmer, a careful fold, or just the patience to let something ferment. If you're already a fan of comfort food in any form, you'll find a lot to love in this list. I've made versions of almost all of these in my own kitchen, including a beef stroganoff that my whole family has requested on repeat.
This post covers 35 recipes that span the full range of what Russian and Eastern European cooking has to offer — from borscht and Olivier salad to Medovik honey cake, pelmeni dumplings, and Chicken Kiev. There are soups, savory pies, cold salads, sweet pancakes, and even a fermented drink that I was honestly skeptical about until I tried it. If you've been looking for a way into this cuisine beyond the one dish you already know, this is a solid place to start. I've also pulled together some related comfort food ideas over in my recipe roundups section, including collections of soup recipes that pair nicely with these.
Here are the 35 recipes I keep coming back to — pick what fits your mood, your week, or your grocery run.
Top 35 Traditional Russian Recipes

1. Polish Beet Borscht Soup
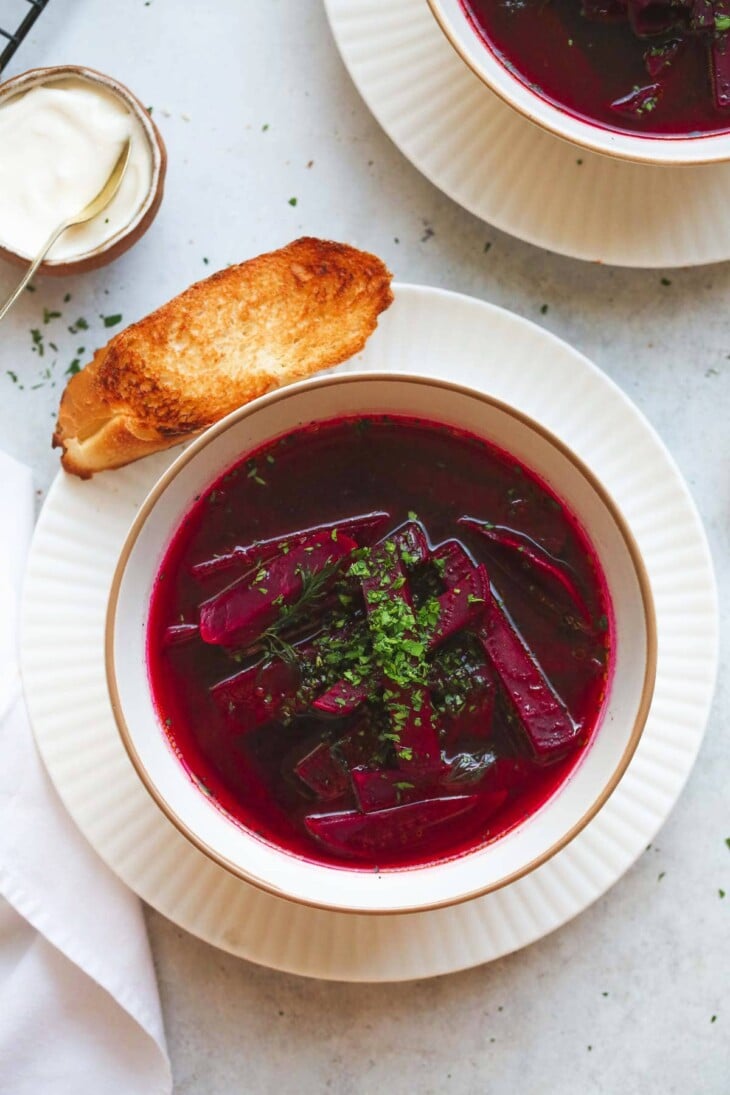
I made borscht for the first time expecting it to taste like something my family would politely eat once and forget about. Instead, Saad asked what that bright red soup was called and whether we could have it again. The color alone stops people — it's this deep, jewel-toned crimson that looks almost too pretty to eat. The flavor is earthy from the beets, gently tangy from the vinegar, and warming in that quiet, slow way that good soup always is. A swirl of sour cream on top and some fresh dill, and it's properly done.
Ingredients
- 4 medium beets, peeled and grated
- 1 onion, diced
- 2 carrots, diced
- 2 stalks celery, diced
- 3 cloves garlic, minced
- 6 cups vegetable or beef broth
- 2 tablespoons apple cider vinegar or lemon juice
- 1 tablespoon olive oil
- 1 teaspoon sugar
- Salt and pepper, to taste
- Sour cream and fresh dill, for serving
Instructions
- Heat olive oil in a large pot over medium heat. Sauté the onion, carrots, and celery for 5–6 minutes until softened. Add the garlic and cook for 1 more minute.
- Add the grated beets and broth. Bring to a boil, then reduce heat and simmer for 25–30 minutes until the beets are completely soft and the soup is deeply colored.
- Stir in the vinegar, sugar, salt, and pepper. Taste and adjust — the soup should be gently tangy and balanced, not sharp.
- Serve hot topped with a swirl of sour cream and fresh dill. You can also blend it smooth for a silkier texture — both versions are good.
Tips
- Tip: Wear gloves when grating the beets — they stain your hands (and everything else) something fierce.
- Tip: Beef broth gives a richer, deeper flavor here; vegetable broth works fine for a lighter or vegetarian version.
- Tip: This soup tastes even better the next day once the flavors settle — make it ahead if you can.
2. Russian Pelmeni Meat Dumplings

These are Russia's answer to a dumpling, and honestly they hold their own against any other dumpling tradition in the world. The dough is thin and slightly chewy, the filling is a simple seasoned mix of pork and beef, and the whole thing comes together with a boil and a generous spoonful of sour cream. Yes, folding takes time — but it's the kind of repetitive kitchen work that's almost meditative once you get into the rhythm of it. I usually make a big batch and freeze half for later, and those frozen ones have saved dinner more than once.
Ingredients
- Dough: 2 cups all-purpose flour, ½ cup warm water, 1 egg, ½ teaspoon salt
- Filling: ½ lb ground pork, ½ lb ground beef, 1 small onion (finely grated), 2 cloves garlic (minced), salt, pepper, and 1 tablespoon cold water
- Sour cream, butter, and fresh dill, for serving
Instructions
- Make the dough: combine flour, egg, warm water, and salt until a smooth, firm dough forms. Knead for 5 minutes, wrap in plastic wrap, and rest for 30 minutes at room temperature.
- Make the filling: combine the ground meats with grated onion, garlic, cold water, salt, and pepper. Mix thoroughly until everything is evenly combined.
- Roll the dough thin (about ⅛ inch) and cut into 2½-inch rounds. Place a small teaspoon of filling in the center of each round, fold in half, and pinch the edges tightly to seal. Bring the two corners together and press to form the classic pelmeni shape.
- Boil in a large pot of well-salted water for 5–7 minutes until they float and the dough is cooked through. Serve with sour cream, melted butter, or in a bowl of clear broth with fresh dill.
Tips
- Tip: Freeze uncooked pelmeni on a floured tray first, then transfer to a bag — they won't stick together and cook straight from frozen in 8–9 minutes.
- Tip: Grating (not chopping) the onion is important — it keeps the filling moist and integrates into the meat without leaving big chunks.
- Tip: Keep the dough covered while you work — it dries out fast and becomes hard to seal if it sits exposed.
3. Beef Stroganoff
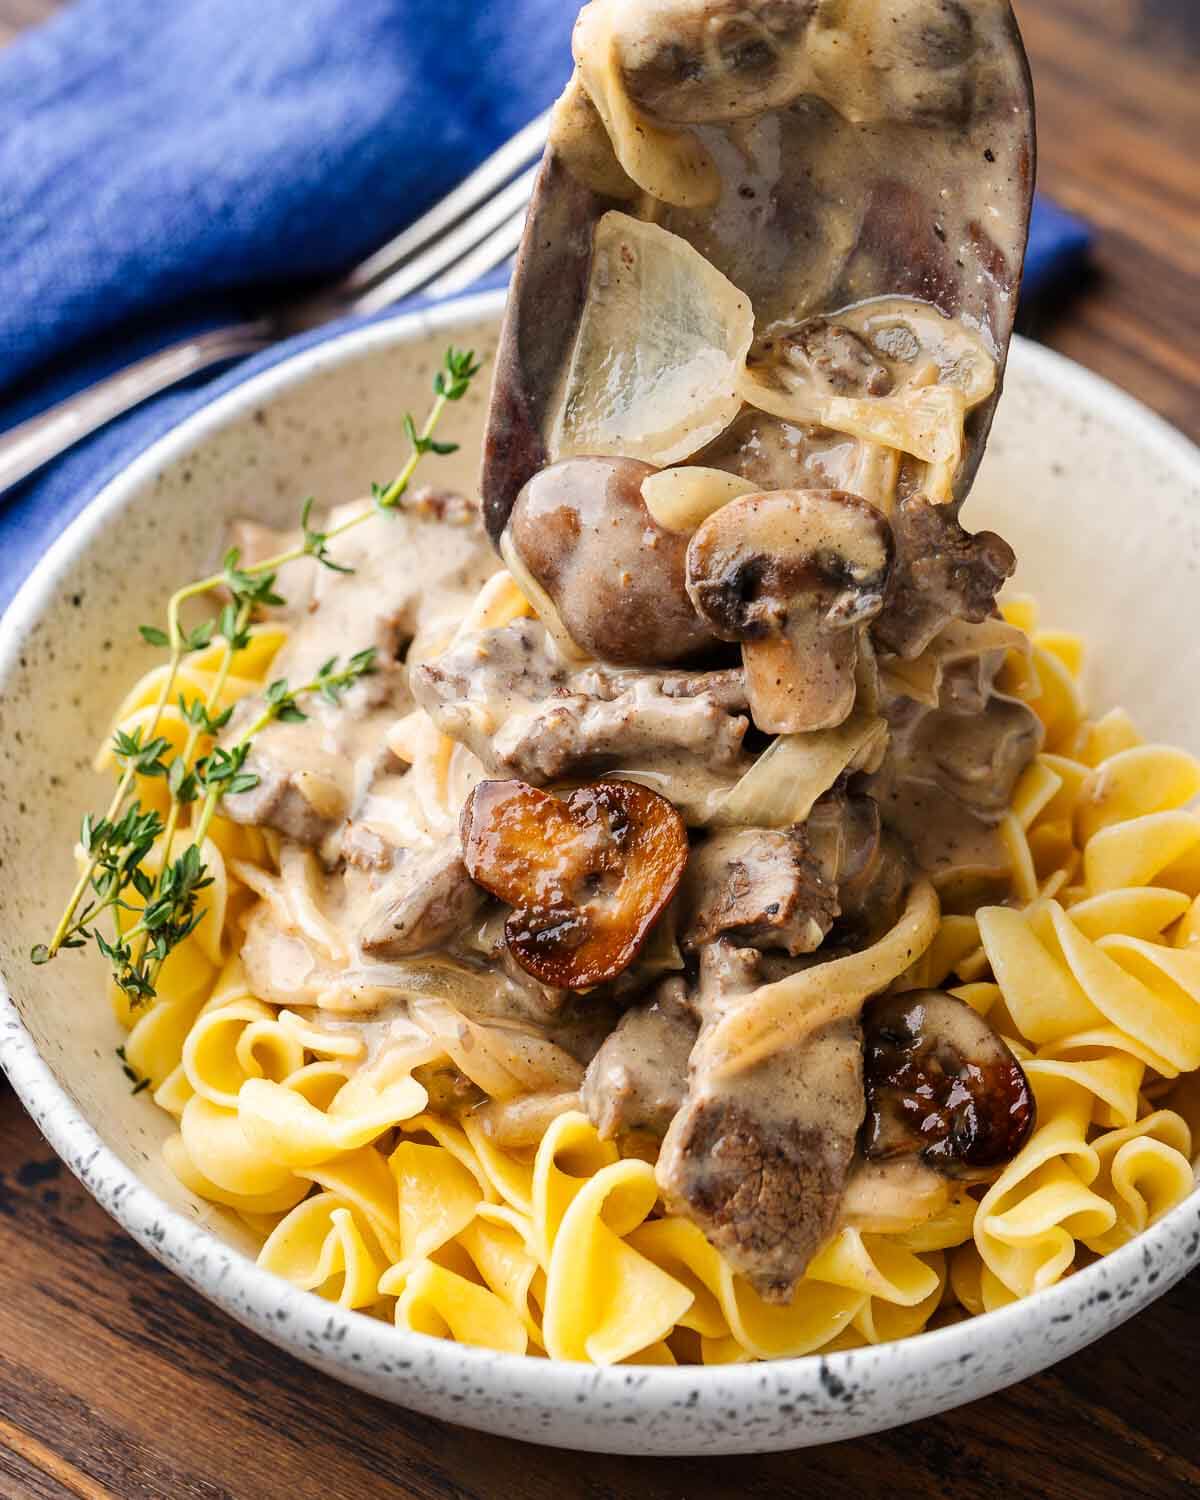
If there's one Russian recipe that the whole world already knows and loves, it's this one. Beef stroganoff is one of those dishes where the simplicity of the ingredients completely belies how good the finished result is — thin strips of seared beef, golden mushrooms, a creamy sauce with just enough tang from the sour cream, all served over egg noodles or rice. My husband prefers it over rice; I like it over wide egg noodles. The key technique here is searing the beef fast over very high heat and not crowding the pan — that's what gives you browning instead of steaming, and browning is where all the flavor lives.
Ingredients
- 1½ lbs beef sirloin or tenderloin, sliced into thin strips
- 8 oz mushrooms, sliced
- 1 onion, thinly sliced
- 3 cloves garlic, minced
- 2 tablespoons butter
- 1 tablespoon olive oil
- 1 tablespoon Worcestershire sauce
- 1 tablespoon Dijon mustard
- 1 cup beef broth
- ¾ cup sour cream
- Salt and pepper, to taste
- Egg noodles or rice, for serving
- Fresh parsley, for garnish
Instructions
- Season the beef strips with salt and pepper. Heat oil in a large skillet over very high heat. Sear the beef in batches for 1–2 minutes until browned on the outside. Remove and set aside — they'll finish cooking when you return them to the sauce later.
- In the same pan, melt the butter over medium heat and sauté the onion for 4–5 minutes. Add the mushrooms and cook until golden, about 5 minutes. Add the garlic and cook 1 minute more.
- Stir in the Worcestershire sauce, Dijon mustard, and beef broth. Simmer for 5 minutes. Remove the pan from heat and stir in the sour cream — adding it off the heat prevents curdling.
- Return the beef to the pan and heat gently over low heat for 2 minutes. Do not let it boil. Season to taste and serve immediately over egg noodles or rice, garnished with fresh parsley.
Tips
- Tip: Pat the beef strips completely dry before searing — moisture on the surface causes steaming instead of browning, and you want that crust.
- Tip: Let your sour cream come to room temperature for 15 minutes before adding it to the sauce — cold sour cream straight from the fridge is more likely to split.
- Tip: If you can't find egg noodles, wide pasta like pappardelle or fettuccine works well as a substitute.
4. Mushroom Pirozhki

Pirozhki are Russian stuffed buns — soft, yeasted dough wrapped around a savory filling and baked until golden — and the mushroom version is one of the most satisfying things to come out of a home oven. The filling is just mushrooms, onion, garlic, and dill cooked down until completely dry and concentrated, which means every bite is packed with earthy, savory flavor without any sogginess. They're good warm out of the oven, good at room temperature, and good cold from the fridge the next morning with a cup of tea. The dough is straightforward — no stand mixer needed, just a bowl and your hands.
Ingredients
- Dough: 3 cups all-purpose flour, 1 packet (2¼ teaspoons) instant yeast, 1 cup warm milk, 2 tablespoons butter (melted), 1 egg, 1 teaspoon sugar, ½ teaspoon salt
- Filling: 1 lb mushrooms (finely chopped), 1 large onion (finely diced), 2 tablespoons butter, 2 cloves garlic (minced), salt and pepper to taste, 2 tablespoons fresh dill
- 1 egg yolk + 1 tablespoon water, for egg wash
Instructions
- Make the dough: combine warm milk, yeast, and sugar in a large bowl. Let sit 5 minutes until foamy. Mix in the egg, melted butter, and salt. Add flour gradually and knead for about 5 minutes until smooth and slightly tacky. Cover and let rise for 1 hour until doubled in size.
- Make the filling: sauté the onion in butter over medium heat for 5 minutes until soft. Add the mushrooms and garlic and cook for 8–10 minutes, stirring occasionally, until all the moisture has evaporated and the mixture looks dry. Season with salt, pepper, and fresh dill. Set aside to cool completely before filling.
- Divide the risen dough into 16 equal pieces. Flatten each piece into a circle about 3 inches wide. Place a heaping tablespoon of filling in the center, gather the edges up, and pinch tightly to seal. Place seam-side down on a parchment-lined baking sheet. Let rest for 20 minutes.
- Brush each bun with egg wash. Bake at 375°F for 18–20 minutes until deep golden brown. Serve warm.
Tips
- Tip: The filling must be completely cool and dry before you use it — warm or wet filling tears the dough and makes the buns soggy inside.
- Tip: If you don't have fresh dill, dried dill works — use 1 teaspoon instead of 2 tablespoons fresh.
- Tip: These freeze well after baking — reheat in a 350°F oven for 10 minutes straight from frozen and they come back almost as good as fresh.
25. Chicken Kiev

I made Chicken Kiev for the first time on a Friday night when I wanted to make something that felt genuinely special — and it delivered in a way I wasn't fully prepared for. You cut into that golden crust and herb butter just pours out, and honestly the whole table goes quiet for a second. The technique sounds intimidating but it's really just about keeping everything cold so the butter stays put while you fry it. The double coating of panko is non-negotiable — skip it and you'll lose that crunch that makes this dish what it is.
Ingredients
- 4 boneless skinless chicken breasts, pounded thin
- 6 tablespoons softened butter
- 3 cloves garlic, minced
- 2 tablespoons fresh parsley, finely chopped
- 1 tablespoon fresh dill, finely chopped
- ½ teaspoon lemon zest
- ½ cup all-purpose flour
- 2 eggs, beaten
- 1½ cups panko breadcrumbs
- Salt and pepper, to taste
- Oil for frying (vegetable or canola)
Instructions
- Mix the softened butter with garlic, parsley, dill, lemon zest, and a pinch of salt until fully combined. Roll it into a log using plastic wrap and freeze for 30 minutes — it needs to be firm so it holds its shape inside the chicken.
- Cut the frozen butter log into 4 equal pieces. Place one piece in the center of each pounded chicken breast, then roll the chicken tightly around the butter, tucking the ends in firmly to seal it completely. Freeze the rolls for another 20 minutes.
- Season each roll with salt and pepper. Coat in flour, then beaten egg, then panko — then go back through the egg and panko one more time. That double layer is what gives you the serious crunch.
- Heat oil to 350°F in a deep skillet or pot and fry the rolls for 8–10 minutes, turning carefully, until deep golden all over. Transfer to a 375°F oven for 10 minutes to make sure the chicken reaches 165°F internally. Rest for 3 minutes before cutting.
Tips
- Tip: Don't skip the freezing steps — cold butter and cold chicken rolls are what stop the butter from leaking out before you even get to the plate.
- Tip: If you don't have fresh dill, dried works fine — use about 1 teaspoon. The garlic and parsley carry most of the flavor anyway.
- Tip: Use a meat thermometer — there's no good visual cue for doneness here since the outside gets dark quickly. 165°F in the center is what you're after.
26. Golubtsy (Russian Cabbage Rolls)

Stuffed cabbage rolls show up in nearly every Eastern European cuisine, and the Russian version — golubtsy — is one of the most comforting things you can pull out of the oven on a cold evening. This particular version stuffs the leaves with a chilli con carne-style filling instead of the more classic plain beef and rice, which makes it a genuinely interesting fusion that somehow works really well. The tomato sauce soaks into the rolls as they bake and by the time they come out, everything has melded into something deeply satisfying. Saad wasn't sure about the cabbage at first, but he cleaned his plate.
Ingredients
- 1 large head green cabbage
- 1 lb ground beef
- 1 (15 oz) can kidney beans, drained and rinsed
- 1 (14 oz) can diced tomatoes
- 1 onion, finely diced
- 2 cloves garlic, minced
- 1 tablespoon chili powder
- 1 teaspoon ground cumin
- ½ cup cooked white rice
- Salt and pepper, to taste
- 2 cups tomato passata or marinara sauce (store-bought is fine)
- Sour cream, for serving
Instructions
- Bring a large pot of water to a boil. Cut out the core of the cabbage and carefully lower the whole head into the boiling water for 3–4 minutes. As the outer leaves soften, peel them off one by one. You need about 12 large pliable leaves. Pat them dry.
- Brown the ground beef in a skillet over medium-high heat, breaking it up as it cooks. Add the onion and garlic and cook for 3–4 minutes. Stir in the chili powder, cumin, diced tomatoes, and kidney beans. Simmer for 10 minutes until thickened, then stir in the cooked rice. Let cool slightly.
- Place a generous spoonful of filling near the base of each cabbage leaf. Roll upward, fold in the sides, and continue rolling to seal. Place seam-side down in a baking dish. Pour the tomato sauce evenly over the top.
- Cover the dish tightly with foil and bake at 350°F for 45–50 minutes until the rolls are tender and the sauce is bubbling. Serve with a dollop of sour cream.
Tips
- Tip: If the cabbage leaves tear, overlap two smaller pieces — they'll hold together fine once they bake in the sauce.
- Tip: Let the filling cool before you roll — hot filling makes the cabbage go limp and everything falls apart.
- Tip: These reheat beautifully the next day — the sauce thickens overnight and the flavor actually improves.
27. Shchi (Russian Cabbage Soup)

Shchi is basically Russia's national soup, and once you make it you understand why — it's the kind of thing you want on a grey Tuesday when you need something honest and warming on the stove. Cabbage, potato, carrot, onion, and broth — that's mostly it, and it doesn't need to be more than that. I use a good-quality beef broth here (the kind from a carton, nothing fancy) and the tomato paste adds just enough depth without making it heavy. In Pakistan we'd serve something like this with bread on the side; this one's no different.
Ingredients
- ½ small head green cabbage, shredded (about 4 cups)
- 2 medium potatoes, peeled and diced into ½-inch cubes
- 2 carrots, diced
- 1 onion, diced
- 3 cloves garlic, minced
- 2 tablespoons tomato paste
- 6 cups beef or vegetable broth
- 2 tablespoons olive oil
- 1 bay leaf
- Salt and black pepper, to taste
- Fresh dill, for finishing
- Sour cream, for serving
Instructions
- Heat olive oil in a large pot over medium heat. Add the onion and carrots and cook for 5–6 minutes, stirring occasionally, until softened. Add the garlic and tomato paste and stir for another minute until the paste darkens slightly — this builds the base flavor of the soup.
- Add the shredded cabbage, diced potatoes, broth, and bay leaf. Stir everything together and bring to a boil over high heat.
- Reduce heat to a steady simmer and cook uncovered for 25–30 minutes until the cabbage is completely soft and the potatoes are tender enough to break with a spoon.
- Remove the bay leaf. Taste and season generously with salt and pepper. Ladle into bowls, scatter fresh dill over the top, and serve with a spoonful of sour cream and crusty bread on the side.
Tips
- Tip: Don't rush the simmer — the cabbage needs a full 25–30 minutes to go from squeaky-raw to genuinely tender and sweet.
- Tip: This is naturally vegetarian if you use vegetable broth — it holds up well without meat and makes a solid weeknight meal on its own.
- Tip: The soup thickens as it sits — if reheating the next day, add a splash of broth or water to loosen it back up.
28. Solyanka Soup

Solyanka is the soup I didn't expect to love as much as I do. It sounds like a strange combination on paper — pickles, capers, olives, smoked sausage, and beef all in one pot — but somehow it pulls together into something rich, tangy, and genuinely addictive. The pickle brine is not optional; it's what gives the broth that signature sharp edge that makes this soup unlike anything else. I'd never had anything like it before I started exploring Russian cooking, and now I make a double batch because it disappears fast.
Ingredients
- ½ lb beef stew meat or pork shoulder, diced into small pieces
- 4 oz smoked sausage or kielbasa, sliced into half-moons
- 1 onion, finely diced
- 3 dill pickles, diced (not sweet pickles — dill only)
- ¼ cup pickle brine (from the jar)
- 2 tablespoons tomato paste
- ¼ cup kalamata olives, sliced
- 1 tablespoon capers, drained
- 5 cups good beef broth
- 2 tablespoons olive oil
- 2 bay leaves
- Salt and black pepper, to taste
- Lemon slices and sour cream, for serving
Instructions
- Heat the olive oil in a large heavy pot over high heat. Add the diced beef and sear without stirring for 2–3 minutes until browned. Remove and set aside. Reduce heat to medium, add the onion to the same pot, and cook for 5 minutes until softened. Add the tomato paste and stir for 2 minutes until it deepens in color.
- Return the beef to the pot. Add the sliced sausage, diced pickles, pickle brine, olives, capers, bay leaves, and broth. Stir everything together and bring to a boil.
- Reduce heat to a low simmer and cook for 30–40 minutes until the beef is completely tender and the broth has taken on a deep, tangy character. Taste before adding salt — the brine, olives, and capers bring a lot of saltiness already.
- Remove the bay leaves. Ladle into bowls and serve with a fresh lemon slice pressed into the broth and a generous spoonful of sour cream on top.
Tips
- Tip: Use dill pickles specifically — bread and butter or sweet pickles will throw off the whole flavor profile of the soup.
- Tip: Taste the broth before adding any salt — between the pickle brine, olives, and capers, it's often salty enough without adding more.
- Tip: Kielbasa from the refrigerated section at Walmart or Costco works perfectly here — no need to track down specialty sausage.
29. Blini (Russian Crepes)
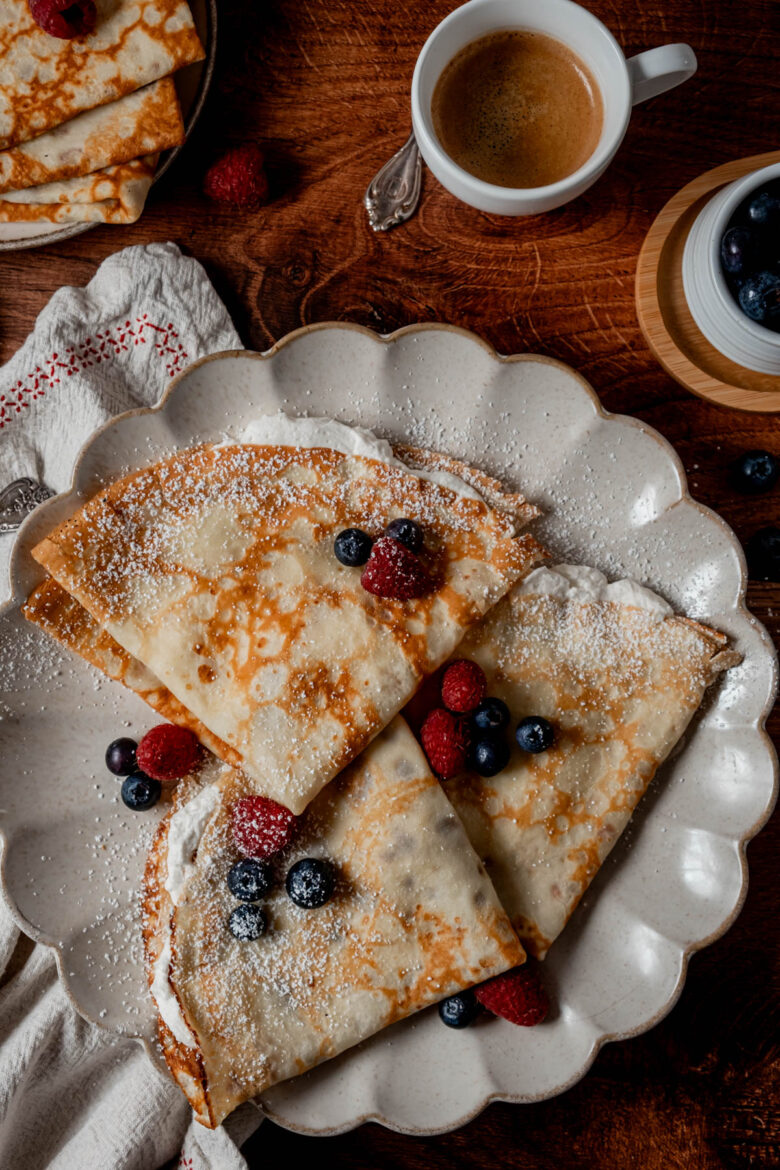
Blini are one of those recipes that look like they require skill but really just require patience with the first two. The first blini almost always goes wrong — too thick, tears, sticks — and that's just how it works. By the third one you've figured out the heat and the pour and then you're flying. I love that this recipe goes both ways: set out smoked salmon, cream cheese, and fresh dill for a proper elegant spread, or honey and jam if you're making these for a lazy weekend breakfast. My husband and I made a whole batch one Saturday and couldn't agree on sweet or savory, so we did both.
Ingredients
- 1 cup all-purpose flour
- 1½ cups whole milk (2% works too)
- 2 large eggs
- 1 tablespoon melted butter, plus more for the pan
- 1 teaspoon sugar
- ¼ teaspoon salt
- Savory toppings: sour cream, smoked salmon, cream cheese, fresh dill, caviar (optional)
- Sweet toppings: honey, strawberry jam, whipped cream, fresh berries
Instructions
- Whisk together the flour, eggs, milk, melted butter, sugar, and salt until you have a completely smooth, very thin batter — thinner than pancake batter. Let it rest for 20–30 minutes at room temperature. This rest lets the flour hydrate properly and makes the blini more tender.
- Heat a small non-stick skillet (6–8 inches) over medium heat and brush lightly with butter. Pour in just enough batter to thinly coat the bottom of the pan — about 2–3 tablespoons — and immediately swirl the pan to spread it out. You want it as thin as possible.
- Cook for 45–60 seconds until the edges begin to lift away from the pan and the bottom is lightly golden. Flip carefully and cook for another 20–30 seconds. Slide onto a plate and repeat, buttering the pan between each one.
- Stack the finished blini on a plate — they won't stick together. Serve warm with your choice of toppings arranged on the side so everyone can build their own.
Tips
- Tip: The first blini almost always fails — it's how you calibrate your pan temperature. Eat it yourself and keep going.
- Tip: Don't skip the resting time — 20 minutes makes a real difference in texture. I usually mix the batter, set a timer, and prep my toppings while I wait.
- Tip: Leftover blini keep well in the fridge for 2 days — layer them with parchment paper so they don't stick, then reheat briefly in a dry pan.
20. Olivier Salad (Russian Potato Salad)

If there's one dish that shows up on every Russian holiday table without fail, this is it. Olivier salad is a creamy, hearty mix of diced potatoes, carrots, peas, pickles, hard-boiled eggs, and chicken — all brought together with a generous amount of mayo. I made this for the first time out of pure curiosity and was genuinely surprised by how much my family loved it; my husband went back for thirds. The key is cutting everything into small, even cubes and letting the salad sit overnight so the flavors really come together — don't skip that resting time.
Ingredients
- 3 medium potatoes, boiled and diced
- 2 carrots, boiled and diced
- 1 cup frozen peas, cooked
- 3 dill pickles, diced
- 3 hard-boiled eggs, diced
- 1 cup cooked chicken or bologna, diced
- ¾ cup mayonnaise
- Salt and pepper, to taste
- Fresh dill, for garnish
Instructions
- Boil the potatoes and carrots separately until just tender — you want them firm enough to dice cleanly, not mushy. Cool completely before cutting.
- Dice everything into small, even cubes — potatoes, carrots, pickles, eggs, and chicken — and combine in a large bowl with the cooked peas.
- Add the mayonnaise and fold gently until everything is evenly coated. Season generously with salt and pepper.
- Cover and refrigerate for at least 2 hours, but overnight is better. The flavors meld and the salad firms up nicely. Garnish with fresh dill before serving.
Tips
- Tip: Cook your potatoes and carrots a day ahead so they're fully cooled — warm vegetables make the mayo greasy and the salad turns soggy.
- Tip: Bologna is the traditional choice and honestly works just as well as chicken — don't overlook it if that's what you have.
- Tip: This keeps well in the fridge for up to 3 days, so it's a solid make-ahead dish for gatherings.
21. Polish Cold Beet Soup (Chłodnik)
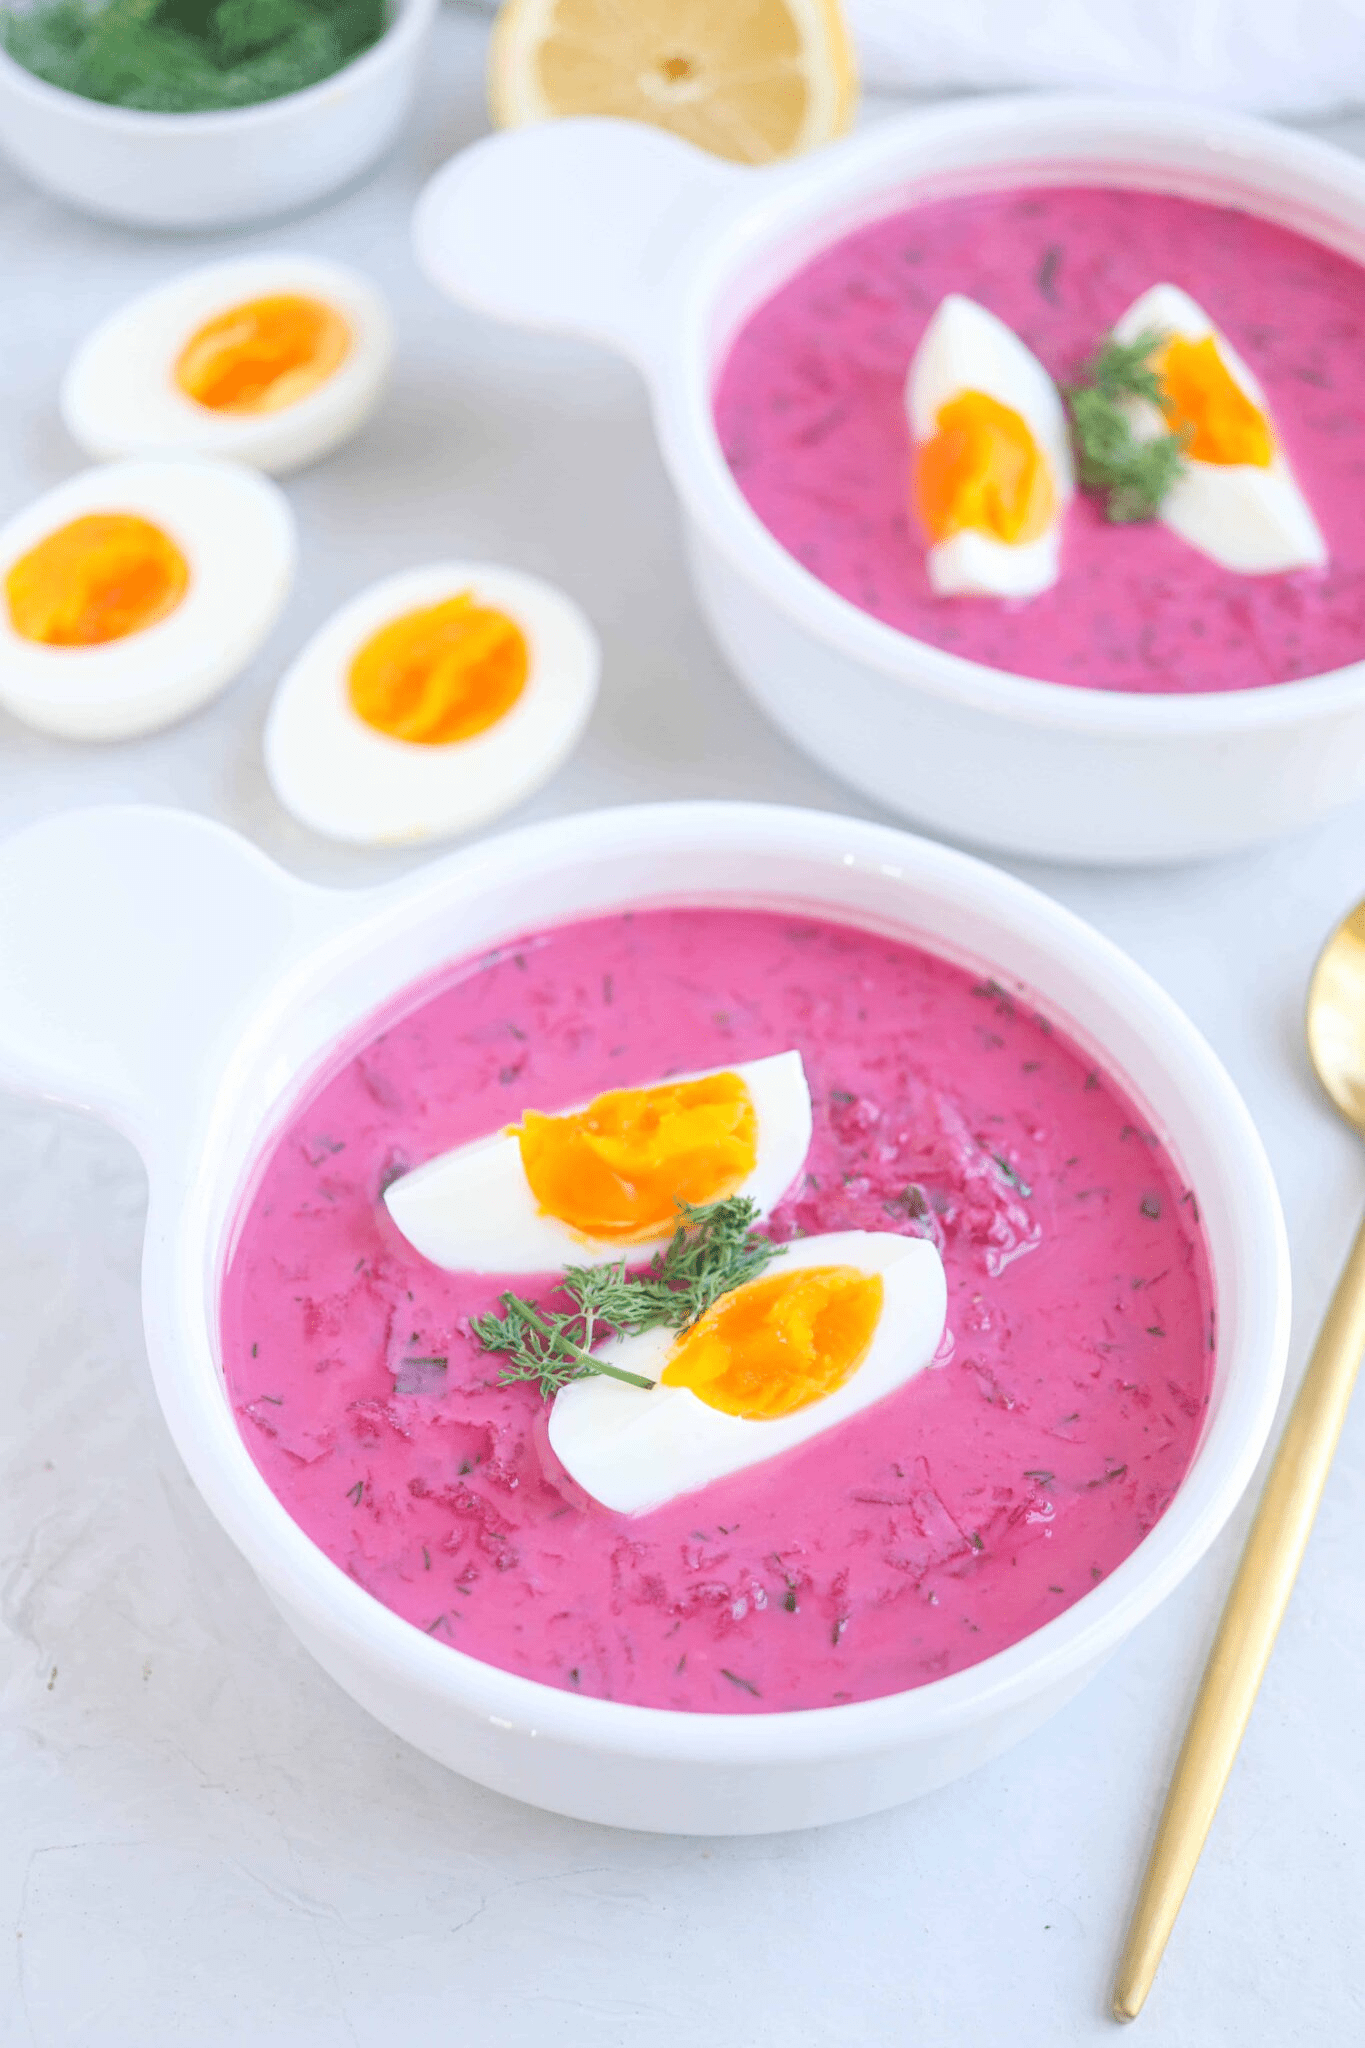
I'll be honest — I had never heard of cold beet soup before I started researching Eastern European food, and when I saw it I was skeptical. But this soup is genuinely one of the most striking things I've put on my table: brilliantly pink, creamy, tangy, and ice cold. It's a Polish classic made with grated cooked beets stirred into yogurt or kefir, loaded with cucumber, radishes, and fresh dill, then topped with a halved hard-boiled egg. On a hot day, this is the kind of thing that makes you wonder why you ever settled for lukewarm leftovers.
Ingredients
- 4 medium beets, cooked and grated (reserve the cooking liquid)
- 1½ cups plain yogurt or kefir
- 1 cup cucumber, finely diced
- 4 radishes, thinly sliced
- 2 tablespoons lemon juice or white wine vinegar
- 1 tablespoon fresh dill, chopped
- Salt and pepper, to taste
- 2–3 hard-boiled eggs, halved, for serving
- Extra dill and a drizzle of olive oil, for garnish
Instructions
- Grate the cooked beets into a large bowl. Stir in the yogurt or kefir and a splash of the reserved beet cooking liquid — add more liquid gradually until you reach a pourable soup consistency.
- Add the cucumber, radishes, lemon juice, and dill. Stir to combine. Season well with salt and pepper and taste — it should be tangy and bright.
- Refrigerate for at least 2 hours. The color deepens as it sits, going from pink to a deep jewel-toned magenta.
- Ladle into bowls, place a halved hard-boiled egg in each, garnish with extra dill and a drizzle of olive oil. Serve immediately while very cold.
Tips
- Tip: Pre-cooked vacuum-packed beets from Trader Joe's or Walmart work perfectly here — no roasting or boiling required, which saves real time.
- Tip: If you can't find kefir, thin plain yogurt with a little cold water until it has a pourable consistency — it works just as well.
- Tip: Wear gloves when grating the beets. I did not do this the first time. My cutting board still has the evidence.
22. Potato Vareniki (Ukrainian Pierogi)

Vareniki are the Eastern European answer to every comfort food craving — soft dumplings stuffed with creamy mashed potato and caramelized onion, boiled until tender, then pan-fried in butter until the outside is golden and just slightly crisp. Saad saw me making these and asked if they were "like samosa but different" — and honestly, that's not a bad description. Served with sour cream and more caramelized onions on top, these are the kind of thing you make once and then find yourself making every couple of weeks. The dough is simple, and the folding gets easier once you get a rhythm going.
Ingredients
- 2 cups all-purpose flour, plus extra for dusting
- ½ cup warm water
- 1 egg
- ½ teaspoon salt
- 2 cups mashed potato, smooth and fully cooled
- 1 large onion, caramelized in butter
- Salt and pepper, to taste
- 2 tablespoons butter, for pan-frying
- Sour cream, fresh chives, and extra caramelized onion, for serving
Instructions
- Make the dough: combine flour, egg, warm water, and salt in a bowl. Knead for about 5 minutes until smooth and elastic. Cover with a damp towel and rest for 30 minutes — this makes it much easier to roll.
- Mix the cooled mashed potato with the caramelized onion, salt, and pepper. Taste it — the filling should be well-seasoned on its own.
- Roll the dough out thin on a floured surface. Cut into 3-inch rounds using a glass or cookie cutter. Place a heaping teaspoon of filling in the center of each round, fold over, and pinch the edges firmly to seal.
- Boil in a large pot of well-salted water for 3–4 minutes until they float and the dough is cooked through. Remove with a slotted spoon and drain.
- Melt butter in a skillet over medium heat. Pan-fry the boiled vareniki for 2–3 minutes per side until golden. Serve immediately with sour cream, caramelized onions, and chives.
Tips
- Tip: Make sure the mashed potato is fully cooled before filling — warm filling tears the dough and makes sealing nearly impossible.
- Tip: You can freeze uncooked vareniki in a single layer on a sheet pan, then transfer to a bag — boil straight from frozen, just add 1–2 extra minutes.
- Tip: Don't skip the pan-fry step. Boiled vareniki are fine, but that buttery golden crust is what makes them memorable.
23. Okroshka (Cold Summer Soup)

Okroshka is the soup I had the hardest time explaining to my family the first time I made it. "It's cold. It has kefir in it. Also cucumbers and eggs and ham." They looked at me like I'd lost my mind — and then they tasted it on a sweltering afternoon and understood immediately. This is a Russian cold summer soup that's less of a traditional soup and more of a chopped salad swimming in a tangy, ice-cold kefir base. Everything gets diced small, stirred together, and chilled until it's almost shockingly refreshing. Serve it with dark bread and a spoonful of sour cream.
Ingredients
- 2 cups kefir or plain yogurt thinned with water
- 2 cups cold water (or kvass if you can find it)
- 2 medium potatoes, boiled and diced
- 3 hard-boiled eggs, diced
- 1 large cucumber, diced
- 4–5 radishes, thinly sliced
- 4 oz cooked ham or bologna, diced
- 3 green onions, sliced
- ¼ cup fresh dill, chopped
- 1 tablespoon lemon juice
- Salt and pepper, to taste
- Sour cream, for serving
Instructions
- Dice the potatoes, eggs, cucumber, and ham into small, even pieces and place in a large bowl. Add the radishes, green onions, and dill and stir to combine.
- Pour the kefir and cold water over the top and stir well. Add lemon juice, salt, and pepper. Taste and adjust — it should be tangy and savory with a clean freshness from the dill.
- Refrigerate for at least 1 hour until very cold. The longer it sits, the better the flavors come together.
- Ladle into bowls and top each with a generous spoonful of sour cream. Serve immediately with slices of dark rye bread on the side.
Tips
- Tip: Kefir is sold at most large grocery stores — look near the yogurt aisle. If you can't find it, thin plain yogurt with cold water to a pourable consistency.
- Tip: Boil and dice your potatoes the day before to save time — they need to be fully cold before going into the soup anyway.
- Tip: This doesn't keep well once assembled — the cucumbers release water and the soup gets watery. Mix and serve the same day for best results.
24. Aspic (Kholodets — Russian Meat Jelly)

Kholodets is the dish that made me genuinely say "I need to understand this better." It sounds strange — slow-cooked pork and chicken suspended in savory, crystal-clear gelatin, sliced cold and served with sharp horseradish and mustard — but it's been on Russian celebration tables for centuries and there's a reason it keeps showing up. The gelatin comes entirely from the collagen in the bones during that long, slow simmer, no packets needed. It's a patience dish; the four to five hours of cooking are mostly hands-off, and the payoff is something genuinely unlike anything else in this list.
Ingredients
- 1 lb pork hock or trotters
- 1 lb chicken legs or wings
- 1 onion, halved
- 2 carrots
- 4 cloves garlic
- 2 bay leaves
- 10 black peppercorns
- Salt, to taste
- Fresh parsley and sliced carrot rounds, for decoration
- Horseradish and mustard, for serving
Instructions
- Place the pork and chicken in a large pot, cover with cold water, and bring to a boil. Skim off all the foam that rises — this is important for a clear broth. Add the onion, carrots, garlic, bay leaves, and peppercorns. Reduce heat to very low and simmer for 4–5 hours until the meat is completely falling off the bone.
- Remove the meat and strain the broth through a fine mesh sieve. The broth should be clear and noticeably thick when cooled. Season generously with salt — it needs to be well-seasoned before it sets.
- Shred the meat finely, discarding all bones and gristle. Arrange decorative carrot rounds and parsley sprigs in the bottom of a shallow serving dish or loaf pan.
- Layer the shredded meat evenly over the decorations, then pour the strained broth over the top. Refrigerate overnight until completely set and firm.
- To serve, slice and plate cold. Serve alongside horseradish and sharp mustard — both cuts through the richness beautifully.
Tips
- Tip: The key to a clear, properly set gelatin is skimming the foam thoroughly at the very beginning — don't rush past that step.
- Tip: To test if your broth will set, drop a little onto a cold plate and put it in the fridge for 10 minutes. If it firms up, you're good. If not, simmer a little longer.
- Tip: Pork hock gives the most gelatin. If you can only find trotters, those work too — ask at the meat counter at your local grocery store or Walmart.
15. Russian Salmon Coulibiac

Coulibiac is one of those recipes that sounds intimidating until you actually make it — and then you realize it's really just a very well-dressed salmon pie. Layers of cooked rice, sautéed mushrooms, sliced hard-boiled eggs, and seasoned salmon are sealed inside golden puff pastry and baked until the whole thing is crisp and beautiful. I made this for Eid one year instead of my usual roast chicken and my husband genuinely thought I'd ordered it from somewhere. The key is getting your fillings fully cooked and cooled before assembly — wet filling makes soggy pastry, and nobody wants that. This one is a proper showstopper, but it's more patient work than difficult work.
Ingredients
- 1 lb salmon fillet, skin removed and sliced into portions
- 1 cup cooked white rice
- 8 oz cremini or white mushrooms, sautéed in 1 tablespoon butter
- 3 hard-boiled eggs, peeled and sliced
- 2 tablespoons fresh dill, chopped (or 1 teaspoon dried)
- Salt and black pepper, to taste
- 2 sheets puff pastry, thawed (Pepperidge Farm works well here)
- 2 egg yolks beaten with 1 tablespoon water, for egg wash
Instructions
- Preheat your oven to 400°F. Season the salmon pieces with salt and pepper. Stir the chopped dill through the cooked rice and season the sautéed mushrooms with salt and pepper. Let all components cool completely before assembling.
- Line a baking sheet with parchment. Lay one sheet of puff pastry flat on it. In the centre, leaving a 2-inch border all around, layer in this order: rice first, then mushrooms, then sliced eggs, then the salmon on top. Keep the layers neat and even.
- Lay the second sheet of puff pastry over the filling. Press the edges together firmly and crimp with a fork or your fingers to seal tightly — any gaps and the filling steams out. Brush the entire surface generously with egg wash.
- Score a light decorative pattern on top with a sharp knife (don't cut all the way through) and cut one or two small steam vents in the centre. Bake for 30–35 minutes until the pastry is deeply golden all over.
- Rest for at least 10 minutes before slicing — this lets the filling settle so it doesn't fall apart when you cut it. Serve with a simple green salad or sour cream on the side.
Tips
- Tip: Make sure every filling component is fully cooled before you assemble — warm filling creates steam inside the pastry and makes the bottom layer go soggy.
- Tip: You can assemble the whole thing the night before, wrap it tightly in plastic wrap, refrigerate overnight, and bake straight from the fridge the next day — it actually holds together better that way.
- Tip: If your puff pastry sheets aren't quite big enough to cover the filling, gently roll them slightly thinner on a lightly floured surface before assembling.
16. Polish Pickle Soup (Zupa Ogórkowa)

I know pickle soup sounds like a dare, but I promise you it isn't. This is one of those Eastern European recipes that looks strange on paper and then completely wins you over at the first spoonful. Grated dill pickles dissolve into a creamy, tangy broth alongside soft potatoes and a swirl of sour cream — it's sharp and warming at the same time. This one is technically Polish rather than Russian, but it belongs firmly in the Eastern European canon and shows up on tables across the region. The first time I made it I used sweet pickles by accident — huge mistake, don't do that. You need proper dill pickles or genuine fermented pickles, and the brine is non-negotiable. Serve it with dark rye bread and you'll wonder where this soup has been your whole life.
Ingredients
- 4 large dill pickles, coarsely grated
- ½ cup dill pickle brine (straight from the jar)
- 3 medium Yukon Gold or russet potatoes, peeled and diced
- 1 medium onion, diced
- 2 medium carrots, diced
- 2 stalks celery, diced
- 5 cups chicken or vegetable broth
- 2 tablespoons unsalted butter
- ½ cup full-fat sour cream
- Salt and black pepper, to taste
- Fresh dill and dark rye bread, for serving
Instructions
- Melt the butter in a large pot over medium heat. Add the onion, carrots, and celery and sauté for 5–6 minutes until the onion is softened and translucent. Add the diced potatoes and pour in the broth. Bring to a boil.
- Reduce heat and simmer for 15 minutes until the potatoes are nearly tender when pierced with a fork. Add the grated pickles and the pickle brine. Stir well and simmer for another 10 minutes — the pickles will soften and their flavour will mellow into the broth.
- Remove the pot from the heat. Stir in the sour cream gradually until fully incorporated and smooth. Taste before adding any salt — the pickles and brine bring a lot of sodium, so you may not need much. Add black pepper to taste.
- Ladle into bowls and top generously with fresh dill. Serve immediately with thick slices of dark rye bread on the side for dipping.
Tips
- Tip: Use only genuine dill pickles or fermented pickles — bread-and-butter pickles or sweet pickles will completely change the flavour profile and not in a good way.
- Tip: To keep the sour cream from curdling, let the soup come off the boil for a minute or two before stirring it in — or temper it by mixing a ladleful of hot soup into the sour cream first, then adding that mixture back to the pot.
- Tip: This soup tastes even better the next day once the flavours have had time to develop — reheat gently over low heat so the sour cream doesn't split.
17. Chicken Cabbage Savory Pirog

If pirozhki are the individual handheld version, pirog is the full-size celebration pie — and this chicken and cabbage version is one of the most satisfying things you can pull out of an oven. A yeasted dough bakes up golden and slightly soft, encasing a filling of shredded chicken and cabbage that's been cooked down with onion, butter, and dill until it's almost jammy. It slices beautifully, it feeds a crowd, and it works as a main dish with soup or as a substantial side. My husband's family would call this proper home cooking — the kind that takes time but fills the table with something genuinely good.
Ingredients
- 1 batch yeasted pirog dough (or use 1 lb store-bought pizza dough, divided in two)
- 2 cups cooked chicken, shredded (rotisserie chicken works great here)
- 3 cups green cabbage, finely shredded
- 1 large onion, diced
- 2 tablespoons unsalted butter
- 1 teaspoon salt, ½ teaspoon black pepper
- 2 tablespoons fresh dill, chopped (or 1 teaspoon dried)
- 1 egg yolk mixed with 1 tablespoon water, for egg wash
Instructions
- Melt the butter in a large skillet over medium heat. Cook the onion for 5 minutes until softened. Add the shredded cabbage, season with salt and pepper, and cook for 10–12 minutes, stirring occasionally, until the cabbage is wilted and lightly golden at the edges. Stir in the dill. Remove from heat, mix in the shredded chicken, and let the filling cool completely.
- Preheat oven to 375°F. Grease a 9x13-inch baking dish. Divide your dough into two portions — make one slightly larger than the other. On a lightly floured surface, roll the larger portion into a rectangle big enough to line the base and sides of the dish with a little overhang. Press it in.
- Spread the cooled filling evenly across the dough base. Roll the second portion of dough to cover the top of the pie. Lay it over the filling, press the edges together with the overhanging bottom dough, and crimp to seal. Brush all over with the egg wash and pierce the top several times with a fork to allow steam to escape.
- Bake for 30–35 minutes until the top is a deep, even golden brown. Let the pirog rest for 10 minutes before slicing — this helps the filling hold together and makes cleaner cuts.
Tips
- Tip: The filling must be fully cooled before it goes into the dough — a warm filling will start to cook the dough from the inside and you'll end up with a raw bottom layer.
- Tip: Cook the cabbage long enough that most of its moisture evaporates — watery filling leads to a soggy base, so don't rush this step.
- Tip: Leftover pirog reheats well in a 325°F oven for 10–12 minutes — it stays much better that way than in the microwave, which makes the dough chewy.
18. Pelmeni (Classic Russian Dumplings)

Growing up in Pakistan, we had our own dumpling tradition — think shami kebabs tucked into dough — so pelmeni felt immediately familiar the first time I made them, just shaped differently. These are Russia's answer to the universal truth that meat wrapped in dough is always a good idea. The dough is simple and stiff, the filling is pork and beef seasoned with onion and garlic, and you boil them until they float. What makes pelmeni special is the grated onion in the filling — it keeps the meat mixture tender and juicy even after boiling, and that's the detail a lot of recipes skip. I always make a double batch because they freeze perfectly and Saad has been known to eat twelve in one sitting without apology.
Ingredients
- Dough: 2½ cups all-purpose flour, plus more for dusting
- 2 large eggs
- ½ cup cold water
- ½ teaspoon salt
- Filling: ½ lb ground pork, ½ lb ground beef
- 1 medium onion, finely grated (not chopped — grated)
- 2 cloves garlic, minced
- 1 teaspoon salt, ½ teaspoon black pepper
- 2 tablespoons cold water
- Melted butter, sour cream, and fresh dill, for serving
Instructions
- Make the dough: combine flour, eggs, cold water, and salt in a bowl. Mix until a shaggy dough forms, then turn out and knead for 5–7 minutes until smooth and firm. It should feel stiffer than bread dough. Wrap in plastic and rest at room temperature for 30 minutes. Meanwhile, combine all filling ingredients in a bowl and mix well until fully combined.
- Roll the rested dough out very thin on a lightly floured surface — about ⅛ inch thick. Use a 2½-inch round cutter (or a glass) to cut circles. Place a small, level teaspoon of filling in the centre of each circle — don't overfill or they'll burst when boiling.
- Fold each circle into a half-moon shape and pinch the edges firmly together, pressing out any air as you seal. Then bring the two pointed corners together and pinch to create the classic pelmeni shape. Place finished dumplings on a lightly floured baking sheet.
- Bring a large pot of well-salted water to a rolling boil. Cook the pelmeni in batches — don't overcrowd. They're ready about 2–3 minutes after they float to the surface, so 6–8 minutes total. Drain with a slotted spoon.
- Serve immediately tossed in melted butter with sour cream on the side and a shower of fresh dill, or ladle into clear chicken broth for a more soup-style presentation.
Tips
- Tip: To freeze, arrange uncooked pelmeni in a single layer on a floured baking sheet and freeze solid (about 2 hours), then transfer to a zip-lock bag. Cook from frozen — just add 3–4 extra minutes to the boiling time.
- Tip: Grating the onion rather than chopping it is not optional — chopped onion stays chunky inside the dumpling and creates uneven texture, while grated onion melts into the meat and keeps everything juicy.
- Tip: Keep the finished dough and shaped pelmeni covered with a damp cloth while you work — pelmeni dough dries out fast and dry edges won't seal properly.
19. Syrniki (Russian Cheese Pancakes)

Syrniki are what happens when cottage cheese becomes breakfast, and once you've tried them you'll wonder why you ever bothered with regular pancakes. They're small, golden, slightly crispy on the outside, and soft with a gentle tang on the inside — somewhere between a pancake and a cheese fritter. The batter comes together in minutes and the whole thing cooks in under twenty minutes. The only place I went wrong early on was using regular wet cottage cheese straight from the container — the mixture was too loose and fell apart in the pan. You need to drain your cottage cheese properly, or better yet use farmer's cheese, which holds its shape from the start. Serve them warm with jam or sour cream and you have a breakfast that feels genuinely special without much effort at all.
Ingredients
- 2 cups farmer's cheese or dry-curd cottage cheese, well drained
- 2 large eggs
- 3 tablespoons granulated sugar
- 1 teaspoon vanilla extract
- ½ cup all-purpose flour, plus extra for shaping
- Pinch of salt
- 2 tablespoons unsalted butter or neutral oil, for frying
- Sour cream, fruit jam, or fresh berries, for serving
Instructions
- In a medium bowl, combine the drained cheese, eggs, sugar, vanilla, salt, and flour. Mix until a soft, slightly sticky dough forms. If the mixture feels too wet to hold a shape, add flour one tablespoon at a time until it just comes together.
- Lightly flour your hands and a clean work surface. Scoop heaped tablespoon-sized portions of dough, roll each into a ball between your palms, then flatten gently into a small round patty about ¾ inch thick. Dust lightly in flour on both sides.
- Heat butter in a non-stick skillet over medium-low heat. Cook the syrniki for 3–4 minutes per side until they are a deep golden brown and cooked through to the centre. Keep the heat at medium-low — high heat browns the outside before the inside sets.
- Serve warm straight from the pan with a spoonful of sour cream, your favourite jam, or a handful of fresh berries alongside.
Tips
- Tip: To drain regular cottage cheese, spoon it into a fine-mesh strainer or a cheesecloth and let it drain in the fridge for at least an hour, or overnight — removing that excess liquid is what makes the syrniki hold their shape in the pan.
- Tip: The dough is supposed to feel a little tacky — don't be tempted to add too much flour trying to make it smooth, or the cooked syrniki will be dense and heavy rather than light and soft inside.
- Tip: Shaped but uncooked syrniki can be refrigerated on a plate for up to 2 hours before frying, which is helpful if you want to get the prep done ahead of a relaxed weekend breakfast.
10. Beet Salad

Beets are one of those vegetables I used to completely ignore — they'd sit at the farmers market and I'd walk right past them. Then I tried a version of this salad at a friend's place and I couldn't stop eating it. The **roasting** is what changes everything: it concentrates that earthy sweetness and makes the beets taste almost caramel-rich. Layered with tangy red onion, creamy crumbled cheese, and toasted walnuts, then finished with a sharp Dijon vinaigrette — it's the kind of salad that looks like you tried much harder than you did. It works alongside almost any Eastern European main on this list, or honestly just on its own with some crusty bread.
Ingredients
- 4 medium beets, roasted or boiled and sliced
- ¼ red onion, thinly sliced
- 2 oz crumbled goat cheese or feta
- ¼ cup walnuts, toasted
- Fresh parsley or dill, chopped
- 3 tablespoons olive oil
- 1½ tablespoons red wine vinegar
- 1 teaspoon Dijon mustard
- 1 teaspoon honey
- Salt and pepper, to taste
Instructions
- Roast the beets wrapped individually in foil at 400°F for 45–60 minutes until a knife slides through easily. Cool completely, then rub off the skins with a paper towel (wear gloves — beet juice stains everything). Slice into rounds or wedges. Alternatively, boil whole unpeeled beets until fork-tender, about 40 minutes, then cool and peel.
- Whisk together the olive oil, red wine vinegar, Dijon mustard, honey, salt, and pepper in a small bowl until combined and slightly emulsified.
- Arrange the sliced beets on a serving platter. Scatter over the thinly sliced red onion, toasted walnuts, and crumbled cheese.
- Drizzle the dressing evenly over the top and finish with a generous scatter of fresh herbs. Serve at room temperature or lightly chilled.
Tips
- Tip: Roast the beets a day ahead and keep them in the fridge — they peel more easily when cold and the whole salad comes together in minutes when you're ready to serve.
- Tip: If you can't find goat cheese, crumbled feta from a block (not pre-crumbled) has better texture and saltiness for this salad.
- Tip: Add the dressing right before serving — beets will bleed their colour into everything if they sit dressed too long, which still tastes fine but looks less neat on the platter.
11. Apple Cinnamon Buckwheat Porridge

Buckwheat porridge was completely foreign to me until I started researching this list — growing up in Pakistan, our breakfast porridge was always semolina or oats. I picked up a bag of **raw buckwheat groats** from the health food aisle at Whole Foods (Walmart carries them too now, usually near the oatmeal) and tried this on a cold morning. It's nuttier than oatmeal, a bit more substantial, and with the stewed apple and cinnamon cooked right into it, it genuinely kept me full until lunch. Saad was skeptical but ate the whole bowl. It's naturally gluten-free, which is a bonus if that matters in your house, and the whole thing takes under 25 minutes from start to finish.
Ingredients
- 1 cup raw buckwheat groats, rinsed well
- 2 cups water or milk (dairy or oat milk both work)
- 1 large apple, peeled and diced small
- 1 teaspoon ground cinnamon
- 1 tablespoon honey or maple syrup
- Pinch of salt
- 1 teaspoon butter, for serving
- Optional toppings: chopped walnuts, extra honey, dried cranberries
Instructions
- Rinse the buckwheat groats thoroughly under cold running water until the water runs clear — this removes the starchy coating and prevents the porridge from going gluey.
- Combine the rinsed buckwheat, water or milk, diced apple, and a pinch of salt in a medium saucepan. Bring to a boil over medium heat, stirring once or twice.
- Reduce the heat to very low, cover with a lid, and cook for 15–18 minutes until the buckwheat is tender and has absorbed all the liquid. Don't lift the lid too early.
- Remove from heat. Stir in the cinnamon and honey. Top each bowl with a small pat of butter and any optional toppings. Serve immediately while hot.
Tips
- Tip: Use milk instead of water if you want a creamier, richer porridge — oat milk gives a lovely subtle sweetness without overpowering the apple.
- Tip: A Granny Smith apple holds its shape better during cooking and gives a nice tartness; a Honeycrisp will soften more and taste sweeter — both work, just different textures.
- Tip: Buckwheat groats are sold in most health food stores and increasingly at Walmart and Costco near the oats and grains — look for raw (not toasted) groats for porridge.
12. Kvass (Russian Fermented Rye Bread Drink)

This one is genuinely unlike anything I'd ever made before. Kvass is a **fermented drink** made from dark rye bread — you steep deeply toasted bread in hot water, let it ferment gently with yeast, and end up with something lightly fizzy, faintly sour, and surprisingly refreshing. It's not beer, it's not juice — it's its own thing entirely. The alcohol content is barely there (think kombucha territory), so the whole family can drink it. I added fresh mint and a few raisins to mine and the flavour was genuinely interesting. Dark rye bread is easy to find at most grocery stores — Pepperidge Farm makes one, and Trader Joe's usually carries a German-style rye.
Ingredients
- 10 oz (about 300g) dark rye bread, sliced
- 2 quarts (about 2 litres) boiling water
- 3 tablespoons granulated sugar
- 1 teaspoon active dry yeast
- Optional: a few fresh mint sprigs, a small handful of raisins, or strips of lemon zest
Instructions
- Spread the rye bread slices on a baking sheet and toast in a 375°F oven for 20–25 minutes, flipping once, until deeply browned and slightly charred at the edges — this dark colour and slightly bitter char is what gives kvass its distinctive flavour. Don't rush this step.
- Place the toasted bread in a large heatproof bowl or jar. Pour the boiling water over it, stir in the sugar and any optional flavourings (mint, raisins, lemon zest). Cover loosely with a clean kitchen towel and leave at room temperature to steep for 8–12 hours.
- Strain the liquid through a fine mesh sieve lined with cheesecloth or a clean thin towel, pressing the bread solids firmly to extract every bit of liquid. Discard the solids.
- Stir the active dry yeast into the strained liquid. Cover loosely again and leave at room temperature for another 8–12 hours until the drink is gently fizzy and smells pleasantly tangy. Transfer immediately to sealed bottles or jars and refrigerate. Drink within 3–4 days.
Tips
- Tip: The longer kvass sits at room temperature after the yeast is added, the more sour and alcoholic it becomes — taste it after 8 hours and refrigerate as soon as you like the flavour.
- Tip: Use a swing-top glass bottle (like a Grolsch-style bottle) if you have one — it handles the slight carbonation safely and looks great on the table.
- Tip: Dark rye bread is available at most larger grocery stores — look in the bakery or specialty bread aisle. Pumpernickel works well too and gives a slightly deeper, more molasses-forward flavour.
13. Russian Honey Cake (Medovik)
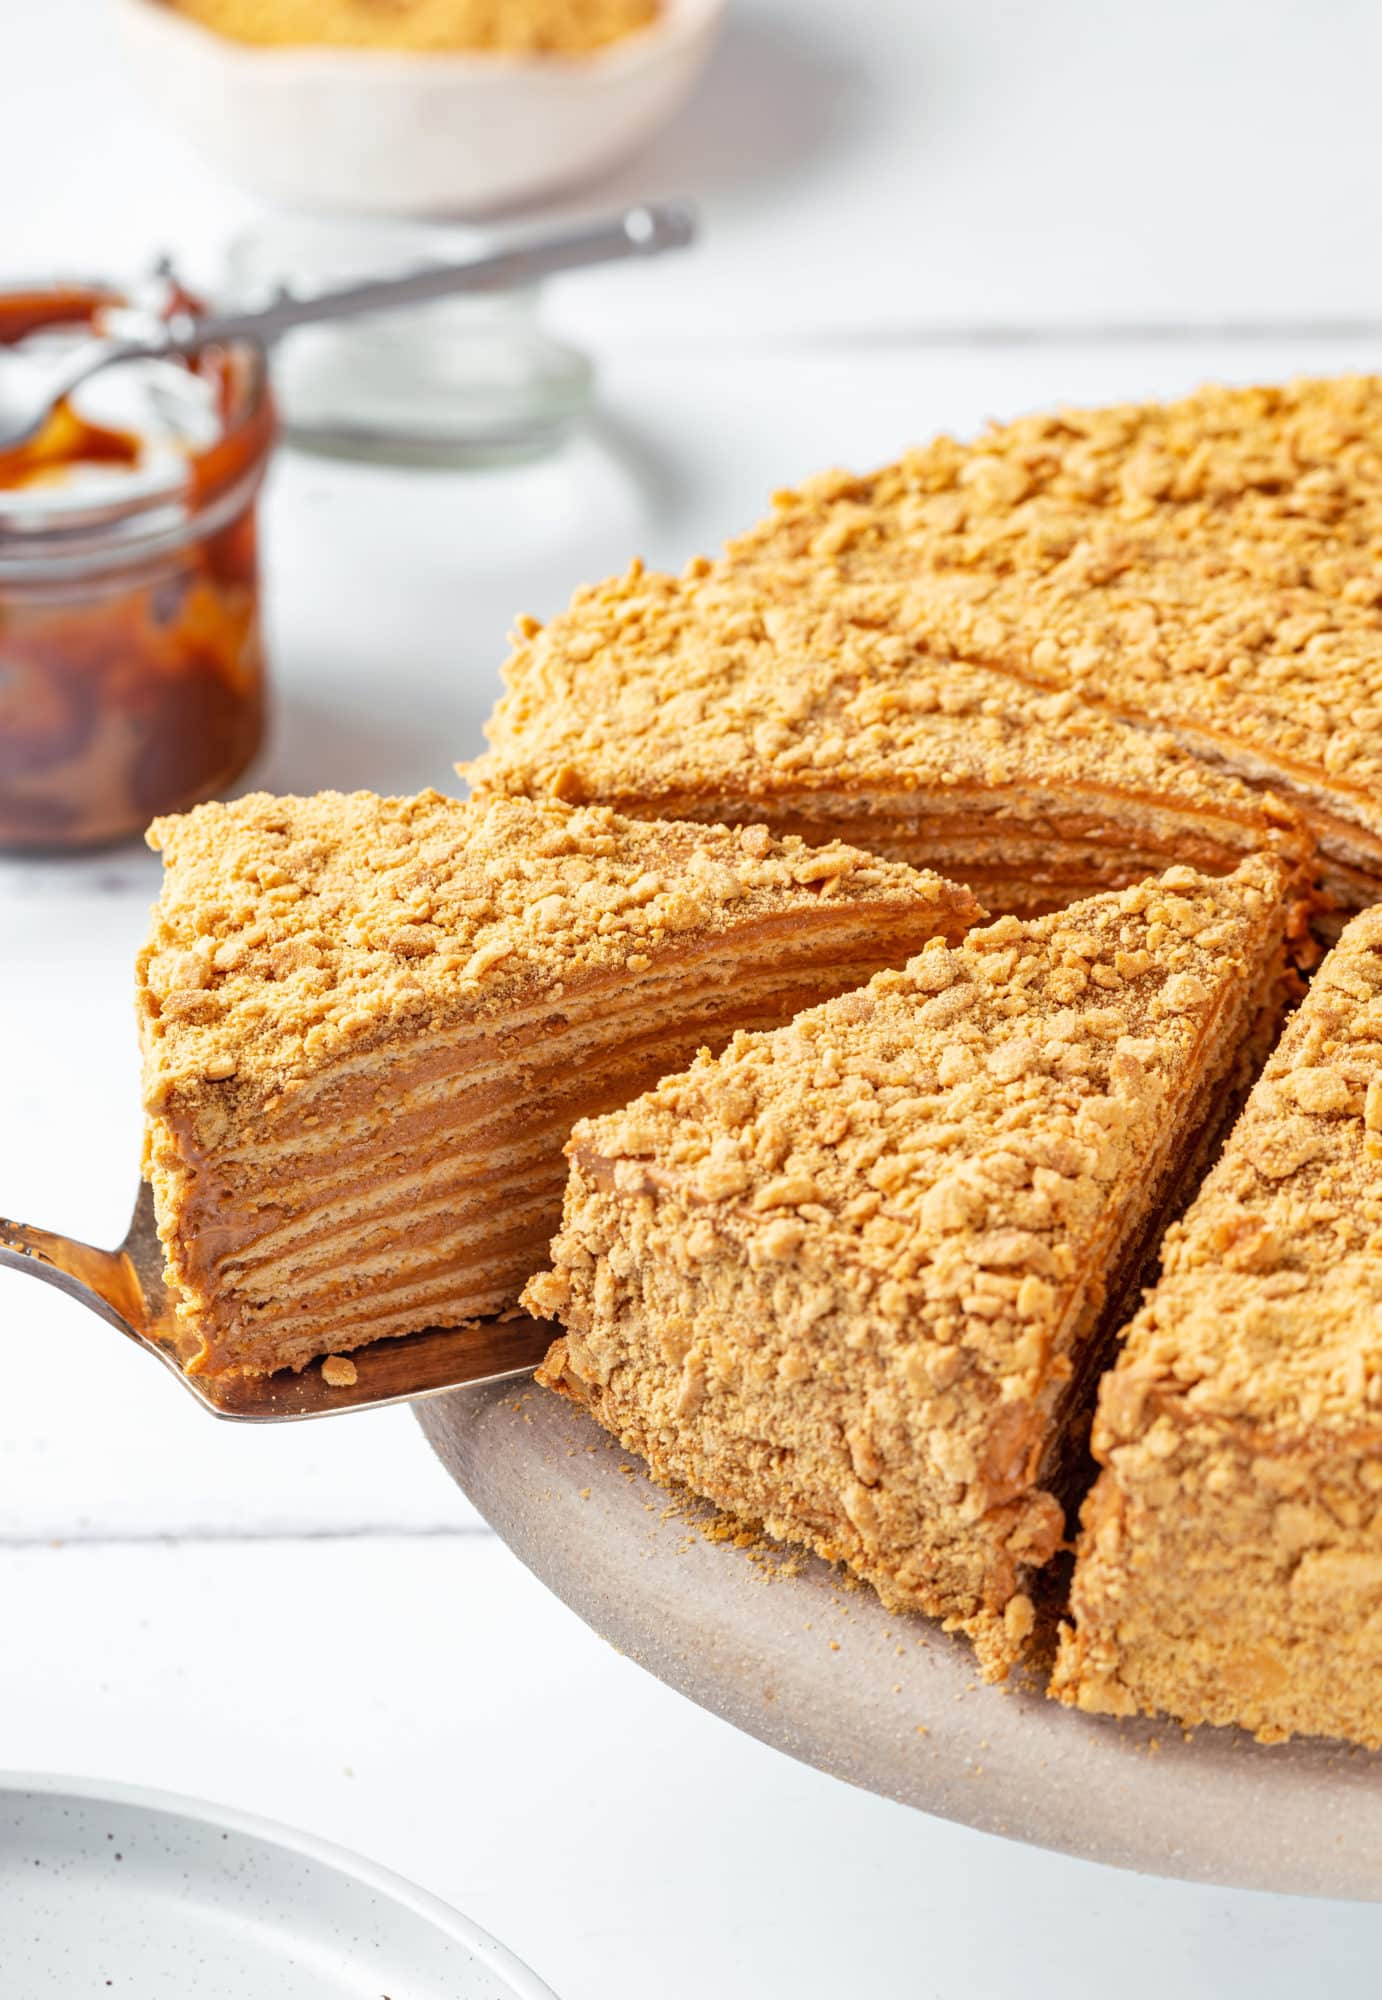
I'll be honest — I was intimidated by this cake for months before I actually tried it. Eight individual layers, each one rolled paper-thin and baked separately? It sounded like a weekend-long project. But here's what I found out: each layer bakes in under 5 minutes, the dough is forgiving, and the sour cream frosting takes about 3 minutes to mix together. The real magic happens **overnight in the fridge**, when those crisp layers drink up the frosting and transform into something impossibly soft and fragrant with honey. This is not my authentic Russian grandmother's recipe — I don't have one of those. But it's a solid home-cook version and every single person I've served it to has asked for the recipe.
Ingredients
- For the cake layers: 3 tablespoons honey, 3 tablespoons granulated sugar, 3 tablespoons unsalted butter, 2 large eggs, 1 teaspoon baking soda, 2½ cups all-purpose flour
- For the frosting: 2 cups full-fat sour cream, ¾ cup powdered sugar, 1 teaspoon vanilla extract
Instructions
- Set a heatproof bowl over a pot of barely simmering water (double boiler style). Add the honey, sugar, and butter and stir until melted and combined. Remove from the heat, then whisk in the eggs and baking soda — the mixture will foam up noticeably, which is normal. Stir in the flour until a soft, slightly sticky dough forms. Let it cool for 15 minutes so it's easier to handle.
- Preheat the oven to 350°F. Divide the dough into 8 equal portions. Working one at a time, roll each portion directly on a sheet of parchment paper until paper-thin. Use a dinner plate (about 8–9 inches) as a template to cut a neat circle — save all the trimmings on a separate baking sheet. Slide the parchment onto a baking sheet and bake each layer for 4–5 minutes until just golden. Cool on a wire rack. Bake the trimmings together until golden and crisp.
- Whisk together the sour cream, powdered sugar, and vanilla until smooth and slightly thickened. Stack the cooled cake layers on a serving plate, spreading a generous layer of frosting between each one and covering the top and sides completely.
- Crush the baked trimmings into fine crumbs (a zip-lock bag and a rolling pin works perfectly) and press them all over the outside of the cake. Refrigerate for a minimum of 8 hours — overnight is non-negotiable. The texture changes completely as the layers absorb the frosting. Slice and serve cold.
Tips
- Tip: Full-fat sour cream is essential here — low-fat versions are too thin and the frosting won't hold between the layers properly. Daisy brand full-fat sour cream works well.
- Tip: The dough is much easier to roll while still slightly warm — if it cools completely and firms up, just warm it in your hands for a minute before rolling.
- Tip: This cake actually tastes better on day two than day one — make it two nights ahead if you're serving it for a gathering.
14. Buzhenina (Herb Roasted Pork)

My husband is a pork roast person, so this one went straight onto the regular rotation the first time I made it. Buzhenina is essentially a **garlic-studded, herb-rubbed pork loin** that you marinate overnight and then slow-roast low and slow — the result is deeply savoury, incredibly moist, and fragrant with rosemary and smoked paprika. Russians traditionally serve it cold, sliced paper-thin as part of a celebration spread, almost like a deli cold cut you made yourself. My husband prefers it warm with roasted vegetables; I like it cold the next day tucked into a sandwich with strong mustard. Both are correct. The overnight marinating is the step you don't want to skip — the flavour goes all the way through the meat.
Ingredients
- 2–3 lbs pork loin or tenderloin
- 6 cloves garlic, cut into thin slivers
- 2 tablespoons Dijon mustard
- 1 tablespoon olive oil
- 1 teaspoon dried rosemary
- 1 teaspoon dried thyme
- 1 teaspoon smoked paprika
- 1½ teaspoons salt and ½ teaspoon black pepper
Instructions
- Using a small sharp knife, make deep incisions all over the pork — aim for about 20–25 cuts across the whole surface. Press a sliver of garlic deep into each incision with your finger. This is what carries garlic flavour through every single slice.
- Mix together the Dijon mustard, olive oil, rosemary, thyme, smoked paprika, salt, and pepper into a thick paste. Rub it all over the pork, getting into every crevice. Place in a zip-lock bag or covered dish and refrigerate for at least 2 hours — overnight gives significantly better flavour.
- When ready to cook, take the pork out of the fridge 30 minutes before roasting so it comes closer to room temperature. Preheat the oven to 325°F. Place the pork in a roasting pan or oven-safe skillet and roast for 1 to 1½ hours, until an instant-read thermometer inserted into the thickest part reads 145°F.
- Rest the pork on a cutting board, loosely tented with foil, for at least 15 minutes before slicing. Serve warm with roasted vegetables and extra mustard on the side, or cool completely, wrap tightly, and refrigerate to slice cold for a celebration platter.
Tips
- Tip: A meat thermometer is genuinely worth having here — pork loin dries out quickly if overcooked, and pulling it at exactly 145°F (not 160°F) is the difference between juicy and disappointing. A basic instant-read from Walmart runs about $10.
- Tip: If you want a crispier crust, increase the oven to 425°F for the final 10 minutes of cooking — it gives the mustard-herb coating a slightly caramelised, darker finish.
- Tip: Cold leftover buzhenina sliced thin on dark rye bread with a smear of grainy mustard is one of the best sandwiches I've had — don't skip the leftovers.
26. Shuba Salad (Herring Under a Fur Coat)

This is the salad I keep hearing about every time Russian food comes up in conversation, and honestly, once you see it sliced open — those dramatic magenta and cream layers — you understand why. Shuba translates roughly to "fur coat," and the beet-covered top really does look like it's been draped in something lush and deep-coloured. Pickled herring forms the base, then you build up layers of boiled potato, carrot, hard-boiled egg, and finally grated beet, each layer generously spread with mayonnaise. The overnight rest in the fridge is non-negotiable — it's what gives the layers structure and lets the flavours properly come together. I made this for a dinner party and Zainab refused to try it on principle, but every adult at the table went back for seconds.
Ingredients
- 8 oz pickled herring fillets, drained and finely chopped
- 3 medium potatoes, boiled and grated
- 2 medium carrots, boiled and grated
- 3 medium beets, boiled and grated
- 3 hard-boiled eggs, grated
- 1 small onion, finely diced
- 1 cup mayonnaise, divided between layers
- Salt and pepper, to taste
- Fresh dill, for garnish
Instructions
- In a large serving dish or a round springform pan lined with plastic wrap, spread the chopped herring in an even layer. Top with the finely diced onion and a thin spread of mayo.
- Add the grated potato and spread a layer of mayo over it. Repeat with the grated carrot and mayo, then the grated egg and mayo.
- Finish with the grated beet as the top layer, then spread a smooth, generous coat of mayo over the entire surface to seal it completely. This is the "fur coat."
- Cover tightly with plastic wrap and refrigerate for at least 4 hours — overnight is strongly preferred. The layers firm up and the flavours deepen considerably.
- Garnish with fresh dill just before serving. Slice cleanly through all layers so each portion shows the full stack.
Tips
- Tip: Wear gloves when grating the beets — they will stain your hands and your cutting board. Ask me how I know.
- Tip: If you can't find pickled herring near you, check the refrigerated section at IKEA food shops or the international aisle at larger grocery stores — it's more widely stocked than you'd expect.
- Tip: Building this in a springform pan gives you a cleaner domed shape. Chill it in the pan, then release and transfer to a platter right before serving.
27. Creamy Vegan Mushroom Stroganoff
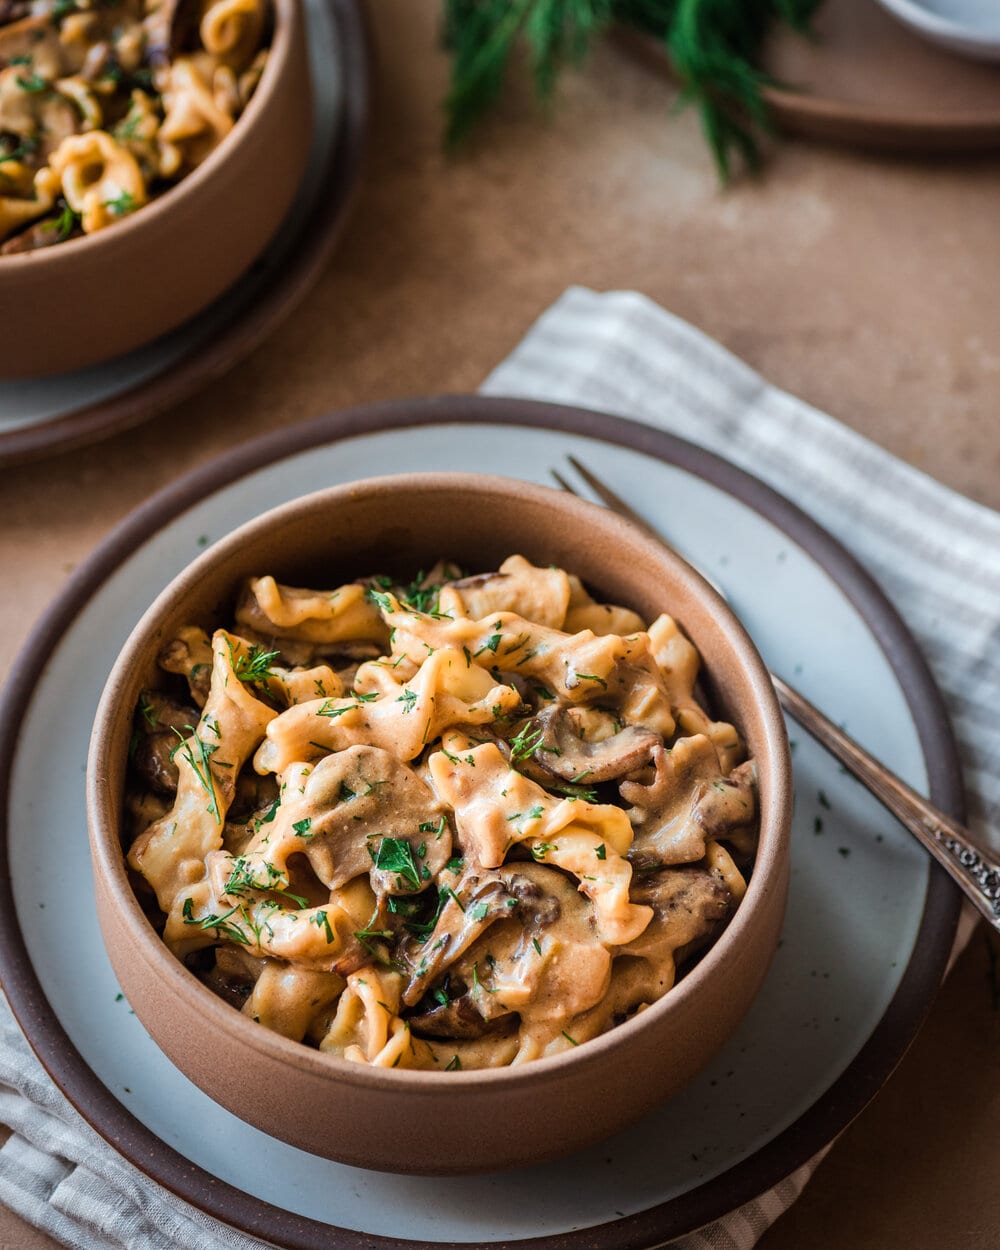
I want to be upfront: my husband was deeply skeptical when I made this. He saw the cashew cream going into the pan and gave me a look. Then he ate two bowls. The trick here is getting a proper hard sear on the mushrooms before anything else happens — don't touch them, don't crowd the pan, let them go golden and almost caramelized. That's where the depth of flavour comes from. The cashew cream (just soaked raw cashews blended smooth with water) gives you a richness that's genuinely hard to distinguish from a dairy-based sauce. Dijon mustard and soy sauce do the heavy lifting on the savoury, tangy notes that make stroganoff taste like itself. This version is fully vegan, but I've served it to plenty of non-vegan guests and nobody missed the beef.
Ingredients
- 1 lb mixed mushrooms (cremini, shiitake, oyster), sliced
- 1 onion, diced
- 4 cloves garlic, minced
- 2 tablespoons olive oil
- 1 tablespoon Dijon mustard
- 1 tablespoon soy sauce
- 1 cup vegetable broth
- 1 cup cashew cream (1 cup raw cashews soaked in water for 4 hours, then blended with ½ cup fresh water until completely smooth)
- 1 teaspoon smoked paprika
- Salt and pepper, to taste
- Fresh parsley and egg-free noodles or rice, for serving
Instructions
- Heat olive oil in a large heavy skillet over high heat until shimmering. Add the mushrooms in a single layer — work in batches if needed — and cook without stirring for 4–5 minutes until deeply golden. Season with salt and pepper, then remove and set aside.
- Lower the heat to medium. In the same pan, sauté the onion for 5 minutes until softened. Add the garlic and smoked paprika and cook for 1 minute more, stirring constantly.
- Stir in the Dijon mustard, soy sauce, and vegetable broth. Let it simmer for 5 minutes, scraping up any browned bits from the bottom of the pan.
- Pour in the cashew cream and stir to combine. Return the seared mushrooms to the pan. Simmer gently for 5 minutes until the sauce thickens slightly. Taste and adjust seasoning.
- Serve over egg-free noodles or rice with a generous scatter of fresh parsley.
Tips
- Tip: Don't skip the soaking step for the cashews — unsoaked cashews won't blend smooth and you'll end up with a grainy sauce. Four hours minimum, overnight is fine too.
- Tip: No high-speed blender? A regular blender works if the cashews are properly soaked. Blend for a full 2 minutes and the cream will come together.
- Tip: Use the widest pan you have for the mushrooms. Crowding them makes them steam instead of sear, and you lose the meaty, caramelized flavour that makes this dish work.
28. Zharkoe (Russian Chicken Stew)

Zharkoe is exactly the kind of stew I reach for when the weather turns and nobody wants anything complicated — just something warm and deeply satisfying. Bone-in chicken pieces are browned until golden, then braised low and slow with potatoes, carrots, and a small amount of tomato paste that gives the broth this gorgeous, slightly reddish colour and a gentle richness. It's one of those recipes where the whole is far better than the sum of its parts. In Pakistan we'd call this kind of dish a shorba — a brothy, hearty stew served over rice — and the logic is the same here. Serve it with crusty bread to catch every last drop of the broth.
Ingredients
- 2 lbs bone-in chicken pieces (thighs and drumsticks work best)
- 3 medium potatoes, peeled and cut into 1-inch cubes
- 2 carrots, sliced into ½-inch rounds
- 1 onion, diced
- 3 cloves garlic, minced
- 2 tablespoons tomato paste
- 2 cups chicken broth
- 2 tablespoons olive oil
- 1 bay leaf
- 1 teaspoon dried thyme
- Salt and pepper, to taste
- Fresh parsley, for serving
Instructions
- Pat the chicken dry and season generously with salt and pepper. Heat olive oil in a large Dutch oven over high heat and brown the chicken pieces for 4–5 minutes per side until deeply golden. Remove and set aside.
- Reduce heat to medium. In the same pot, sauté the onion and carrots for 5 minutes until softened. Add the garlic and tomato paste and cook for 1 minute, stirring constantly, until the tomato paste darkens slightly.
- Return the browned chicken to the pot. Add the potatoes, chicken broth, bay leaf, and thyme. Bring to a boil, then reduce to a gentle simmer. Cover and cook for 35–40 minutes until the chicken is cooked through and pulls easily from the bone, and the potatoes are tender.
- Remove the bay leaf. Taste and adjust the seasoning. Serve in deep bowls topped with fresh parsley, with crusty bread on the side.
Tips
- Tip: Don't rush the browning step — that deep golden crust on the chicken is what gives the broth its flavour. Pale chicken means a pale-tasting stew.
- Tip: Cut your potatoes roughly the same size so they cook evenly. Too small and they'll fall apart into the broth; too large and they'll still be firm when everything else is done.
- Tip: This stew tastes even better the next day once everything has had time to sit together. Make it ahead and reheat gently on the stovetop.
29. Pelmeni in Chicken Broth

I grew up eating dumplings in broth — we have our own versions in Pakistani cooking — so when I first made pelmeni this way, it immediately felt familiar and comforting in the way only soup can. The key is the broth itself: it needs to be properly flavourful, because there's nowhere to hide with such a simple preparation. Use a good homemade chicken stock if you have it, or reach for a high-quality store-bought one — I use the Swanson carton broth from Walmart and it works well here. The pelmeni cook right in the broth, soaking up the flavour as they go, and then you finish with a heavy hand of fresh dill and a generous spoonful of sour cream that slowly melts into the bowl. It's one of the most straightforwardly good things in this entire list.
Ingredients
- 24 prepared pelmeni, store-bought or homemade
- 6 cups rich chicken broth, homemade or good-quality store-bought
- 2 cloves garlic, smashed
- 1 bay leaf
- Salt and pepper, to taste
- Fresh dill and sliced green onion, for serving
- Sour cream, for serving
- Dark rye bread, for serving
Instructions
- Pour the chicken broth into a large pot and bring to a gentle simmer over medium heat. Add the smashed garlic and bay leaf and let the broth simmer for 10 minutes so the aromatics can infuse it. Season with salt and pepper, then fish out and discard the garlic and bay leaf.
- Add the pelmeni directly to the simmering broth. Cook for 6–8 minutes, until they float to the surface and the dough is fully cooked through with no raw doughy centre.
- Ladle into deep bowls, making sure each bowl gets a generous portion of pelmeni and plenty of hot broth.
- Top with fresh dill, sliced green onion, and a large dollop of sour cream. Serve immediately with slices of dark rye bread.
Tips
- Tip: Keep the broth at a gentle simmer rather than a rolling boil — aggressive boiling can tear the dumpling wrappers open and you'll lose the filling into the broth.
- Tip: Store-bought pelmeni from the freezer section works perfectly here. Russian or Eastern European grocery stores stock them, but some larger international aisles at Walmart or Whole Foods carry them too.
- Tip: Don't let the soup sit too long before serving — the dumplings will continue absorbing broth and get soft. Serve it as soon as the pelmeni are cooked.
30. Herring Under a Fur Coat Salad
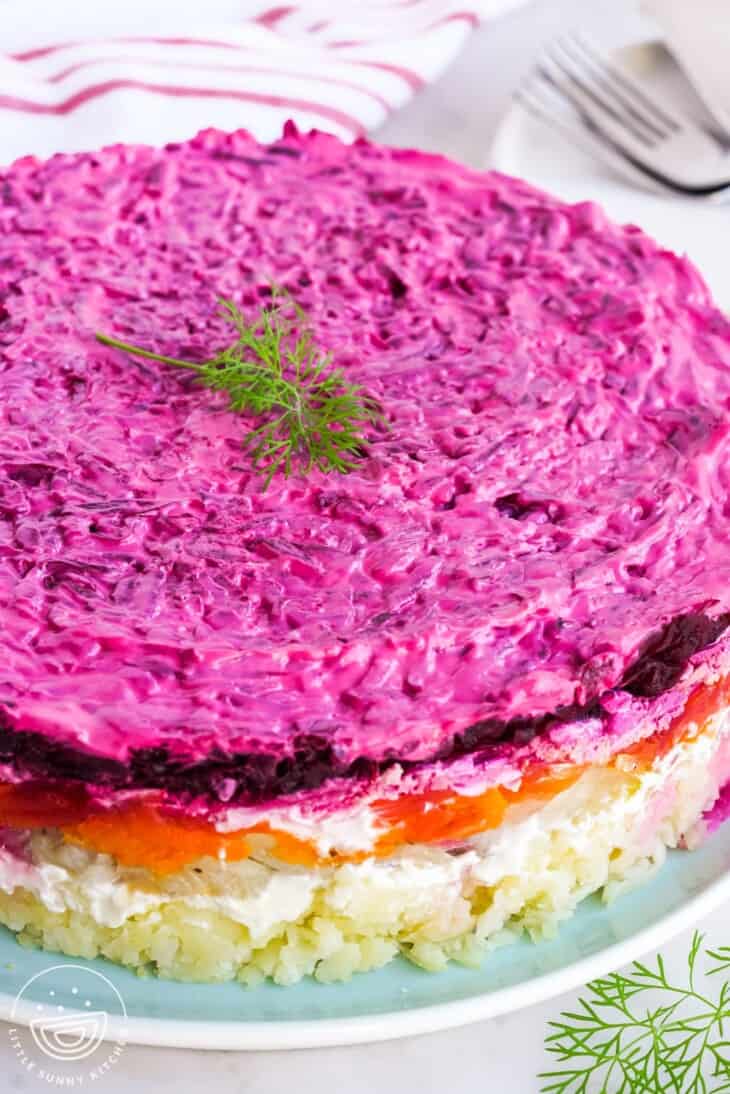
Yes, there are two versions of this salad in this list — and I kept them both because they genuinely differ enough to be worth it. This one uses four beets instead of three and a higher egg-to-potato ratio, which gives it a slightly brighter, earthier flavour profile and a looser, more casual presentation in a glass dish rather than a moulded dome. Think of recipe 26 as the showstopper centrepiece version and this one as the everyday layered salad you'd throw together on a Tuesday. Same core idea — pickled herring, boiled vegetables, mayo — but the proportions and the final look are different enough that they're worth having in your rotation separately. The overnight chill is still essential here.
Ingredients
- 8 oz pickled herring, drained and finely chopped
- 3 potatoes, boiled and grated
- 2 carrots, boiled and grated
- 4 beets, boiled and grated
- 4 hard-boiled eggs, grated
- 1 onion, very finely diced
- 1 cup mayonnaise, divided between layers
- Salt and pepper, to taste
- Fresh dill and sliced green onion, for garnish
Instructions
- In a large glass dish, spread the chopped herring in an even layer across the bottom. Scatter the finely diced onion evenly on top.
- Add the grated potato as the next layer and spread a thin, even coat of mayo over it. Follow with the grated carrot and mayo, then the grated egg and mayo.
- Finish with the grated beet on top. Spread the remaining mayo in a smooth, complete layer over the beet surface, covering everything from edge to edge. This is the "fur coat."
- Cover tightly and refrigerate for at least 4 hours, preferably overnight. The mayo will absorb into the layers and everything will firm up and meld together.
- Just before serving, garnish with fresh dill and sliced green onion. Serve cold, cutting through all layers so each portion gets the full stack.
Tips
- Tip: A glass dish is ideal here so you can see the layers from the side — it makes the presentation much more dramatic when you bring it to the table.
- Tip: Grate all your vegetables while they're still slightly warm — they grate more cleanly and the texture is better once chilled. Cold boiled beets in particular can get a bit watery when grated.
- Tip: If raw onion feels too sharp for you, soak the diced onion in cold water for 10 minutes and pat dry before layering — it takes the edge off without losing the flavour.
4. Apple Sharlotka (Russian Apple Cake)

Sharlotka is the cake I make when I want something homemade and impressive but I genuinely have no time or energy. It's five pantry ingredients poured over apples and baked — and somehow it comes out looking like you planned it. The apples sink into the batter and caramelize on the bottom, and when you flip it out, that golden layer is the top. I dust it with powdered sugar while it's still warm and it's gone before it properly cools. Saad asked me once why we don't make this every week, and honestly I didn't have a good answer.
Ingredients
- 4 medium apples, peeled, cored, and sliced
- 3 large eggs
- 1 cup granulated sugar
- 1 cup all-purpose flour
- 1 teaspoon baking powder
- 1 teaspoon vanilla extract
- Pinch of salt
- Powdered sugar, for dusting
Instructions
- Preheat oven to 350°F. Grease a 9-inch round springform pan. Arrange the sliced apples in an even layer across the bottom of the pan.
- Beat the eggs and sugar together with a hand mixer or by hand for 4–5 minutes until the mixture is thick, pale, and has roughly tripled in volume. Beat in the vanilla extract.
- Gently fold in the flour, baking powder, and salt until just combined — don't overmix or you'll lose the air you just built. Pour the batter evenly over the apples.
- Bake for 40–45 minutes until the top is deep golden and a toothpick inserted into the center comes out clean. Let cool in the pan for 10 minutes, then invert onto a serving plate so the apples face up. Dust generously with powdered sugar and serve warm or at room temperature.
Tips
- Tip: Granny Smith apples give a nice tartness that balances the sweet batter, but any firm apple works — Fuji, Honeycrisp, or whatever you have on hand.
- Tip: If you don't have a hand mixer, beat vigorously by hand with a whisk for at least 5–6 minutes — the volume in the eggs is what makes this cake light, so don't rush that step.
- Tip: Dust the powdered sugar while the cake is still warm — it melts in slightly and looks beautiful. Dust again right before serving if you want a fresh, clean look.
3. Syrniki (Russian Cheese Pancakes with Blueberry Sauce)

I've made syrniki a few times in this roundup because there are genuinely two ways to serve them and they feel like completely different dishes. This version — with a quick blueberry sauce spooned over the top — is the one I make for weekend mornings when I want breakfast to feel like a proper occasion. The sauce takes under 10 minutes and the bright tartness cuts right through the rich, golden pancakes. It's one of those combinations that sounds simple and then actually surprises you. Farmer's cheese is the traditional choice here, but well-drained dry-curd cottage cheese works perfectly and is easy to find at most grocery stores.
Ingredients
- 2 cups farmer's cheese or dry cottage cheese, drained well
- 2 large eggs
- 3 tablespoons granulated sugar
- 1 teaspoon vanilla extract
- ½ cup all-purpose flour, plus more for shaping
- Pinch of salt
- 2 tablespoons butter, for frying
- Blueberry sauce: 1½ cups fresh or frozen blueberries, 3 tablespoons sugar, 1 tablespoon lemon juice, 2 tablespoons water
Instructions
- Start the blueberry sauce first: combine blueberries, sugar, lemon juice, and water in a small saucepan over medium heat. Simmer for 8–10 minutes, stirring occasionally, until the berries have burst and the sauce has thickened. Remove from heat and set aside.
- Make the syrniki dough: mix together the cottage cheese, eggs, sugar, vanilla, salt, and flour until a soft, slightly sticky dough forms. If it feels too wet to handle, add flour one tablespoon at a time.
- On a floured surface, shape the dough into small round patties about ½ inch thick. Coat lightly in flour on both sides to help them hold their shape in the pan.
- Melt butter in a heavy skillet over medium-low heat. Fry the syrniki for 3–4 minutes per side until deeply golden and cooked through. Don't rush the heat — medium-low is the key to getting them cooked inside without burning.
- Serve the warm syrniki with the blueberry sauce spooned generously over the top. Add a dollop of sour cream on the side if you have it.
Tips
- Tip: The drier your cottage cheese, the easier the dough is to work with. Line a colander with cheesecloth and let it drain overnight in the fridge if you have time.
- Tip: Frozen blueberries work just as well as fresh for the sauce — no need to thaw them first, just add an extra minute or two of cooking time.
- Tip: Leftover syrniki reheat well in a dry pan over low heat the next morning — they're just as good the second day.
2. Walnut-Shaped Cookies with Walnut Cream

These are the kind of cookies that make people stop and stare at a dessert table. They look exactly like little walnuts — the shell, the ridges, everything — and when you bite in, there's this rich, sweet walnut cream filling inside. I'll be honest: you do need the special walnut-shaped moulds for these, and that's a non-negotiable. But the moulds are inexpensive and easy to find online, and once you have them, these cookies become one of your most impressive party tricks. The dough is a simple buttery shortbread and the filling is just ground walnuts with condensed milk — nothing complicated, just very, very good.
Ingredients
- Cookie dough: 1 cup (2 sticks) softened butter, ½ cup powdered sugar, 2 egg yolks, 1 teaspoon vanilla extract, 2 cups all-purpose flour, pinch of salt
- Walnut filling: 1 cup walnuts, finely ground in a food processor (or chopped very fine by hand), ½ cup sweetened condensed milk, 1 teaspoon vanilla extract, 2 tablespoons softened butter
- Walnut-shaped cookie moulds (required for shaping)
- Powdered sugar, for dusting (optional)
Instructions
- Make the filling first so it has time to firm up: stir together ground walnuts, condensed milk, vanilla, and softened butter until smooth and combined. Refrigerate for at least 30 minutes until firm enough to spoon or pipe.
- Make the dough: beat the softened butter and powdered sugar together until light and fluffy. Beat in the egg yolks and vanilla. Stir in the flour and salt until a soft dough comes together. Wrap and refrigerate for 30 minutes.
- Preheat oven to 350°F. Grease each half of the walnut moulds well. Press a small ball of dough into each half, pushing it up the sides to create an even shell. Press the mould halves together firmly.
- Bake for 12–15 minutes until the cookies are golden. Let cool completely in the moulds before unmoulding carefully — they're fragile when warm.
- Spoon or pipe a small amount of walnut filling into the hollow of each cookie half. Press two halves together to form a complete "walnut." Allow to set for at least 1 hour before serving. Dust with powdered sugar if desired.
Tips
- Tip: Don't skip chilling the dough — cold dough holds its shape in the mould much better and gives you cleaner, crisper cookie shells.
- Tip: If you don't have a food processor, chop the walnuts as finely as you can by hand — a slightly chunky texture in the filling actually adds a nice bite.
- Tip: These keep well in an airtight container at room temperature for up to 5 days, and the filling actually gets better after a day as the flavors settle together.
1. Ryazhenka (Ukrainian Fermented Baked Milk)

This is the one recipe in this entire list that I had genuinely never encountered before researching this roundup, and it fascinated me completely. Ryazhenka is fermented baked milk — whole milk that bakes low and slow in the oven for hours until it develops a deep caramelized color and a nutty, almost toffee-like flavor, then gets cultured overnight into something thick, tangy, and completely unlike regular yogurt or kefir. The process is mostly hands-off; you just need patience. It's traditionally served chilled as a drink, but I loved it spooned over porridge. The only thing to know going in: use regular full-fat whole milk, not ultra-pasteurized — ultra-pasteurized won't ferment properly and you'll end up frustrated.
Ingredients
- 4 cups whole milk, full-fat and not ultra-pasteurized
- 2 tablespoons plain yogurt with live active cultures (as the starter)
Instructions
- Pour the whole milk into an oven-safe pot, Dutch oven, or clay pot. Place it uncovered in a 200°F oven for 6–8 hours. The milk will slowly reduce, deepen in color to a creamy beige, and form a golden-brown skin on the surface — that skin is a sign you're doing it right.
- Remove from the oven and let cool until the milk reaches around 110°F — warm enough to activate the cultures but not hot enough to kill them. A kitchen thermometer is helpful here, but if you don't have one, it should feel comfortably warm on your wrist, not hot.
- Gently lift the skin off and set it aside. Whisk the plain yogurt starter into the warm milk until evenly distributed. Carefully place the skin back on top — it's traditional and it keeps a crust from forming during fermentation.
- Wrap the pot in a clean kitchen towel to keep it insulated and leave at room temperature, undisturbed, for 8–12 hours. It should thicken and develop a mild, pleasant tang. Refrigerate until fully cold before serving.
- Serve chilled as a drink, spoon it over porridge or oatmeal, or enjoy it alongside any of the baked goods in this roundup.
Tips
- Tip: Check the label on your milk before you start — if it says "ultra-pasteurized" or "UHT," it won't ferment. Look for regular pasteurized whole milk instead, which you can usually find at Trader Joe's, Walmart, or any standard grocery store.
- Tip: The longer you ferment it (up to 12 hours), the tangier the result. If you prefer it milder, check it at the 8-hour mark and refrigerate as soon as it's set to your liking.
- Tip: Ryazhenka keeps in the refrigerator for up to 5 days. The flavor deepens a little each day, so don't be surprised if it tastes even better on day two or three.
Share This Post!
If you found this roundup useful, share it with someone who loves cooking their way through different cuisines — pin it, send it, or post it somewhere a fellow food lover will see it. 🥟🍲
View More Recipes here Recipe Roundups
Russian cooking surprised me the first time I really sat down and cooked through it properly. I expected heavy and one-note, and instead I got layered, warming, surprisingly adaptable food. The beet salads, the hearty soups, the pastry-wrapped pies — there's real craft in this cuisine, and a lot of it translates beautifully to a home kitchen without specialty equipment or hard-to-find ingredients. I've made most of these for my family on regular weeknights, not just for special occasions, and they've held up every single time.
What I love most about this list is the range. You've got Borscht when you need something soul-warming on a cold Tuesday. You've got Beef Stroganoff when you want something that feels a little special but still comes together in under an hour. You've got Pelmeni when the kids are asking for something they can eat with their hands and dip into sour cream. My husband had seconds of almost everything on this list — which, if you know him, means a lot. He's not usually the adventurous one at the table. Russian food won him over quietly, through sheer comfort.
If you're just starting with this cuisine, I'd say begin with the Borscht or the Chicken Kiev — both are forgiving, both are deeply satisfying, and both will give you an honest feel for what Russian home cooking is all about. Then work your way through the rest. There's no wrong order. Pick whatever sounds good for the week you're having. 🥣🥟❄️✨
More Recipes You Might Like
- Traditional German Recipes — if you loved the hearty, stick-to-your-ribs quality of this Russian list, German cooking will feel like a natural next stop.
- Easy Soup Recipes — Borscht got you in the mood for more bowls? This roundup covers soups from all over, for every season and craving.
- Comfort Food Dinner Recipes — Russian food lives in the comfort food category, and this list has even more weeknight-friendly options across different cuisines.
- Ground Beef Recipes — Pelmeni and Beef Stroganoff fans will find a lot to love here — practical, family-sized meals built around affordable beef.
- Browse All Recipe Roundups — if you want to keep exploring cuisines and categories, this is the full library of everything I've put together on the site.
Frequently Asked Questions
What are the most beginner-friendly recipes in this list?
Borscht and Beef Stroganoff are both great starting points. They use familiar ingredients, they're hard to mess up badly, and they give you a real sense of what Russian home cooking tastes like. Olivier Salad is also extremely low-pressure — it's basically a chopped salad with a mayo dressing, no cooking anxiety involved.
Can I make any of these recipes ahead of time?
Yes — and honestly, several of them taste better the next day. Borscht is a classic make-ahead soup; the flavors deepen overnight in the fridge. Pelmeni can be assembled and frozen raw, then boiled straight from frozen whenever you need them. Olivier Salad is best made a few hours ahead and chilled before serving. I usually make a double batch of Borscht on Sunday and we eat it through Wednesday without complaints.
Are Russian recipes hard to make at home without specialty ingredients?
Most of them are surprisingly accessible. The core ingredients — beets, cabbage, sour cream, dill, beef, potatoes, onions — are things you'll find at any regular grocery store. A few recipes call for buckwheat, which you can find at Whole Foods, some Walmarts, or online easily enough. I didn't need a single specialty Russian ingredient to make the majority of what's on this list.
What do Russians typically serve alongside these dishes?
Sour cream shows up as a topping or side for almost everything — soup, dumplings, pancakes, you name it. Dark rye bread is a classic accompaniment to soups and salads. A lot of mains are served with boiled or mashed potatoes, or alongside buckwheat. In my kitchen I usually serve the soups with crusty bread from a bakery, and it works perfectly well.
Which recipe on this list is best for feeding a crowd?
Borscht scales up beautifully — just use your biggest pot and it feeds as many people as you need. Pelmeni are also great for a crowd because you can make a huge batch in advance and cook them in batches as guests arrive. Shuba (the layered herring salad) is a traditional party dish that actually looks impressive on a table even though it's mostly just layering and chilling — no active cooking stress while guests are around.
Share This Post!
If this list gave you something useful — a new soup to try, a dumpling recipe to bookmark, or just the confidence to cook something outside your usual rotation — pass it along. Pin it, share it with a friend who likes to cook, or save it for later. That's genuinely what keeps this site going. 📌❤️