
Sliders should be simple. You grab a pack of Hawaiian rolls, you pile something good inside, and you put them on the table. That's the deal. But somehow every time I searched for slider recipes online, I ended up with either a list of variations on the exact same cheeseburger slider, or something that required me to slow-cook a brisket for eight hours and make a homemade brioche bun from scratch. Neither of those is what I needed on a Friday night when my kids were asking what's for dinner every four minutes. So I went looking — actually looking — for recipes that cover the full range of what sliders can be, from quick weeknight ground beef sliders to smoky pulled pork to Japanese karaage chicken stuffed into a soft little bun.
What makes a slider worth making, in my opinion, is that it delivers on the ratio. The bun has to be soft enough to hold without falling apart, the filling has to be saucy enough to be interesting but not so wet that everything slides out the back, and the whole thing has to come together in a reasonable amount of time. I'm not grading on authenticity — I make Mexican burger sliders with Tex-Mex cheese in my kitchen in Pakistan, so I'm the last person to lecture anyone about tradition. What I care about is whether the recipe actually works and whether people go back for seconds. If you want more ideas for crowd-friendly handheld food, my post on easy ground beef recipes has a lot of overlap with this list.
This roundup has 34 slider recipes and they go in a lot of different directions. You'll find BBQ pulled pork sliders, French dip sliders, Philly cheesesteak sliders, and even BBQ jackfruit sliders with vegan coleslaw for anyone cooking for a mixed crowd. There are breakfast sliders for lazy weekend mornings, whiskey sheet pan sliders for game day, and salmon sliders with garlic lemon aioli for when you want something a little different. I've also linked a few Hawaiian roll-specific recipes throughout because Hawaiian rolls are genuinely the easiest shortcut in the slider world — if you haven't stocked up on them at Costco yet, consider this your reminder. And if you're putting together a full spread, my easy appetizers roundup and my party food ideas post pair well with anything on this list.
Here are the 34 recipes I keep coming back to — pick whatever fits your week, your crowd, or whatever you happen to have in the fridge.
Top 34 Easy Slider Recipes
33. BBQ Chicken Sliders

BBQ chicken sliders are one of those things I make when I want everyone happy and I don't want to spend an hour in the kitchen. I use rotisserie chicken from Costco, shred it while it's still warm, and toss it in whatever BBQ sauce I have — Sweet Baby Ray's works great here. The slaw on top is non-negotiable for me: you need that crunch against the saucy chicken or the whole thing gets too soft. These disappear fast at any gathering, and I mean fast.
Ingredients
- 1 rotisserie chicken, shredded (about 3 cups of meat)
- ¾ cup BBQ sauce (Sweet Baby Ray's or your favorite)
- 12 slider buns or Hawaiian rolls
- 1 cup coleslaw mix (bagged from the store is fine)
- 3 tablespoons mayonnaise
- 1 tablespoon apple cider vinegar
- 1 teaspoon sugar
- Salt and black pepper to taste
- 6 slices pepper jack or cheddar cheese (optional but recommended)
Instructions
- In a bowl, mix the coleslaw mix with mayonnaise, apple cider vinegar, sugar, salt, and pepper. Toss well and refrigerate while you prep the chicken.
- Warm the shredded chicken in a skillet over medium heat, then stir in the BBQ sauce until everything is coated and heated through, about 3-4 minutes.
- If using cheese, lay slices on the bottom buns and place under a broiler for 1-2 minutes until just melted. Watch it — broilers are fast.
- Pile the BBQ chicken onto the bottom buns, top with a generous spoonful of slaw, then close with the top bun. Serve immediately.
Tips
- Tip: Make the slaw at least 20 minutes ahead so it softens slightly — it tastes better when it's had time to sit.
- Tip: If you're feeding a crowd, keep the BBQ chicken warm in a slow cooker on the "keep warm" setting so people can assemble their own sliders.
- Tip: Toast the buns cut-side down in a dry pan for 1-2 minutes before assembling — it keeps them from getting soggy under the saucy chicken.
32. Easy Baked Meatball Sliders on Hawaiian Rolls
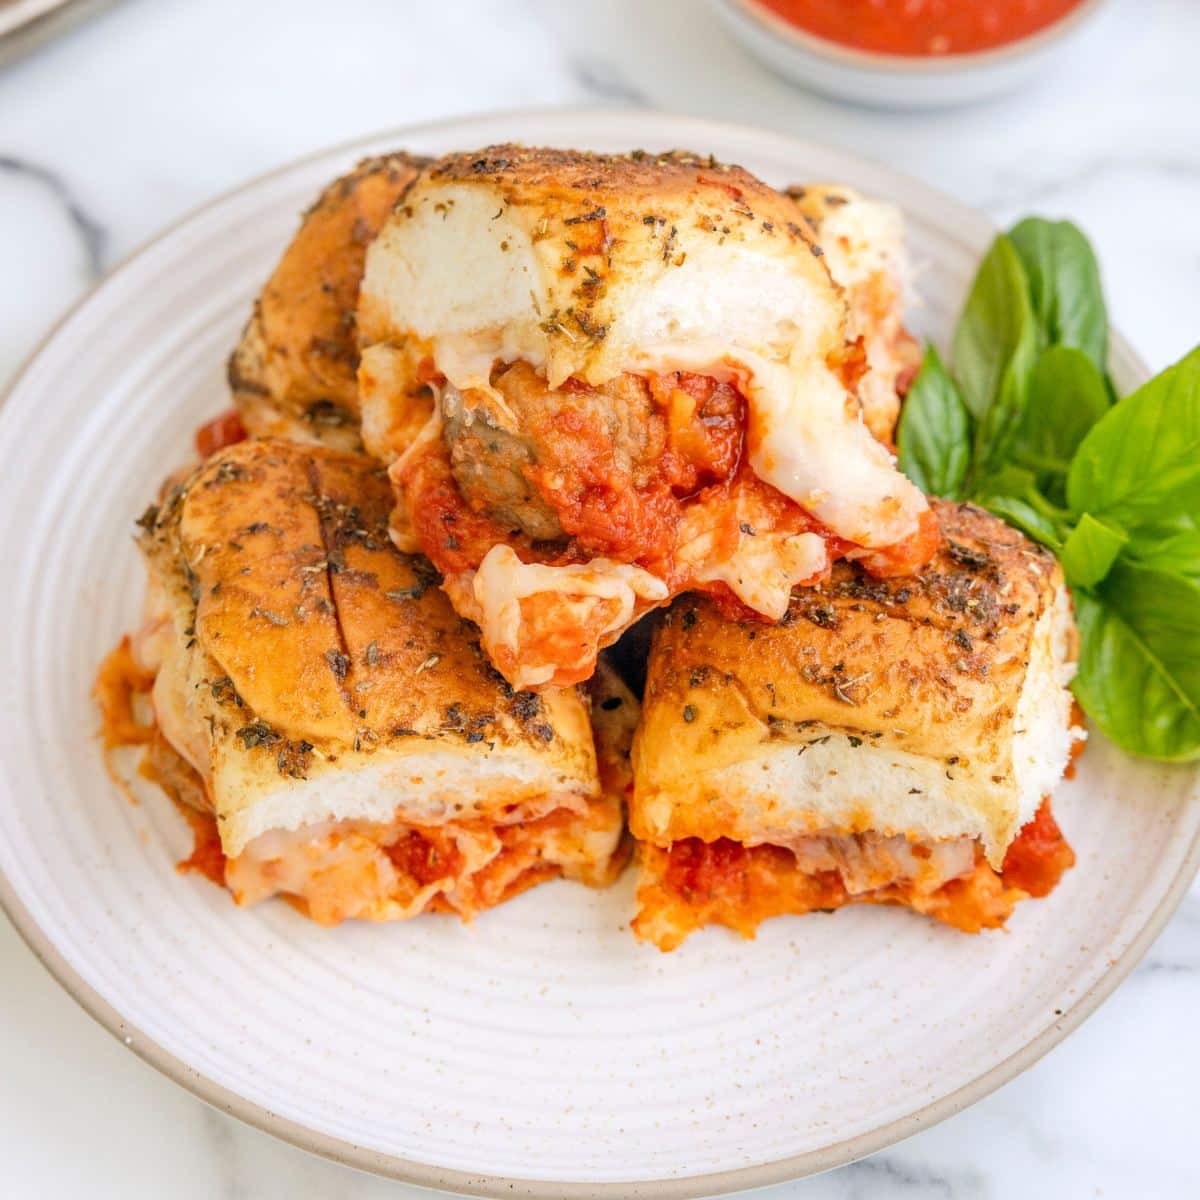
These meatball sliders on Hawaiian rolls are one of Saad's most-requested dinners, and I completely understand why — the sweetness of the roll against tangy marinara and gooey melted mozzarella is genuinely hard to stop eating. I use frozen meatballs to keep things simple on a weeknight, and honestly, no one can tell. The key is baking them covered with foil first, then uncovered at the end so the cheese gets that golden, slightly crispy edge. This is a 30-minute meal that looks like you tried harder than you did.
Ingredients
- 12 Hawaiian rolls (one standard pack)
- 12 frozen or homemade meatballs, cooked
- 1½ cups marinara sauce (jarred is fine — Rao's or Prego both work)
- 1½ cups shredded mozzarella cheese
- 2 tablespoons butter, melted
- ½ teaspoon garlic powder
- 1 teaspoon Italian seasoning
- 2 tablespoons grated Parmesan (optional)
Instructions
- Preheat your oven to 350°F. Slice the entire pack of Hawaiian rolls in half horizontally, keeping the rolls connected. Place the bottom half in a greased 9x13 baking dish.
- Spoon about half the marinara over the bottom rolls, then place one meatball on each roll section. Spoon the remaining marinara over the meatballs, then cover generously with mozzarella.
- Place the top half of the rolls over the cheese. Mix the melted butter with garlic powder and Italian seasoning, then brush it over the tops. Sprinkle Parmesan on if using.
- Cover with foil and bake for 15 minutes. Remove foil and bake another 8-10 minutes until the tops are golden and the cheese is fully melted. Slice into individual sliders and serve hot.
Tips
- Tip: Press the meatballs down slightly once they're on the rolls so they don't roll around when you put the top buns on — saves a mess.
- Tip: You can assemble these up to 4 hours ahead, cover with foil, and refrigerate — just add 5 extra minutes to the covered bake time.
- Tip: Provolone works really well here instead of mozzarella if you want a slightly sharper flavor.
31. Simple Turkey Burger Sliders
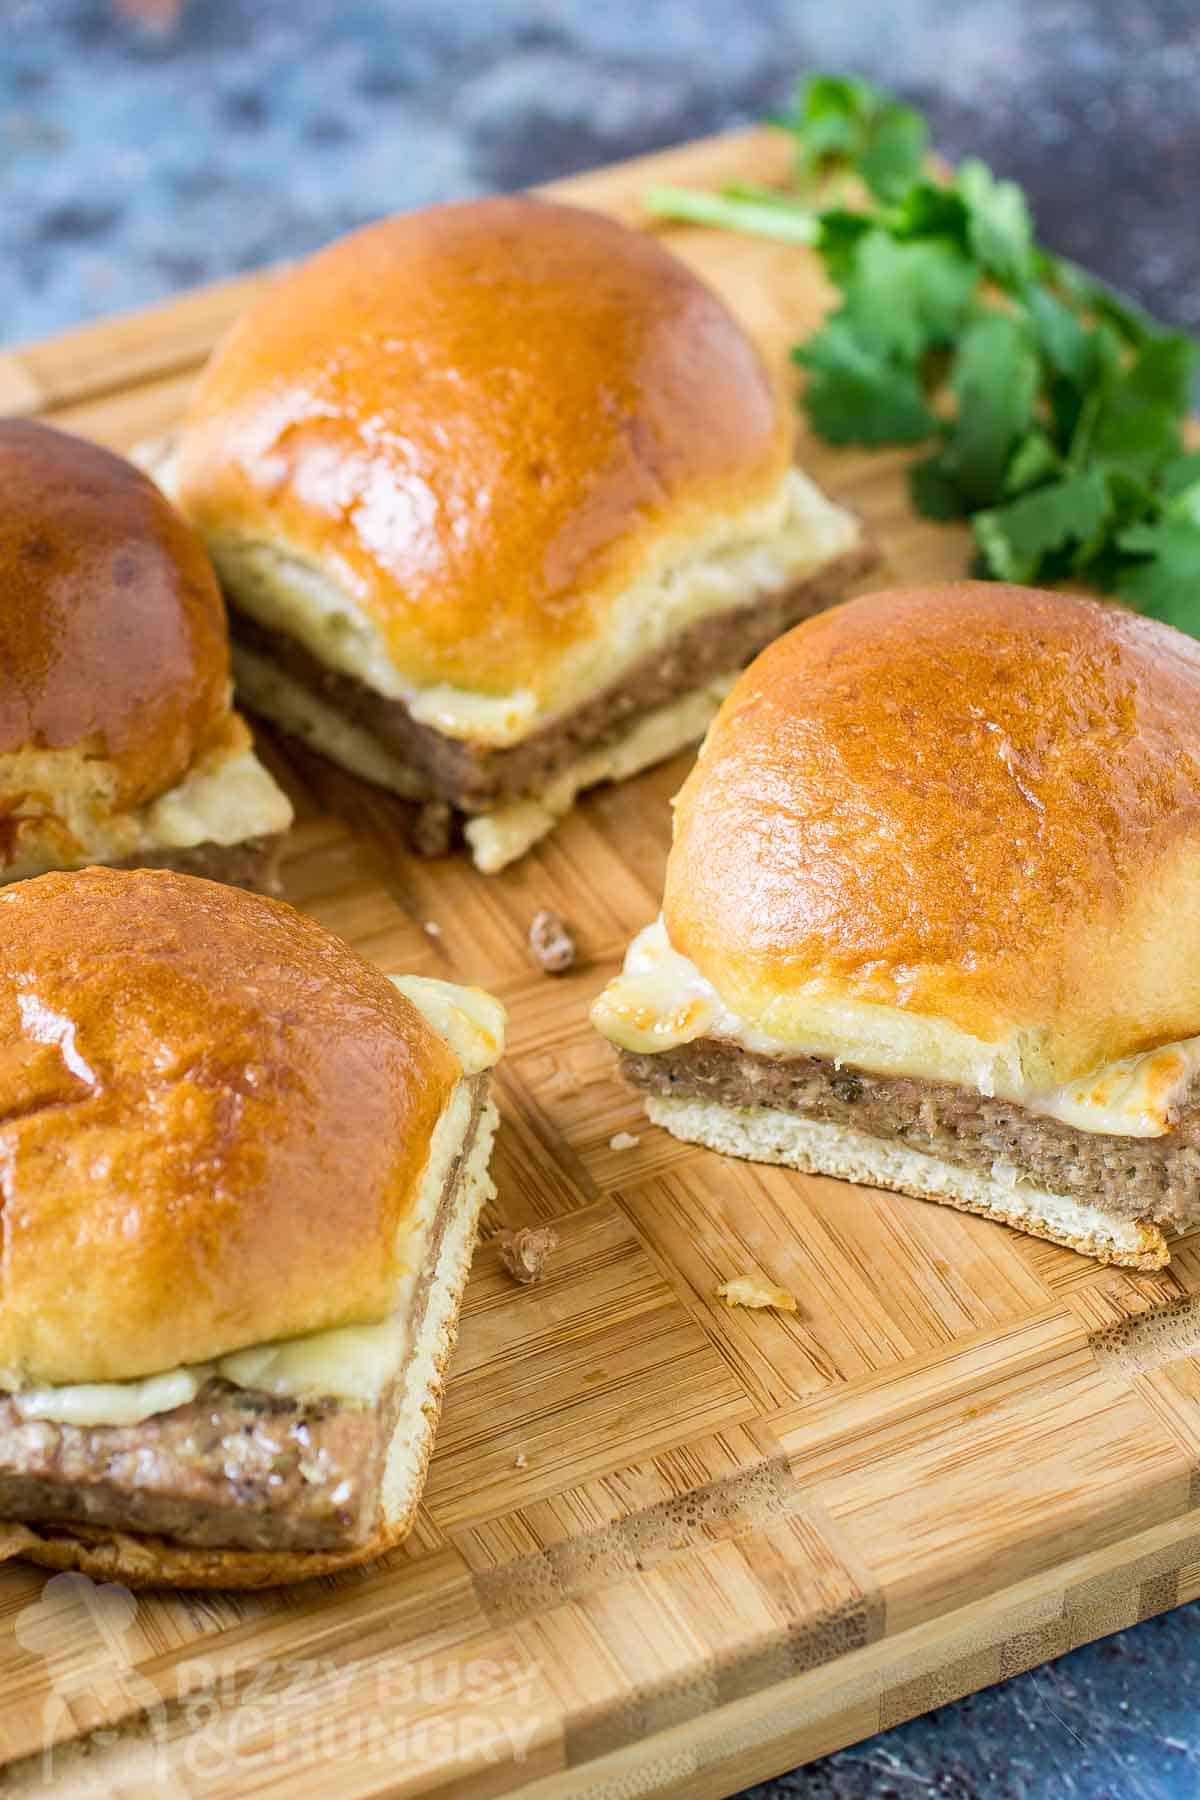
Turkey burgers have a reputation for being dry and boring, and I used to believe it — until I started adding Worcestershire sauce and a bit of grated onion directly into the meat. That changed everything. These small patties cook fast, stay juicy, and with a good tangy sauce on top they hold their own against any beef slider. I keep the toppings simple: lettuce, tomato, and a quick sriracha mayo that takes about 30 seconds to make. These are the ones I reach for when I want something lighter without feeling like I'm settling.
Ingredients
- 1 lb ground turkey (93% lean)
- 2 tablespoons Worcestershire sauce
- 2 tablespoons grated yellow onion
- ½ teaspoon garlic powder
- Salt and black pepper to taste
- 12 slider buns
- Lettuce leaves and sliced tomato for topping
- ¼ cup mayonnaise + 1 teaspoon sriracha (for the sauce)
- 1 tablespoon olive oil for the pan
Instructions
- Mix the ground turkey with Worcestershire sauce, grated onion, garlic powder, salt, and pepper. Mix until just combined — don't overwork the meat or it'll get tough.
- Divide into 12 equal portions and shape into small patties, about ½ inch thick. Make a small indent in the center of each one with your thumb — this prevents them from puffing up.
- Heat olive oil in a skillet over medium-high heat. Cook patties for 3-4 minutes per side until cooked through to 165°F internal temperature. Don't press them down while they cook.
- Stir together the mayonnaise and sriracha. Spread on both sides of the slider buns, then assemble with the patty, lettuce, and tomato. Serve right away.
Tips
- Tip: Ground turkey sticks to your hands — wet your palms slightly before shaping the patties and it's much easier to handle.
- Tip: Add a slice of pepper jack or Swiss cheese in the last minute of cooking for a melty upgrade without much extra effort.
- Tip: These patties can be shaped and refrigerated up to 24 hours ahead — just pull them out 10 minutes before cooking so they're not ice cold going into the pan.
30. Roast Beef Sliders
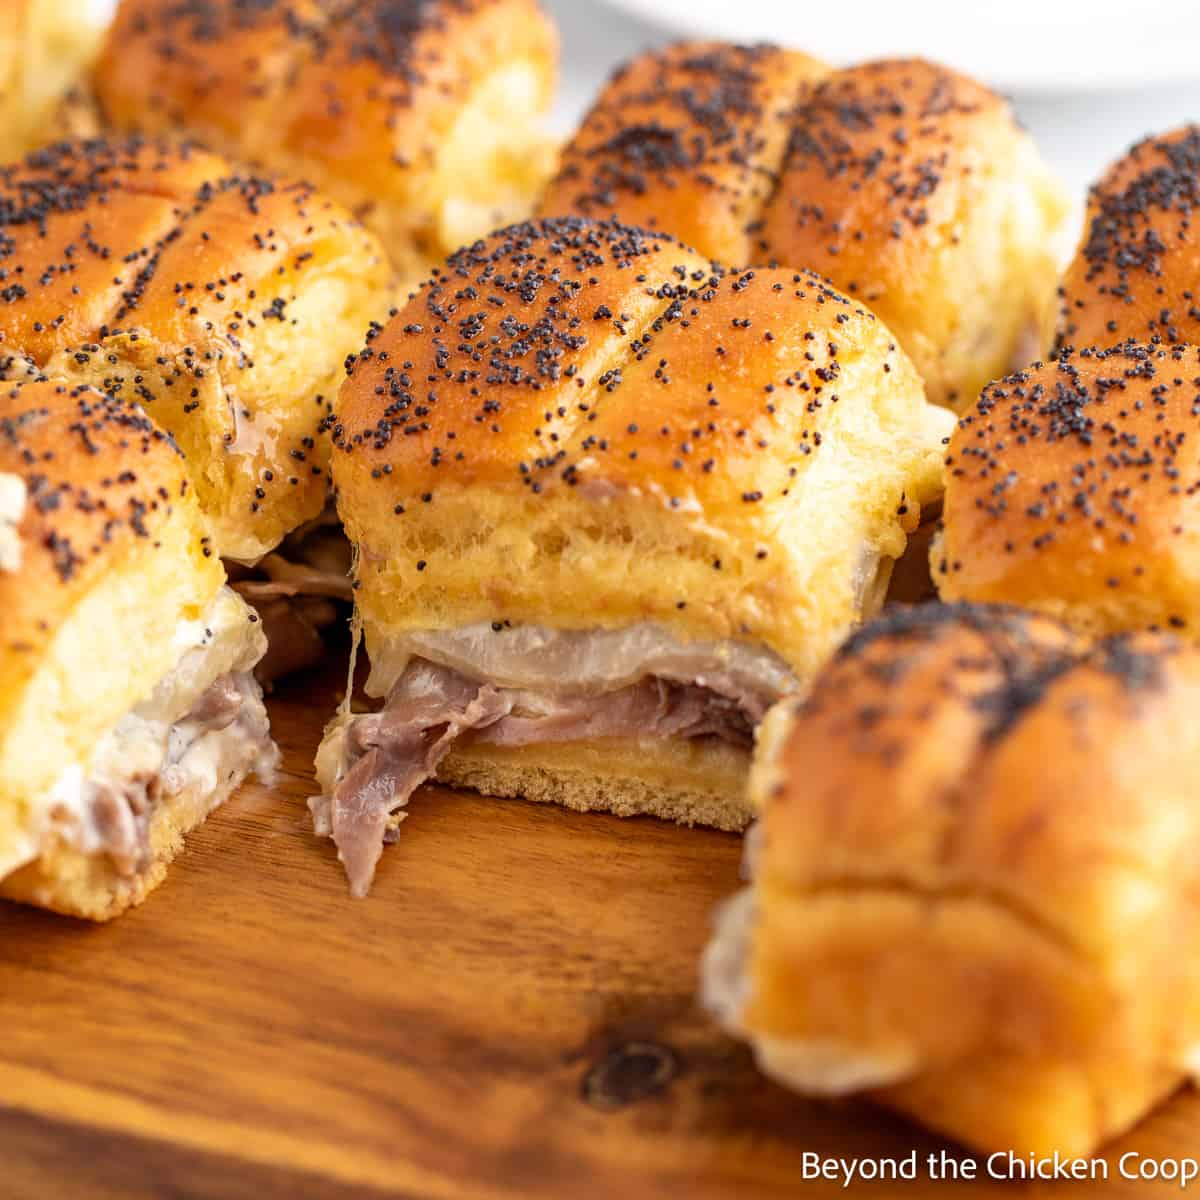
Roast beef sliders feel a little more elevated than the usual slider lineup, and I like having at least one on the table that makes it feel like you put in some effort. I use deli roast beef from Walmart — thin-sliced, stacked generously — and melt provolone right over it before adding the top bun. The au jus dipping sauce is what makes this recipe: a simple beef broth reduction with a little Worcestershire and thyme, and suddenly you're serving something that feels like a proper meal rather than a party snack. My husband always asks for these specifically.
Ingredients
- 12 slider buns or Hawaiian rolls
- 1 lb thinly sliced deli roast beef
- 6 slices provolone cheese, halved
- 3 tablespoons butter, melted
- 1 teaspoon Worcestershire sauce (divided)
- ½ teaspoon garlic powder
- 1 cup beef broth
- ¼ teaspoon dried thyme
- Salt and pepper to taste
Instructions
- Preheat oven to 350°F. Slice the rolls in half horizontally and place the bottoms in a baking dish. Layer roast beef evenly over the bottom rolls, then lay provolone over the beef.
- Place the top buns over the cheese. Mix melted butter with ½ teaspoon Worcestershire and garlic powder, then brush generously over the tops of the buns.
- Cover with foil and bake 15 minutes, then remove foil and bake another 5-7 minutes until the tops are golden and cheese is melted through.
- While the sliders bake, combine beef broth, remaining ½ teaspoon Worcestershire, thyme, salt, and pepper in a small saucepan. Simmer over medium heat for 5-6 minutes until slightly reduced. Serve alongside the sliders for dipping.
Tips
- Tip: Fold the roast beef rather than laying it flat — folded slices give you a better meat-to-bun ratio in each bite.
- Tip: Swiss cheese or sharp white cheddar are both good swaps for provolone if that's what you have on hand.
- Tip: The au jus can be made up to 2 days ahead and reheated — it actually tastes better after sitting overnight in the fridge.
29. Easy BBQ Pulled Pork Sliders Recipe
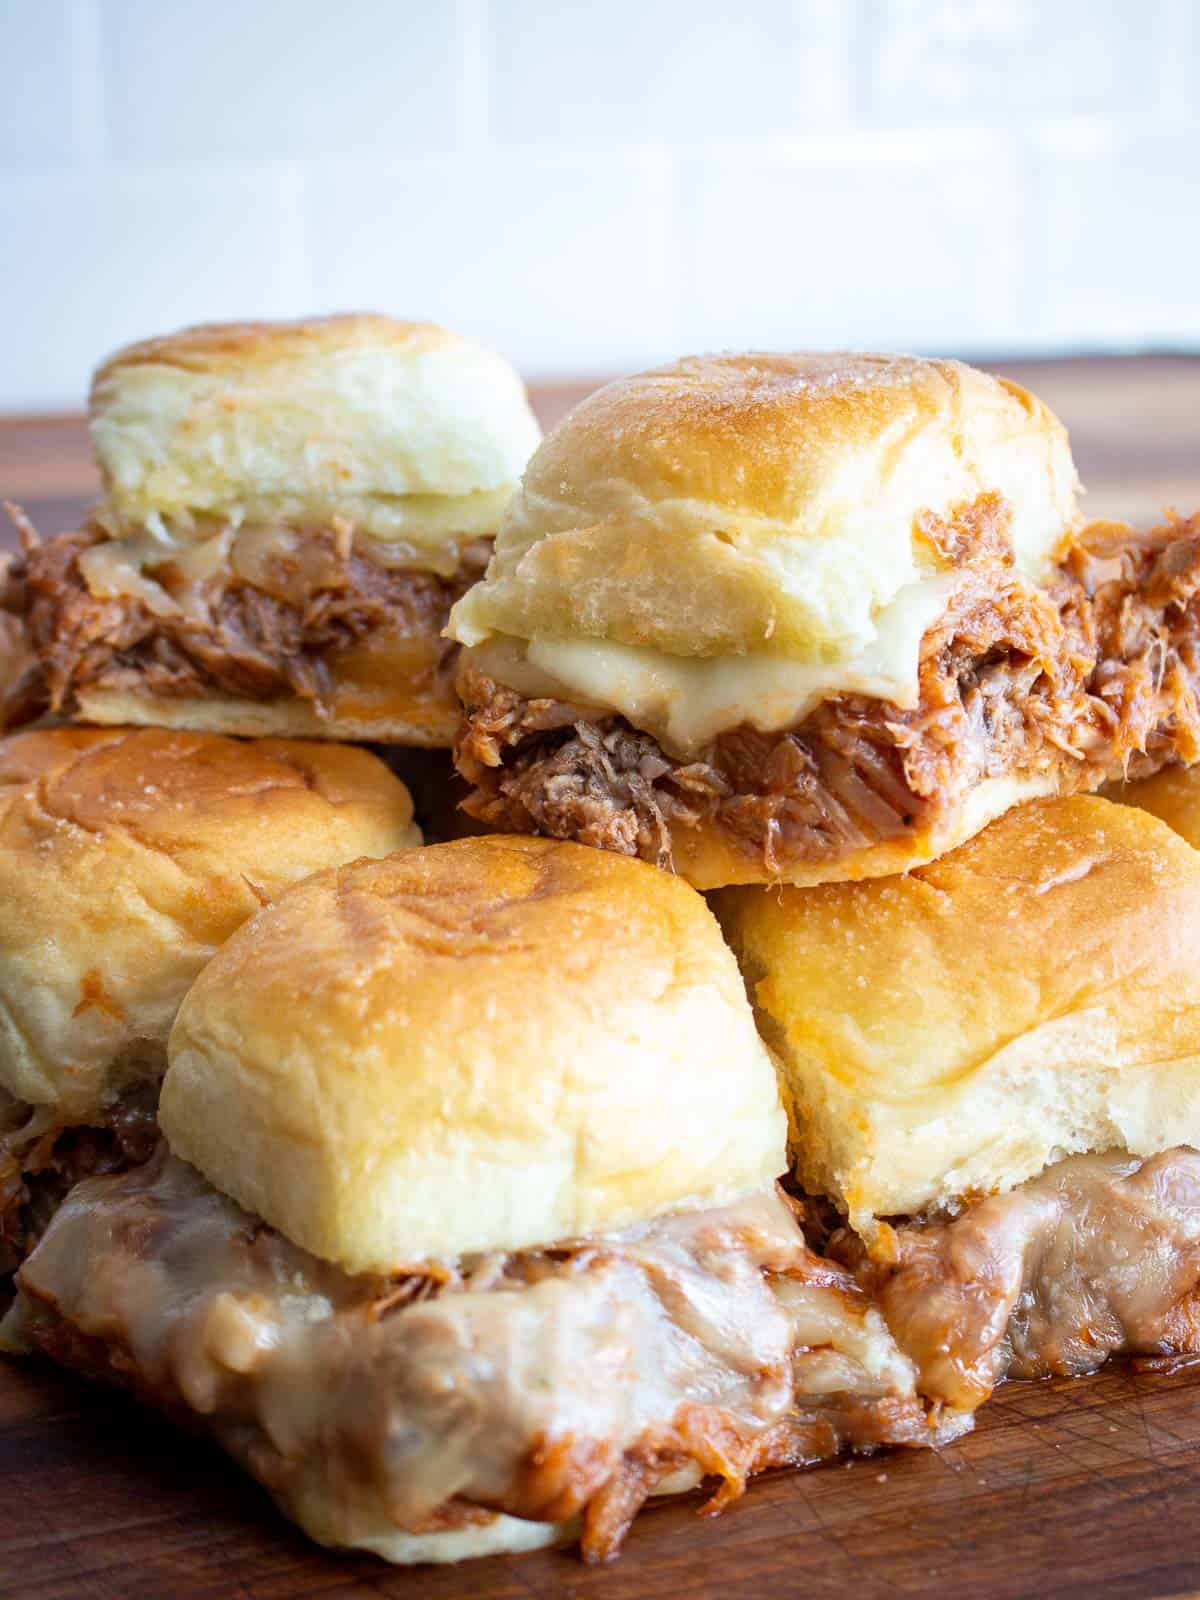
Pulled pork sliders are one of those things that look like a lot of effort but really aren't — especially if you let a slow cooker do the heavy lifting. The pork cooks low and slow until it practically falls apart, you shred it with two forks, toss it with BBQ sauce, and pile it onto soft slider buns with some pickles for tang. I make a double batch every single time because one batch disappears before I even set the table. The pickles are non-negotiable — that little bite of acid cuts through all the richness and makes the whole thing come together.
Ingredients
- 2½ lbs boneless pork shoulder (pork butt works too)
- 1 teaspoon garlic powder
- 1 teaspoon smoked paprika
- ½ teaspoon onion powder
- Salt and black pepper to taste
- 1 cup BBQ sauce (I use Sweet Baby Ray's), plus extra for serving
- ¼ cup apple cider vinegar
- 12 slider buns (Hawaiian rolls are ideal)
- Dill pickle slices, for topping
- Coleslaw (optional but highly recommended)
Instructions
- Season the pork shoulder all over with garlic powder, smoked paprika, onion powder, salt, and pepper. Place it in the slow cooker.
- Pour the BBQ sauce and apple cider vinegar over the pork. Cook on low for 8 hours or high for 4-5 hours, until the meat is completely tender and pulls apart easily.
- Remove the pork and shred it using two forks, discarding any large pieces of fat. Return the shredded meat to the slow cooker and stir it into the cooking juices.
- Split the slider buns and pile the pulled pork onto each bottom half. Top with pickle slices, a spoonful of coleslaw if using, and a drizzle of extra BBQ sauce.
- Cap with the top buns and serve immediately.
Tips
- Tip: Don't skip the apple cider vinegar — it keeps the pork from going overly sweet and adds a subtle tang that makes a real difference.
- Tip: The pulled pork keeps well in the fridge for up to 4 days, so this is a great make-ahead option for parties or meal prep.
- Tip: If the sauce in the slow cooker is too thin after cooking, ladle some of it into a small saucepan and simmer for 5 minutes to reduce before stirring it back into the pork.
28. Sloppy Joe Sliders
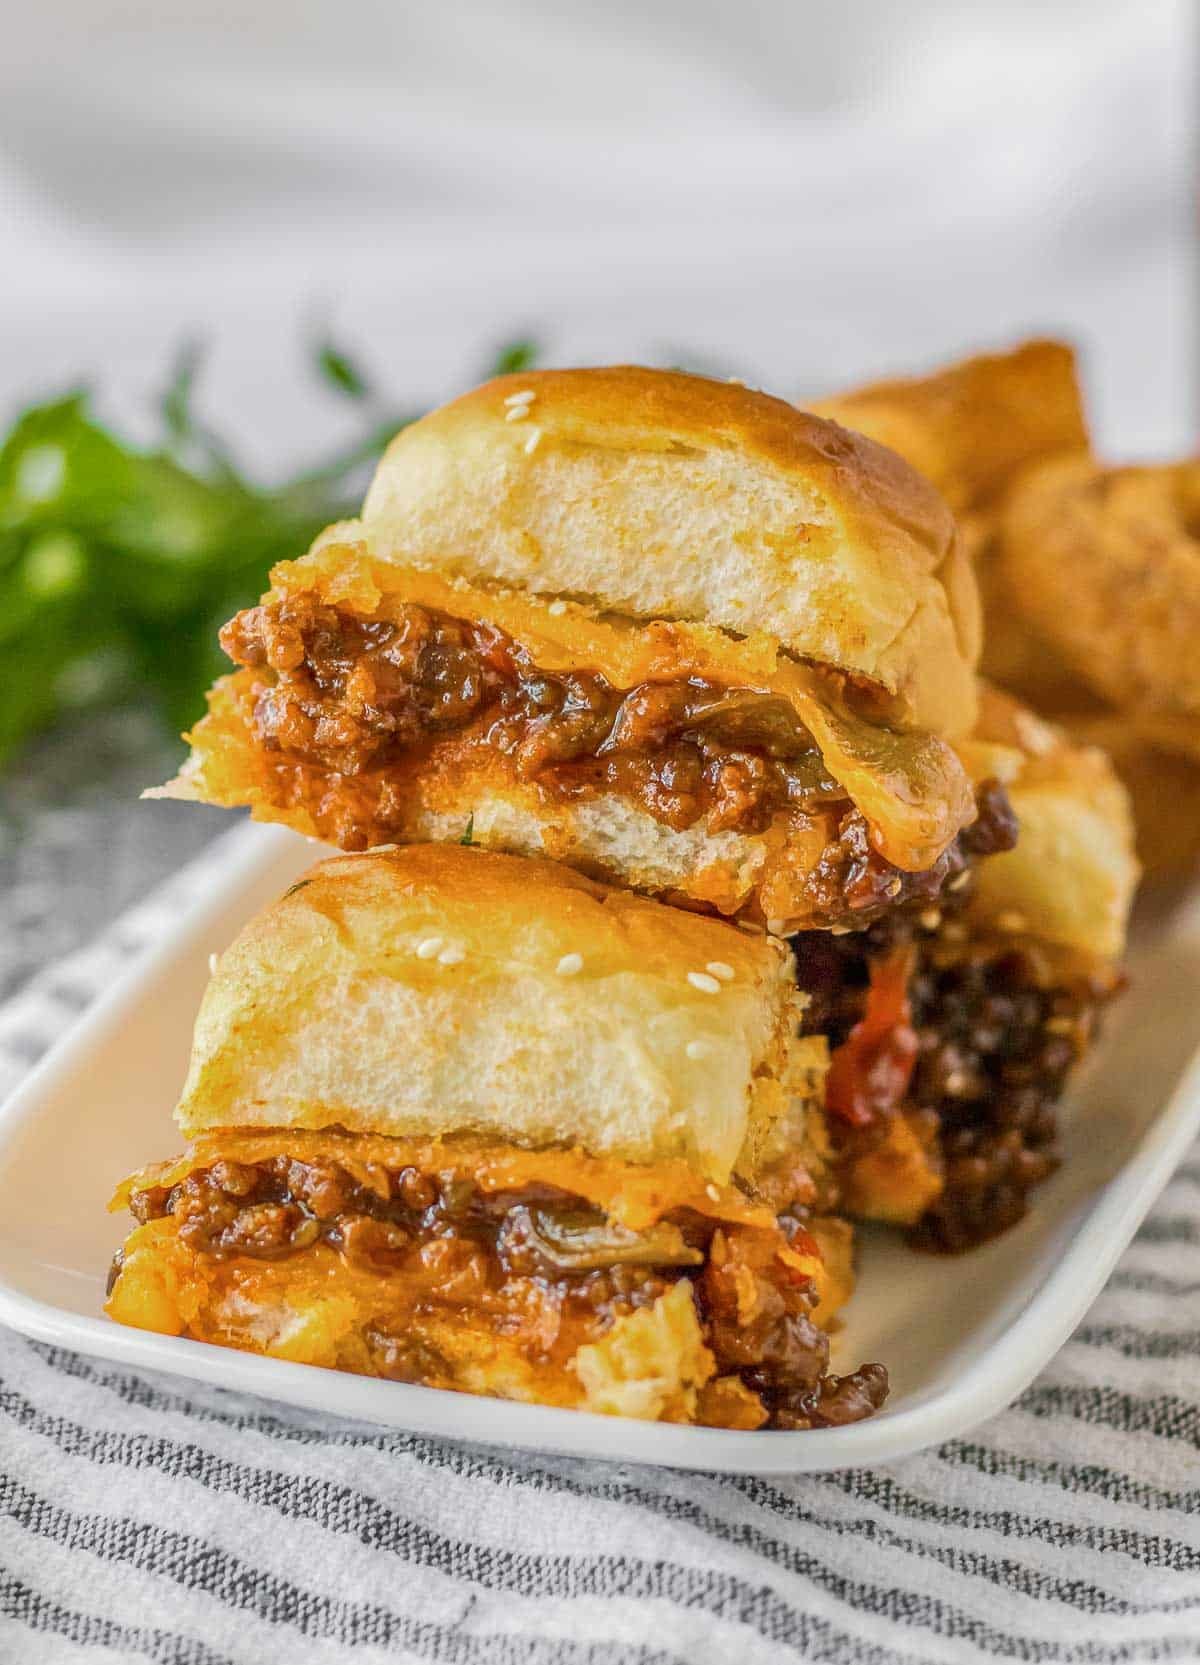
There's something about sloppy Joe filling on a tiny soft bun that just works better than the full-size sandwich version — maybe it's the higher bun-to-meat ratio, or maybe it's just that everything tastes more fun when it's small. This is a 30-minute stovetop recipe: ground beef cooked down with onion, bell pepper, tomato sauce, and a hit of Worcestershire until it's thick and saucy. Pile it onto slider buns, top with a little shredded cheddar, and let the kids make a mess. That's the whole point.
Ingredients
- 1 lb ground beef (80/20 works best)
- ½ yellow onion, finely diced
- ½ green bell pepper, finely diced
- 2 cloves garlic, minced
- 1 cup tomato sauce
- 2 tablespoons ketchup
- 1 tablespoon Worcestershire sauce
- 1 tablespoon brown sugar
- Salt and pepper to taste
- 12 slider buns
- ½ cup shredded cheddar cheese, for topping
Instructions
- Heat a large skillet over medium-high heat. Add the ground beef and cook, breaking it up as it browns, about 5-6 minutes. Drain excess fat.
- Add the onion, bell pepper, and garlic to the skillet and cook for another 3-4 minutes until softened.
- Stir in the tomato sauce, ketchup, Worcestershire sauce, and brown sugar. Reduce heat to medium-low and simmer for 8-10 minutes, stirring occasionally, until the mixture thickens. Season with salt and pepper.
- Spoon the sloppy Joe filling generously onto the bottom halves of the slider buns. Sprinkle with shredded cheddar, then cap with the top buns.
- Serve immediately with napkins nearby — and lots of them.
Tips
- Tip: Let the filling simmer long enough that it's genuinely thick — a watery sloppy Joe will soak through the bun in about 30 seconds and turn everything into a mess.
- Tip: The filling reheats beautifully, so make it a day ahead and just warm it up when you're ready to serve — it actually tastes better the next day.
- Tip: Toast the slider buns cut-side down in a dry pan for 1-2 minutes before filling — it creates a slight barrier so the buns hold up longer without getting soggy.
27. French Dip Sliders
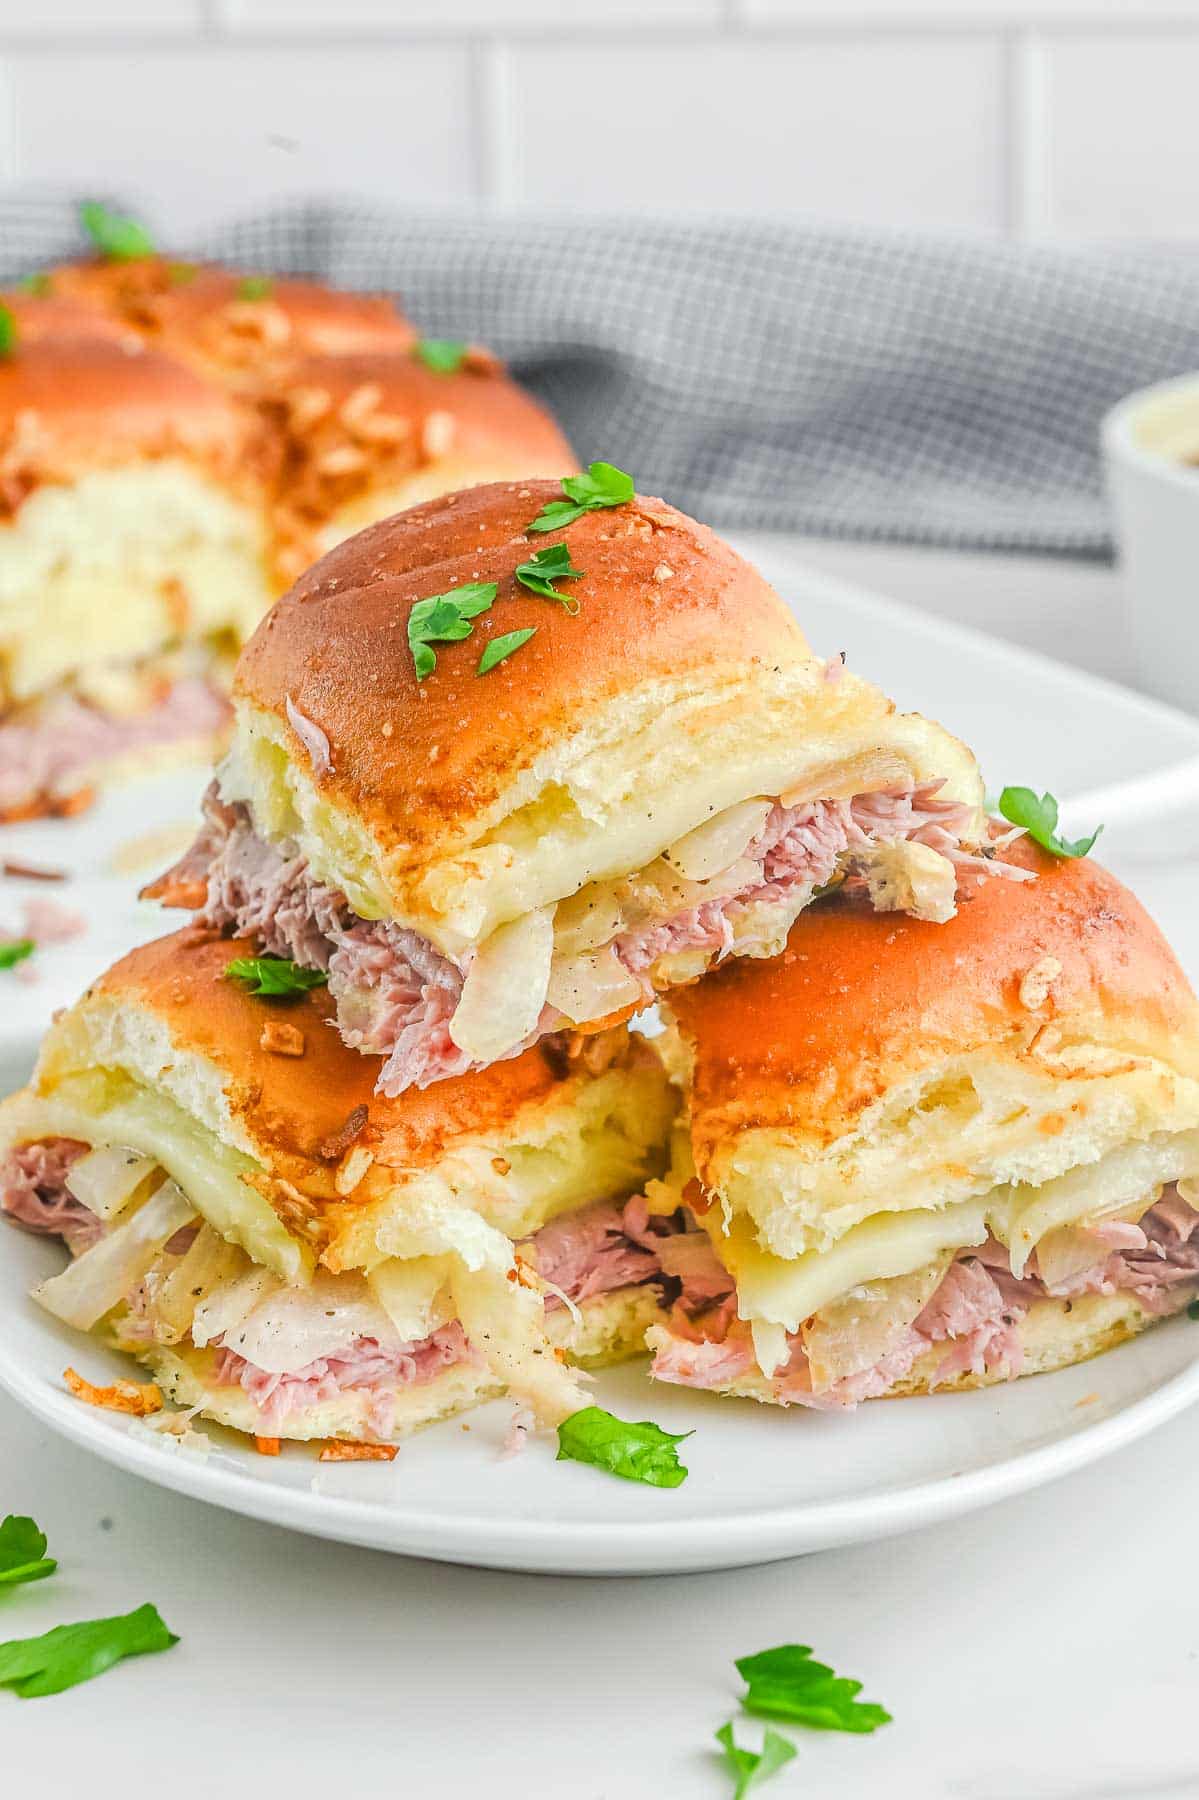
French dip sliders were completely new to me — growing up in Pakistan, dipping sandwiches into broth wasn't exactly a thing — but the moment I tried making these I understood the appeal immediately. Thinly sliced roast beef, melted provolone, and crispy fried onions are stacked onto slider rolls, then the whole pan gets baked together so the tops get golden and the cheese melts into the meat. The au jus dipping sauce on the side is what makes it — warm, savory, and just salty enough. My husband dipped his sliders three times per bite. That told me everything I needed to know.
Ingredients
- 12 slider rolls (Hawaiian rolls work well)
- ¾ lb deli roast beef, thinly sliced
- 6 slices provolone cheese
- ½ cup crispy fried onions (French's brand from Walmart works great)
- 3 tablespoons butter, melted
- 1 teaspoon Worcestershire sauce
- ½ teaspoon garlic powder
- 1 packet (1 oz) au jus mix, prepared according to package directions
Instructions
- Preheat your oven to 350°F. Slice the entire sheet of slider rolls in half horizontally (keeping them connected) and place the bottom halves in a greased 9x13 baking dish.
- Layer the roast beef evenly over the bottom rolls, followed by the provolone slices, then scatter the crispy fried onions on top.
- Place the top halves of the rolls back on. Mix the melted butter with Worcestershire sauce and garlic powder, then brush it all over the tops of the rolls.
- Cover loosely with foil and bake for 15 minutes, then uncover and bake for another 5 minutes until the tops are golden and the cheese has melted through.
- Prepare the au jus according to the packet directions while the sliders bake. Separate the sliders and serve with the warm au jus for dipping.
Tips
- Tip: Don't skip covering the pan with foil for the first 15 minutes — it traps steam so the cheese melts properly without the tops browning too fast.
- Tip: Horseradish sauce spread thinly on the bottom rolls before adding the beef is an optional addition that adds a nice kick if your crowd likes a bit of heat.
- Tip: Serve the au jus in small individual ramekins so each person gets their own dipping bowl — it keeps things tidy and everyone gets enough.
26. Philly Cheesesteak Sliders
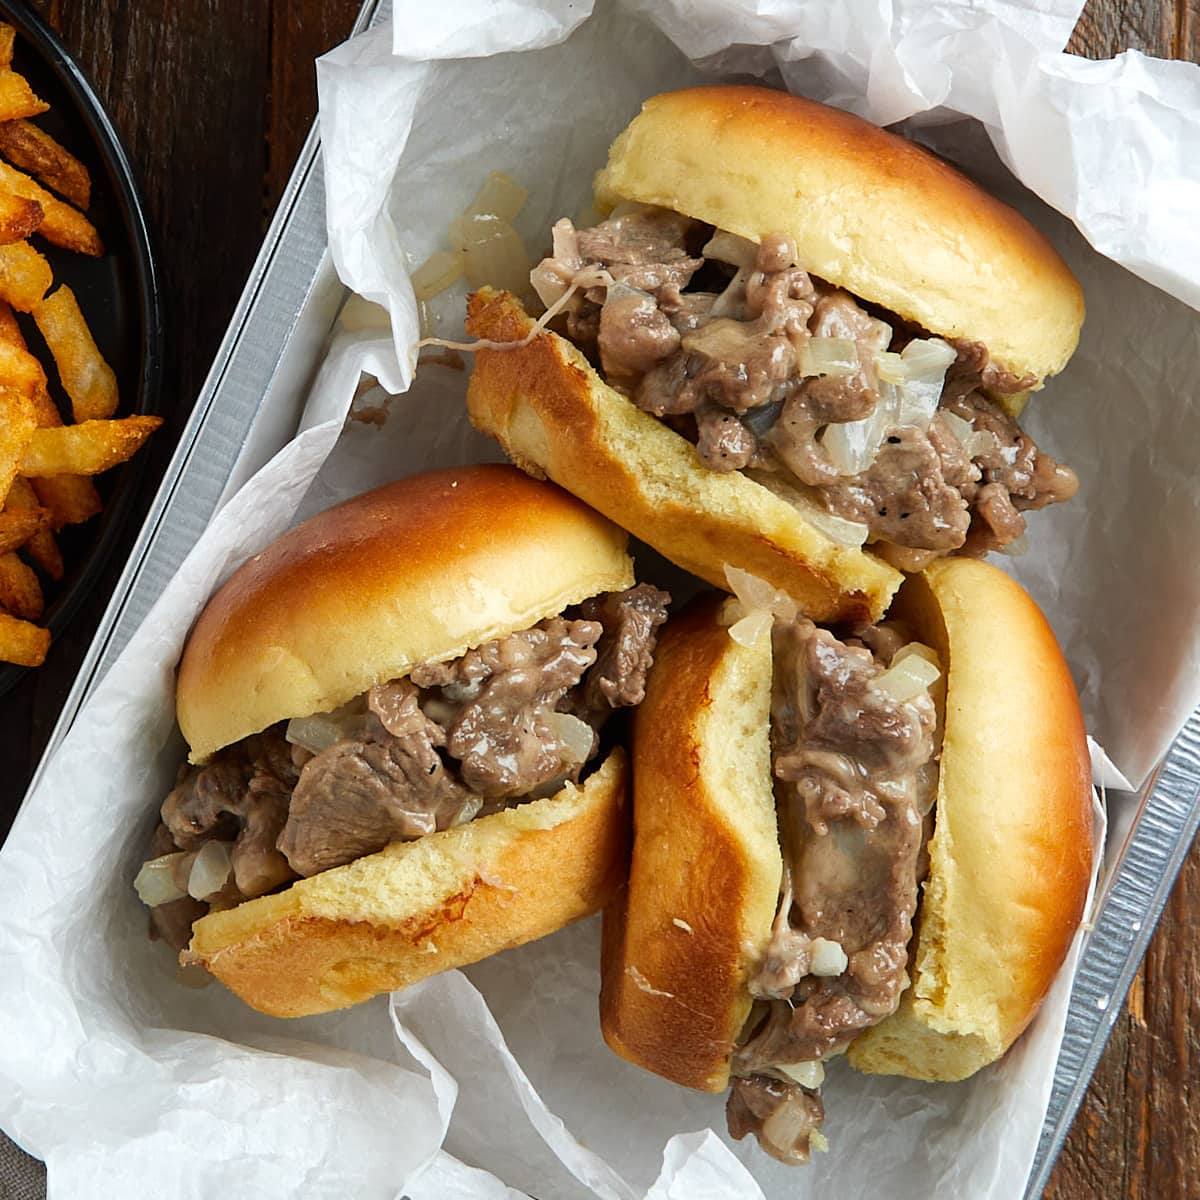
Everything you love about a Philly cheesesteak — the thinly sliced beef, the soft sautéed peppers and onions, that melted provolone — squeezed into a slider bun and baked until the whole thing is hot and gooey. This is one of those recipes where the prep is genuinely simple but the results feel like you put in a lot more effort. I use shaved beef from the deli counter at Walmart because it's already thin enough and saves me from trying to slice raw meat myself, which never goes as well as I plan. Saad always grabs two of these before anyone else gets to them.
Ingredients
- ¾ lb shaved beef (ribeye or deli roast beef sliced very thin)
- 1 green bell pepper, thinly sliced
- 1 small yellow onion, thinly sliced
- 2 tablespoons olive oil
- Salt, pepper, and garlic powder to taste
- 6 slices provolone cheese
- 12 slider buns
- 3 tablespoons butter, melted
- 1 teaspoon Worcestershire sauce
Instructions
- Heat olive oil in a large skillet over medium-high heat. Add the sliced onion and bell pepper with a pinch of salt and cook, stirring occasionally, for 6-8 minutes until softened and slightly caramelized.
- Push the vegetables to one side, add the shaved beef to the other side, and season with salt, pepper, and garlic powder. Cook for 2-3 minutes, breaking up any clumps, then stir everything together.
- Preheat your oven to 350°F. Slice the slider rolls in half horizontally and lay the bottom halves in a greased baking dish. Spoon the beef and pepper mixture evenly over the bottom rolls, then lay the provolone slices on top.
- Place the top rolls on, then brush with the melted butter mixed with Worcestershire sauce. Cover with foil and bake for 12 minutes, then uncover and bake another 5 minutes until golden on top.
- Slice apart and serve hot.
Tips
- Tip: Cook the peppers and onions until they're genuinely soft and sweet — rushing this step leaves them with a raw crunch that doesn't belong in a cheesesteak.
- Tip: White American cheese is a more traditional Philly choice if you can find it — provolone is easier to source and works just as well for sliders.
- Tip: If you want mushrooms in there (some people love them, some don't), sauté them with the peppers and onions — they add an earthy depth that works really well.
25. Easy Breakfast Sliders
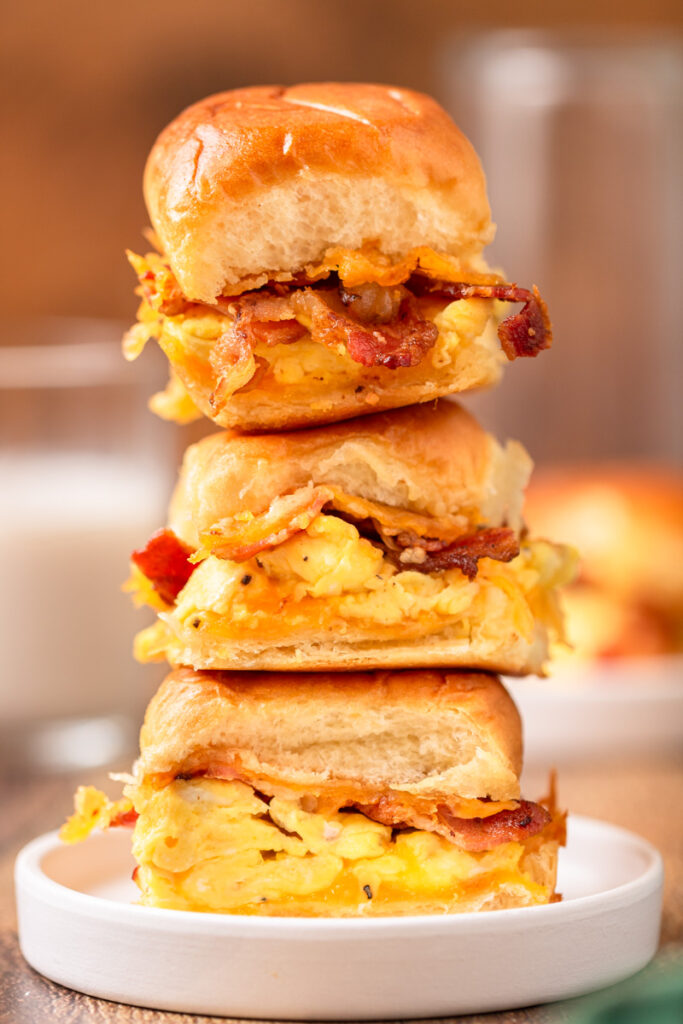
Breakfast sliders are one of those ideas that sound unnecessary until you actually make them — and then suddenly a regular breakfast sandwich feels like too much work by comparison. Scrambled eggs, crispy bacon, and melted cheddar all tucked into soft slider buns, then brushed with a garlic-butter glaze and baked together so everything melds into one hot, cohesive little bite. I started making these on weekend mornings when I needed something that could feed the whole family at once without standing over the stove flipping individual sandwiches. You build the whole thing in a pan and pull it out of the oven in one go — that alone makes it worth it.
Ingredients
- 12 slider buns (Hawaiian rolls are perfect here)
- 8 large eggs
- ¼ cup milk
- Salt and pepper to taste
- 8 slices bacon, cooked until crispy and roughly broken
- 6 slices cheddar cheese (or American cheese)
- 3 tablespoons butter, melted
- ½ teaspoon garlic powder
- ½ teaspoon dried parsley or chives
Instructions
- Preheat oven to 350°F. Whisk the eggs with the milk, salt, and pepper. Cook in a nonstick skillet over medium-low heat, stirring gently, until just barely set — you want them slightly underdone since they'll finish in the oven.
- Slice the slider rolls in half horizontally and place the bottom halves in a greased 9x13 baking dish. Spoon the scrambled eggs evenly over the bottom rolls.
- Distribute the bacon pieces evenly over the eggs, then lay the cheddar slices on top to cover everything.
- Place the top halves of the rolls back on. Mix the melted butter with garlic powder and dried parsley, then brush it generously over the tops.
- Cover with foil and bake for 12 minutes, then remove the foil and bake for another 4-5 minutes until the tops are lightly golden. Slice and serve hot.
Tips
- Tip: Undercook the scrambled eggs slightly on the stovetop — they'll finish cooking in the oven and stay soft rather than turning rubbery.
- Tip: Sausage patties or ham work just as well as bacon here — swap in whatever you have or whatever your family prefers.
- Tip: These can be assembled the night before, covered, and refrigerated — just pull them out while the oven preheats and add 5 extra minutes to the covered bake time.
24. French Onion Beef Sliders
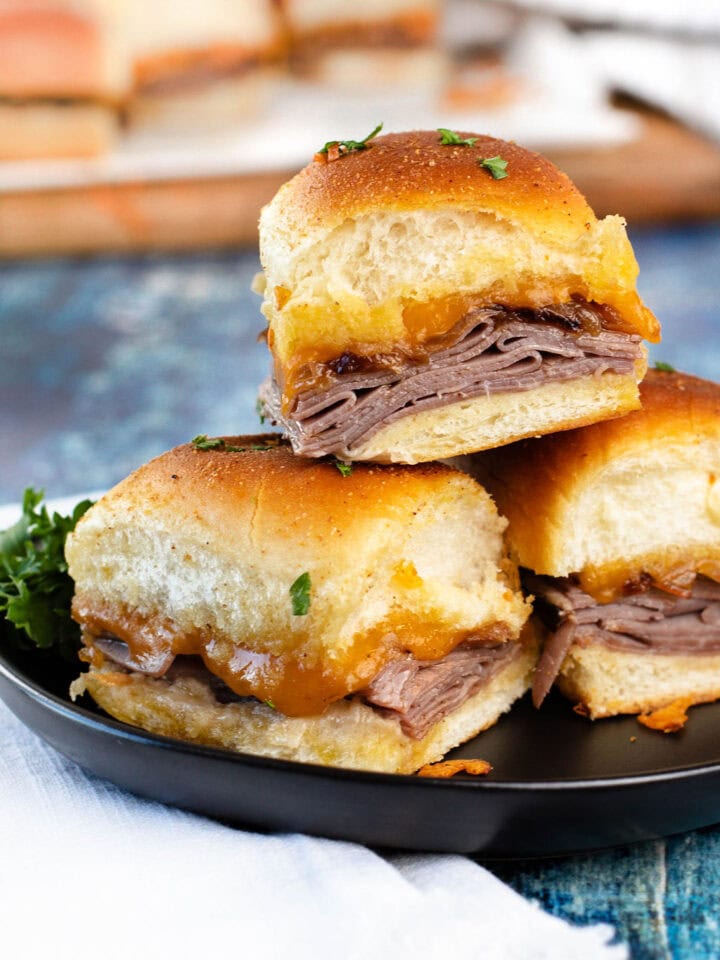
If you've ever made French onion soup and thought "this needs to be a sandwich," these sliders are exactly that. Slow-cooked caramelized onions piled onto seasoned ground beef, then topped with melted Swiss and baked under a buttery glaze — every layer earns its place. The caramelizing step takes patience (at least 30 minutes, don't rush it), but that's what gives you that deep, almost sweet onion flavor that makes these feel way more special than a regular beef slider. I make these for game nights and they disappear before I've even sat down.
Ingredients
- 1 lb ground beef (80/20)
- 2 large yellow onions, thinly sliced
- 2 tablespoons butter (for onions)
- 1 teaspoon Worcestershire sauce
- ½ teaspoon garlic powder
- Salt and black pepper to taste
- 6 slices Swiss cheese
- 12-count Hawaiian rolls or dinner rolls
- 3 tablespoons butter, melted (for glaze)
- 1 teaspoon Dijon mustard
- ½ teaspoon onion powder
Instructions
- Melt 2 tablespoons butter in a skillet over medium-low heat. Add sliced onions with a pinch of salt and cook, stirring occasionally, for 30-35 minutes until deeply golden and caramelized. Don't turn up the heat to rush this — you'll just get steamed onions, not caramelized ones.
- In a separate skillet over medium-high heat, cook the ground beef, breaking it up as it browns. Season with garlic powder, Worcestershire sauce, salt, and pepper. Drain excess fat.
- Preheat oven to 350°F. Slice the rolls horizontally as one slab, keeping the tops and bottoms intact. Place the bottom halves in a greased 9x13 baking dish.
- Layer the beef mixture over the rolls, then top with caramelized onions and Swiss cheese slices. Place the top halves of the rolls on.
- Mix melted butter, Dijon mustard, and onion powder. Brush generously over the tops of the rolls. Cover with foil and bake for 15 minutes, then uncover and bake another 5 minutes until the tops are golden.
Tips
- Tip: You can caramelize the onions a day ahead and store them in the fridge — this makes assembly on the day of much faster.
- Tip: Gruyère works even better than Swiss if you can find it — it melts beautifully and has that classic French onion soup flavor.
- Tip: Keep the foil on for most of the bake time so the rolls stay soft and don't dry out before the filling is warmed through.
23. Chicken Bacon Ranch Sliders

Chicken, bacon, and ranch together in a slider — Zainab would eat this every single week if I let her. The combination is familiar and crowd-friendly, but what makes this recipe work is the technique: you use shredded cooked chicken (rotisserie from Costco is perfect here), mix it with ranch dressing and cream cheese so it stays creamy and doesn't dry out, then pile it onto rolls with crispy bacon and melted cheddar. Baked together until everything is gooey and the tops are golden, these come out tasting way more put-together than the effort involved.
Ingredients
- 2 cups cooked shredded chicken (rotisserie works great)
- 4 oz cream cheese, softened
- ¼ cup ranch dressing
- 6 strips bacon, cooked and crumbled
- 1 cup shredded cheddar cheese
- 12-count Hawaiian rolls
- 3 tablespoons butter, melted
- 1 teaspoon dried parsley
- ½ teaspoon garlic powder
Instructions
- Preheat oven to 350°F. In a bowl, mix shredded chicken with softened cream cheese and ranch dressing until well combined and creamy.
- Slice the rolls horizontally as a slab and place the bottom halves in a greased 9x13 baking dish. Spread the chicken mixture evenly over the bottoms.
- Sprinkle crumbled bacon over the chicken, then top with shredded cheddar. Place the top halves of the rolls back on.
- Mix melted butter with garlic powder and dried parsley. Brush over the tops of the rolls.
- Cover with foil and bake for 15 minutes. Remove foil and bake another 5-7 minutes until the tops are golden and the cheese is fully melted. Slice and serve warm.
Tips
- Tip: Let the cream cheese sit at room temperature for at least 15 minutes before mixing — cold cream cheese clumps and won't blend smoothly into the chicken.
- Tip: You can assemble these the night before, refrigerate unbaked, and brush with the butter glaze right before they go in the oven.
- Tip: Add a few sliced pickled jalapeños between the chicken layer and the cheese if you want a little heat — it balances the richness really well.
22. Turkey Sliders with Swiss and Cranberry
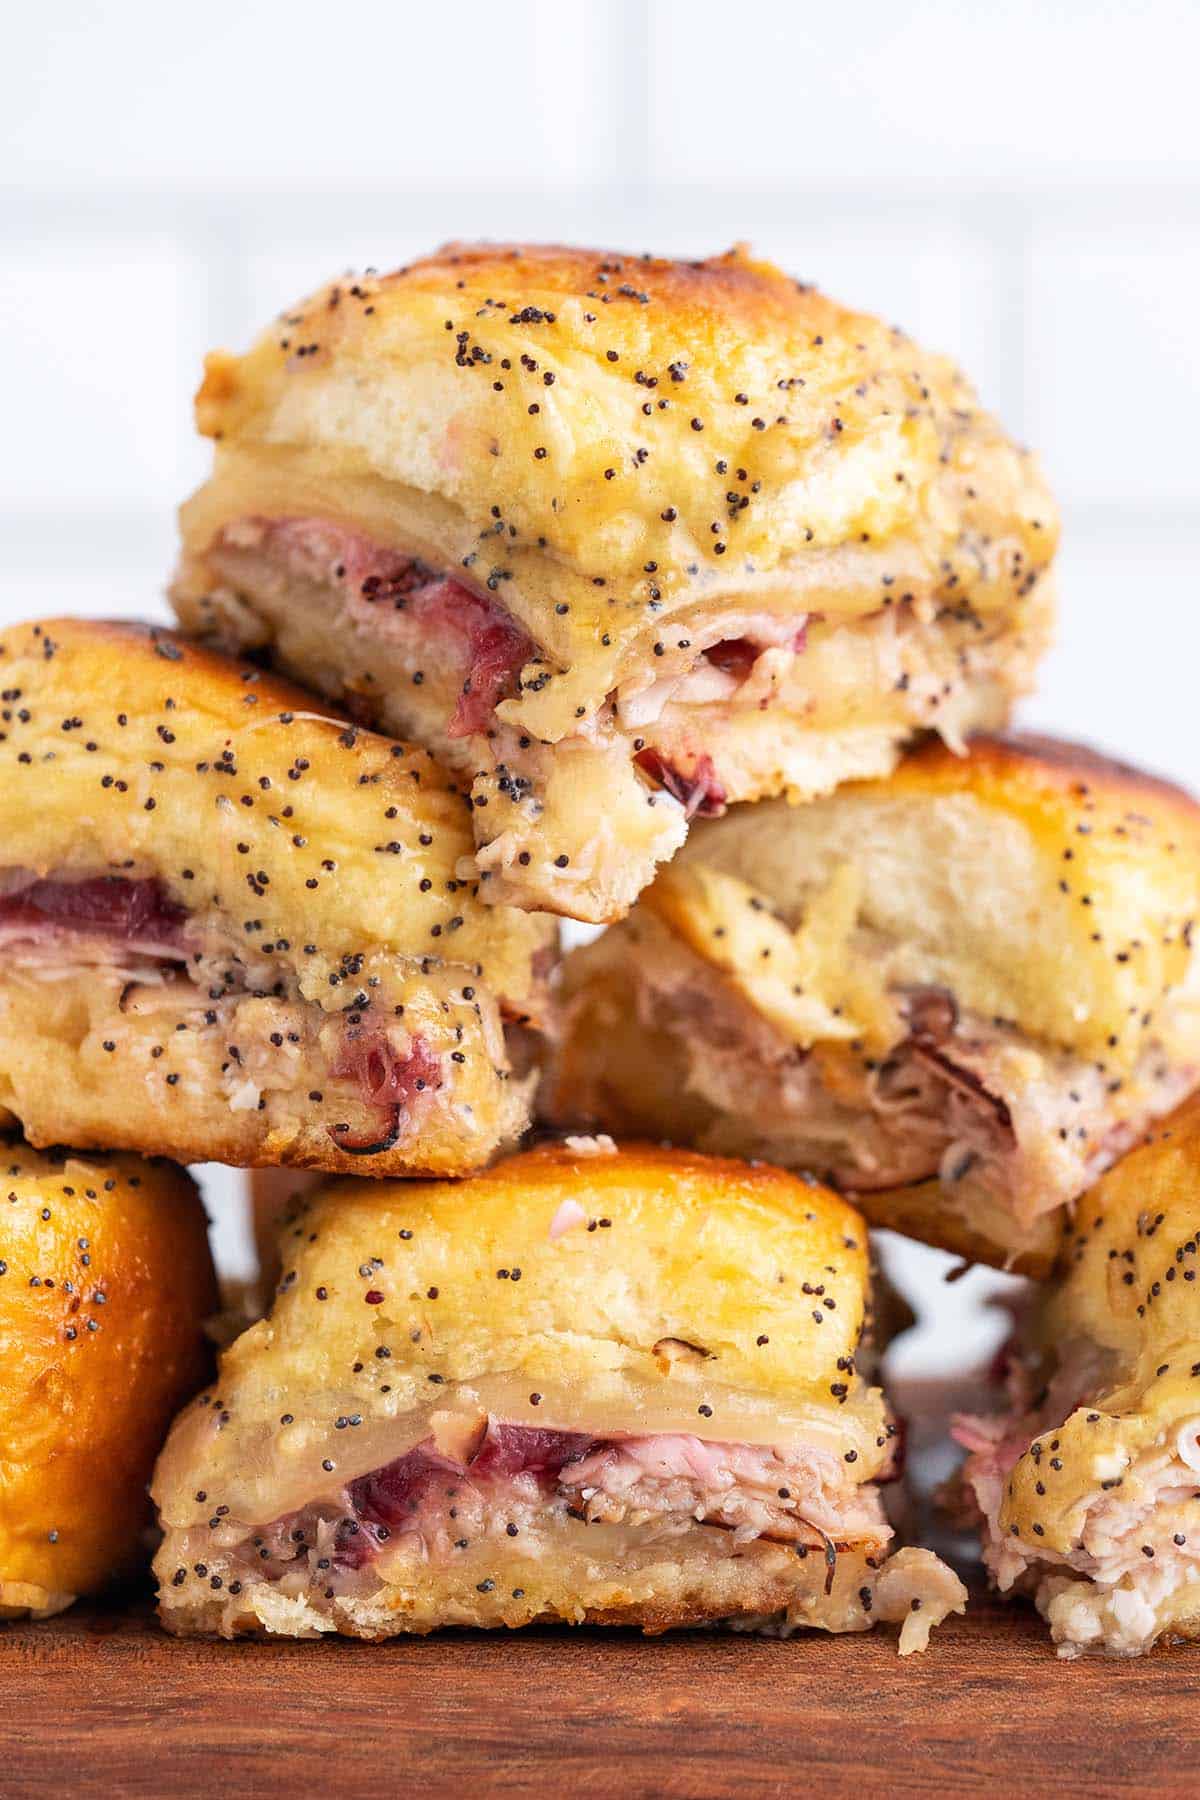
These are the sliders I make when I have leftover turkey after a big roast and need to turn it into something that feels intentional rather than "here's what I couldn't finish yesterday." Thin-sliced turkey layered with Swiss cheese and a smear of cranberry sauce on soft rolls — it sounds simple, and it is, but the sweet-tart cranberry against the savory turkey is a combination that works every single time. If you don't have leftover turkey, deli turkey from Walmart or Trader Joe's works just as well for a quick weeknight version.
Ingredients
- ¾ lb sliced deli turkey or leftover roast turkey
- 6 slices Swiss cheese
- ½ cup whole berry cranberry sauce (canned is fine)
- 2 tablespoons mayonnaise
- 1 teaspoon Dijon mustard
- 12-count Hawaiian rolls
- 3 tablespoons butter, melted
- 1 teaspoon poppy seeds (optional)
- ½ teaspoon garlic powder
Instructions
- Preheat oven to 350°F. Mix mayonnaise and Dijon mustard together in a small bowl. Slice the rolls as a slab and place the bottom halves in a greased 9x13 dish.
- Spread the mayo-mustard mixture on the bottom halves of the rolls. Layer the turkey slices evenly over the tops, then spoon cranberry sauce over the turkey.
- Lay Swiss cheese slices over the cranberry layer, then place the top halves of the rolls back on.
- Mix melted butter with garlic powder and poppy seeds if using. Brush generously over the roll tops. Cover with foil and bake for 15 minutes, then uncover and bake 5 more minutes until golden.
Tips
- Tip: Don't skip the mayo-mustard layer on the bottom — it keeps the rolls from getting soggy from the cranberry sauce sitting directly on the bread.
- Tip: These are especially good around the holidays when you have leftover cranberry sauce — it's a great way to use it up in a way that feels fresh.
- Tip: Provolone is a good swap for Swiss if that's what you have on hand — it melts just as well and has a mild flavor that doesn't compete with the cranberry.
21. Easy From-Scratch Meatball Sliders on Hawaiian Rolls
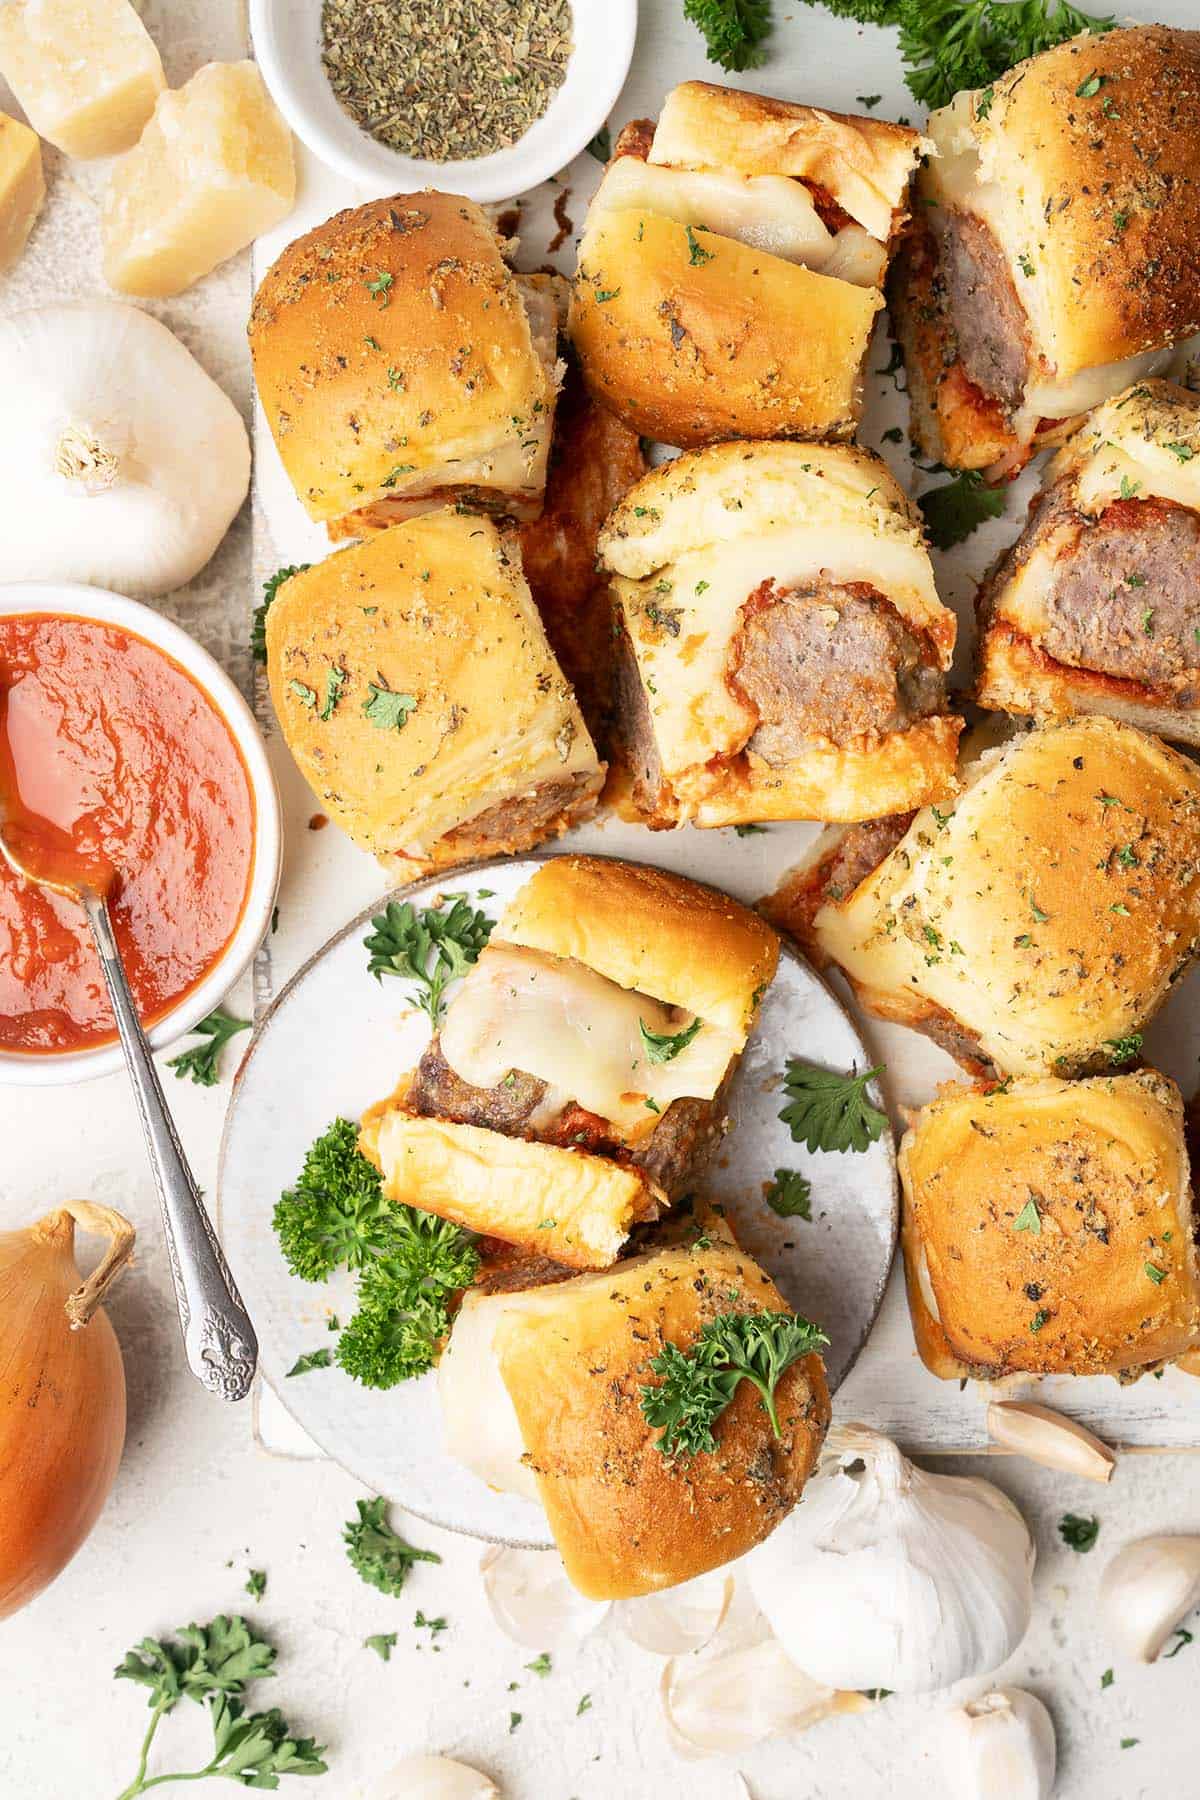
I'll be honest — I'm not Italian, and these aren't authentic Italian meatballs. But I've been making a version of these for years and they're one of my most-requested slider recipes, so they earn their spot here on merit alone. The meatballs are made from scratch with beef, breadcrumbs, parmesan, and Italian seasoning, simmered in marinara until tender, then tucked into Hawaiian rolls with a thick layer of mozzarella. Baked until the cheese bubbles and the rolls get slightly crisp on top, they taste like a meatball sub but in a hand-held, party-friendly format. I always make a double batch because one pan is never enough.
Ingredients
- 1 lb ground beef
- ⅓ cup Italian breadcrumbs
- ¼ cup grated parmesan cheese
- 1 egg
- 2 cloves garlic, minced
- 1 teaspoon Italian seasoning
- Salt and pepper to taste
- 1½ cups marinara sauce (jarred is fine — Rao's from Costco is my go-to)
- 1 cup shredded mozzarella cheese
- 12-count Hawaiian rolls
- 2 tablespoons butter, melted
- ½ teaspoon garlic powder
Instructions
- Combine ground beef, breadcrumbs, parmesan, egg, minced garlic, Italian seasoning, salt, and pepper in a bowl. Mix just until combined — overmixing makes tough meatballs. Roll into 12 small balls.
- Brown the meatballs in a skillet over medium-high heat for 2-3 minutes per side (they don't need to be fully cooked through yet). Add marinara sauce, reduce heat to low, and simmer for 10 minutes until cooked through.
- Preheat oven to 350°F. Slice rolls as a slab and place bottoms in a greased 9x13 dish. Spoon a little marinara on the bottom halves, then place one meatball per roll section.
- Top meatballs with remaining marinara and shredded mozzarella. Place the top halves of the rolls back on. Mix melted butter with garlic powder and brush over the tops.
- Cover with foil and bake 15 minutes. Uncover and bake another 5 minutes until cheese is bubbly and the tops are lightly golden. Serve immediately.
Tips
- Tip: Keep the meatballs small enough to fit inside the roll without the top sliding off — aim for about 1½ inches in diameter.
- Tip: Frozen pre-made meatballs work as a shortcut — just simmer them in the marinara for 15-20 minutes straight from frozen until warmed through.
- Tip: A sprinkle of red pepper flakes over the cheese before baking adds a gentle heat that pairs really well with the sweet Hawaiian rolls.
20. Fall Spiced Pulled Pork Sliders

Pulled pork sliders show up on a lot of lists, but what makes this version different is the spice blend — cinnamon, smoked paprika, cumin, and a touch of brown sugar go into the rub, giving the pork this warm, slightly smoky depth that feels completely right for fall. Top it with a quick apple cider slaw and you've got something that hits both savory and bright in the same bite. The pork goes in a slow cooker in the morning, and by dinner everything is ready to assemble in about ten minutes. It's the kind of recipe that makes you look like you planned your day well, even if you didn't.
Ingredients
- 2½ lbs pork shoulder (bone-in or boneless)
- 1 teaspoon smoked paprika
- ½ teaspoon ground cinnamon
- ½ teaspoon ground cumin
- 2 tablespoons brown sugar
- 1 teaspoon garlic powder
- Salt and black pepper to taste
- ½ cup apple cider (or apple juice)
- 2 cups pre-shredded coleslaw mix
- 2 tablespoons apple cider vinegar
- 1 tablespoon mayonnaise
- 1 teaspoon honey
- 12-count slider rolls or Hawaiian rolls
Instructions
- Mix smoked paprika, cinnamon, cumin, brown sugar, garlic powder, salt, and pepper together. Rub the mixture all over the pork shoulder. Place in a slow cooker and pour apple cider around the base.
- Cook on low for 8 hours or high for 5 hours, until the pork is completely tender and falls apart easily. Remove from the slow cooker and shred with two forks, discarding any large pieces of fat. Return shredded pork to the juices in the slow cooker and stir to coat.
- While the pork rests, make the slaw. Toss coleslaw mix with apple cider vinegar, mayonnaise, and honey. Season with salt and pepper. Let it sit for at least 10 minutes so the flavors come together.
- To assemble, split the slider rolls and pile a generous amount of pulled pork on each bottom half. Top with a spoonful of slaw, then close with the top half of the roll. Serve immediately.
Tips
- Tip: The pork tastes even better the next day once the juices have had time to soak back in — make it ahead and reheat gently on the stove with a splash of its cooking liquid.
- Tip: If you don't have a slow cooker, you can braise the pork in a covered Dutch oven at 325°F for 3½ to 4 hours — same result, different path.
- Tip: Add the slaw right before serving, not before — it releases liquid and can make the rolls soggy if it sits assembled too long.
19. Whiskey Sheet Pan Sliders
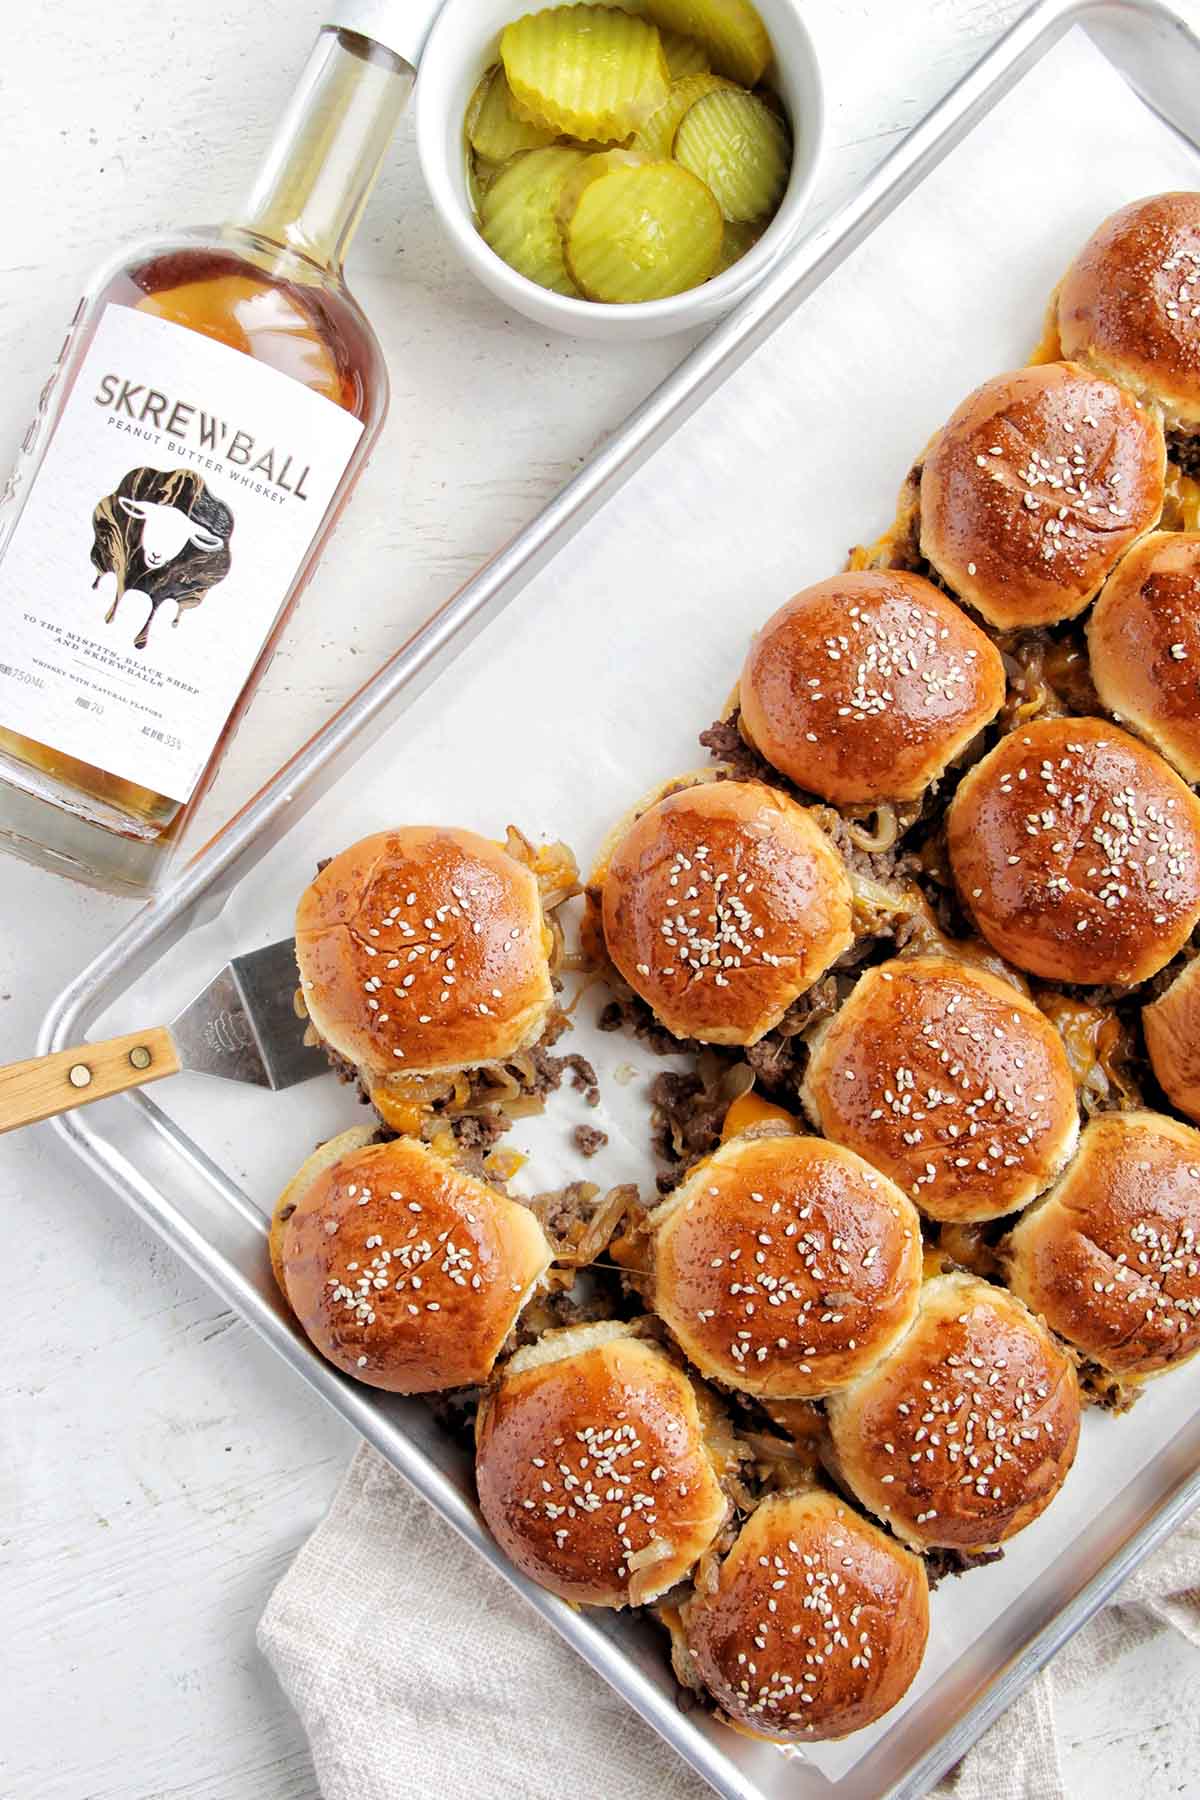
I'll be honest — I was skeptical about adding whiskey to a slider recipe. But that smoky-sweet glaze over ground beef patties baked right on a sheet pan? It works. The whole thing comes together in one pan, which means less mess and more time to actually sit down and eat. These are the kind of sliders you bring to a game day spread and people ask you what's in the glaze — and you smile and say "a little whiskey."
Ingredients
- 1 lb ground beef (80/20 for best flavor)
- 1 teaspoon garlic powder
- 1 teaspoon onion powder
- Salt and black pepper to taste
- 6 slider buns (Hawaiian rolls work great)
- 6 slices American or cheddar cheese
- 3 tablespoons whiskey (bourbon works too)
- 2 tablespoons brown sugar
- 1 tablespoon soy sauce
- 1 tablespoon butter
Instructions
- Preheat oven to 375°F. Mix ground beef with garlic powder, onion powder, salt, and pepper. Shape into 6 small patties and place on a lined sheet pan.
- In a small saucepan over medium heat, combine whiskey, brown sugar, soy sauce, and butter. Stir and simmer for 3-4 minutes until slightly thickened into a glaze.
- Brush the glaze over the raw patties generously. Bake for 15-18 minutes until cooked through, brushing with more glaze halfway through.
- Place a slice of cheese on each patty during the last 2 minutes of baking so it melts. Serve immediately on slider buns.
Tips
- Tip: Don't skip the soy sauce in the glaze — it adds a depth that balances the sweetness of the brown sugar.
- Tip: If you'd rather skip the alcohol, replace the whiskey with 2 tablespoons apple juice plus 1 tablespoon apple cider vinegar — it gives a similar tangy-sweet result.
- Tip: Make a double batch of the glaze and keep it in the fridge — it's great brushed over grilled chicken too.
18. Easy Cheeseburger Sliders with Hawaiian Rolls

These are the sliders that show up at every potluck for a reason. Mini cheeseburger patties with melted cheddar, dill pickles, and that slightly-sweet Hawaiian roll holding it all together — it's a combination that just works every single time. I've made these for Zainab's birthday party, for weekend lunches, and once just because we had ground beef in the fridge and needed something fast. They were gone in under ten minutes all three times.
Ingredients
- 1 lb ground beef (80/20)
- 1 teaspoon Worcestershire sauce
- ½ teaspoon garlic powder
- Salt and black pepper to taste
- 1 package (12 count) Hawaiian sweet rolls
- 6 slices cheddar cheese, halved
- Dill pickle slices
- Yellow mustard and ketchup for serving
- 2 tablespoons butter, melted (for brushing rolls)
Instructions
- Mix ground beef with Worcestershire sauce, garlic powder, salt, and pepper. Divide into 12 small balls and flatten into thin patties slightly wider than your rolls — they shrink when cooked.
- Heat a skillet or griddle over medium-high heat. Cook patties for 2-3 minutes per side. Add half a cheese slice to each patty in the last minute and cover the pan briefly to melt the cheese.
- Brush the cut sides of Hawaiian rolls with melted butter and lightly toast them in a dry skillet or under the broiler for 1-2 minutes.
- Assemble: patty on bottom bun, top with pickles, mustard, and ketchup. Serve immediately while the cheese is still melty.
Tips
- Tip: Press a small indent in the center of each raw patty with your thumb — this prevents them from puffing up in the middle as they cook.
- Tip: King's Hawaiian rolls from Walmart or Costco are the standard here — the slight sweetness is what makes these different from regular sliders.
- Tip: For a crowd, keep finished sliders warm in a 200°F oven while you cook the remaining batches.
17. Easy Mexican Burger Sliders With Spicy Tex-Mex Cheese

My husband has a high spice tolerance — decades of Pakistani food will do that — so when I put these in front of him with jalapeños and Tex-Mex cheese, he actually said "now we're talking." The seasoned beef patties get a cumin-heavy rub, the cheese is properly spicy, and the toppings lean fully into the Tex-Mex direction with pickled jalapeños and a smear of chipotle mayo. These are not mild. That's the point.
Ingredients
- 1 lb ground beef
- 1 teaspoon cumin
- 1 teaspoon chili powder
- ½ teaspoon smoked paprika
- Salt and pepper to taste
- 6 slider buns, toasted
- 6 slices pepper jack cheese (or any spicy Tex-Mex blend)
- ¼ cup pickled jalapeño slices
- 3 tablespoons mayonnaise
- 1 tablespoon chipotle sauce (from a can of chipotles in adobo)
- Shredded lettuce and sliced tomato for topping
Instructions
- Mix chipotle sauce into the mayonnaise and set aside. This is your chipotle mayo — it takes 30 seconds and makes a big difference.
- Combine ground beef with cumin, chili powder, smoked paprika, salt, and pepper. Form into 6 small patties.
- Cook patties in a hot skillet over medium-high heat, 3 minutes per side. Add pepper jack cheese in the last minute and cover to melt.
- Toast the slider buns. Spread chipotle mayo on both cut sides, then layer with the cheesy patty, jalapeños, lettuce, and tomato. Serve right away.
Tips
- Tip: Pepper jack from Trader Joe's or Walmart melts beautifully and has just the right heat level — no need to hunt for a specialty Tex-Mex blend.
- Tip: For a milder version, swap pickled jalapeños for banana pepper rings and reduce the chili powder to ½ teaspoon.
- Tip: The chipotle mayo can be made a day ahead and stored covered in the fridge — the flavor actually deepens overnight.
16. Buffalo Sliders with a Sweet Potato "Bun"
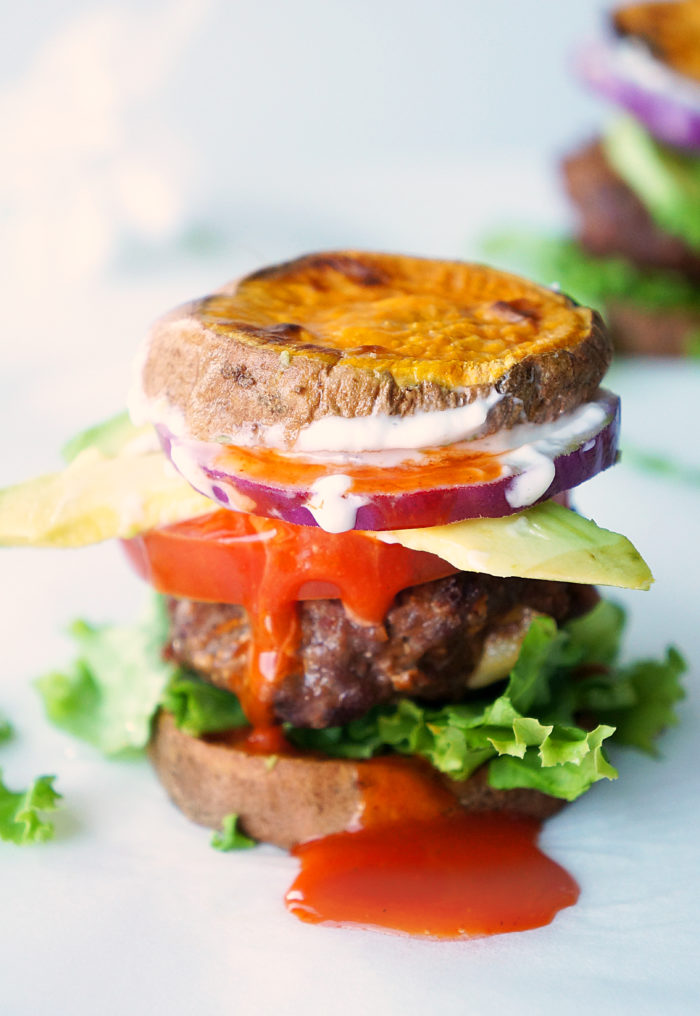
This one caught me off guard when I first saw it — roasted sweet potato rounds standing in for the bun. I made it mostly out of curiosity and ended up genuinely liking it. The buffalo chicken patties are spicy and punchy, and the sweet potato adds this earthy sweetness that actually balances the heat really well. It's not my everyday slider, but when I want something lighter and a little different, this is what I make.
Ingredients
- 1 lb ground chicken
- 3 tablespoons buffalo sauce (Frank's RedHot is what I use)
- ½ teaspoon garlic powder
- Salt and pepper to taste
- 2 large sweet potatoes, sliced into ½-inch rounds
- 1 tablespoon olive oil
- ¼ cup blue cheese or ranch dressing
- Celery sticks and shredded lettuce for serving
Instructions
- Preheat oven to 400°F. Lay sweet potato rounds on a lined sheet pan, brush both sides with olive oil, and season with salt. Roast for 20-25 minutes, flipping halfway, until tender and lightly caramelized on the edges.
- While the sweet potatoes roast, mix ground chicken with buffalo sauce, garlic powder, salt, and pepper. Form into patties roughly the same diameter as your sweet potato rounds.
- Cook chicken patties in a lightly oiled skillet over medium heat, 4-5 minutes per side, until cooked through (internal temp 165°F). Brush with extra buffalo sauce in the last minute.
- Stack: sweet potato round, chicken patty, a drizzle of blue cheese or ranch dressing, a little shredded lettuce, then top with another sweet potato round. Secure with a toothpick if needed.
Tips
- Tip: Cut your sweet potato rounds as evenly as possible so they roast at the same rate — uneven slices mean some burn while others are still raw in the middle.
- Tip: Ground chicken is stickier than beef — wet your hands slightly before forming the patties so they don't stick to your palms.
- Tip: If blue cheese isn't your thing, ranch works just as well and keeps the flavor profile approachable for kids.
15. Cheeseburger Sliders with Caramelized Onions
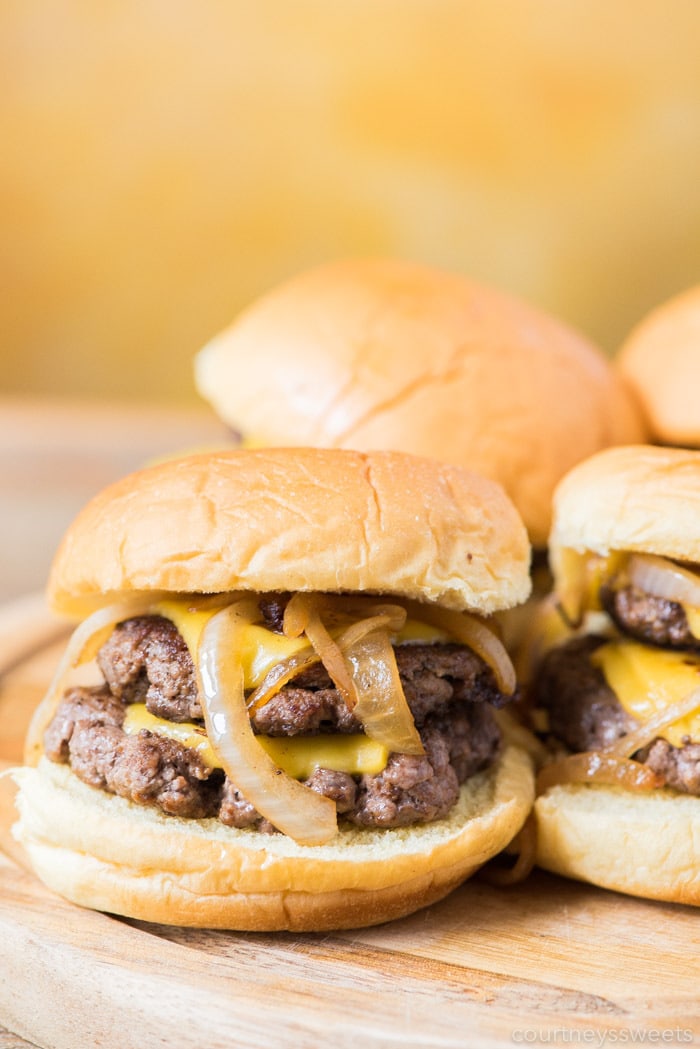
The first time I tried to caramelize onions for a slider, I rushed it — turned the heat up too high and ended up with bitter, half-burnt onions that I picked off the top and pretended weren't there. The second time I went slow and low like you're supposed to, and the difference was dramatic. Properly caramelized onions on a cheeseburger slider are jammy and sweet and deeply savory all at once. Don't rush this step — it's what makes these worth making over a regular cheeseburger slider.
Ingredients
- 2 large yellow onions, thinly sliced
- 2 tablespoons butter
- 1 teaspoon sugar (helps them along)
- Salt to taste
- 1 lb ground beef (80/20)
- 1 teaspoon Worcestershire sauce
- Salt and black pepper to taste
- 6 slices Swiss or cheddar cheese
- 6 slider buns, toasted
- Dijon mustard for serving
Instructions
- Melt butter in a heavy skillet over low-medium heat. Add sliced onions, sugar, and a pinch of salt. Cook slowly for 35-40 minutes, stirring every few minutes, until deeply golden and jammy. Do not rush this.
- Mix ground beef with Worcestershire sauce, salt, and pepper. Form into 6 patties. Cook in a separate hot skillet over medium-high heat, 2-3 minutes per side.
- Add a slice of cheese to each patty in the last minute of cooking and cover the pan to melt.
- Toast slider buns. Spread Dijon on the bottom bun, add the cheesy patty, pile a generous spoonful of caramelized onions on top, and close with the top bun. Serve immediately.
Tips
- Tip: Caramelized onions keep well in the fridge for up to 5 days — make a big batch on Sunday and use them on sliders, sandwiches, and eggs all week.
- Tip: Swiss cheese is the classic pairing here — its mild nuttiness doesn't compete with the sweet onions the way a sharp cheddar might.
- Tip: If your onions start sticking to the pan, add a splash of water or beef broth and scrape up the bits — those browned bits are flavor, not waste.
14. Sticky Pulled Pork Sliders
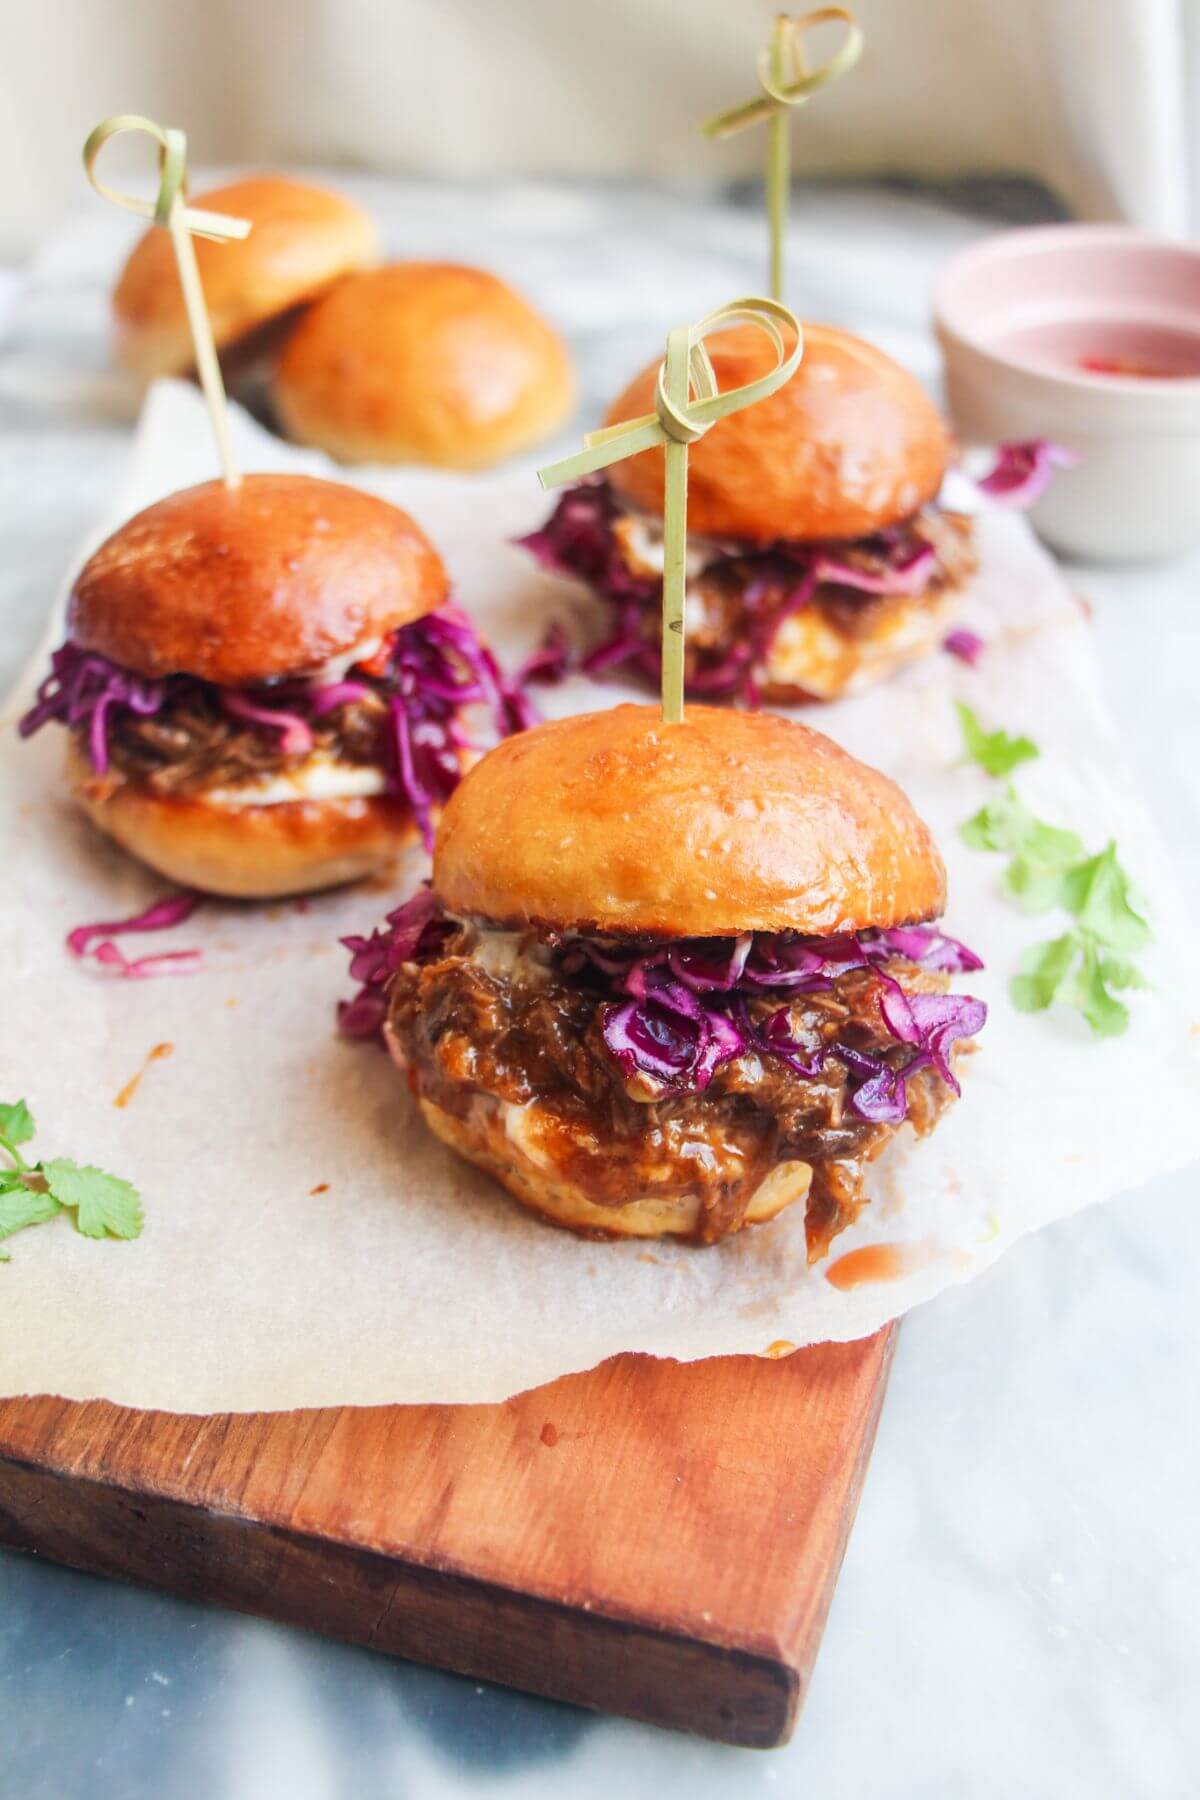
Pulled pork sliders are one of those things that look like a lot of effort but actually do most of their own work in the slow cooker. The pork gets cooked down until it shreds apart with barely any effort, then you toss it in a sticky, sweet-savory glaze that clings to every strand. I made a big batch of these for a family get-together last Eid and the tray was gone before I had a chance to sit down. The soft buns soak up just enough of that sauce without going soggy, which is the whole trick with sliders like this — timing matters.
Ingredients
- 2 lbs boneless pork shoulder
- 1 teaspoon garlic powder
- 1 teaspoon smoked paprika
- ½ teaspoon onion powder
- Salt and black pepper to taste
- ½ cup chicken broth
- ¾ cup BBQ sauce (store-bought is fine — I use Sweet Baby Ray's)
- 2 tablespoons honey
- 1 tablespoon brown sugar
- 12 slider buns
- Coleslaw (store-bought or homemade), for topping
Instructions
- Season the pork shoulder all over with garlic powder, smoked paprika, onion powder, salt, and pepper. Place it in a slow cooker with the chicken broth.
- Cook on low for 8 hours or high for 4-5 hours, until the pork shreds easily with two forks. Drain most of the liquid, leaving just a little behind to keep things moist.
- In a small saucepan over medium heat, combine the BBQ sauce, honey, and brown sugar. Stir until the sugar dissolves and the sauce thickens slightly, about 3-4 minutes.
- Toss the shredded pork with the sticky glaze until every strand is coated.
- Pile the pulled pork onto slider buns and top with coleslaw. Serve immediately while everything is warm.
Tips
- Tip: If you don't have a slow cooker, braise the pork in a covered Dutch oven at 325°F for about 3 hours — same result, just uses the oven.
- Tip: The pork can be cooked a day ahead and refrigerated. Reheat it with a splash of broth in a skillet before glazing so it doesn't dry out.
- Tip: Lightly toast the slider buns cut-side down in a dry pan for one minute — it stops them from going soggy under all that sauce.
13. BBQ Jackfruit Sliders With Vegan Coleslaw

I'll be honest — I was skeptical about jackfruit the first time I tried cooking with it. Growing up in Pakistan, we eat raw jackfruit as a vegetable curry called kathal, so the idea of using canned young jackfruit as a pulled pork substitute took some convincing. But once it's shredded and simmered in smoky BBQ sauce, the texture is genuinely impressive — it pulls apart in strands just like slow-cooked meat. Paired with a tangy vegan coleslaw on a soft bun, this one holds its own even for people who aren't vegan. I've served it at a table with dedicated meat-eaters and nobody complained.
Ingredients
- 2 cans (20 oz each) young green jackfruit in water or brine, drained and rinsed
- 1 tablespoon olive oil
- 1 teaspoon smoked paprika
- ½ teaspoon cumin
- ¾ cup vegan BBQ sauce
- 2 cups shredded green cabbage
- 1 cup shredded purple cabbage
- 1 medium carrot, grated
- 3 tablespoons vegan mayo
- 1 tablespoon apple cider vinegar
- 1 teaspoon maple syrup
- 12 slider buns (check they're vegan if needed)
Instructions
- Pat the drained jackfruit dry with paper towels, then use your hands or two forks to shred it, discarding any tough core pieces.
- Heat olive oil in a large skillet over medium-high heat. Add the jackfruit along with smoked paprika and cumin. Cook for 5-6 minutes, stirring occasionally, until the edges start to brown and slightly crisp up.
- Pour in the BBQ sauce, reduce heat to medium-low, and simmer for another 8-10 minutes until the jackfruit is coated and sticky. Keep warm.
- While the jackfruit cooks, mix together the cabbages, carrot, vegan mayo, apple cider vinegar, and maple syrup in a bowl. Season with salt and pepper. Let it sit for 10 minutes so the flavors come together.
- Load the slider buns with BBQ jackfruit and top generously with vegan coleslaw. Serve straight away.
Tips
- Tip: Make sure you buy young green jackfruit in water or brine — NOT ripe jackfruit in syrup, which is sweet and won't work here at all.
- Tip: Getting the jackfruit properly dry before frying is what gives it that slightly caramelized edge — don't skip the paper towel step.
- Tip: The coleslaw can be made up to 4 hours ahead and kept in the fridge — it actually gets better as it sits and softens slightly.
12. Cheeseburger Sliders

Sometimes the classic is the classic for a reason. Cheeseburger sliders are basically everything great about a proper burger but in a smaller, easier-to-manage form — and they come together in under 30 minutes. My husband prefers these over full-size burgers because the ratio of bun to meat to cheese is just right in a slider. I season the beef simply and cook it in a hot cast iron skillet so it gets that dark, seared crust. A slice of American cheese melted on top and a good squirt of ketchup is honestly all you need, though I won't judge you for adding pickles and mustard too.
Ingredients
- 1 lb ground beef (80/20 for best flavor)
- ½ teaspoon garlic powder
- ½ teaspoon onion powder
- Salt and black pepper to taste
- 6 slices American cheese (or cheddar)
- 12 slider buns
- Shredded iceberg lettuce
- Ketchup and mustard, for serving
- Sliced pickles (optional but recommended)
Instructions
- Mix ground beef with garlic powder, onion powder, salt, and pepper. Divide into 12 equal portions and roll into balls, then flatten into thin patties slightly wider than your slider buns — they'll shrink as they cook.
- Heat a cast iron skillet or heavy pan over high heat until very hot. Cook patties in batches for 2 minutes per side, pressing down slightly with a spatula for a good sear.
- In the last 30 seconds of cooking, lay half a slice of cheese on each patty and cover the pan briefly to help it melt.
- Toast the slider buns cut-side down in the same pan for 30-45 seconds, picking up all those browned bits left behind.
- Assemble: bottom bun, a little lettuce, the cheeseburger patty, ketchup, mustard, pickles, top bun. Done.
Tips
- Tip: Don't overwork the meat when mixing — handle it just enough to incorporate the seasoning, or the patties will turn dense and tough.
- Tip: Make sure your patties are wider than the buns before cooking — people always underestimate how much burgers shrink in the pan.
- Tip: If you're feeding a crowd, you can keep cooked patties warm in a 200°F oven while you finish the remaining batches.
11. Hawaiian Roll Turkey Pesto Sliders
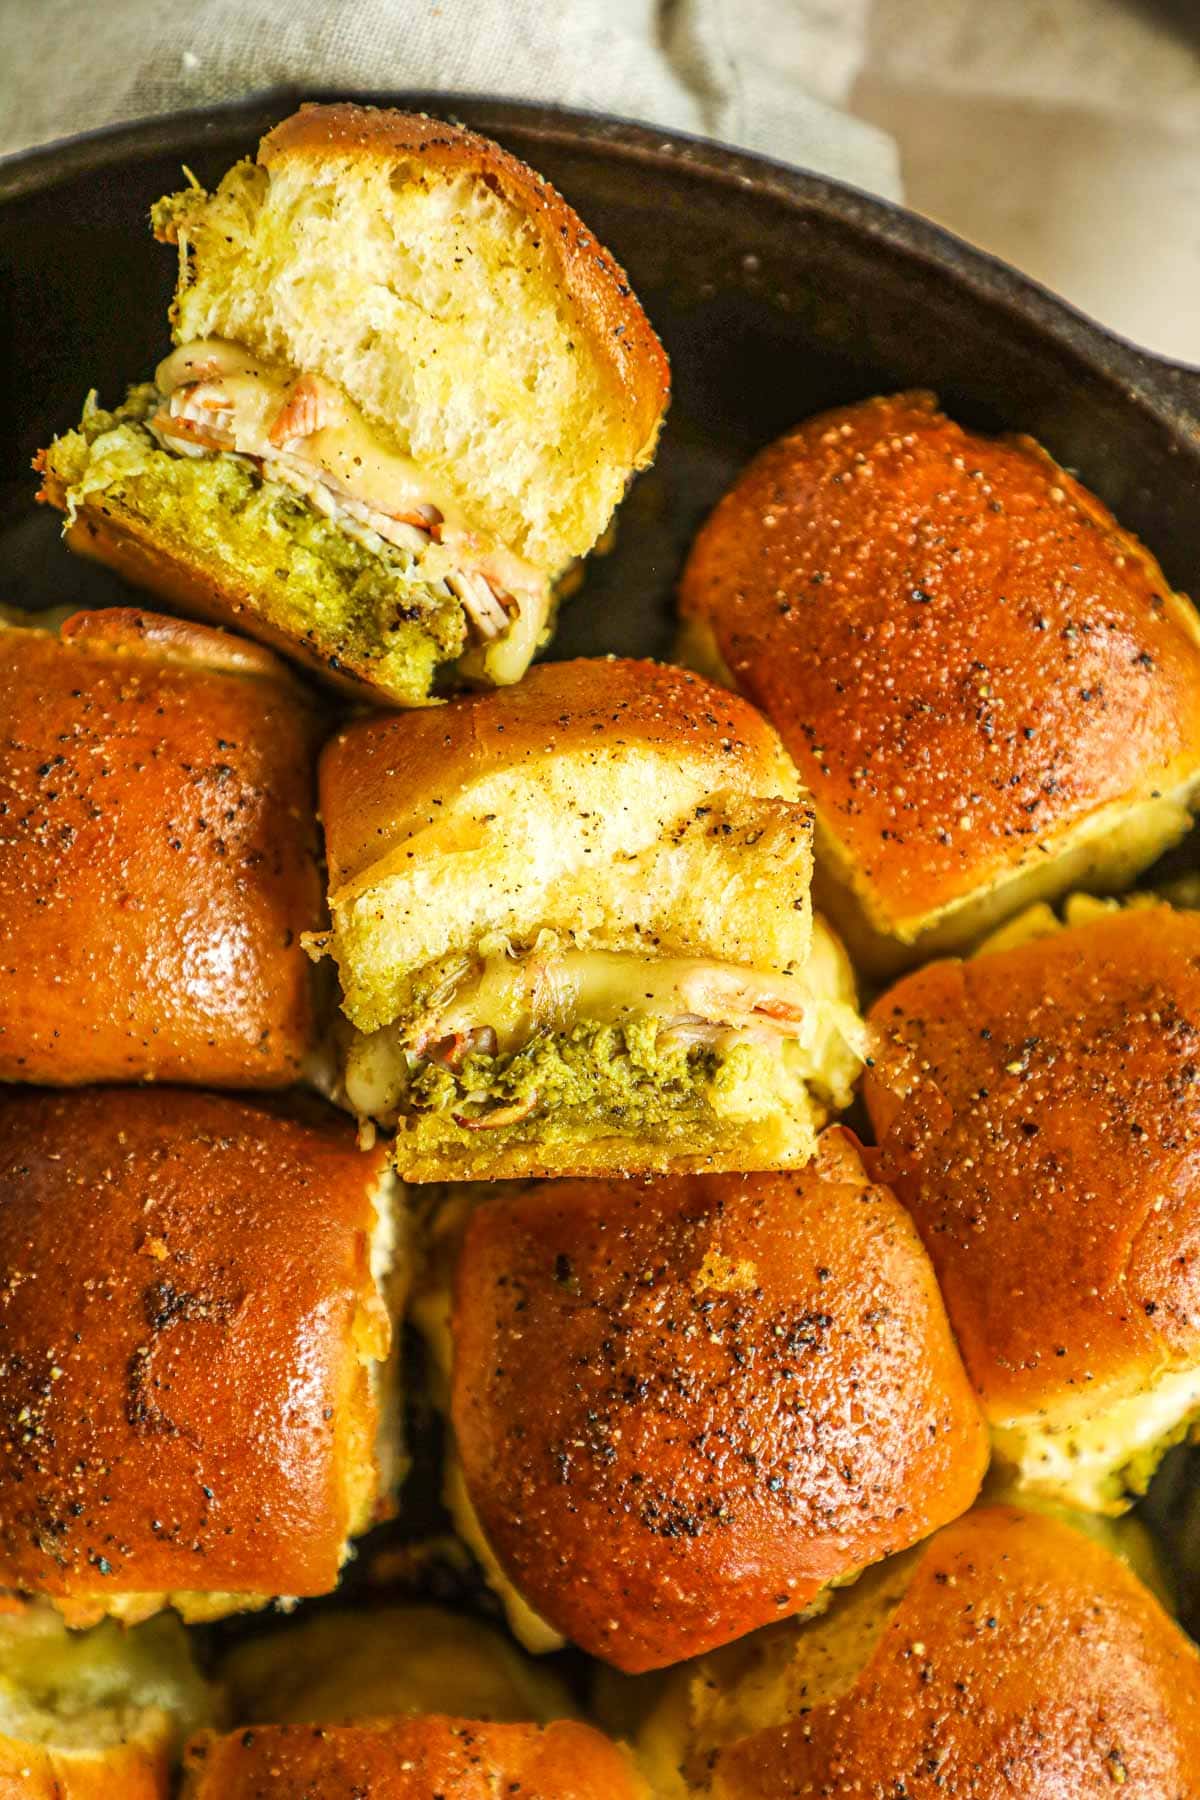
I make these whenever I have leftover deli turkey in the fridge and I need something that feels more put-together than a sandwich. The combination of herby pesto, stretchy melted mozzarella, and that slightly sweet Hawaiian roll is genuinely one of the better flavor combinations in this whole list. Everything gets assembled as one big slab, then baked together so the cheese melts into every corner and the tops of the rolls go golden. It's the kind of slider that looks like you planned it intentionally, even if you made it from fridge odds and ends on a Tuesday night.
Ingredients
- 1 pack (12 count) Hawaiian rolls
- ¾ lb deli turkey, sliced
- ⅓ cup basil pesto (store-bought works great)
- 6 oz fresh mozzarella, sliced (or 1 cup shredded)
- ¼ cup sun-dried tomatoes, roughly chopped (optional)
- 2 tablespoons butter, melted
- ½ teaspoon garlic powder
- 1 tablespoon grated Parmesan (for brushing the tops)
Instructions
- Preheat your oven to 350°F. Without separating the rolls, slice the entire pack in half horizontally so you have one large bottom slab and one large top slab.
- Place the bottom slab in a greased baking dish. Spread the pesto evenly across the cut surface, then layer the turkey and mozzarella on top. Add sun-dried tomatoes if using.
- Place the top slab over the fillings. Mix the melted butter with garlic powder and Parmesan, then brush generously over the top of the rolls.
- Cover loosely with foil and bake for 15 minutes, then remove the foil and bake for another 5-8 minutes until the tops are golden and the cheese has fully melted.
- Let them cool for 2-3 minutes before slicing along the roll lines and serving.
Tips
- Tip: Fresh mozzarella gives a better melt and stretch than pre-shredded, but if that's what you have on hand, it will still work fine.
- Tip: Don't skip the foil for the first 15 minutes — it traps steam that helps the cheese melt before the tops over-brown.
- Tip: These can be assembled up to 4 hours ahead, covered, and refrigerated unbaked — just add 3-4 minutes to the covered bake time if going in cold from the fridge.
10. Karaage Chicken Sliders (Japanese Fried Chicken Sliders)
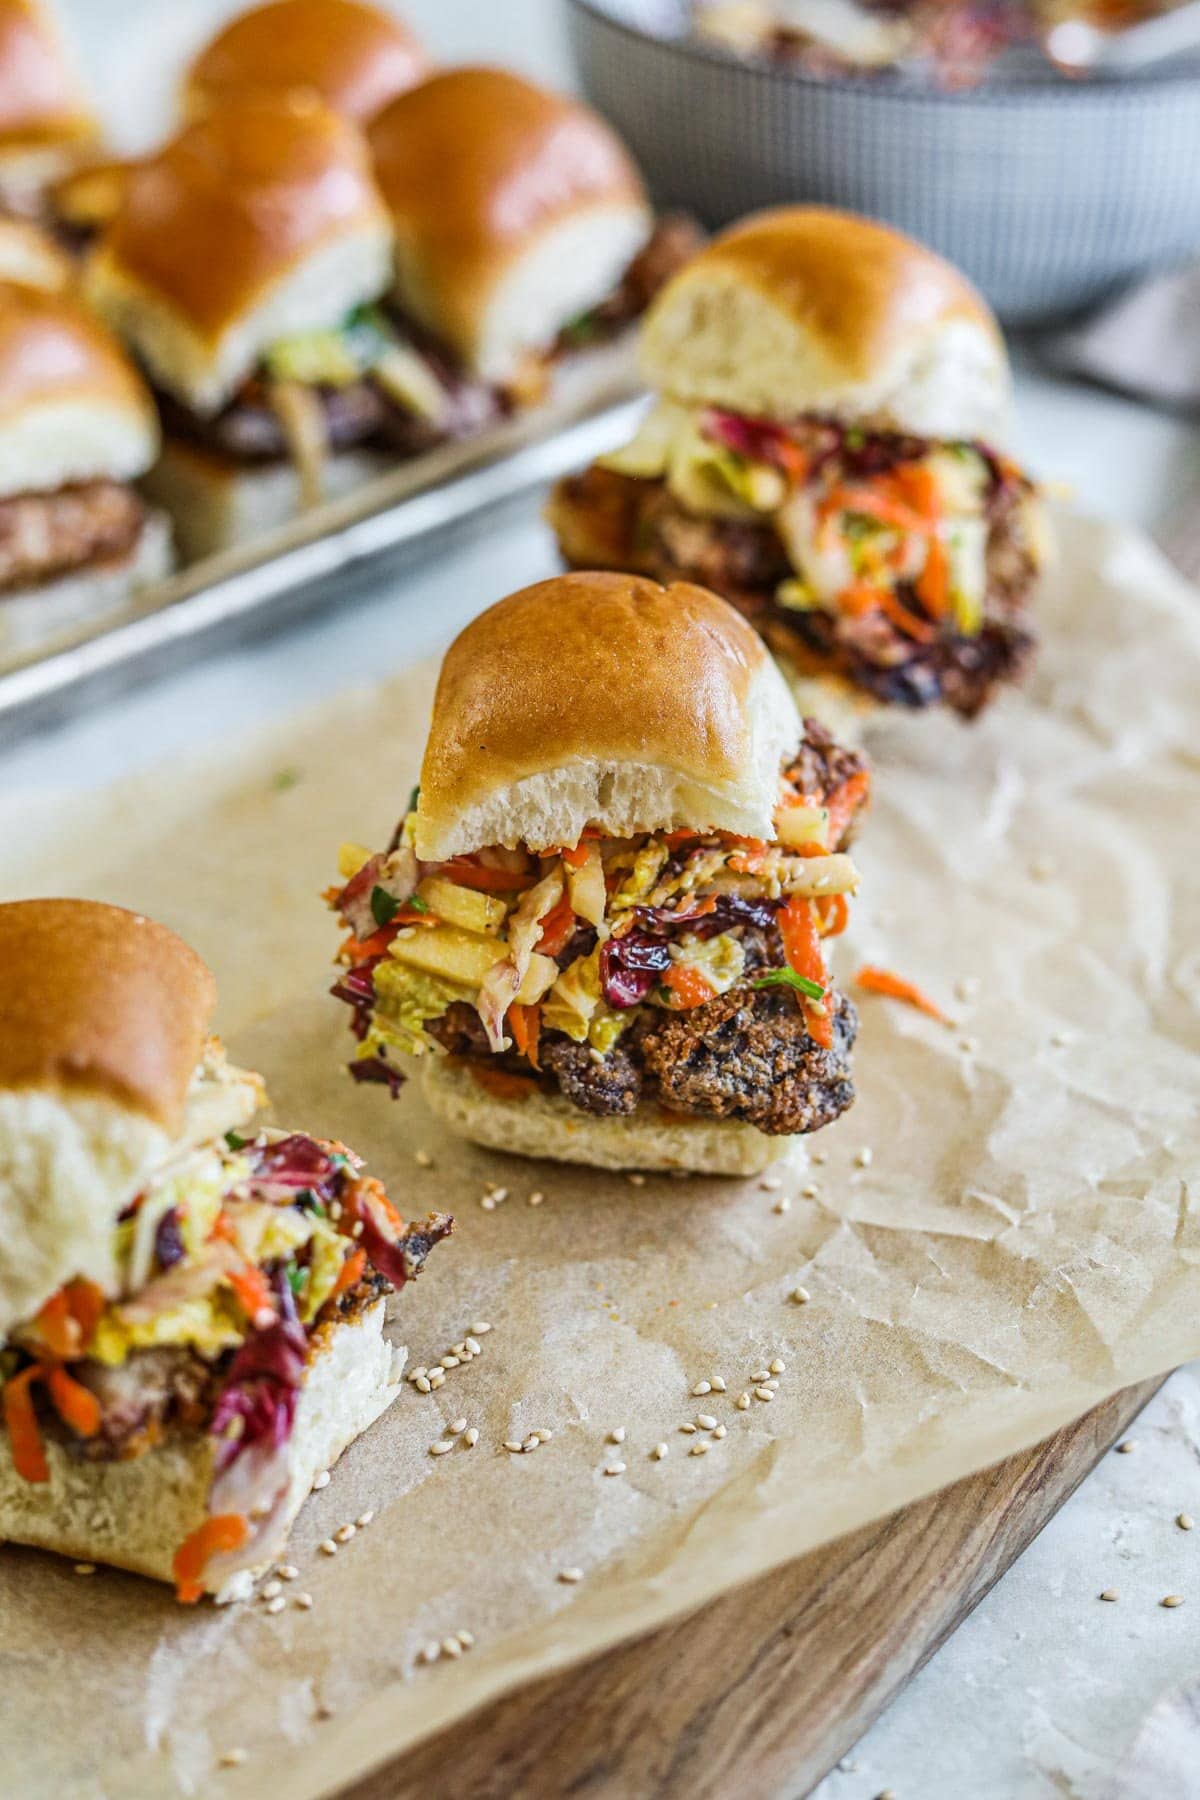
Karaage is Japanese fried chicken, and if you've never made it before, it's going to change how you think about fried chicken in general. The chicken marinates in a soy-ginger-sake mixture before being coated in potato starch and fried until impossibly crispy. That marinade is what makes it different — the flavor goes all the way through, not just on the surface. Tucked into a soft slider bun with Japanese mayo and a few thin-sliced vegetables, this is the kind of slider that gets everyone curious and asking what you did differently. The frying takes a bit of attention but it's not complicated — just don't crowd the pan.
Ingredients
- 1 lb boneless, skinless chicken thighs, cut into bite-sized pieces
- 3 tablespoons soy sauce
- 1 tablespoon sake (or dry sherry, or just skip it)
- 1 teaspoon fresh ginger, grated
- 1 teaspoon sesame oil
- ½ cup potato starch (or cornstarch as a substitute)
- Neutral oil for frying (vegetable or canola)
- 3 tablespoons Japanese mayo (Kewpie brand — find it at Walmart or Asian grocery stores)
- 1 teaspoon sriracha (optional, for a spicy mayo)
- 12 slider buns
- Thinly sliced cucumber and shredded cabbage, for topping
Instructions
- Combine the soy sauce, sake, grated ginger, and sesame oil in a bowl. Add the chicken pieces, toss to coat, and marinate for at least 30 minutes (up to 2 hours in the fridge for deeper flavor).
- Pour about 1½ inches of oil into a heavy skillet or pot and heat to 350°F. While the oil heats, toss the marinated chicken pieces in potato starch until fully and evenly coated.
- Fry the chicken in batches — don't crowd the pan — for 3-4 minutes until golden and crispy. Remove and drain on a wire rack or paper towels.
- For extra crunch, fry each piece a second time for 1-2 minutes at 375°F. This double-fry step is optional but makes a real difference to the texture.
- Mix the Japanese mayo with sriracha if using. Spread on both sides of the slider buns, add cucumber and cabbage, then pile on the karaage chicken. Serve immediately while the chicken is still crispy.
Tips
- Tip: Potato starch gives a lighter, crispier crust than regular flour — if you can find it at Walmart or any Asian grocery, use it. Cornstarch is the next best option.
- Tip: Chicken thighs stay juicier than breast meat when fried — don't swap them out or the karaage will be dry in the middle.
- Tip: Serve these sliders the moment the chicken comes out of the oil — the crispy coating softens quickly once it's assembled, so don't let them sit around.
9. Guinness Corned Beef Sliders

I made these for St. Patrick's Day last year mostly as a joke — like, are we really doing themed sliders? — and then they disappeared in about twenty minutes. The corned beef gets braised in Guinness until it's fall-apart tender, and that slightly bitter, malty braising liquid does something really good to the meat. Piled onto soft rolls with mustard and sauerkraut, these are bold and savory in a way that regular beef sliders just aren't. If you're not a sauerkraut fan, thinly sliced pickles work too — still gets you that tangy contrast you need.
Ingredients
- 2 lbs corned beef brisket (store-bought with spice packet, or from your deli counter)
- 1 bottle (12 oz) Guinness stout
- 1 cup beef broth
- 3 cloves garlic, smashed
- 1 cup sauerkraut, drained and squeezed dry
- 3 tablespoons whole grain or Dijon mustard
- 6–8 slices Swiss cheese
- 12 slider buns (Hawaiian rolls or brioche slider buns)
- 2 tablespoons butter, melted (for brushing the tops)
Instructions
- Place the corned beef in a slow cooker or Dutch oven. Pour the Guinness and beef broth over it, add the garlic and the spice packet. Cook on low for 8 hours (slow cooker) or covered in a 300°F oven for 3–4 hours, until completely tender.
- Remove the beef and let it rest for 10 minutes, then slice thinly against the grain or shred with two forks — both work fine here.
- Preheat your oven to 350°F. Slice the slider buns in half and spread mustard on the bottom halves. Layer on the corned beef, a spoonful of sauerkraut, and a slice of Swiss cheese.
- Place the tops on and brush generously with melted butter. Cover loosely with foil and bake for 12 minutes, then uncover and bake another 3–5 minutes until the tops are golden and the cheese is fully melted.
Tips
- Tip: Squeeze the sauerkraut really well before adding it — too much liquid makes the buns soggy from the inside out.
- Tip: These reheat well the next day. Wrap leftovers in foil and warm at 325°F for about 10 minutes.
- Tip: No Guinness? A dark lager or even a cup of strong black tea with a tablespoon of Worcestershire makes a decent substitute for the braising liquid.
8. Cheeseburger Sliders

Sometimes the classics earn their spot just by being exactly what everyone wants. These cheeseburger sliders are straightforward — juicy beef patties, melted American cheese, tangy pickles — and they work every single time. I've made fancier versions with caramelized onions and brioche, but when it's a game day and I need something that feeds a crowd without stress, this is the one I come back to. The key is not overworking the meat and getting a good sear in a hot pan before they go into the oven to finish under the cheese.
Ingredients
- 1½ lbs 80/20 ground beef
- 1 teaspoon garlic powder
- 1 teaspoon onion powder
- Salt and black pepper to taste
- 6 slices American cheese (or cheddar)
- 12 dill pickle chips
- 2 tablespoons yellow mustard
- 2 tablespoons ketchup
- 12 slider buns
- 1 tablespoon butter or oil for the pan
Instructions
- Mix the ground beef with garlic powder, onion powder, salt, and pepper. Don't overwork it — just combine until the seasonings are distributed. Divide into 12 equal portions and press each one into a thin patty slightly wider than your buns (they'll shrink).
- Heat a large skillet or cast iron pan over medium-high heat with butter or oil. Cook the patties in batches, 2–3 minutes per side, until cooked through. Place a half-slice of cheese on each patty right after you flip it.
- Spread mustard and ketchup on the bottom buns. Add a cheesy patty to each, top with a pickle chip or two, and close with the top bun.
- Optional but worth it: place the assembled sliders on a sheet pan, cover with foil, and bake at 350°F for 5 minutes so everything melds together and the buns get slightly toasty on the bottom.
Tips
- Tip: 80/20 ground beef is what you want here — leaner beef makes dry, sad little patties.
- Tip: Press a small indent in the center of each raw patty with your thumb — it keeps them from puffing up into a dome as they cook.
- Tip: Make the patties ahead and refrigerate raw — they cook from cold in the same time and hold their shape better.
7. Salmon Sliders with Garlic Lemon Aioli
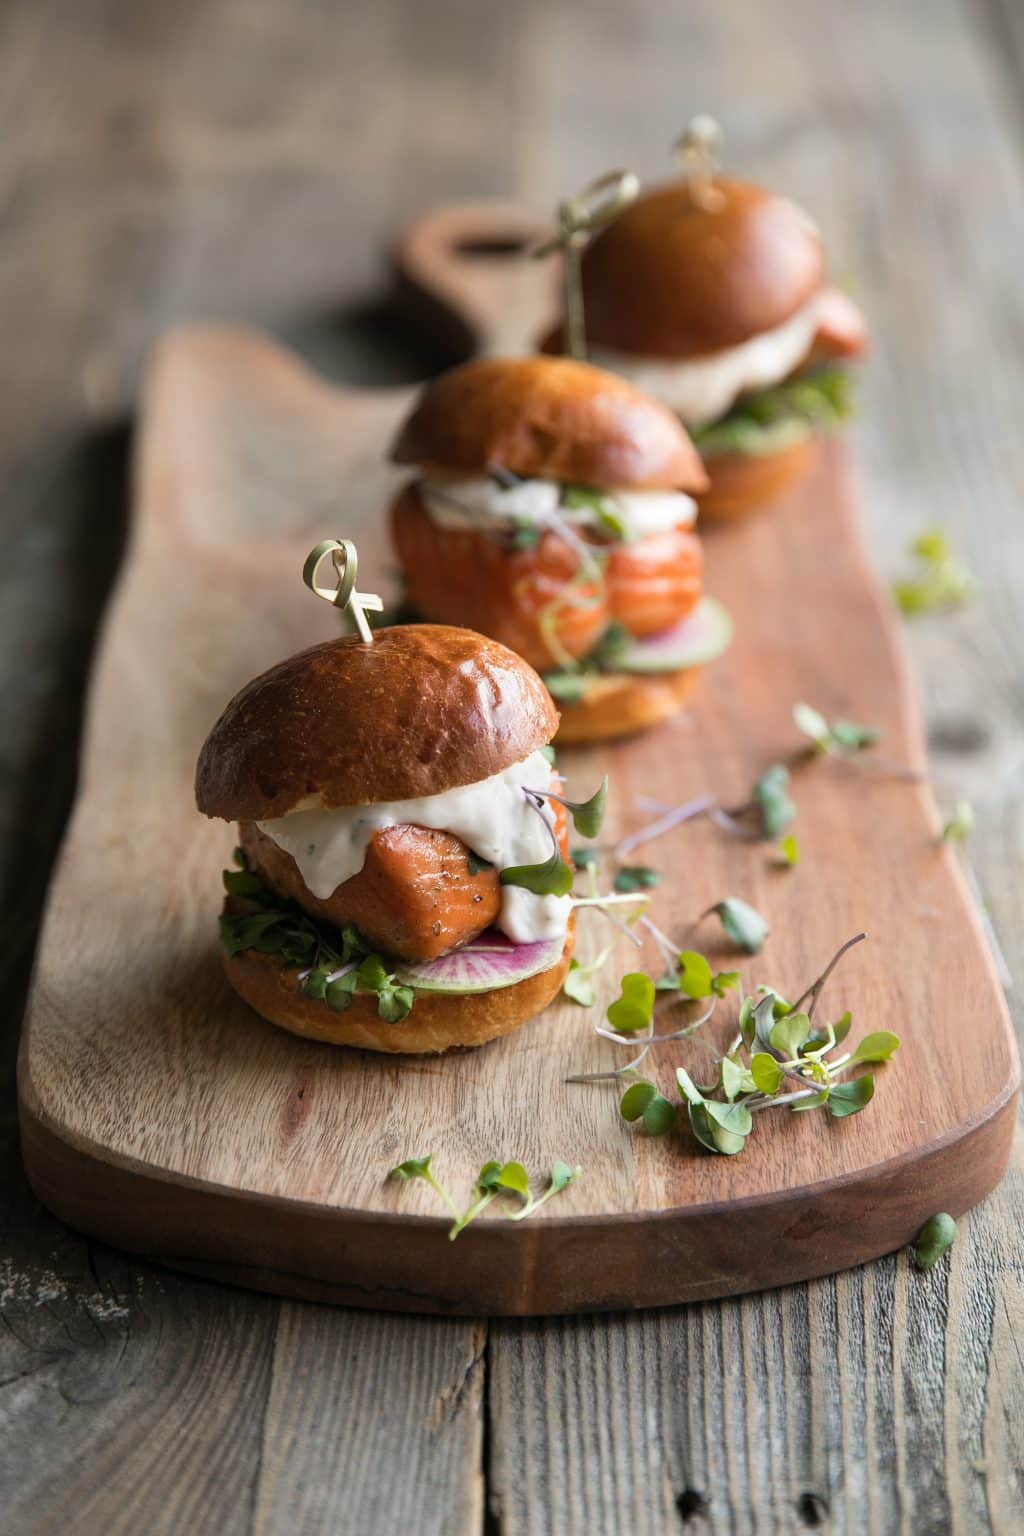
I'll be honest — I was skeptical about salmon sliders the first time I saw them. My brain was stuck on beef. But these converted me fast. The salmon patties are flaky inside, crisp outside, and that garlic lemon aioli is genuinely the thing that makes them. It's bright and garlicky and just rich enough to feel indulgent without being heavy. These are the sliders I make when I want something that feels a little more special than the usual spread — they look impressive and they're actually not that hard.
Ingredients
- 1 lb fresh salmon fillet, skin removed (or 2 cans of good-quality canned salmon, well drained)
- ¼ cup breadcrumbs (plain or panko)
- 1 egg
- 2 tablespoons Dijon mustard
- 2 green onions, finely chopped
- Salt and pepper to taste
- 2 tablespoons olive oil for cooking
- For the aioli: ½ cup mayonnaise, 2 cloves garlic (minced or grated), juice of half a lemon, ¼ teaspoon salt
- 12 slider buns
- Butter lettuce or arugula for topping (optional)
Instructions
- Make the aioli first so the flavors have time to come together: whisk together the mayonnaise, garlic, lemon juice, and salt. Refrigerate until ready to use.
- Finely chop the fresh salmon by hand (don't use a food processor — it makes it mushy). Combine with breadcrumbs, egg, Dijon, green onions, salt, and pepper. Mix gently and form into 12 small patties.
- Heat olive oil in a skillet over medium heat. Cook the salmon patties for 3–4 minutes per side until golden and cooked through. Work in batches to avoid crowding the pan.
- Spread aioli on both sides of each bun. Add a salmon patty and top with a leaf of butter lettuce or a small handful of arugula if you like a little peppery bite. Serve immediately.
Tips
- Tip: Chill the formed patties in the fridge for 20 minutes before cooking — they hold together much better in the pan.
- Tip: Chop the salmon by hand rather than blitzing it — you want some texture in the patty, not a smooth paste.
- Tip: The aioli can be made up to 2 days ahead and kept covered in the fridge — the garlic flavor actually deepens a bit, which is a good thing.
6. Buffalo Chicken Sliders
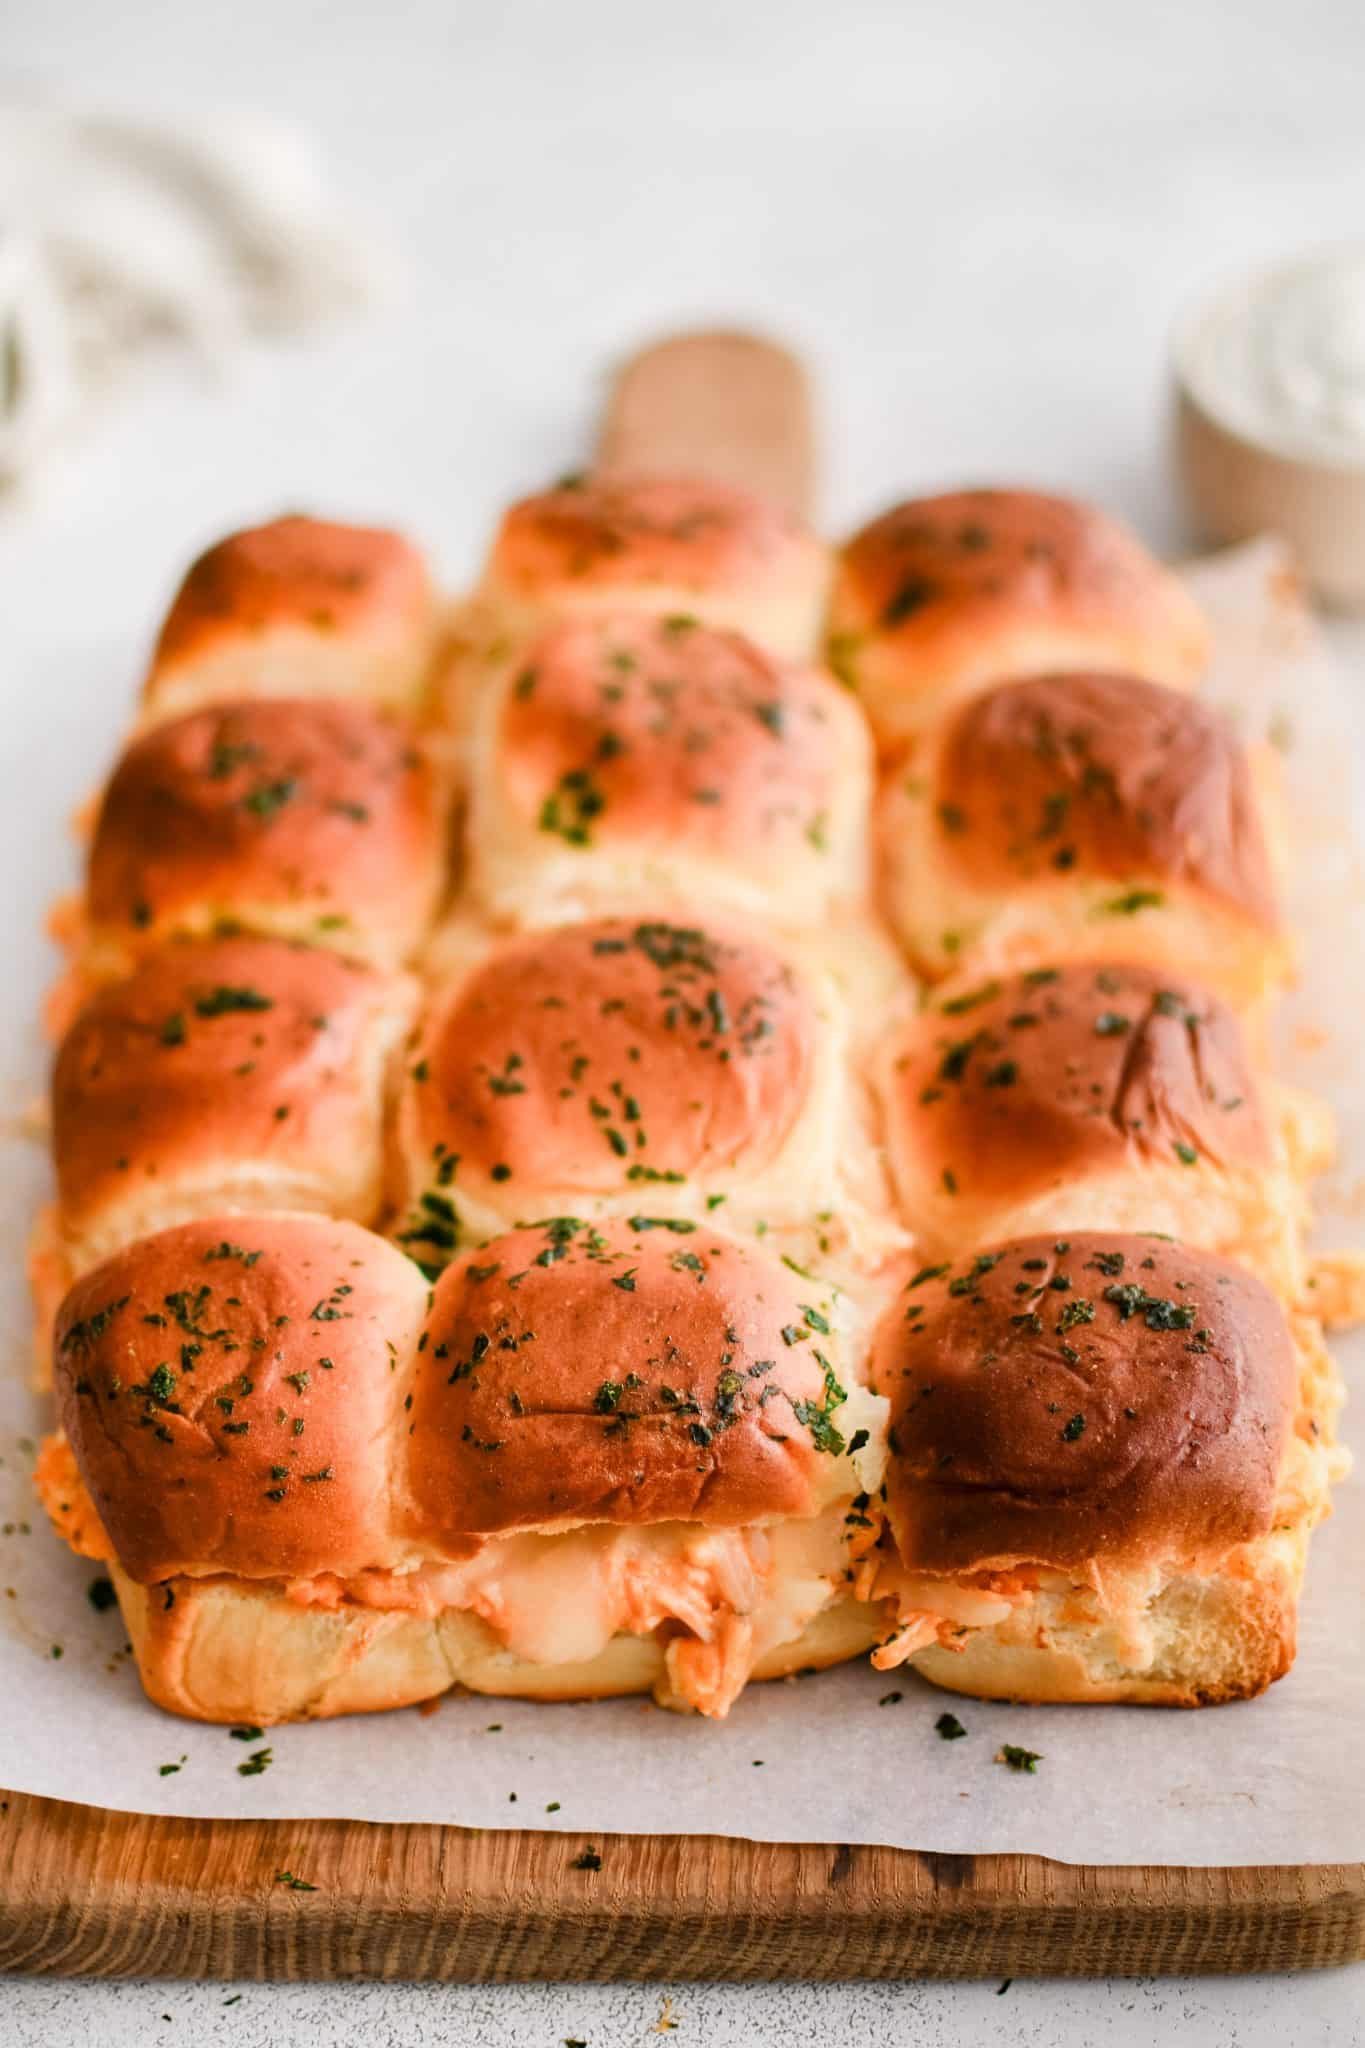
These are my husband's absolute weakness. Any time buffalo sauce shows up in this house, he appears in the kitchen immediately. These sliders are spicy, saucy, and just messy enough to be satisfying — shredded chicken coated in buffalo sauce, piled onto soft rolls with a drizzle of ranch and a handful of crispy fried onions on top for crunch. I use rotisserie chicken when I'm short on time, which keeps the whole thing to under 20 minutes of actual work. The oven step at the end is what brings it all together — the buns get slightly toasty and the cheese melts into everything.
Ingredients
- 2 cups cooked shredded chicken (rotisserie works great)
- ½ cup buffalo sauce (Frank's RedHot is my go-to)
- 4 oz cream cheese, softened
- 1 cup shredded mozzarella or Monterey Jack cheese
- ½ cup crispy fried onions (French's from any grocery store)
- 3 tablespoons ranch dressing, plus more for serving
- 12 slider buns (Hawaiian rolls)
- 2 tablespoons butter, melted
Instructions
- Preheat your oven to 350°F. In a bowl, mix the shredded chicken with buffalo sauce and softened cream cheese until well combined and creamy. Taste and add more buffalo sauce if you want more heat.
- Slice the rolls in half keeping them connected as a sheet. Place the bottom halves in a greased baking dish. Spread the buffalo chicken mixture evenly over the bottom layer, then drizzle with ranch and sprinkle with shredded cheese.
- Scatter the crispy fried onions over the cheese, then press the top halves of the rolls down gently. Brush the tops with melted butter.
- Cover with foil and bake for 15 minutes, then remove the foil and bake another 5 minutes until the tops are golden and the cheese is bubbling. Slice and serve with extra ranch on the side.
Tips
- Tip: Softened cream cheese is key — cold cream cheese won't mix smoothly into the chicken and you'll get lumps throughout.
- Tip: Add the crispy onions just before baking (not during assembly ahead of time) so they stay crunchy rather than turning soggy.
- Tip: For a milder version, swap half the buffalo sauce for barbecue sauce — still delicious, just less heat.
5. Pulled Pork Sliders

Pulled pork sliders are one of those things where the slow cooker does almost all the work and you just get to take the credit. The pork shoulder braises low and slow until it shreds apart with basically no effort, then gets tossed with BBQ sauce and piled onto mini buns with a scoop of creamy coleslaw on top. That combination of smoky-sweet pork and cool, crunchy slaw is what makes these so good — you want that contrast. I make a double batch of the pork because it freezes well and I can pull it out for a quick weeknight dinner later.
Ingredients
- 2½ lbs boneless pork shoulder (also sold as pork butt)
- 1 teaspoon smoked paprika
- 1 teaspoon garlic powder
- 1 teaspoon onion powder
- Salt and black pepper to taste
- ¾ cup BBQ sauce (store-bought is totally fine — I use Sweet Baby Ray's), plus more for serving
- ½ cup apple cider vinegar
- For the quick coleslaw: 2 cups pre-shredded coleslaw mix, 3 tablespoons mayonnaise, 1 tablespoon apple cider vinegar, 1 teaspoon sugar, salt to taste
- 12 slider buns
Instructions
- Rub the pork shoulder all over with smoked paprika, garlic powder, onion powder, salt, and pepper. Place in the slow cooker and pour the apple cider vinegar around it. Cook on low for 8 hours or high for 5 hours, until completely fall-apart tender.
- While the pork cooks, make the coleslaw: toss the coleslaw mix with mayonnaise, vinegar, sugar, and salt. Taste and adjust — it should be creamy with a little tang. Refrigerate until needed.
- Remove the pork and shred it with two forks, discarding any large fat pieces. Drain most of the cooking liquid from the slow cooker, then return the shredded pork and mix with BBQ sauce. Let it sit in the warm slow cooker on the "keep warm" setting for another 15 minutes so the flavors meld.
- Pile the pulled pork onto the bottom buns, top with a generous scoop of coleslaw, and close. Serve with extra BBQ sauce on the side.
Tips
- Tip: The coleslaw needs at least 30 minutes in the fridge to soften slightly and absorb the dressing — don't skip that resting time.
- Tip: Shredded pork freezes really well in zip-lock bags for up to 3 months — freeze before adding the BBQ sauce so you can season it differently next time.
- Tip: Toast the slider buns cut-side down in a dry pan for 1–2 minutes before assembling — it keeps them from getting soggy under all that saucy pork.
30. Easy Grilled Meatball Sliders
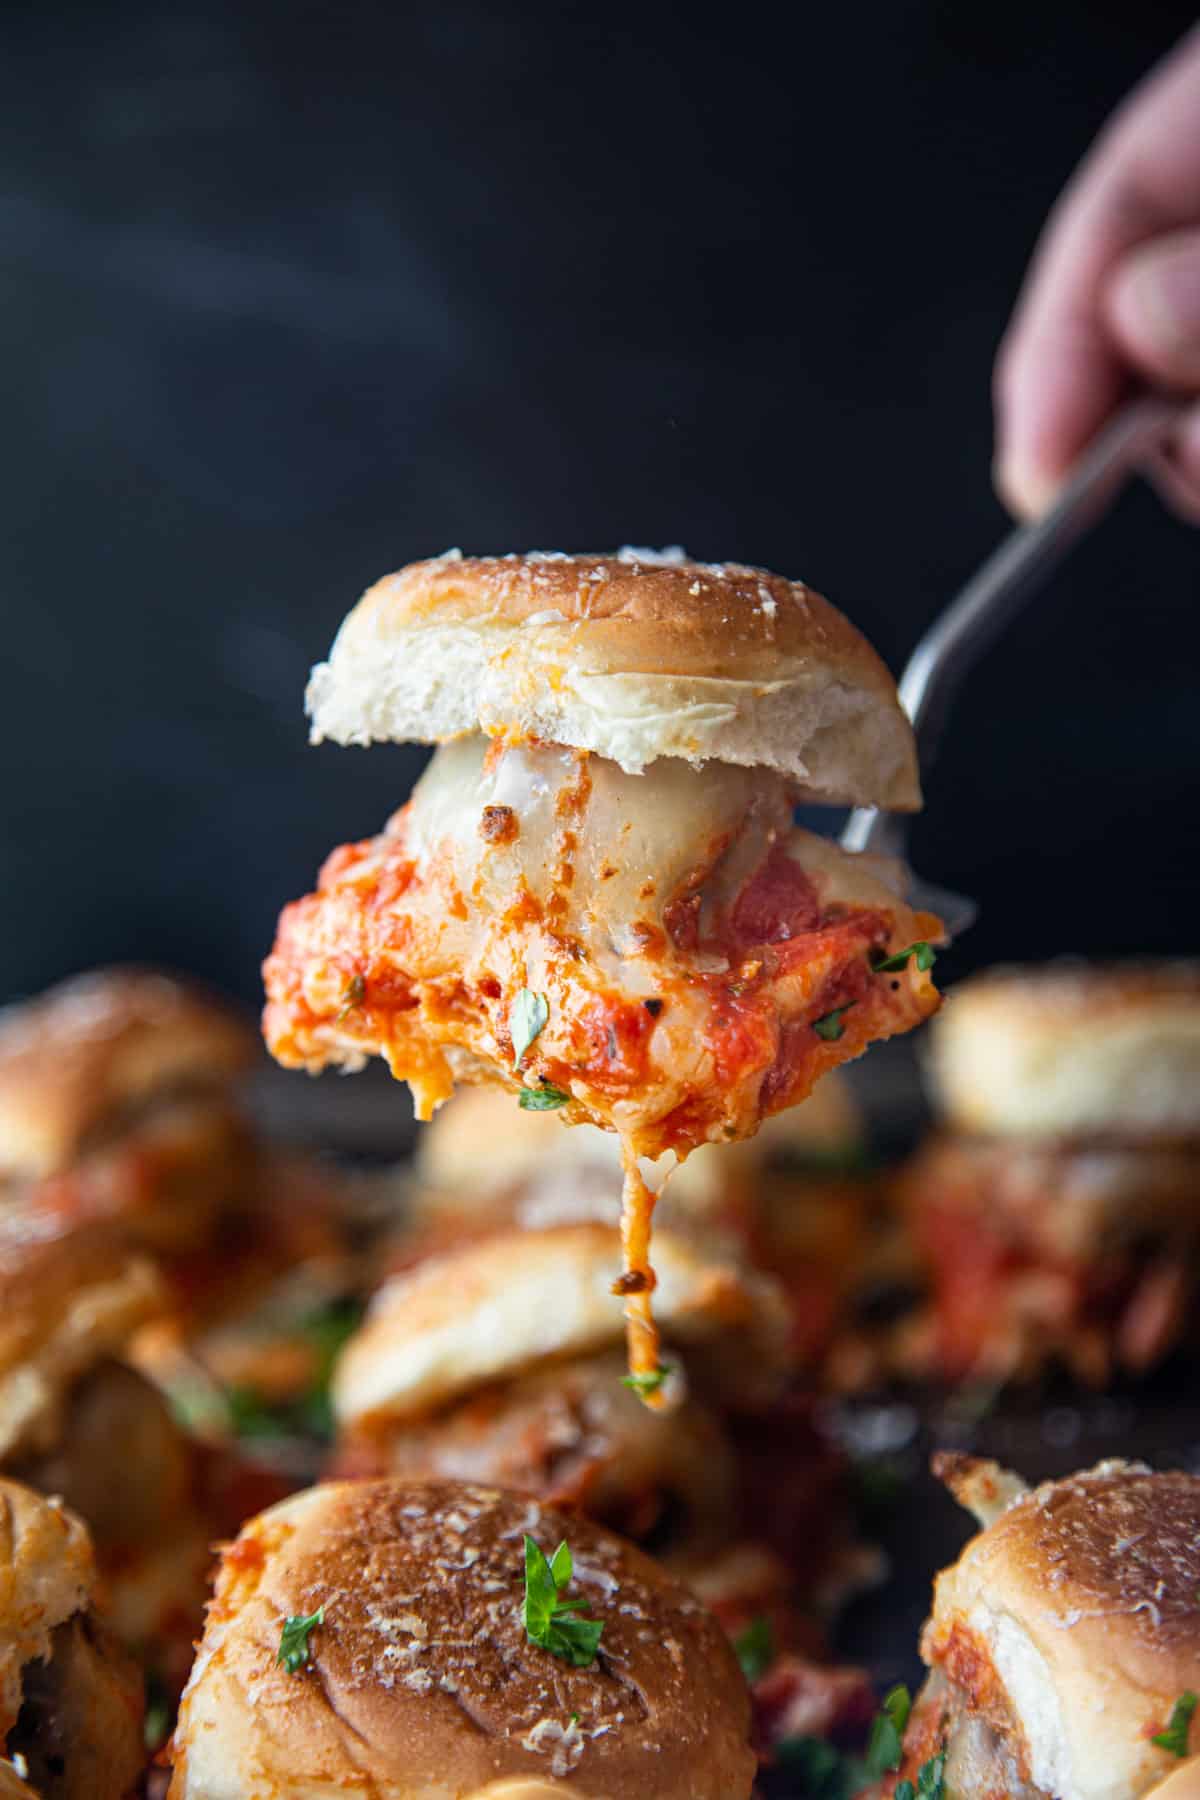
These grilled meatball sliders are the kind of thing I throw together when I want something that feels hearty without requiring me to cook an actual full dinner. Juicy meatballs, warm marinara, and melted mozzarella piled onto soft slider buns — it's a combination that works every single time. I usually use frozen meatballs on a weeknight and nobody complains, but if you have a few extra minutes, homemade ones on the grill take this to a different level entirely. Saad calls these "pizza burgers" and I've stopped correcting him because honestly, he's not wrong.
Ingredients
- 1 lb ground beef (80/20)
- ¼ cup breadcrumbs
- 1 egg
- 2 cloves garlic, minced
- 1 teaspoon Italian seasoning
- ½ teaspoon salt and ¼ teaspoon black pepper
- 1 cup marinara sauce (jarred is fine)
- 6 slider buns
- 6 slices mozzarella or provolone cheese
Instructions
- Mix ground beef, breadcrumbs, egg, garlic, Italian seasoning, salt, and pepper together in a bowl until just combined — don't overwork the meat or the meatballs get tough.
- Roll into 12 meatballs roughly the size of a golf ball and refrigerate for 15 minutes so they hold their shape on the grill.
- Grill over medium-high heat for 10-12 minutes, turning every few minutes, until cooked through. Internal temp should hit 165°F.
- Warm the marinara in a small saucepan. Toast the slider buns cut-side down on the grill for about 1 minute.
- Place 2 meatballs on each bun, spoon marinara over the top, add a slice of cheese, and serve immediately.
Tips
- Tip: No grill? These meatballs bake just as well at 400°F for 18-20 minutes on a sheet pan lined with foil.
- Tip: Chilling the meatballs before grilling is a step I skipped the first time — they fell apart on the grates. Don't skip it.
- Tip: Short on time? Grab a bag of frozen fully-cooked meatballs from Walmart or Costco, heat them in the marinara, and assemble. Still tastes great.
31. Easy Smoked Italian Roast Beef Sliders
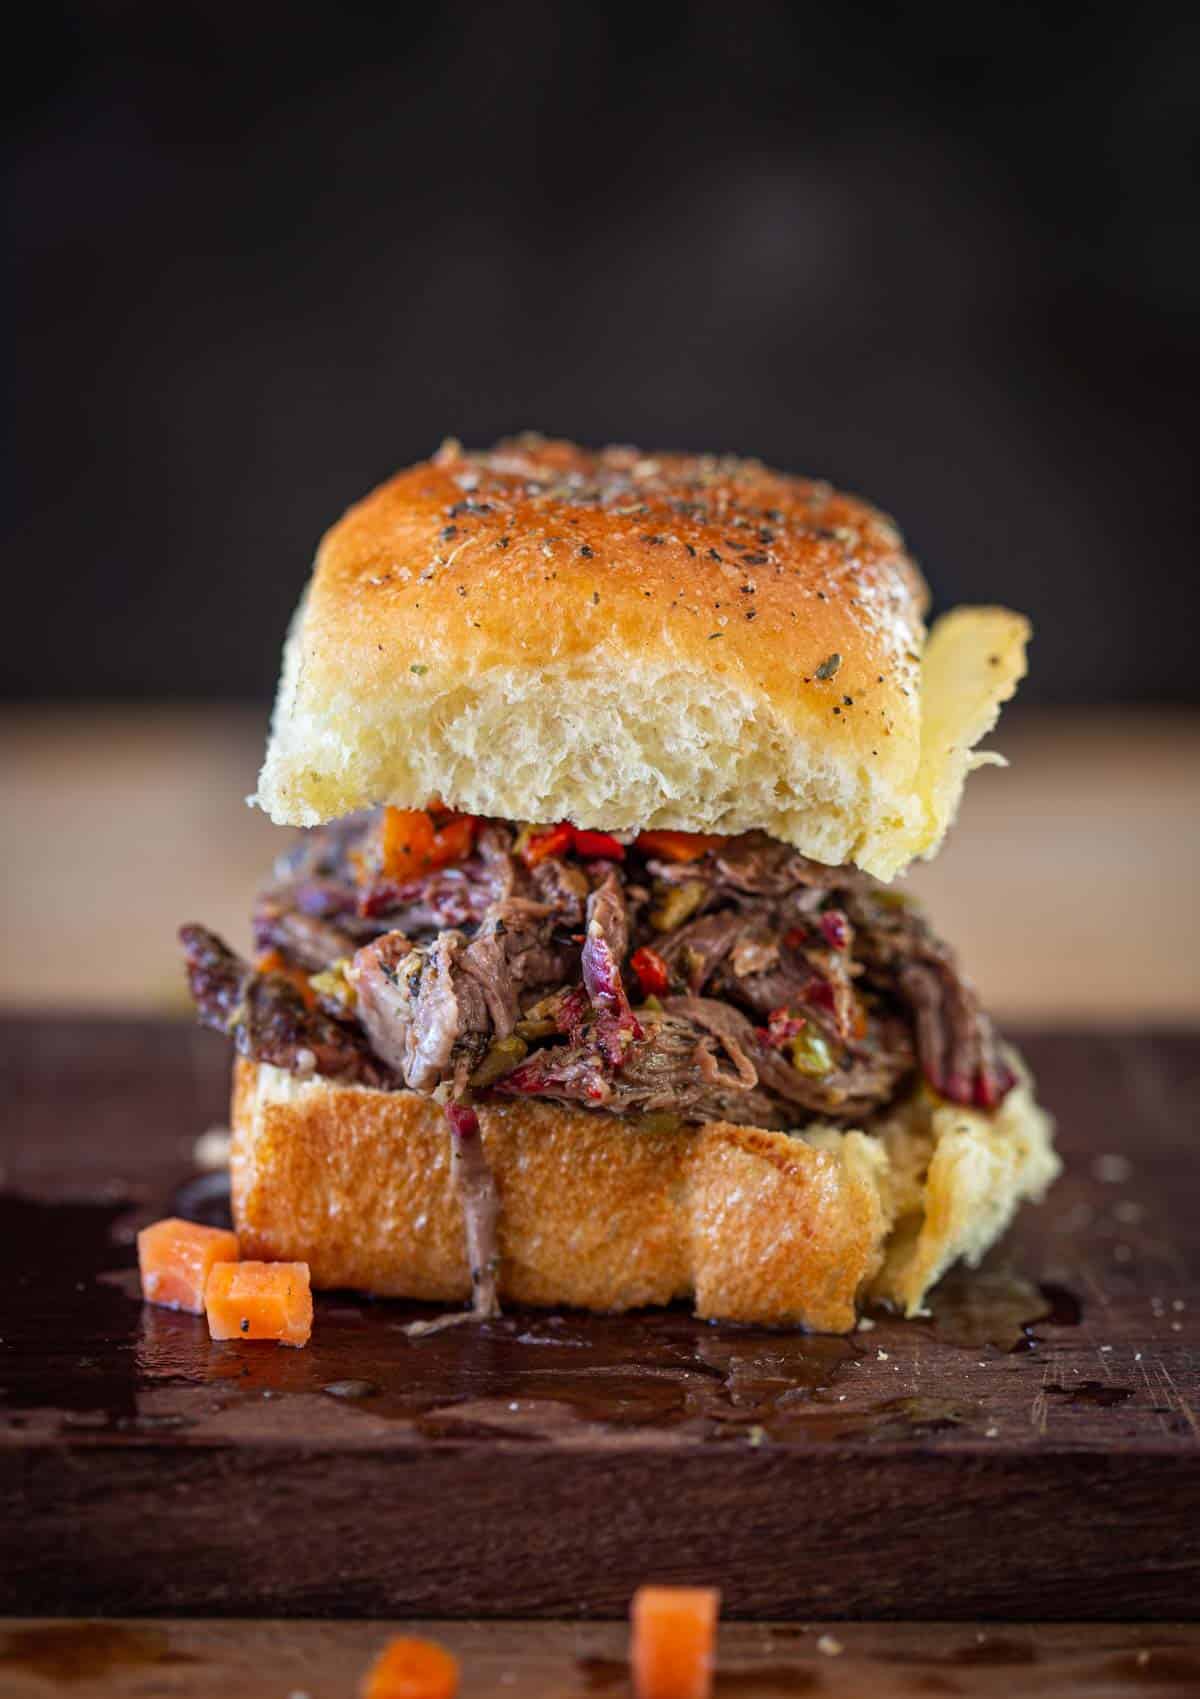
If you've never put Italian dressing on a roast beef slider before, I need you to trust me on this one. Smoked or slow-cooked pulled beef layered with provolone, a drizzle of Italian dressing, and a soft bun that gets baked until slightly crispy on top — it's the kind of slider that makes people ask for the recipe before they've even finished eating. I don't always have a smoker going, so I'll use a slow cooker with a good chuck roast and a splash of beef broth, then pile it high and bake the assembled sliders in the oven. Either way works.
Ingredients
- 2 lbs chuck roast
- 1 teaspoon garlic powder
- 1 teaspoon onion powder
- 1 teaspoon smoked paprika
- Salt and black pepper to taste
- ½ cup beef broth
- ¼ cup Italian dressing (store-bought is perfect here)
- 12 slider buns
- 6 slices provolone cheese, halved
- 2 tablespoons butter, melted
- 1 teaspoon dried Italian herbs
Instructions
- Season the chuck roast generously with garlic powder, onion powder, smoked paprika, salt, and pepper. Place in a slow cooker with the beef broth and cook on low for 8 hours or high for 4-5 hours until it pulls apart easily.
- Shred the beef and toss with Italian dressing while it's still warm so the dressing absorbs into the meat.
- Preheat oven to 350°F. Slice the slider buns in half horizontally as one sheet, keeping them connected. Place the bottom halves in a baking dish.
- Layer the pulled beef evenly over the buns, then add the provolone cheese slices. Place the top buns on and brush with melted butter mixed with dried Italian herbs.
- Cover with foil and bake for 15 minutes, then uncover and bake another 5 minutes until the tops are golden. Slice and serve.
Tips
- Tip: The slow cooker version is not authentic smoked beef — but it gets the job done on a weeknight and the Italian dressing carries a lot of flavor.
- Tip: Make the beef a day ahead and refrigerate it — the flavor actually deepens overnight. Just reheat with a splash of broth before assembling.
- Tip: Giardiniera (pickled Italian vegetables) on top takes these sliders to a completely different level if you can find it at your grocery store.
32. Pulled Pork Sliders
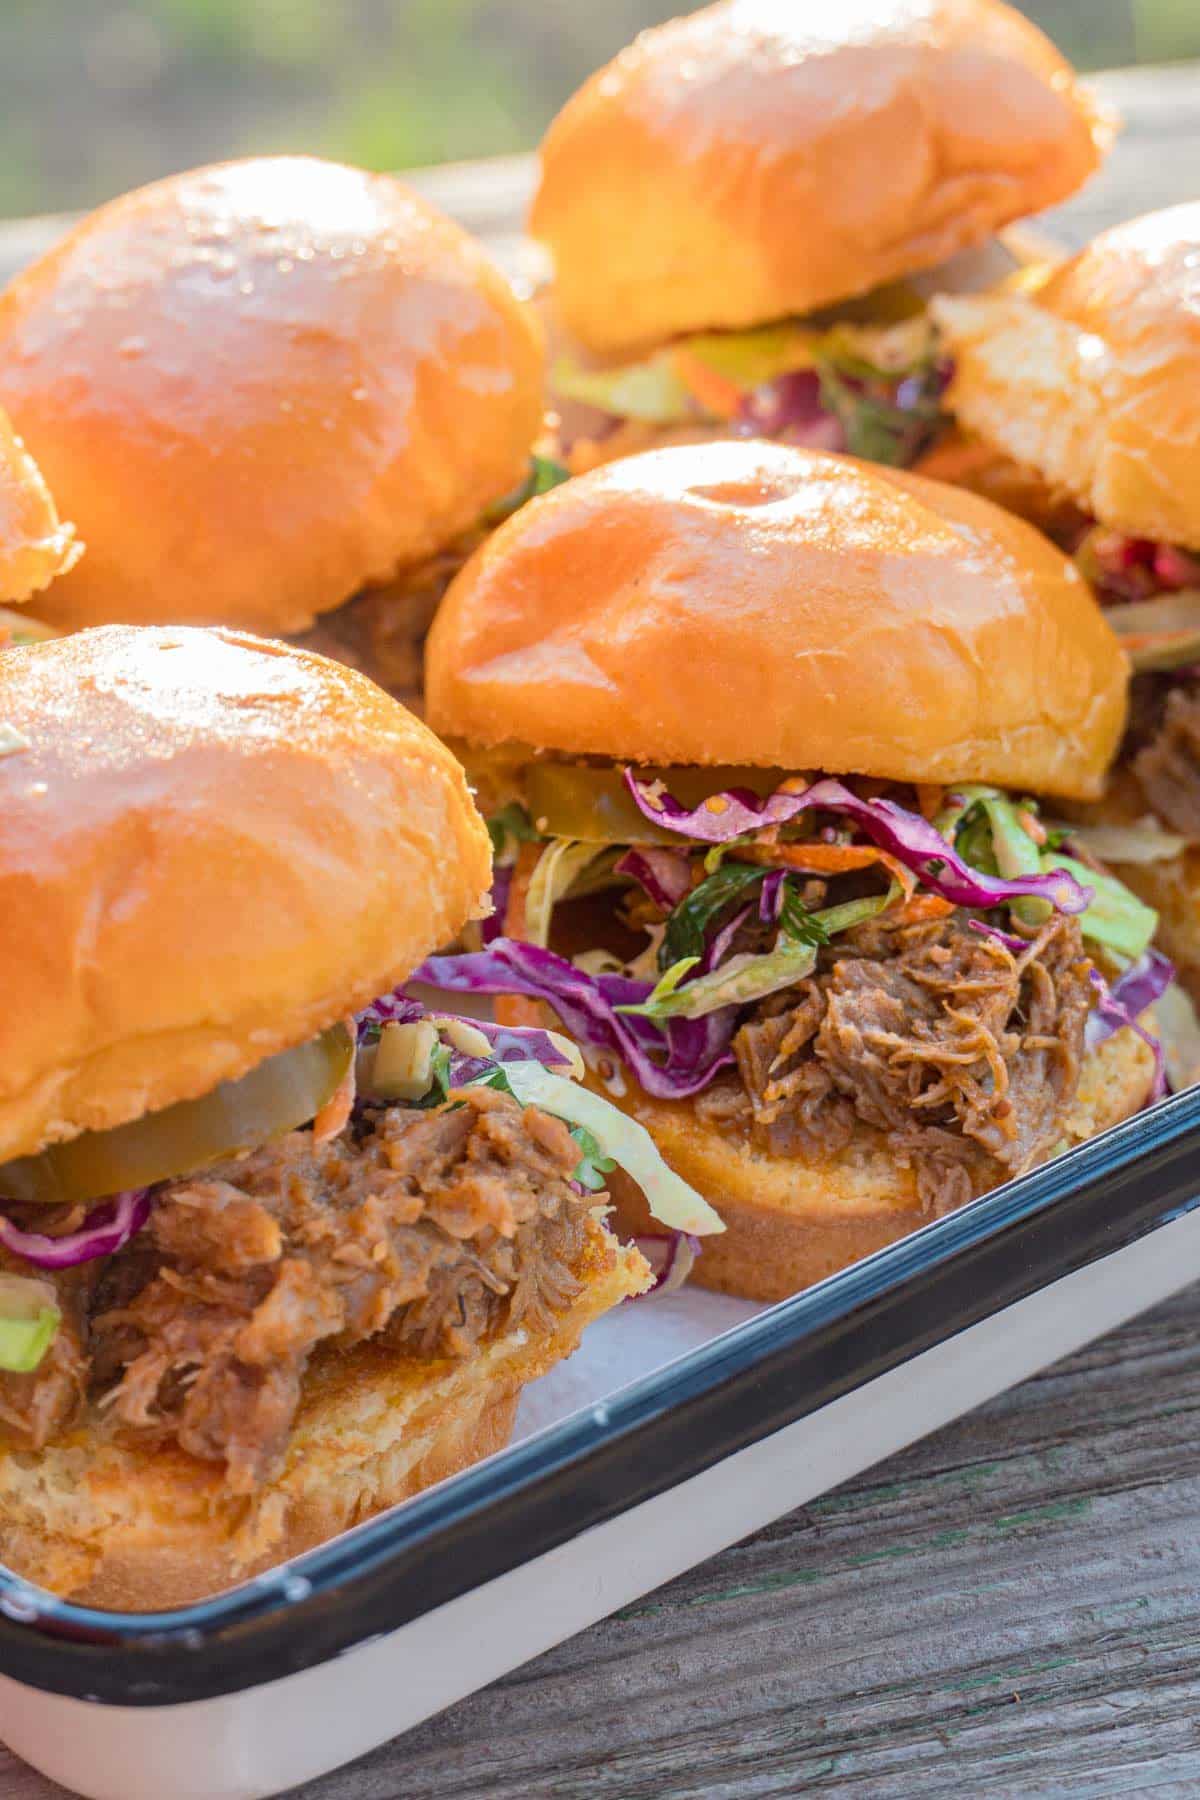
Pulled pork sliders are probably the most crowd-friendly thing on this entire list — I've never once brought these to a gathering and come home with leftovers. Slow-cooked pork shoulder that falls apart, tossed in tangy barbecue sauce, piled onto soft Hawaiian rolls with a scoop of creamy coleslaw on top. The coleslaw isn't optional in my opinion — that crunch and cool contrast against the warm, saucy pork is what makes the whole thing work. I make a double batch of the pork when I do this because it disappears in one sitting and I always wish I had more.
Ingredients
- 3 lbs pork shoulder (bone-in or boneless)
- 1 tablespoon brown sugar
- 1 teaspoon smoked paprika
- 1 teaspoon garlic powder
- 1 teaspoon onion powder
- Salt and black pepper to taste
- ½ cup chicken broth
- ¾ cup barbecue sauce (your favorite brand)
- 12 slider buns or Hawaiian rolls
- 1½ cups store-bought coleslaw mix tossed with 3 tablespoons mayo and 1 tablespoon apple cider vinegar
Instructions
- Combine brown sugar, smoked paprika, garlic powder, onion powder, salt, and pepper and rub all over the pork shoulder. Place in a slow cooker with the chicken broth and cook on low for 8-10 hours until completely tender.
- Remove the pork and shred it using two forks, discarding any large pieces of fat. Return the shredded meat to the slow cooker and stir in the barbecue sauce. Let it sit on warm for 10 minutes to soak up the sauce.
- While the pork rests, toss the coleslaw mix with mayo and apple cider vinegar. Season with a pinch of salt and pepper.
- Toast the slider buns lightly if you like. Pile the pulled pork onto the bottom buns, top with a spoonful of coleslaw, and close with the top bun.
Tips
- Tip: Pork shoulder from Costco is the most economical cut for this — you get a large piece for a reasonable price and it's ideal for long slow cooking.
- Tip: The coleslaw can be made up to a day ahead and refrigerated — it actually gets better as it sits and softens slightly.
- Tip: Leftover pulled pork freezes beautifully for up to 3 months. Portion it into zip-lock bags and you've got slider filling ready to go on a busy night.
33. Roast Beef Sliders

These roast beef sliders are the ones I make when I want something that looks impressive but takes almost no effort at all. Thin-sliced deli roast beef, Swiss cheese, and a horseradish-mayo spread layered onto soft buns and baked until the cheese is melted and the tops are golden — it's genuinely one of the easiest things on this list. My husband prefers these over almost every other slider I make, which says something because he's eaten a lot of sliders at this point. The horseradish is key — don't skip it or swap it out, it's what gives these their personality.
Ingredients
- 12 slider buns or Hawaiian rolls
- ¾ lb deli roast beef, thinly sliced
- 6 slices Swiss cheese, halved
- 3 tablespoons mayonnaise
- 1½ tablespoons prepared horseradish
- 1 teaspoon Dijon mustard
- 3 tablespoons butter, melted
- 1 teaspoon Worcestershire sauce
- ½ teaspoon garlic powder
- 1 tablespoon dried minced onion
Instructions
- Preheat oven to 350°F. Mix the mayonnaise, horseradish, and Dijon mustard in a small bowl and set aside.
- Slice the slider buns in half horizontally as one connected sheet. Place the bottom halves in a greased 9x13 baking dish. Spread the horseradish mayo evenly over the cut sides of both the top and bottom buns.
- Layer the roast beef evenly over the bottom buns, then add the Swiss cheese slices on top. Place the top buns back on.
- Whisk together the melted butter, Worcestershire sauce, garlic powder, and dried minced onion. Brush generously over the tops of the buns.
- Cover tightly with foil and bake for 15 minutes. Remove the foil and bake another 5-7 minutes until the tops are golden brown and the cheese is fully melted. Slice and serve warm.
Tips
- Tip: Ask the deli counter to slice the roast beef extra thin — it layers better and you get more meat distributed across all 12 sliders without running out.
- Tip: These can be fully assembled, covered, and refrigerated up to 4 hours ahead. Just add the butter topping right before baking so the buns don't get soggy.
- Tip: If horseradish is too sharp for your crowd, cut it back to 1 teaspoon and add a little extra Dijon — you still get the flavor without the heat.
Sliders are one of those things that look impressive on a table but are genuinely not that hard to pull off. Whether you're making them for a game day crowd, a kids' birthday, a casual Friday dinner, or just because you had a pack of Hawaiian rolls sitting on the counter — there's a recipe in this list for you. I've made sliders for everything from Saad's school friends to my husband's late-night hunger strikes, and they've never once disappointed. That says a lot.
What I love most about sliders is how forgiving they are. Swap the protein, change the cheese, skip a sauce, add a sauce — they handle substitutions better than almost any other recipe I know. If you're new to making them, start with the baked pull-apart style where everything goes into the pan together. That method is almost impossible to mess up, and it comes out looking like you tried harder than you did. The buttery brush on top is the one thing I'd tell every first-timer not to skip — it's what takes them from fine to actually good.
Pick one that fits what you have in your kitchen right now. That's the whole point of a list like this — you don't need a special occasion or a special trip to the store. Most of these come together in under 30 minutes, and more than a few of them work with rotisserie chicken or leftover meat from earlier in the week. Make a double batch if you're feeding more than four people. They disappear fast. 🍔✨🥳
More Recipes You'll Want Next
- Browse All Recipe Roundups — when you need a starting point and don't know what you're in the mood for yet
- Easy Ground Beef Recipes — if the burger sliders in this list got your attention, this one goes deeper
- Chicken Appetizer Recipes — great companion post if you're building a party spread and need more finger food ideas
- Easy Party Food Ideas — sliders pair perfectly with everything in this list for a full game day or gathering menu
- Pulled Pork Recipes — if the pulled pork slider caught your eye, here's a whole roundup built around it
Frequently Asked Questions
What's the best bread for sliders?
Hawaiian rolls are the go-to for most baked sliders — they're soft, slightly sweet, and hold up without falling apart. You can find them at pretty much any Walmart, Costco, or regular grocery store. Brioche slider buns work well too if you want something a little more neutral in flavor. Potato rolls are another solid option if Hawaiian rolls aren't available near you.
Can I make sliders ahead of time?
Most baked sliders can be assembled a few hours ahead, covered with foil, and refrigerated until you're ready to bake. Just hold off on the butter topping until right before they go in the oven. I've done this for parties plenty of times — it actually makes things easier because you're not scrambling when guests arrive. Cold fillings might need an extra 5 minutes of bake time, so keep an eye on them.
How many sliders should I make per person?
As a side or appetizer, count on 2 to 3 sliders per person. If they're the main dish and you're feeding hungry people — especially kids or adults who skipped lunch — plan for 3 to 4 each. I always make a little more than I think I need. Leftovers reheat fine the next day, so there's no real downside to having extra.
What temperature do you bake sliders at?
Most baked slider recipes in this list use 350°F (175°C), covered with foil for the first part and then uncovered for the last 5 minutes to get that golden top. Some go up to 375°F if you want a crispier crust on the bun. The covered-then-uncovered method is the one I use consistently — it keeps the inside from drying out while still giving you color on top.
Which slider recipe in this list is easiest for a beginner?
Any of the baked pull-apart sliders with a pre-cooked filling — like rotisserie chicken or deli ham — are the most beginner-friendly. You're basically layering ingredients, brushing butter on top, and baking. There's no raw meat to worry about and very little that can go wrong. If I were making sliders for the very first time, that's where I'd start.
Share This Post!
If this list helped you figure out what to make, pin it or share it with someone who's always the one bringing food to a gathering. They'll thank you. 🍔📌
View More Recipes here Recipe Roundups





Comments
No Comments