
Party food in our house is never simple — Saad wants something crispy, Zainab wants something dippable, my husband wants whatever has the most sauce, and I'm standing in the kitchen trying to make everyone happy before guests arrive. Chicken appetizers are the one thing that solves all of that at once. Easy to prep ahead, easy to scale up, and easy to disappear off the tray faster than you'd expect. Over the years I've made dozens of versions — wings, dips, skewers, egg rolls, meatballs — and the ones that keep coming back are the ones that actually work without demanding half your day.
What makes a chicken appetizer worth making? In my experience: it has to be something you can mostly prep before your guests walk through the door, it has to have real flavor (not just salt and breadcrumbs), and it has to look like you put in more effort than you did. The best ones in this list hit at least two of those three. Some of these are quick air fryer recipes, some are slow cooker dips that basically make themselves, and a few are proper crowd-showstoppers that are still totally doable on a weeknight. If you're also looking for main dish ideas to go alongside these, my post on easy chicken dinner recipes has a lot of the same energy — practical, tested, real food.
In this roundup you'll find everything from Bang Bang Chicken Skewers and Buffalo Chicken Egg Rolls to Chicken Yakitori, Butter Chicken Wings, and even a gorgeous BBQ Chicken Flatbread that works as a starter or a light meal. There's a solid mix of baked, fried, air-fried, and slow-cooked options — so whatever equipment you have, something here will work for you. I've also pulled in a few dip-style recipes like the Crockpot Buffalo Chicken Dip because honestly, a warm cheesy dip with chips is still one of the best party moves you can make. If wings are your thing in particular, check out my chicken wing recipes roundup for even more options beyond what's here.
Here are the 33 chicken appetizers I keep coming back to — pick the one that fits your occasion, your crowd, and honestly, how much energy you have that day.
Top 33 Easy Chicken Appetizer Recipes
32. Chinese Lemon Chicken Salad
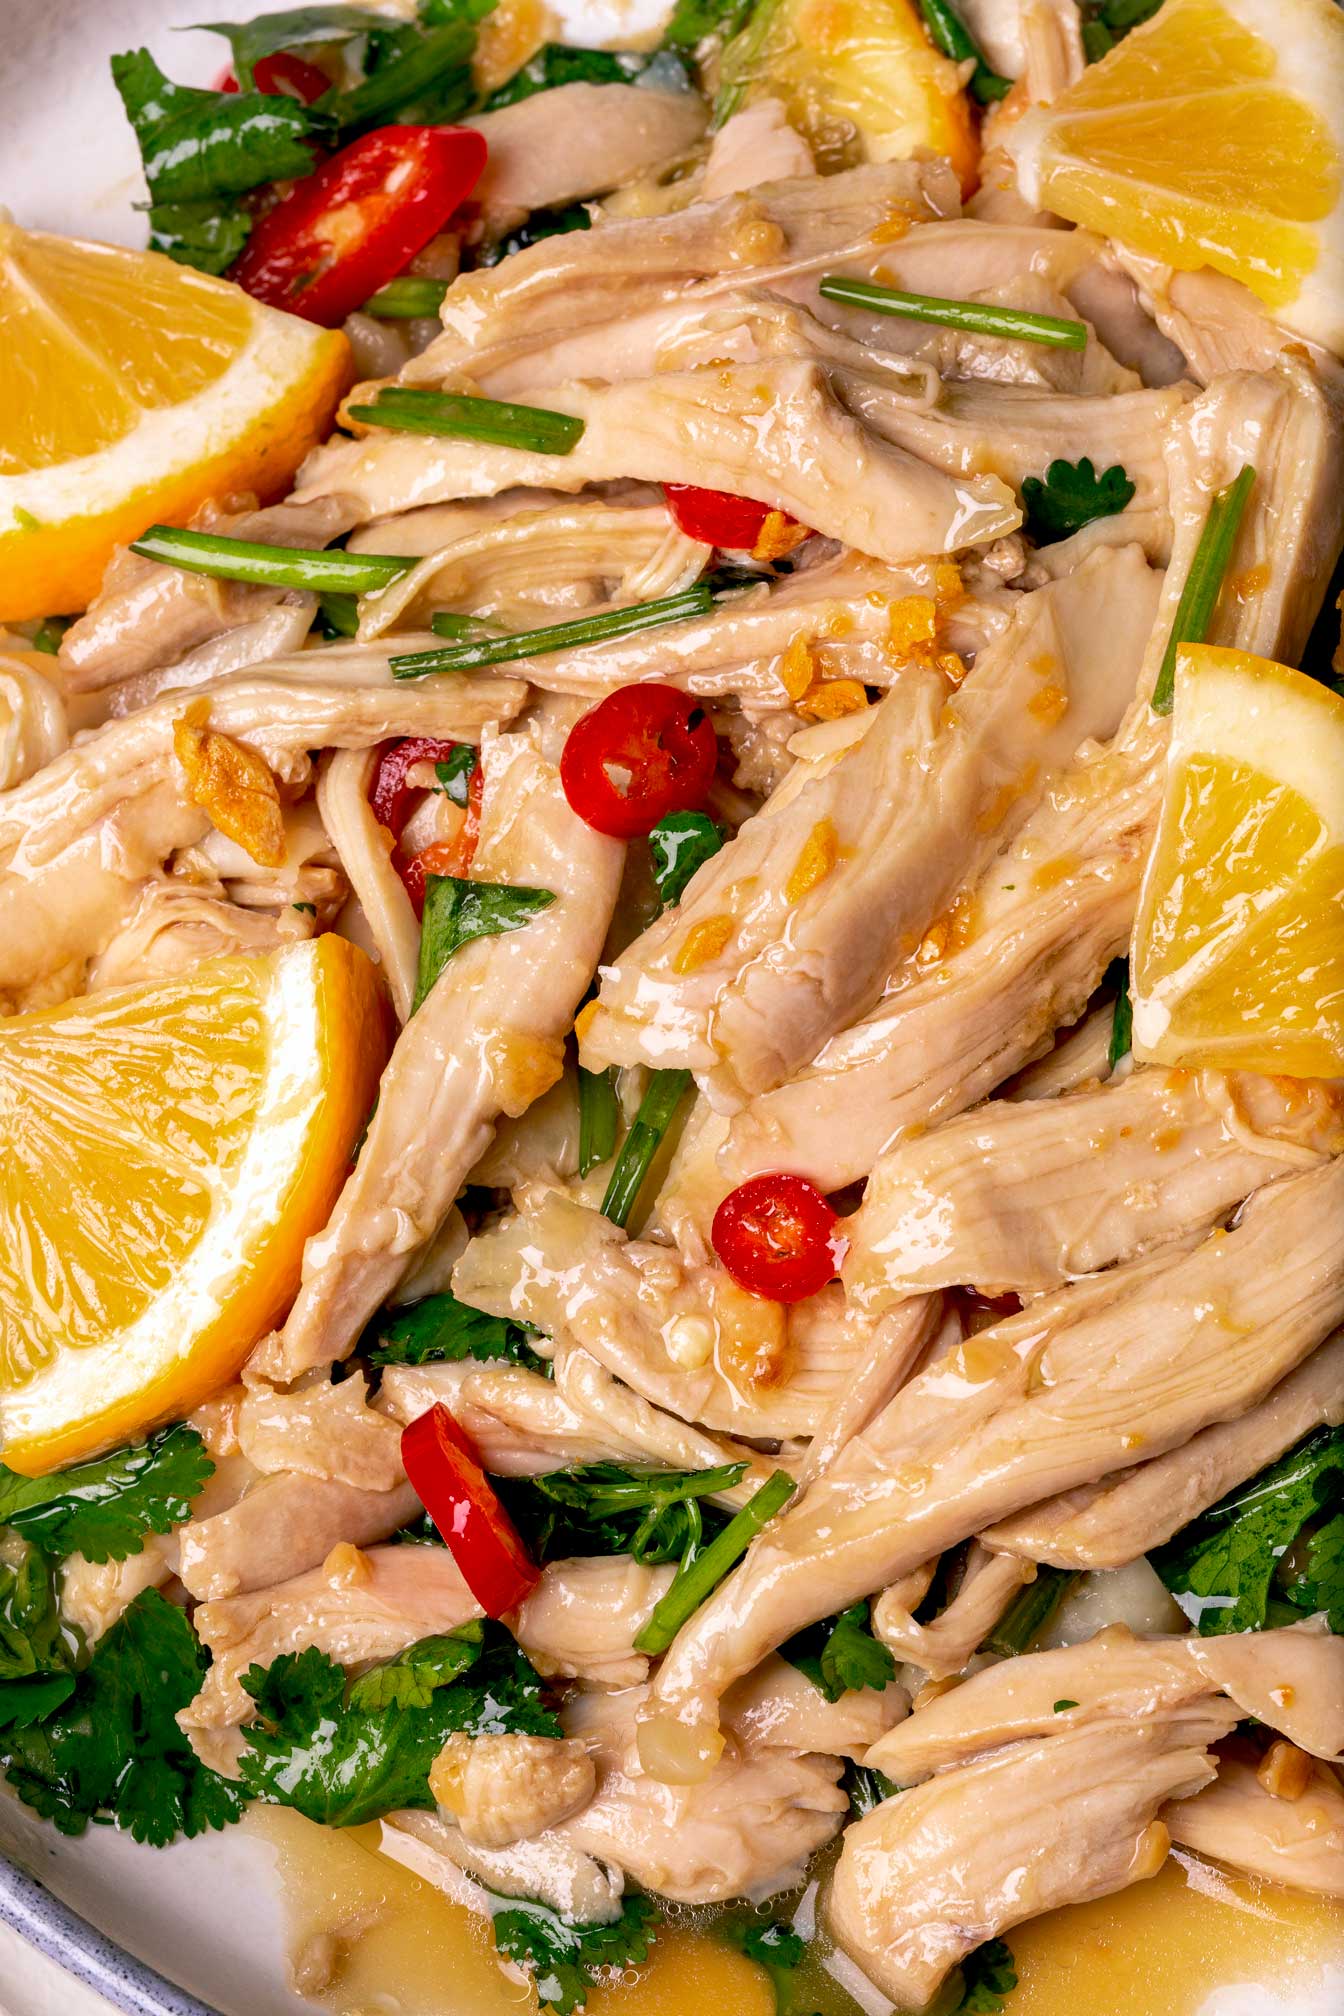
This one surprised me. I expected a heavy, mayo-loaded salad and got something completely different — shredded chicken, crunchy cabbage, and a bright lemon-sesame dressing that somehow feels both light and satisfying at the same time. It works beautifully as an appetizer because you can serve it in small cups or lettuce cups and people just keep going back for more. The citrus cuts through any richness, which makes it a smart pairing next to heavier finger foods on a party spread.
Ingredients
- 2 cups cooked chicken breast, shredded
- 2 cups napa cabbage, finely shredded
- 1 cup red cabbage, finely shredded
- 1 large carrot, julienned or grated
- 3 green onions, thinly sliced
- ¼ cup toasted slivered almonds or sesame seeds
- 3 tablespoons fresh lemon juice
- 2 tablespoons soy sauce (low sodium works fine)
- 1 tablespoon sesame oil
- 1 tablespoon honey
- 1 teaspoon fresh ginger, grated
- 1 clove garlic, minced
Instructions
- Whisk together lemon juice, soy sauce, sesame oil, honey, ginger, and garlic in a small bowl until fully combined. Taste and adjust — if you want more citrus punch, add another squeeze of lemon.
- Combine the shredded chicken, both cabbages, carrot, and green onions in a large mixing bowl.
- Pour the dressing over the salad and toss everything well until evenly coated.
- Top with toasted almonds or sesame seeds right before serving so they stay crunchy. Serve in small cups, lettuce wraps, or on a platter.
Tips
- Tip: Rotisserie chicken from Costco or Walmart makes this genuinely fast — shred it while still warm and it pulls apart in seconds.
- Tip: Make the dressing up to two days ahead and refrigerate it. Toss with the salad no more than 30 minutes before serving or the cabbage will wilt.
- Tip: If you can't find napa cabbage, regular green cabbage works — just slice it very thin so it stays tender.
31. Chicken Zucchini Fritters
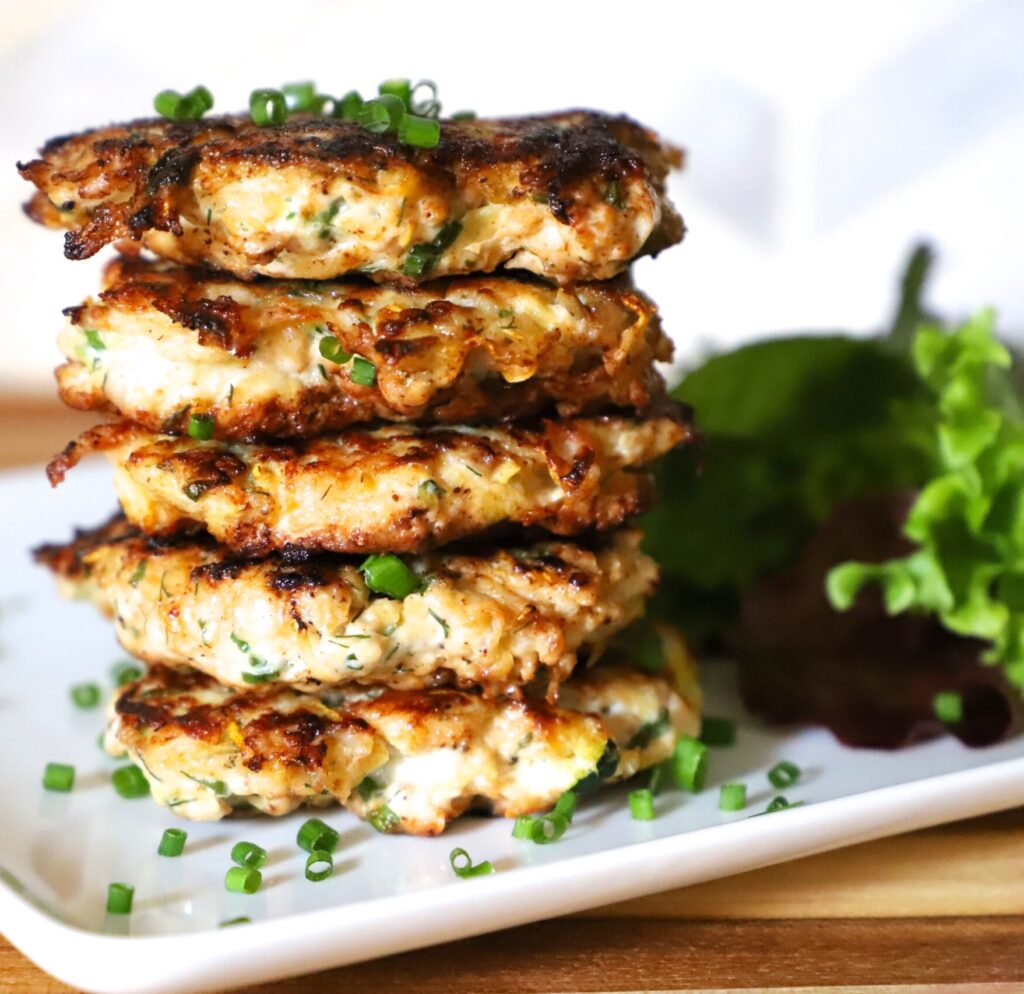
Fritters are one of those things that sound fancier than they are. These are essentially seasoned ground chicken and grated zucchini mixed together, pan-fried until golden — and they come out crispy on the outside with a soft, almost fluffy center. I make a double batch because they disappear at any gathering, and they're honestly just as good at room temperature as they are straight from the pan. Serve them with a simple yogurt dip or sour cream and people will think you spent way more time than you did.
Ingredients
- 1 lb ground chicken
- 2 medium zucchini, grated (about 2 cups)
- 1 egg
- ¼ cup breadcrumbs (plain or seasoned)
- 2 cloves garlic, minced
- 2 tablespoons fresh parsley, chopped (or 1 teaspoon dried)
- ½ teaspoon onion powder
- ½ teaspoon salt
- ¼ teaspoon black pepper
- 2 tablespoons olive oil, for frying
Instructions
- Grate the zucchini and place it in a clean kitchen towel. Squeeze out as much moisture as you possibly can — this is the most important step. Wet zucchini means soggy fritters that won't hold together.
- In a large bowl, combine the squeezed zucchini, ground chicken, egg, breadcrumbs, garlic, parsley, onion powder, salt, and pepper. Mix until everything is evenly incorporated.
- Shape the mixture into small patties about 2 inches wide and ½ inch thick. The mixture will be soft — that's normal. Wet hands help.
- Heat olive oil in a heavy skillet over medium heat. Cook the fritters in batches for 3–4 minutes per side until deep golden brown and cooked through. Don't crowd the pan or they'll steam instead of crisping.
- Transfer to a paper towel-lined plate. Serve warm with yogurt, sour cream, or your favorite dipping sauce.
Tips
- Tip: Squeezing the zucchini thoroughly is non-negotiable — I learned the hard way the first time I skipped this step and ended up with a pan full of falling-apart mush.
- Tip: These reheat well in a 375°F oven for 8 minutes, which makes them great for prepping a few hours before a party.
- Tip: Swap ground chicken for ground turkey if that's what you have — works just as well.
30. Crock Pot Buffalo Chicken Dip

My husband thinks buffalo chicken dip is the greatest invention in American food history. I'm not going to argue with him because honestly, it's hard to stop eating once it's in front of you. The slow cooker version is my favorite for parties because you just set it and forget it, and it stays warm the entire time guests are eating — no reheating, no fuss. Thick, creamy, tangy, and spicy, it works with tortilla chips, celery sticks, sliced baguette, or whatever you have on hand.
Ingredients
- 2 cups cooked chicken, shredded (rotisserie chicken works great)
- 8 oz cream cheese, softened and cubed
- ½ cup Frank's RedHot sauce (or any buffalo hot sauce)
- ½ cup ranch dressing (bottled is fine)
- 1 cup shredded cheddar cheese, divided
- ½ cup shredded mozzarella cheese
- 2 green onions, sliced (for garnish)
Instructions
- Add the cream cheese, buffalo sauce, ranch dressing, and half the cheddar to the slow cooker. Stir to combine as best you can — it doesn't need to be perfectly smooth yet.
- Add the shredded chicken and stir it in. Cover and cook on LOW for 2–3 hours or HIGH for 1–1.5 hours, stirring once halfway through.
- Once everything is melted and bubbly, give it a good stir until smooth. Sprinkle the remaining cheddar and the mozzarella on top.
- Cover for another 10 minutes until the cheese on top melts. Garnish with sliced green onions and serve directly from the crock pot with chips, celery, or bread.
Tips
- Tip: Let the cream cheese sit out for 15 minutes before adding it — cold cream cheese clumps and takes much longer to melt evenly.
- Tip: Adjust heat by using more or less buffalo sauce — start conservative and add more at the end if you want it spicier.
- Tip: No slow cooker? Make this in a 375°F oven in an oven-safe dish for about 25 minutes, stirring once halfway through.
29. Bang Bang Chicken Skewers
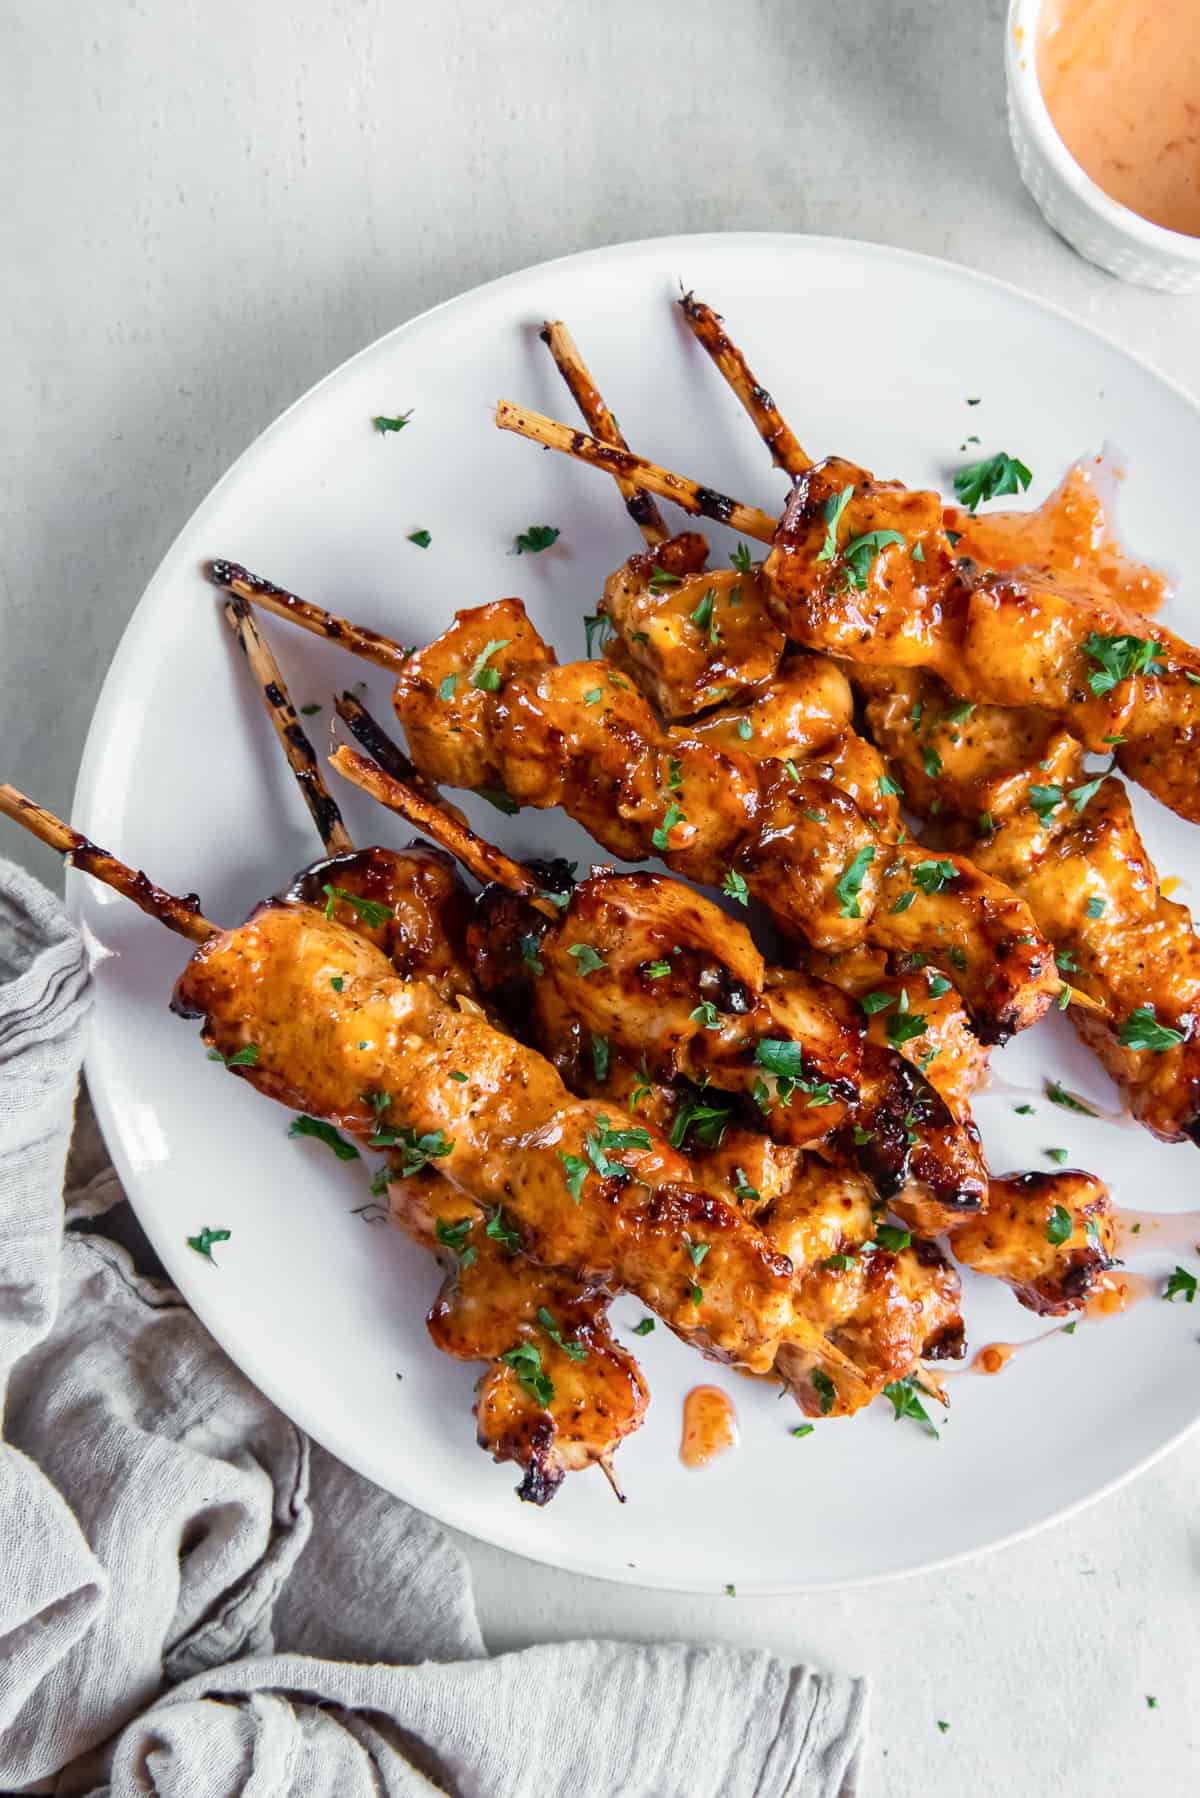
The name is a little dramatic but the sauce absolutely earns it. Bang bang sauce — that creamy, sweet-spicy combination of mayo, sweet chili sauce, and sriracha — is genuinely one of the best things you can put on grilled chicken. Threaded onto skewers and cooked until slightly charred at the edges, these are the kind of appetizer that gets finished before you've even set out everything else. Saad asks for these constantly, which tells you everything you need to know.
Ingredients
- 1.5 lbs boneless skinless chicken breast or thighs, cut into 1.5-inch cubes
- 1 tablespoon olive oil
- ½ teaspoon garlic powder
- ½ teaspoon paprika
- ½ teaspoon salt
- ¼ teaspoon black pepper
- ½ cup mayonnaise
- 3 tablespoons sweet chili sauce (found in the Asian aisle at most grocery stores)
- 1–2 teaspoons sriracha (adjust to your heat preference)
- 1 teaspoon lime juice
- Wooden or metal skewers
Instructions
- If using wooden skewers, soak them in water for at least 30 minutes so they don't burn. Whisk together the mayonnaise, sweet chili sauce, sriracha, and lime juice in a small bowl. Set aside — this is your bang bang sauce.
- Toss the chicken cubes with olive oil, garlic powder, paprika, salt, and pepper until evenly coated. Thread onto skewers, leaving a little space between each piece.
- Grill over medium-high heat for 5–6 minutes per side, or cook in a grill pan on the stovetop, until cooked through and the edges have a little char. Internal temperature should reach 165°F.
- Drizzle or brush generously with bang bang sauce in the last minute of cooking, then drizzle more over the top just before serving. Garnish with sliced green onions or sesame seeds if you like.
Tips
- Tip: Chicken thighs stay juicier on the grill than breast meat — if you're worried about drying out, go with thighs.
- Tip: Make the bang bang sauce a day ahead and refrigerate it — the flavor actually deepens overnight.
- Tip: No grill? These work perfectly under the broiler on a sheet pan — broil on high for 5–6 minutes per side, watching closely.
28. Easy Buffalo Chicken Dip
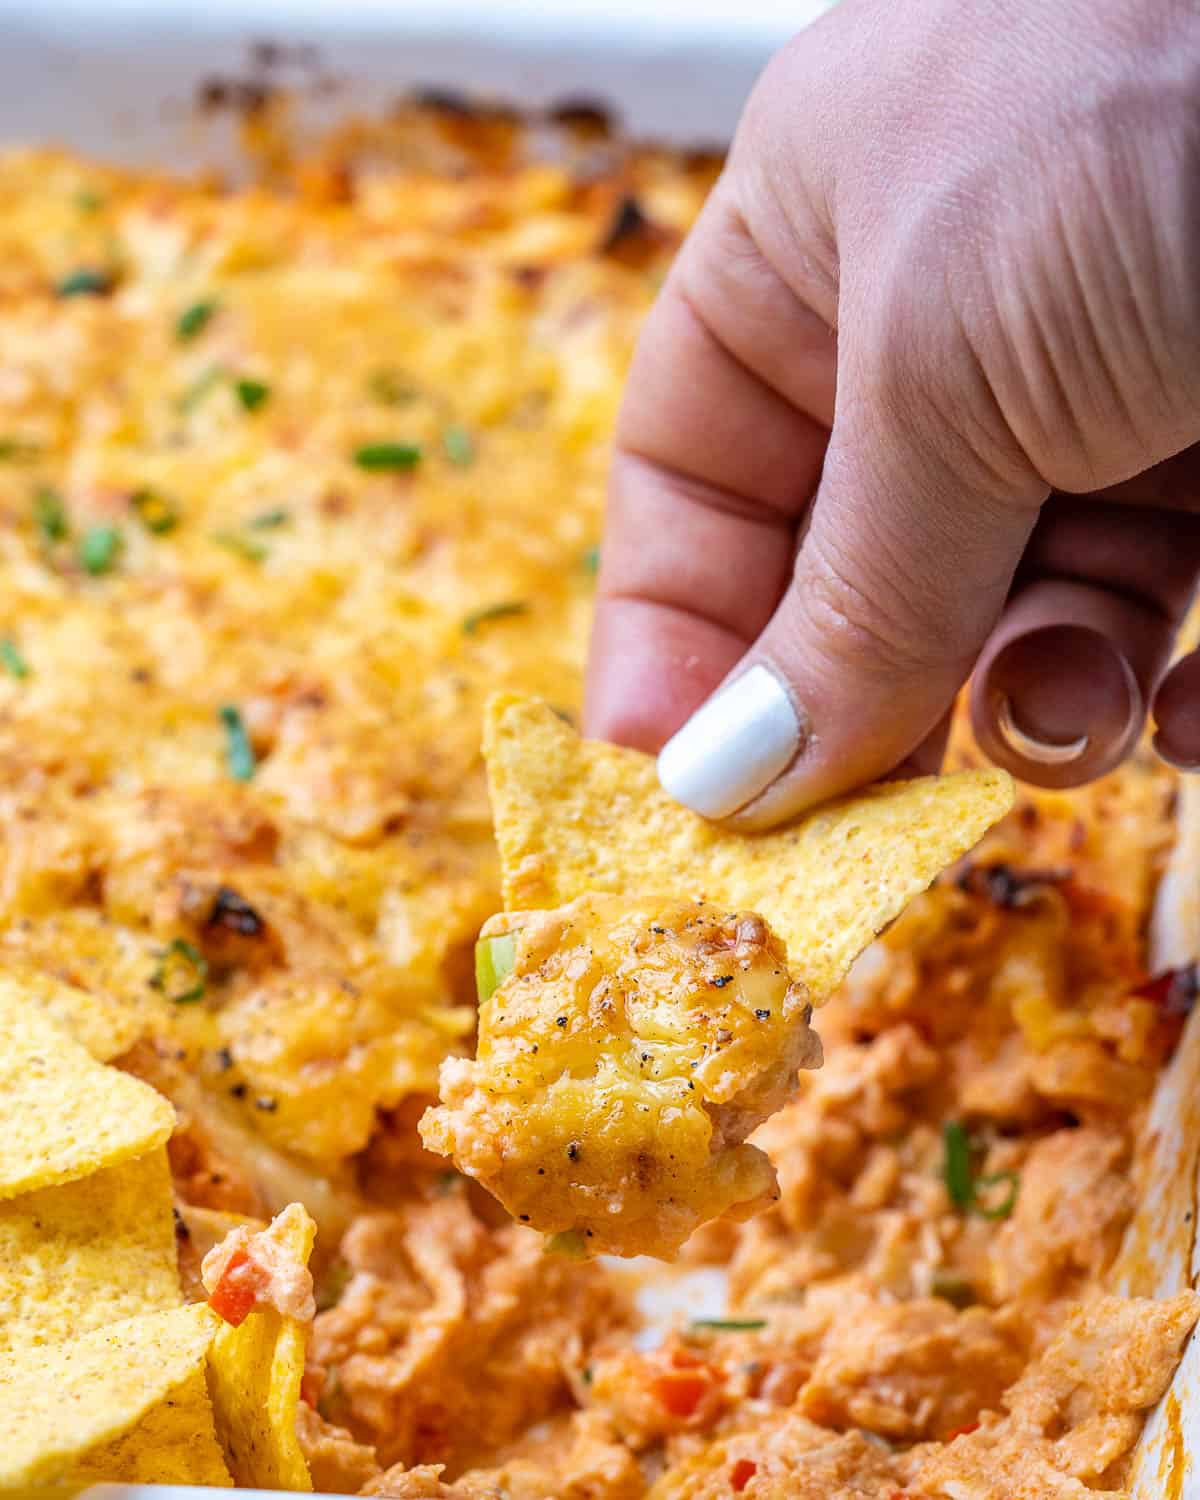
Buffalo chicken dip is one of those things I make whenever I need something crowd-friendly and dead simple. You pile shredded chicken, cream cheese, hot sauce, and cheddar into a baking dish and walk away — the oven does everything. I've brought this to Eid gatherings, birthday parties, and game nights, and the dish comes back empty every single time. Serve it warm with tortilla chips, celery sticks, or sliced baguette and watch it disappear.
Ingredients
- 2 cups cooked shredded chicken (rotisserie works great)
- 8 oz cream cheese, softened
- ½ cup Frank's RedHot sauce (or any buffalo-style hot sauce)
- ½ cup ranch dressing
- 1½ cups shredded cheddar cheese, divided
- ¼ teaspoon garlic powder
- Tortilla chips or celery sticks, for serving
Instructions
- Preheat your oven to 375°F. In a large bowl, mix together the softened cream cheese, hot sauce, ranch dressing, garlic powder, and 1 cup of the shredded cheddar until combined.
- Fold in the shredded chicken and spread the mixture evenly into a 9-inch baking dish or cast iron skillet.
- Top with the remaining ½ cup of cheddar and bake for 20-25 minutes, until the edges are bubbling and the top is golden.
- Let it sit for 5 minutes before serving — it's extremely hot straight from the oven. Serve with chips, celery, or bread.
Tips
- Tip: Let the cream cheese sit at room temperature for at least 15 minutes before mixing — cold cream cheese clumps and doesn't blend smoothly into the dip.
- Tip: You can assemble this the night before, refrigerate it, and bake it fresh the next day — just add 5 extra minutes to the baking time.
- Tip: For more heat, add an extra tablespoon of hot sauce or a pinch of cayenne on top before baking.
27. Oven-Baked Honey Garlic Chicken Wings
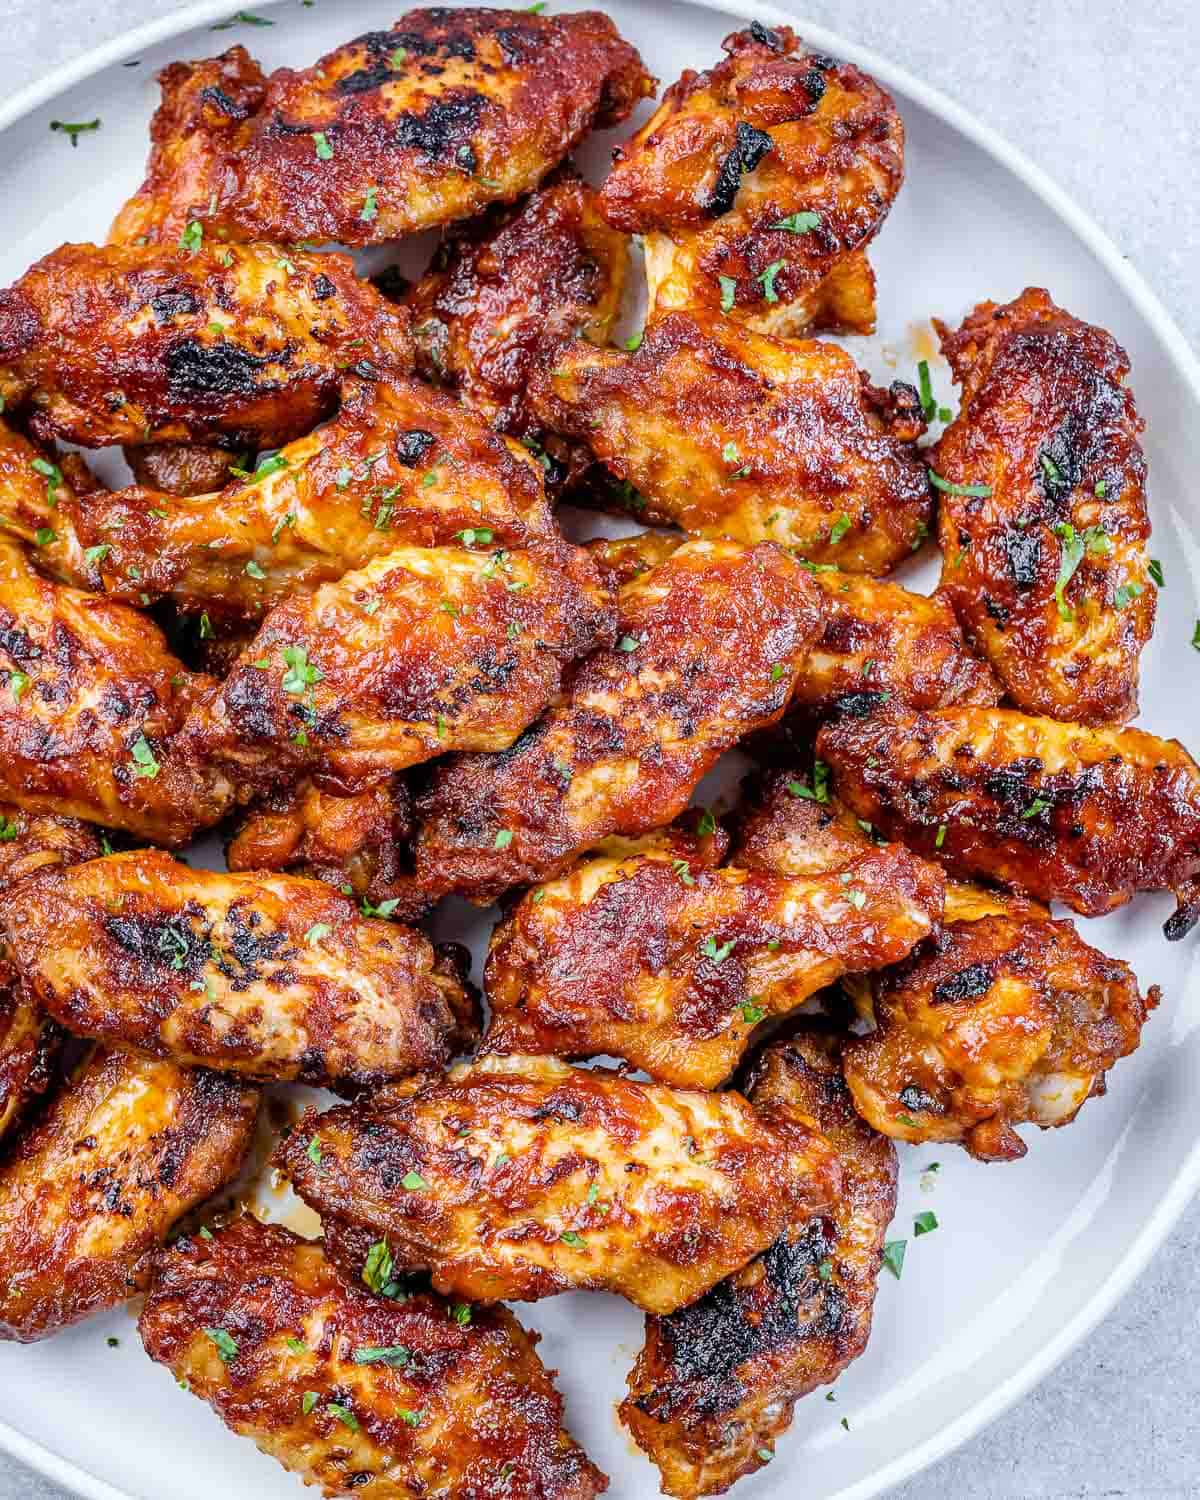
I made these for the first time when I was trying to avoid deep frying and didn't want to deal with a pot of hot oil. The oven does a surprisingly good job of crisping up the skin, especially if you pat the wings completely dry before seasoning — that step matters more than people realize. The honey garlic glaze goes on at the end so it caramelizes instead of burning, and you get that sticky, lacquered finish that looks like a lot of effort but really isn't.
Ingredients
- 2 lbs chicken wings, split into flats and drumettes
- 1 tablespoon baking powder (not baking soda — this is what makes them crispy)
- 1 teaspoon salt
- ½ teaspoon black pepper
- ¼ cup honey
- 3 cloves garlic, minced
- 2 tablespoons soy sauce
- 1 tablespoon butter
Instructions
- Preheat oven to 425°F. Pat the wings very dry with paper towels — this is the most important step for crispy skin. Toss with baking powder, salt, and pepper.
- Arrange wings on a wire rack set over a foil-lined baking sheet. Bake for 40-45 minutes, flipping once halfway through, until the skin is golden and crispy.
- While wings bake, melt butter in a small saucepan over medium heat. Add garlic and cook 1 minute until fragrant. Stir in honey and soy sauce and simmer for 2-3 minutes until slightly thickened.
- Toss the hot baked wings in the honey garlic sauce and return to the oven for 5 minutes to caramelize the glaze. Serve immediately.
Tips
- Tip: The wire rack is key — it lets hot air circulate under the wings so the bottoms don't steam and go soggy. If you don't have one, flip the wings every 15 minutes instead.
- Tip: Don't skip the baking powder — it raises the pH of the skin and helps it brown and crisp up far better than seasoning alone.
- Tip: The glaze can be made up to two days ahead and stored in the fridge — just reheat before tossing.
26. Air Fryer Buffalo Chicken Meatballs

These are what I make when I want the flavor of buffalo wings without the mess of actual wings — no bones, no dripping sauce everywhere, just neat little meatballs with all that heat and tang packed in. The air fryer gets them golden on the outside in about 12 minutes, and then you toss them in more buffalo sauce right before serving. Zainab picks around the spicy ones and goes straight for the ranch, but my husband eats a full plate of these every time I make them.
Ingredients
- 1 lb ground chicken
- ¼ cup panko breadcrumbs
- 1 egg
- 2 tablespoons Frank's RedHot sauce, plus more for tossing
- ½ teaspoon garlic powder
- ½ teaspoon onion powder
- ½ teaspoon salt
- 2 oz crumbled blue cheese or shredded cheddar (optional, fold into meat mixture)
- Ranch or blue cheese dressing, for dipping
Instructions
- In a large bowl, combine ground chicken, panko, egg, 2 tablespoons hot sauce, garlic powder, onion powder, and salt. Mix until just combined — don't overmix or the meatballs will be dense.
- Roll into 1½-inch meatballs (you should get about 20). Lightly spray the air fryer basket with cooking spray and arrange meatballs in a single layer with a little space between each.
- Air fry at 400°F for 10-12 minutes, shaking the basket halfway through, until the meatballs are cooked through and lightly golden on the outside.
- Transfer to a bowl, toss with additional buffalo sauce to coat, and serve immediately with ranch or blue cheese dipping sauce on the side.
Tips
- Tip: Ground chicken is stickier than beef — wet your hands slightly before rolling the meatballs and they'll shape much more easily.
- Tip: No air fryer? Bake at 400°F on a lined sheet pan for 18-20 minutes, flipping once at the halfway point.
- Tip: To dial back the heat for kids, reduce the hot sauce in the mix to 1 tablespoon and serve the extra sauce on the side so adults can add more.
25. Crockpot Buffalo Chicken Dip
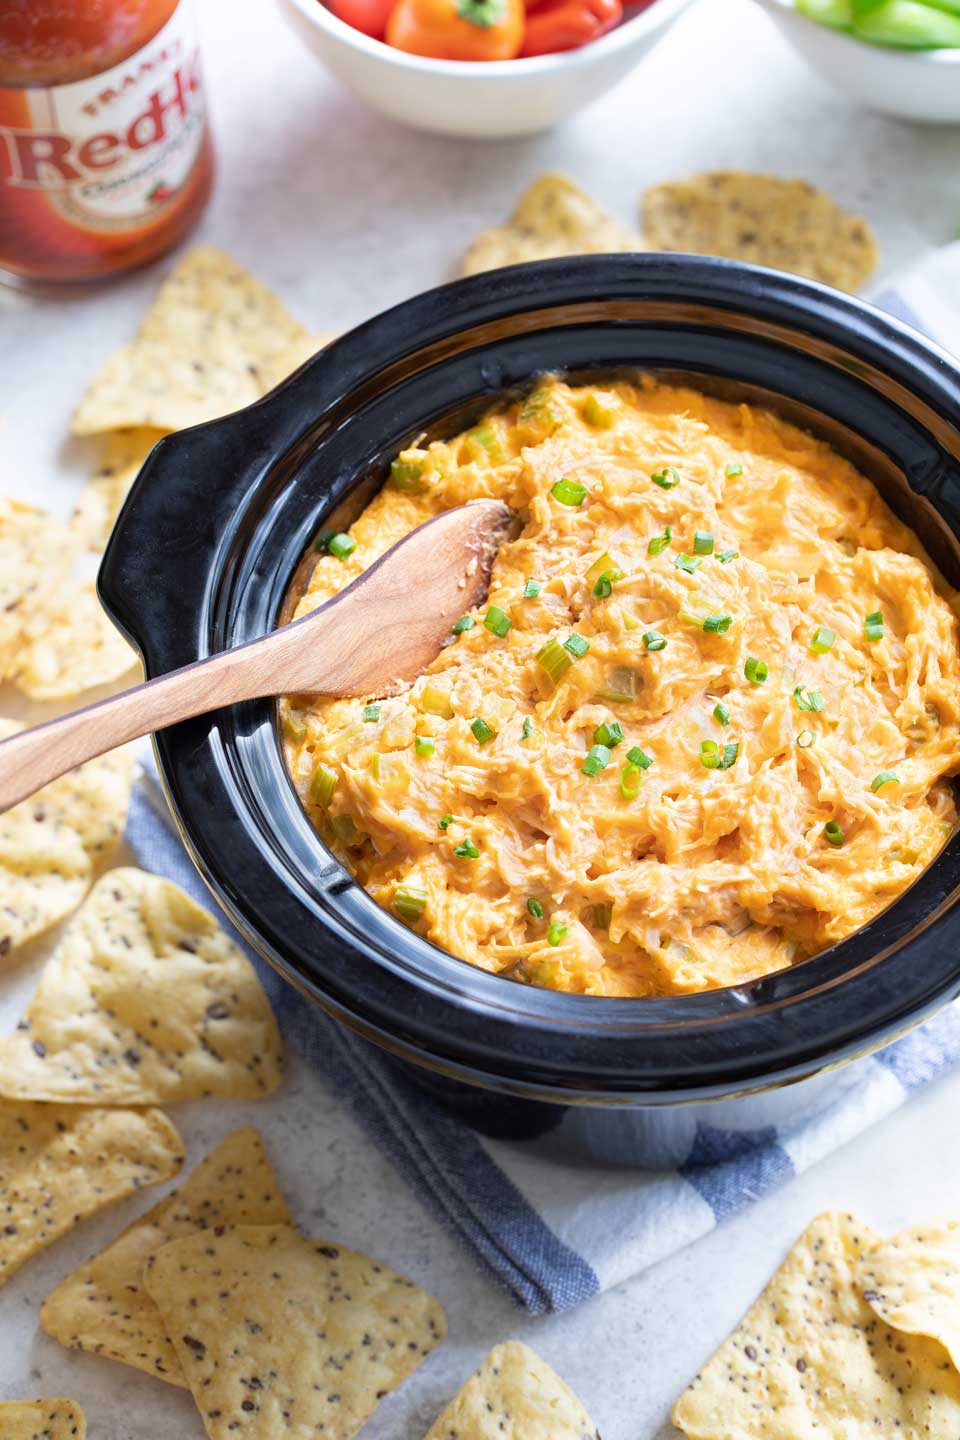
This is the slow cooker version of buffalo chicken dip, and the reason it earns a separate spot on this list is that you can keep it warm in the crockpot for hours without any effort — which is exactly what you want at a party where you can't babysit a baking dish. Everything goes in raw, cooks low and slow, and you just stir and shred at the end. I make a double batch because it really does disappear in one sitting.
Ingredients
- 1 lb boneless skinless chicken breasts
- 8 oz cream cheese, cut into cubes
- ½ cup Frank's RedHot sauce
- ½ cup ranch dressing
- 1 cup shredded cheddar cheese, divided
- ½ teaspoon garlic powder
- Tortilla chips, crackers, or sliced veggies for dipping
Instructions
- Place chicken breasts in the bottom of the slow cooker. Add cream cheese cubes, hot sauce, ranch dressing, garlic powder, and ½ cup of the shredded cheddar on top.
- Cook on LOW for 3-4 hours or HIGH for 1.5-2 hours, until the chicken is fully cooked through and tender enough to shred.
- Remove the chicken, shred it with two forks, then return it to the slow cooker. Stir everything together until smooth and combined.
- Top with the remaining ½ cup of cheddar, switch the slow cooker to WARM, and serve directly from the pot with your choice of dippers.
Tips
- Tip: Keep the slow cooker on the WARM setting throughout the party — the dip stays at the perfect temperature and consistency for hours without drying out.
- Tip: If the dip looks too thick after stirring, add a splash of milk or a tablespoon of chicken broth and stir to loosen it up.
- Tip: Frozen chicken breasts work here — just add 30-45 extra minutes to the cook time and check that the internal temperature reaches 165°F before shredding.
24. Sumac Lemon Baked Chicken Wings
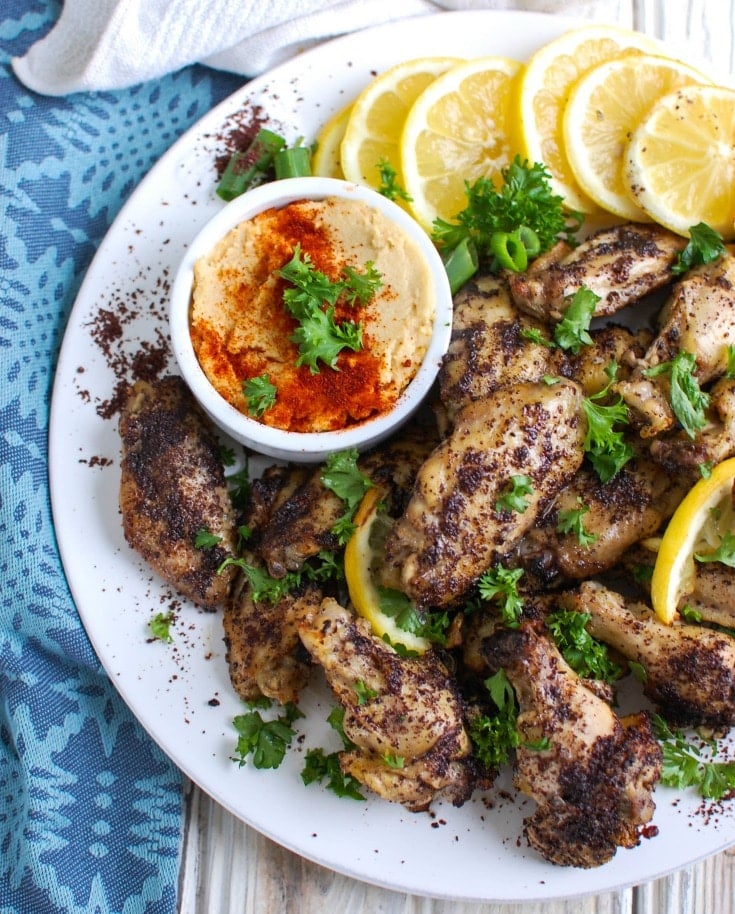
Sumac is something I grew up with in Pakistan — it's that deep red-purple powder with a sharp, citrusy tang that brightens everything it touches. Combined with lemon and garlic on baked chicken wings, it creates something that tastes genuinely different from any other wing recipe on this list. If you can't find sumac at a regular grocery store, check the international aisle or order it online — it's worth tracking down and keeps for months in your spice cabinet.
Ingredients
- 2 lbs chicken wings, split
- 2 tablespoons sumac (find it at international grocery stores or Amazon — substitute with 1½ tablespoons lemon zest in a pinch)
- Zest and juice of 1 large lemon
- 3 cloves garlic, minced
- 3 tablespoons olive oil
- 1 teaspoon salt
- ½ teaspoon black pepper
- ½ teaspoon dried oregano
- Fresh parsley, chopped, for garnish
Instructions
- In a large bowl, whisk together sumac, lemon zest, lemon juice, minced garlic, olive oil, salt, pepper, and oregano. Add the chicken wings and toss until every piece is well coated.
- Cover and marinate in the refrigerator for at least 30 minutes, or up to overnight for deeper flavor. When ready to cook, preheat oven to 425°F.
- Arrange wings on a wire rack set over a foil-lined baking sheet. Bake for 35-40 minutes, flipping once at the 20-minute mark, until the skin is crispy and the wings are cooked through.
- Transfer to a serving platter, garnish with fresh parsley and an extra squeeze of lemon juice, and serve hot.
Tips
- Tip: Sumac burns faster than regular spices because of its acidity — keep the oven at 425°F rather than cranking it higher, and watch the wings in the last 10 minutes.
- Tip: The longer you marinate, the more the sumac flavor develops — overnight in the fridge gives you noticeably better results than a 30-minute quick soak.
- Tip: These pair really well with a simple yogurt dipping sauce — just mix ½ cup plain Greek yogurt with a minced garlic clove, a squeeze of lemon, and a pinch of salt.
23. Chicken Bacon Ranch Wonton Cups

These little wonton cups are one of those appetizers that disappear faster than you can plate them. Wonton wrappers pressed into a mini muffin tin get crispy in the oven, and then you fill them with a creamy chicken-bacon-ranch mixture that's genuinely addictive. The whole thing takes under 30 minutes, and the hardest part is stopping yourself from eating them before guests arrive. I've made these for a couple of get-togethers and every single time someone asks me for the recipe before they've even finished chewing.
Ingredients
- 24 wonton wrappers
- 1½ cups cooked chicken, shredded or finely diced (rotisserie works great)
- 4 strips bacon, cooked crispy and crumbled
- 4 oz cream cheese, softened
- 3 tablespoons ranch dressing
- ½ cup shredded cheddar cheese
- 2 green onions, thinly sliced
- Salt and black pepper to taste
Instructions
- Preheat your oven to 375°F. Lightly grease a 24-cup mini muffin tin and press one wonton wrapper into each cup, shaping it gently so the edges come up and form a little bowl.
- Bake the empty wonton cups for 5 minutes until just starting to turn golden. This gives them a head start so they stay crispy after filling.
- In a bowl, mix together the softened cream cheese, ranch dressing, shredded chicken, crumbled bacon, cheddar, and most of the green onions. Season with salt and pepper.
- Spoon about 1 tablespoon of filling into each pre-baked wonton cup. Don't overfill — they'll bubble over and stick.
- Bake for another 10-12 minutes until the cups are golden and the filling is heated through. Top with remaining green onions and serve immediately.
Tips
- Tip: Let the cream cheese sit out for 15-20 minutes before mixing — cold cream cheese clumps and won't incorporate smoothly into the filling.
- Tip: You can prep the filling a day ahead and refrigerate it. Just fill and bake the cups right before serving so the wontons stay crisp.
- Tip: Wonton wrappers are usually in the refrigerated produce section near tofu and fresh pasta — check Walmart or your regular grocery store if you're not sure where to look.
22. Chicken Yakitori
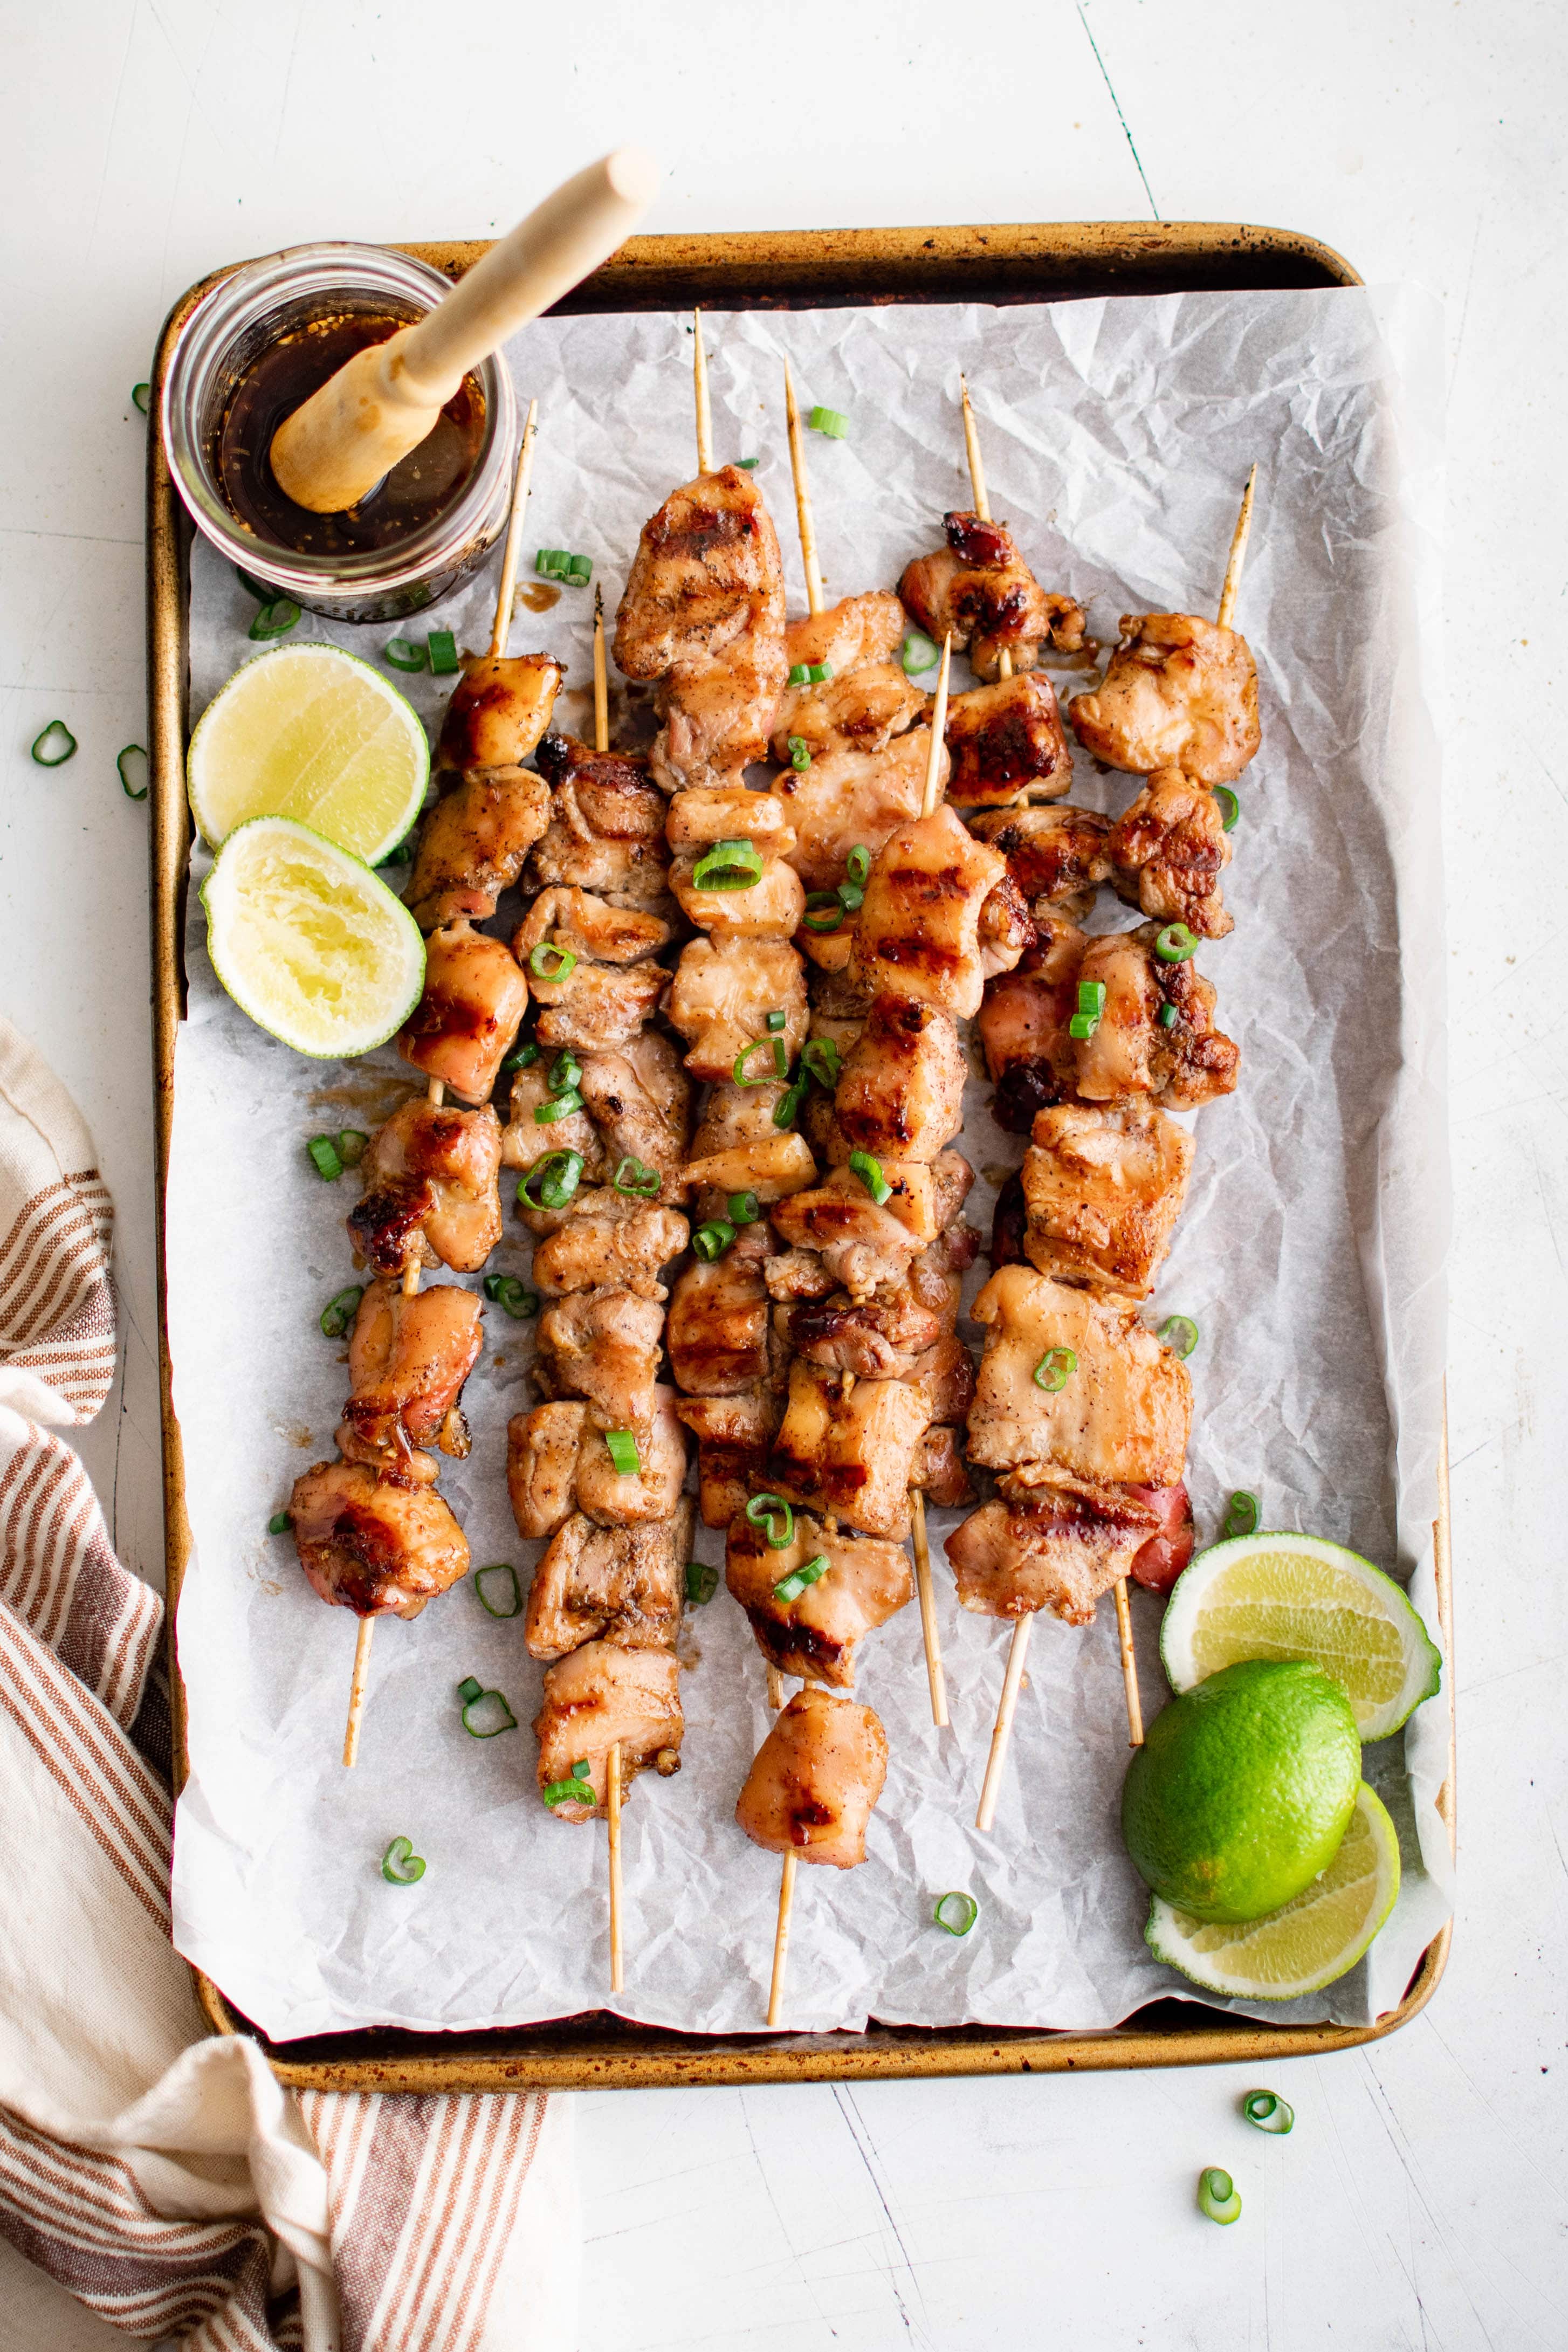
Yakitori is Japanese grilled chicken skewers glazed in a sweet-savory tare sauce made from soy sauce, mirin, and sugar. I'll be honest — I didn't grow up eating Japanese food, so the first time I made this I wasn't sure if I was getting the sauce ratio right. Third attempt, I did. The sauce is the whole point here: it caramelizes onto the chicken as it grills and gets slightly sticky and intensely flavored. These are the kind of skewers that make people slow down and actually pay attention to what they're eating.
Ingredients
- 1½ lbs boneless, skinless chicken thighs, cut into 1-inch pieces
- ¼ cup soy sauce
- ¼ cup mirin (or 3 tablespoons rice vinegar + 1 tablespoon sugar as substitute)
- 2 tablespoons sake (or dry sherry, or just skip it)
- 1 tablespoon sugar
- 1 teaspoon sesame oil
- Bamboo skewers, soaked in water for 30 minutes
- Sliced green onions and sesame seeds, for garnish
Instructions
- Combine soy sauce, mirin, sake, and sugar in a small saucepan over medium heat. Stir until sugar dissolves, then simmer for 8-10 minutes until slightly thickened and glossy. Stir in sesame oil and set aside. This is your tare glaze.
- Thread 4-5 pieces of chicken onto each soaked skewer, leaving a little space between pieces so they cook evenly.
- Heat a grill pan or outdoor grill to medium-high. Grill skewers for 4-5 minutes per side until cooked through and slightly charred.
- During the last 2 minutes of cooking, brush the tare glaze generously over the skewers and let it caramelize. Flip and brush the other side.
- Transfer to a plate, brush with one more coat of glaze, and top with green onions and sesame seeds. Serve immediately.
Tips
- Tip: Chicken thighs work much better than breast here — they stay juicy on the grill and don't dry out the way breast does when you're busy glazing and flipping.
- Tip: The tare sauce can be made 3-4 days ahead and refrigerated — this is a big time-saver when you're prepping for a party.
- Tip: No grill? A cast iron skillet on high heat gives you good char marks and works just fine indoors — open a window though, it does smoke.
21. Crock Pot Buffalo Wings
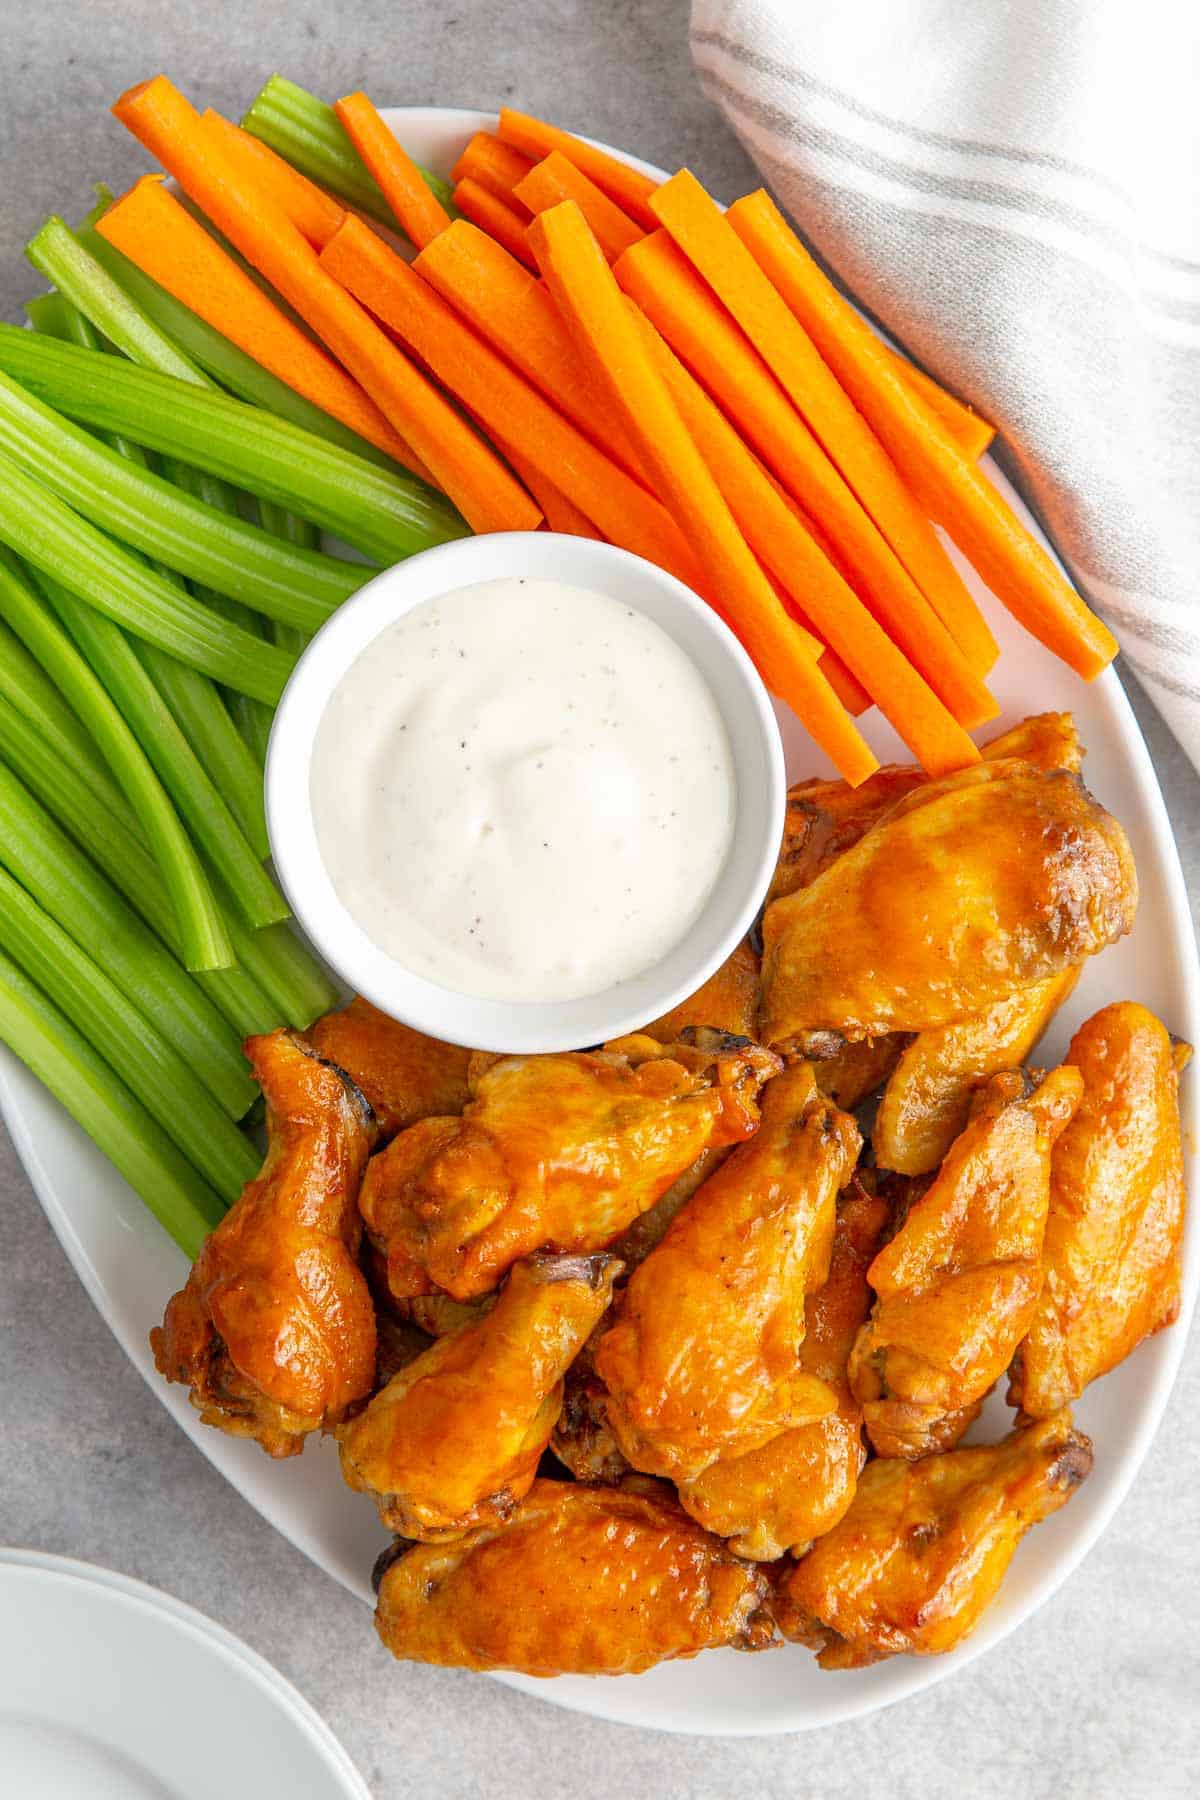
I was skeptical about slow cooker wings for a long time — I assumed they'd come out soft and sad with no real texture. Then I tried this method where you finish them under the broiler for a few minutes after the slow cooker does its job, and everything clicked. The crock pot makes the meat incredibly tender and infused with buffalo flavor all the way through, and the broiler crisps up the skin just enough. These are genuinely low-effort and genuinely good, which is a combination that doesn't come along often enough.
Ingredients
- 3 lbs chicken wings, split into flats and drumettes
- 1 cup buffalo sauce (Frank's RedHot works great), divided
- 1 teaspoon garlic powder
- 1 teaspoon onion powder
- ½ teaspoon smoked paprika
- ½ teaspoon black pepper
- 2 tablespoons butter, melted
- Blue cheese or ranch dressing, for serving
Instructions
- Pat wings completely dry with paper towels — this is important for getting any crispiness later. Season with garlic powder, onion powder, paprika, and black pepper.
- Place wings in the slow cooker and pour ¾ cup of the buffalo sauce over them. Toss to coat, cover, and cook on HIGH for 2.5-3 hours or LOW for 4-5 hours.
- Preheat your broiler to high. Line a baking sheet with foil and arrange the wings in a single layer. Broil for 4-5 minutes per side until the skin crisps and chars slightly at the edges.
- Mix the remaining ¼ cup buffalo sauce with the melted butter. Toss the broiled wings in this mixture right before serving for a fresh, glossy coat of flavor.
- Serve immediately with blue cheese or ranch dressing and celery sticks on the side.
Tips
- Tip: Don't skip the broiler step — the slow cooker alone won't give you any texture on the skin, and texture is half the appeal of a good wing.
- Tip: If you're making these for a party, the slow cooker step can be done hours ahead. Just broil them right before guests arrive.
- Tip: Want them less spicy? Use half buffalo sauce and half melted butter in the slow cooker — it tones down the heat considerably while keeping all the flavor.
20. Mexican Chicken Satay
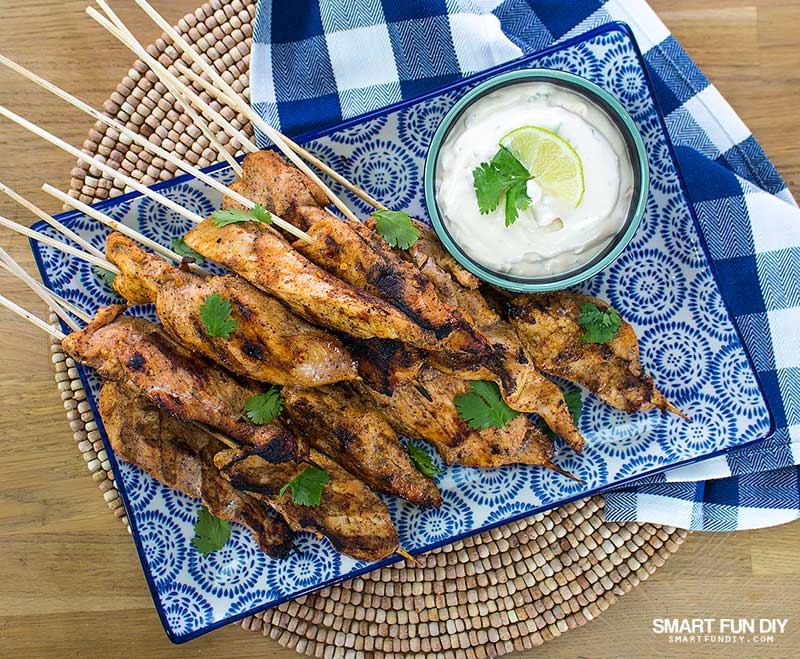
Growing up in Pakistan, satay was always a Southeast Asian thing in my mind — peanut sauce, lemongrass, that whole direction. This Mexican twist takes the skewer format and swings it completely differently: chili powder, cumin, lime, and a dipping sauce that goes more salsa-meets-chipotle than peanut. It's a fun idea that actually works well as party food because it's finger-friendly, easy to eat standing up, and the flavors are bold enough to hold their own next to drinks and conversation. Great for game day or any casual outdoor gathering.
Ingredients
- 1½ lbs boneless chicken breast or thighs, cut into 1-inch strips
- 2 tablespoons olive oil
- 1 teaspoon chili powder
- 1 teaspoon ground cumin
- ½ teaspoon smoked paprika
- ½ teaspoon garlic powder
- Juice of 1 lime
- Salt and pepper to taste
- ½ cup sour cream
- 2 tablespoons chipotle sauce or salsa, for dipping
Instructions
- In a bowl, combine olive oil, chili powder, cumin, smoked paprika, garlic powder, lime juice, salt, and pepper. Add the chicken strips and toss well to coat. Let marinate for at least 20 minutes at room temperature, or up to 4 hours in the fridge.
- Thread the marinated chicken strips onto soaked bamboo skewers, weaving the skewer through each strip so the chicken stays flat and cooks evenly.
- Grill on medium-high heat for 3-4 minutes per side until cooked through with some char on the edges. You can also cook these in a hot grill pan on the stovetop.
- Mix sour cream with chipotle sauce or salsa to make the dipping sauce. Adjust heat level to your preference.
- Serve skewers hot with the dipping sauce on the side and lime wedges for squeezing.
Tips
- Tip: Threading the chicken in a flat ribbon shape (rather than chunks) means more surface area touching the grill — that translates to better char and more flavor in every bite.
- Tip: The dipping sauce can be as simple as storebought chipotle mayo if you're pressed for time — Hellmann's makes one that works well here.
- Tip: Make a double batch of the marinade and freeze half the raw chicken in it — then you've got marinated skewer meat ready to go for next time with zero extra effort.
19. Crockpot Chicken Nachos
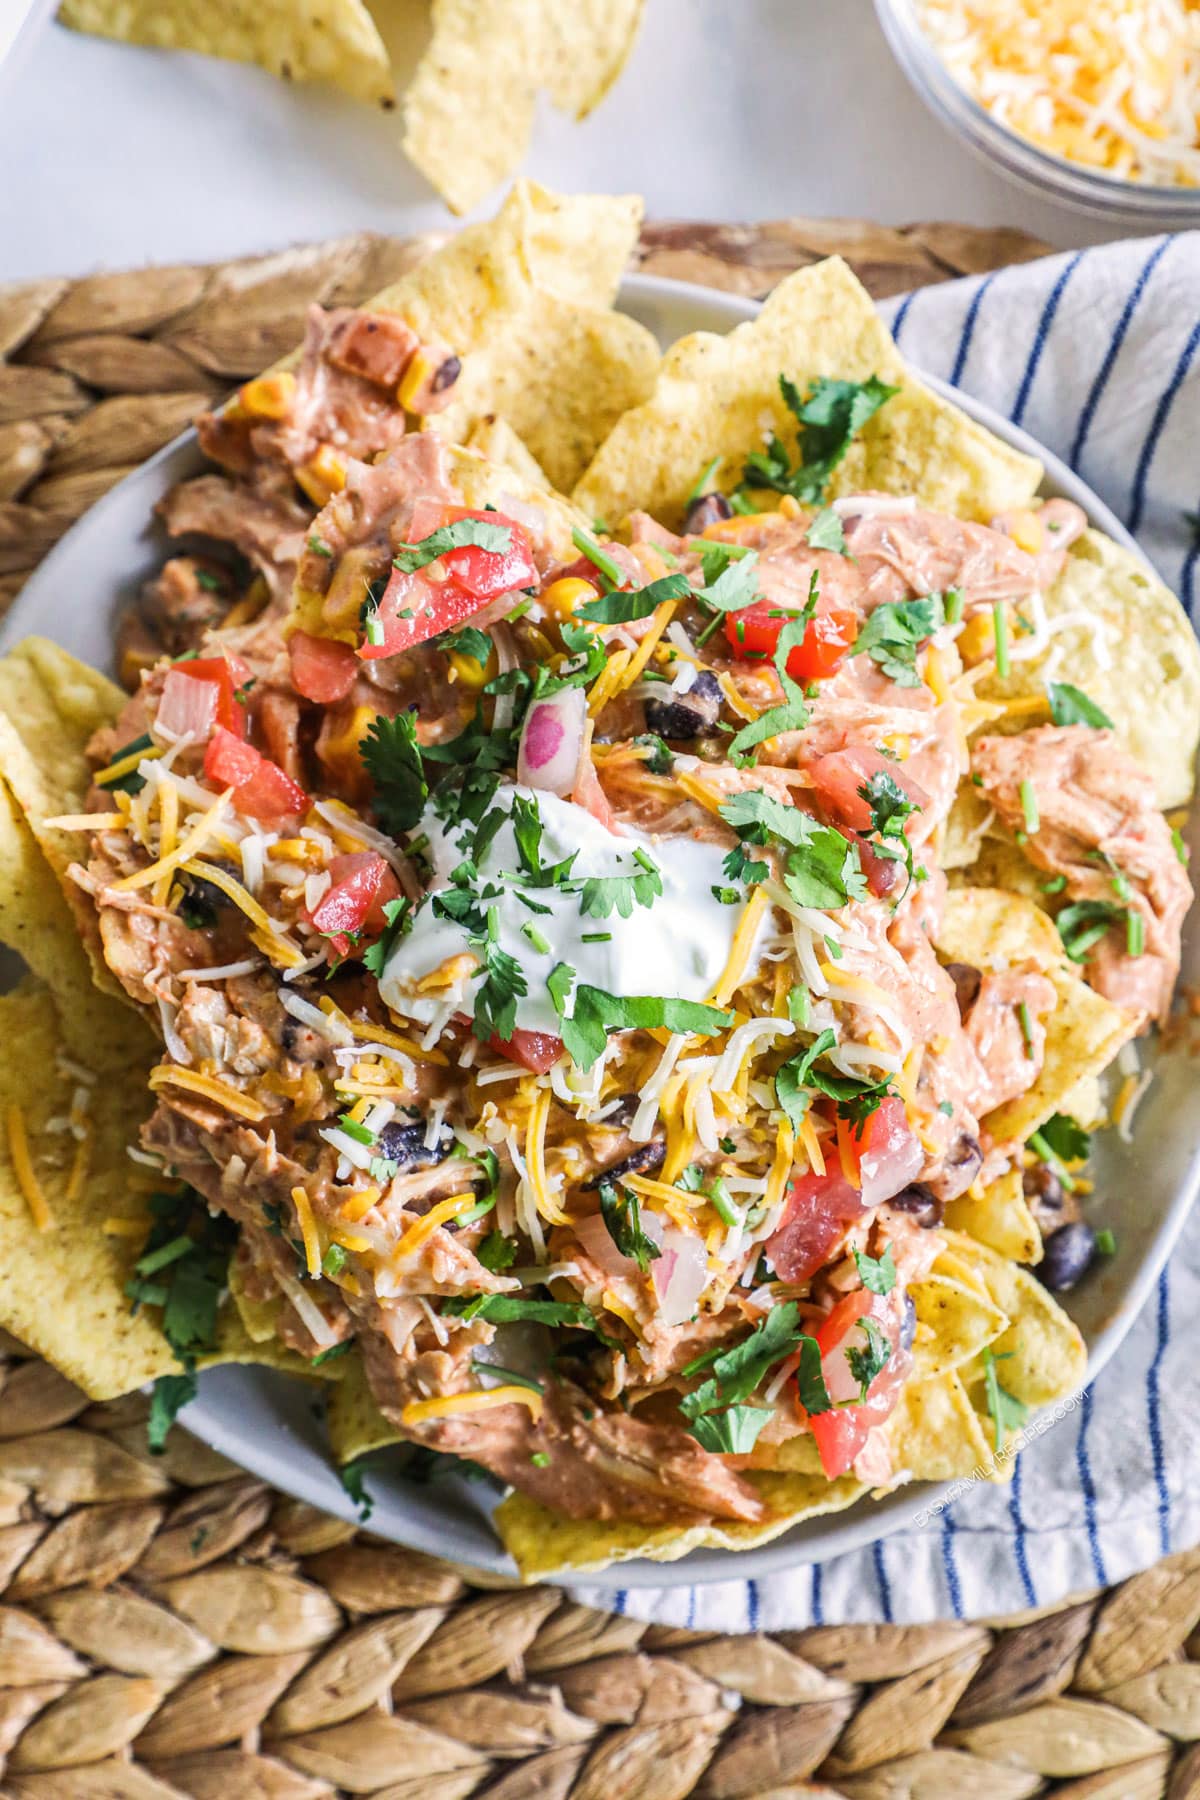
Nachos are usually something I throw together last-minute, but this version starts in the crockpot hours before anyone shows up — and the chicken comes out so tender and well-seasoned that it carries the whole dish. You slow-cook the chicken with taco seasoning and salsa until it shreds effortlessly, then pile it onto chips with cheese and all the toppings right before serving. Saad will eat nachos at any time of day, so this one gets made more often than I probably intended when I first tried it. It's the kind of recipe that makes you look more prepared than you actually were.
Ingredients
- 1½ lbs boneless skinless chicken breasts
- 1 packet (1 oz) taco seasoning
- 1 cup salsa (mild, medium, or hot — your call)
- One 15 oz can black beans, drained and rinsed
- One 10 oz bag tortilla chips
- 2 cups shredded Mexican blend cheese
- Toppings: sour cream, guacamole, sliced jalapeños, chopped cilantro, diced tomatoes
Instructions
- Place chicken breasts in the crockpot. Sprinkle taco seasoning over them, then pour salsa on top. Cover and cook on LOW for 4-5 hours or HIGH for 2.5-3 hours, until the chicken is completely tender.
- Shred the chicken directly in the crockpot using two forks, then stir in the black beans. Let everything sit in the juices for another 10 minutes so the beans warm through and absorb flavor.
- Preheat your oven to 400°F. Spread tortilla chips in a single layer on a large baking sheet or oven-safe platter. Spoon the chicken mixture generously over the chips, then cover with shredded cheese.
- Bake for 8-10 minutes until the cheese is fully melted and bubbling. Watch them — chips can go from perfect to burnt faster than you'd think.
- Pull them out, add all your toppings, and serve immediately while the cheese is still hot.
Tips
- Tip: Don't add all the toppings before baking — sour cream and guacamole go on after the oven, otherwise they melt into a sad puddle and the whole thing gets soggy.
- Tip: The crockpot chicken keeps well for 3-4 days in the fridge, so you can make the filling ahead and just assemble nachos fresh each time — handy if you want a quick weeknight snack.
- Tip: Use thick, sturdy chips like restaurant-style tortilla chips from Costco or Trader Joe's — thinner chips collapse under the weight of the toppings before you even get them to the table.
18. Crisp Keto Air Fryer Lemon Pepper Wings
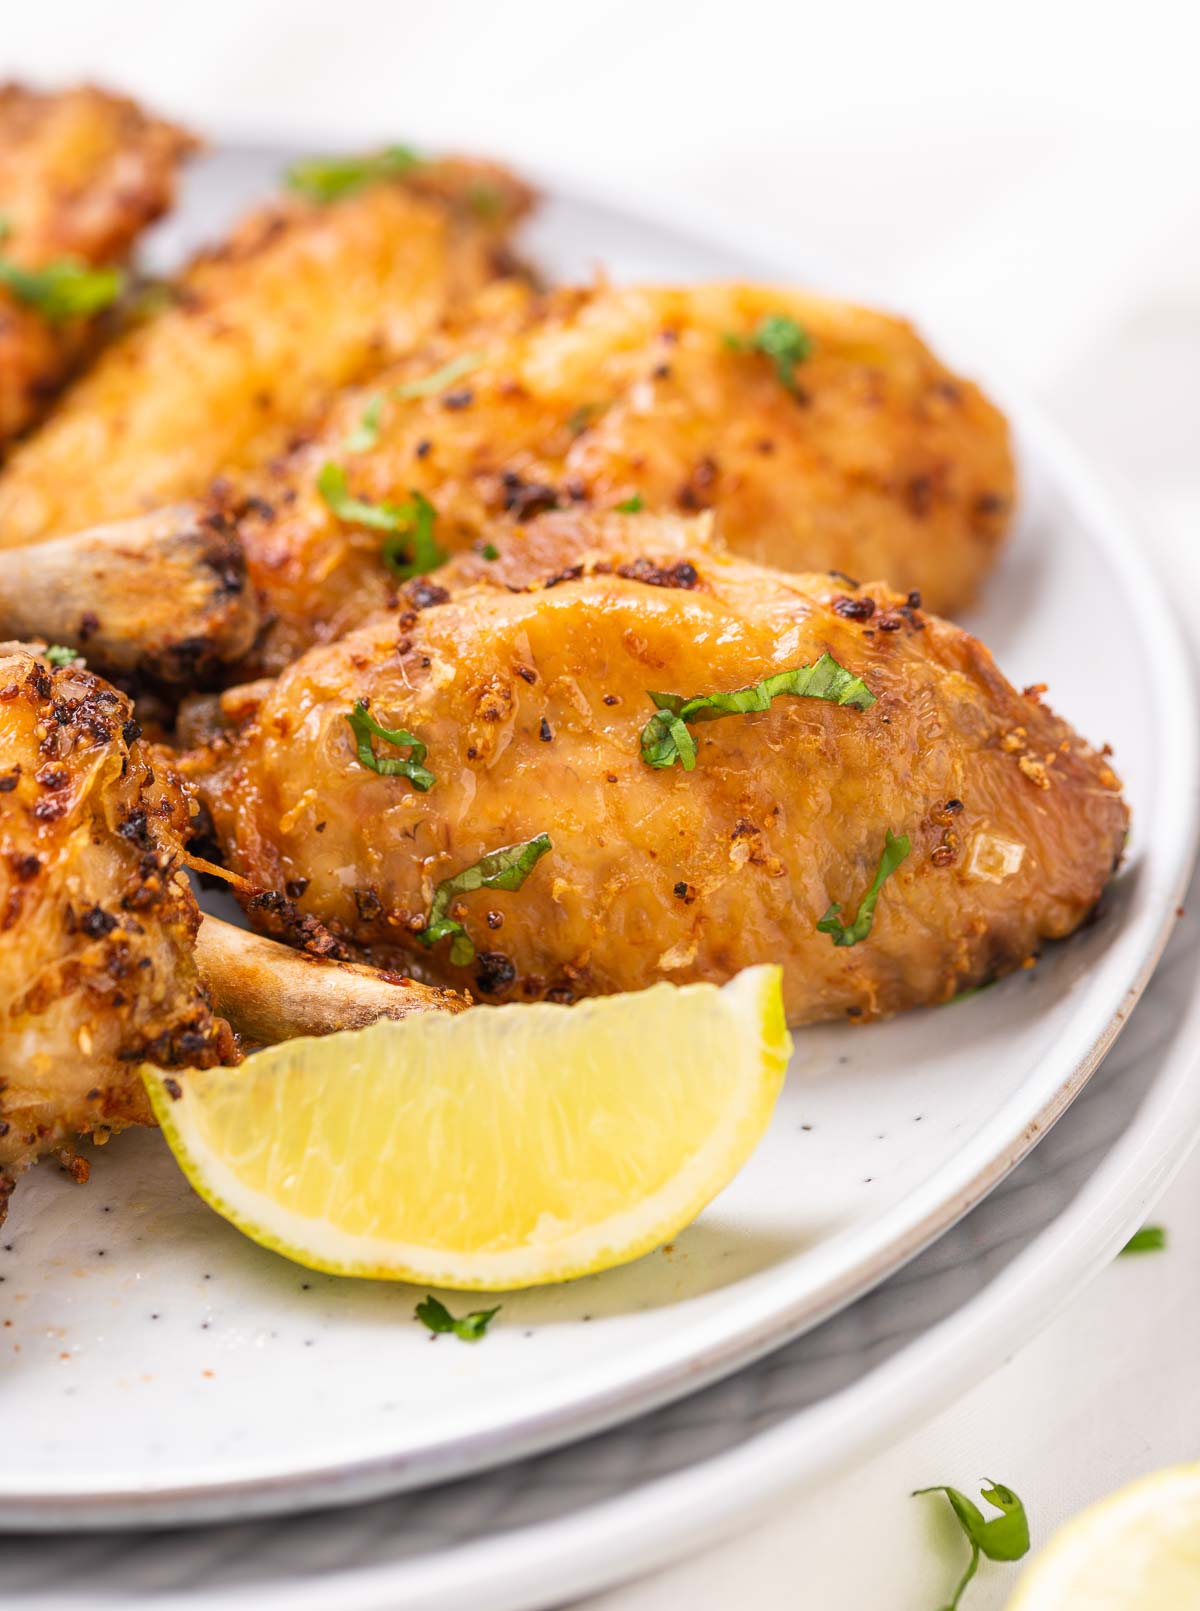
If you're watching carbs but still want wings that actually taste good, this is the recipe. The air fryer does most of the work here — you get genuinely crispy skin without deep frying, and the lemon pepper coating is bright, tangy, and simple to put together. I made these for a get-together last winter and nobody asked whether they were keto. They just ate them.
Ingredients
- 2 lbs chicken wings, split into flats and drumettes
- 1 tablespoon baking powder (aluminum-free)
- 1 teaspoon salt
- 2 teaspoons lemon pepper seasoning
- 1 teaspoon garlic powder
- 1 tablespoon olive oil
- Zest of 1 lemon
- Fresh lemon wedges, for serving
Instructions
- Pat wings completely dry with paper towels — this is the step that makes or breaks crispiness. Toss them in a bowl with the baking powder, salt, garlic powder, and lemon pepper seasoning until evenly coated.
- Drizzle olive oil over the wings and toss again. Arrange in a single layer in the air fryer basket — don't stack them or they'll steam instead of crisp.
- Air fry at 400°F for 22-25 minutes, flipping halfway through, until the skin is golden and visibly crispy.
- Remove from the air fryer, immediately scatter fresh lemon zest over the hot wings, and serve with lemon wedges on the side.
Tips
- Tip: Baking powder (not baking soda) is the secret to crackly skin — it draws moisture out during cooking. Don't skip it.
- Tip: If you want extra tang, squeeze fresh lemon juice over the wings right before serving in addition to the zest.
- Tip: Work in batches if your air fryer is small — a crowded basket will give you pale, soft skin instead of the crisp you're after.
17. Honey Sriracha Meatballs
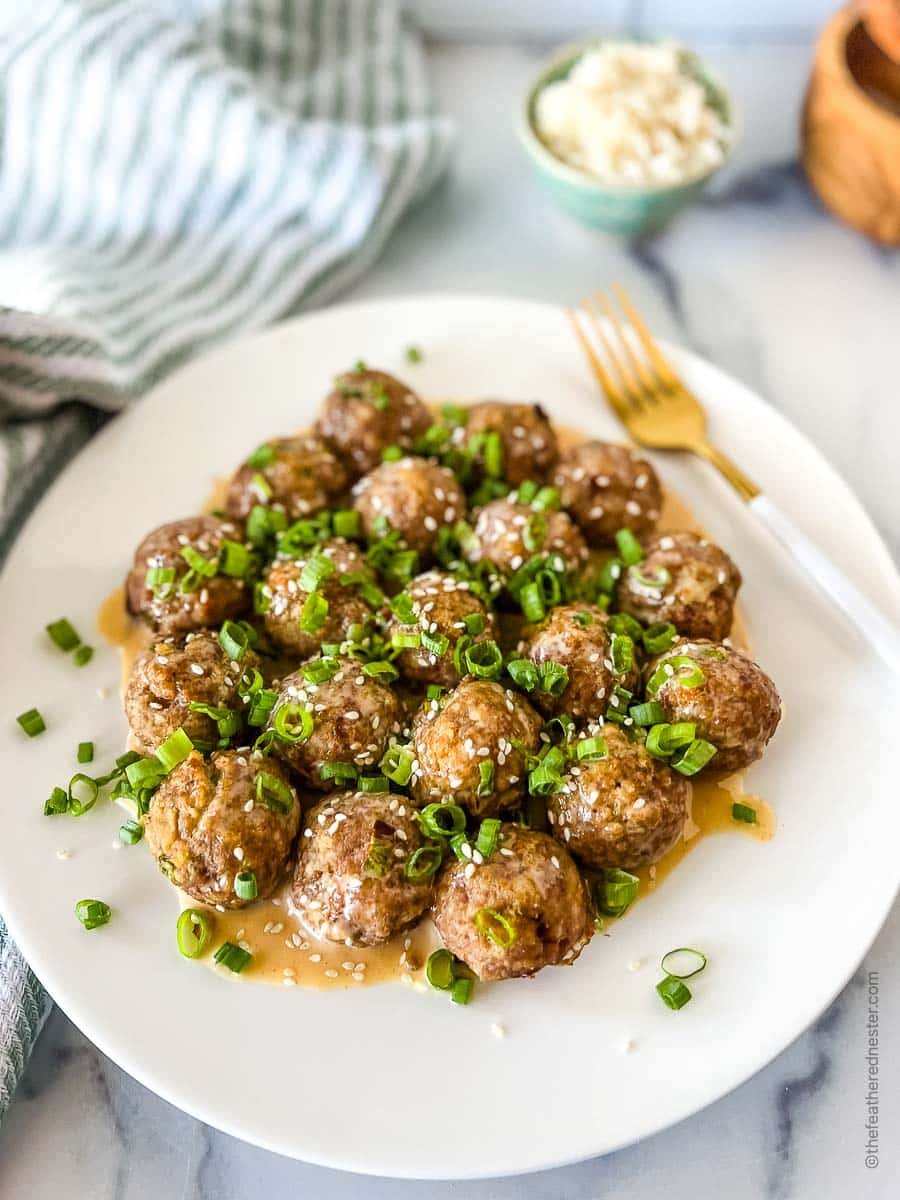
These meatballs hit every note — sweet from honey, spicy from sriracha, and savory all the way through. The glaze gets sticky and glossy on the outside while the inside stays tender, which is exactly what you want in a party meatball. They hold well in a slow cooker on warm if you're serving them at a gathering, which makes them genuinely low-maintenance once they're done.
Ingredients
- 1 lb ground chicken
- ¼ cup breadcrumbs
- 1 egg
- 2 cloves garlic, minced
- ½ teaspoon salt
- ¼ cup honey
- 2 tablespoons sriracha (adjust to your heat preference)
- 1 tablespoon soy sauce
- 1 teaspoon rice vinegar
- Sliced green onions, for garnish
Instructions
- Preheat oven to 400°F. Line a baking sheet with parchment paper. Mix the ground chicken, breadcrumbs, egg, garlic, and salt in a bowl until just combined — don't overwork it or the meatballs will be dense.
- Roll into 1½-inch balls and arrange on the prepared baking sheet. Bake for 18-20 minutes until cooked through and lightly golden on the outside.
- While meatballs bake, whisk together honey, sriracha, soy sauce, and rice vinegar in a small saucepan over medium-low heat. Simmer for 3-4 minutes until slightly thickened.
- Toss the baked meatballs in the warm glaze until fully coated. Transfer to a serving dish and scatter green onions on top.
Tips
- Tip: Ground chicken is stickier than beef — wet your hands lightly before rolling the meatballs and they'll shape much more easily.
- Tip: If you want it less spicy, pull the sriracha back to 1 tablespoon and add an extra teaspoon of honey to balance.
- Tip: These reheat really well — make them a day ahead, store glazed in the fridge, and warm in a skillet over low heat before serving.
16. Buffalo Chicken Bombs

Picture a pull-apart dough ball stuffed with buffalo chicken and melted cheese — that's what you're getting here. The outside bakes up golden and slightly crisp while the inside is hot, saucy, and gooey. These are the kind of appetizer that disappears from the tray before you've even finished setting everything else out. I make a double batch because one is never enough.
Ingredients
- 1½ cups cooked shredded chicken
- ⅓ cup buffalo hot sauce (Frank's RedHot works great)
- 4 oz cream cheese, softened
- 1 cup shredded mozzarella cheese
- 1 can (16 oz) refrigerated biscuit dough (like Pillsbury Grands)
- 2 tablespoons butter, melted
- ½ teaspoon garlic powder
- Ranch or blue cheese dressing, for dipping
Instructions
- Preheat oven to 375°F. Mix shredded chicken with buffalo sauce, cream cheese, and mozzarella in a bowl until well combined into a thick, scoopable filling.
- Separate the biscuit dough into individual rounds and flatten each one into a roughly 4-inch circle with your palm.
- Place a heaping tablespoon of the chicken filling in the center of each round. Pull the edges up around the filling and pinch firmly to seal — make sure there are no gaps or the cheese will escape during baking.
- Arrange seam-side down on a parchment-lined baking sheet. Stir garlic powder into the melted butter and brush generously over each bomb. Bake for 18-22 minutes until deep golden brown.
Tips
- Tip: Rotisserie chicken from Costco or Walmart is perfect here — just shred it while it's still warm and it pulls apart in seconds.
- Tip: Press the seam really well — any opening and you'll have molten cheese pooling on your baking sheet instead of staying inside the bomb.
- Tip: Serve immediately — these are at their best when the cheese inside is still stretchy and hot.
15. Chicken Fingers with 6 Mayo Dipping Sauces

Chicken fingers don't need much convincing — Saad has been requesting them since he could talk. What makes this version stand out is the lineup of six mayo-based dipping sauces that go alongside, each with a completely different flavor profile. You get everything from smoky chipotle to honey mustard to garlic herb, so there's genuinely something for every person at the table. It's a great setup for a crowd because everyone just picks their favorite and goes.
Ingredients
- 1½ lbs chicken breast, cut into strips
- 1 cup buttermilk (or regular milk with 1 tablespoon vinegar, left to sit 5 minutes)
- 1 cup all-purpose flour
- 1 cup panko breadcrumbs
- 1 teaspoon paprika
- 1 teaspoon garlic powder
- Salt and pepper to taste
- Oil for frying (or cooking spray if baking)
- 1 cup mayonnaise, divided among 6 small bowls for the dipping sauces
- Mix-ins for the sauces: sriracha, chipotle in adobo, honey + mustard, garlic + herbs, lemon + capers, and ketchup + relish
Instructions
- Soak chicken strips in buttermilk for at least 30 minutes (up to 2 hours in the fridge) — this keeps them juicy and helps the coating stick.
- Mix flour, panko, paprika, garlic powder, salt, and pepper in a shallow dish. Pull each strip from the buttermilk, let the excess drip off, and press firmly into the coating on all sides.
- To fry: heat about 1 inch of oil in a heavy skillet to 350°F. Fry strips in batches for 3-4 minutes per side until golden and cooked through. To bake: arrange on an oiled rack over a sheet pan and bake at 425°F for 20-22 minutes, flipping once.
- While the chicken cooks, prepare the six dipping sauces by stirring each mix-in into roughly 2-3 tablespoons of mayo per sauce. Season each one with salt and a squeeze of lemon if needed.
Tips
- Tip: Panko gives a noticeably crunchier crust than regular breadcrumbs — it's worth keeping a box in your pantry specifically for this.
- Tip: Don't skip the buttermilk soak — even 30 minutes makes a real difference in how tender and juicy the chicken turns out.
- Tip: The dipping sauces can all be made the night before and stored covered in the fridge, which makes party prep much easier.
14. Garlic Lemon Pepper Wings
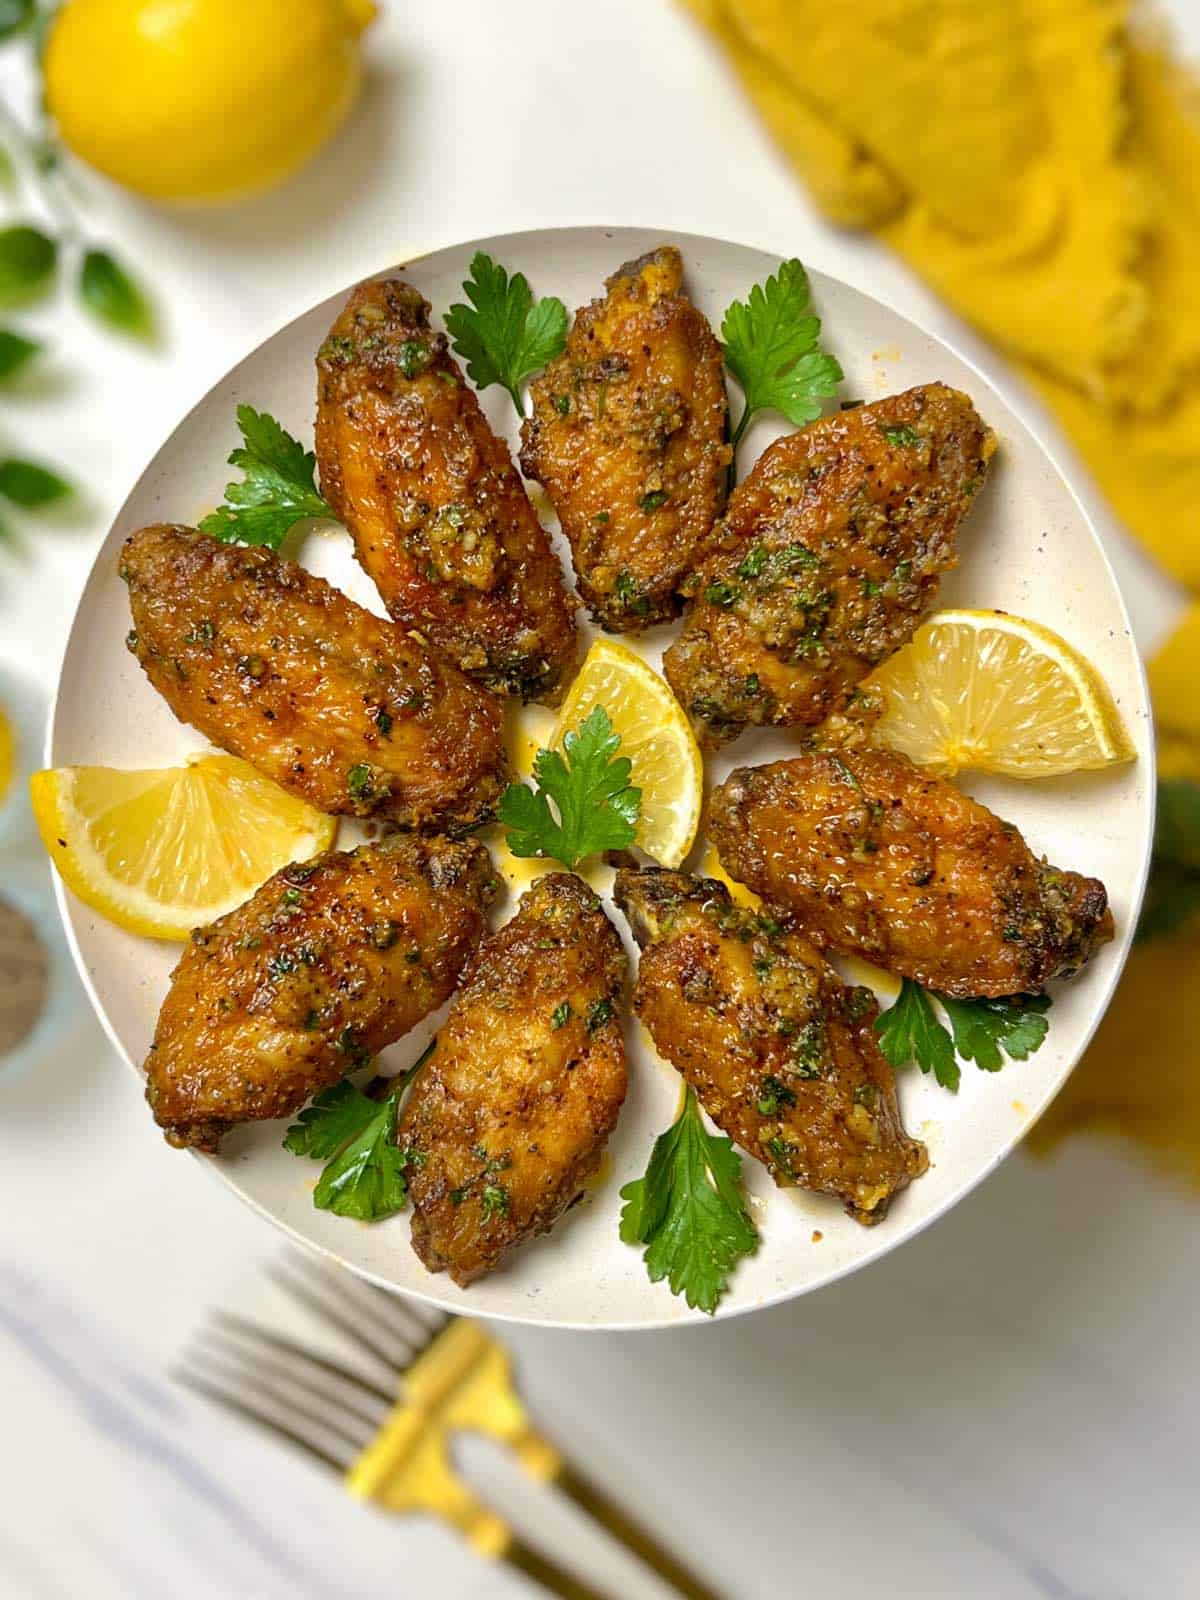
Lemon pepper wings are already great, but adding garlic to the equation takes them somewhere better. The combination of minced garlic, cracked black pepper, and fresh lemon zest creates a coating that's bold without being heavy — these don't need a dipping sauce, though nobody will complain if you put ranch on the side. The trick is getting the wings properly dry before they go in the oven so the skin crisps up instead of steaming.
Ingredients
- 2 lbs chicken wings, split
- 1 tablespoon olive oil
- 4 cloves garlic, minced
- Zest of 1 large lemon
- 1 tablespoon fresh lemon juice
- 1½ teaspoons coarsely cracked black pepper
- 1 teaspoon salt
- ½ teaspoon onion powder
- 2 tablespoons butter, melted
Instructions
- Preheat oven to 425°F. Pat wings thoroughly dry with paper towels and place on a wire rack set over a foil-lined baking sheet — the rack lets hot air circulate underneath and crisps the skin from all sides.
- Toss wings with olive oil, salt, onion powder, and half the cracked pepper. Spread back out on the rack and bake for 40-45 minutes, flipping once at the halfway mark, until deeply golden.
- While wings finish baking, combine melted butter, minced garlic, lemon zest, lemon juice, and remaining pepper in a large bowl.
- Pull the wings from the oven and immediately toss them in the garlic lemon butter mixture until every piece is well coated. Serve right away.
Tips
- Tip: For extra-crispy results, leave the wings uncovered on the rack in the fridge for an hour before baking — that air-drying step makes a noticeable difference.
- Tip: Add the lemon butter toss right after the wings come out of the oven — the residual heat blooms the garlic slightly and helps the coating cling.
- Tip: Freshly cracked pepper has noticeably more bite than pre-ground — if you have a pepper mill, use it here.
13. Hot Honey Lemon Pepper Wings
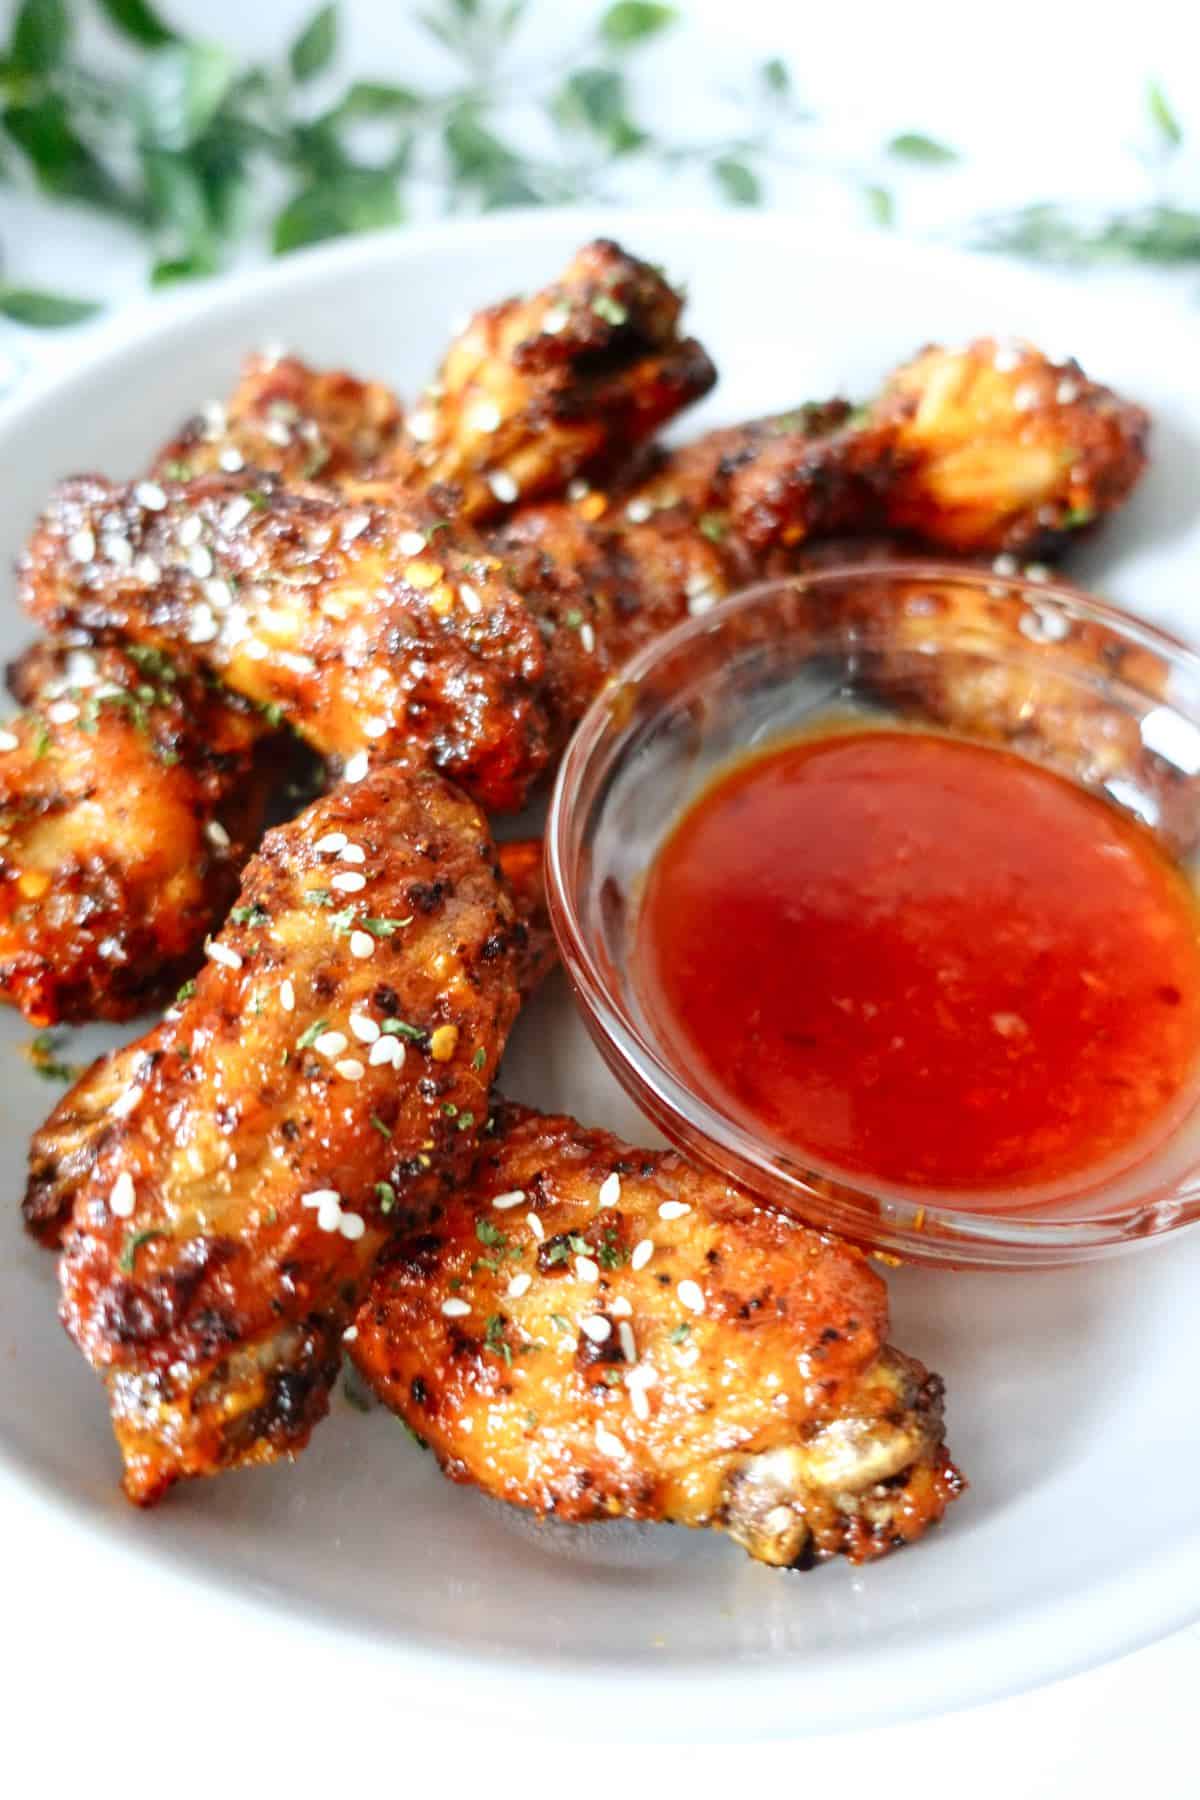
Lemon pepper wings are good. Hot honey lemon pepper wings are something else entirely. The hot honey glaze hits you with sweetness first, then the heat creeps in, and the lemon pepper keeps everything bright and sharp so it doesn't go cloying. I made these for a get-together last Eid and had people asking me what was in them — the combination sounds simple but it really works. These are the kind of wings that make people hover near the platter.
Ingredients
- 2 lbs chicken wings, split into flats and drumettes
- 1 tablespoon baking powder
- 1 teaspoon salt
- 2 teaspoons lemon pepper seasoning
- ¼ cup hot honey (Mike's Hot Honey works great, or mix regular honey with ½ teaspoon red pepper flakes)
- 2 tablespoons unsalted butter
- 1 tablespoon fresh lemon juice
- Zest of 1 lemon
Instructions
- Pat wings completely dry with paper towels — this is the step that actually makes them crispy, so don't rush it. Toss with baking powder, salt, and lemon pepper seasoning until evenly coated.
- Arrange on a wire rack set over a baking sheet. Bake at 425°F for 45 minutes, flipping halfway through, until the skin is golden and crisp.
- While wings bake, melt butter in a small saucepan over low heat. Stir in hot honey, lemon juice, and lemon zest. Keep warm.
- Pull wings from the oven and toss immediately in the warm hot honey glaze. Serve right away — they don't sit well once sauced.
Tips
- Tip: Don't skip the baking powder — it draws moisture out of the skin and gives you that crunch without a drop of oil.
- Tip: If you can't find hot honey at your local store, Walmart and Costco usually stock Mike's Hot Honey, or just DIY it with regular honey and chili flakes warmed together.
- Tip: Extra lemon zest stirred in right before serving brightens the whole glaze — don't skip it if you want that punchy citrus finish.
12. Twice Cooked Chicken Wing Confit

I'll be honest — when I first came across chicken wing confit, I thought it sounded too fussy for a home cook like me. But the method is actually straightforward: you slow-cook the wings in fat until they're impossibly tender, then blast them with high heat to get the skin shatteringly crisp. The two-stage cooking process is what makes these different from anything else on this list. The meat practically falls off the bone, and the skin crisps up better than anything you'd get from straight baking or frying. Worth the extra step when you want to impress.
Ingredients
- 2 lbs chicken wings, split
- 2 cups olive oil or neutral oil (canola works fine)
- 4 garlic cloves, smashed
- 3 sprigs fresh thyme (or ½ teaspoon dried)
- 1 teaspoon salt
- ½ teaspoon black pepper
- ½ teaspoon smoked paprika
Instructions
- Season wings with salt, pepper, and smoked paprika. Place in a deep baking dish with garlic and thyme, then pour oil over until wings are mostly submerged.
- Cover tightly with foil and bake at 275°F for 1 hour 30 minutes. The wings should be very tender but still holding their shape.
- Remove wings from the oil and let them rest on a wire rack for 10 minutes. At this point you can refrigerate them for up to 2 days before the second cook.
- When ready to serve, crank the oven to 450°F (or use a broiler) and roast the confit wings for 15–20 minutes until the skin is deep golden and crisp. Serve immediately.
Tips
- Tip: The confit oil left behind is incredibly flavorful — strain it and use it to roast vegetables or fry eggs. Don't throw it away.
- Tip: Do the first cook the day before a party and refrigerate overnight — the second high-heat cook takes under 20 minutes, which is very manageable when guests are arriving.
- Tip: You don't need fancy duck fat for confit — a good neutral oil or even extra virgin olive oil gets the job done at home.
11. Baked Crispy BBQ Chicken Wings

These are the wings I make when I want something crowd-friendly without pulling out a deep fryer. Baking at high heat with a little baking powder in the dry rub is what gets the skin genuinely crispy — then you brush on BBQ sauce in the last few minutes so it caramelizes rather than burning. My husband eats these with rice, Saad dunks them straight into extra BBQ sauce, and honestly both approaches work. This is the recipe I'd suggest to anyone who's nervous about wings — it's forgiving, the oven does most of the work, and the result looks like you tried much harder than you did.
Ingredients
- 2 lbs chicken wings, split
- 1 tablespoon baking powder
- 1 teaspoon garlic powder
- 1 teaspoon smoked paprika
- 1 teaspoon salt
- ½ teaspoon black pepper
- ¾ cup BBQ sauce (your favorite store-bought — Sweet Baby Ray's is reliable)
Instructions
- Dry the wings thoroughly with paper towels, then toss in baking powder, garlic powder, smoked paprika, salt, and pepper until evenly coated.
- Place on a wire rack over a lined baking sheet. Bake at 425°F for 40 minutes, flipping once at the 20-minute mark.
- Brush wings generously with BBQ sauce and return to the oven for 8–10 more minutes until the sauce is sticky and caramelized at the edges.
- Let rest 5 minutes before serving — the sauce sets a bit and sticks better to the skin.
Tips
- Tip: Add the BBQ sauce only in the last 10 minutes — if it goes on too early it burns before the skin crisps, which I learned the frustrating way.
- Tip: A wire rack is important here — it lets air circulate under the wings so the underside crisps instead of steaming against the pan.
- Tip: For smokier flavor without a smoker, use hickory-smoked BBQ sauce and double the smoked paprika in the dry rub.
10. Soy Garlic Chicken Wings
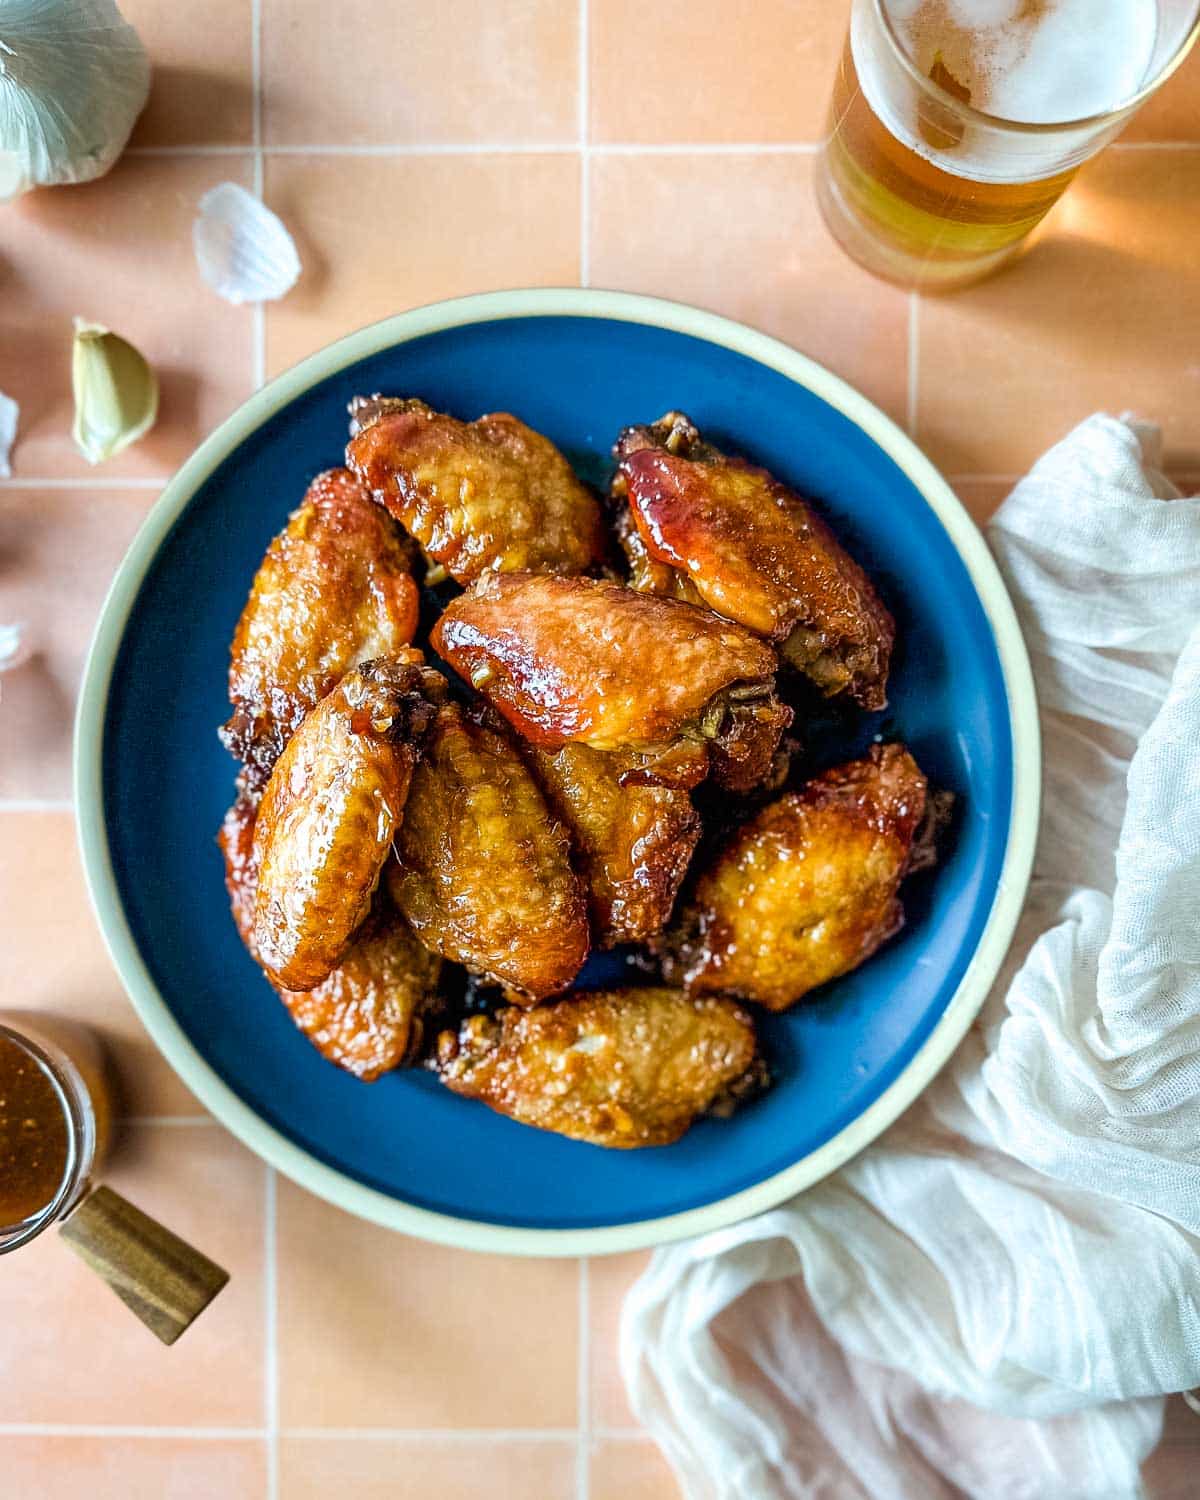
Soy garlic wings are one of those recipes where the ingredient list looks almost too short to produce anything interesting — and then you taste them and understand. The soy-garlic glaze reduces down into something deeply savory and slightly sticky, coating each wing in that umami-forward flavor that makes Korean-style wings so addictive. I make a double batch every time because one batch disappears before I've finished washing up the pan. These work just as well in the oven as they do in a fryer, which is how I always make them.
Ingredients
- 2 lbs chicken wings, split
- 1 tablespoon baking powder
- ½ teaspoon salt
- ⅓ cup soy sauce (low-sodium preferred)
- 3 tablespoons honey
- 6 garlic cloves, minced
- 1 tablespoon sesame oil
- 1 teaspoon rice vinegar
- Sesame seeds and sliced green onions, to garnish
Instructions
- Pat wings dry, toss with baking powder and salt, and arrange on a wire rack over a baking sheet. Bake at 425°F for 45 minutes, flipping halfway, until crispy.
- While wings bake, combine soy sauce, honey, minced garlic, sesame oil, and rice vinegar in a small saucepan. Simmer over medium heat for 5–7 minutes, stirring, until slightly thickened.
- Toss hot wings in the soy garlic glaze until every piece is well coated. The sauce should cling — if it seems too thin, let it simmer another 2 minutes before adding the wings.
- Garnish with sesame seeds and green onions and serve immediately.
Tips
- Tip: Low-sodium soy sauce is important here — regular soy with the reduction can get very salty very fast.
- Tip: If you want more heat, add ½ teaspoon gochujang or a pinch of red pepper flakes to the glaze while it simmers.
- Tip: Sesame oil goes in at the end of the glaze, not the beginning — high heat kills the flavor, so add it off the heat or right at the end of simmering.
9. Hot Honey Lemon Pepper Wings
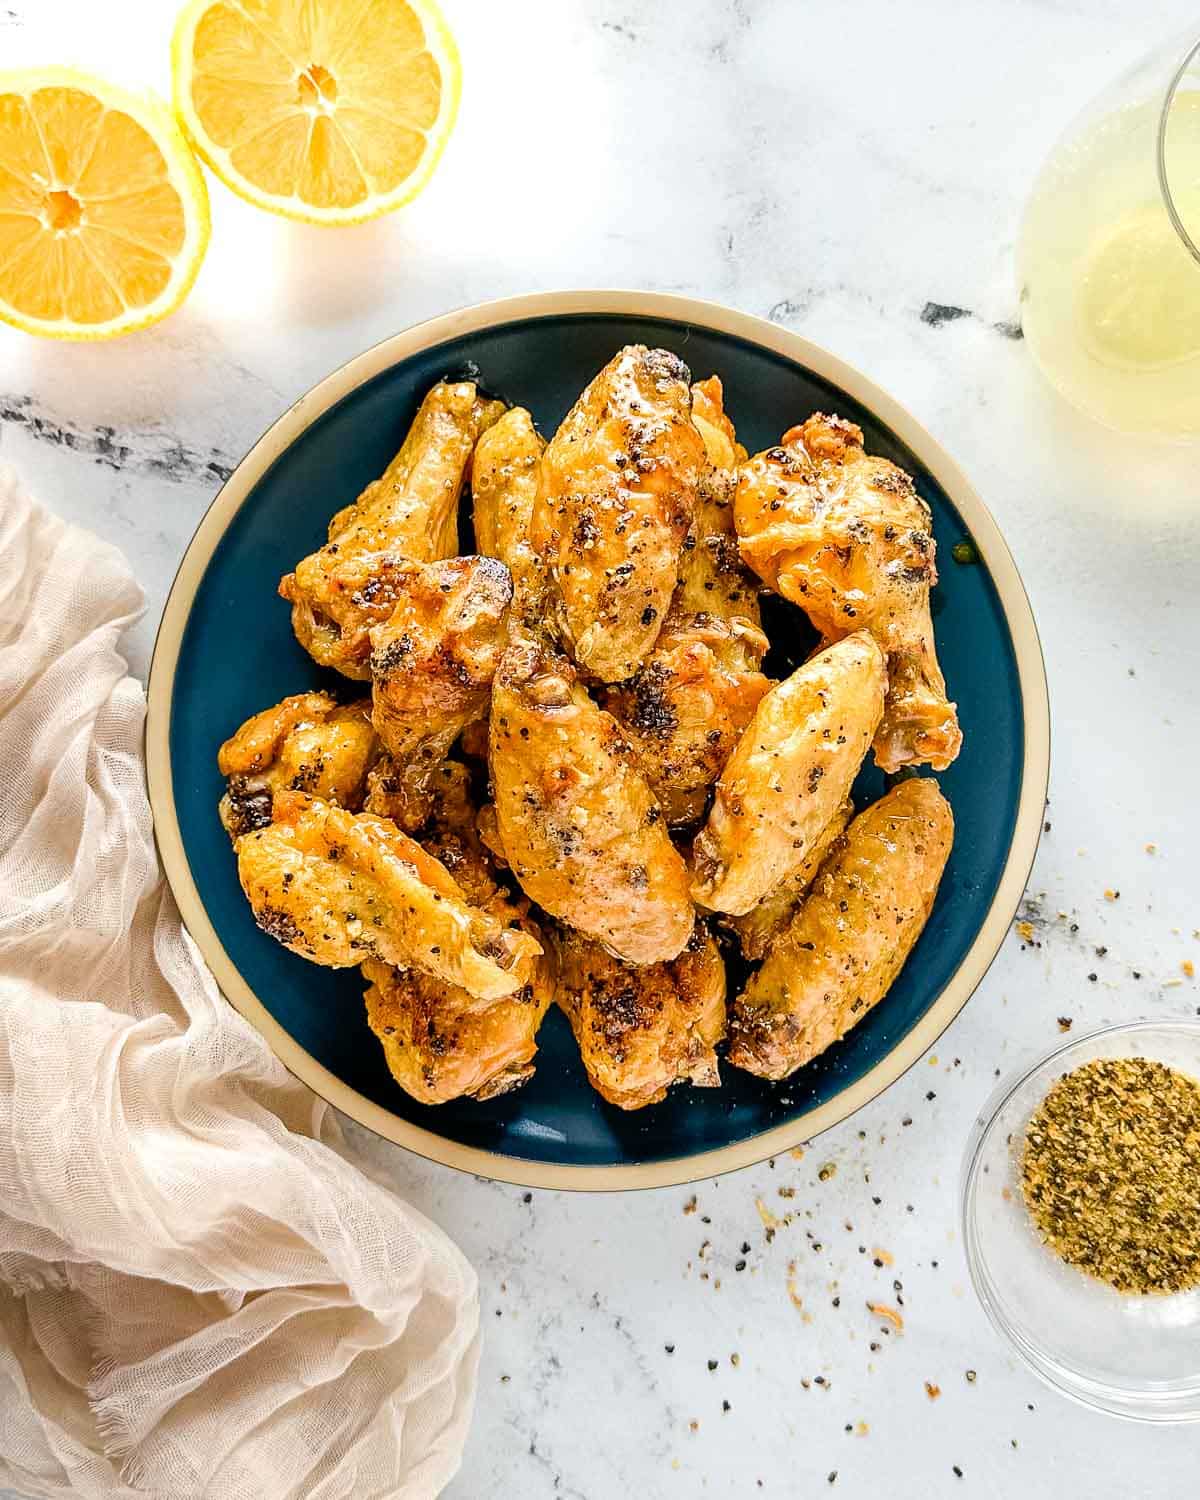
Yes, there are two hot honey lemon pepper wing recipes in this roundup — and they're different enough to both earn their place. This version leans harder into the lemon pepper seasoning as a dry rub rather than just a background note, which gives you a more pronounced citrusy bite before the hot honey glaze even comes into play. If the first version is balanced, this one is bolder. I like keeping both in rotation depending on what I'm going for — the subtle version for mixed crowds, this one for people who actually want to taste the seasoning.
Ingredients
- 2 lbs chicken wings, split
- 1 tablespoon baking powder
- 1 tablespoon lemon pepper seasoning (generous — this is the star)
- ½ teaspoon salt
- ½ teaspoon cayenne pepper
- 3 tablespoons hot honey
- 1 tablespoon unsalted butter
- Juice and zest of 1 lemon
Instructions
- Dry wings well and toss with baking powder, lemon pepper seasoning, salt, and cayenne until everything is coated. The dry rub should be thick enough that you can see it on the skin.
- Set on a wire rack over a baking sheet and bake at 425°F for 45 minutes, flipping once, until the skin is crisp and deeply golden.
- Melt butter in a small pan, stir in hot honey, lemon juice, and lemon zest. Remove from heat as soon as it's combined — you don't want to cook the glaze long here, just warm it through.
- Toss wings in the glaze right before serving. Finish with an extra pinch of lemon pepper on top if you want more punch.
Tips
- Tip: The lemon pepper seasoning in the dry rub and the lemon juice in the glaze work differently — the rub toasts into the skin, the glaze keeps things fresh and bright. Don't skip either one.
- Tip: Cayenne is adjustable — start with ¼ teaspoon if you're cooking for kids or heat-sensitive guests, and work up from there.
- Tip: These wings are best eaten within 10 minutes of saucing — the glaze starts to soften the crust if they sit too long, so time your finish accordingly.
26. Restaurant-Style Chicken 65
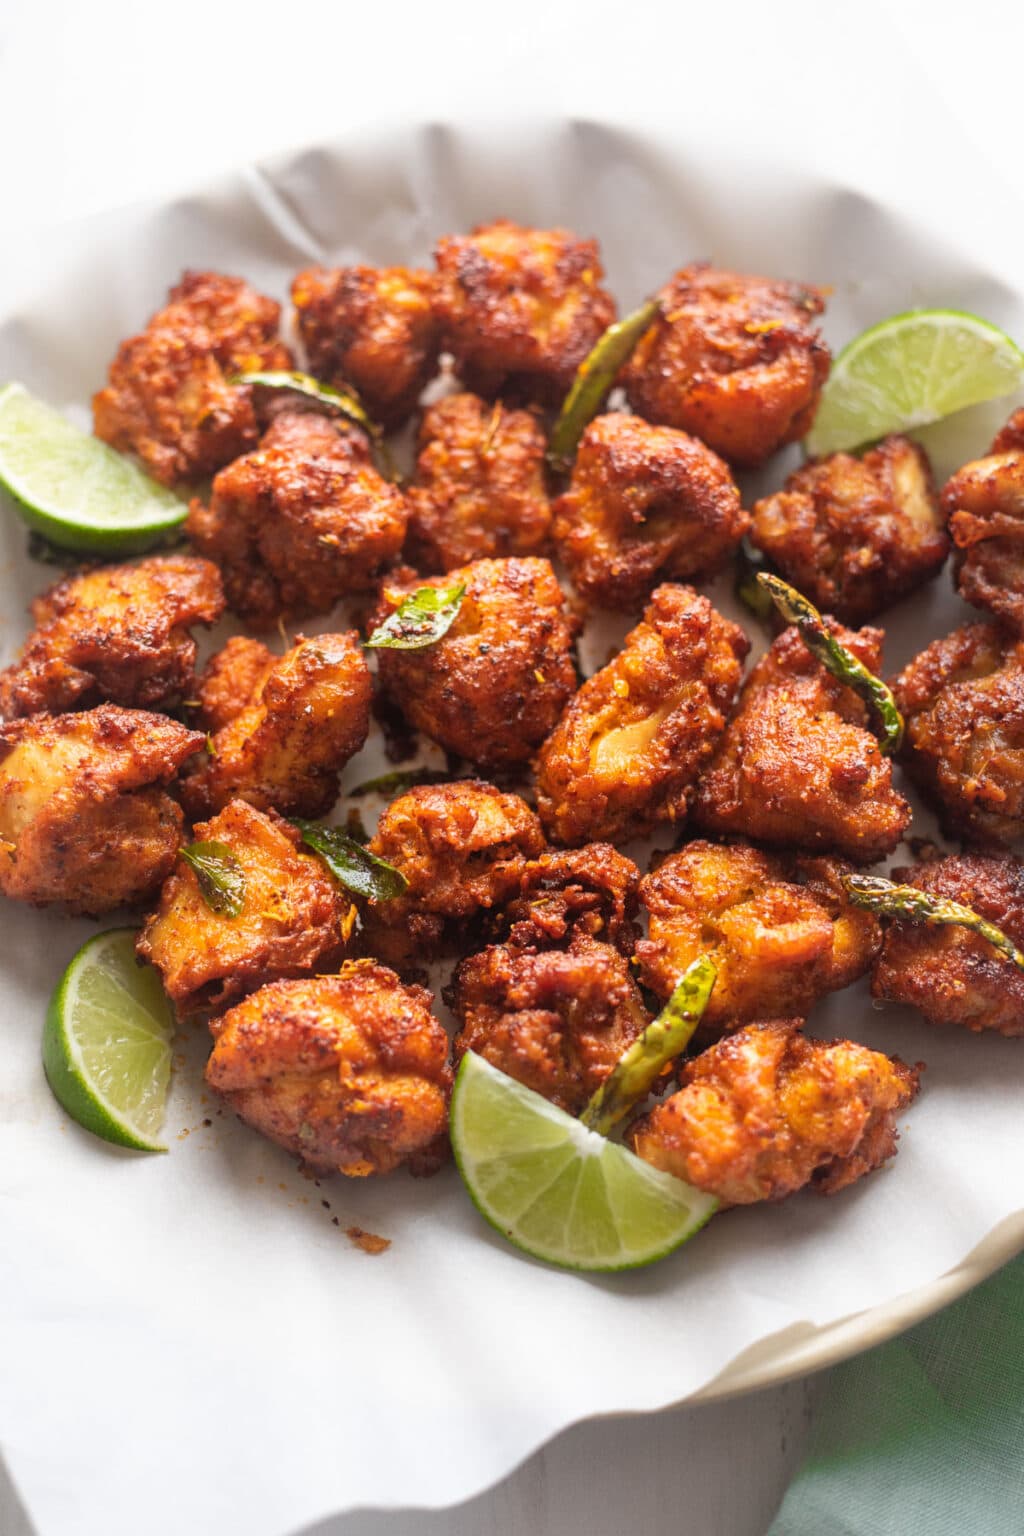
Chicken 65 is one of those recipes I grew up eating at Pakistani-Chinese restaurants — yes, it traveled that far and took on its own character. The original is from South India, and it's deeply spiced, tangy, and fiery in a way that's completely different from anything you'd find at a Western restaurant. The marinade does most of the work here: yogurt, red chili, ginger-garlic paste, and a handful of whole spices that get blitzed right into the batter. Don't skip the curry leaves if you can find them — they give it that signature restaurant smell the moment they hit the hot oil. If you're making this for a crowd, I'd double the batch because it disappears fast.
Ingredients
- 1½ lbs boneless skinless chicken thighs, cut into 1½-inch pieces
- 3 tablespoons plain yogurt
- 1½ teaspoons ginger-garlic paste (or 1 teaspoon minced garlic + ½ teaspoon grated ginger)
- 1 teaspoon Kashmiri red chili powder (or ½ teaspoon cayenne + ½ teaspoon sweet paprika)
- 1 teaspoon cumin powder
- ½ teaspoon turmeric
- 1 teaspoon garam masala
- 3 tablespoons cornstarch
- 2 tablespoons all-purpose flour
- Salt to taste
- Oil for deep frying
- 10-12 fresh curry leaves (optional but recommended)
- 2-3 dried red chilies, broken in half
Instructions
- In a large bowl, combine yogurt, ginger-garlic paste, chili powder, cumin, turmeric, garam masala, cornstarch, flour, and salt. Mix into a thick batter.
- Add the chicken pieces and toss until every piece is fully coated. Let it marinate for at least 30 minutes, or up to 4 hours in the fridge.
- Heat oil in a deep skillet or wok to 350°F. Fry the chicken in batches for 5-6 minutes, turning occasionally, until deep golden and cooked through. Don't crowd the pan or the temperature drops and the coating goes soggy.
- In a separate small pan, heat 1 tablespoon of oil over high heat. Add curry leaves and dried red chilies and fry for 30 seconds until fragrant and slightly crisp.
- Toss the fried chicken with the curry leaves and chilies. Serve immediately with sliced onion rings and a squeeze of lemon.
Tips
- Tip: Chicken thighs stay juicier than breasts here — I tried it with breast meat once and it was a bit dry by the time it fried through.
- Tip: Kashmiri chili powder gives that restaurant-red color without excessive heat. If you can't find it at an Indian grocery, mix equal parts paprika and a pinch of cayenne.
- Tip: For a lighter version, air fry at 400°F for 14-16 minutes, flipping halfway — the texture is slightly different but still really good.
27. Baked Chicken Wings
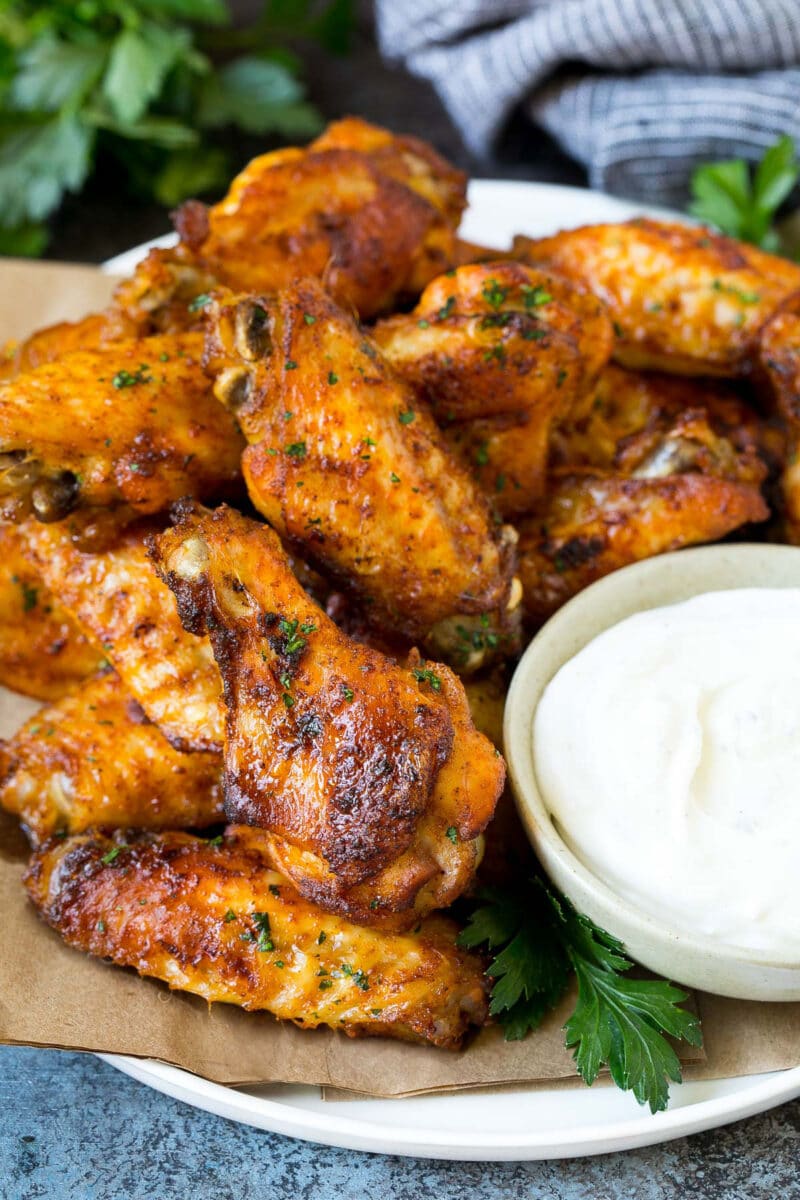
I was skeptical about baked wings for years — I assumed they'd come out rubbery and pale, nothing like the crispy ones you get from a deep fryer. Then I learned the trick: baking powder in the coating. It sounds odd, but it pulls moisture out of the skin and creates tiny air pockets that crisp up beautifully in a hot oven. These have become my go-to for game nights and family gatherings because I can get three sheet pans going at once without standing over a pot of hot oil. Season them however you like — buffalo sauce, honey garlic, plain salt and pepper — the base recipe works every time.
Ingredients
- 2 lbs chicken wings, separated into flats and drumettes
- 1 tablespoon baking powder (aluminum-free)
- 1 teaspoon garlic powder
- 1 teaspoon onion powder
- 1 teaspoon smoked paprika
- 1 teaspoon salt
- ½ teaspoon black pepper
- Your choice of sauce for tossing after baking (buffalo, honey garlic, BBQ, etc.)
Instructions
- Pat the wings completely dry with paper towels — this is the most important step. Any moisture left on the skin will steam instead of crisp.
- In a large bowl, toss the wings with baking powder, garlic powder, onion powder, paprika, salt, and pepper until evenly coated.
- Arrange wings in a single layer on a wire rack set over a foil-lined baking sheet. This lets hot air circulate all around the wings. Refrigerate uncovered for at least 1 hour (or overnight) for extra crispiness.
- Bake at 425°F for 45-50 minutes, flipping once halfway through, until the skin is deeply golden and crispy.
- Toss immediately with your sauce of choice and serve hot.
Tips
- Tip: The wire rack is non-negotiable for crispiness — without it, the bottom of the wings sits in its own fat and goes soft.
- Tip: If you don't have time to rest them in the fridge, at least let the coated wings sit at room temperature for 30 minutes before baking.
- Tip: Make sure your baking powder is aluminum-free — the regular kind can leave a faint metallic taste on the skin.
28. Chicken Taquitos (Baked or Fried)
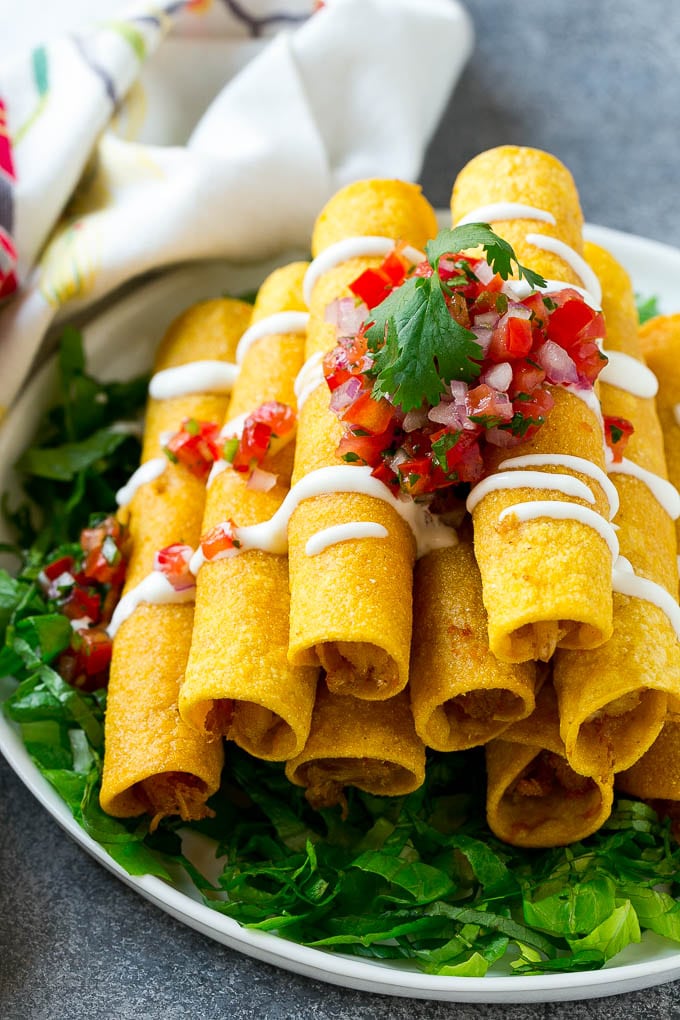
Taquitos weren't part of my childhood at all — the first time I had them was at a Mexican restaurant here and I immediately thought "this is basically a rolled samosa without the pastry." Same concept: spiced filling, crispy exterior, something good for dipping. My version uses rotisserie chicken which cuts the prep time dramatically, and the cream cheese in the filling keeps everything moist even after baking. Zainab loves these with sour cream; my husband goes straight for the salsa. If you choose to bake instead of fry, a quick spray of cooking oil on the outside before they go in the oven is what gets them properly golden.
Ingredients
- 2 cups shredded cooked chicken (rotisserie works great)
- 4 oz cream cheese, softened
- ½ cup shredded Mexican blend cheese
- 1 teaspoon cumin
- 1 teaspoon chili powder
- ½ teaspoon garlic powder
- ¼ cup salsa (from a jar is fine)
- Salt to taste
- 12-14 small (6-inch) flour or corn tortillas
- Cooking spray (for baking) or oil for frying
Instructions
- Mix together the shredded chicken, cream cheese, shredded cheese, cumin, chili powder, garlic powder, salsa, and salt until well combined.
- Warm the tortillas for 20-30 seconds in the microwave (wrapped in a damp paper towel) so they're pliable and won't crack when you roll them.
- Spoon 2-3 tablespoons of filling along the bottom edge of each tortilla and roll tightly. Place seam-side down on a baking sheet.
- To bake: Spray rolled taquitos generously with cooking spray. Bake at 425°F for 15-18 minutes, flipping once, until golden and crispy. To fry: Heat 1 inch of oil in a skillet to 350°F. Fry in batches seam-side down for 2-3 minutes per side until golden.
- Serve with sour cream, guacamole, or extra salsa for dipping.
Tips
- Tip: Corn tortillas give a more authentic flavor but crack easily — warm them well and don't overfill. Flour tortillas are more forgiving for beginners.
- Tip: These freeze beautifully before baking. Assemble, freeze on a sheet pan, then transfer to a zip bag. Bake straight from frozen at 425°F for about 20-22 minutes.
- Tip: Don't skip placing them seam-side down — that's what keeps them from unrolling as they cook.
29. Baked Chicken Meatballs
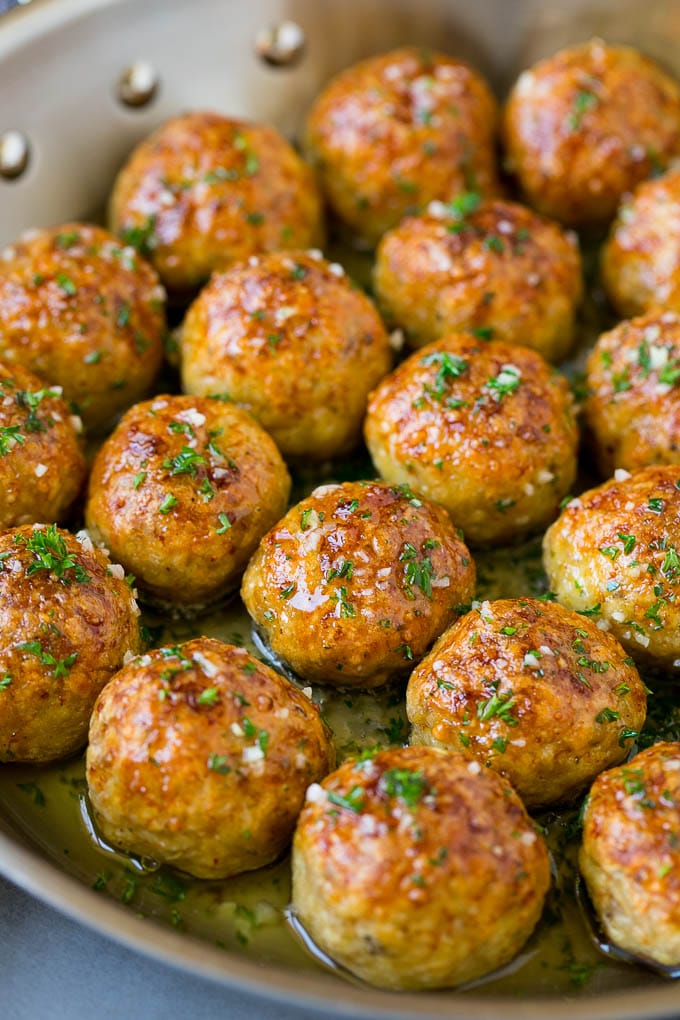
Ground chicken meatballs have a reputation for being dry, and honestly the first time I made them they were — I used chicken breast mince and baked them too long. The fix is simple: ground chicken thigh meat instead of breast, and pulling them out the moment they hit 165°F internally. These bake up in about 20 minutes, which makes them genuinely weeknight-friendly, and they work with almost any dipping sauce you have in the fridge — sweet chili, marinara, honey mustard, whatever. They're also one of the few appetizers I can make ahead and reheat without losing anything.
Ingredients
- 1 lb ground chicken (thigh preferred)
- ⅓ cup breadcrumbs (plain or Italian seasoned)
- 1 egg
- ¼ cup grated Parmesan cheese
- 2 garlic cloves, minced
- 2 tablespoons fresh parsley, finely chopped (or 1 teaspoon dried)
- 1 teaspoon Italian seasoning
- ½ teaspoon onion powder
- ¾ teaspoon salt
- ¼ teaspoon black pepper
Instructions
- Preheat oven to 400°F. Line a baking sheet with parchment paper and lightly grease it.
- In a large bowl, combine all ingredients and mix gently with your hands until just combined — overmixing makes the meatballs tough.
- Scoop and roll into balls about 1½ inches in diameter (a cookie scoop helps keep them uniform). Place on the prepared baking sheet with a little space between each.
- Bake for 18-22 minutes, until cooked through and lightly golden on the outside. Check with a meat thermometer — 165°F internal temperature is your target.
- Serve hot with your choice of dipping sauce.
Tips
- Tip: Wet your hands lightly before rolling — ground chicken is sticky and damp hands keep it from clumping to your palms.
- Tip: These reheat well in a 350°F oven for 8-10 minutes. I make a double batch on Sundays and use the leftovers in wraps during the week.
- Tip: For a gluten-free version, swap the breadcrumbs for an equal amount of almond flour — the texture is slightly denser but they hold together fine.
30. Butter Chicken Wings
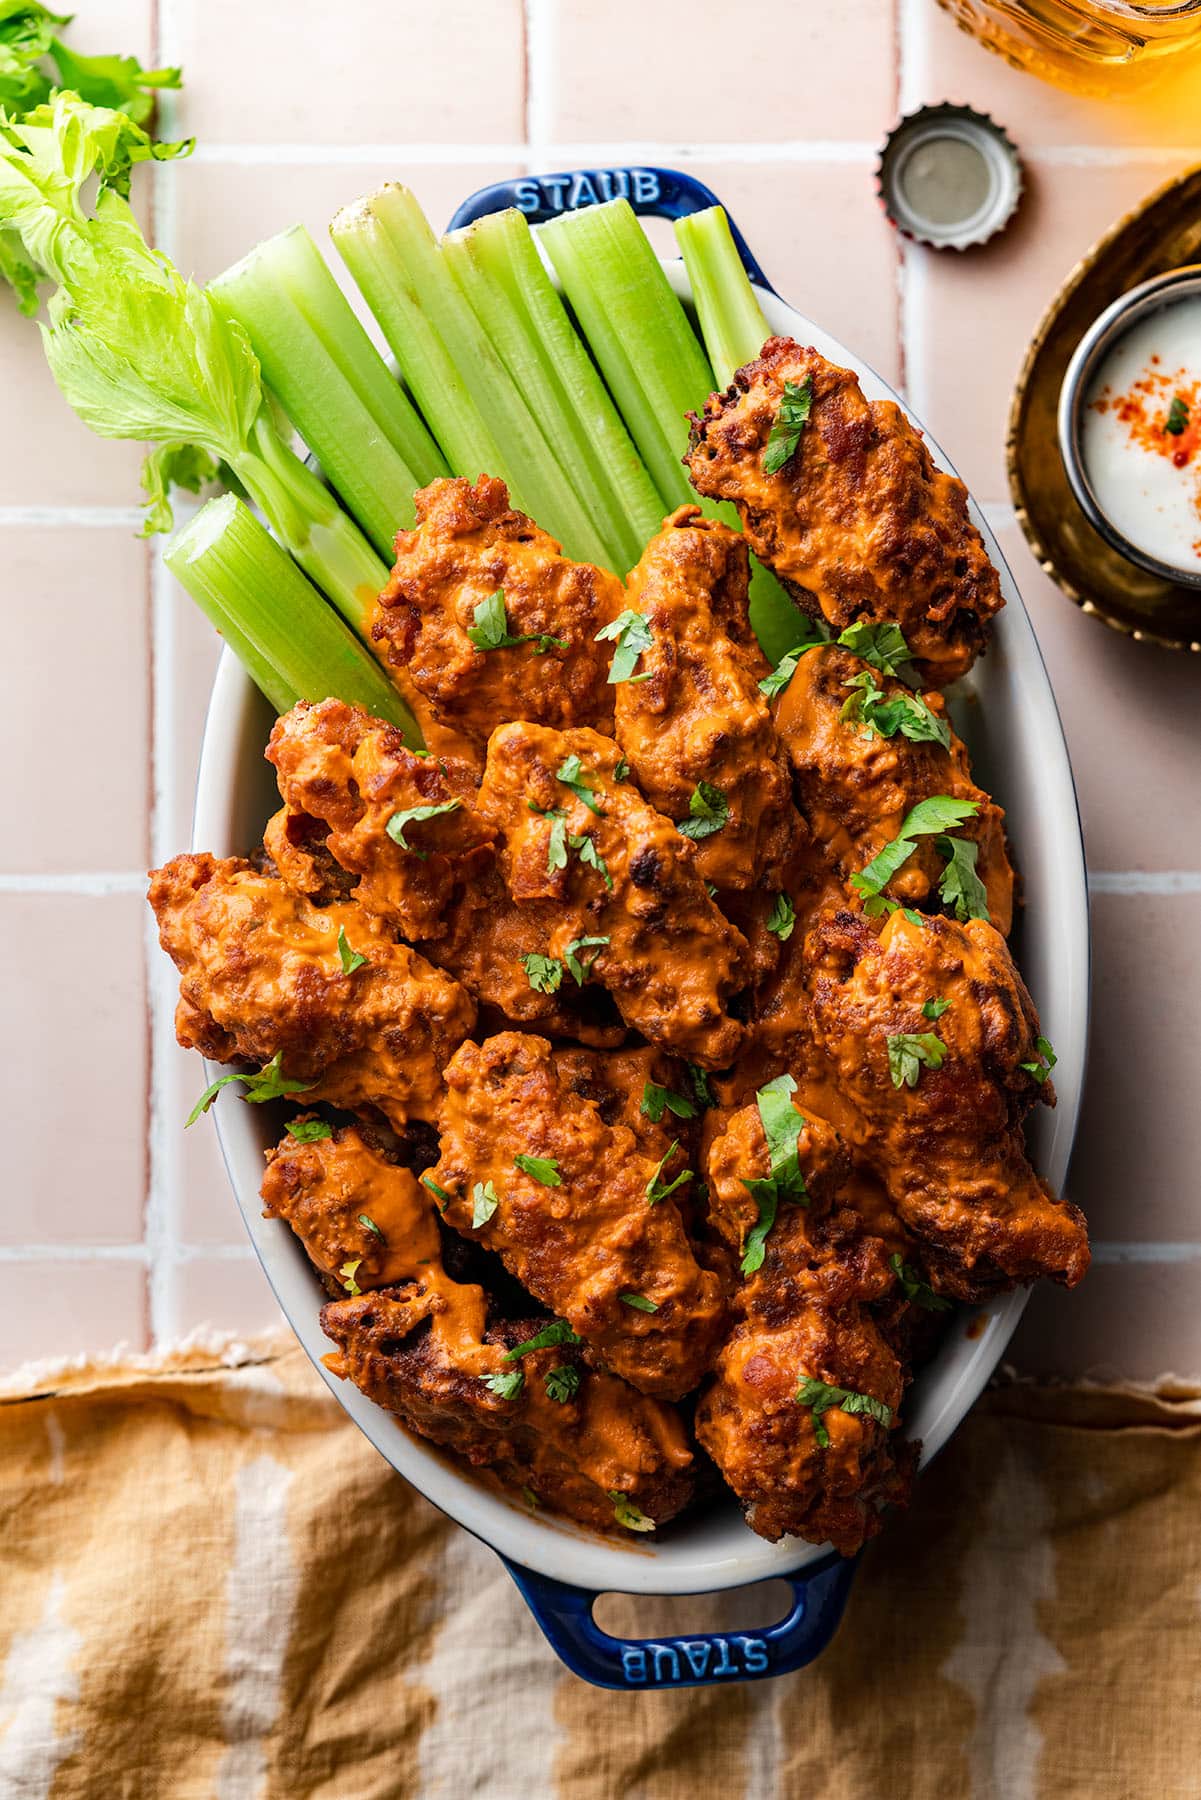
This one is genuinely clever — someone looked at butter chicken sauce and thought "what if I used it on wings instead of a curry" and the answer is: it works incredibly well. The sauce is creamy, mildly spiced with warm aromatics, slightly tangy from tomatoes, and it coats wings in a way that feels familiar if you grew up eating South Asian food but is also approachable for anyone who's never had butter chicken before. I make the sauce from scratch because I think the canned version doesn't have quite the same depth, but honestly a good store-bought butter chicken simmer sauce (Trader Joe's has a decent one) cuts the time in half. Grill or bake the wings first, then sauce them — don't try to bake them in the sauce or it burns.
Ingredients
- 2 lbs chicken wings, separated
- Salt and pepper to season wings
- 2 tablespoons butter
- 1 teaspoon ginger-garlic paste
- 1 cup canned crushed tomatoes
- ½ cup heavy cream
- 1 teaspoon garam masala
- 1 teaspoon cumin
- ½ teaspoon Kashmiri chili powder (or sweet paprika)
- 1 teaspoon sugar
- Salt to taste
- Fresh cilantro for garnish
Instructions
- Season wings with salt and pepper. Bake at 425°F on a wire rack for 45 minutes, flipping halfway, until golden and cooked through. (You can also grill them over medium-high heat for 20-25 minutes, turning occasionally.)
- While wings cook, make the butter chicken sauce. Melt butter in a saucepan over medium heat. Add ginger-garlic paste and cook for 1 minute until fragrant.
- Add crushed tomatoes, garam masala, cumin, chili powder, sugar, and salt. Simmer for 10 minutes, stirring occasionally, until thickened slightly.
- Stir in heavy cream and simmer for another 3-4 minutes until the sauce is rich and glossy. Taste and adjust salt.
- Toss the hot wings in the butter chicken sauce until fully coated. Garnish with fresh cilantro and serve immediately.
Tips
- Tip: The sauce can be made a day ahead and stored in the fridge — it actually tastes better the next day as the flavors develop.
- Tip: For a shortcut, use a store-bought butter chicken simmer sauce (Trader Joe's or Patak's both work well) — just simmer it with a splash of cream to enrich it.
- Tip: Serve with naan or warm pita on the side for scooping up the extra sauce — it's too good to leave in the bowl.
30. BBQ Chicken Flatbreads
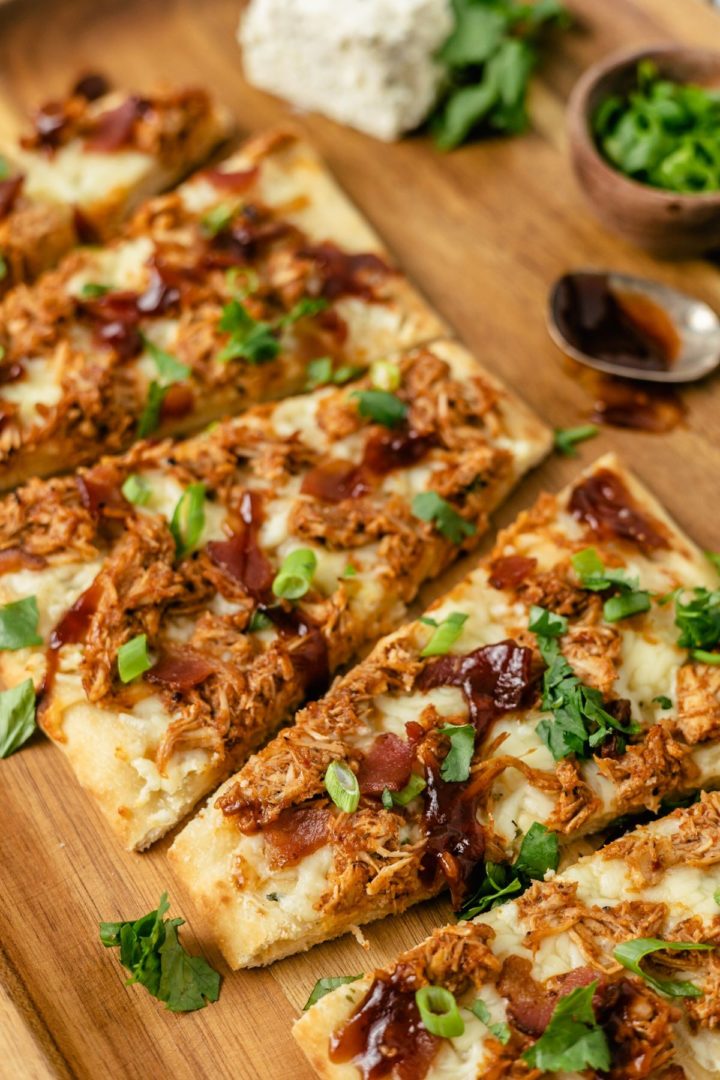
BBQ chicken flatbreads are one of those appetizers that look like you put in way more effort than you actually did. You get smoky, saucy chicken on a crispy flatbread base with melted cheese and a few veggies — and the whole thing comes together in under 20 minutes. I started making these on Friday nights when I needed something quick but wanted everyone to feel like it was a proper snack situation. They slice up easily into strips or squares, which makes them great for passing around at a gathering without needing plates or forks.
Ingredients
- 2 flatbreads or naan (store-bought is fine)
- 1½ cups cooked chicken, shredded or chopped
- ⅓ cup BBQ sauce (plus more for drizzling)
- 1 cup shredded mozzarella or a Mexican blend
- ¼ red onion, thinly sliced
- ½ cup corn kernels (frozen and thawed, or canned)
- Fresh cilantro or parsley to finish
Instructions
- Preheat your oven to 400°F. Place flatbreads on a baking sheet lined with foil.
- Toss the shredded chicken with BBQ sauce until well coated.
- Spread a thin layer of BBQ sauce over each flatbread, then top with cheese, sauced chicken, red onion, and corn.
- Bake for 10–12 minutes until the cheese is melted and the edges of the flatbread are crisp.
- Remove from the oven, drizzle with a little extra BBQ sauce, scatter over fresh herbs, slice, and serve immediately.
Tips
- Tip: Rotisserie chicken from Costco or Walmart works perfectly here — shred it while it's still warm and it pulls apart in seconds.
- Tip: Don't overload the flatbread or it'll go soggy in the middle — a thin, even layer of toppings gives you a crispier result.
- Tip: You can assemble these up to an hour ahead and keep them unbaked in the fridge — just pop them in the oven when guests arrive.
31. Buffalo Chicken Egg Rolls

Buffalo chicken egg rolls are exactly the kind of appetizer that disappears before you've even finished frying the last batch. You get that hot, tangy buffalo chicken filling — usually mixed with cream cheese and a little cheddar — wrapped up in a crispy shell that shatters when you bite into it. I make these whenever I want something that feels indulgent but is actually pretty straightforward. The filling takes about ten minutes to throw together, and the frying goes fast once you get your oil to the right temperature. Serve them with a side of ranch or blue cheese and they're done.
Ingredients
- 2 cups cooked chicken, shredded
- ⅓ cup buffalo hot sauce (Frank's RedHot works well)
- 4 oz cream cheese, softened
- ½ cup shredded cheddar cheese
- 2 green onions, sliced
- 10–12 egg roll wrappers
- Vegetable oil for frying
- Ranch or blue cheese dressing for serving
Instructions
- In a bowl, mix the shredded chicken with buffalo sauce, softened cream cheese, cheddar, and green onions until everything is combined and creamy.
- Lay an egg roll wrapper on a clean surface in a diamond shape. Place about 3 tablespoons of filling near the bottom center.
- Fold the bottom corner up over the filling, fold in both sides, then roll tightly upward. Dab the top corner with a little water to seal. Repeat with remaining wrappers and filling.
- Heat about 2 inches of vegetable oil in a heavy skillet or saucepan to 350°F. Fry the egg rolls in batches for 3–4 minutes, turning occasionally, until deep golden brown all over.
- Drain on a paper-towel-lined plate and serve hot with ranch or blue cheese on the side.
Tips
- Tip: Make sure your cream cheese is fully softened before mixing — cold cream cheese leaves lumps in the filling and doesn't coat the chicken evenly.
- Tip: Don't overcrowd the pan when frying — too many at once drops the oil temperature and you end up with greasy, pale egg rolls instead of crispy ones.
- Tip: You can bake these at 400°F for about 15–18 minutes instead of frying — brush them with a little oil first and flip halfway through for even browning.
32. Chicken 65
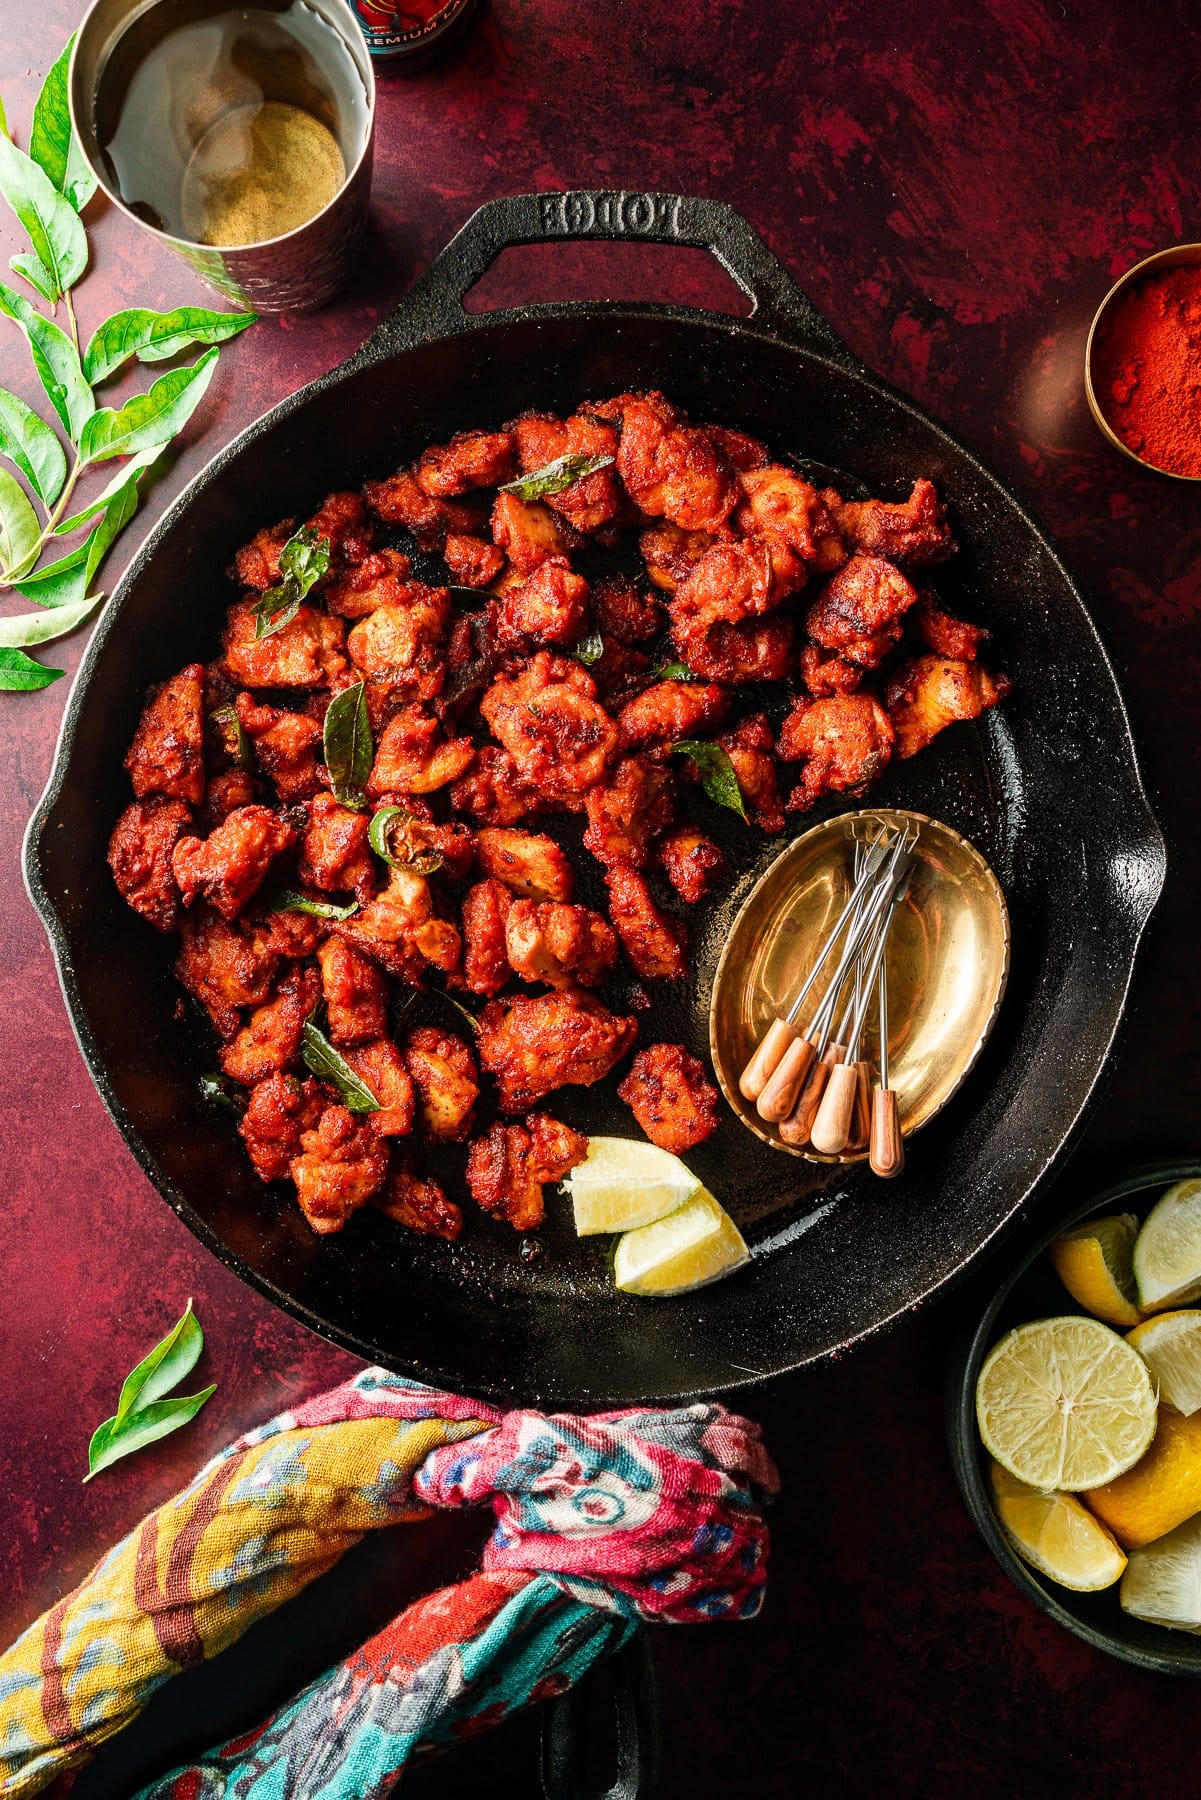
Chicken 65 is a South Indian deep-fried chicken dish that I grew up eating at restaurants but only started making at home a few years ago. The marinade is the whole thing — yogurt, red chili powder, ginger-garlic paste, and a few spices that give the chicken this deeply red, fiery, tangy coating once it's fried. It's one of those recipes where the smell alone will pull everyone into the kitchen. I serve it with sliced onions, a squeeze of lemon, and green chilies on the side, which is how I always had it growing up. For anyone who hasn't tried it, think of it as the South Asian answer to spicy fried chicken bites — and it belongs on every appetizer table.
Ingredients
- 1½ lbs boneless chicken thighs or breast, cut into bite-sized pieces
- ¼ cup plain full-fat yogurt
- 1½ teaspoons Kashmiri red chili powder (or use ½ teaspoon cayenne + 1 teaspoon smoked paprika for color and heat)
- 1 teaspoon ginger-garlic paste (or ½ teaspoon each grated fresh ginger and garlic)
- ½ teaspoon garam masala
- ½ teaspoon cumin powder
- 1 tablespoon cornstarch
- 1 tablespoon all-purpose flour
- Salt to taste
- Oil for deep frying
- Sliced onion, lemon wedges, and fresh curry leaves to serve (optional but traditional)
Instructions
- Combine the yogurt, chili powder, ginger-garlic paste, garam masala, cumin, cornstarch, flour, and salt in a bowl. Add the chicken pieces and toss to coat well. Cover and marinate for at least 30 minutes — an hour is better if you have time.
- Heat oil in a deep heavy pot or wok to 350°F. The oil should be deep enough to submerge the chicken pieces.
- Fry the chicken in batches — don't crowd the pot — for about 5–6 minutes, turning once or twice, until the outside is deeply colored and the chicken is cooked through.
- For extra crispiness, let the oil come back up to temperature between batches, then fry each piece a second time for 1–2 minutes. This double-fry step makes a real difference in texture.
- Drain on paper towels, then serve hot with sliced onions, a squeeze of lemon, and fresh curry leaves if you have them.
Tips
- Tip: Kashmiri red chili powder gives you that signature deep red color without being overwhelmingly hot — if you can find it at an Indian grocery store or on Amazon, it's worth it. Otherwise the paprika-plus-cayenne swap works fine.
- Tip: Chicken thighs stay juicier than breast through the frying process — I almost always use thighs for this one.
- Tip: The double-fry method isn't strictly necessary but it gives you that restaurant-style crunch that holds up even after a few minutes on the plate — skip it if you're short on time, but try it at least once.
Thirty-three chicken appetizers and I still can't pick a favorite. Honestly, that's the whole point of a list like this — different nights call for different things. Some weeks I want something I can throw together in 20 minutes because everyone's already hovering in the kitchen asking when dinner is ready. Other weeks I have a little more time and I want something that actually looks impressive on a plate. These recipes cover both ends of that, and everything in between.
If I had to steer you somewhere specific: the baked options are where I'd start if you're feeding a crowd and don't want to stand at the stove the whole time. The skewers and sliders are what I make when I know kids are involved — Saad can eat four sliders in one sitting and somehow still have room for actual dinner, which I will never understand. And the crispy fried ones? Save those for when you have a little patience and a good playlist. They're worth the effort.
Whatever you end up making, I hope it earns you a clean plate and at least one request to make it again. That's always the real measure in my kitchen. If something from this list works out for you, I'd genuinely love to hear about it — drop a comment and tell me which one you tried. 🍗🔥✨
More Recipes You Might Like
- Easy Chicken Dinner Recipes — if these appetizers got you in the chicken mood, here's where to take it for a full meal
- Ground Beef Appetizers — another great starter round-up when you want to mix up the protein
- Party Food Ideas — a broader collection when you need a full spread, not just one thing
- Easy Dipping Sauces — because a good chicken bite deserves an equally good sauce next to it
- Sheet Pan Chicken Recipes — for when you want that same easy chicken energy but scaled up into a proper dinner
Frequently Asked Questions
Can I make these chicken appetizers ahead of time?
Most of them, yes — with a little planning. Marinades, meatball mixtures, and stuffed bites can all be prepped a day in advance and kept covered in the fridge. The one thing I'd hold off on is any final frying or crisping — do that right before serving so you don't lose the texture. Baked options reheat pretty well at 350°F for 8 to 10 minutes.
How much chicken should I plan per person for appetizers?
A rough guide I use: about 3 to 4 pieces per person if these are one of several appetizers on the table. If chicken is the only starter and it's a hungry crowd, bump that to 5 or 6. I always make a double batch of whatever I choose — it disappears faster than I expect, every single time.
Which of these appetizers work best for a party or big gathering?
Anything baked on a sheet pan is my go-to for big groups — you can scale up easily and it doesn't require you to stand over the stove. Chicken skewers and sliders also work well because they're portion-controlled and easy to pick up without plates. Stay away from anything that needs to be served piping hot and immediately — that's stressful when you're also trying to talk to guests.
Can I use frozen chicken for these recipes?
Yes, just make sure it's fully thawed before you start cooking. I usually move frozen chicken from the freezer to the fridge the night before. If I'm in a hurry, I submerge the sealed bag in cold water and change the water every 30 minutes — works in about an hour for boneless breasts or thighs. Never go straight from frozen to the pan; the outside cooks way faster than the inside and you end up with a dry, uneven result.
What dipping sauces go well with chicken appetizers?
Ranch is the obvious answer and I won't pretend my kids don't demand it with everything. But honey mustard, a simple garlic aioli, or a sweet chili sauce all do a lot of work too. For anything with South Asian spicing, a quick yogurt-mint dip takes about two minutes to put together and makes a big difference. Match the sauce to the flavor profile of the appetizer — a smoky spiced skewer wants something cooling, while a mild chicken bite can handle something punchy.
Share This Post!
If this list helped you find something worth making, save it to Pinterest or share it with someone who's always the one bringing food to gatherings — they'll thank you for it. 🍗📌
View More Recipes here Recipe Roundups





Comments
No Comments