
Spring in our house comes with a specific kind of pressure: everyone's tired of the heavy stews and slow-cooker meals we leaned on all winter, but nobody can agree on what they actually want instead. Saad wants something "not soup," Zainab wants something green (she went through a phase), and my husband just wants whatever's on the table. So every March I find myself going back through my saved recipes and rebuilding a rotation from scratch — lighter meals, brighter flavors, things that feel like the weather actually changed. Spring cooking is some of my favorite cooking, not because it's fancy, but because the ingredients do most of the work for you.
What I look for in a good spring meal is pretty simple: fresh vegetables that are actually in season, something with lemon or herbs that wakes the whole dish up, and a recipe that doesn't take an hour on a weeknight. I also want variety — not every dinner in April should be a salad just because it's warm. Some weeks I want a light pasta, some weeks a grilled fish, and some weeks honestly just a big bowl with everything thrown in. If a recipe checks two or three of those boxes, it earns a spot. I've also covered a lot of this territory before in my post on easy weeknight dinners — spring just gives you even better raw material to work with.
This list of 27 recipes covers a real range — from a Creamy Asparagus Soup that somehow has no cream in it (I was skeptical the first time, I'm a convert now), to a Cilantro Lime Shrimp Bowl that I've made on repeat since last April, to an Italian Broccoli Pasta with Pecorino and Lemon that my husband requests without even knowing it's a "spring" recipe. There's seafood, there's vegetarian, there's grain bowls, there's wraps — basically whatever kind of cook you are in spring, something on this list will fit your week. I've also pulled from some of my favorite categories, so if you want more ideas after this, check out my roundups on healthy dinner recipes and easy salmon recipes.
Here are the 27 spring recipes I keep coming back to — pick whatever fits your week and go from there.

27. Sheet Pan Lemon Caper Salmon Cakes (Paleo)
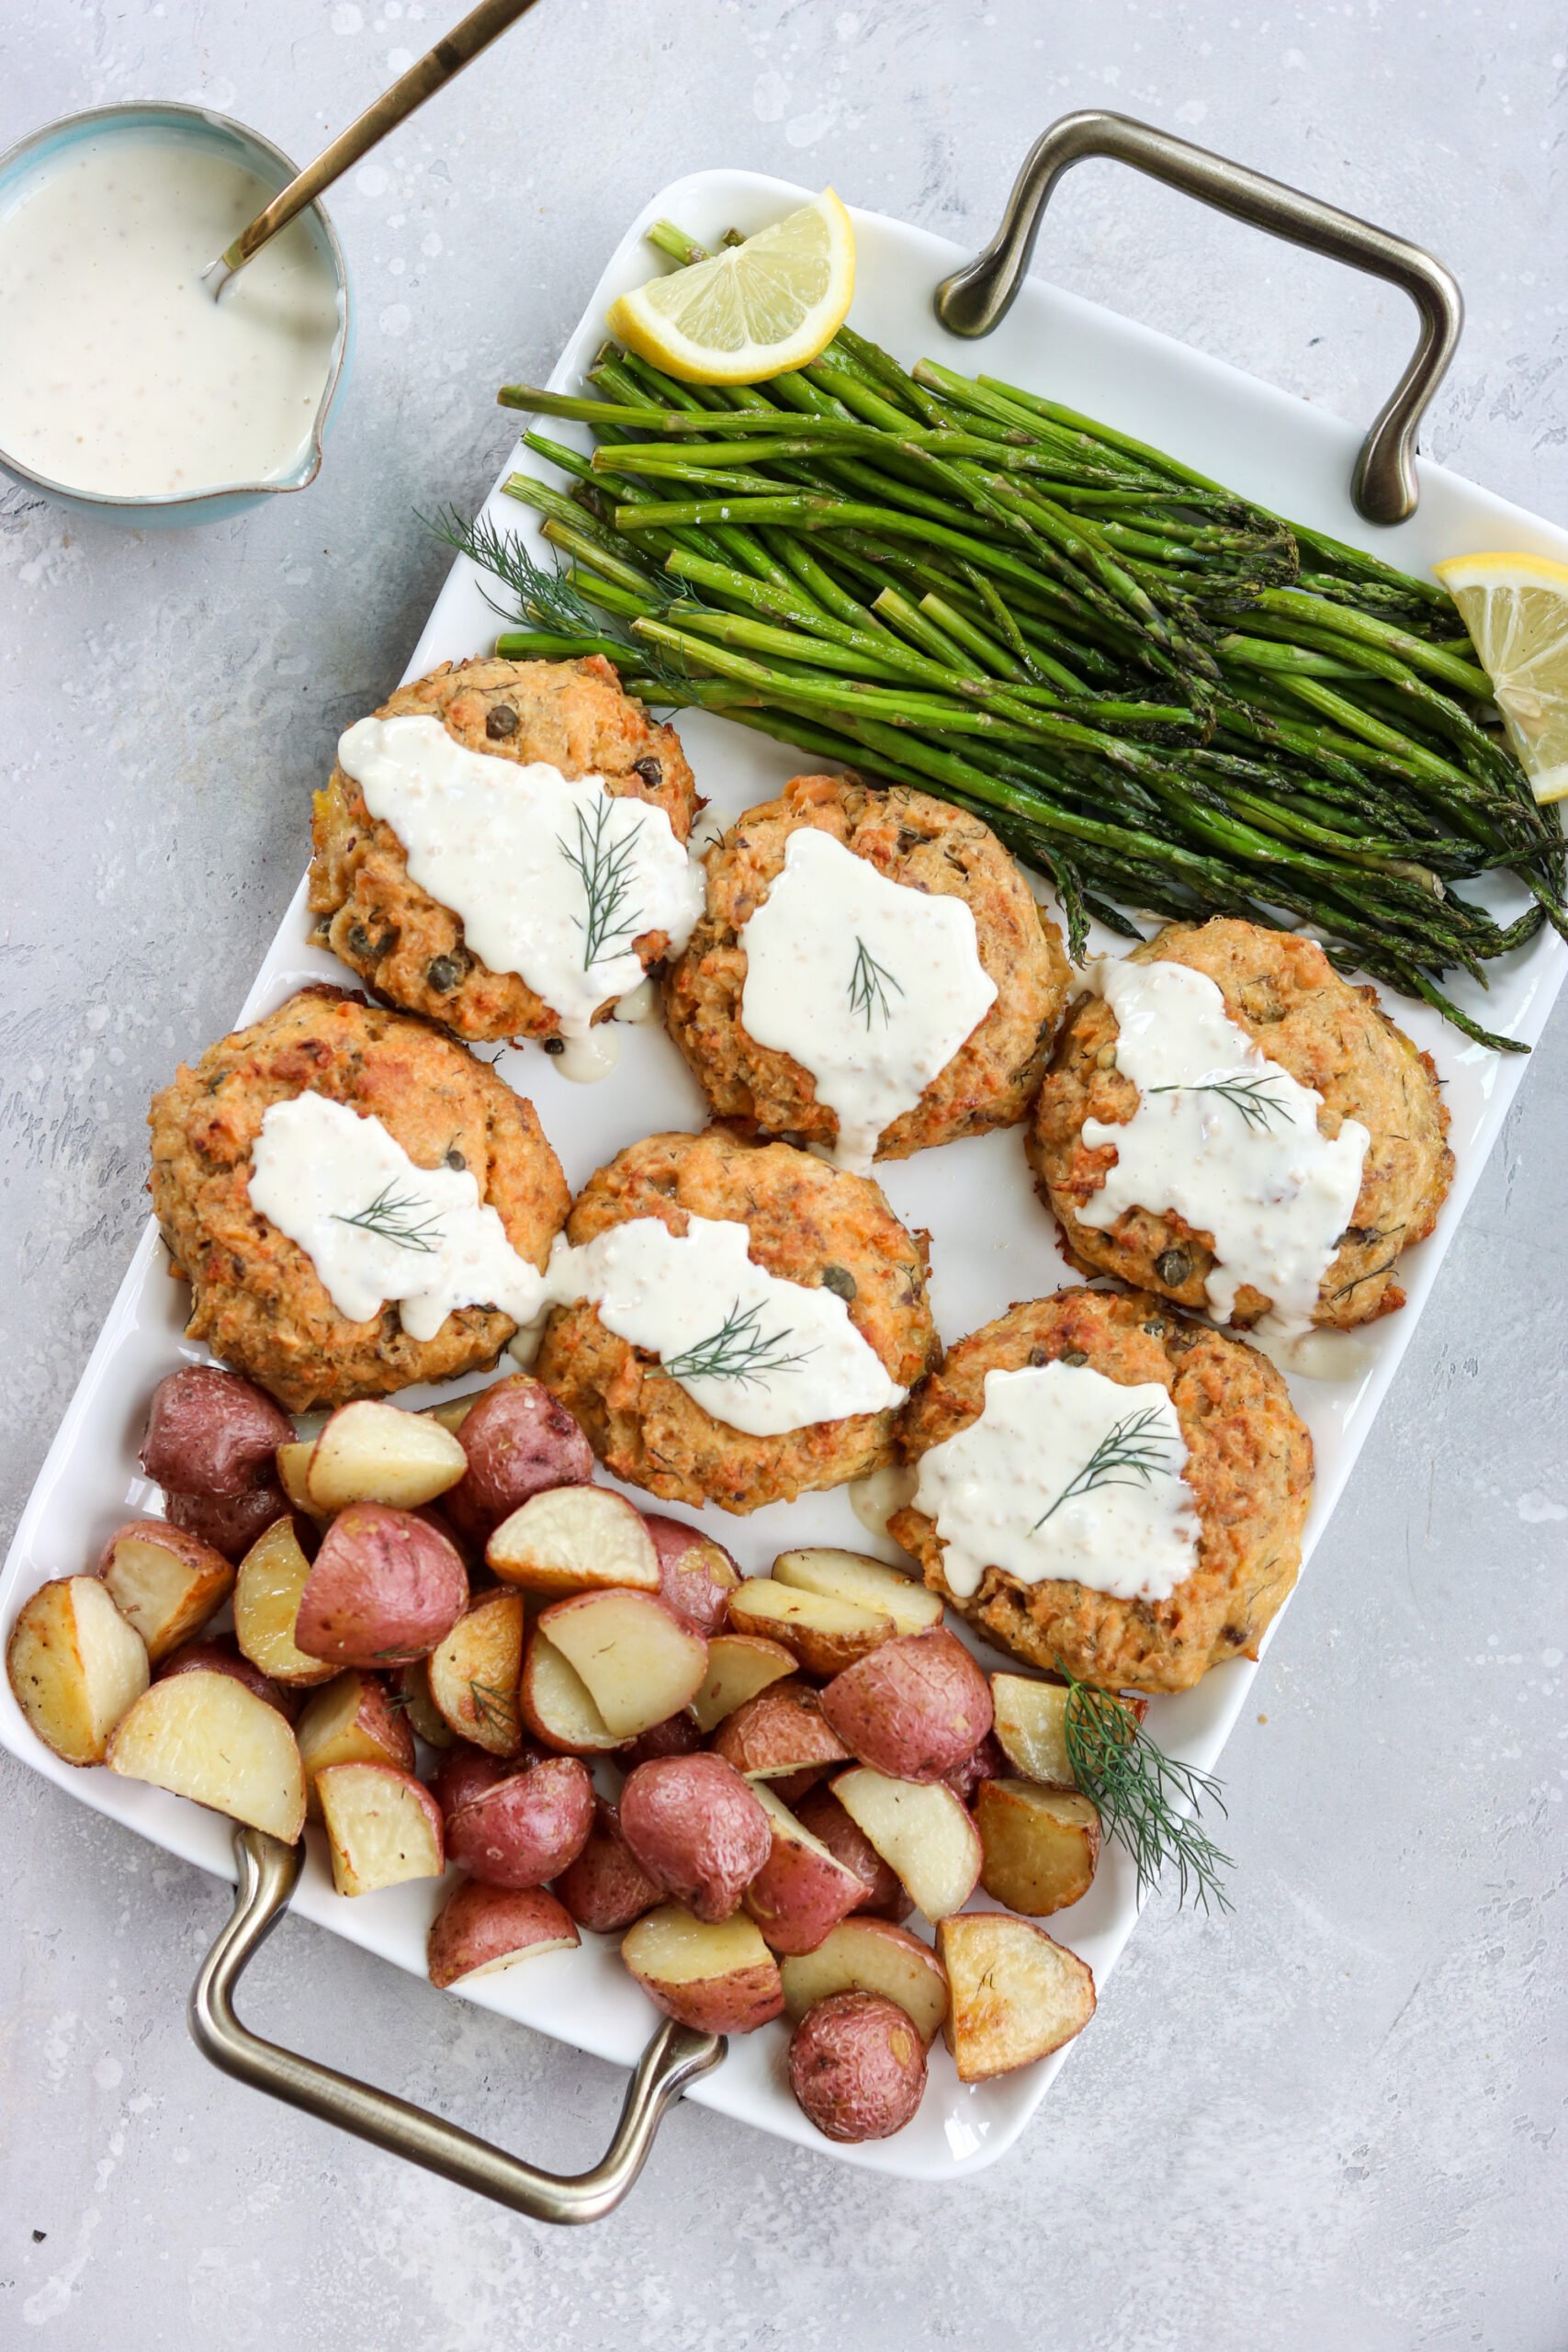
I made these salmon cakes on a Tuesday night when I had a can of salmon sitting in the pantry and absolutely no plan. Everything goes on one sheet pan — no frying, no standing over a skillet splashing oil — and they come out golden on the outside, tender in the middle. The lemon and capers do real work here: the brightness cuts through the richness of the salmon in a way that feels almost restaurant-worthy for something this simple. If you're eating paleo or just trying to get more fish into your week, this one earns its spot.
Ingredients
- 2 cans (14.75 oz each) wild-caught salmon, drained and flaked
- 2 eggs, lightly beaten
- ¼ cup almond flour
- 2 tablespoons capers, drained and roughly chopped
- Zest and juice of 1 lemon
- 2 tablespoons fresh parsley, chopped
- ½ teaspoon garlic powder
- ½ teaspoon salt
- ¼ teaspoon black pepper
- 2 tablespoons olive oil (for brushing the pan and tops)
Instructions
- Preheat your oven to 400°F. Line a sheet pan with parchment paper and brush it lightly with olive oil.
- In a large bowl, combine the drained salmon, beaten eggs, almond flour, capers, lemon zest, lemon juice, parsley, garlic powder, salt, and pepper. Mix until everything holds together — the mixture should be firm enough to shape.
- Form the mixture into 8 equal patties, about ¾-inch thick. Place them on the prepared sheet pan and brush the tops lightly with olive oil.
- Bake for 15-18 minutes, flipping once halfway through, until the cakes are golden brown on both sides and cooked through.
- Serve immediately with a fresh green salad or roasted asparagus on the side. A dollop of dairy-free mayo or avocado sauce on top is really good here.
Tips
- Tip: Make sure your salmon is well-drained — any extra liquid and the patties won't hold their shape. I press it between paper towels for a minute before mixing.
- Tip: If almond flour isn't available, regular breadcrumbs work fine (though the recipe won't be paleo anymore). Either way, the texture comes out well.
- Tip: These reheat really well the next day in a hot skillet for 2 minutes per side — they get even crispier than straight from the oven.
26. Spring Roll in a Bowl
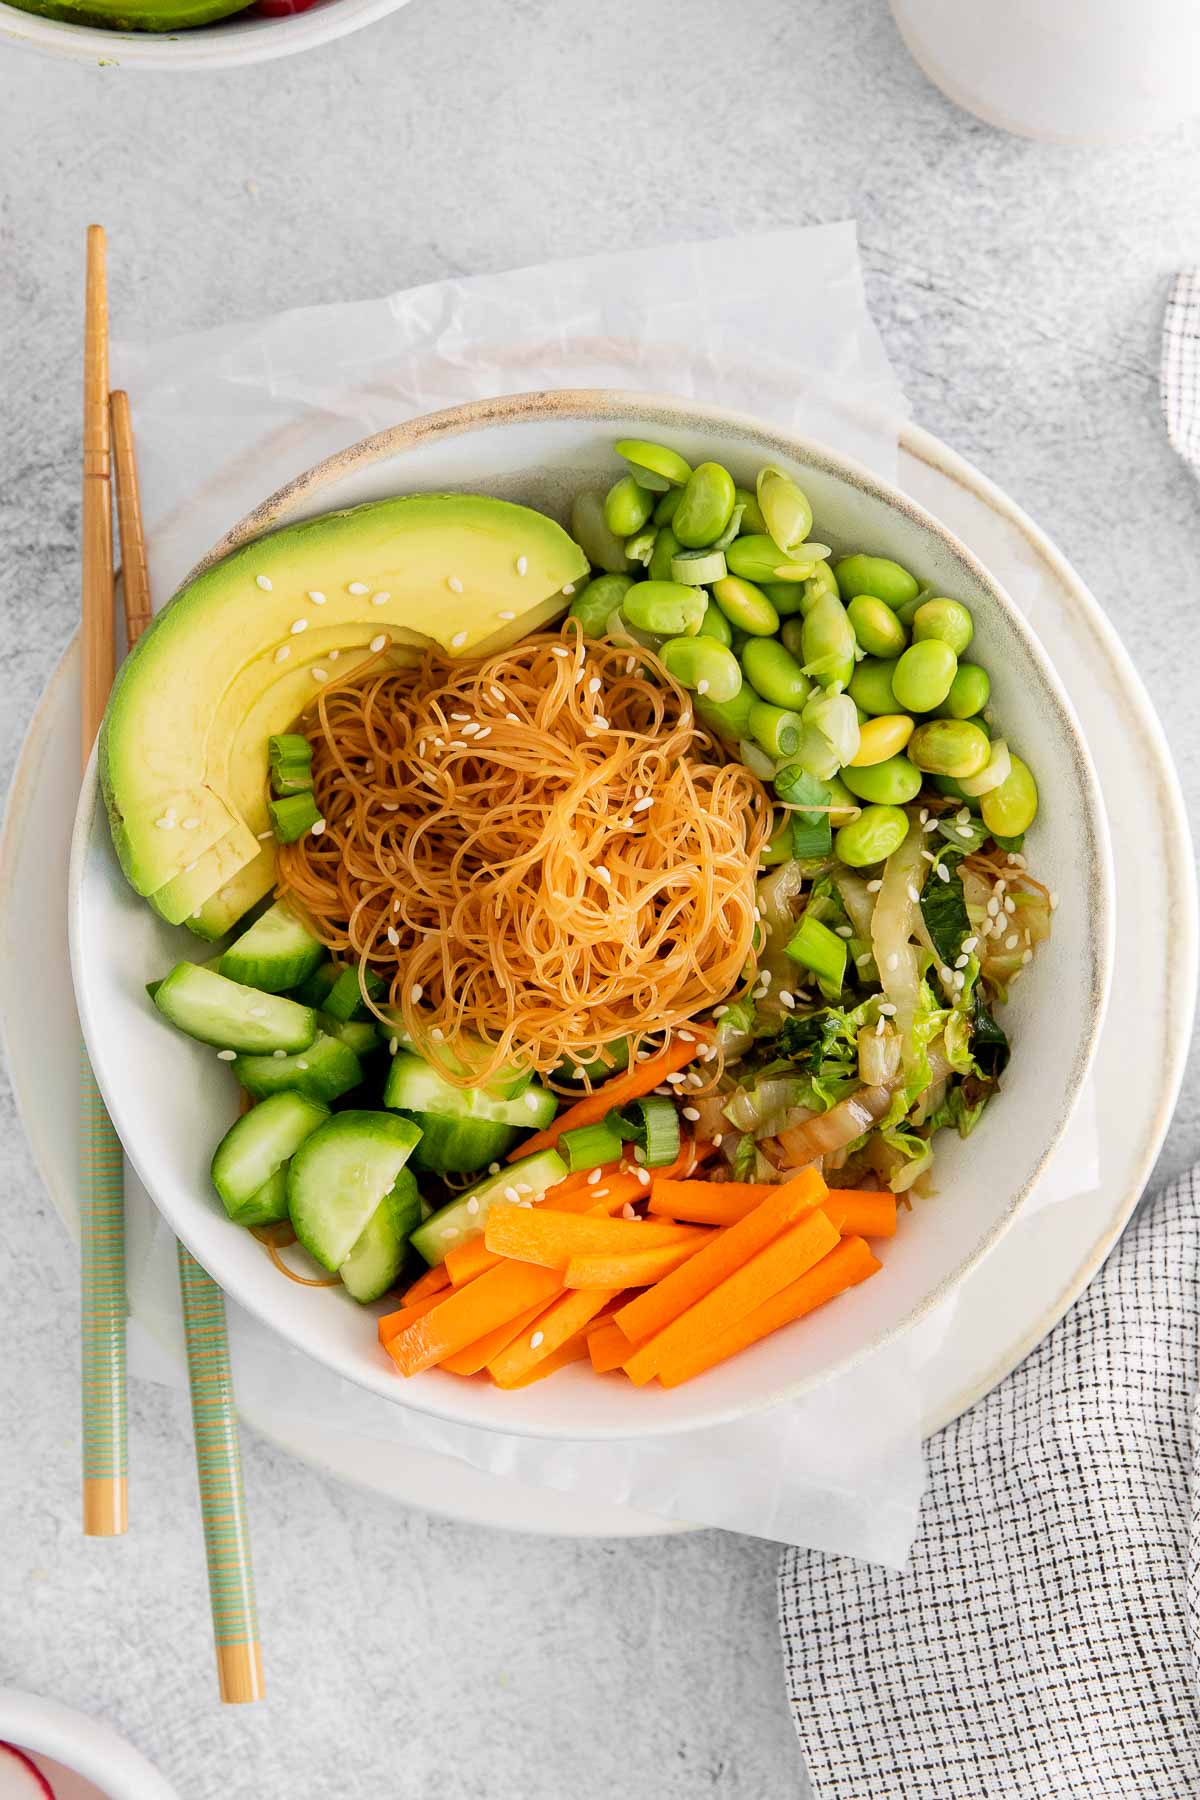
Growing up, spring rolls in Pakistan were always the deep-fried, crispy-wrapped kind — the ones my mother made for guests. This version is the complete opposite of that, and I mean that in the best way. Everything you love about a classic spring roll — the crunchy cabbage, the savory protein, the punchy dressing — but no wrapping, no frying, just everything tossed in a bowl and eaten immediately. It's one of those meals that feels light but keeps you full for hours, which makes it ideal for spring lunches when it's warm enough that you don't want anything heavy.
Ingredients
- 1 lb ground pork (or ground chicken)
- 3 cups shredded green cabbage
- 1 cup shredded carrots
- 3 green onions, sliced
- 3 cloves garlic, minced
- 1 tablespoon fresh ginger, grated
- 3 tablespoons soy sauce (or tamari for gluten-free)
- 1 tablespoon rice vinegar
- 1 tablespoon sesame oil
- 1 teaspoon sriracha (optional, for heat)
- 2 tablespoons vegetable oil
- Sesame seeds and fresh cilantro, to serve
Instructions
- Heat vegetable oil in a large skillet or wok over medium-high heat. Add the ground pork and cook, breaking it up, until browned and cooked through, about 6-7 minutes. Drain any excess fat.
- Add the garlic and ginger to the skillet and stir for about 30 seconds until fragrant. Add the cabbage and carrots and toss everything together, cooking for 3-4 minutes until the vegetables are just slightly softened but still have some crunch.
- In a small bowl, whisk together the soy sauce, rice vinegar, sesame oil, and sriracha. Pour the dressing over the skillet and toss to coat everything evenly.
- Remove from heat and stir in the green onions. Divide into bowls and top with sesame seeds and fresh cilantro before serving.
Tips
- Tip: Don't overcook the cabbage — you want it to still have some bite. About 3-4 minutes in the pan is enough. Soggy cabbage ruins the whole texture of this dish.
- Tip: A bag of pre-shredded coleslaw mix from Walmart or Trader Joe's works perfectly here and saves you 10 minutes of chopping. I use it every single time.
- Tip: Serve over rice noodles or steamed white rice if you want to stretch this into a more filling meal for a larger family.
25. Grilled Mahi Mahi with Cherry Chipotle Salsa
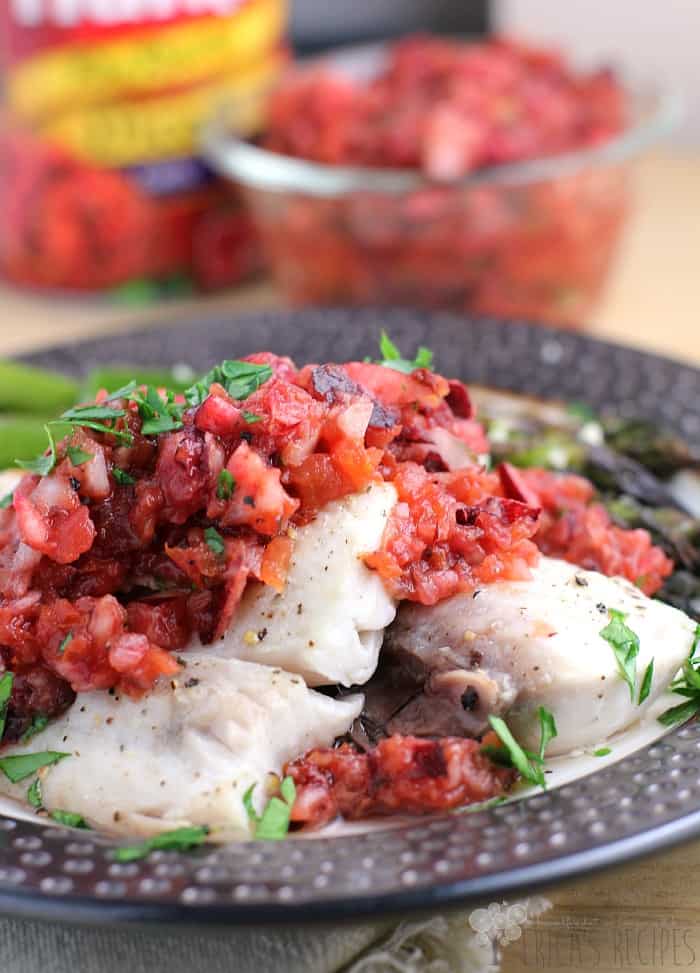
This is the kind of recipe that sounds fancy but comes together in under 30 minutes, which is exactly what I need on a weeknight when I'm trying to cook something that doesn't look like I gave up. Mahi mahi is a firm, meaty fish — it holds up on the grill without falling apart, which is more than I can say for some other fish I've attempted to grill over the years. The cherry chipotle salsa is the real star: sweet cherries with smoky chipotle heat is a combination that I didn't expect to love as much as I do. My husband put it on everything that night, including his rice.
Ingredients
- 4 mahi mahi fillets (about 6 oz each)
- 2 tablespoons olive oil
- 1 teaspoon cumin
- ½ teaspoon smoked paprika
- ½ teaspoon salt and ¼ teaspoon black pepper
- 1 cup fresh or frozen cherries, pitted and roughly chopped
- 1-2 chipotle peppers in adobo sauce, minced (from a can — find these in the Latin foods aisle at most grocery stores)
- 1 tablespoon adobo sauce (from the same can)
- 2 tablespoons red onion, finely diced
- 1 tablespoon fresh lime juice
- 2 tablespoons fresh cilantro, chopped
Instructions
- Make the salsa first so the flavors have time to meld. Combine the chopped cherries, chipotle peppers, adobo sauce, red onion, lime juice, and cilantro in a small bowl. Stir, taste, and adjust heat or lime to your liking. Set aside.
- Pat the mahi mahi fillets dry with paper towels — this is important for getting a good sear. Brush both sides with olive oil and season with cumin, smoked paprika, salt, and pepper.
- Preheat your grill or grill pan to medium-high heat. Grill the fillets for 3-4 minutes per side without moving them — let the grill do the work and you'll get clean grill marks and no sticking.
- The fish is done when it flakes easily with a fork and the internal temperature reads 137°F. Transfer to plates and spoon the cherry chipotle salsa generously over the top. Serve immediately.
Tips
- Tip: No grill? A cast iron skillet on high heat works just as well. Get it properly hot before adding the fish — you want it sizzling on contact.
- Tip: Frozen cherries work fine for the salsa. Thaw them, drain the excess liquid, and chop — the flavor is still great and they're available year-round unlike fresh ones.
- Tip: If chipotle peppers are too spicy for your household, use just one pepper and skip the extra adobo sauce. You still get the smoky flavor without too much heat.
24. Lemon Pepper Fish

Some nights I just need dinner on the table in 20 minutes with minimal cleanup, and this lemon pepper fish is exactly that kind of recipe. Cod or tilapia both work beautifully — whatever is on sale at your grocery store that week is the right answer. The seasoning is simple on purpose: lemon zest, cracked black pepper, a little garlic powder, and butter. Nothing complicated. The first time I made this I used bottled lemon pepper seasoning and it was fine, but fresh lemon zest genuinely makes a difference — it's brighter and less artificial-tasting. Worth the 30 seconds it takes to zest a lemon.
Ingredients
- 4 white fish fillets (cod, tilapia, or halibut — about 6 oz each)
- Zest of 2 lemons plus 2 tablespoons fresh lemon juice
- 1 teaspoon coarsely cracked black pepper
- ½ teaspoon garlic powder
- ½ teaspoon salt
- 2 tablespoons butter
- 1 tablespoon olive oil
- Fresh parsley, to garnish
Instructions
- Pat the fish fillets completely dry with paper towels. In a small bowl, mix together the lemon zest, cracked black pepper, garlic powder, and salt. Press this seasoning mixture onto both sides of each fillet.
- Heat the butter and olive oil together in a large skillet over medium-high heat. Using both fat together raises the smoke point so the butter doesn't burn before the fish is cooked through.
- Add the fillets to the hot pan and cook for 3-4 minutes on the first side without touching them. Flip carefully and cook another 2-3 minutes until the fish flakes easily. Thicker fillets like cod may need an extra minute.
- Squeeze the fresh lemon juice over the fish right in the pan, let it sizzle for 10 seconds, then transfer to plates. Garnish with fresh parsley and serve immediately with steamed rice, roasted potatoes, or a simple green salad.
Tips
- Tip: Dry fish = crispy fish. If you skip patting the fillets dry, they steam instead of sear and you lose that golden crust. This step takes 10 seconds and matters.
- Tip: If you only have pre-mixed lemon pepper seasoning from the spice aisle, use 1½ teaspoons in place of the zest and pepper — it works in a pinch, just taste before adding extra salt since most blends already contain it.
- Tip: Leftover cooked fish keeps in the fridge for up to 2 days and is excellent flaked over a salad the next day — don't throw it out.
23. Avocado Tomato Cucumber Salad
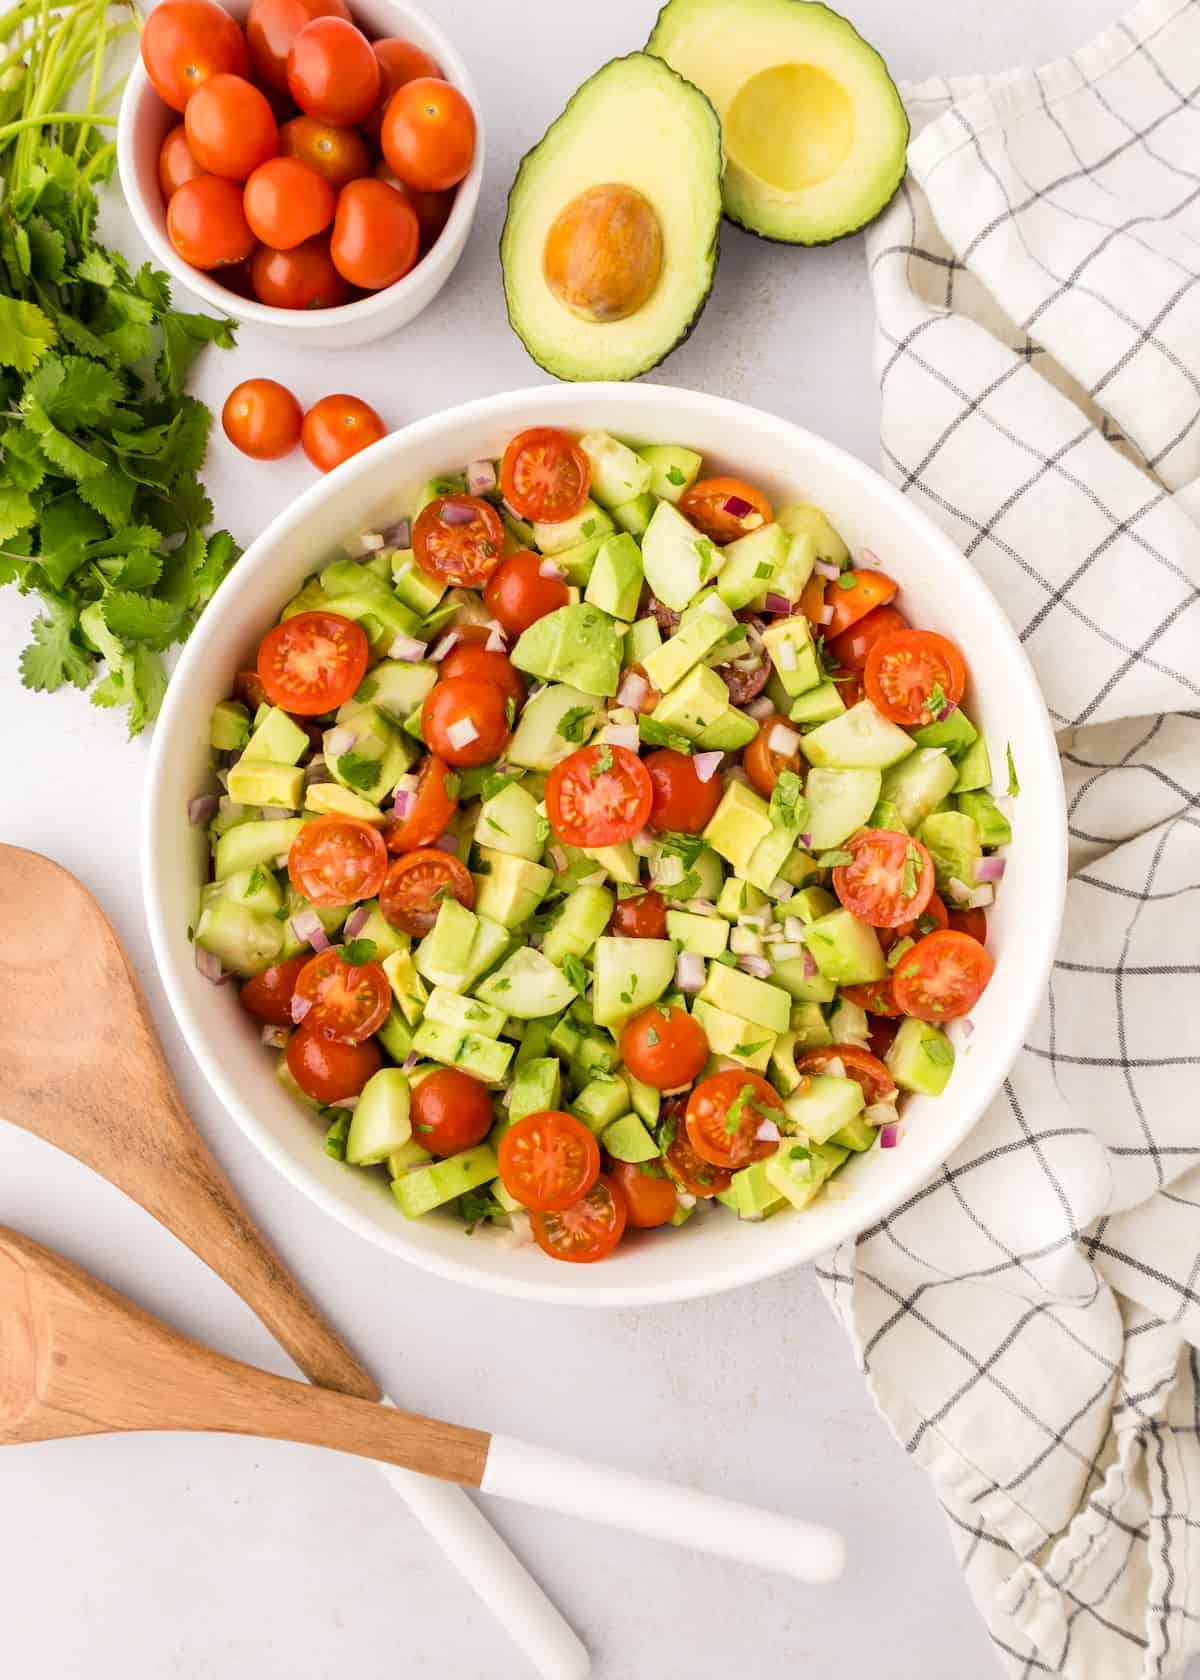
Zainab is the salad eater in our house — the rest of us need convincing — but this one gets eaten by everyone, including Saad who normally picks salad leaves off his plate like they personally offended him. The combination of creamy avocado, juicy tomato, and cool crisp cucumber with nothing more than olive oil, lemon juice, and a little garlic is one of those things that works exactly because it's not overcomplicated. It's a great keto-friendly side dish that doubles as a light lunch on its own. Make it right before serving — once you dress it, the avocado starts to soften and the cucumbers release water, so don't let it sit too long.
Ingredients
- 2 ripe avocados, diced into ¾-inch chunks
- 2 cups cherry tomatoes, halved (or 2 medium tomatoes, diced)
- 1 large English cucumber, diced
- ¼ red onion, very thinly sliced
- 3 tablespoons extra-virgin olive oil
- 2 tablespoons fresh lemon juice
- 1 small clove garlic, finely minced or pressed
- ½ teaspoon salt and ¼ teaspoon black pepper
- 2 tablespoons fresh parsley or cilantro, chopped (optional but good)
Instructions
- Whisk together the olive oil, lemon juice, minced garlic, salt, and pepper in a small bowl to make the dressing. Taste it — it should be bright and a little sharp. Adjust lemon or salt as needed.
- Add the diced cucumber, cherry tomatoes, and red onion to a large bowl. Pour about two-thirds of the dressing over and toss gently.
- Add the diced avocado last and drizzle the remaining dressing over the top. Fold everything together very gently — you want the avocado to stay in chunks, not turn into guacamole.
- Scatter the fresh parsley or cilantro over the top and serve immediately. This salad is best eaten within an hour of making it.
Tips
- Tip: Pick avocados that yield slightly to gentle pressure but aren't mushy. If yours are rock hard, leave them on the counter for a day or two — don't refrigerate them until they're ripe.
- Tip: If you find raw red onion too sharp, soak the sliced onion in cold water for 10 minutes before adding it to the salad. It takes the edge off without losing the flavor.
- Tip: This works really well alongside grilled chicken or fish, making it a complete and easy spring meal without much effort on either component.
22. Cilantro Lime Shrimp Bowl

This is one of those bowls that looks like you put in more effort than you actually did. Shrimp gets marinated in a quick **cilantro-lime mixture**, then cooked in about five minutes flat — I make it on weeknights when I need something on the table fast and still want it to feel fresh. The lime cuts through everything and makes the whole bowl taste bright, which is exactly what spring meals should do. Serve it over white rice or brown rice, pile on whatever toppings you have — sliced avocado, corn, cherry tomatoes — and you're done.
Ingredients
- 1 lb large shrimp, peeled and deveined
- 3 tablespoons fresh lime juice (about 2 limes)
- ¼ cup fresh cilantro, chopped
- 2 cloves garlic, minced
- 1 tablespoon olive oil
- ½ teaspoon cumin
- ½ teaspoon salt
- 2 cups cooked white or brown rice
- Toppings: sliced avocado, corn, cherry tomatoes, extra cilantro and lime wedges
Instructions
- In a bowl, combine lime juice, cilantro, garlic, olive oil, cumin, and salt. Add the shrimp and toss to coat. Let it marinate for 10–15 minutes — don't go longer or the lime will start cooking the shrimp.
- Heat a skillet over medium-high heat. Add the shrimp in a single layer and cook for 2 minutes per side until pink and just cooked through. Don't overcrowd the pan or they'll steam instead of sear.
- Divide the cooked rice into bowls. Top with the shrimp and any pan juices left in the skillet.
- Add your toppings — avocado, corn, tomatoes, a squeeze of fresh lime — and serve immediately.
Tips
- Tip: Frozen shrimp works perfectly here — just thaw under cold running water for about 5 minutes and pat very dry before marinating so you get a good sear.
- Tip: If cilantro isn't your thing, flat-leaf parsley gives you the fresh herb element without the polarizing flavor.
- Tip: I make a double batch of the shrimp when I'm meal prepping — they reheat well and work in tacos the next day too.
21. Three-Bean Salad
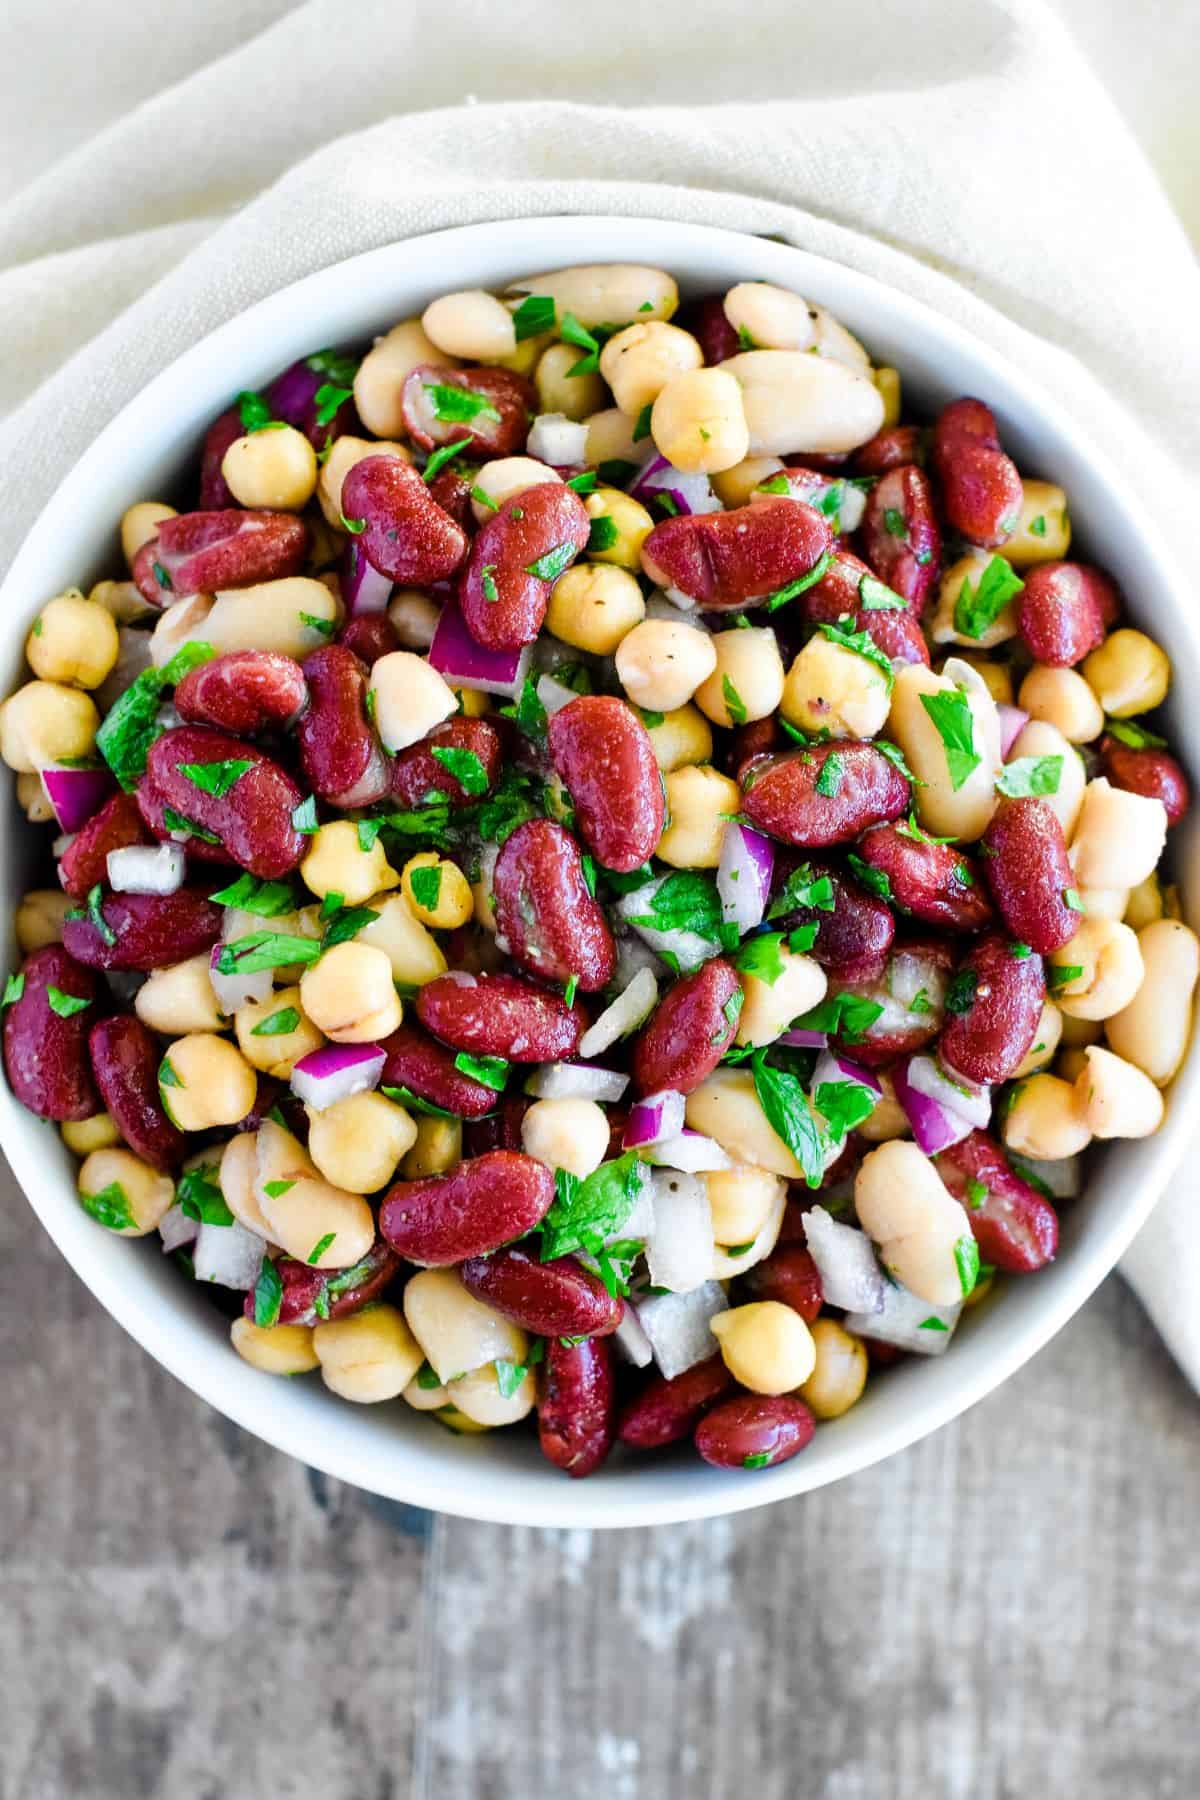
Three-bean salad is one of those recipes I used to overlook completely — it sounded boring to me. Then I made it for a picnic last spring and it was gone before everything else on the table. The **tangy vinaigrette** soaks into the beans and makes them taste genuinely good, and the red onion adds a little bite that balances everything out. It's also one of the rare salads that actually gets better as it sits, which means you can make it hours ahead and it's still great. Bring it to your next cookout and watch it disappear.
Ingredients
- 1 can (15 oz) kidney beans, drained and rinsed
- 1 can (15 oz) chickpeas, drained and rinsed
- 1 can (15 oz) green beans, drained (or 1½ cups fresh green beans, blanched)
- ½ red onion, thinly sliced
- ¼ cup fresh parsley, chopped
- 3 tablespoons apple cider vinegar
- 3 tablespoons olive oil
- 1 tablespoon sugar (or honey)
- ½ teaspoon salt and ¼ teaspoon black pepper
Instructions
- In a large bowl, combine the kidney beans, chickpeas, and green beans. Add the sliced red onion and parsley and toss everything together gently.
- In a small bowl or jar, whisk together the apple cider vinegar, olive oil, sugar, salt, and pepper until the sugar dissolves.
- Pour the dressing over the bean mixture and toss well to coat. Taste and adjust salt or vinegar as needed.
- Cover and refrigerate for at least 30 minutes before serving — ideally 2 hours or more so the beans absorb the dressing properly.
Tips
- Tip: If raw red onion is too sharp for you, soak the sliced onion in cold water for 10 minutes before adding it — takes the edge off without losing the crunch.
- Tip: This keeps well in the fridge for up to 3 days, so it's a genuinely useful make-ahead side for the whole week.
- Tip: Swap the green beans for black-eyed peas or wax beans if that's what you have — the vinaigrette works with any firm bean.
20. Easy Chana Saag (Indian Chickpea Curry with Spinach)
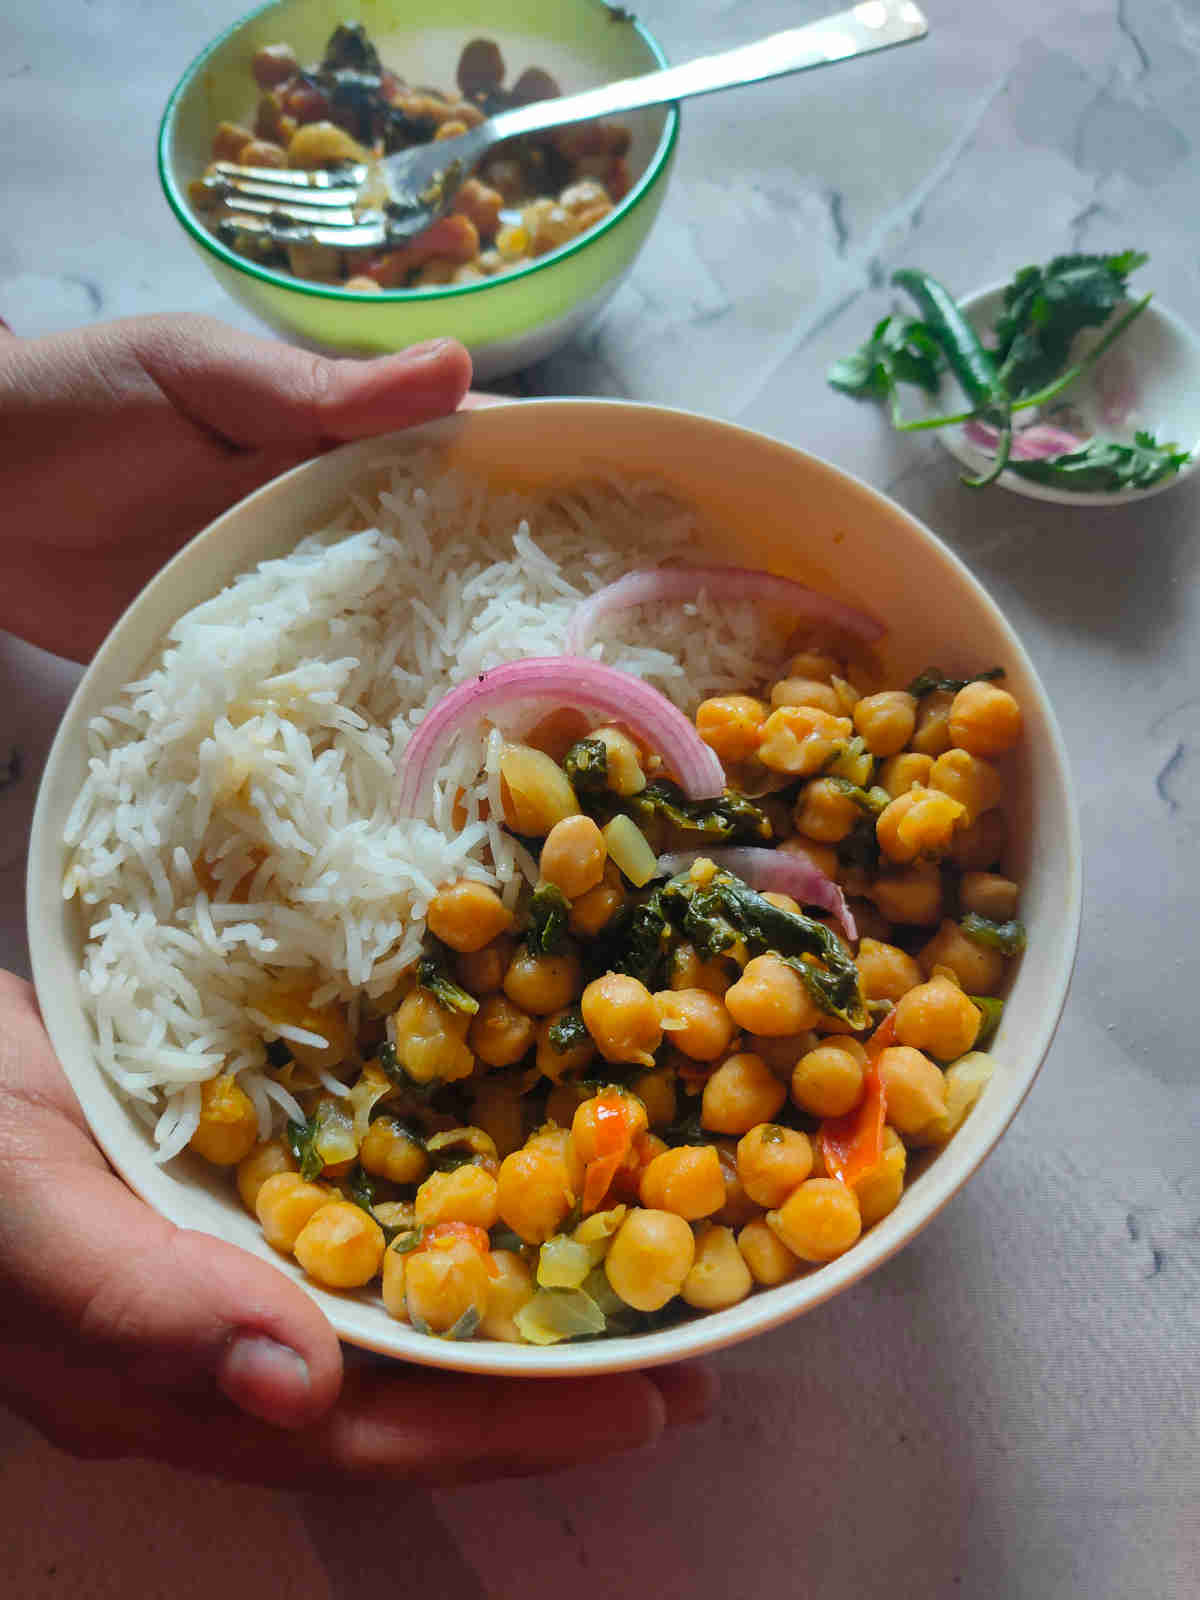
Okay, this one is close to my heart. Growing up in Pakistan, we made chana saag at home regularly — it's not identical to restaurant versions, but it's the kind of weeknight curry that comes together with pantry staples and tastes like real cooking. Canned chickpeas and fresh spinach wilted into a **spiced tomato base** — that's really all it takes. My version isn't strictly authentic to any one regional recipe, but it works, and it's genuinely satisfying. Saad will eat this without complaint, which is high praise from a nine-year-old who usually pushes vegetables to the side of his plate.
Ingredients
- 2 cans (15 oz each) chickpeas, drained and rinsed
- 4 cups fresh baby spinach (or one 10 oz bag frozen spinach, thawed and squeezed dry)
- 1 medium onion, finely diced
- 3 cloves garlic, minced
- 1 teaspoon fresh ginger, grated
- 1 can (14 oz) diced tomatoes
- 2 tablespoons oil
- 1 teaspoon cumin seeds
- 1 teaspoon coriander powder
- ½ teaspoon turmeric
- ½ teaspoon garam masala
- Salt to taste
Instructions
- Heat oil in a heavy skillet or pot over medium heat. Add the cumin seeds and let them sizzle for about 30 seconds — you'll smell them bloom. Add the onion and cook for 6–8 minutes until soft and golden.
- Add garlic and ginger and stir for 1 minute. Add the coriander powder and turmeric and stir for another 30 seconds to cook the spices into the oil.
- Pour in the diced tomatoes and cook for 5 minutes, stirring occasionally, until the tomatoes break down and the oil starts to separate from the masala.
- Add the chickpeas and ¼ cup water. Stir well and simmer for 8–10 minutes so the chickpeas absorb the sauce.
- Add the spinach in handfuls and stir until wilted — about 2–3 minutes. Finish with garam masala and salt. Serve with rice or naan.
Tips
- Tip: The step where the oil separates from the tomato masala matters — don't rush it. That's when you know the base is properly cooked and your curry won't taste raw.
- Tip: Garam masala is available at most large grocery stores now — Walmart and Kroger both carry it. If you can't find it, a pinch of ground cinnamon plus a little extra cumin gets you close enough.
- Tip: Leftovers taste even better the next day once the chickpeas have had time to soak up the sauce fully.
19. Creamy Lemon Basil Pasta
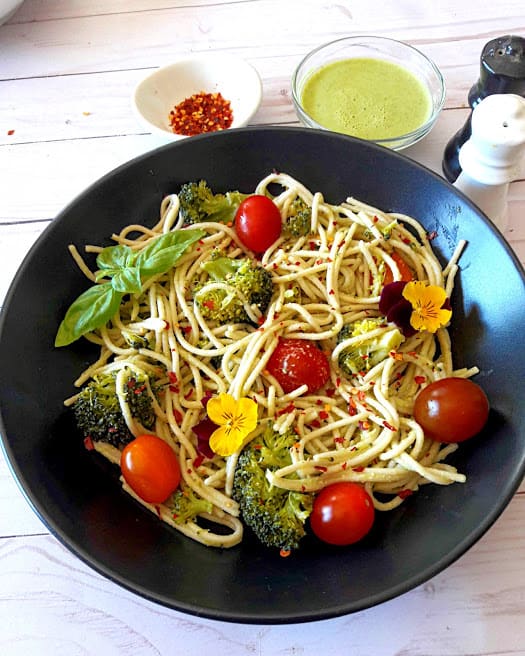
Spring pasta should feel light, and this one does. The sauce is built from a small amount of cream, fresh lemon juice, lemon zest, and a generous handful of **fresh basil** — it coats the pasta without being heavy, which is exactly what I want when the weather starts warming up. I've made it with spaghetti, linguine, and even penne — all work. Toss in some grilled chicken or shrimp if you want to make it a full meal, or serve it as-is alongside a simple salad. Either way it comes together in the time it takes to boil the pasta.
Ingredients
- 12 oz spaghetti or linguine
- 2 tablespoons butter
- 3 cloves garlic, minced
- ½ cup heavy cream (or half-and-half for a lighter version)
- Zest and juice of 1 large lemon
- ¼ cup fresh basil leaves, roughly torn
- ½ cup freshly grated Parmesan
- ¼ cup pasta cooking water (reserved before draining)
- Salt and black pepper to taste
Instructions
- Cook pasta in well-salted boiling water according to package directions. Before draining, scoop out ¼ cup of the starchy pasta water — this helps the sauce come together later.
- While the pasta cooks, melt butter in a large skillet over medium heat. Add garlic and cook for 1–2 minutes until fragrant but not browned.
- Pour in the heavy cream and bring to a gentle simmer. Add lemon zest, lemon juice, and a pinch of salt. Let it simmer for 2–3 minutes until slightly thickened.
- Add the drained pasta to the skillet and toss to coat. Add the reserved pasta water a splash at a time to loosen the sauce if needed. Remove from heat and stir in the Parmesan and basil.
- Taste for salt and pepper, add more lemon if you want it brighter, and serve immediately with extra Parmesan on top.
Tips
- Tip: Don't skip the pasta water — it has starch in it that helps the cream sauce cling to the noodles instead of pooling at the bottom of the bowl.
- Tip: Add the basil off the heat so it stays bright green and fragrant rather than turning dark and limp.
- Tip: Pre-grated Parmesan from a bag won't melt as smoothly as freshly grated — if you can, grate it yourself or buy a block and use a box grater.
18. Lemon Rice
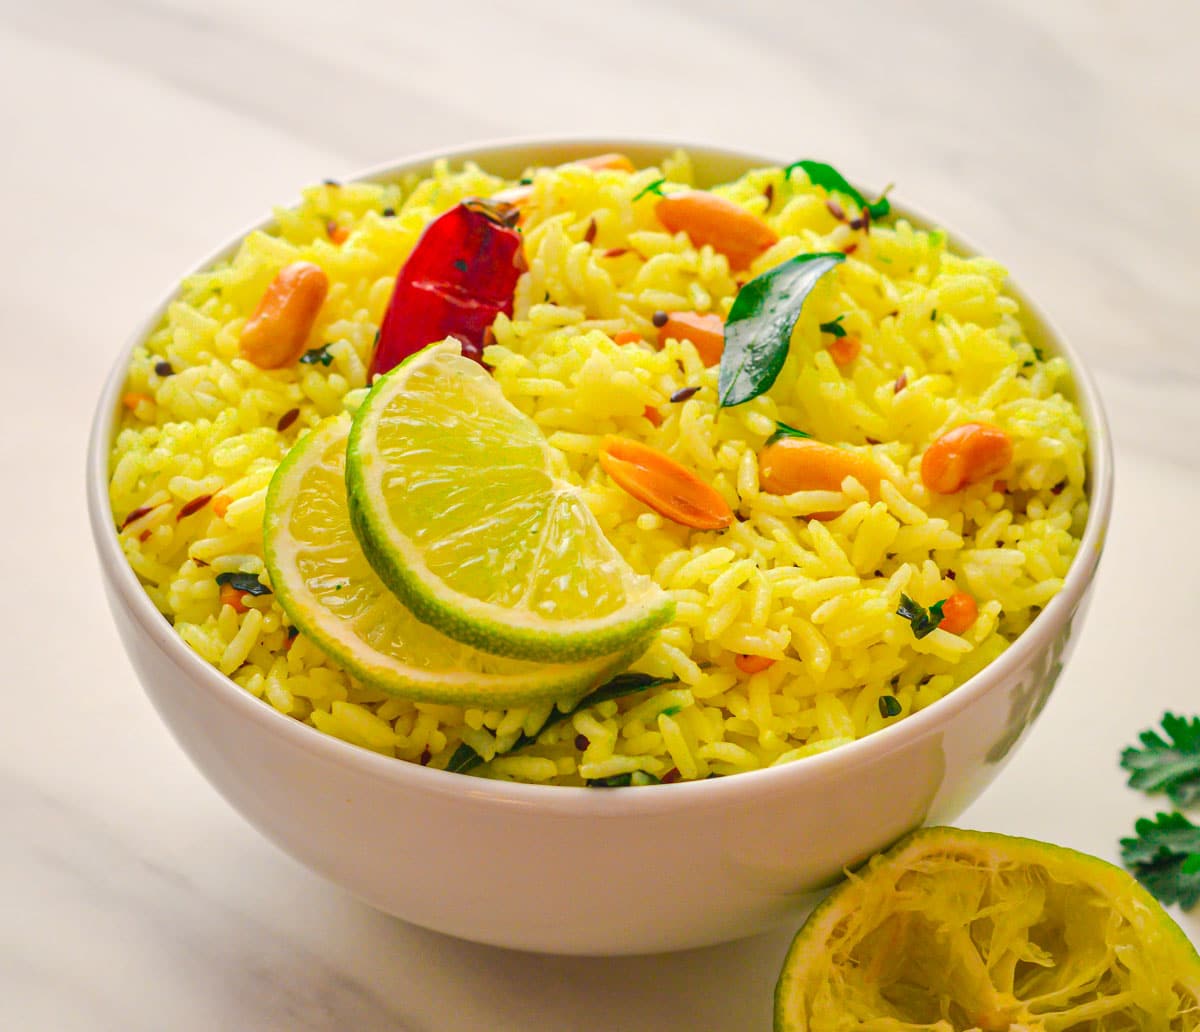
Lemon rice is a South Indian staple and once you make it, plain rice starts feeling a little dull by comparison. The whole thing relies on a quick **tempering of mustard seeds and curry leaves** in oil that gets poured over cooked rice along with turmeric and fresh lemon juice — the smell alone is worth making this. It works as a side with grilled chicken or fish, or just eaten with a dollop of yogurt when you want something simple. If you can't find curry leaves at a regular grocery store, just leave them out — the lemon and mustard seeds still carry the dish.
Ingredients
- 2 cups cooked long-grain white rice, cooled
- 3 tablespoons fresh lemon juice (about 1½ lemons)
- 1 teaspoon lemon zest
- 2 tablespoons oil (neutral oil or coconut oil)
- 1 teaspoon mustard seeds
- 8–10 fresh curry leaves (optional — skip if unavailable)
- 1 dried red chili (optional, for a little heat)
- ¼ teaspoon turmeric
- 2 tablespoons roasted peanuts or cashews (optional, for crunch)
- Salt to taste
Instructions
- Heat oil in a small pan over medium heat. Add the mustard seeds and wait — once they start popping, add the curry leaves and dried red chili (if using) and stir for about 30 seconds. Stand back a little when the curry leaves go in, they splatter.
- Add the turmeric and stir quickly for 15 seconds. If you're using peanuts or cashews, add them now and let them toast for a minute.
- Pour this tempered oil mixture over the cooled cooked rice. Add the lemon juice, lemon zest, and salt. Toss everything together gently until the rice is evenly coated and yellow from the turmeric.
- Taste and adjust lemon or salt. Serve warm or at room temperature — both work well.
Tips
- Tip: Use day-old cooked rice if you have it — the drier texture absorbs the lemon and oil more evenly than freshly cooked rice, which can turn mushy when you toss it.
- Tip: Mustard seeds are easy to find in the spice aisle at most grocery stores — they look like tiny black seeds and cost almost nothing. Don't substitute yellow mustard powder, it's a completely different flavor.
- Tip: This rice is great packed cold in a lunchbox the next day — the flavors settle in overnight and it tastes even more lemony.
13. Italian Broccoli Pasta with Pecorino and Lemon

This is not my attempt at authentic Italian cooking — it's my home version, and I want to be upfront about that. But it works. Broccoli gets cooked down until it's almost saucy, the pasta soaks up all that garlicky olive oil, and a generous handful of grated pecorino brings this salty, nutty sharpness that I honestly prefer over parmesan here. The lemon zest at the end is what pulls everything together — don't skip it. My kids eat this without complaint, which in this house is the highest endorsement I can give a vegetable pasta.
Ingredients
- 12 oz pasta (rigatoni, penne, or spaghetti all work)
- 1 large head broccoli, cut into small florets (about 4 cups)
- 4 cloves garlic, thinly sliced
- ¼ cup olive oil
- ½ teaspoon red pepper flakes
- Zest and juice of 1 lemon
- ½ cup finely grated pecorino romano (or parmesan if that's what you have)
- Salt and black pepper to taste
- ½ cup reserved pasta water
Instructions
- Cook pasta in well-salted boiling water according to package directions. Before draining, scoop out about ½ cup of the starchy pasta water — this is what makes the sauce come together.
- In a large skillet over medium heat, warm the olive oil and add the sliced garlic and red pepper flakes. Cook for about 1 minute until fragrant but not browned.
- Add the broccoli florets and a pinch of salt. Cook for 8–10 minutes, stirring occasionally, until the broccoli is very tender and starting to break down at the edges. Add a splash of water if the pan gets dry.
- Add the drained pasta to the skillet along with the reserved pasta water. Toss everything together over medium heat for 1–2 minutes until the broccoli coats the pasta like a loose sauce.
- Remove from heat. Add lemon zest, lemon juice, and most of the pecorino. Toss well, taste for salt, and serve with the remaining cheese on top.
Tips
- Tip: Don't rush the broccoli — letting it cook down until it's really soft is what gives you that saucy, clingy texture rather than just broccoli sitting on top of pasta.
- Tip: Pecorino is saltier than parmesan, so hold back on adding extra salt until after you've tossed in the cheese and tasted it.
- Tip: Want to add protein? A can of drained white beans stirred in at the end makes this a complete meal without much extra effort.
14. Crunchy Caesar Kale Wrap
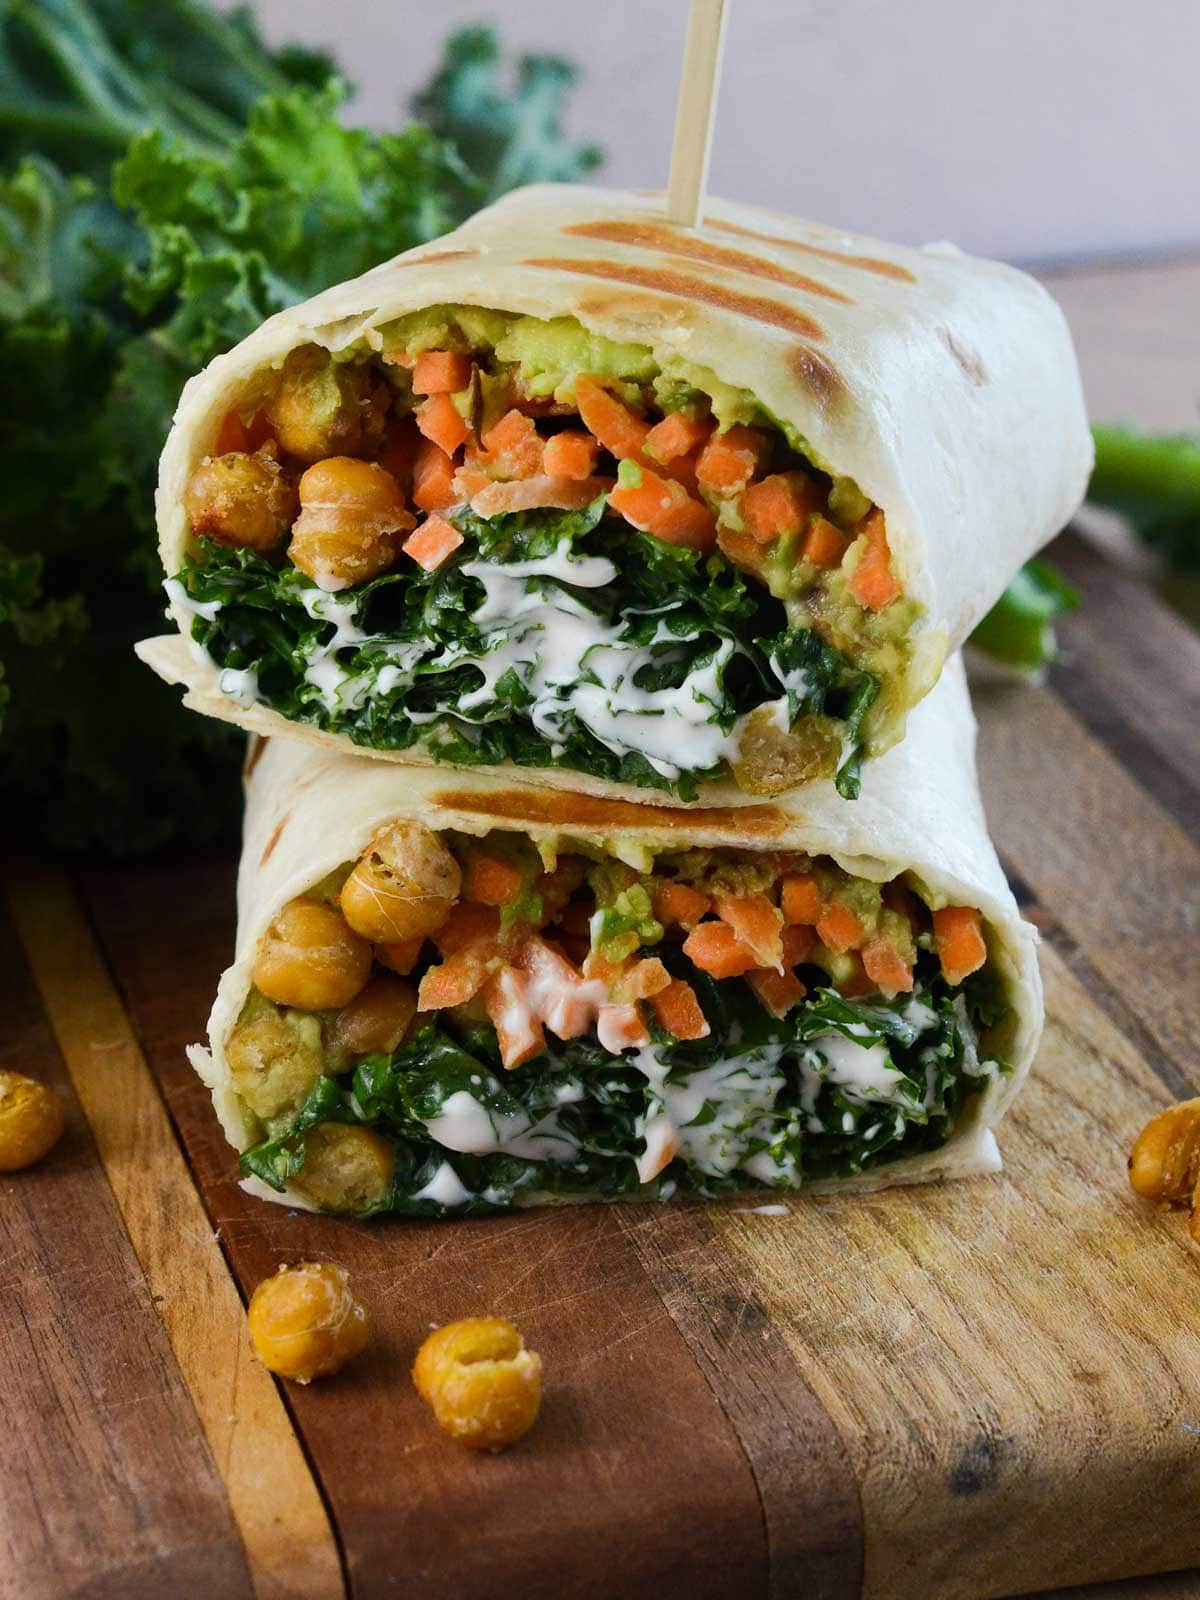
I started making these wraps on weekday afternoons when I needed something fast that wasn't just sad leftover rice. The concept is simple: massaged kale, crisp romaine, crunchy croutons, and a creamy Caesar dressing all rolled into a large flour tortilla. What I didn't expect was how well the kale holds up — unlike regular lettuce wraps that go soggy in minutes, these stay crunchy even if you pack them an hour ahead. I add grilled chicken when I have it, but the wrap is genuinely satisfying without it too.
Ingredients
- 2 large flour tortillas (10-inch burrito size)
- 2 cups chopped curly kale, stems removed
- 1 cup chopped romaine lettuce
- ½ cup Caesar dressing (store-bought is totally fine)
- ½ cup croutons, roughly crushed
- ¼ cup grated parmesan
- 1 cup grilled or rotisserie chicken, shredded (optional)
- Salt and black pepper to taste
Instructions
- Place the chopped kale in a bowl and drizzle with about 1 teaspoon of olive oil and a pinch of salt. Use your hands to massage it for about a minute until it softens slightly — this takes away the raw bitterness.
- Add the romaine, parmesan, and Caesar dressing to the bowl. Toss well to coat everything evenly.
- Add the shredded chicken if using, and toss again. Taste and adjust salt and pepper.
- Warm the tortillas in a dry skillet for 30 seconds per side — this makes them pliable and easier to roll without cracking.
- Scatter the crushed croutons over the center of each tortilla, then pile on the kale Caesar mixture. Fold in the sides and roll tightly. Slice in half and serve immediately.
Tips
- Tip: Add the croutons right before rolling — if you toss them into the salad too early they'll absorb the dressing and lose their crunch, which is the whole point of them being there.
- Tip: For a plant-based version, skip the chicken and add sliced avocado instead — it adds enough creaminess that you won't miss the meat.
- Tip: If you're packing these for lunch, keep the dressing separate and dress the greens right before eating so nothing gets soggy.
15. Asparagus Radish Salad with Honey-Mustard Dressing

Radishes are one of those vegetables I ignored for years, and I genuinely regret it. This salad changed my mind. The thinly sliced radishes bring this sharp, peppery bite that plays beautifully against the tender asparagus spears, and the honey-mustard dressing is the kind of thing you want to drizzle on everything. It comes together in about 15 minutes, it looks gorgeous on a table because of the pink and green contrast, and it's the kind of side dish that makes people think you put in more effort than you actually did. I make a double batch when I bring it to family gatherings because it disappears fast.
Ingredients
- 1 lb fresh asparagus, woody ends snapped off
- 1 bunch radishes (about 8–10), thinly sliced into rounds
- 2 tablespoons Dijon mustard
- 1 tablespoon honey
- 3 tablespoons olive oil
- 1 tablespoon apple cider vinegar (or white wine vinegar)
- Salt and black pepper to taste
- Fresh parsley or chives for garnish (optional)
Instructions
- Bring a pot of salted water to a boil. Blanch the asparagus spears for 2 minutes, then immediately transfer to a bowl of ice water to stop the cooking and keep them bright green. Drain and pat dry.
- In a small bowl or jar, whisk together the Dijon mustard, honey, olive oil, and vinegar. Season with salt and pepper. Taste it — it should be tangy, slightly sweet, and balanced.
- Cut the blanched asparagus into 2-inch pieces and arrange on a serving plate. Scatter the sliced radishes over the top.
- Drizzle the honey-mustard dressing over the salad. Garnish with fresh parsley or chives if you have them. Serve immediately or refrigerate for up to 1 hour before serving.
Tips
- Tip: The ice bath after blanching is not optional if you want the asparagus to stay that vivid green — skipping it means dull, army-colored spears and nobody wants that on their spring table.
- Tip: Use a mandoline or the slicing disk on a food processor to get the radishes paper-thin — thin slices are milder and more elegant than chunky ones. If you don't have either, just slice carefully with a sharp knife.
- Tip: This dressing keeps in a jar in the fridge for up to a week, so make extra and use it on roasted vegetables or grain bowls throughout the week.
16. Easy White Fish with Healthy Lemon Garlic Sauce
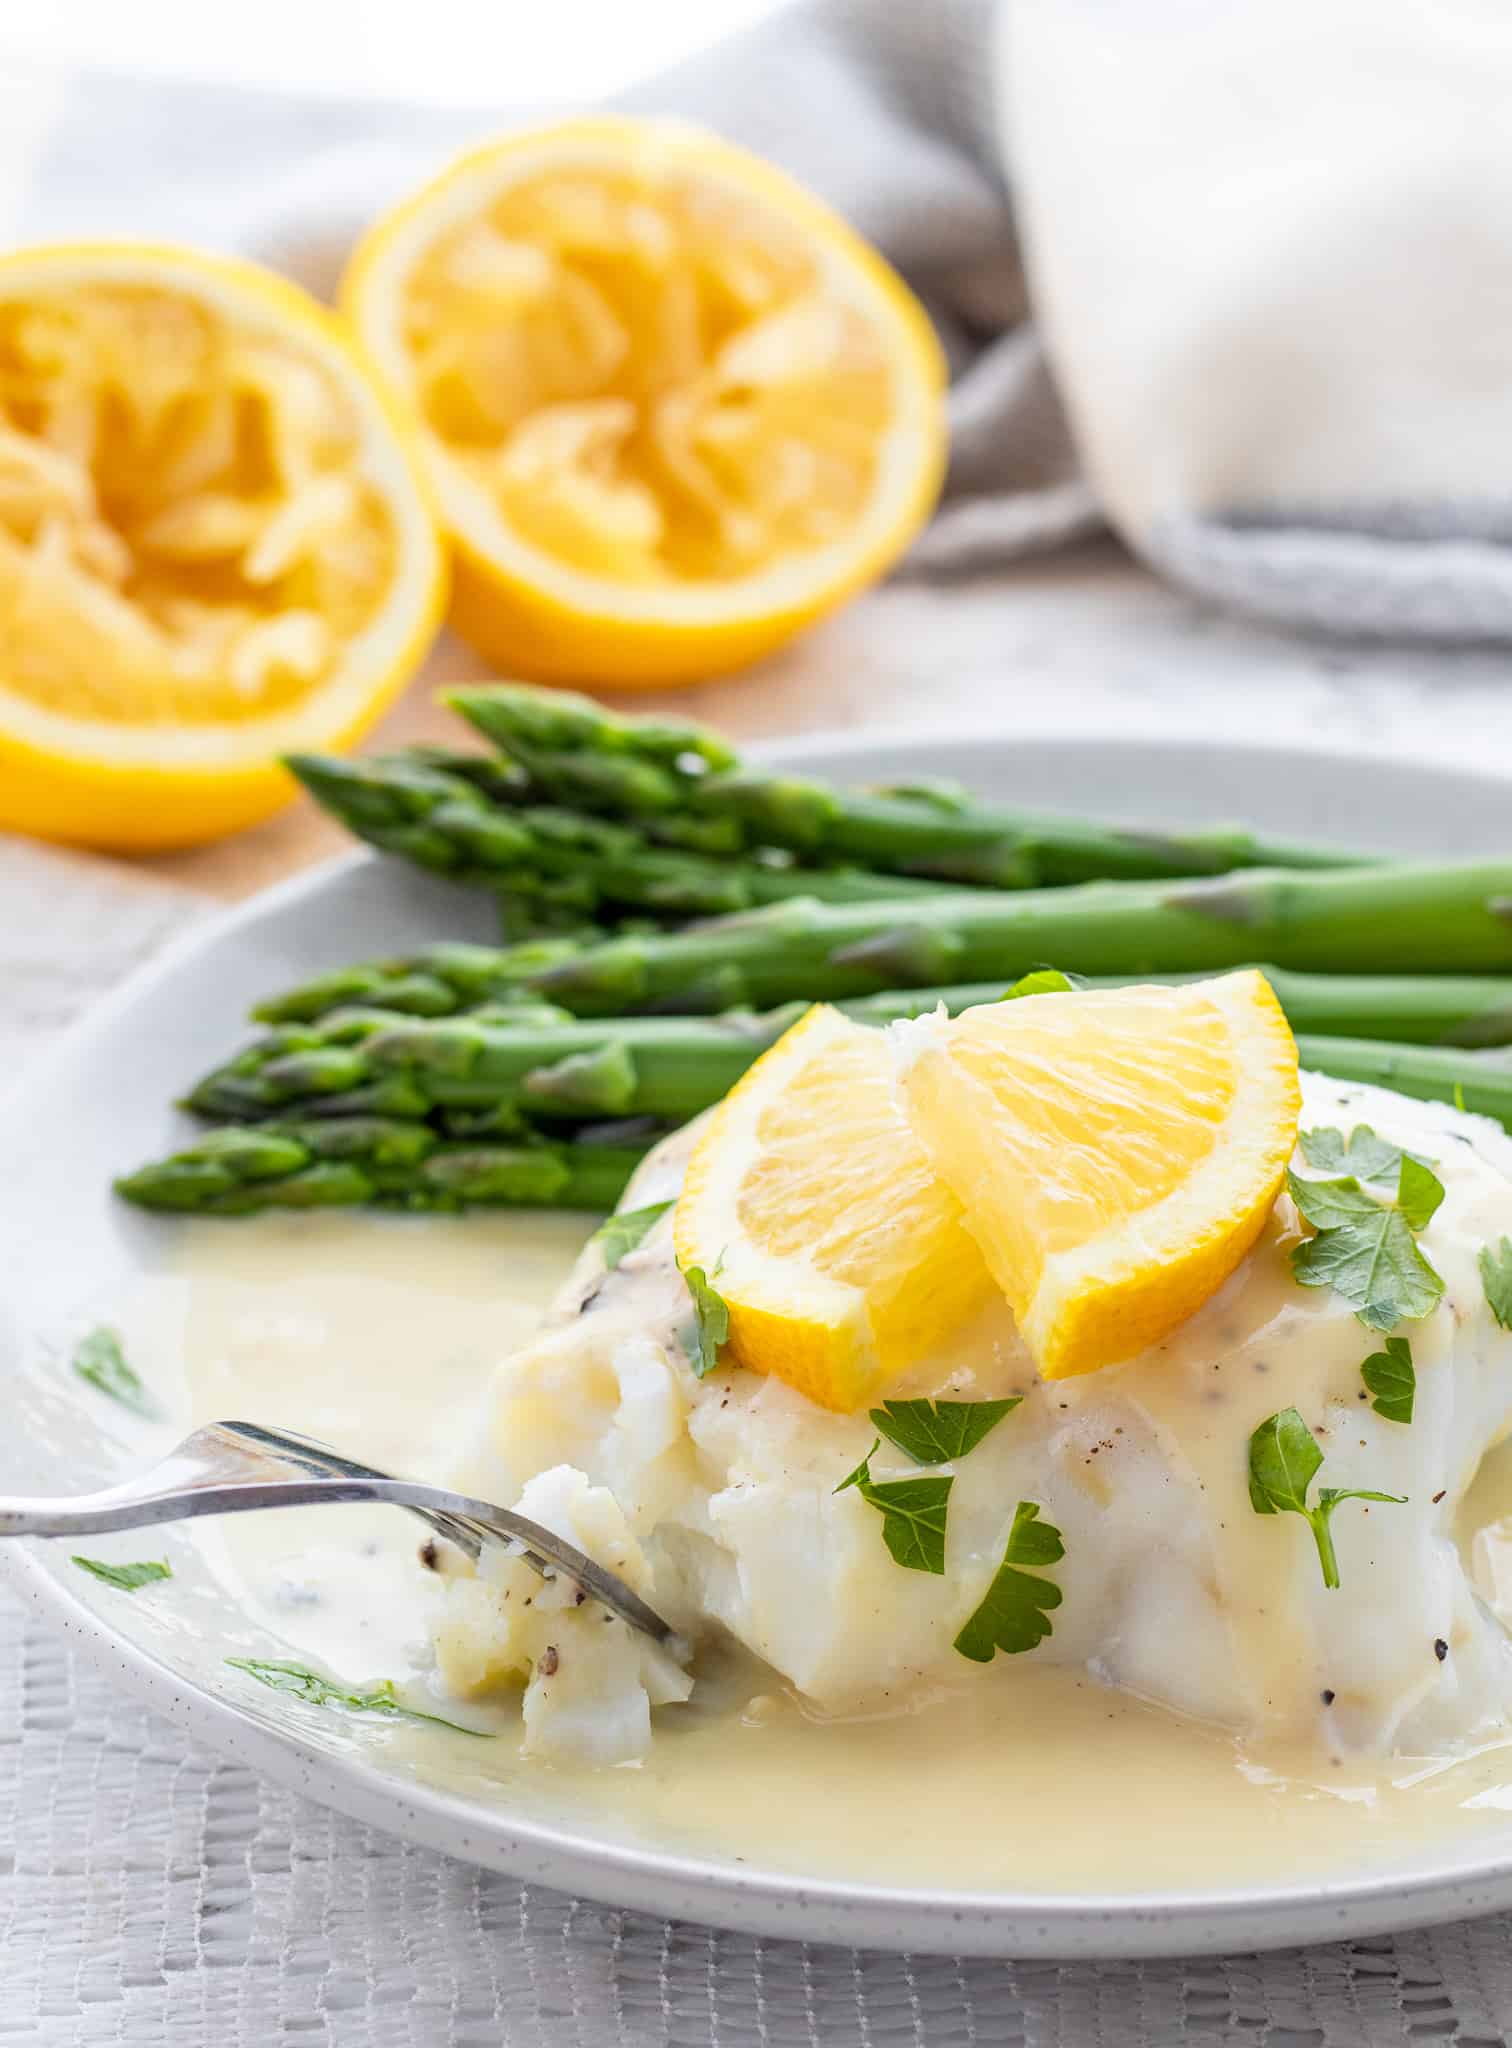
Fish used to intimidate me. I'd overcook it, underseason it, or have it fall apart in the pan. This recipe is what finally clicked — white fish fillets cooked in a simple lemon garlic sauce that comes together with olive oil, garlic, broth, and fresh lemon juice, no butter anywhere. The sauce stays light but it's anything but bland. Tilapia, cod, and mahi-mahi all work here, and Costco usually has affordable options for all three. My husband asks for this over rice with a side salad at least once a week during spring and summer.
Ingredients
- 4 white fish fillets (cod, tilapia, or mahi-mahi, about 5–6 oz each)
- 3 tablespoons olive oil, divided
- 4 cloves garlic, minced
- ½ cup low-sodium chicken broth (or vegetable broth)
- 3 tablespoons fresh lemon juice (about 1 large lemon)
- 1 teaspoon lemon zest
- ½ teaspoon dried oregano
- Salt and black pepper to taste
- Fresh parsley, chopped, for serving
Instructions
- Pat the fish fillets completely dry with paper towels — this is the most important step for getting a good sear. Season both sides generously with salt, pepper, and oregano.
- Heat 2 tablespoons of olive oil in a large skillet over medium-high heat. Once the oil is shimmering, add the fish fillets. Cook for 3–4 minutes per side depending on thickness, until golden and the fish flakes easily with a fork. Transfer to a plate.
- Reduce heat to medium. Add the remaining 1 tablespoon of olive oil to the same pan, then add the minced garlic. Cook for 30–45 seconds until fragrant — watch it closely so it doesn't burn.
- Pour in the chicken broth and lemon juice. Scrape up any browned bits from the bottom of the pan. Let the sauce simmer for 2–3 minutes until it reduces slightly. Stir in the lemon zest.
- Return the fish to the pan, spoon the sauce over the top, and cook for another minute to warm through. Garnish with fresh parsley and serve with rice, roasted vegetables, or a simple green salad.
Tips
- Tip: Don't move the fish around while it's searing — let it sit undisturbed so a proper crust forms. If it's sticking, it's not ready to flip yet.
- Tip: Frozen fish fillets work fine here — just thaw them fully in the fridge overnight and pat them very dry before cooking, otherwise they'll steam instead of sear.
- Tip: If you want a slightly richer sauce without butter, stir in a tablespoon of olive oil right at the end off the heat — it emulsifies into the broth and gives the sauce more body.
17. Shaved Asparagus Salad
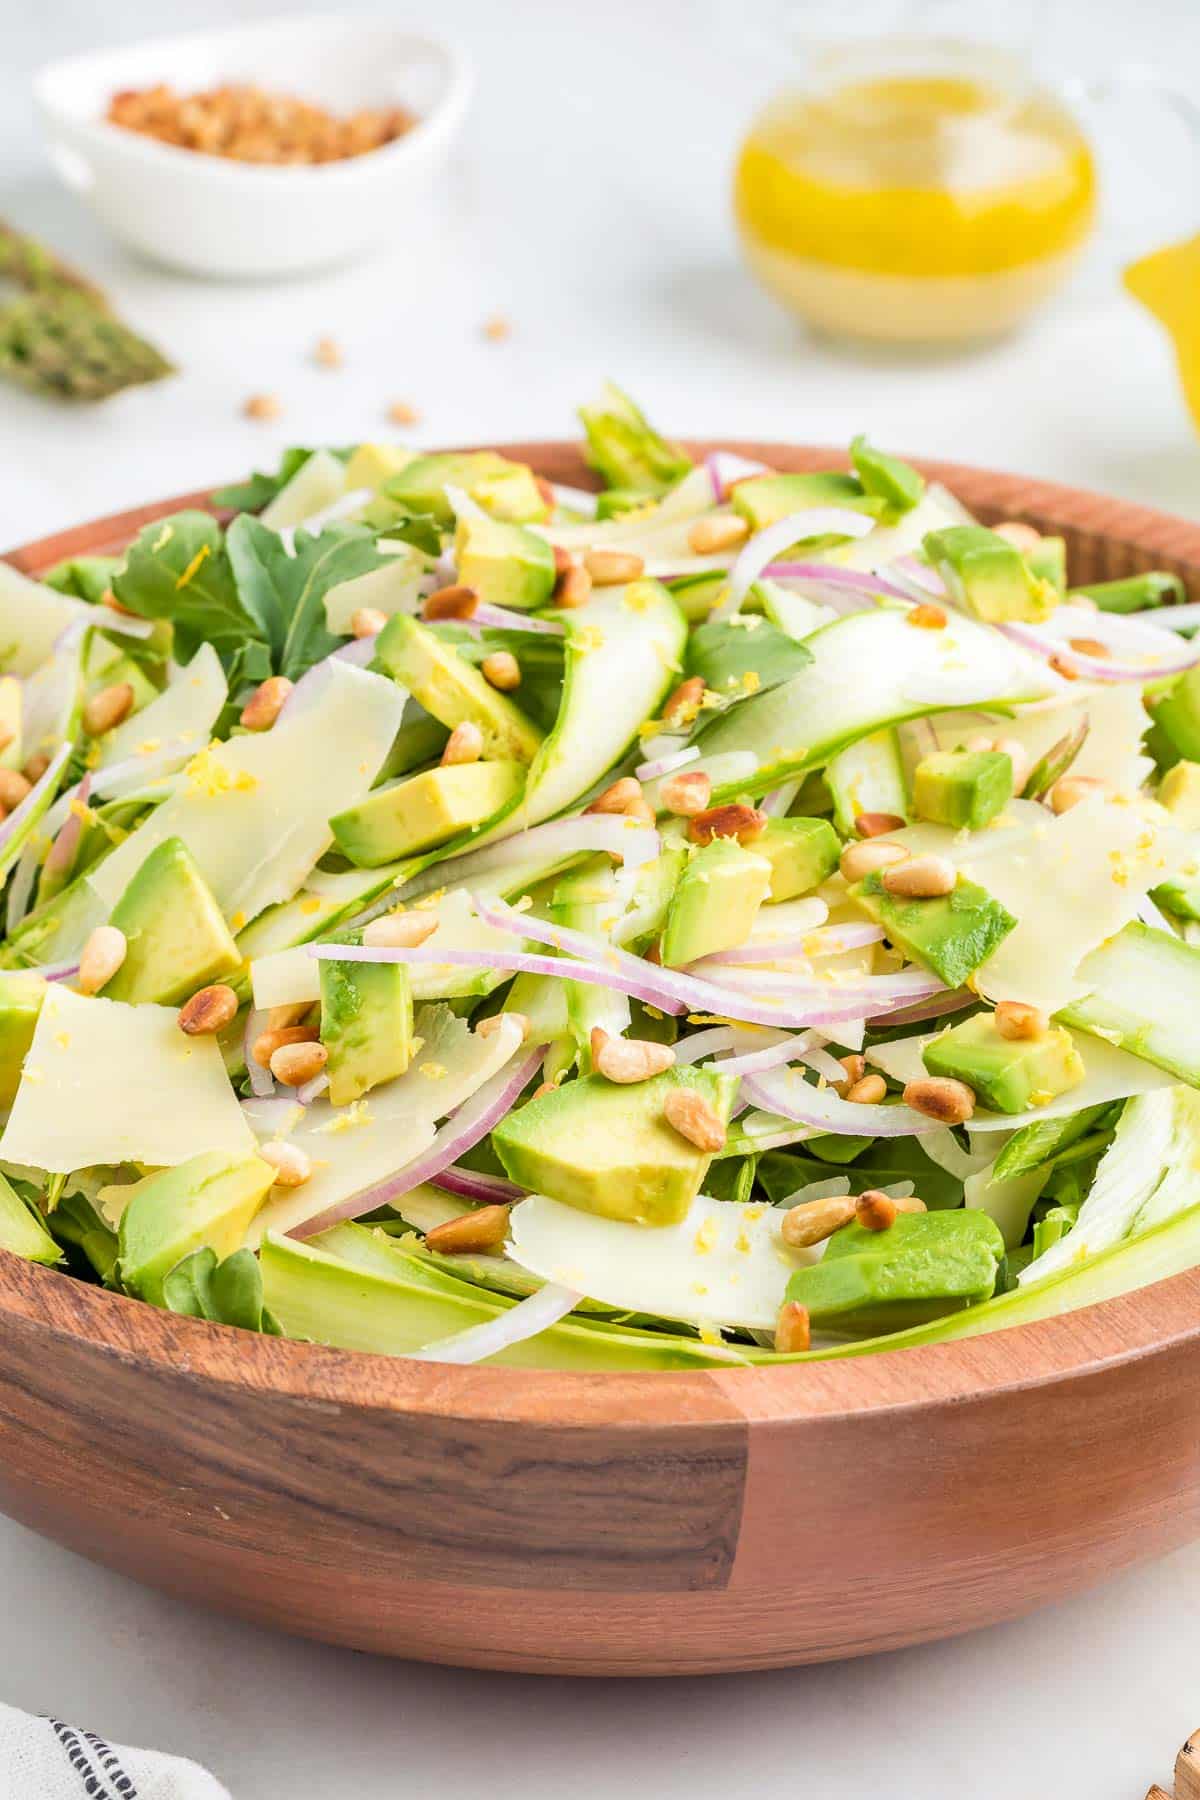
I was skeptical about eating asparagus raw the first time I tried this — I'd only ever roasted or steamed it. But shaving it into thin ribbons with a vegetable peeler completely changes the texture. It becomes almost delicate, not grassy or tough, and it absorbs a lemon-olive oil dressing beautifully. Saad actually ate this without realizing it was a vegetable until halfway through, which felt like a small personal victory. This takes about 10 minutes and requires zero cooking, which makes it my go-to when I need something green on the table fast.
Ingredients
- 1 lb thick asparagus spears (thicker stalks shave better than thin ones)
- 3 tablespoons good olive oil
- 2 tablespoons fresh lemon juice
- 1 teaspoon lemon zest
- ¼ cup shaved or finely grated parmesan
- ¼ teaspoon red pepper flakes (optional)
- Salt and freshly cracked black pepper to taste
- 2 tablespoons toasted pine nuts or slivered almonds (optional but good)
Instructions
- Snap off the woody ends of the asparagus. Hold each spear flat on a cutting board and use a vegetable peeler to shave it into long, thin ribbons from base to tip. Some pieces will break into shorter strips — that's fine, just keep going.
- Place the shaved asparagus in a large bowl. In a small bowl, whisk together the olive oil, lemon juice, lemon zest, salt, and pepper to make the dressing.
- Pour the dressing over the asparagus ribbons and toss gently to coat. Let it sit for 5 minutes — the ribbons will soften slightly in the acid, which is what you want.
- Transfer to a serving plate or bowl. Scatter the shaved parmesan, red pepper flakes, and toasted nuts over the top. Serve right away.
Tips
- Tip: Thick asparagus is genuinely easier to shave than thin spears — the thin ones snap before you get a ribbon going. Look for the medium-to-thick bundles at the store.
- Tip: Don't dress this salad more than 15–20 minutes before serving — the ribbons will wilt and lose their appealing texture if they sit in the dressing too long.
- Tip: A block of parmesan that you shave yourself with the peeler gives you those beautiful thin curls that look far more impressive than pre-grated — and it only takes an extra 30 seconds.
8. Pan-Fried Sea Bass Recipe with Pesto (Basil Pistou)

Pan-fried sea bass is one of those recipes that looks far more impressive than the effort it takes. The fish gets crispy skin on the outside and stays delicate and flaky inside, and the fresh basil pistou — basically a French-style pesto without the parmesan — ties everything together with a bright, herby finish. I was skeptical the first time I tried pan-frying fish this way because I kept getting it stuck to the pan, but the trick is very hot oil and not touching the fish for the first two minutes. Let it release on its own. Serve it over a simple green salad or with crusty bread and this is a genuinely complete spring dinner.
Ingredients
- 2 sea bass fillets, skin on (about 6 oz each)
- 2 tablespoons olive oil
- Salt and black pepper to taste
- 1 cup fresh basil leaves, packed
- 2 cloves garlic
- 3 tablespoons olive oil (for pistou)
- 1 tablespoon lemon juice
- ¼ teaspoon salt (for pistou)
Instructions
- Make the pistou first: blend basil, garlic, lemon juice, 3 tablespoons olive oil, and ¼ teaspoon salt in a small blender or food processor until smooth. If you don't have a blender, just chop the basil and garlic very finely and stir everything together — the texture is chunkier but it works fine.
- Pat the sea bass fillets completely dry with paper towels — this is the step most people skip and it's why the skin doesn't get crispy. Season both sides generously with salt and pepper.
- Heat 2 tablespoons olive oil in a heavy skillet over medium-high heat until shimmering. Place fillets skin-side down and press gently for the first 10 seconds to prevent curling.
- Cook skin-side down for 3–4 minutes without moving — the fish will release naturally when the skin is crispy. Flip and cook for another 1–2 minutes until the flesh is opaque all the way through.
- Plate the fish skin-side up, spoon the basil pistou generously over the top, and serve immediately.
Tips
- Tip: If sea bass isn't available at your store, branzino or striped bass work just as well here — same technique, same timing.
- Tip: The pistou can be made up to a day ahead and kept in the fridge — just press plastic wrap directly onto the surface so it doesn't oxidize and turn brown.
- Tip: A stainless steel or cast iron pan gives you the best crust — avoid nonstick if you can, it won't get the skin quite as crispy.
9. Hawaiian Garlic Chicken (Gluten Free)
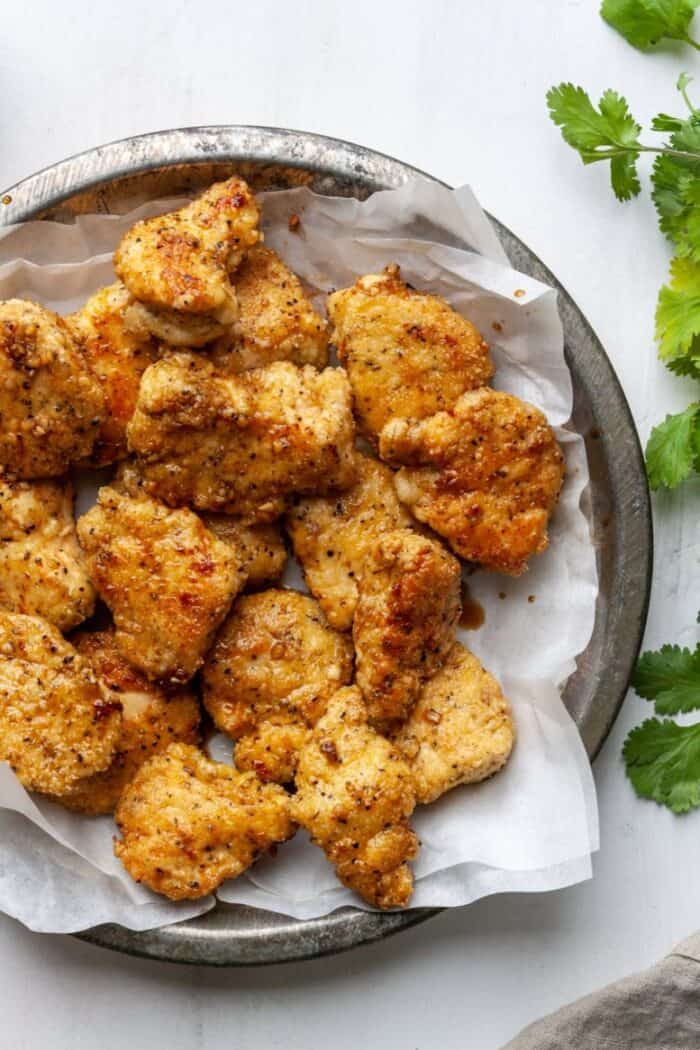
Hawaiian garlic chicken is the kind of recipe that sounds a little unusual — pineapple with garlic and soy — but once you try it you completely understand why it works. The pineapple juice tenderizes the chicken and gives it a subtle sweetness, while the garlic keeps it savory enough that it doesn't tip into dessert territory. My husband was skeptical the first time I put this on the table but he ate two servings and asked when I'd make it again, so that tells you everything. It's naturally gluten free as long as you use tamari or a certified GF soy sauce, and it comes together fast enough for a weeknight dinner.
Ingredients
- 1½ lbs boneless skinless chicken thighs (or breasts)
- ½ cup pineapple juice (from a can of crushed pineapple or pure juice)
- 3 tablespoons tamari or gluten-free soy sauce
- 5 cloves garlic, minced
- 1 tablespoon brown sugar
- 1 tablespoon rice vinegar
- 1 teaspoon sesame oil
- 1 tablespoon neutral oil (avocado or vegetable)
- Sliced green onions and sesame seeds, to garnish
- Cooked white rice, to serve
Instructions
- Whisk together the pineapple juice, tamari, minced garlic, brown sugar, rice vinegar, and sesame oil in a bowl. Add the chicken, toss to coat, and marinate for at least 20 minutes — or up to overnight in the fridge.
- Heat neutral oil in a large skillet over medium-high heat. Remove chicken from the marinade (reserve the marinade) and cook for 5–6 minutes per side until cooked through and golden.
- Pour the reserved marinade into the pan after flipping the chicken. Let it bubble and reduce for 2–3 minutes — it will thicken into a glossy glaze that coats the chicken.
- Slice or serve the chicken thighs whole over rice, spoon any remaining glaze from the pan on top, and finish with green onions and sesame seeds.
Tips
- Tip: Chicken thighs stay juicier than breasts here — if you use breasts, watch the cook time carefully so they don't dry out.
- Tip: A can of crushed pineapple from Walmart or Trader Joe's gives you both the juice and pineapple chunks you can throw into the pan for extra texture.
- Tip: If the glaze reduces too fast and starts to burn, splash in 2 tablespoons of water and lower the heat — the sugar in the pineapple juice catches quickly.
10. Gluten Free Vegan Lemon Orzo Soup Recipe [Oil-Free]
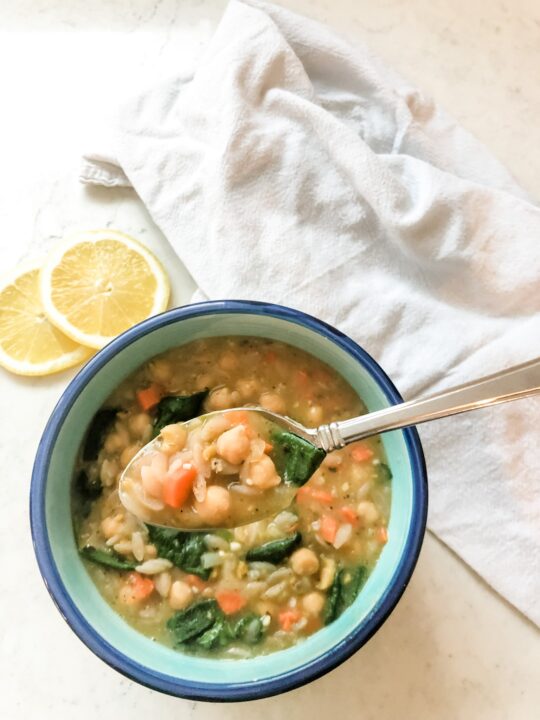
Lemon orzo soup sounds simple — and it is — but it delivers in a way that feels like spring in a bowl. The brightness from the lemon lifts everything, the orzo gives it enough body to be genuinely filling, and the chickpeas add protein without any heaviness. This version is both vegan and gluten free, and it's oil-free which means it's also genuinely light. I make a double batch of this because it disappears fast — the broth gets absorbed by the orzo as it sits, so by day two it's almost like a thick stew, which my family actually prefers. Use certified gluten-free orzo if you need this to be strictly GF (Bob's Red Mill carries it, or check the health food aisle at Whole Foods).
Ingredients
- 1 cup dry gluten-free orzo (or regular orzo if not strictly GF)
- 1 can (15 oz) chickpeas, drained and rinsed
- 1 medium yellow onion, diced
- 3 cloves garlic, minced
- 2 medium carrots, sliced into rounds
- 2 stalks celery, sliced
- 6 cups low-sodium vegetable broth
- Juice of 2 lemons (about ¼ cup)
- 1 teaspoon dried thyme
- Salt and black pepper to taste
- Fresh parsley, chopped, to garnish
Instructions
- In a large pot over medium heat, add the onion, garlic, carrots, and celery with a splash of vegetable broth (about 2 tablespoons) instead of oil. Sauté for 4–5 minutes, stirring often, until softened — add another splash of broth if things start to stick.
- Add the dried thyme, chickpeas, and remaining vegetable broth. Bring to a boil, then reduce to a simmer and cook for 10 minutes so the vegetables get fully tender.
- Stir in the dry orzo and cook for another 8–10 minutes until the orzo is just tender. Don't overcook — it will continue to absorb liquid even off the heat.
- Remove from heat, stir in lemon juice, and season generously with salt and pepper. Taste and adjust — the lemon is the star here, so don't hold back.
- Ladle into bowls and top with fresh parsley. Serve with gluten-free bread or on its own.
Tips
- Tip: If you're storing leftovers, keep the orzo separate from the broth if possible — otherwise it soaks up everything and turns into more of a stew by day two (which isn't bad, just different).
- Tip: Add a big handful of fresh spinach or kale in the last minute of cooking for extra greens — it wilts right in without changing the flavor much.
- Tip: Lemon zest from one of the lemons stirred in at the end gives an extra pop of citrus flavor — I started doing this and now I can't make it without.
11. Bruschetta Chicken Pasta
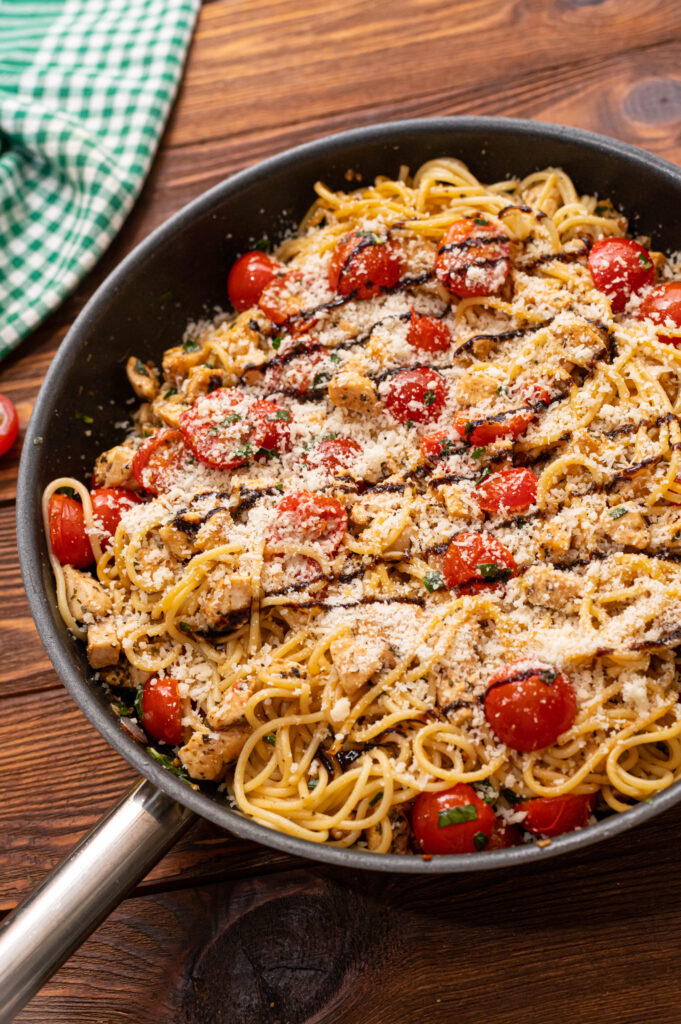
Bruschetta chicken pasta takes everything you love about bruschetta — the juicy tomatoes, fresh basil, garlic, and balsamic — and tosses it with tender pan-seared chicken and pasta. It sounds like a restaurant dish but it genuinely comes together in about 30 minutes on a weeknight. The key is using ripe, in-season tomatoes rather than the watery ones you get in winter — this is a spring and summer recipe for a reason. A shower of freshly grated parmesan at the end and a drizzle of good balsamic glaze make it feel a lot fancier than the effort involved.
Ingredients
- 12 oz penne or spaghetti
- 1 lb boneless skinless chicken breasts, pounded to even thickness
- 2 tablespoons olive oil, divided
- 1 teaspoon Italian seasoning
- Salt and black pepper to taste
- 3 medium ripe tomatoes, diced and drained (about 2 cups)
- 3 cloves garlic, minced
- ¼ cup fresh basil, torn or chiffonaded
- 2 tablespoons balsamic vinegar (or balsamic glaze for drizzling)
- ½ cup freshly grated parmesan cheese
Instructions
- Cook pasta according to package directions in well-salted water. Reserve ½ cup pasta water before draining.
- While pasta cooks, season chicken with Italian seasoning, salt, and pepper. Heat 1 tablespoon olive oil in a skillet over medium-high heat and cook chicken for 5–6 minutes per side until cooked through. Let rest 5 minutes, then slice or cube.
- In a large bowl, combine diced tomatoes (make sure to drain the excess juice), minced garlic, torn basil, balsamic vinegar, remaining 1 tablespoon olive oil, and a pinch of salt. This is your bruschetta topping — let it sit while you finish the pasta so the flavors come together.
- Toss hot drained pasta with the bruschetta mixture, adding a splash of pasta water if it looks dry. The heat from the pasta will gently warm the tomatoes without fully cooking them.
- Divide pasta into bowls, top with sliced chicken, a generous amount of parmesan, and a drizzle of balsamic glaze if you have it.
Tips
- Tip: Drain the diced tomatoes well — I learned this the hard way the first time I made it. Watery tomatoes make the pasta soupy and dilute all the flavor you worked for.
- Tip: Balsamic glaze (the thick syrupy kind you find at Costco or Trader Joe's) gives a cleaner, sweeter finish than plain balsamic vinegar — worth keeping a bottle in your pantry.
- Tip: This also works as a cold pasta salad — cook the pasta, chill it, toss with the bruschetta mixture, and add the chicken cold. Great for spring lunches.
12. World's Easiest Cucumber Sandwiches | Tea Sandwich Recipe
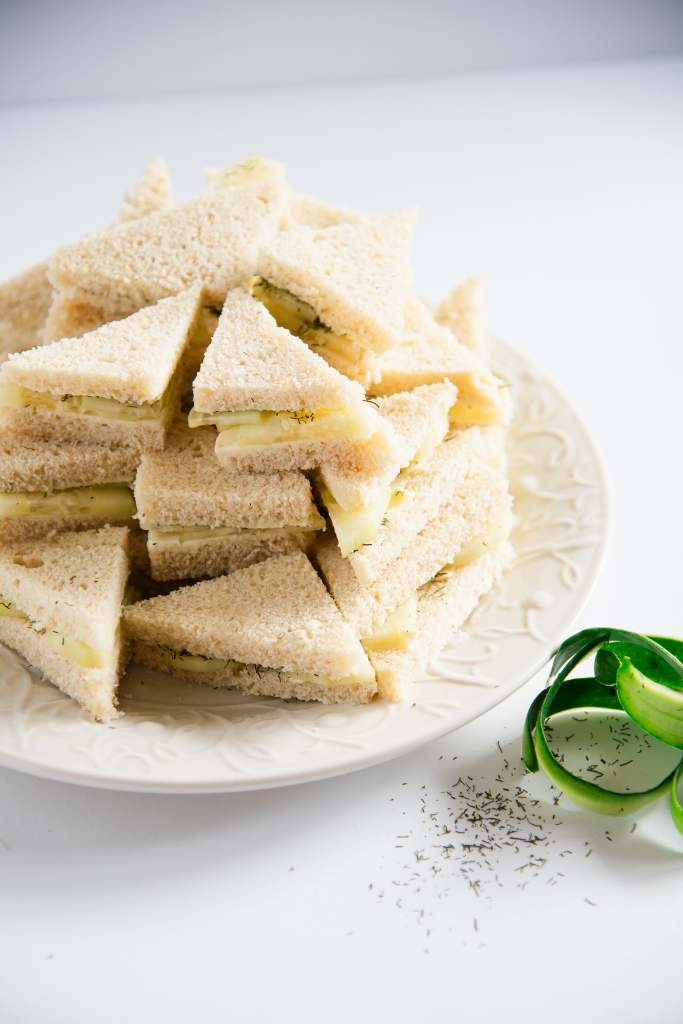
Cucumber sandwiches feel like they belong at a garden party or a spring brunch, and honestly they do — but they're also just a really solid light lunch that takes about ten minutes to put together. The combination of herbed cream cheese and cool, crisp cucumber on soft white bread is simple in the best way. Growing up in Pakistan we didn't have tea sandwiches in this style, but once I tried them I completely understood why they're a fixture at spring gatherings in the UK and the US. They're also easy to scale up — if you're making these for a crowd, just do the math on the cream cheese and cucumber and you're set.
Ingredients
- 8 slices soft white sandwich bread (crusts removed if you want the classic look)
- 8 oz cream cheese, softened to room temperature
- 1 tablespoon fresh dill, chopped (or ½ teaspoon dried dill)
- 1 clove garlic, very finely minced or grated
- 1 teaspoon lemon juice
- ¼ teaspoon salt
- 1 medium English cucumber, thinly sliced (about ⅛ inch thick)
- Black pepper to taste
Instructions
- Let the cream cheese sit at room temperature for at least 15 minutes before you start — cold cream cheese tears the bread and doesn't spread evenly. Mix it with the dill, garlic, lemon juice, salt, and a crack of black pepper until smooth and combined.
- Slice the cucumber as thinly and evenly as you can — a mandoline slicer makes this easy but a sharp knife works fine. Lay the slices on a paper towel and pat dry so they don't make the bread soggy.
- Spread the herbed cream cheese generously on one side of each bread slice — all the way to the edges so every bite has flavor.
- Layer cucumber slices in a single, slightly overlapping layer on half the bread slices, then top with the remaining slices cream-cheese-side down. Press gently.
- Cut into fingers (three strips per sandwich) or triangles, arrange on a platter, and serve within an hour of assembling for the best texture.
Tips
- Tip: English cucumbers (the long ones in plastic wrap at most grocery stores) have fewer seeds and thinner skin than regular cucumbers — worth the small extra cost for sandwiches.
- Tip: You can make the herbed cream cheese up to two days ahead and keep it refrigerated — just spread it on the bread right before serving so things don't get soggy.
- Tip: Swap the dill for chives or fresh mint if that's what you have on hand — both work beautifully with cucumber and keep the spring freshness going.
3. Creamy Vegan Wild Garlic Soup

Wild garlic has this short window in spring where it's everywhere at the farmers market, and I always grab a bunch without knowing exactly what I'll do with it. This soup is what I land on most often. It's completely vegan, naturally gluten-free, and has this deep, mellow garlic flavor that doesn't hit you over the head the way raw garlic does — it's softer, almost herby. I blend it smooth with a stick blender right in the pot, so cleanup is easy. If you can't find wild garlic at your store, a mix of baby spinach and a couple of regular garlic cloves gets you surprisingly close.
Ingredients
- 3 cups wild garlic leaves, roughly chopped (or 2 cups baby spinach + 2 cloves regular garlic)
- 1 tablespoon olive oil
- 1 medium yellow onion, diced
- 2 medium Yukon Gold potatoes, peeled and cubed
- 3 cups vegetable broth
- ½ cup canned coconut milk (full fat)
- ½ teaspoon salt, plus more to taste
- ¼ teaspoon black pepper
- Pinch of nutmeg
Instructions
- Heat olive oil in a medium pot over medium heat. Add the diced onion and cook for 5-6 minutes until softened and translucent.
- Add the cubed potatoes and vegetable broth. Bring to a boil, then reduce heat and simmer for 12-15 minutes until the potatoes are completely fork-tender.
- Add the wild garlic leaves and stir them in. Cook for just 2 minutes — you want them wilted but still bright green so the soup keeps its color.
- Remove from heat. Use a stick blender to blend the soup until completely smooth. Stir in the coconut milk, salt, pepper, and nutmeg.
- Return to low heat for 2-3 minutes to warm through. Taste and adjust salt. Serve with a swirl of extra coconut milk on top if you like.
Tips
- Tip: Don't overcook the wild garlic after adding it — 2 minutes max. Any longer and you lose that vivid green color and get a more bitter flavor.
- Tip: No stick blender? Let the soup cool slightly, then blend in a regular blender in two batches with the lid slightly vented to let steam escape.
- Tip: This soup keeps well in the fridge for 3 days. It thickens as it sits — just add a splash of broth when reheating to loosen it back up.
4. Roast Salmon with Greens
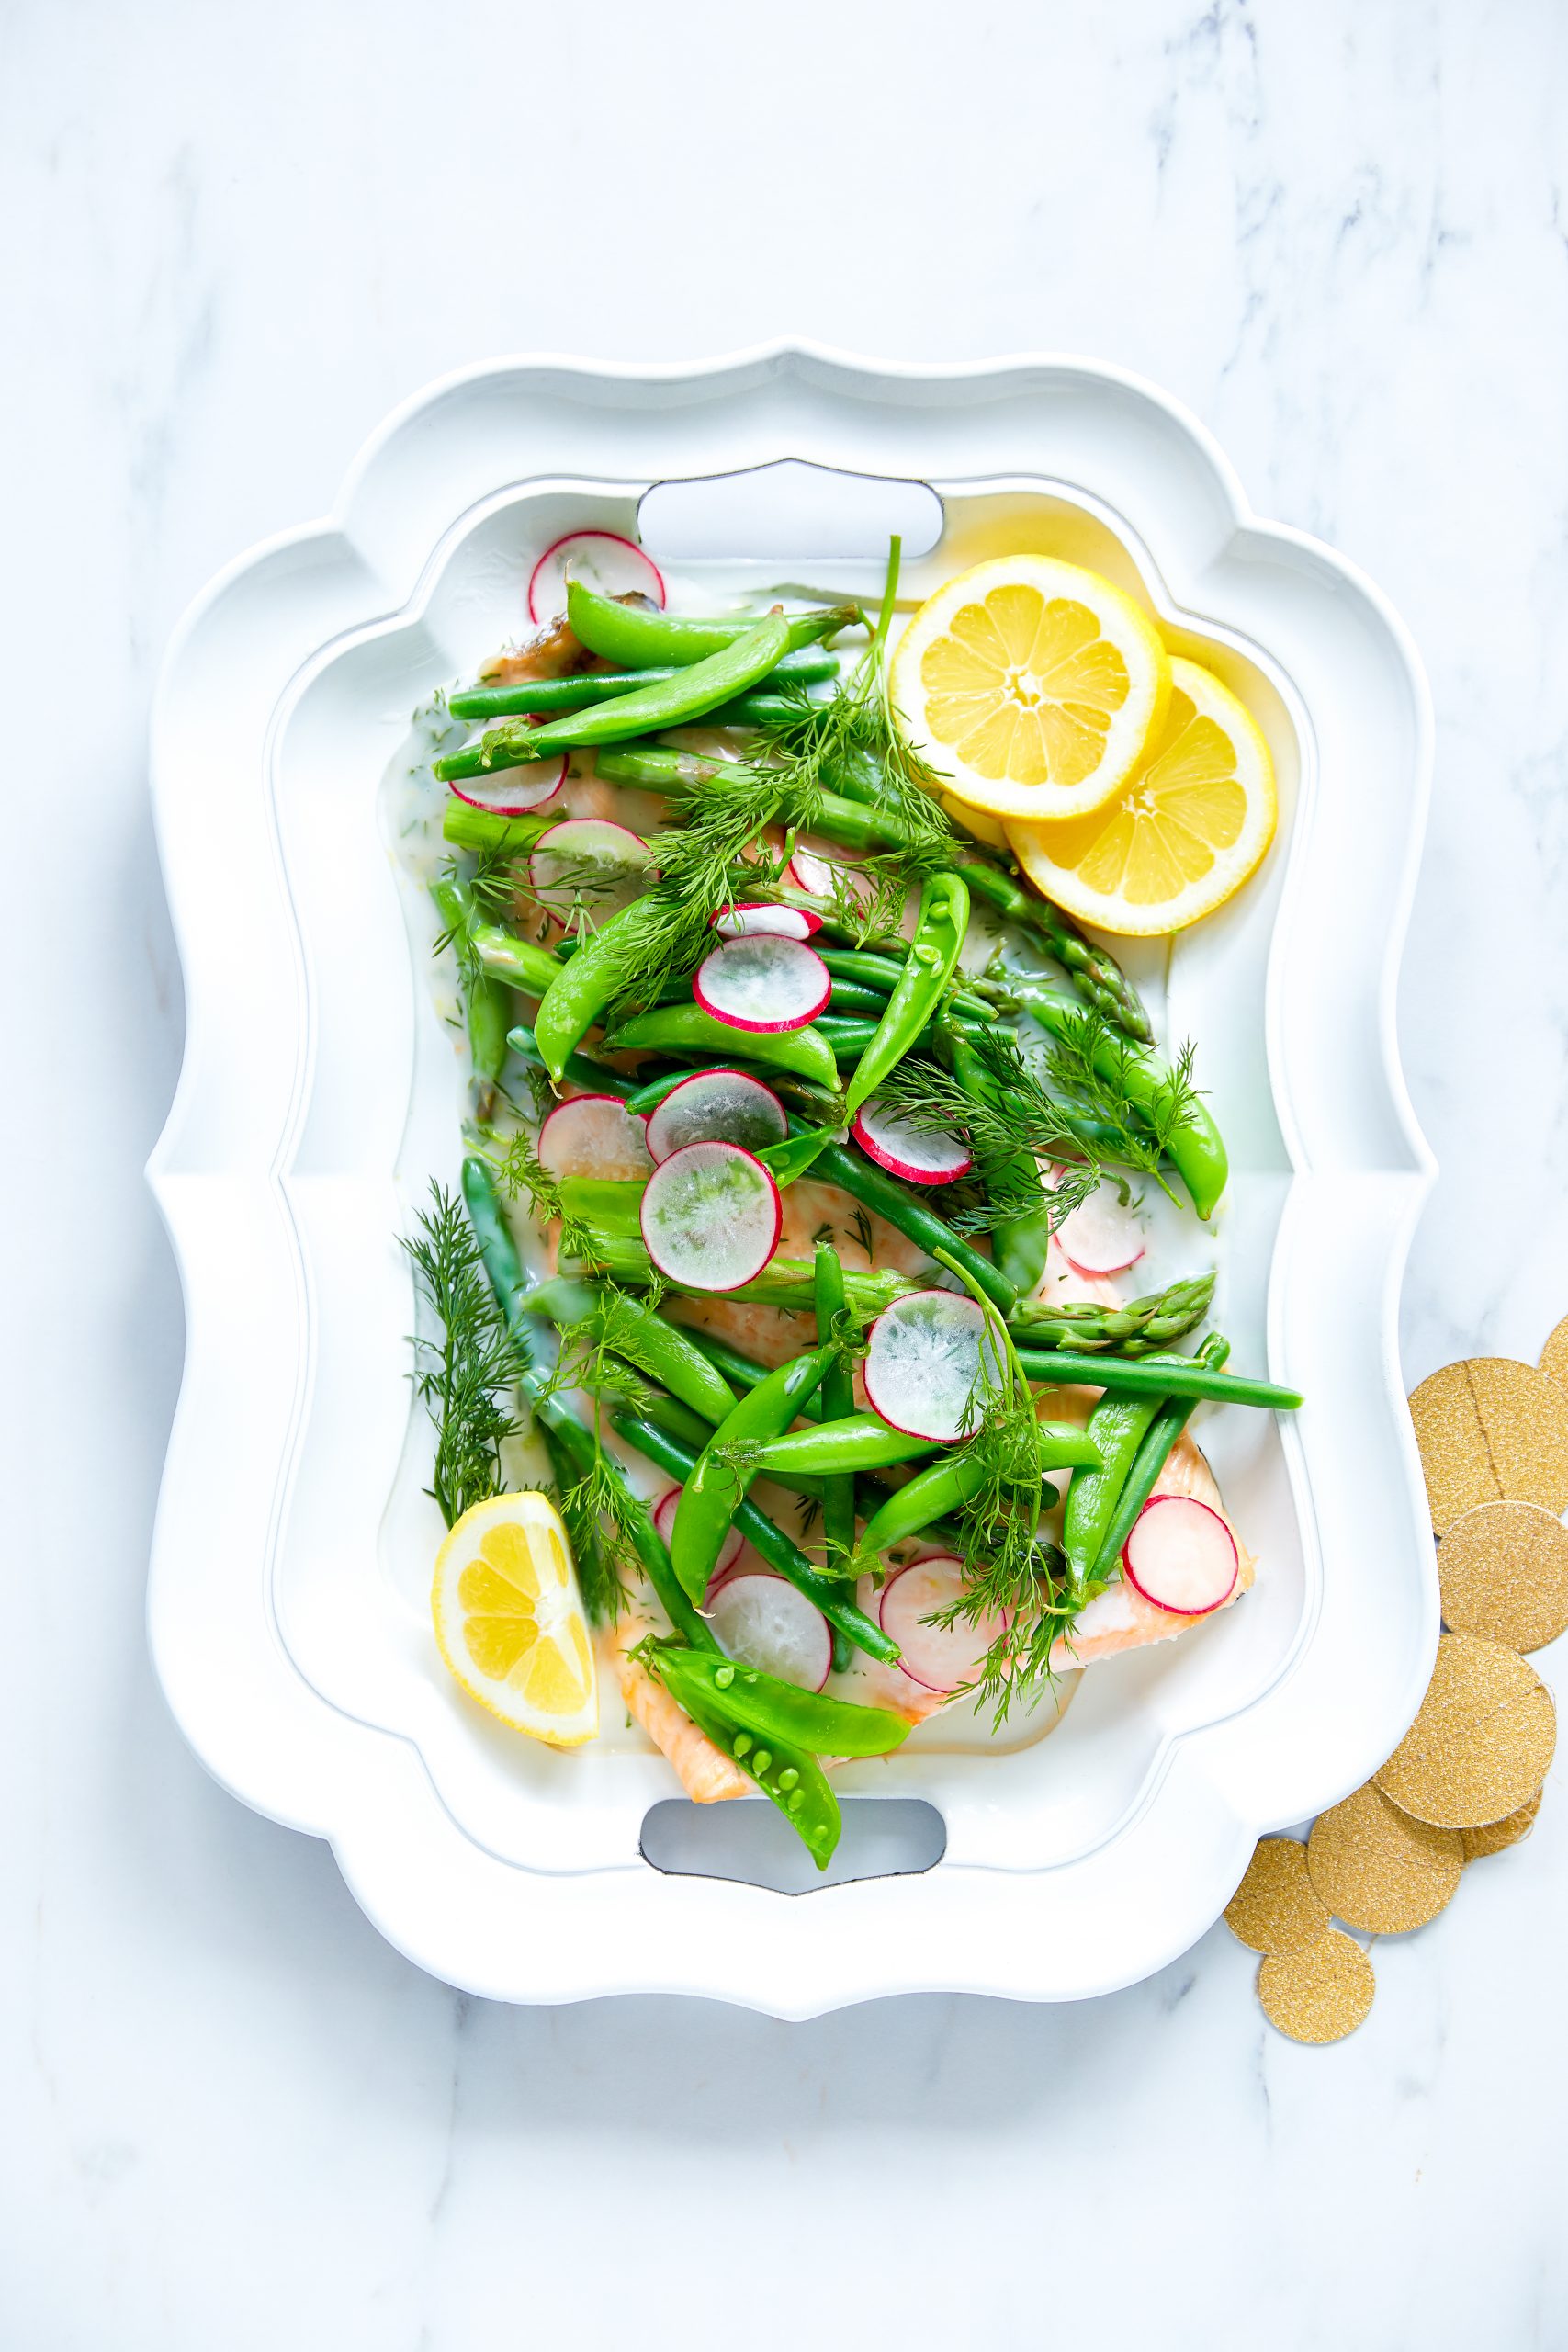
Salmon is one of those proteins I reach for when I need dinner on the table fast without it feeling like a lazy meal. This version roasts in the oven while the greens cook in a skillet at the same time, so everything comes together in under 30 minutes. The salmon stays juicy inside with a slightly caramelized edge, and the sautéed spinach underneath soaks up all the roasting juices. My husband eats this over rice every single time; I usually just eat it straight from the pan with a piece of crusty bread.
Ingredients
- 4 salmon fillets (about 6 oz each), skin-on
- 2 tablespoons olive oil, divided
- 1 teaspoon garlic powder
- ½ teaspoon smoked paprika
- Salt and black pepper to taste
- 5 oz baby spinach (one standard bag)
- 2 cloves garlic, thinly sliced
- 1 tablespoon lemon juice
- Lemon wedges, for serving
Instructions
- Preheat your oven to 400°F. Line a sheet pan with foil and brush with 1 tablespoon of the olive oil.
- Pat the salmon fillets dry with a paper towel — this is what helps them get that slightly caramelized edge rather than steaming. Season both sides with garlic powder, smoked paprika, salt, and pepper. Place skin-side down on the prepared sheet pan.
- Roast for 12-14 minutes, until the salmon is opaque and flakes easily with a fork. Thicker fillets may need 15-16 minutes.
- While the salmon roasts, heat the remaining tablespoon of olive oil in a large skillet over medium heat. Add the sliced garlic and cook for 1 minute until fragrant. Add the spinach in big handfuls, tossing as it wilts. Season with salt and drizzle with lemon juice.
- Plate the sautéed greens and place a salmon fillet on top. Serve with lemon wedges.
Tips
- Tip: Patting the salmon dry before seasoning makes a real difference — wet fish steams instead of roasting and you miss out on that slightly crisp exterior.
- Tip: Swap spinach for kale, Swiss chard, or arugula — any tender green works here. Just note that kale needs an extra 2-3 minutes in the pan.
- Tip: Frozen salmon fillets work fine — just thaw them completely overnight in the fridge and pat very dry before roasting.
5. Orecchiette Pasta with Asparagus Pesto
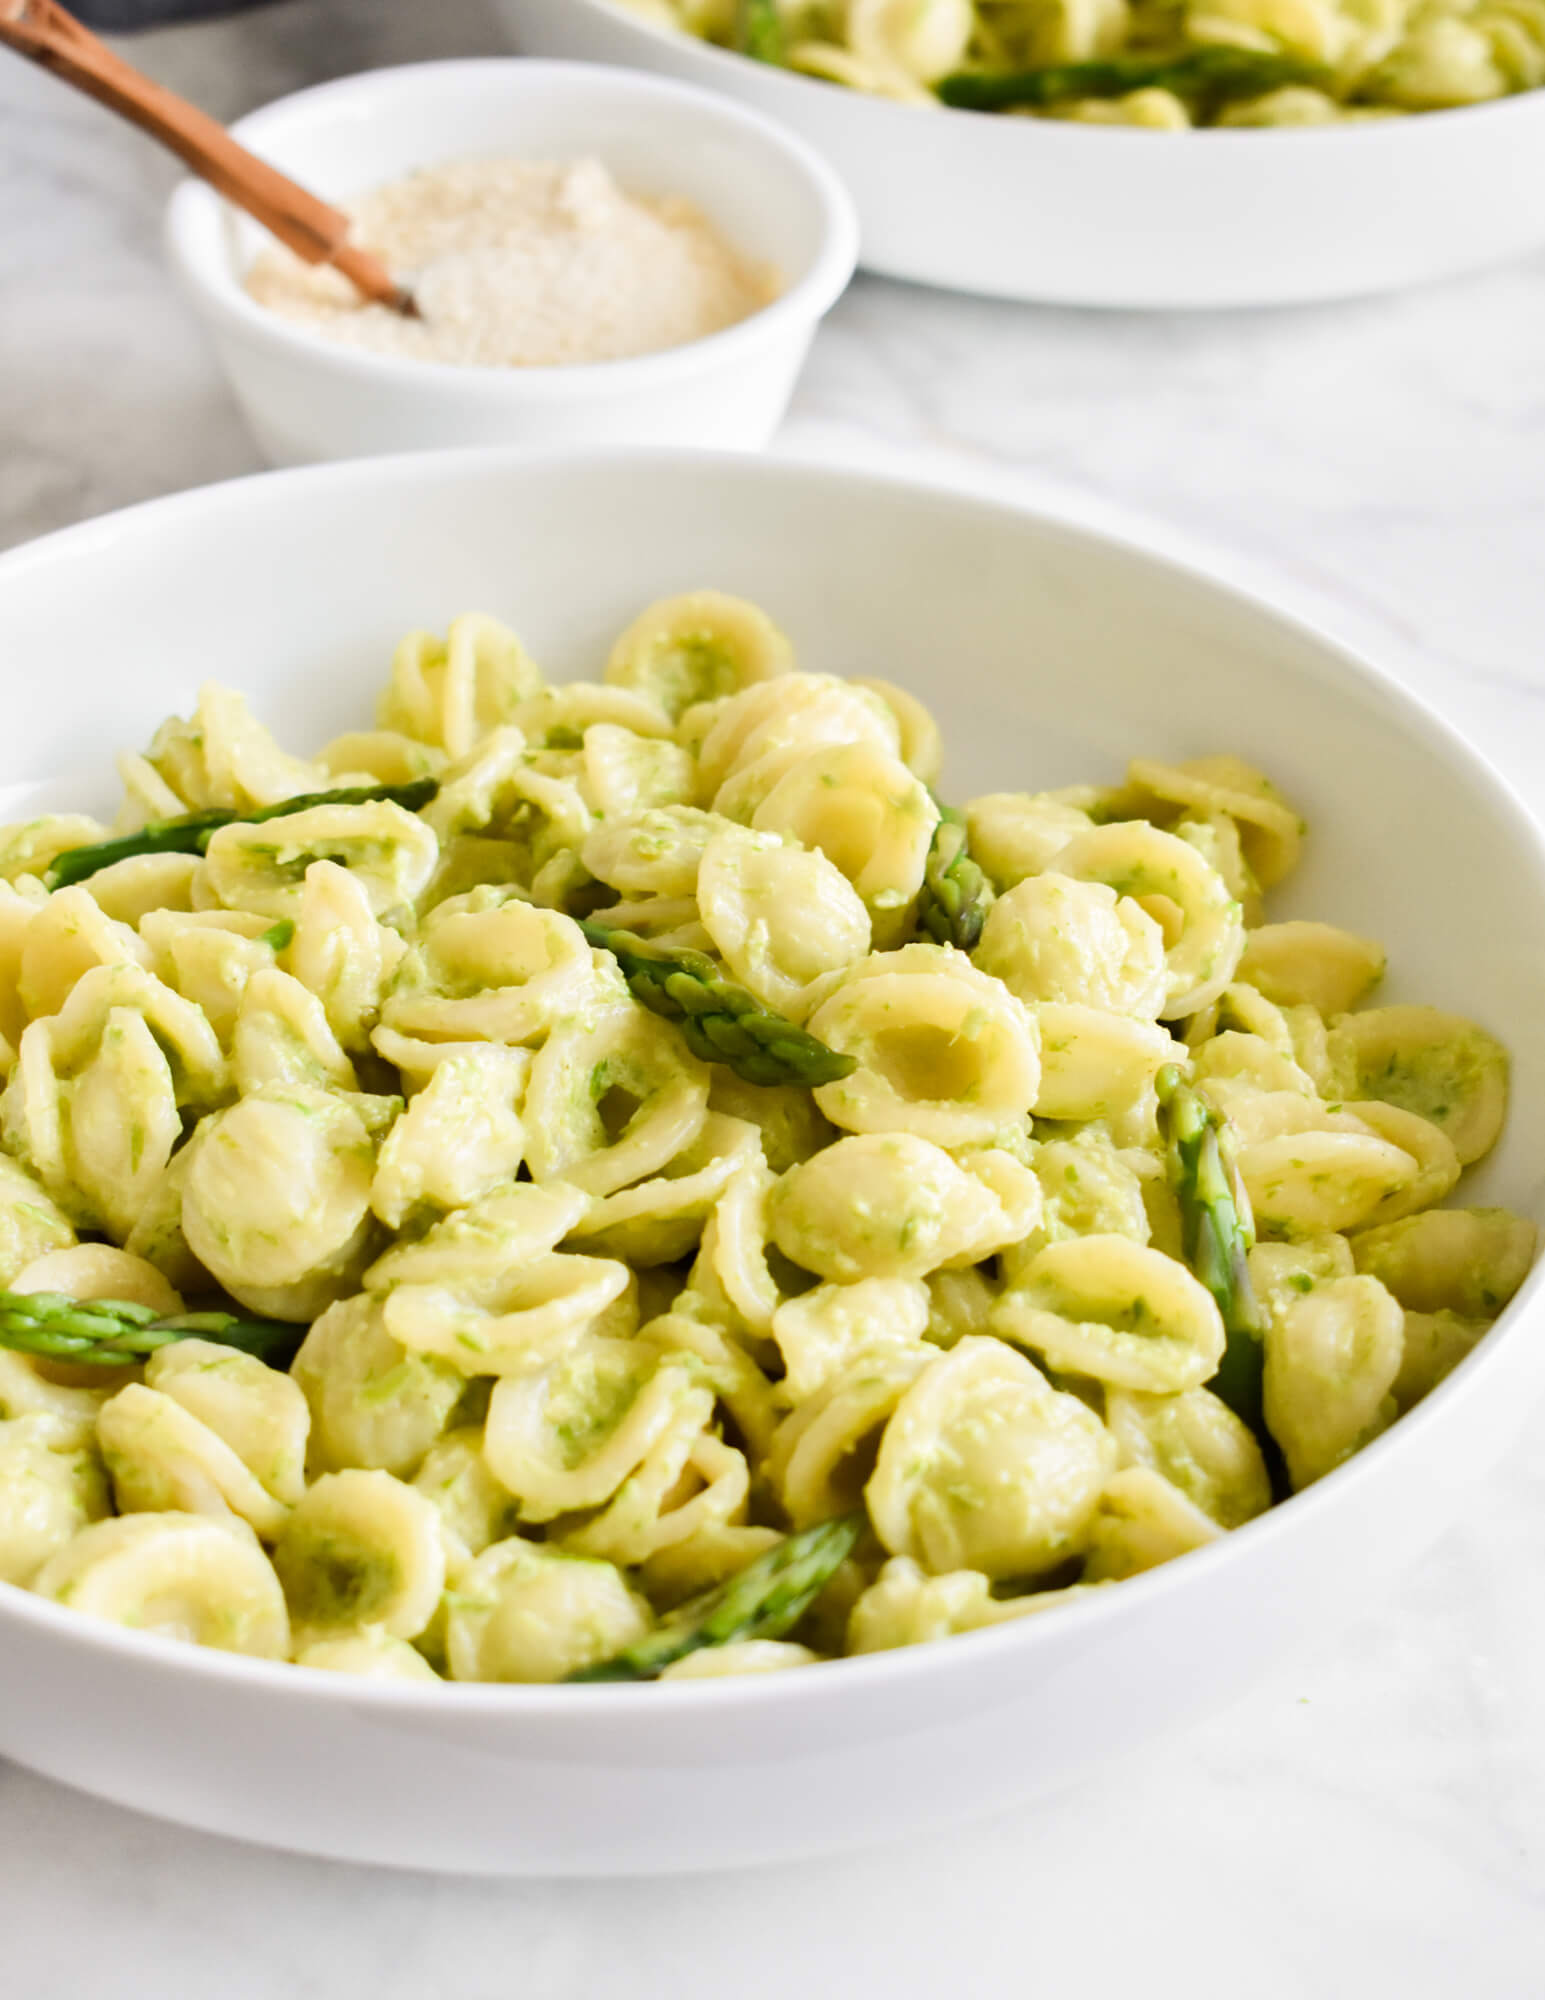
Asparagus season in spring is short, and this pasta is one of the best ways I know to use it. Instead of serving asparagus as a side, you blitz it into a pesto — with basil, garlic, lemon, and parmesan — and toss it through orecchiette so every little cup of pasta catches the sauce. Growing up in Pakistan, we had no concept of pesto, but once I started making it I realized it's just the kind of herb paste we already knew how to make. This version isn't strictly traditional Italian pesto — it's my home cook interpretation, and it works. Saad calls it "the green pasta" and asks for it at least once a month during spring.
Ingredients
- 12 oz orecchiette pasta (or any short pasta like fusilli or penne)
- 1 lb asparagus, woody ends snapped off
- 1 cup fresh basil leaves
- 2 cloves garlic
- ⅓ cup grated parmesan (or nutritional yeast to keep it vegan)
- ¼ cup pine nuts (or toasted walnuts — cheaper and works just as well)
- 3 tablespoons olive oil, plus more for finishing
- 2 tablespoons lemon juice
- Salt and black pepper to taste
- Reserved pasta water (about ½ cup)
Instructions
- Cook the orecchiette in well-salted boiling water according to package directions. Before draining, scoop out ½ cup of pasta water and set it aside — you'll need it for the sauce.
- While pasta cooks, blanch the asparagus: drop the spears into the boiling pasta water for 2-3 minutes until bright green and just tender. Transfer immediately to a bowl of ice water to stop cooking, then drain.
- Make the pesto: Set aside a few asparagus tips for garnish. Add the remaining asparagus, basil, garlic, parmesan, pine nuts, olive oil, and lemon juice to a food processor. Blend until smooth. Season with salt and pepper. (No food processor? Chop everything very finely by hand and stir together — it'll be more rustic but still delicious.)
- Toss the drained pasta with the asparagus pesto, adding the reserved pasta water a splash at a time until the sauce coats the pasta loosely and silkily.
- Plate and top with the reserved asparagus tips, an extra drizzle of olive oil, and more parmesan if you like.
Tips
- Tip: Don't skip the pasta water — the starch in it is what makes the pesto cling to the pasta instead of sitting in a puddle at the bottom of the bowl.
- Tip: Toasted walnuts are a great budget swap for pine nuts here. Toast them in a dry pan for 3-4 minutes over medium heat, stirring constantly, until fragrant.
- Tip: The pesto can be made up to 2 days ahead and stored in the fridge with a thin layer of olive oil on top to keep it from browning.
6. Spring Salad – A Delicious Boiled Egg Salad

This is the kind of salad that actually fills you up. Boiled eggs do a lot of the heavy lifting here — they add protein and substance so it works as a proper lunch or a light dinner side, not just a garnish situation. The base is fresh spring vegetables: crisp green beans, radishes, cucumber, and whatever tender lettuce you have. A simple lemon-Dijon dressing ties it all together. It's loosely inspired by a Niçoise style salad, though I skip the anchovies and keep it vegetarian — easy to find everything at Walmart or Trader Joe's, no specialty shopping needed.
Ingredients
- 4 large eggs
- 1 cup green beans, trimmed
- 4 cups mixed spring lettuce or butter lettuce, torn
- 1 cup cherry tomatoes, halved
- ½ English cucumber, sliced into half-moons
- 4-5 radishes, thinly sliced
- 2 tablespoons olive oil
- 1 tablespoon lemon juice
- 1 teaspoon Dijon mustard
- Salt and black pepper to taste
Instructions
- Hard-boil the eggs: place them in a saucepan, cover with cold water, bring to a boil, then turn off the heat and let sit covered for 10 minutes. Transfer to an ice bath for 5 minutes, then peel and halve.
- Blanch the green beans in boiling salted water for 2-3 minutes until bright green and just tender-crisp. Drain and rinse under cold water immediately to stop the cooking.
- Make the dressing: whisk together olive oil, lemon juice, Dijon mustard, salt, and pepper in a small bowl or shake in a jar until combined.
- Arrange the lettuce on a large plate or shallow bowl. Scatter the green beans, cherry tomatoes, cucumber, and radishes over the top. Nestle the egg halves throughout.
- Drizzle the dressing over everything just before serving. Toss gently or leave it arranged and let people dress their own portion.
Tips
- Tip: The ice bath for the eggs isn't optional if you want a clean peel — cold water stops the cooking and makes the shell separate easily from the white.
- Tip: Add a handful of crumbled feta or a few olives if you want the salad to feel a bit more substantial as a standalone lunch.
- Tip: Dress the salad right before eating — not ahead of time. Dressed lettuce wilts quickly and you'll lose all the crunch.
7. Mediterranean Yellow Rice

Rice cooked with turmeric is something I grew up eating — in Pakistan we call a version of it zarda or just haldi wala chawal — so this Mediterranean take felt immediately familiar to me the first time I tried it. The technique is slightly different: you toast the rice in olive oil with onion and garlic first, which gives it a nuttier base, then the turmeric and warm spices go in before the liquid. The result is this gorgeous golden rice that works as a side dish next to almost anything — grilled chicken, roasted vegetables, fish, or even just a simple yogurt raita. I make a double batch because it disappears fast, and it reheats really well the next day.
Ingredients
- 1½ cups long-grain white rice (basmati works great here)
- 2 tablespoons olive oil
- 1 small yellow onion, finely diced
- 3 cloves garlic, minced
- 1 teaspoon ground turmeric
- ½ teaspoon ground cumin
- ½ teaspoon ground coriander
- 2¾ cups chicken broth (or vegetable broth to keep it vegetarian)
- ¾ teaspoon salt
- 2 tablespoons fresh parsley or cilantro, chopped, for serving
Instructions
- Rinse the rice under cold water until the water runs mostly clear. This removes excess starch and helps the grains stay separate. Drain well.
- Heat olive oil in a medium saucepan over medium heat. Add the onion and cook for 5-6 minutes until softened and starting to turn golden at the edges.
- Add the garlic and cook for 1 minute. Add the drained rice and stir to coat in the oil. Toast the rice for 2-3 minutes, stirring frequently, until it smells slightly nutty.
- Stir in the turmeric, cumin, and coriander. Pour in the broth and add the salt. Bring to a boil, then reduce heat to the lowest setting, cover tightly, and cook for 15-18 minutes until all liquid is absorbed.
- Remove from heat and let the rice steam, still covered, for 5 minutes. Fluff with a fork, taste for salt, and scatter fresh parsley or cilantro on top before serving.
Tips
- Tip: The toasting step is worth doing — it adds a subtle nuttiness that plain boiled rice doesn't have. Don't rush it or skip it.
- Tip: Keep the lid on during the steaming rest at the end — those 5 minutes off the heat finish the cooking and help the grains separate cleanly when you fluff.
- Tip: Stir in a handful of frozen peas or golden raisins along with the broth if you want to stretch this into a more complete side dish with a slightly sweet contrast.
26. Spinach Pesto Sauce (Easy Recipe)
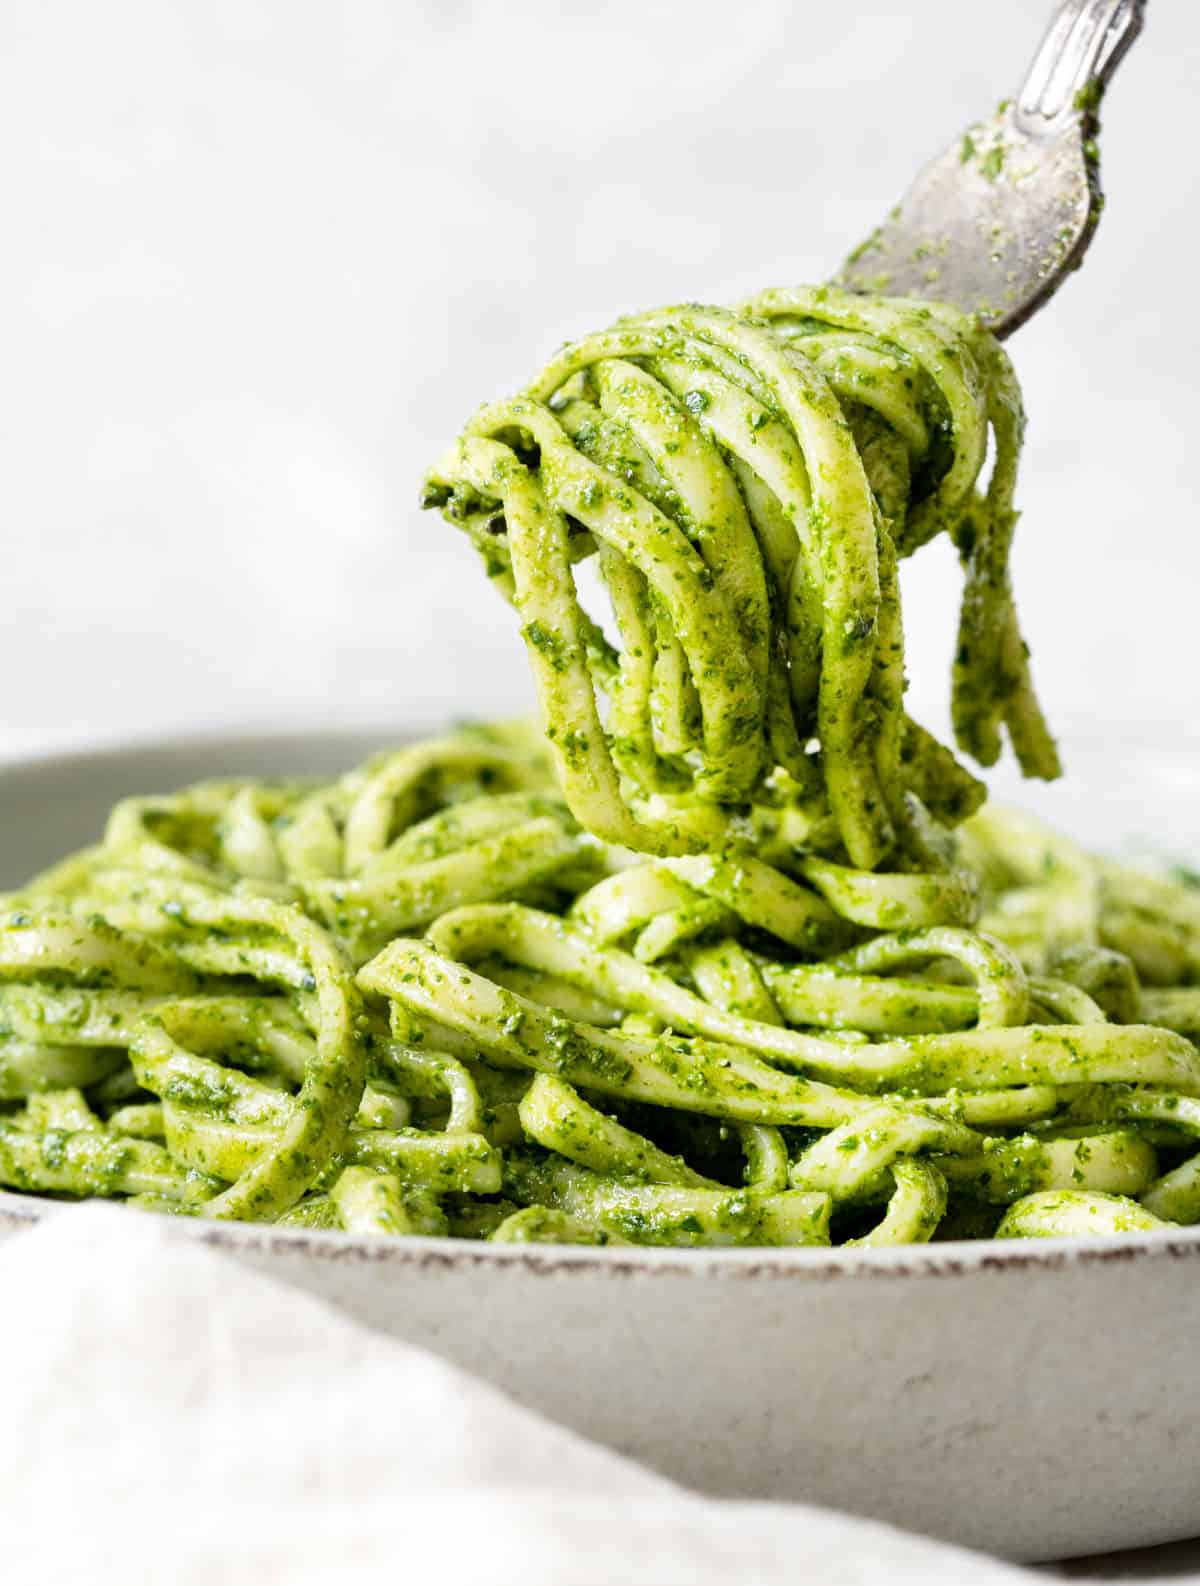
I make this spinach pesto at least once a month and I always wonder why I don't make it more often. It takes about ten minutes, it uses fresh spinach that's everywhere in spring, and it tastes nothing like the jarred pesto from the store. The first time I made it I used way too much garlic and it was almost inedible — lesson learned, one clove is enough unless you really know what you're doing. This works on pasta, obviously, but I've also spread it on sandwiches, stirred it into scrambled eggs, and used it as a dipping sauce for flatbread.
Ingredients
- 3 cups fresh spinach, packed
- ½ cup fresh basil leaves (or an extra ½ cup spinach if basil is hard to find)
- ⅓ cup pine nuts (or walnuts — much cheaper and works just as well)
- 1 garlic clove
- ½ cup grated Parmesan cheese
- ½ cup olive oil, plus more as needed
- 2 tablespoons lemon juice
- ½ teaspoon salt, or to taste
- ¼ teaspoon black pepper
Instructions
- Toast the nuts in a dry skillet over medium heat for 2-3 minutes, stirring constantly, until lightly golden and fragrant. Watch them closely — they go from toasted to burned very fast. Let them cool for a couple of minutes.
- Add the spinach, basil, garlic, toasted nuts, Parmesan, lemon juice, salt, and pepper to a food processor or blender. Pulse a few times to break everything down roughly.
- With the processor running, slowly drizzle in the olive oil until the pesto comes together into a smooth but slightly textured sauce. Scrape down the sides as needed.
- Taste and adjust — more lemon for brightness, more salt if it needs it, a splash more olive oil if it looks too thick.
- Store in a sealed jar in the fridge for up to 5 days. Press a thin layer of olive oil on top before sealing to keep the color bright green.
Tips
- Tip: No food processor? A blender works fine. If you don't have either, chop everything very finely by hand and mix with the oil — it'll be more rustic but still tastes great.
- Tip: Freeze pesto in an ice cube tray for easy single-serving portions. Pop out a cube or two whenever you need a quick sauce — they keep for up to 3 months in a freezer bag.
- Tip: For a dairy-free version, skip the Parmesan and add an extra tablespoon of lemon juice plus a pinch more salt. It loses a little richness but it's still very good.
27. Creamy Asparagus Soup (With No Cream!)
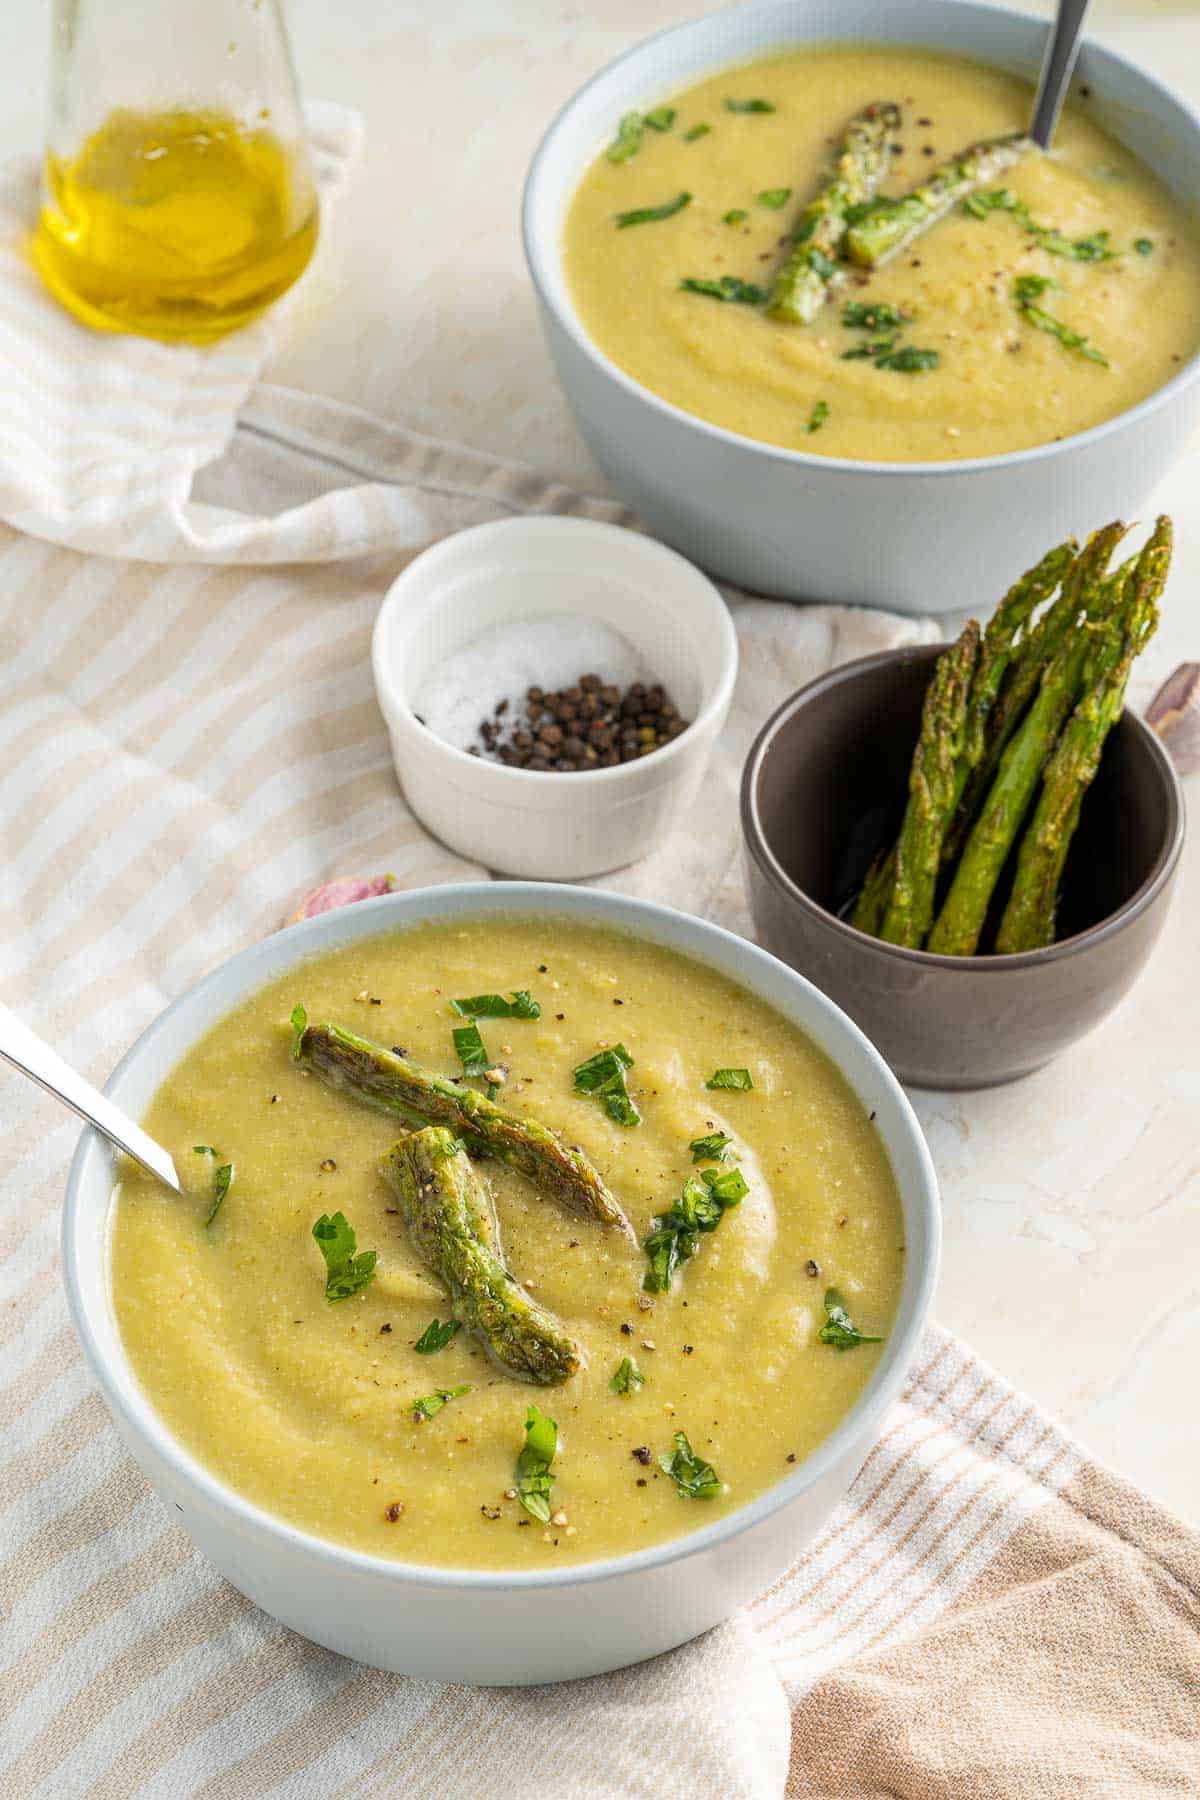
Saving the best spring recipe for last felt right, and this soup earns that spot. Asparagus is one of those vegetables that only shows up for a few weeks in spring before it disappears, and this soup is the reason I buy an extra bunch every time I see it at Costco or the farmers market. The trick that makes it genuinely creamy without any dairy is adding a small potato — it breaks down completely in the blender and gives the broth that silky, thick texture you'd expect from something loaded with cream. My husband didn't believe me when I told him there was no cream in it. That felt like a win.
Ingredients
- 1½ lbs fresh asparagus, woody ends snapped off, cut into 1-inch pieces
- 1 medium Yukon Gold potato, peeled and diced (about 1 cup)
- 1 medium yellow onion, diced
- 3 garlic cloves, minced
- 4 cups vegetable broth (or chicken broth)
- 1 tablespoon olive oil
- 2 tablespoons lemon juice
- ½ teaspoon salt, plus more to taste
- ¼ teaspoon black pepper
- Fresh chives or a drizzle of olive oil, to serve (optional)
Instructions
- Heat the olive oil in a large pot over medium heat. Add the onion and cook for 5 minutes until softened and translucent. Add the garlic and cook for another minute.
- Add the diced potato and asparagus pieces to the pot. Pour in the broth, bring to a boil, then reduce heat to a steady simmer. Cook for 15-18 minutes until the potato is completely soft and the asparagus is tender.
- Remove from heat and let it cool for 5 minutes. Using an immersion blender directly in the pot, blend until completely smooth. Alternatively, carefully transfer in batches to a regular blender — just don't fill it more than halfway with hot liquid.
- Stir in the lemon juice, salt, and pepper. Taste and adjust seasoning — asparagus needs a good amount of salt to really shine, so don't be shy.
- Ladle into bowls and top with fresh chives, a crack of black pepper, or a small drizzle of good olive oil. Serve with crusty bread or a simple salad on the side.
Tips
- Tip: Don't skip the lemon juice at the end — it's what keeps the soup from tasting flat. Add it after blending so the brightness stays intact and doesn't cook off.
- Tip: For an even deeper green color, blanch the asparagus in boiling water for 2 minutes and transfer to ice water before adding it to the soup. It's an extra step but makes the soup look stunning in the bowl.
- Tip: This soup stores well in the fridge for 3 days and also freezes beautifully for up to 2 months. I make a double batch when asparagus is in season and freeze half so I can pull it out when the season is long over.
Twenty-seven recipes is a lot to sort through, I know. But that's kind of the point — spring is a long season, and you need more than one or two ideas to carry you through it. Some weeks you want something light and fresh, something that actually uses the produce that's finally showing up at the store. Other weeks you just need dinner on the table fast and you don't want to think too hard about it. This list has both. I put together recipes I've actually made, not just ones that photograph well.
My honest suggestion: bookmark two or three from this list that match what you already have in your fridge this week. Don't try to plan all twenty-seven at once — that's how meal planning burns people out. Pick the ones that feel easy and build from there. The lemon pasta and the sheet pan chicken are probably the easiest entry points if you're not sure where to start. Saad has requested the lemon pasta three times in one month, which tells you everything you need to know.
Spring cooking should feel lighter than winter cooking — less heavy cream, more fresh herbs, more color on the plate. I hope at least a few of these recipes make it into your regular rotation this season. If something works for your family, I'd genuinely love to hear about it. Leave a comment below and let me know which one you tried first. 🌿🍋✨
More Recipe Inspiration
- Easy Weeknight Dinners — fast, no-fuss meals for when the day ran long
- Healthy Dinner Recipes — lighter meals that don't feel like a compromise
- Sheet Pan Dinners — one pan, less cleanup, dinner actually happens
- Pasta Recipes — from quick weeknight bowls to slow Sunday sauces
- Chicken Dinner Recipes — reliable, crowd-friendly, and always on rotation in my kitchen
Frequently Asked Questions
What makes a recipe a good spring meal?
For me it comes down to two things: lighter ingredients and faster cook times. Spring meals should feel like a shift away from heavy winter stews — think fresh vegetables, bright citrus, herbs that are actually in season. That doesn't mean they have to be boring or diet-food adjacent. It just means you're not relying on cream and butter to carry everything.
Which of these spring recipes can I prep ahead of time?
Most of the grain bowls, soups, and pasta salads in this list hold up well in the fridge for 2 to 3 days. I usually make a double batch of anything grain-based on Sunday and pull from it through Wednesday. Where things get trickier is anything with fresh greens or avocado — those are better made the day you're eating them or they go sad fast.
Are these recipes family-friendly for kids?
Most of them, yes. I cook for two kids who have opinions, so I don't put recipes on this site that are wildly adventurous without a note. A few of these have mild heat that you can dial back. The pasta dishes, the sheet pan chicken, and the simple salads all tend to go over well with younger eaters. When in doubt, serve the sauce on the side.
Can I use frozen vegetables in these spring recipes?
Yes, for most of them. Frozen peas, corn, and edamame work perfectly fine in stir-fries, soups, and pasta dishes. Where I'd push you toward fresh is anything where the vegetable is the star — like a simple asparagus side or a salad where texture matters. Frozen asparagus, for example, gets too soft and watery. But frozen peas in a pasta? Totally fine.
Which recipe on this list is the easiest for a beginner cook?
I'd point a beginner toward the lemon garlic pasta or the sheet pan chicken and vegetables — both are forgiving, use ingredients you can find anywhere, and teach you the basics of timing and seasoning without throwing anything too complicated at you. The pasta especially: if you can boil water and squeeze a lemon, you can make it.
Share This Post!
If this list helped you figure out dinner this week, pin it or share it with someone who's also staring at a bunch of spring vegetables wondering what to do with them. 🌿✨
View More Recipes here Recipe Roundups





Comments
No Comments