
Back to school season hits differently when you have two kids with completely different tastes. Saad wants something hearty and filling, Zainab wants something sweet but not too sweet, and I'm standing in the kitchen at 7am trying to figure out how to make both of them happy before the bus comes. That's exactly why I started building this list — not because I wanted to be a snack-prep hero, but because I was tired of reaching for the same store-bought granola bars week after week, looking at the ingredient list, and putting them right back on the shelf.
A good back to school snack has to do a few things: it has to hold up in a lunchbox without turning into mush, it has to be something kids will actually eat (not just something that comes home untouched), and ideally it takes less than 30 minutes of active work. I also tried to make sure this list covers different needs — nut-free options for school policies, no-bake recipes for hot days when I don't want to turn on the oven, and a few savory ones because not every kid wants something sweet at 2pm. If you're also looking for ideas beyond snacks, my school lunch ideas post has a lot of overlap with what I pack on the same days.
This list has 25 recipes, and I tried to make it genuinely varied. You'll find energy balls (both peanut butter-based and nut-free versions), protein muffins, soft granola bars, overnight oats for the mornings when we're running behind, savory options like Broccoli Cheddar Quinoa Bars, and even a few things that work as both snack and breakfast — like the Hash Brown Egg Breakfast Muffins and the Breakfast Cookies. If you want more ideas for quick morning food alongside these, my easy breakfast recipes roundup is worth a look too. A few of these are gluten-free, a few are vegan, and several happen to be both — I've noted it in each section so you can scan for what works for your family.
Here are the 25 I keep coming back to — pick whatever fits your week and your kids.
Top 25 Back to School Snack Recipes

25. Apricot and Walnut Soft Granola Bars
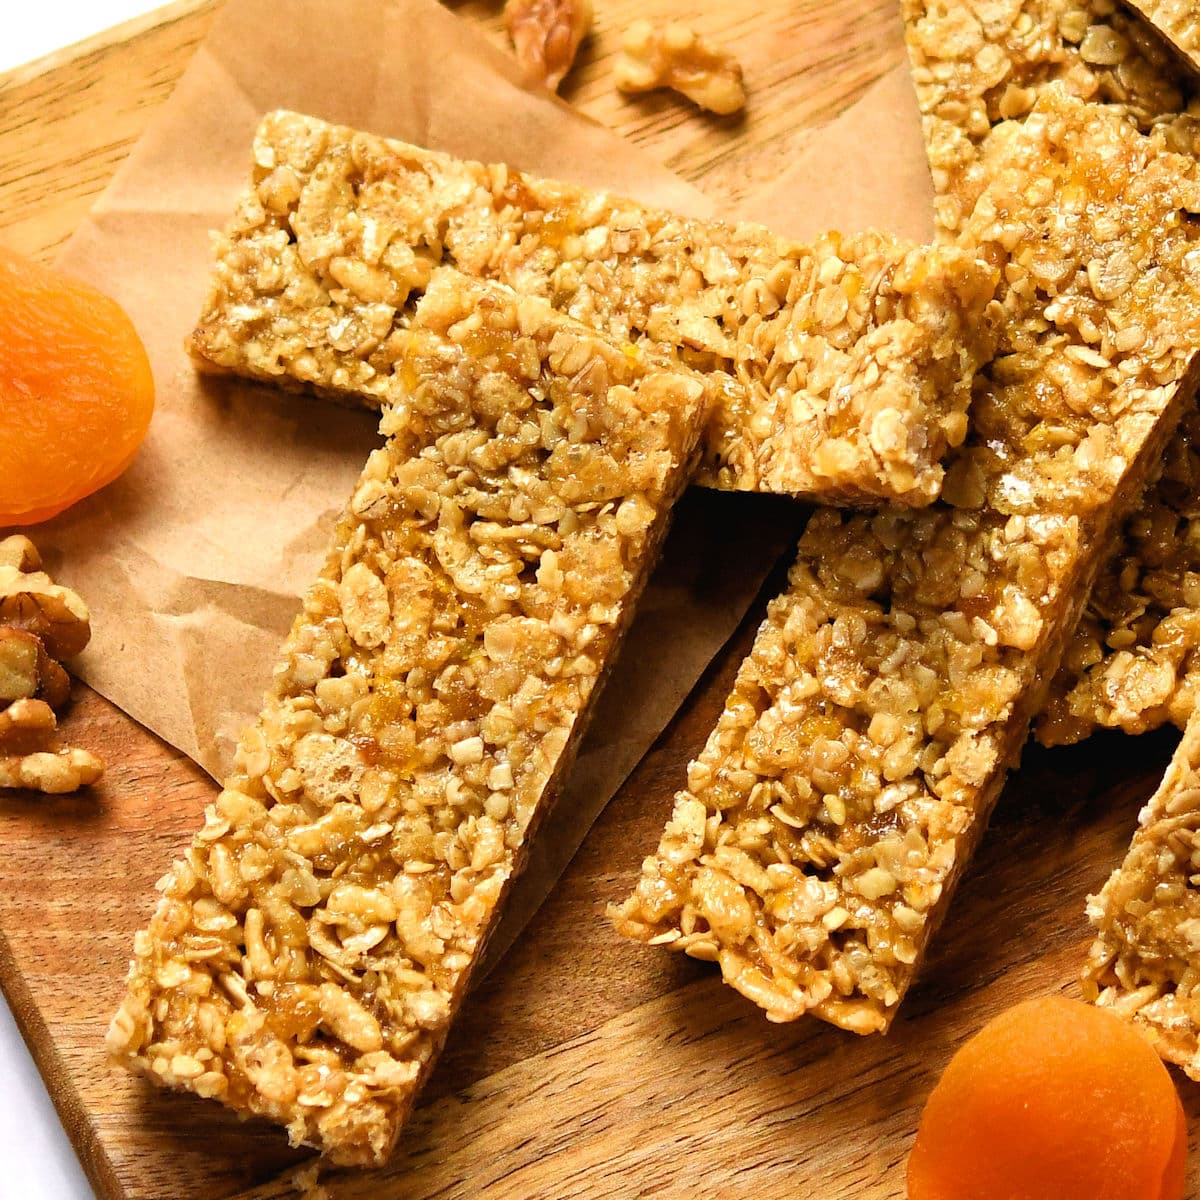
I make a double batch of these every Sunday because they disappear before Wednesday. The combination of chewy dried apricots and toasty walnuts pressed into a honey-oat base is exactly the kind of after-school snack that doesn't feel like a compromise — the kids eat it, I'm not stressed about what's in it. The coconut flakes add a little something extra without being overwhelming, and the bars stay soft enough that even Zainab, who is very particular about texture, keeps coming back for more. Cut them into thick rectangles, wrap individually in parchment, and they go straight into the lunchbox.
Ingredients
- 2 cups old-fashioned rolled oats
- ¾ cup chopped dried apricots
- ½ cup roughly chopped walnuts
- ¼ cup unsweetened shredded coconut
- ⅓ cup honey
- ¼ cup creamy peanut butter or almond butter
- 2 tablespoons unsalted butter
- 1 teaspoon vanilla extract
- ¼ teaspoon salt
Instructions
- Preheat your oven to 325°F. Line an 8x8 inch baking pan with parchment paper, leaving some overhang so you can lift the bars out cleanly.
- Spread the oats and walnuts on a sheet pan and toast for 8 minutes until just lightly golden. This step makes a real difference in flavor — don't skip it.
- In a small saucepan over medium-low heat, melt together the honey, peanut butter, butter, and salt, stirring until smooth. Remove from heat and stir in the vanilla.
- Combine the toasted oats and walnuts with the apricots and coconut in a large bowl. Pour the warm honey mixture over and stir until everything is evenly coated.
- Press the mixture firmly into the prepared pan — use the bottom of a measuring cup to really pack it down. Bake for 18–20 minutes until the edges are golden.
- Let cool completely in the pan before lifting out and slicing into bars. They firm up as they cool, so don't rush this part.
Tips
- Tip: If your dried apricots are very dry and stiff, soak them in warm water for 10 minutes then pat dry before chopping — they'll be much easier to chew in the finished bar.
- Tip: Store bars in an airtight container at room temperature for up to 5 days, or refrigerate for up to 2 weeks. Wrap individually for grab-and-go lunchboxes.
- Tip: Swap walnuts for pecans or sunflower seeds if there's a nut allergy situation at school — the bars hold together just as well.
24. Peanut Butter Raisin Balls
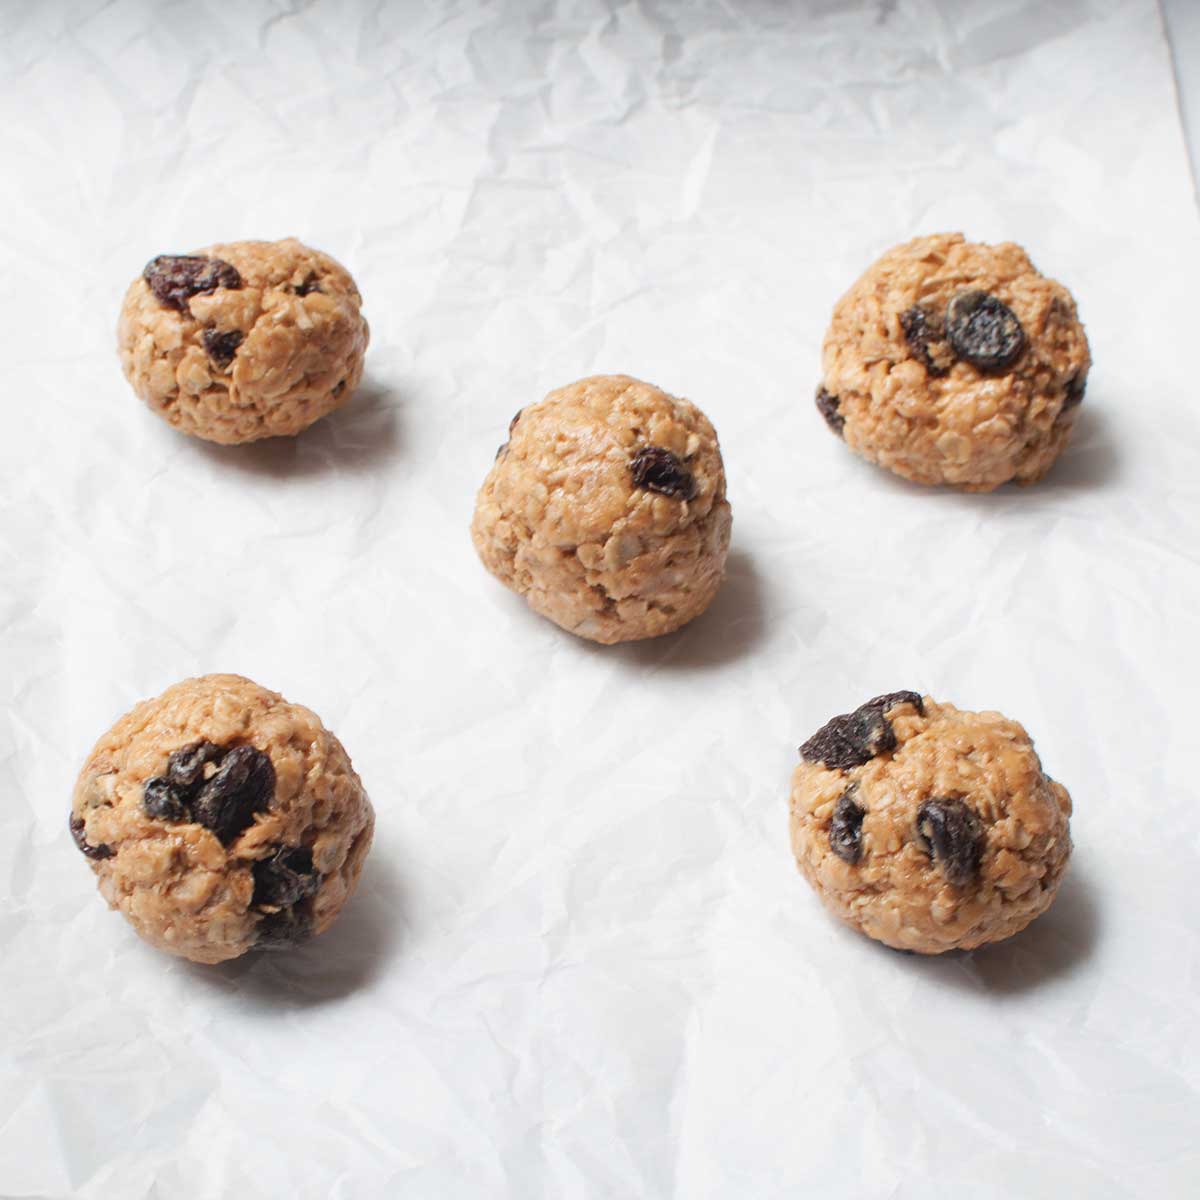
These are probably the fastest snack I make — mix everything in one bowl, roll into balls, refrigerate, done. No oven, no stovetop, no mess worth complaining about. The raisins add natural sweetness so you don't need much honey, and the peanut butter keeps everyone full long enough that we're not hitting the snack cabinet an hour later. I've made these with Jif creamy from Walmart and also with the natural peanut butter from Trader Joe's — both work, though the natural kind makes the mixture a little looser, so just refrigerate for an extra 15 minutes before rolling.
Ingredients
- 1 cup old-fashioned rolled oats
- ½ cup creamy peanut butter
- ⅓ cup raisins
- 3 tablespoons honey
- 1 tablespoon chia seeds (optional but adds a nice crunch)
- ½ teaspoon vanilla extract
- Pinch of salt
Instructions
- Combine all ingredients in a medium bowl and stir until fully mixed. The mixture should hold together when you squeeze a bit between your fingers — if it's too sticky, add a tablespoon more oats.
- Cover the bowl and refrigerate for 30 minutes. This firms up the mixture and makes rolling much easier — skipping this step means sticky hands and lopsided balls.
- Scoop about 1 tablespoon of mixture and roll between your palms into a smooth ball. Repeat until all the mixture is used — you should get around 16–18 balls.
- Place finished balls on a parchment-lined plate or container and refrigerate for at least 15 more minutes to set before serving or packing.
Tips
- Tip: Swap raisins for mini chocolate chips, dried cranberries, or chopped dates depending on what your kids prefer — all three work well with the peanut butter base.
- Tip: These keep in the fridge for up to a week in an airtight container, or freeze them in a zip-lock bag for up to 2 months and pull out as needed.
- Tip: For nut-free lunchboxes, sunflower seed butter is a solid one-for-one substitute for the peanut butter here.
23. Easy Chocolate Baked Oats
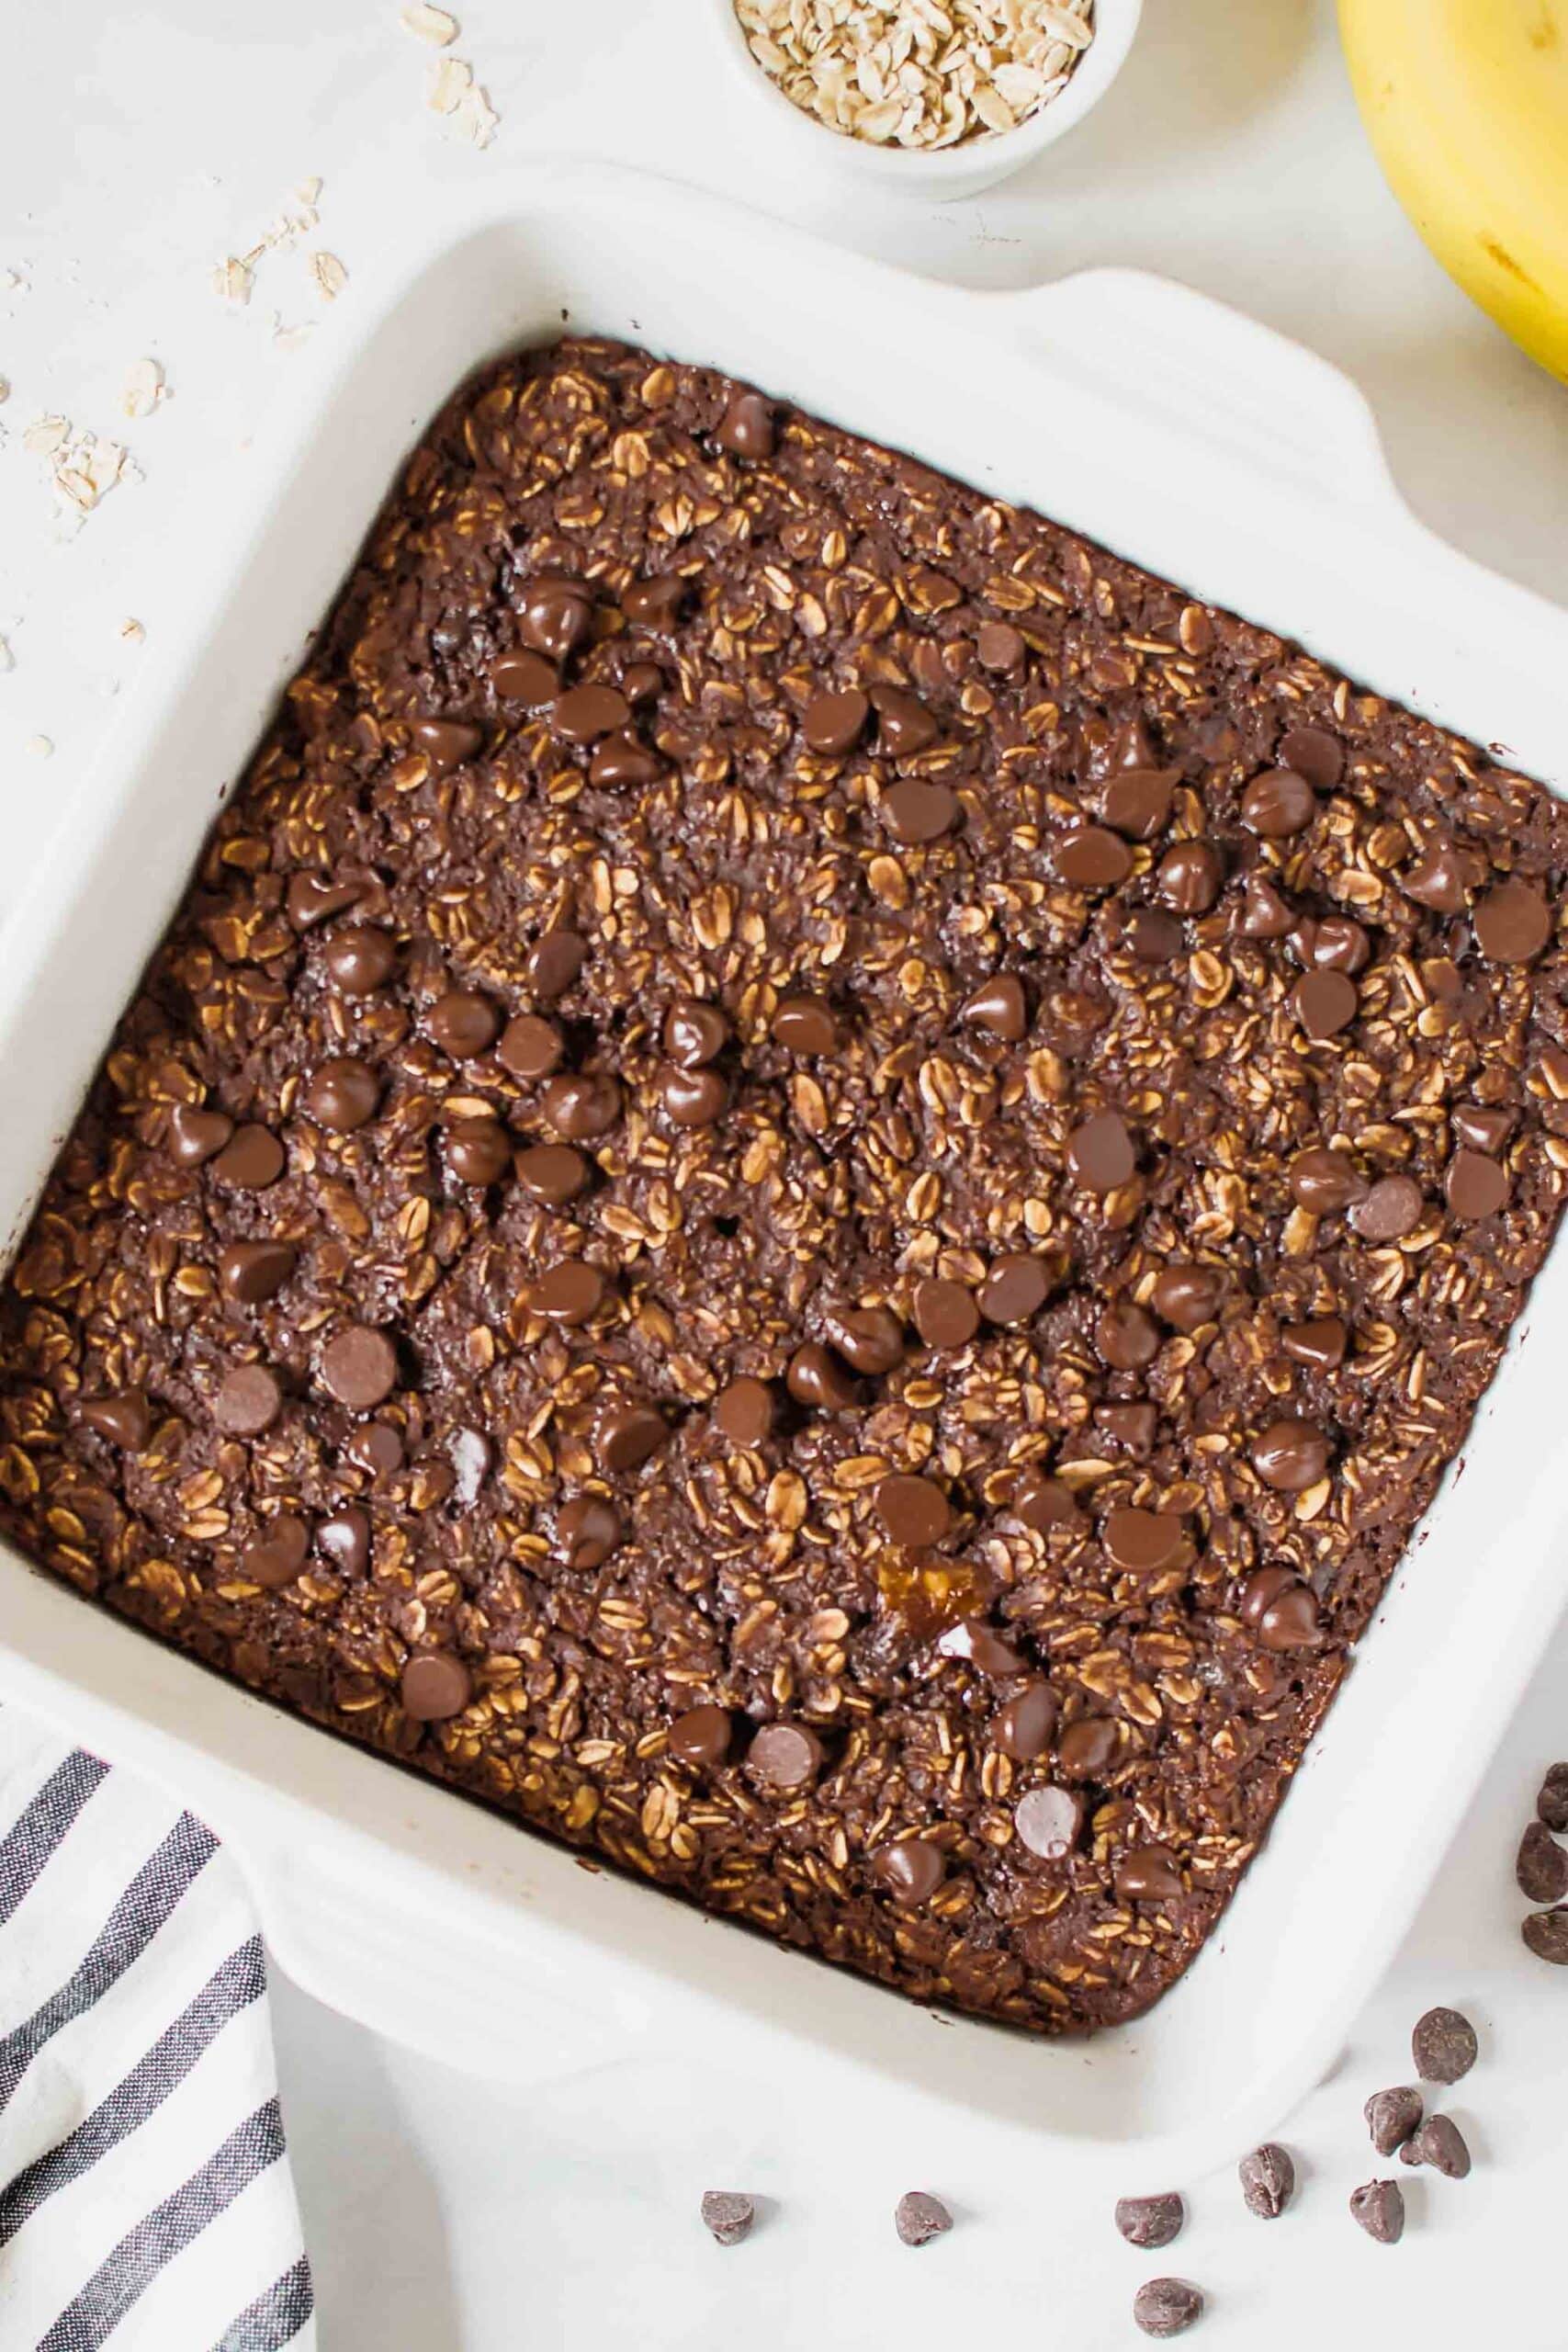
The first time I made baked oats I expected something dense and gummy. What came out of the oven was more like a soft chocolate cake — genuinely surprised me. You blend everything together so the oats become almost floury, and the result has this cakey, tender crumb that feels nothing like a bowl of porridge. I make a batch in a muffin tin on Sunday so each portion is already individual-sized, and the kids can grab one cold from the fridge before school without any reheating needed. It's one of those recipes where chocolate is doing real work as a disguise for something actually nutritious.
Ingredients
- 1 cup old-fashioned rolled oats
- 1 cup milk (dairy or oat milk both work)
- 1 large egg
- 2 tablespoons unsweetened cocoa powder
- 2 tablespoons honey or maple syrup
- ½ teaspoon baking powder
- ½ teaspoon vanilla extract
- Pinch of salt
- 2 tablespoons mini chocolate chips (optional, for topping)
Instructions
- Preheat oven to 350°F. Grease a small oven-safe ramekin, a muffin tin, or an 8x8 baking dish depending on what portions you want.
- Add the oats, milk, egg, cocoa powder, honey, baking powder, vanilla, and salt to a blender and blend for about 30 seconds until the oats are mostly broken down and the batter looks smooth. If you don't have a blender, a food processor works, or just whisk everything together — the texture will be slightly more rustic but still good.
- Pour batter into your prepared dish and scatter chocolate chips on top if using. Bake for 22–25 minutes for a ramekin or muffin tin, or 30–35 minutes for the full dish, until the center is set and the edges pull away slightly.
- Let cool for 5 minutes before serving warm, or cool completely and refrigerate for up to 4 days. Eat cold straight from the fridge or microwave for 30 seconds.
Tips
- Tip: A ripe mashed banana blended in adds natural sweetness and lets you cut the honey down to just 1 tablespoon — great if you're trying to reduce added sugar.
- Tip: Baking in a 12-cup muffin tin gives you perfectly portioned snack-sized rounds that are easy to pack individually in lunchboxes.
- Tip: Don't open the oven before the 20-minute mark — I learned that the hard way and ended up with sunken, gummy centers.
22. No Bake Energy Bites
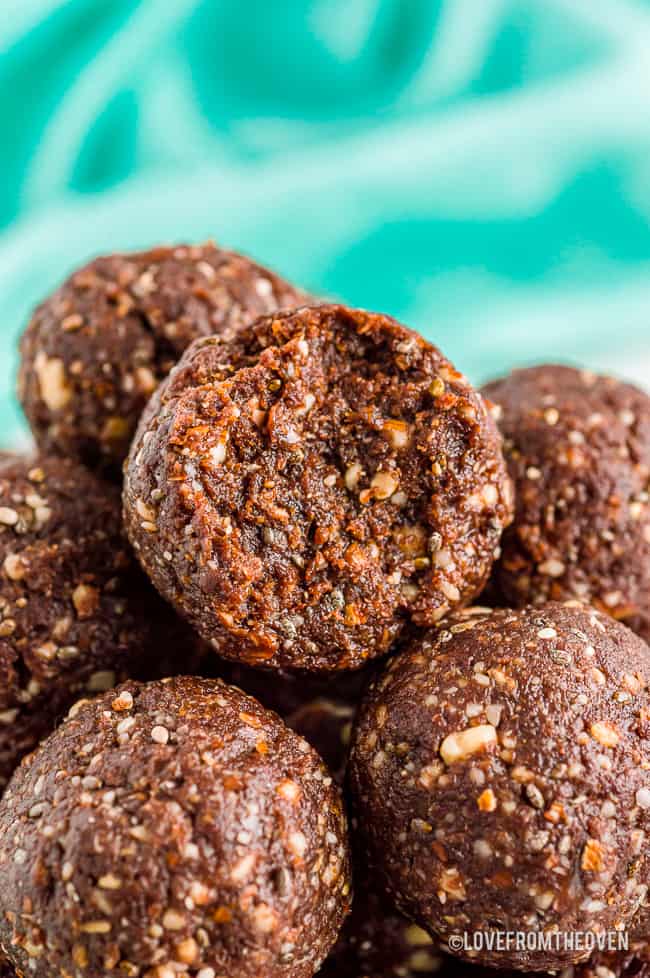
If I had to pick one recipe from this entire list that I've made the most times, it's these. They're the kind of thing you can pull together in 10 minutes with ingredients already sitting in your pantry — oats, peanut butter, honey, chocolate chips. No baking, no special equipment, nothing you need to run out and buy. The chocolate chips make them feel like a treat rather than health food, which is exactly why kids eat them without negotiation. My husband throws two in his pocket on his way out the door and calls it breakfast, so they work across the whole family.
Ingredients
- 1½ cups old-fashioned rolled oats
- ½ cup creamy peanut butter
- ⅓ cup honey
- ½ cup mini chocolate chips
- 2 tablespoons ground flaxseed (optional)
- 1 teaspoon vanilla extract
Instructions
- Stir all ingredients together in a large bowl until fully combined. The mixture will look a little crumbly at first — keep mixing and it comes together.
- Cover the bowl and refrigerate for 30 minutes. This is the key step — chilling firms up the peanut butter so the balls actually hold their shape when you roll them.
- Roll into 1-inch balls using your hands. If the mixture sticks, lightly wet your palms. You should get about 20 balls from this batch.
- Store in an airtight container in the refrigerator. They'll keep for up to 10 days — if they last that long.
Tips
- Tip: Add dried cherries, shredded coconut, or chopped almonds to customize — this base recipe is very forgiving and can handle about ¼ cup of add-ins without falling apart.
- Tip: These freeze well. Lay them flat on a parchment-lined tray to freeze solid, then transfer to a zip-lock bag. Pull out however many you need the night before.
- Tip: If the mixture is too wet to roll, add oats a tablespoon at a time. If it's too dry, add a small drizzle of honey and mix again.
21. Cakey Blueberry Protein Muffins

These muffins are what I reach for when I need a snack that actually keeps kids going through a long school afternoon rather than sending them crashing an hour later. The protein powder gets folded right into the batter so it's invisible — no one knows it's there, which is the whole point. I use vanilla-flavored protein powder (whatever's cheapest at Costco) and it works beautifully with the blueberries. The texture is genuinely cakey, not dry and chalky the way protein baked goods can sometimes be, and that comes down to not overmixing and pulling them from the oven the moment a toothpick comes out clean.
Ingredients
- 1½ cups all-purpose flour
- ½ cup vanilla protein powder (whey or plant-based both work)
- 1½ teaspoons baking powder
- ¼ teaspoon salt
- 2 large eggs
- ½ cup plain Greek yogurt
- ⅓ cup honey or maple syrup
- ¼ cup milk
- 3 tablespoons melted coconut oil or neutral vegetable oil
- 1 teaspoon vanilla extract
- 1 cup fresh or frozen blueberries
Instructions
- Preheat oven to 375°F. Line a 12-cup muffin tin with paper liners or grease well with cooking spray.
- In a large bowl, whisk together the flour, protein powder, baking powder, and salt. In a separate bowl, whisk the eggs, Greek yogurt, honey, milk, oil, and vanilla until smooth.
- Pour the wet ingredients into the dry and fold together with a spatula until just combined — a few streaks of flour are fine. Do not overmix or you'll get tough, dense muffins.
- Toss the blueberries with 1 teaspoon of flour (this stops them sinking to the bottom), then gently fold into the batter.
- Divide batter evenly among the muffin cups, filling each about ¾ full. Bake for 18–22 minutes until a toothpick inserted in the center comes out clean.
- Cool in the tin for 5 minutes, then transfer to a wire rack. Store in an airtight container at room temperature for 3 days or refrigerate for up to a week.
Tips
- Tip: If using frozen blueberries, don't thaw them first — fold them in straight from the freezer to prevent the batter from turning purple.
- Tip: These muffins freeze really well. Once fully cooled, wrap individually in plastic wrap, place in a zip-lock bag, and freeze for up to 3 months. Microwave for 45 seconds straight from frozen.
- Tip: No protein powder? Just swap it for an equal amount of additional flour — you'll lose the protein boost but the muffins will still be delicious.
20. Chocolate Coconut Energy Balls With Dates (No-Bake Bliss Balls)
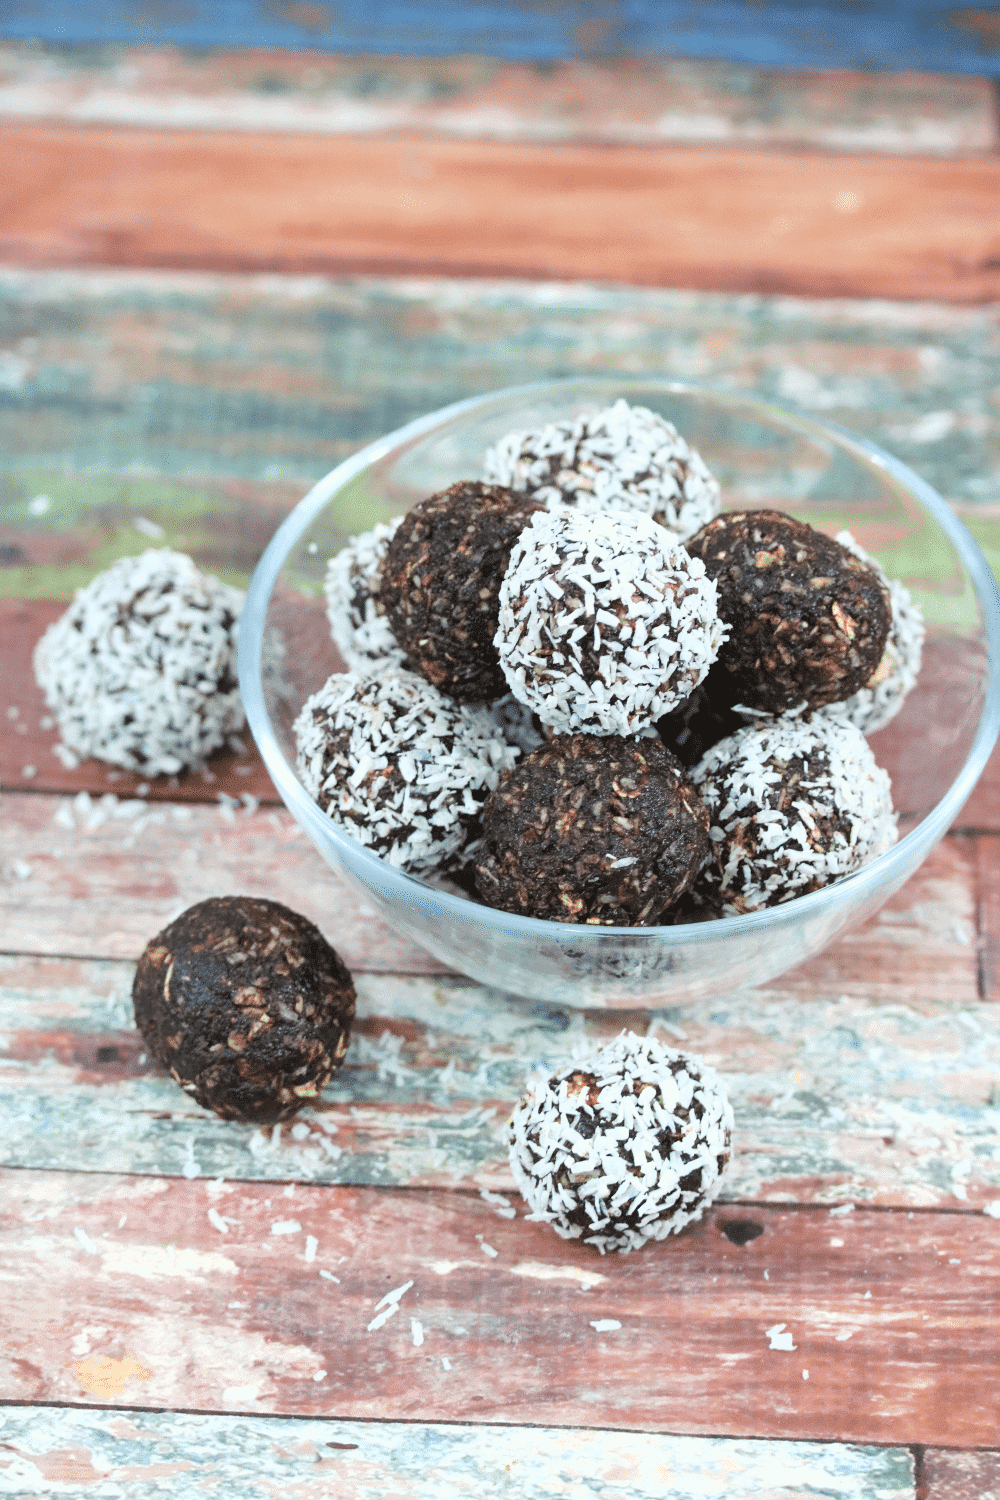
I make a double batch of these every Sunday because they disappear by Tuesday — Saad sneaks them out of the fridge like they're candy, which honestly is kind of the point. These are made with Medjool dates, shredded coconut, cocoa powder, and nuts, blended together and rolled into little balls that taste way more indulgent than they have any right to. No baking, no oven, no fuss. They're also vegan and gluten-free, so if you've got lunchbox allergy concerns, these fit right in — just swap the nuts for seeds if needed.
Ingredients
- 1 cup Medjool dates, pitted (about 10-12 dates)
- ½ cup rolled oats
- ¼ cup unsweetened shredded coconut, plus extra for rolling
- 3 tablespoons unsweetened cocoa powder
- ¼ cup almonds or cashews (or sunflower seeds for nut-free)
- 1 tablespoon chia seeds (optional)
- 1 tablespoon coconut oil
- Pinch of salt
Instructions
- If your dates are dry, soak them in warm water for 10 minutes and drain well before using.
- Add all ingredients to a food processor and blend until the mixture comes together into a sticky dough. If you don't have a food processor, chop everything finely by hand and mix well — it takes longer but works.
- Roll the mixture into balls about 1 inch in diameter, then roll each ball in extra shredded coconut to coat.
- Place on a lined tray and refrigerate for at least 30 minutes to firm up. Store in an airtight container in the fridge for up to one week.
Tips
- Tip: If the mixture feels too wet to roll, refrigerate it for 15 minutes first — it firms up quickly and becomes much easier to handle.
- Tip: For nut-free lunchboxes, replace the almonds with sunflower seeds or pumpkin seeds — the texture stays the same.
- Tip: These freeze well. Make a big batch, freeze on a tray, then transfer to a zip-lock bag — they thaw in a lunchbox by snack time.
19. Healthy Zucchini Muffins
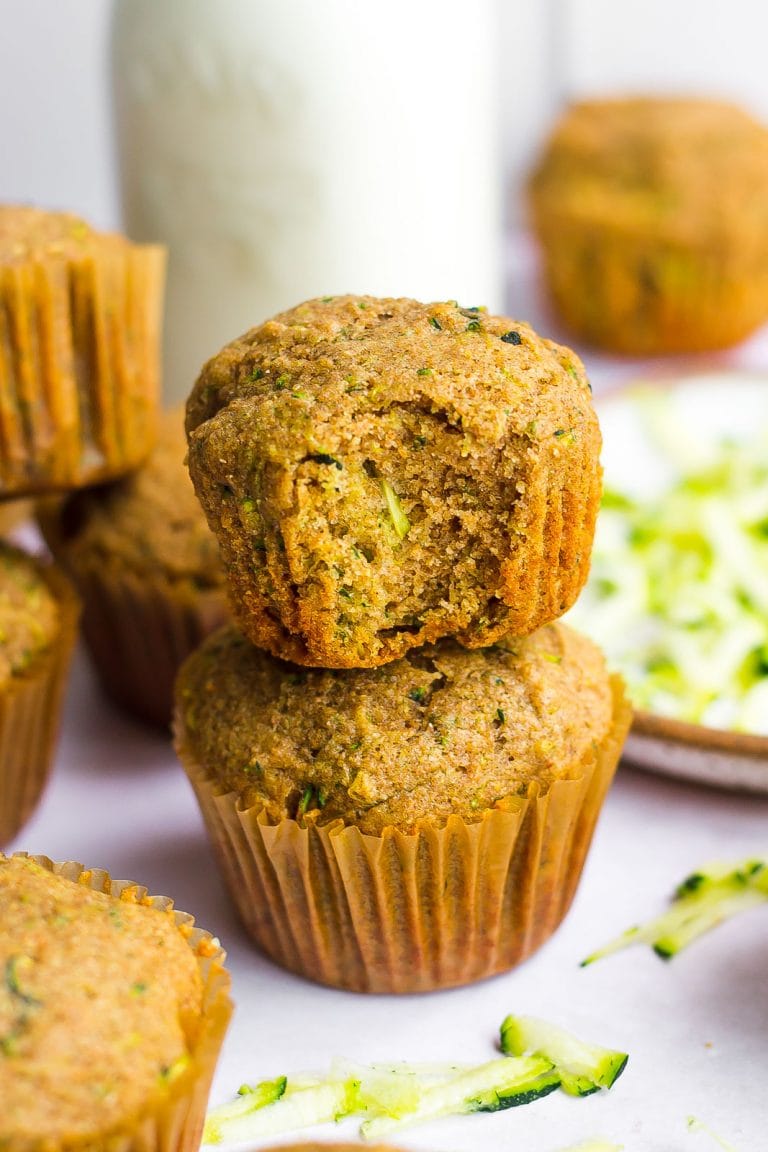
My kids have absolutely no idea there's a full zucchini hidden in these muffins, and I plan on keeping it that way. These are made with whole wheat flour, oats, honey, and grated zucchini — they come out soft, lightly sweet, and genuinely satisfying rather than that dry cardboard texture you sometimes get with "healthy" muffins. The zucchini melts right into the batter and keeps everything moist. You can toss in some chocolate chips or chopped walnuts depending on who you're baking for — I usually do half plain, half with chocolate chips to keep everyone happy.
Ingredients
- 1½ cups whole wheat flour
- ½ cup rolled oats
- 1 teaspoon baking soda
- 1 teaspoon cinnamon
- ¼ teaspoon salt
- 2 eggs
- ⅓ cup honey (or maple syrup)
- ⅓ cup neutral oil (vegetable or melted coconut oil)
- 1 teaspoon vanilla extract
- 1½ cups grated zucchini (about 1 medium zucchini), squeezed of excess moisture
- ½ cup chocolate chips or chopped walnuts (optional)
Instructions
- Preheat your oven to 350°F. Line a 12-cup muffin tin with paper liners or grease it well.
- In a large bowl, whisk together the flour, oats, baking soda, cinnamon, and salt.
- In a separate bowl, whisk together the eggs, honey, oil, and vanilla. Stir in the grated zucchini — make sure you've squeezed out the excess water with a clean kitchen towel first, otherwise the muffins turn out too dense.
- Pour the wet ingredients into the dry and fold gently until just combined. Don't overmix. Fold in chocolate chips or nuts if using.
- Divide batter evenly into the muffin cups — about ¾ full each. Bake for 20-22 minutes until a toothpick comes out clean. Cool for 5 minutes in the pan before transferring to a rack.
Tips
- Tip: Squeezing the moisture out of the zucchini is the most important step — skip it and your muffins will be gummy in the center no matter how long you bake them.
- Tip: These freeze really well. Bake a full batch, let them cool completely, then freeze in a zip-lock bag — grab one the night before school and it's thawed by morning.
- Tip: For a dairy-free version, use dairy-free chocolate chips — brands like Enjoy Life (available at Walmart and Target) work perfectly here.
18. Raspberry Overnight Oats
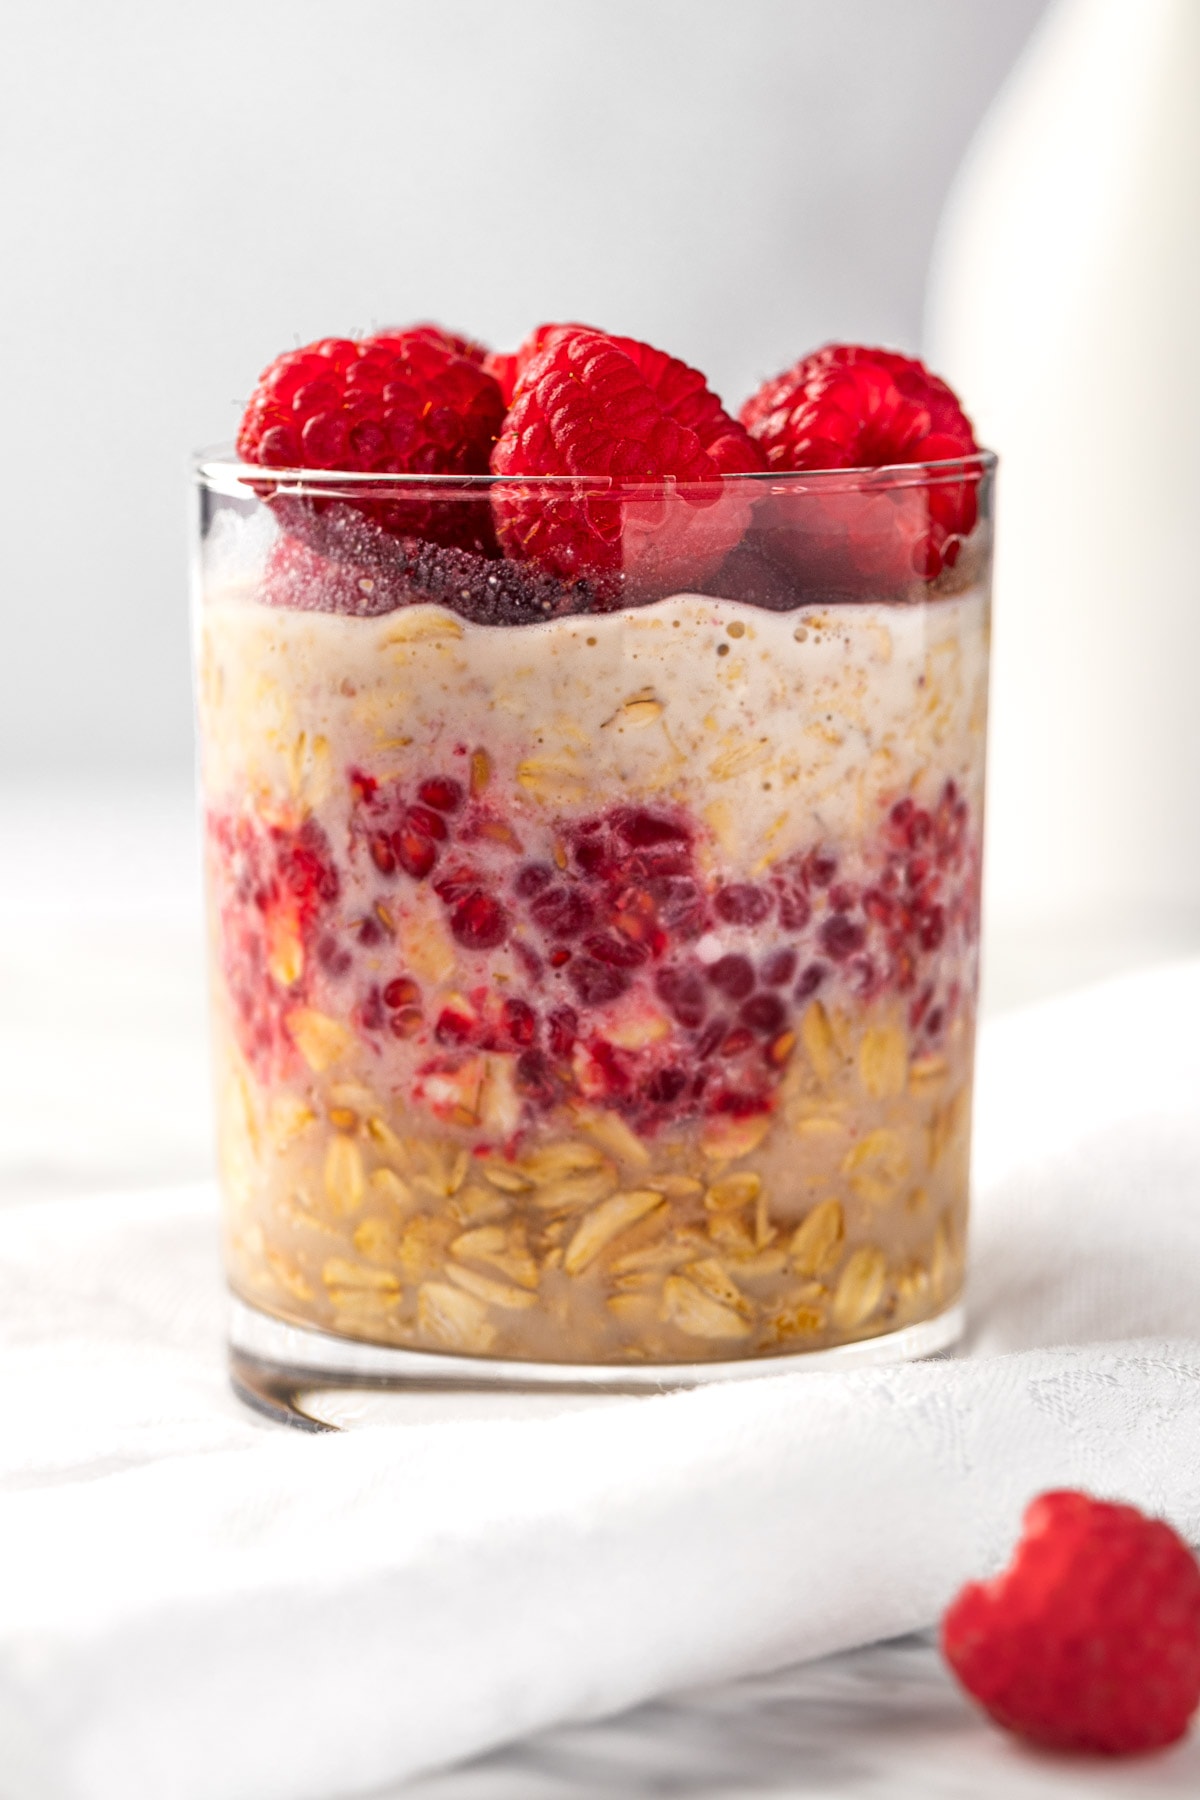
Some mornings there's just no time to cook anything, and that's exactly where overnight oats save you. You stir together oats, milk, yogurt, a little honey, and fresh or frozen raspberries in a jar the night before — by morning it's creamy, thick, and already flavored from the berries breaking down overnight. The raspberries give it this tart-sweet thing that makes it feel like more than just oats. It works as a quick breakfast or packs easily into a small container for a mid-morning school snack.
Ingredients
- ½ cup rolled oats (not instant)
- ½ cup milk of choice (dairy or oat milk both work)
- ¼ cup plain Greek yogurt
- 1 tablespoon honey or maple syrup
- 1 teaspoon vanilla extract
- 1 tablespoon chia seeds
- ½ cup fresh or frozen raspberries
- Extra raspberries and a drizzle of honey for topping
Instructions
- In a jar or small container with a lid, combine the oats, milk, yogurt, honey, vanilla, and chia seeds. Stir well to combine.
- Gently fold in the raspberries — if they're frozen, add them straight in and they'll thaw overnight. Seal the jar and refrigerate for at least 6 hours or overnight.
- In the morning, give it a good stir. If it looks too thick, splash in a little extra milk. Top with fresh raspberries and a drizzle of honey before serving or packing.
Tips
- Tip: Frozen raspberries from Costco or Aldi work just as well as fresh here and cost a fraction of the price — stock up and use them all week.
- Tip: Make 4-5 jars at once on Sunday night and you have snacks or breakfasts ready for the whole school week — they keep well in the fridge for up to 4 days.
- Tip: Add a tablespoon of nut butter stirred in before refrigerating for extra staying power — almond butter works especially well with the raspberry flavor.
17. Vegan Banana Chocolate Chip Muffins (GF)

Those overripe bananas sitting on your counter going completely black — these muffins are exactly where they need to go. Made with almond flour, oats, ripe bananas, and dairy-free chocolate chips, they're gluten-free and vegan without tasting like a compromise. The bananas do most of the sweetening work, so you barely need any added sugar. They come out fluffy and moist with little pockets of melted chocolate throughout — honestly one of the better lunchbox muffins I've landed on, and I've tested a lot of them.
Ingredients
- 3 very ripe bananas, mashed (about 1¼ cups)
- 2 tablespoons maple syrup or honey (if not strictly vegan)
- ¼ cup coconut oil, melted
- 1 teaspoon vanilla extract
- 1 cup almond flour
- 1 cup rolled oats (certified GF if needed)
- 1 teaspoon baking powder
- ½ teaspoon cinnamon
- ¼ teaspoon salt
- ½ cup dairy-free chocolate chips (Enjoy Life brand works great)
Instructions
- Preheat oven to 350°F. Line a muffin tin with paper liners or grease well.
- In a large bowl, mash the bananas until smooth. Stir in the maple syrup, melted coconut oil, and vanilla.
- Add the almond flour, oats, baking powder, cinnamon, and salt to the banana mixture and stir until just combined — don't overwork it.
- Fold in most of the chocolate chips, saving a few to press on top of each muffin for looks.
- Spoon into muffin cups about ¾ full. Press reserved chocolate chips on top. Bake 20-23 minutes until a toothpick comes out clean. Cool in the pan for 10 minutes before removing.
Tips
- Tip: The riper the bananas, the sweeter and more flavorful these get — if yours aren't black-spotted yet, pop them in a 300°F oven for 15 minutes to speed up ripening.
- Tip: GF oats matter if you're baking for a celiac household — regular oats are processed on the same equipment as wheat, so look for the certified GF label.
- Tip: These stay moist for 3 days at room temperature in an airtight container, or freeze for up to 2 months — they reheat in the microwave in about 30 seconds.
16. Nut Free Chocolate Bliss Balls
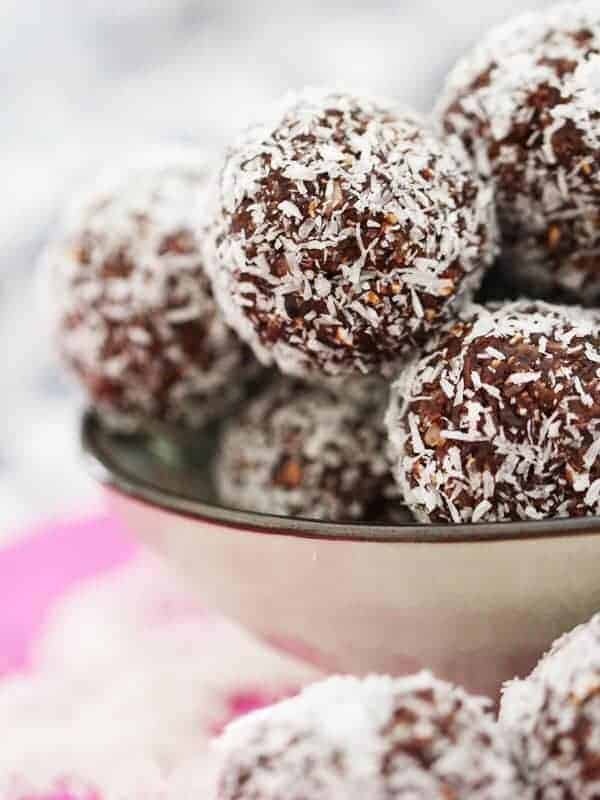
If your kid's school has a strict nut-free policy, these are your answer. Made with dates, oats, sunflower seeds, and cocoa powder — completely nut-free but still rich and chocolatey enough that kids actually want to eat them. The sunflower seeds give you that slightly nutty bite without any actual nuts, and the dates hold everything together without needing any added sugar. I keep a container of these in the fridge all week and they honestly go faster than anything with nuts in it.
Ingredients
- 1 cup Medjool dates, pitted
- ½ cup rolled oats
- ⅓ cup sunflower seeds (raw or lightly toasted)
- 3 tablespoons unsweetened cocoa powder
- 1 tablespoon sunflower seed butter (or omit for drier texture)
- 1 tablespoon honey or maple syrup
- Pinch of salt
- 2 tablespoons shredded coconut or cocoa powder for rolling (optional)
Instructions
- Soak dates in warm water for 5-10 minutes if they're on the drier side, then drain thoroughly and pat dry.
- Add all ingredients to a food processor and blend until a sticky dough forms — it should hold together when you press some between your fingers. If it's crumbly, add dates or a tiny splash of water one teaspoon at a time.
- Roll into balls about 1 inch each. Roll in shredded coconut or extra cocoa powder if you like, or leave plain.
- Refrigerate on a lined tray for 20-30 minutes to firm up. Store in an airtight container in the fridge for up to 10 days.
Tips
- Tip: Toast the sunflower seeds in a dry pan for 3-4 minutes before blending — it brings out a deeper, slightly nutty flavor that makes these taste much more interesting.
- Tip: You can add dried cranberries, raisins, or chopped dried apricots for variation — just reduce the dates slightly so they don't become too sweet.
- Tip: Check sunflower seeds at Trader Joe's or Walmart bulk bins — they're usually much cheaper there than buying pre-packaged, and you'll want a good supply for weekly batches.
11. Savory Granola Bar Recipe: Cheesy Sun-Dried Tomato Pizza Bar
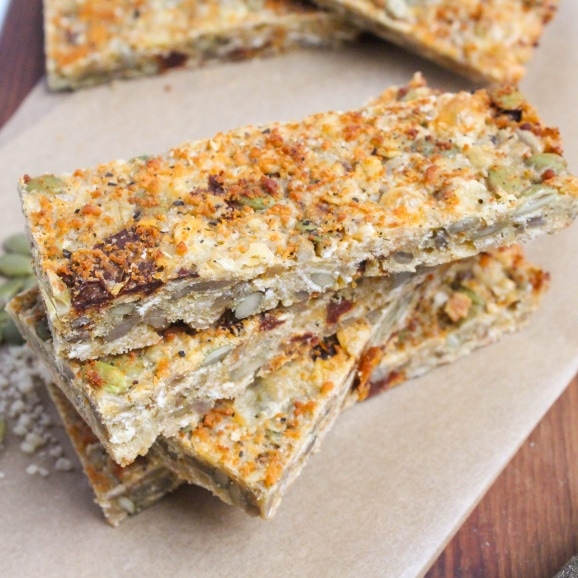
Sweet granola bars are everywhere, so when I came across a savory version I had to try it. These cheesy sun-dried tomato bars taste like a pizza-flavored snack bar — oats, parmesan, herbs, and tangy tomatoes pressed into something your kids will actually want to eat. My husband thought I was joking when I said "savory granola bar" but he finished three of them in one sitting. They're sturdy enough to pack in a lunchbox without crumbling, and they hold up through a full school day.
Ingredients
- 2 cups old-fashioned rolled oats
- ½ cup grated parmesan cheese
- ⅓ cup sun-dried tomatoes, finely chopped (oil-packed, drained)
- ¼ cup pumpkin seeds
- 1 teaspoon dried Italian seasoning
- ½ teaspoon garlic powder
- ¼ teaspoon salt
- 2 eggs, lightly beaten
- 3 tablespoons olive oil
Instructions
- Preheat your oven to 350°F. Line an 8x8-inch baking pan with parchment paper and lightly grease it.
- In a large bowl, combine the oats, parmesan, sun-dried tomatoes, pumpkin seeds, Italian seasoning, garlic powder, and salt. Stir well to distribute everything evenly.
- Add the beaten eggs and olive oil to the dry mixture. Stir until everything is thoroughly coated and the mixture holds together when pressed.
- Press the mixture firmly into the prepared pan — really press it down hard so the bars hold their shape after baking.
- Bake for 22-25 minutes until the top is golden and the edges look set. Let cool completely in the pan before cutting into bars — this step is non-negotiable or they'll fall apart.
Tips
- Tip: Make sure to drain the sun-dried tomatoes really well before chopping — excess oil makes the bars greasy and they won't bind properly.
- Tip: Swap pumpkin seeds for sunflower seeds if that's what you have — both add a nice crunch and hold up well in baking.
- Tip: Store in an airtight container at room temperature for up to 4 days, or refrigerate for up to a week. They actually get firmer the next day.
12. Healthy Chex Mix
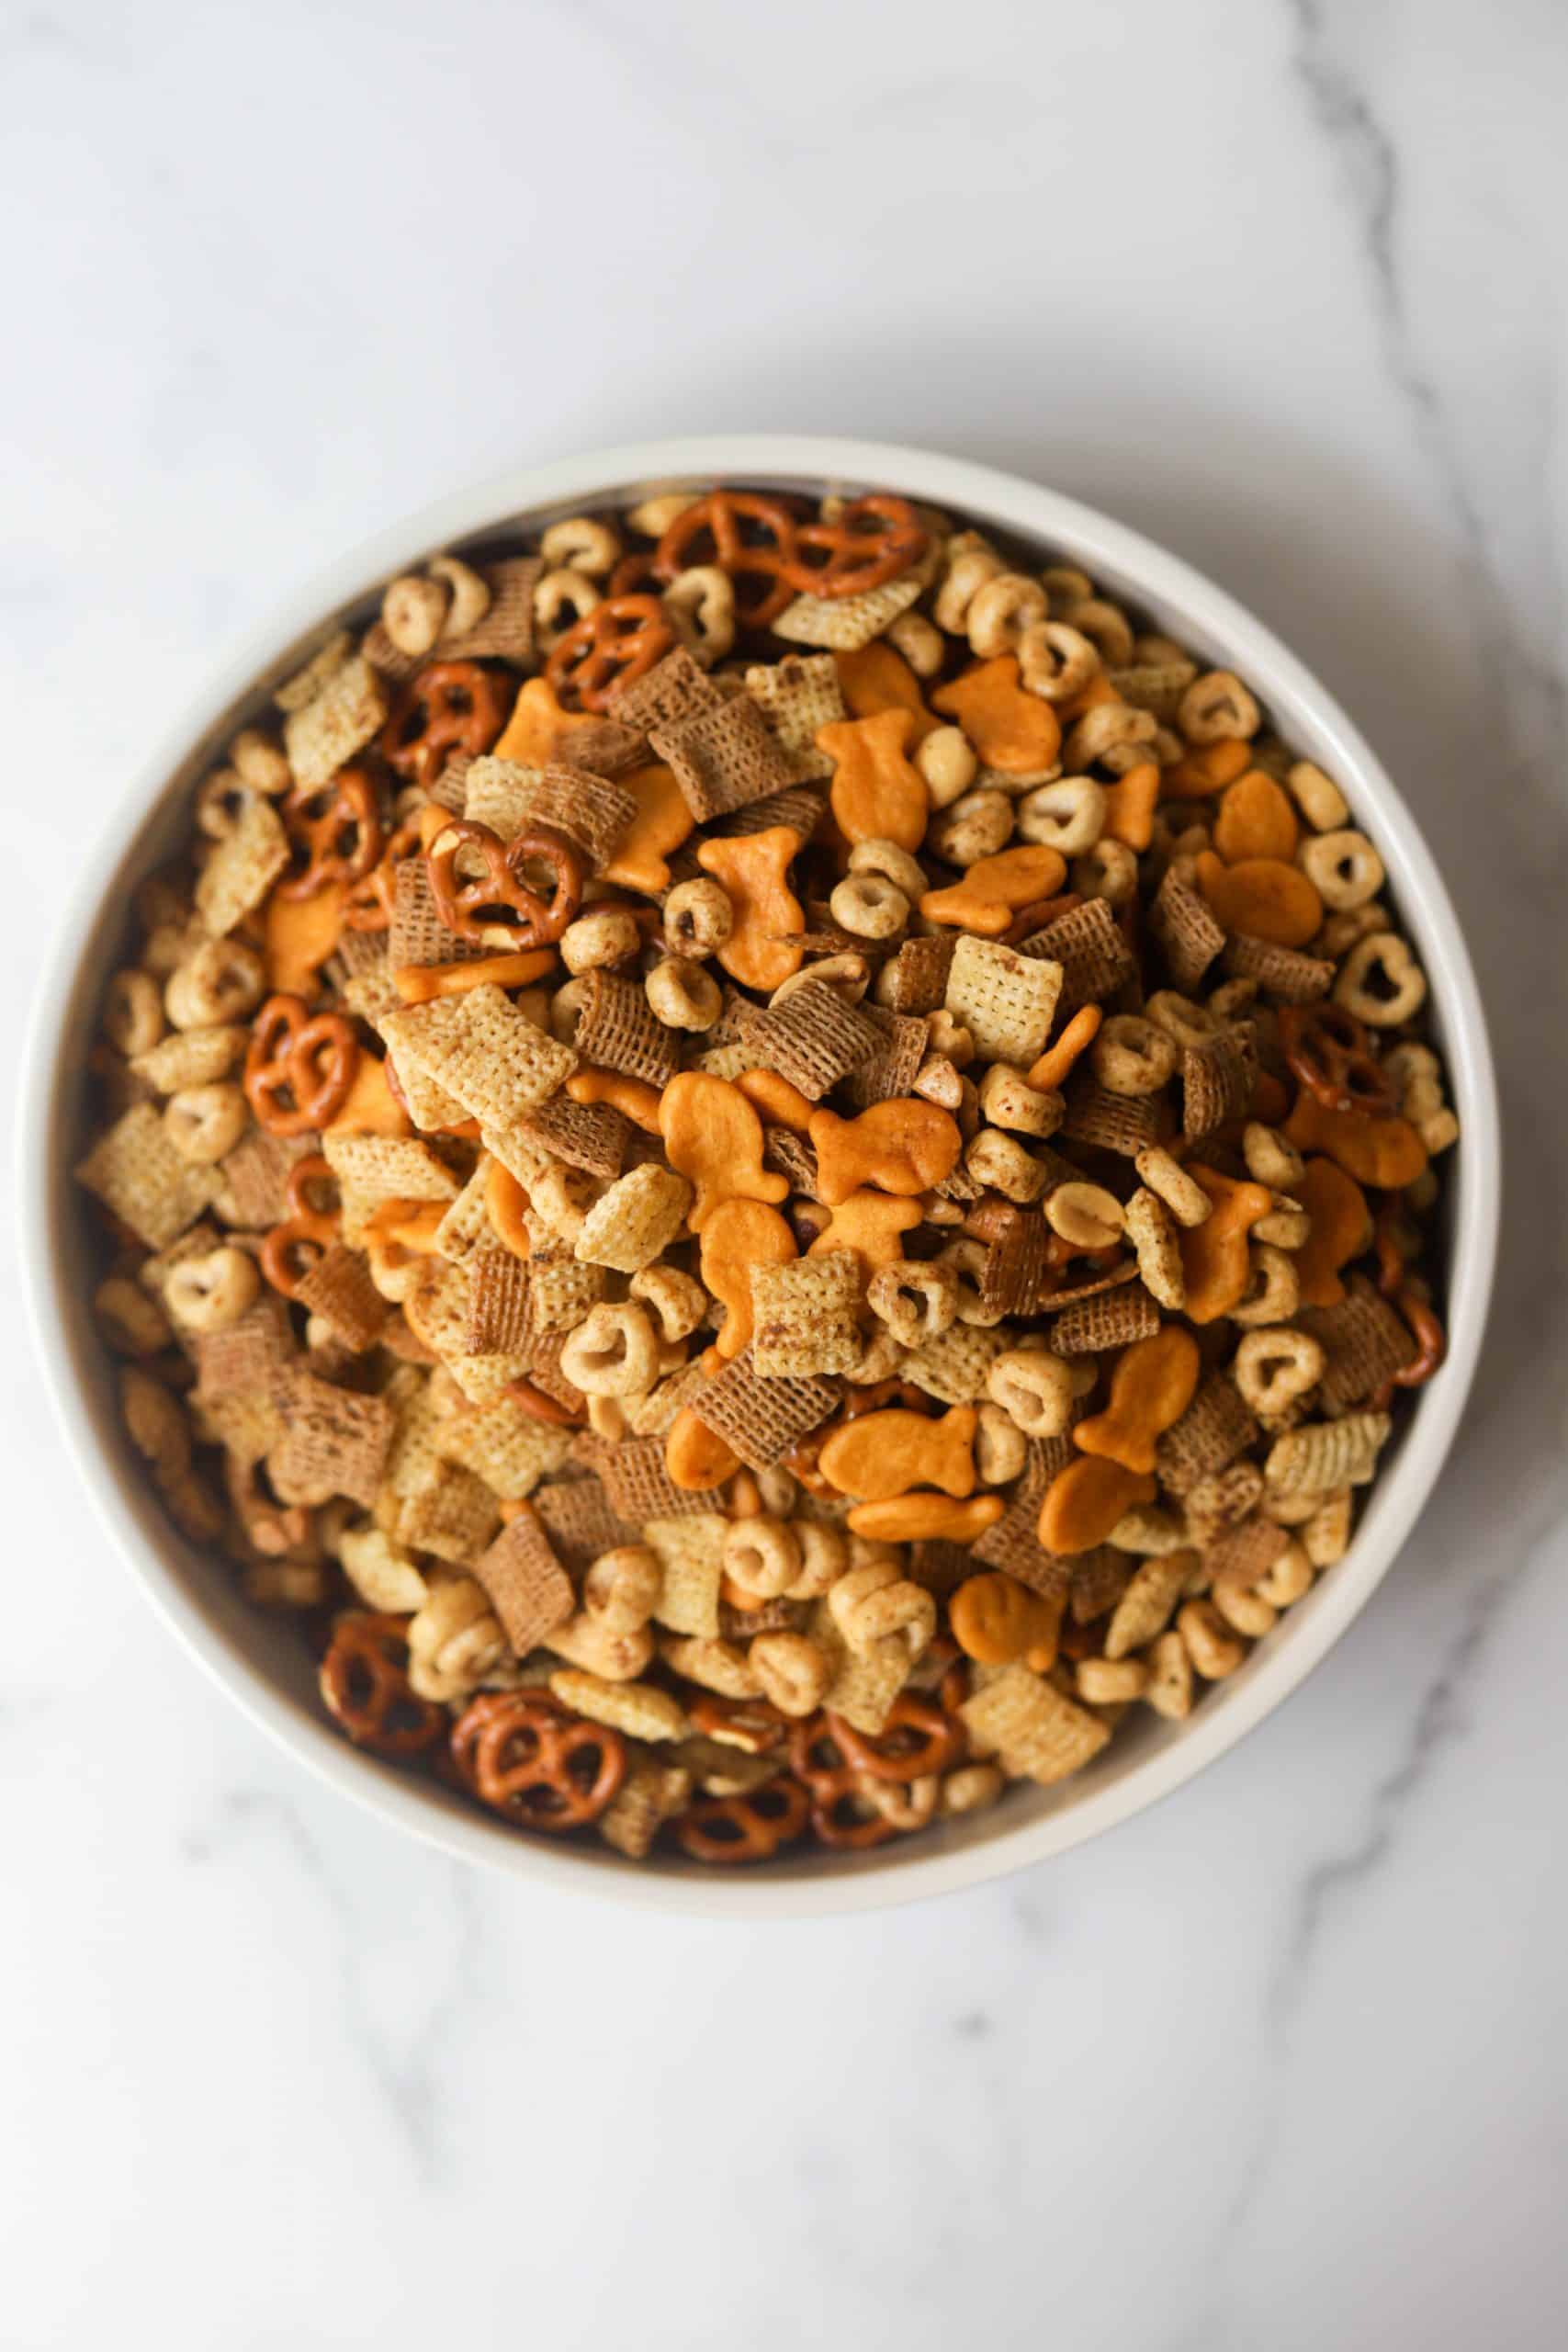
The classic Chex mix from the box is fine, but this homemade version is genuinely better — and you control exactly what goes in it. I use a mix of rice Chex, nuts, seeds, and a honey-olive oil coating with a little smoked paprika and Worcestershire. It bakes up crunchy and fragrant, and I make a double batch because one tray disappears before it even cools down. It travels well in zip-lock bags, which makes it perfect for the lunchbox or the after-school snack bowl.
Ingredients
- 3 cups Rice Chex cereal
- 1 cup Corn Chex cereal
- ½ cup raw almonds
- ½ cup pumpkin seeds
- ¼ cup sunflower seeds
- 2 tablespoons olive oil
- 1 tablespoon honey
- 1 tablespoon Worcestershire sauce
- ½ teaspoon smoked paprika
- ¼ teaspoon garlic powder
- ½ teaspoon salt
Instructions
- Preheat oven to 300°F. Line a large rimmed baking sheet with parchment paper.
- In a small bowl, whisk together the olive oil, honey, Worcestershire sauce, smoked paprika, garlic powder, and salt until combined.
- In a large bowl, toss together both cereals, almonds, pumpkin seeds, and sunflower seeds. Pour the oil mixture over the top and toss well to coat everything evenly.
- Spread the mixture in a single layer on the prepared baking sheet. Bake for 30-35 minutes, stirring every 10 minutes so it toasts evenly and nothing burns at the edges.
- Let cool completely on the pan — it crisps up further as it cools. Store in an airtight container at room temperature for up to 2 weeks.
Tips
- Tip: Low and slow is the key here — 300°F instead of higher heat means the mix toasts evenly without the nuts burning before the cereal gets crispy.
- Tip: If your kids prefer a sweeter mix, add an extra teaspoon of honey and a pinch of cinnamon to the coating — it leans slightly sweet-savory and they'll love it.
- Tip: Pretzels make a great addition if you want more crunch — just swap out one of the seed portions and reduce the salt slightly since pretzels are already salty.
13. One Bowl Zucchini Chocolate Chip Muffins
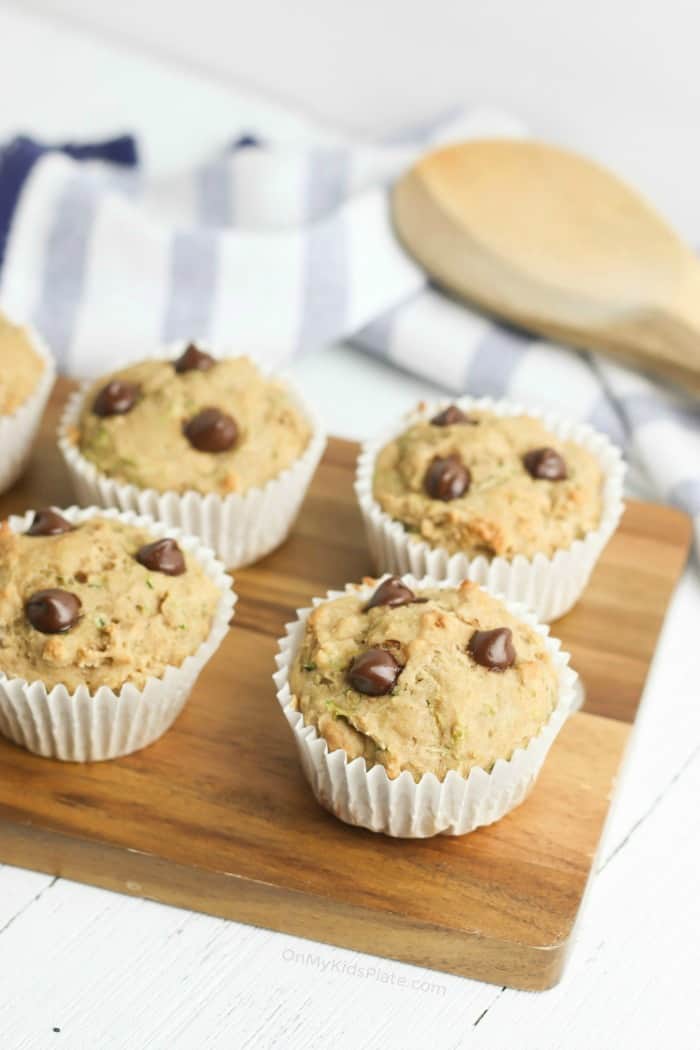
The selling point of these muffins is literally in the name — one bowl, which means minimal cleanup on a school morning when I'm already juggling three things at once. The grated zucchini keeps them incredibly moist without making them taste like vegetables (Zainab has no idea there's a vegetable in hers), and the chocolate chips make them feel like a treat. They come together in under 30 minutes and freeze beautifully, so I batch-bake on Sundays and pull them out all week.
Ingredients
- 1½ cups all-purpose flour (or whole wheat flour for extra nutrition)
- 1 teaspoon baking soda
- 1 teaspoon ground cinnamon
- ¼ teaspoon salt
- 1 cup grated zucchini (about 1 medium zucchini), excess moisture squeezed out
- ⅓ cup honey or maple syrup
- ⅓ cup coconut oil or vegetable oil, melted
- 2 eggs
- 1 teaspoon vanilla extract
- ½ cup semi-sweet chocolate chips, plus more for topping
Instructions
- Preheat oven to 350°F. Line a 12-cup muffin tin with paper liners or grease it well.
- In a large bowl, whisk together the oil, honey, eggs, and vanilla until smooth. Add the squeezed-out grated zucchini and stir to combine — squeezing out the moisture is important or your muffins will be wet in the middle.
- Add the flour, baking soda, cinnamon, and salt directly to the wet ingredients. Stir until just combined — a few lumps are fine. Don't overmix or the muffins will be dense.
- Fold in the chocolate chips. Divide the batter evenly among the muffin cups, filling each about ¾ full. Sprinkle a few extra chips on top if you want them to look good.
- Bake for 18-22 minutes until a toothpick inserted in the center comes out clean. Cool in the pan for 5 minutes, then transfer to a wire rack.
Tips
- Tip: Squeeze the grated zucchini in a clean kitchen towel or paper towels before adding it — if you skip this the batter gets too wet and the muffins won't cook through evenly.
- Tip: These freeze really well — let them cool completely, then store in a zip-lock freezer bag for up to 3 months. Pull one out the night before and it's ready by morning.
- Tip: Add ¼ cup chopped walnuts along with the chocolate chips for extra texture and a little protein boost.
14. Healthy Banana Zucchini Muffins
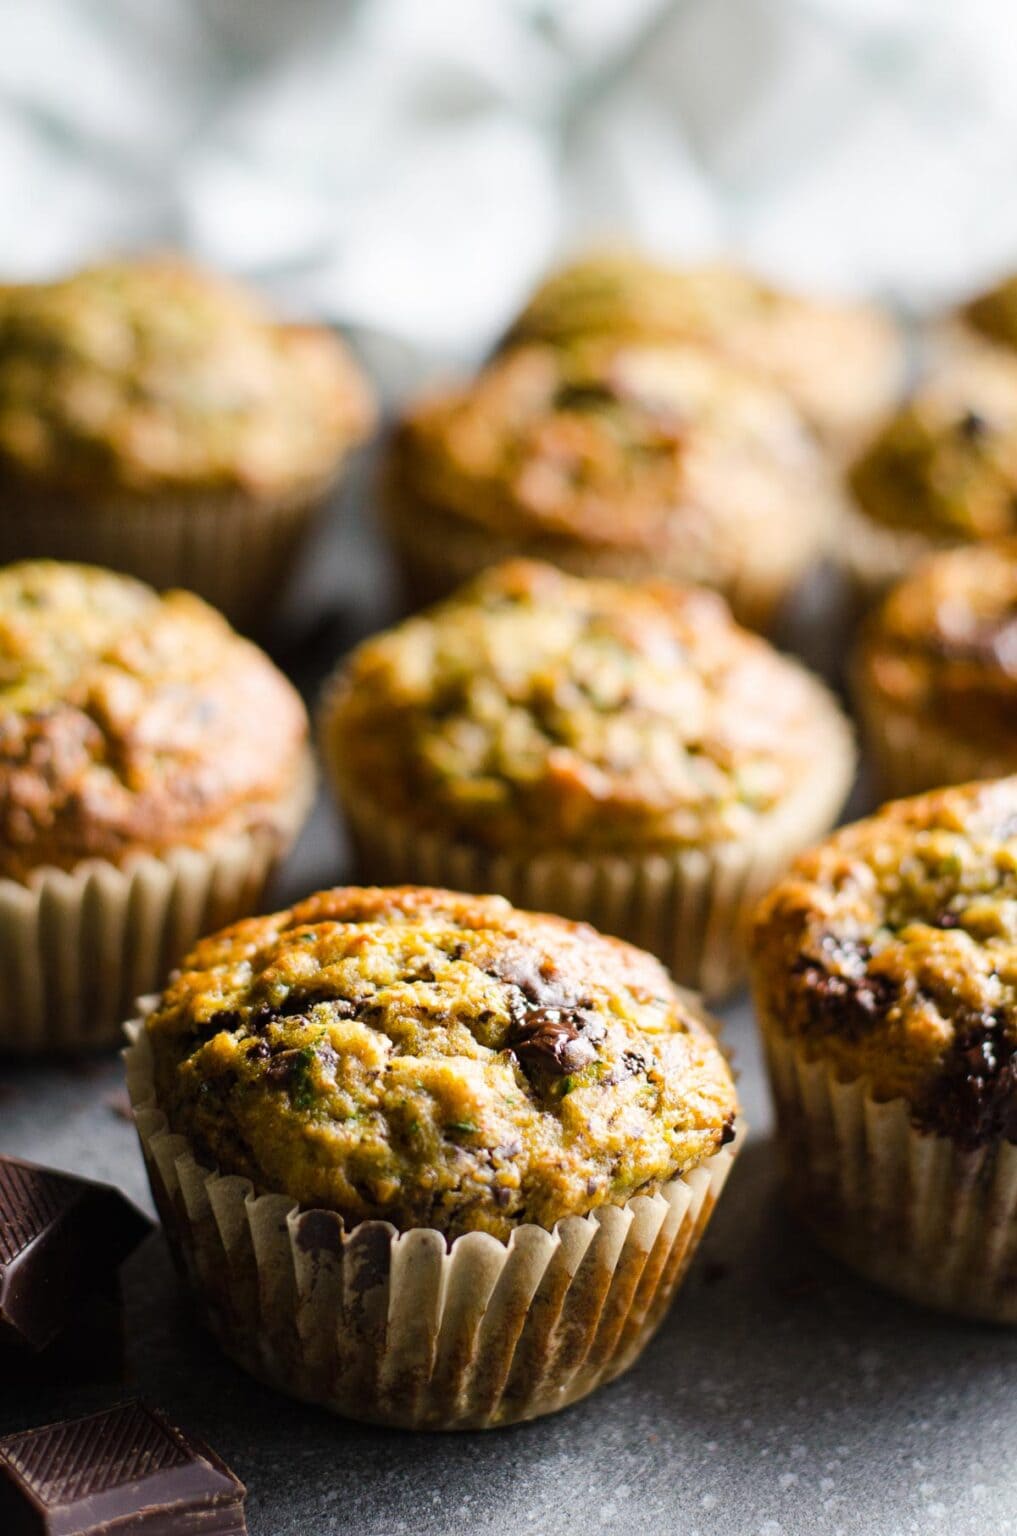
Two vegetables-in-disguise muffins in one roundup — but these earn their own spot because the banana changes everything. Overripe bananas bring natural sweetness so you barely need any added sugar, and the zucchini keeps the crumb soft and light. I make these with a mix of oat flour and whole wheat flour, which gives them a slightly heartier texture than a regular muffin — they hold up in a lunchbox without crumbling into a mess. These are also the ones I make when I've got spotty bananas sitting on the counter and zucchini from the farmers market that needs to be used up.
Ingredients
- 2 large overripe bananas, mashed (about 1 cup)
- 1 cup grated zucchini, excess moisture squeezed out
- 1 cup whole wheat flour
- ½ cup oat flour (or blend ½ cup rolled oats in a blender until fine)
- 1 teaspoon baking soda
- 1 teaspoon cinnamon
- ¼ teaspoon salt
- 2 eggs
- 3 tablespoons maple syrup or honey
- ¼ cup coconut oil or vegetable oil, melted
- 1 teaspoon vanilla extract
Instructions
- Preheat oven to 350°F. Line a 12-cup muffin tin with paper liners.
- In a large bowl, mash the bananas until smooth. Whisk in the eggs, oil, maple syrup, and vanilla until combined.
- Stir in the squeezed zucchini. Add both flours, baking soda, cinnamon, and salt. Stir until just combined — the batter will be thick and that's exactly right.
- Divide the batter evenly among the muffin cups, filling each about ¾ full. Bake for 20-24 minutes until a toothpick comes out clean and the tops spring back when lightly pressed.
- Cool in the pan for 5 minutes before transferring to a rack. They slice cleanly once fully cool.
Tips
- Tip: The riper the bananas, the sweeter the muffins — black-spotted bananas are ideal here and mean you can reduce or skip the maple syrup entirely.
- Tip: If you don't have oat flour, just pulse regular rolled oats (the kind from Quaker or Trader Joe's) in a blender for about 30 seconds — you get the same result.
- Tip: These freeze well for up to 3 months. I thaw overnight in the fridge and they're perfectly moist the next morning.
15. How to Dehydrate Pears
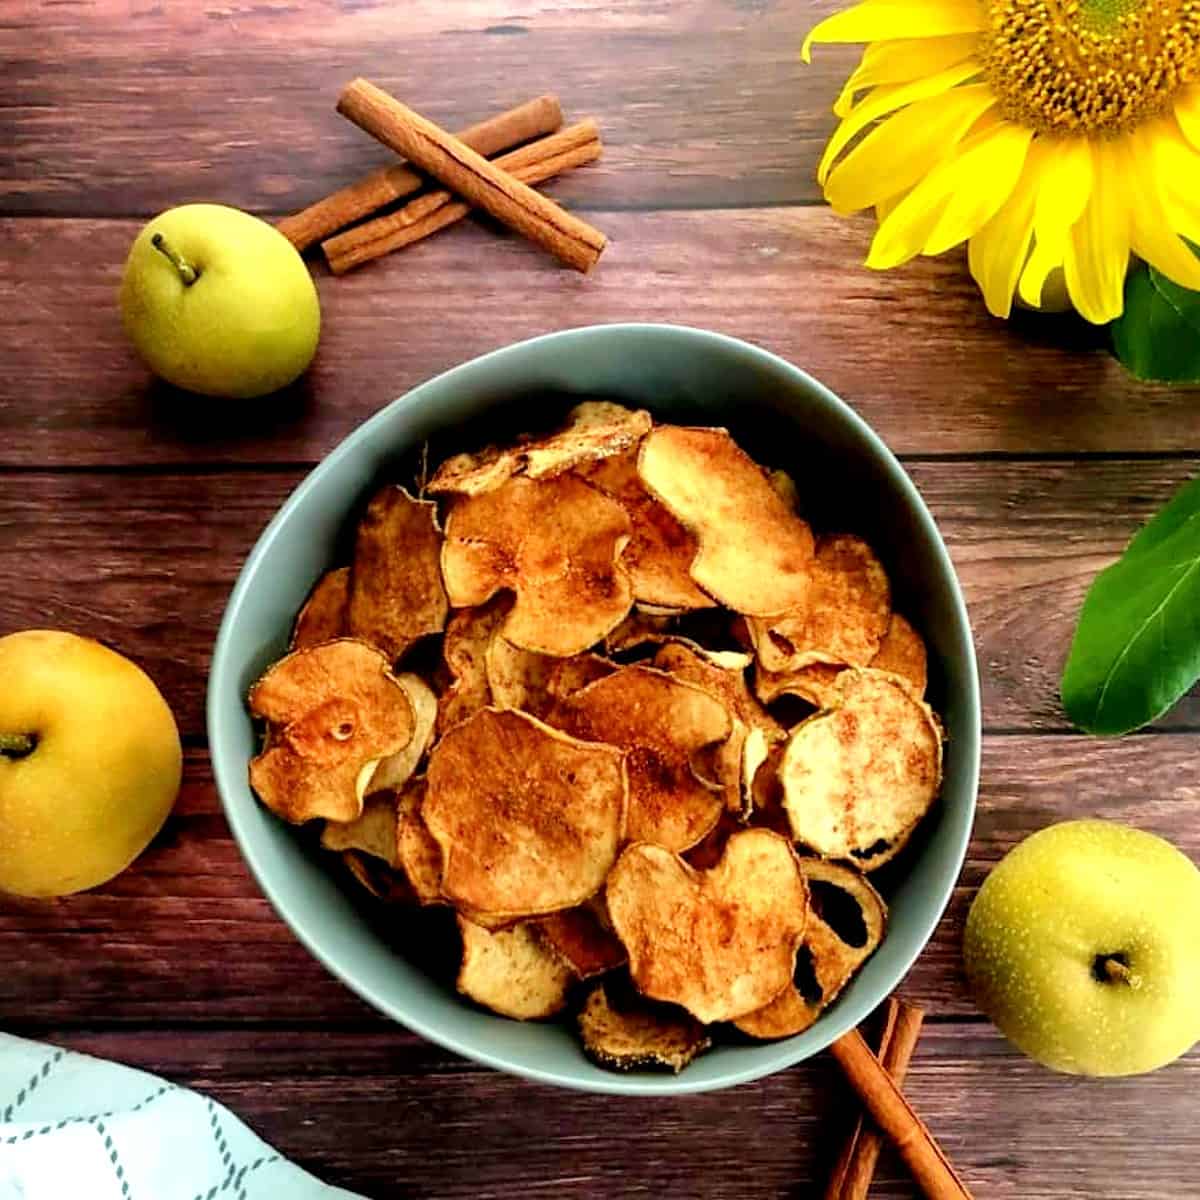
I don't own a dehydrator — never have — so when I first heard about dehydrating fruit I assumed it was off the table for me. Turns out a regular oven at low heat does the job completely fine, just takes a bit longer. Dehydrated pears come out chewy, sweet, and intensely pear-flavored in a way that fresh pears just aren't. They're shelf-stable for weeks, which makes them one of the smartest snacks to prep on a Sunday afternoon. No added sugar, no preservatives, just pear.
Ingredients
- 4 medium ripe but firm pears (Bartlett or Bosc work well)
- 2 tablespoons lemon juice (fresh or bottled)
- 2 cups cold water (for the lemon soak)
- Optional: ½ teaspoon cinnamon or a pinch of cardamom for dusting
Instructions
- Preheat your oven to 200°F. Line two large baking sheets with parchment paper and place wire cooling racks on top if you have them — this helps air circulate underneath the slices.
- Mix the lemon juice and cold water in a large bowl. Core the pears and slice them very thinly — about ⅛ inch thick. A mandoline makes this easier, but a sharp knife works fine if you go slowly. Drop the slices into the lemon water as you go to prevent browning.
- Pat the pear slices dry with paper towels — removing surface moisture helps them dehydrate faster and more evenly. Arrange in a single layer on the prepared baking sheets. Dust lightly with cinnamon if using.
- Bake at 200°F for 3 to 4 hours, flipping the slices halfway through. They're done when they feel dry and leathery to the touch but still have a slight bend — they shouldn't be brittle or crisp like a chip.
- Let cool completely on the racks before storing. Store in an airtight container or zip-lock bag at room temperature for up to 3 weeks, or in the fridge for up to 2 months.
Tips
- Tip: Slice thickness matters a lot — if your slices are uneven, some will finish before others. Try to keep them as consistent as possible so you're not pulling individual pieces out at different times.
- Tip: If your oven runs hot, prop the door open very slightly with a wooden spoon — this lets moisture escape and keeps the temperature lower so the pears dry rather than bake.
- Tip: This same method works with apples, mangoes, and strawberries — adjust the drying time based on how thick the fruit is and how much moisture it contains.
10. Ultimate Snack Tray Ideas (for Lunch or Dinner)
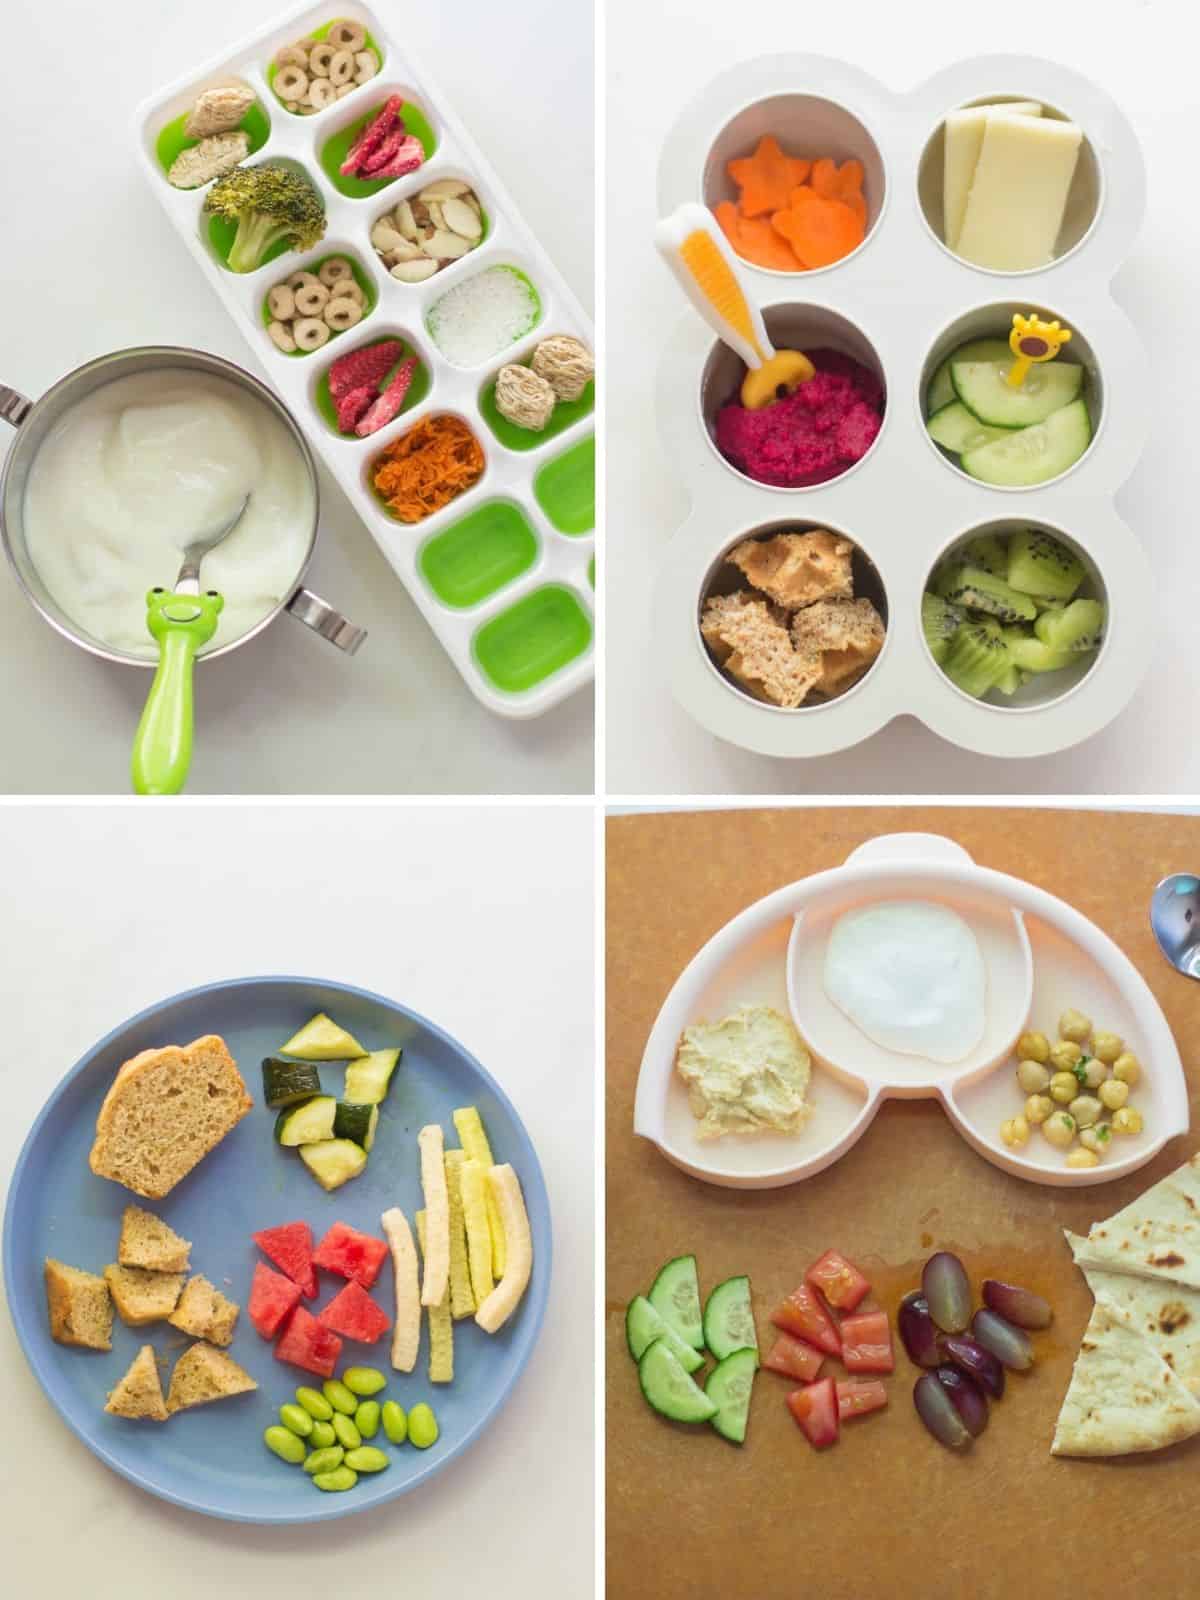
A snack tray is honestly one of my most-used tricks on days when I can't be bothered to cook a proper lunch. I pile a large cutting board or a flat tray with whatever I have — some cheese, crackers, a handful of grapes, a few carrot sticks, some hummus — and everyone just picks what they want. Saad loves building his own little plate from it, and Zainab always goes straight for the cheese. The beauty of this is there's no real recipe to mess up, but I've found that the combination below works really well for after-school grazing or a light weekend lunch.
Ingredients
- 4 oz cheddar or gouda cheese, sliced or cubed
- 1 cup crackers (Ritz, Triscuits, or similar)
- 1 cup grapes or sliced strawberries
- 1 cup baby carrots, cucumber slices, or bell pepper strips
- ¼ cup hummus or ranch dip
- ¼ cup mixed nuts or sunflower seeds (optional)
- A few slices of deli turkey or salami (optional, for more protein)
Instructions
- Choose a large flat tray, cutting board, or baking sheet as your base.
- Place small bowls or ramekins on the tray for dips and any wet items — this keeps things from sliding into each other.
- Arrange cheese, crackers, fruit, and vegetables in separate sections around the bowls, filling in gaps with nuts or seeds.
- Set out on the table and let everyone assemble their own plate. Refrigerate any leftovers covered with plastic wrap — it keeps well for about a day.
Tips
- Tip: Pack individual portions into small bento containers the night before for a grab-and-go school snack the next day.
- Tip: Keep the tray visually interesting by varying colors — red grapes next to orange carrots next to pale crackers makes kids more likely to actually eat it.
- Tip: If you're skipping nuts for a school-safe tray, pumpkin seeds or dried cranberries work great as a substitute for that extra texture.
9. Broccoli Cheddar Quinoa Bars
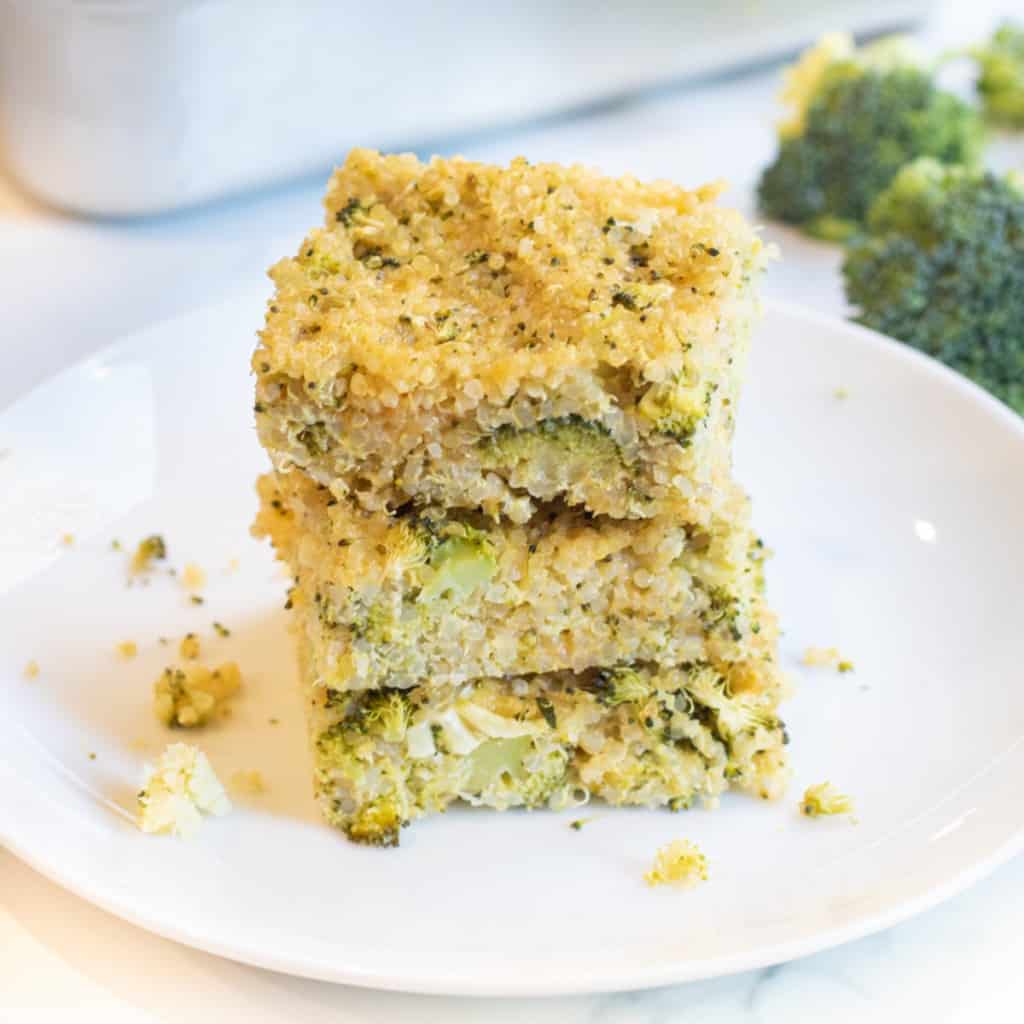
I was skeptical the first time I made these — quinoa in a bar felt like a stretch. But they actually hold together really well, and the cheddar gives them enough flavor that the kids don't even notice there's broccoli inside. They come out with a slightly crispy outside and a soft, cheesy middle, which is exactly what you want. I make a batch on Sunday and they go straight into the lunchbox for Monday and Tuesday — they reheat fine in a toaster oven for about 5 minutes if you want them warm.
Ingredients
- 1 cup cooked quinoa (cooled)
- 1½ cups broccoli florets, steamed and finely chopped
- 1 cup shredded sharp cheddar cheese
- 2 large eggs
- ¼ cup breadcrumbs (regular or gluten-free)
- ½ teaspoon garlic powder
- ¼ teaspoon salt
- ¼ teaspoon black pepper
Instructions
- Preheat your oven to 375°F. Line an 8x8-inch baking pan with parchment paper and lightly grease it.
- In a large bowl, combine cooked quinoa, chopped broccoli, cheddar, eggs, breadcrumbs, garlic powder, salt, and pepper. Mix until everything is evenly combined.
- Press the mixture firmly and evenly into the prepared pan — pressing it down hard helps the bars hold their shape once baked.
- Bake for 20–25 minutes until the top is golden and the edges look set. Let cool in the pan for at least 10 minutes before cutting into bars.
- Store in an airtight container in the fridge for up to 4 days, or freeze individually wrapped for up to 2 months.
Tips
- Tip: Make sure to squeeze excess moisture out of the steamed broccoli before adding it — wet broccoli is the main reason these bars fall apart.
- Tip: Use pre-cooked quinoa from a packet (Costco and Trader Joe's both carry them) to cut down prep time significantly.
- Tip: These taste great cold straight from the fridge, so they're genuinely convenient as a no-reheat school snack.
8. Homemade Gluten-Free + Allergy-Free Uncrustables (Vegan)

Store-bought Uncrustables are convenient, but if your kid has a gluten intolerance or a nut allergy, those aren't an option. This homemade version uses gluten-free bread and allergy-safe fillings, and you seal the edges with a small round cookie cutter or the rim of a glass — no special gadget needed. I make a batch of six on Sunday, wrap each one in plastic wrap, and they go straight into the freezer. Pull one out in the morning and it's thawed by lunchtime. Genuinely useful for busy school weeks.
Ingredients
- 8 slices gluten-free sandwich bread (Canyon Bakehouse is a widely available brand)
- ½ cup sunflower seed butter (allergy-safe alternative to peanut butter)
- ¼ cup strawberry or grape jam
- A 3½-inch round cookie cutter or large glass (for sealing and cutting)
Instructions
- Lay out pairs of bread slices on a flat surface. Spread sunflower seed butter on one slice of each pair, leaving a ½-inch border around the edge.
- Add about 1 tablespoon of jam in the center of the sunflower butter — don't spread it all the way to the edges or it'll leak when you press down.
- Place the second slice on top and press the edges firmly together with your fingers first, then press the cookie cutter or glass rim down hard to seal and cut through both slices simultaneously.
- To freeze: wrap each sandwich tightly in plastic wrap, place in a zip-lock bag, and freeze for up to 1 month. To serve, thaw at room temperature for 30–45 minutes or overnight in the fridge.
Tips
- Tip: Slightly frozen bread is actually easier to cut cleanly — pop the slices in the freezer for 10 minutes before assembling if your gluten-free bread is very soft.
- Tip: Swap the jam for a thin layer of dairy-free chocolate spread for a dessert-style version the kids will love.
- Tip: Label each freezer bag with the date — these keep well for a month but the bread texture starts to suffer after that.
7. Nut-Free Chocolate Bliss Balls
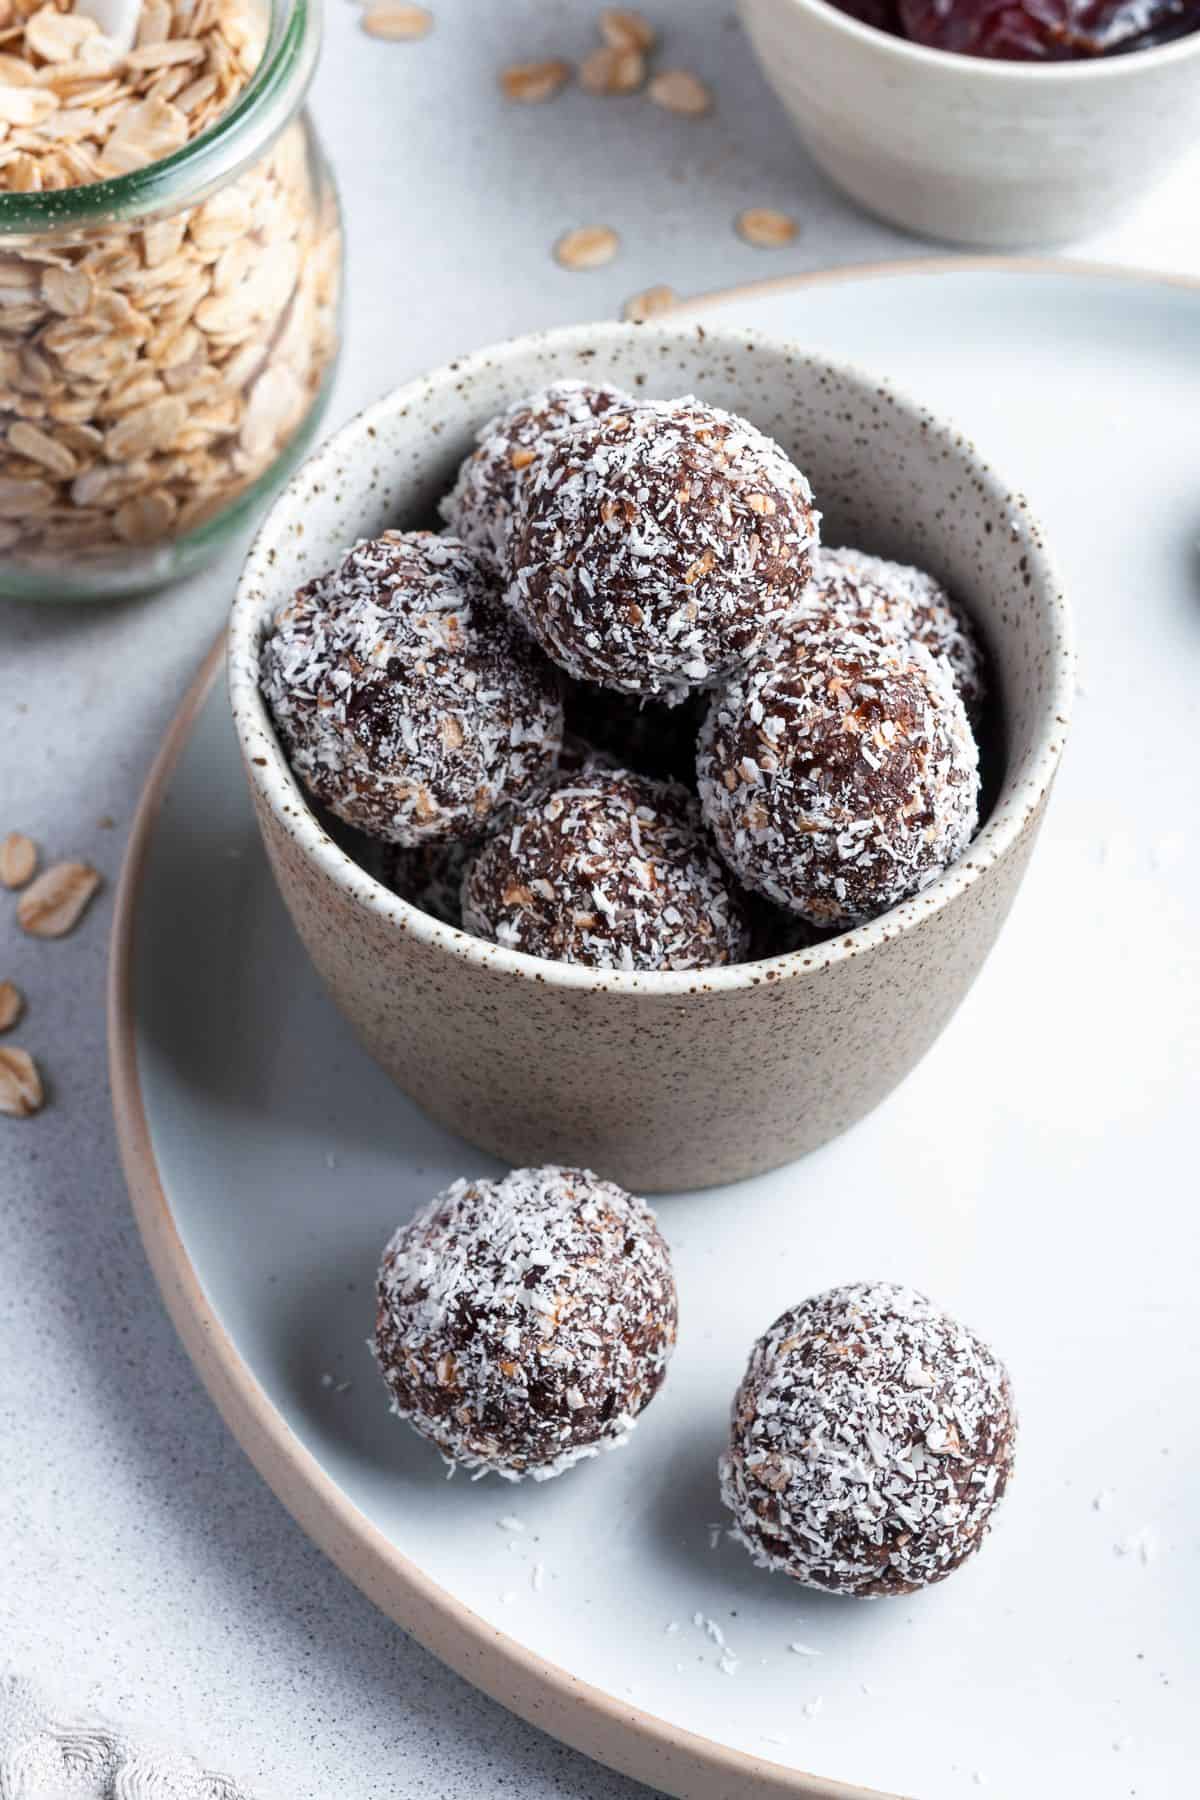
These are one of those things I started making because I needed something school-safe — no nuts, no baking, nothing complicated — and they ended up becoming a regular thing in our house. The base is dates, oats, and sunflower seeds blended together with cocoa powder, and the result is surprisingly fudgy and rich. No oven, no special equipment beyond a food processor (or a blender in a pinch), and the whole batch comes together in about 15 minutes. I make a double batch every time because they disappear fast.
Ingredients
- 1 cup pitted Medjool dates (about 10–12 dates)
- 1 cup rolled oats
- ½ cup sunflower seeds (raw or lightly toasted)
- 3 tablespoons unsweetened cocoa powder
- 1 tablespoon maple syrup or honey
- 1 teaspoon vanilla extract
- Pinch of salt
- Optional: ¼ cup shredded coconut or mini chocolate chips for rolling
Instructions
- If your dates feel dry, soak them in warm water for 10 minutes and drain well before using — this makes blending much easier and the balls hold together better.
- Add all ingredients to a food processor and pulse until the mixture starts clumping together. It should hold its shape when pressed — if it's too dry, add 1 teaspoon of water at a time.
- Roll the mixture into balls about 1 inch in diameter. If rolling in coconut or chocolate chips, do that now.
- Place on a parchment-lined tray and refrigerate for at least 30 minutes to firm up. Store in an airtight container in the fridge for up to 1 week or freeze for up to 2 months.
Tips
- Tip: If you don't have a food processor, chop the dates very finely by hand and mash everything together in a bowl — it takes more effort but works fine.
- Tip: Add a tablespoon of chia seeds for extra nutrition without changing the taste or texture noticeably.
- Tip: Keep a few in a small container in your bag — they travel well at room temperature for a few hours, making them great for school pickup snacks too.
6. Vegan Applesauce Banana Bread

I've made banana bread more times than I can count, but this vegan version using applesauce instead of eggs was new to me — and honestly it works better than I expected. The applesauce keeps it moist without making it dense, and because you're using very ripe bananas the sweetness is already built in without loading it up with sugar. This isn't authentic anything, it's just a practical, egg-free, dairy-free loaf that slices well and holds up in a lunchbox for two or three days without going dry. I sometimes fold in a handful of dairy-free chocolate chips for the kids.
Ingredients
- 3 very ripe bananas, mashed (about 1¼ cups)
- ½ cup unsweetened applesauce
- ⅓ cup maple syrup or coconut sugar
- ¼ cup neutral oil (vegetable or melted coconut oil)
- 1 teaspoon vanilla extract
- 1½ cups all-purpose flour (or 1:1 gluten-free flour blend)
- 1 teaspoon baking soda
- ½ teaspoon cinnamon
- ¼ teaspoon salt
- Optional: ½ cup dairy-free chocolate chips or chopped walnuts
Instructions
- Preheat your oven to 350°F. Grease a 9x5-inch loaf pan or line it with parchment paper.
- In a large bowl, mash the bananas well, then stir in applesauce, maple syrup, oil, and vanilla until combined.
- Add flour, baking soda, cinnamon, and salt directly to the wet mixture and stir until just combined — don't overmix or the bread will turn out tough.
- Fold in chocolate chips or walnuts if using, then pour the batter into the prepared pan.
- Bake for 50–60 minutes until a toothpick inserted in the center comes out clean. Let cool in the pan for 10 minutes, then transfer to a wire rack. Wait until fully cool before slicing — it firms up as it cools.
Tips
- Tip: The riper the bananas the better — I'm talking fully black-spotted, almost too soft to eat. Those give the most sweetness and moisture.
- Tip: Tent the loaf loosely with foil after 35 minutes if the top is browning too quickly — this happened to me the first time and I ended up with a dark crust and an underbaked center.
- Tip: Slice the whole loaf and freeze individual slices wrapped in plastic — pull one out each morning and it's thawed by snack time at school.
21. Hash Brown Egg Breakfast Muffins for Kids
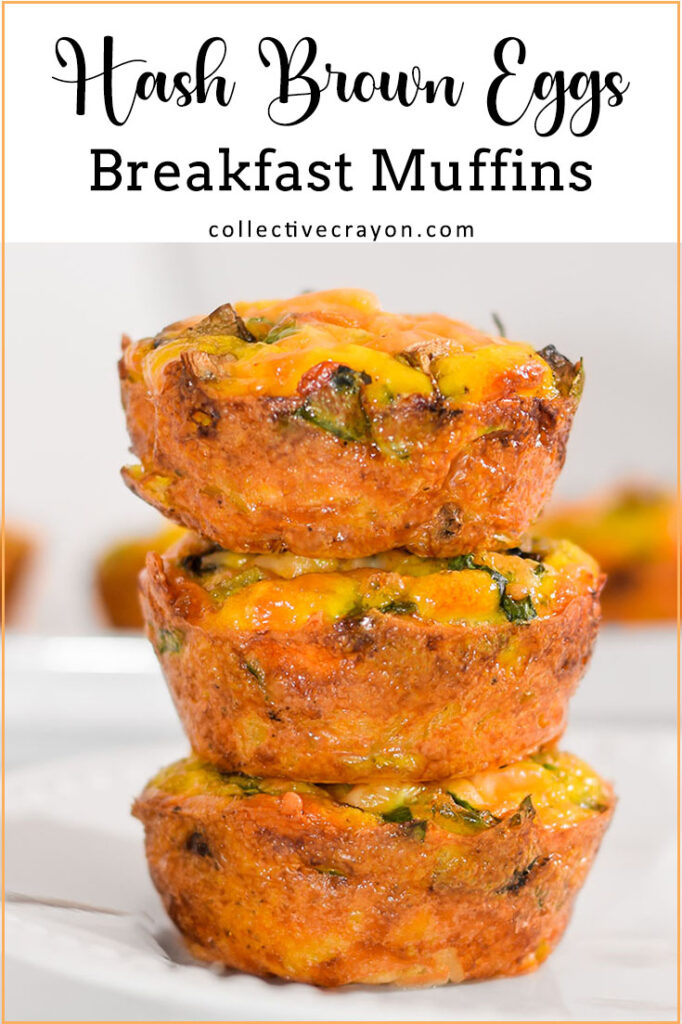
These little muffins are honestly one of the smartest things I make during the school week. You get a crispy hash brown base pressed into a muffin tin, an egg cracked right on top, and whatever fillings you have on hand — shredded cheese, diced bell pepper, a little crumbled sausage. They bake up into tidy, self-contained portions that my kids can grab and eat without needing a plate or a fork. I make a batch on Sunday and we're set through Wednesday morning at least.
Ingredients
- 2 cups frozen shredded hash browns, thawed and squeezed dry
- 1 tablespoon olive oil or melted butter
- ¼ teaspoon salt
- ¼ teaspoon garlic powder
- 6 large eggs
- ½ cup shredded cheddar cheese
- ¼ cup diced bell pepper or cooked crumbled sausage (optional)
- Salt and black pepper to taste
Instructions
- Preheat oven to 400°F. Grease a standard 12-cup muffin tin well with cooking spray or butter.
- Mix the thawed, squeezed hash browns with olive oil, salt, and garlic powder. Press about 2 tablespoons of the mixture firmly into the bottom and up the sides of each muffin cup to form a little nest.
- Bake the hash brown shells for 15 minutes until the edges start to turn golden and crisp up.
- Remove from oven. Sprinkle a little cheese and any optional fillings into each cup, then crack one egg into each (or beat the eggs first and pour in for a scrambled version).
- Return to oven and bake another 12–15 minutes until eggs are set. Let cool 5 minutes before removing. Store in the fridge up to 4 days; reheat in the microwave for 45 seconds.
Tips
- Tip: Squeezing the moisture out of the hash browns is the most important step — if they're wet, the shells won't crisp up and everything falls apart when you try to pop them out.
- Tip: If your kids don't like runny yolks, beat the eggs with a splash of milk before pouring them in — you get a fluffier, more uniform fill that younger kids tend to prefer.
- Tip: Silicone muffin pans make removal much easier than metal ones — these are under $15 at Walmart and worth having for recipes like this.
22. Paleo Chocolate Protein Balls (No Dates)
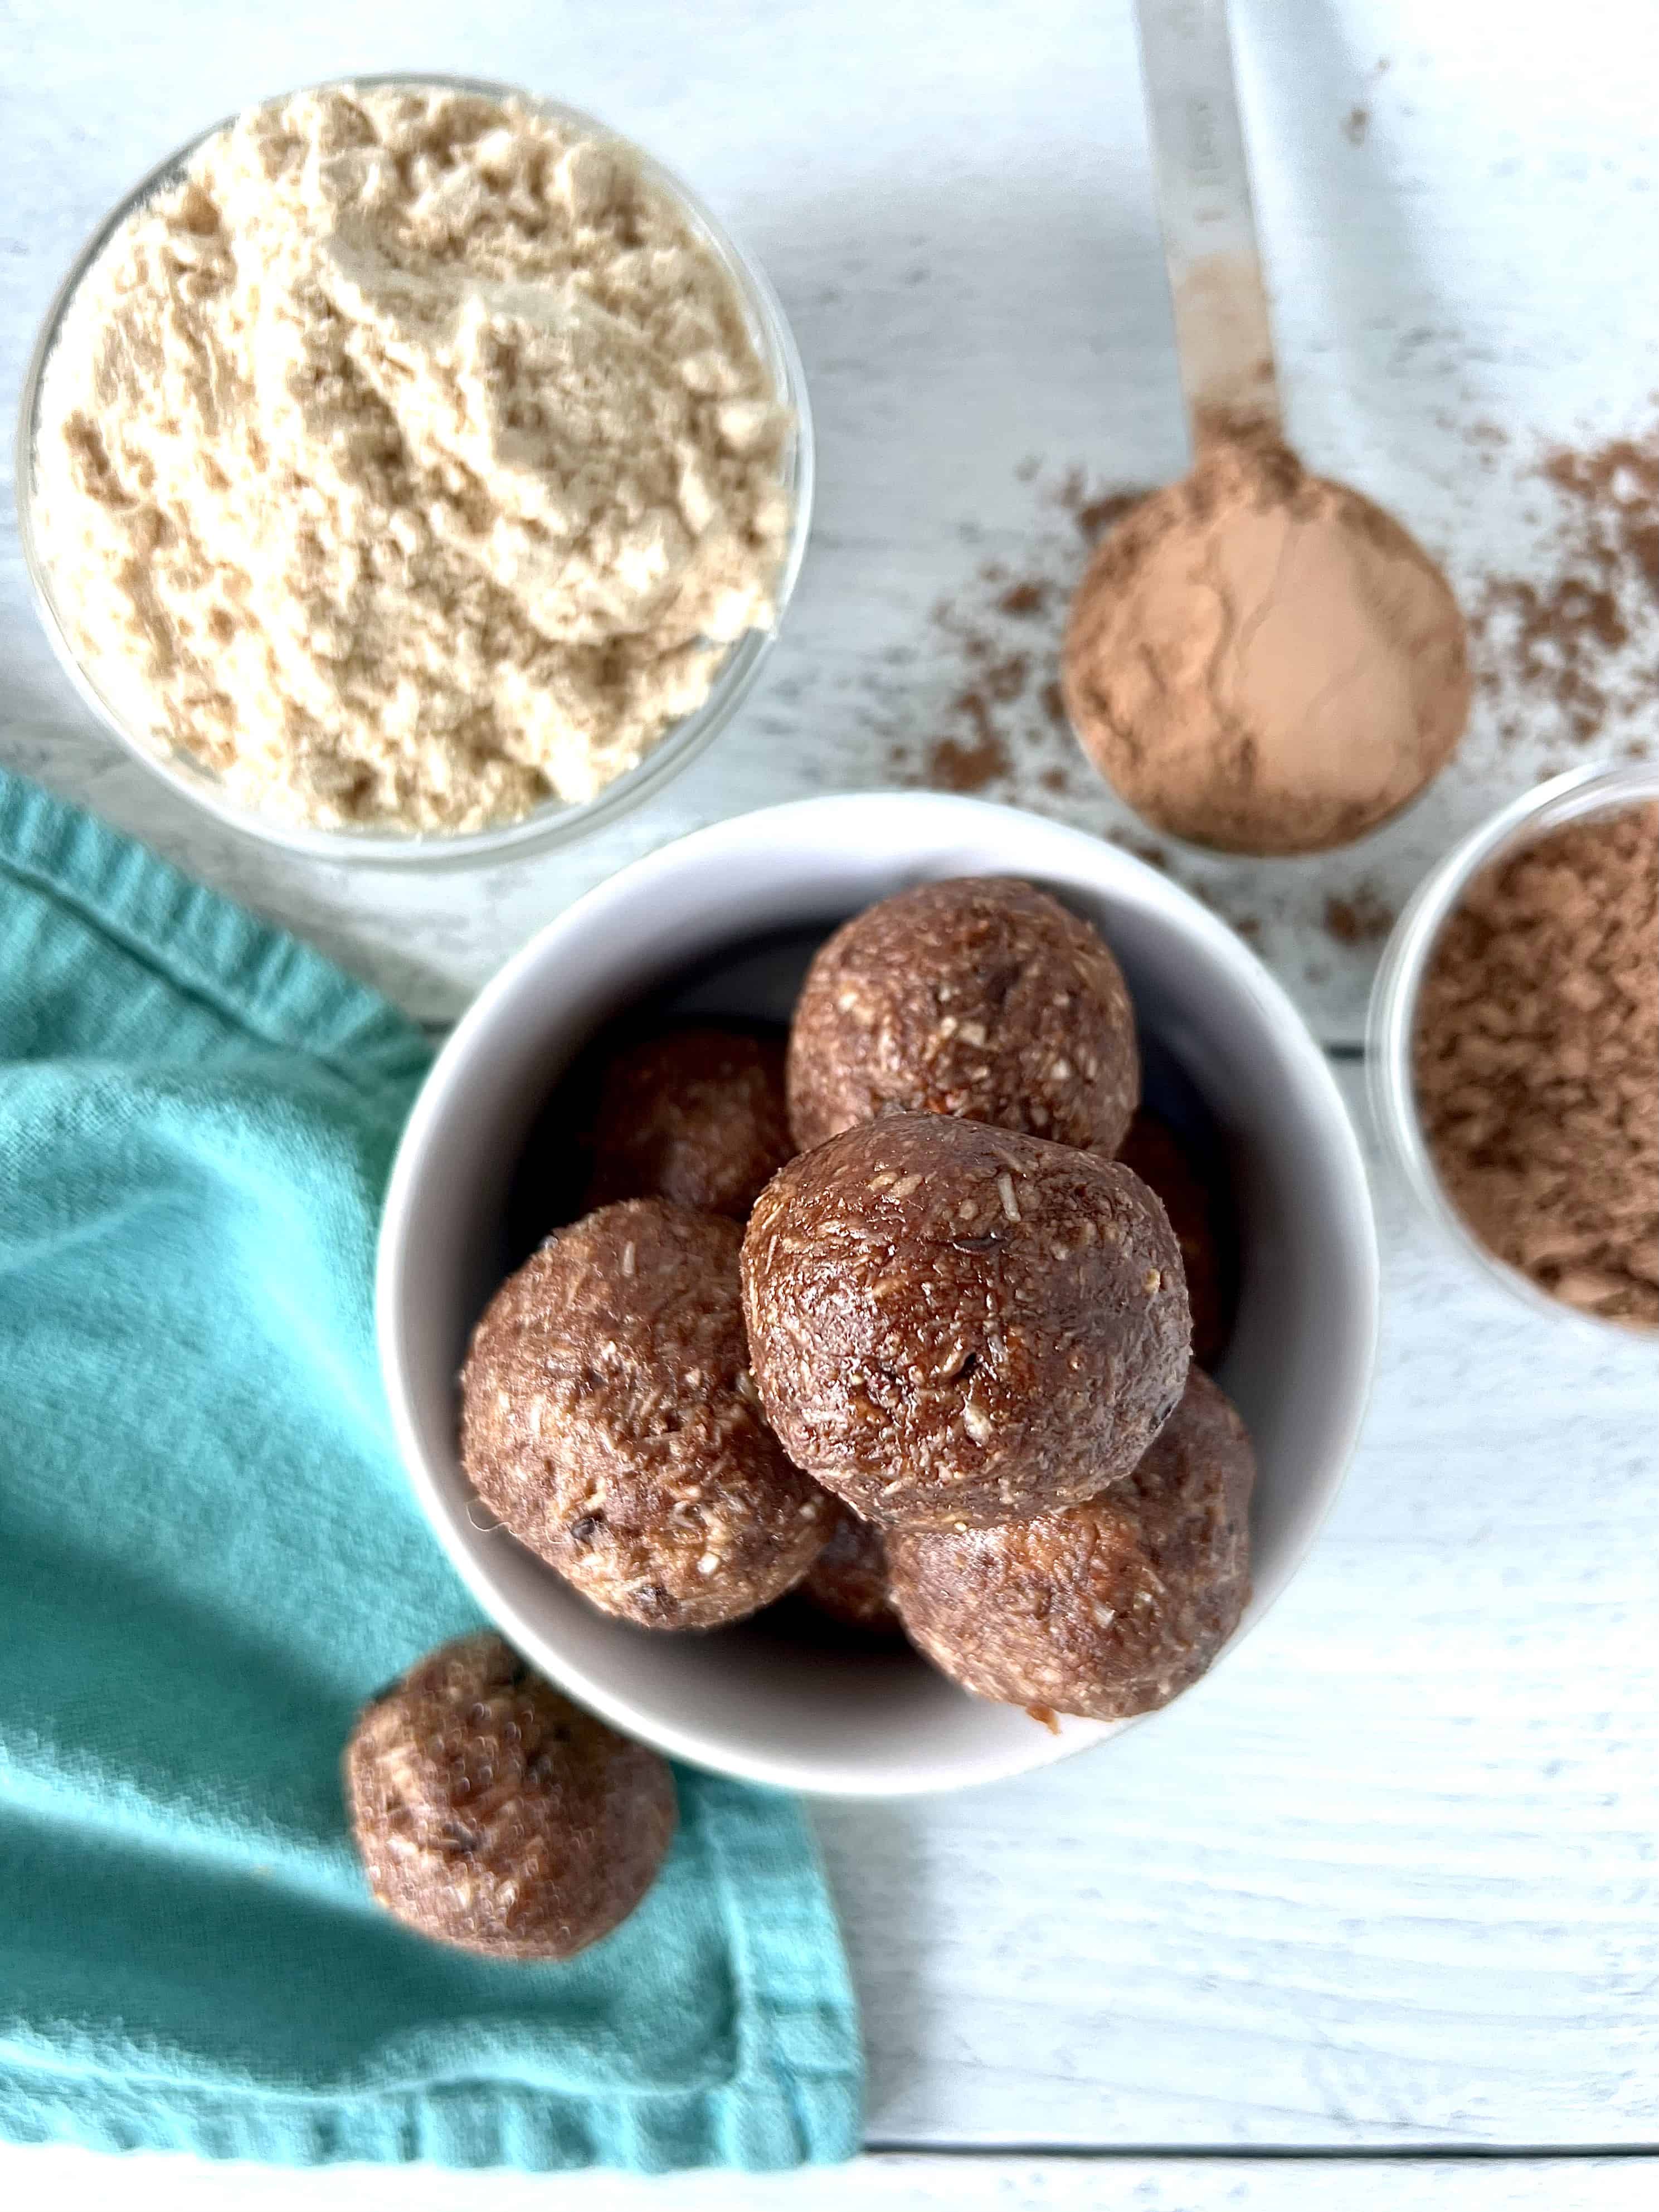
A lot of energy ball recipes lean heavily on dates for binding and sweetness, which is fine, but not everyone has dates on hand or likes their flavor. This version skips them entirely and uses almond butter and maple syrup to hold everything together. The result is a deeply chocolatey, fudgy little ball that tastes more like a treat than a snack — which is exactly how you get kids to actually eat them. They're also paleo and gluten-free, so they work for a range of dietary needs without tasting like health food.
Ingredients
- 1 cup almond flour
- ¼ cup unsweetened cocoa powder
- 2 tablespoons paleo-friendly chocolate or vanilla protein powder (optional but helpful)
- ½ cup almond butter (smooth, no sugar added)
- 3 tablespoons pure maple syrup (or honey)
- 1 teaspoon vanilla extract
- Pinch of salt
- ¼ cup unsweetened shredded coconut or chopped nuts for rolling (optional)
Instructions
- Add almond flour, cocoa powder, protein powder (if using), and salt to a mixing bowl. Stir to combine the dry ingredients evenly.
- Add the almond butter, maple syrup, and vanilla extract. Mix until a thick dough forms. If it feels too dry to roll, add another teaspoon of maple syrup. If too sticky, add a tablespoon more almond flour.
- Refrigerate the dough for 15 minutes — this makes it much easier to roll without sticking to your hands.
- Roll into 1-inch balls (you should get about 14–16). Roll in shredded coconut or chopped nuts if desired.
- Store in an airtight container in the fridge for up to 1 week, or freeze for up to 2 months.
Tips
- Tip: Stir your almond butter well before measuring — the oil separates and if you scoop from the top you'll get a greasy, runny mixture that won't bind properly.
- Tip: If you can't find paleo protein powder or just don't have it, leave it out entirely — the balls still hold together and taste great, they'll just be slightly softer.
- Tip: I double this batch every single time I make it because a single batch disappears before the end of the first school day. Seriously, make more than you think you need.
23. 3 Ingredient Peanut Butter Oatmeal Balls
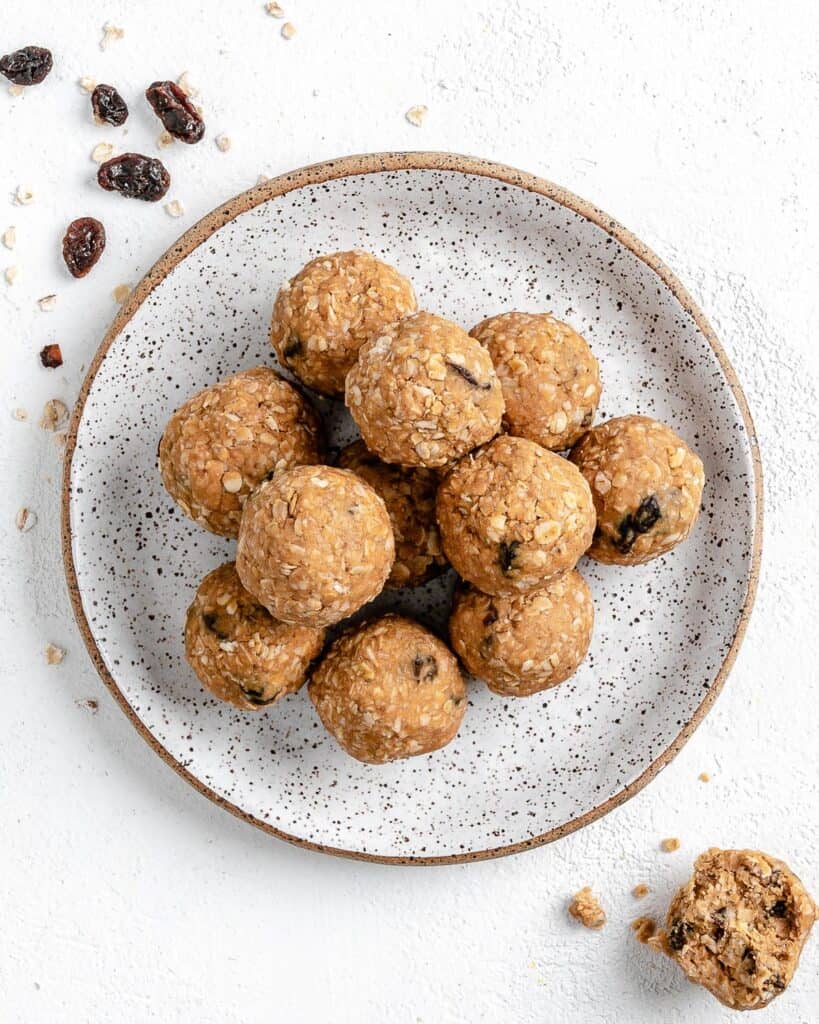
Three ingredients. That's it — rolled oats, peanut butter, and honey. I was skeptical the first time I tried this because it seemed too simple to actually taste like something worth eating, but Zainab grabbed four of them off the plate before I'd even finished rolling the last batch. The oats give them a chewy bite, the peanut butter adds protein that keeps kids full, and the honey holds everything together with just enough sweetness. No oven, no mixer, no fuss.
Ingredients
- 1 cup rolled oats (old-fashioned, not instant)
- ½ cup peanut butter (creamy or chunky — both work)
- 3 tablespoons honey (or maple syrup for vegan)
- Optional add-ins: 2 tablespoons mini chocolate chips, raisins, or ground flaxseed
Instructions
- Combine oats, peanut butter, and honey in a medium bowl. Stir until everything is fully incorporated and no dry oats remain at the bottom. Fold in any add-ins at this stage.
- Cover the bowl and refrigerate for 20–30 minutes. This step is important — the mixture firms up significantly and becomes easy to roll without sticking.
- Scoop out about 1 tablespoon of dough and roll between your palms into a ball. You should get around 12–14 balls from this recipe.
- Store in an airtight container in the refrigerator for up to 1 week. They can also be frozen for up to 3 months.
Tips
- Tip: If your peanut butter is very thick and stiff, microwave it for 15 seconds before mixing — it'll incorporate into the oats much more evenly and you won't end up with dry pockets.
- Tip: For nut-free school lunches, sunflower seed butter from Trader Joe's or Walmart swaps in perfectly and keeps the same texture.
- Tip: Mini chocolate chips are the most popular add-in at my house by a wide margin — if you're making these for kids for the first time, start with those before experimenting with anything else.
24. Breakfast Cookies
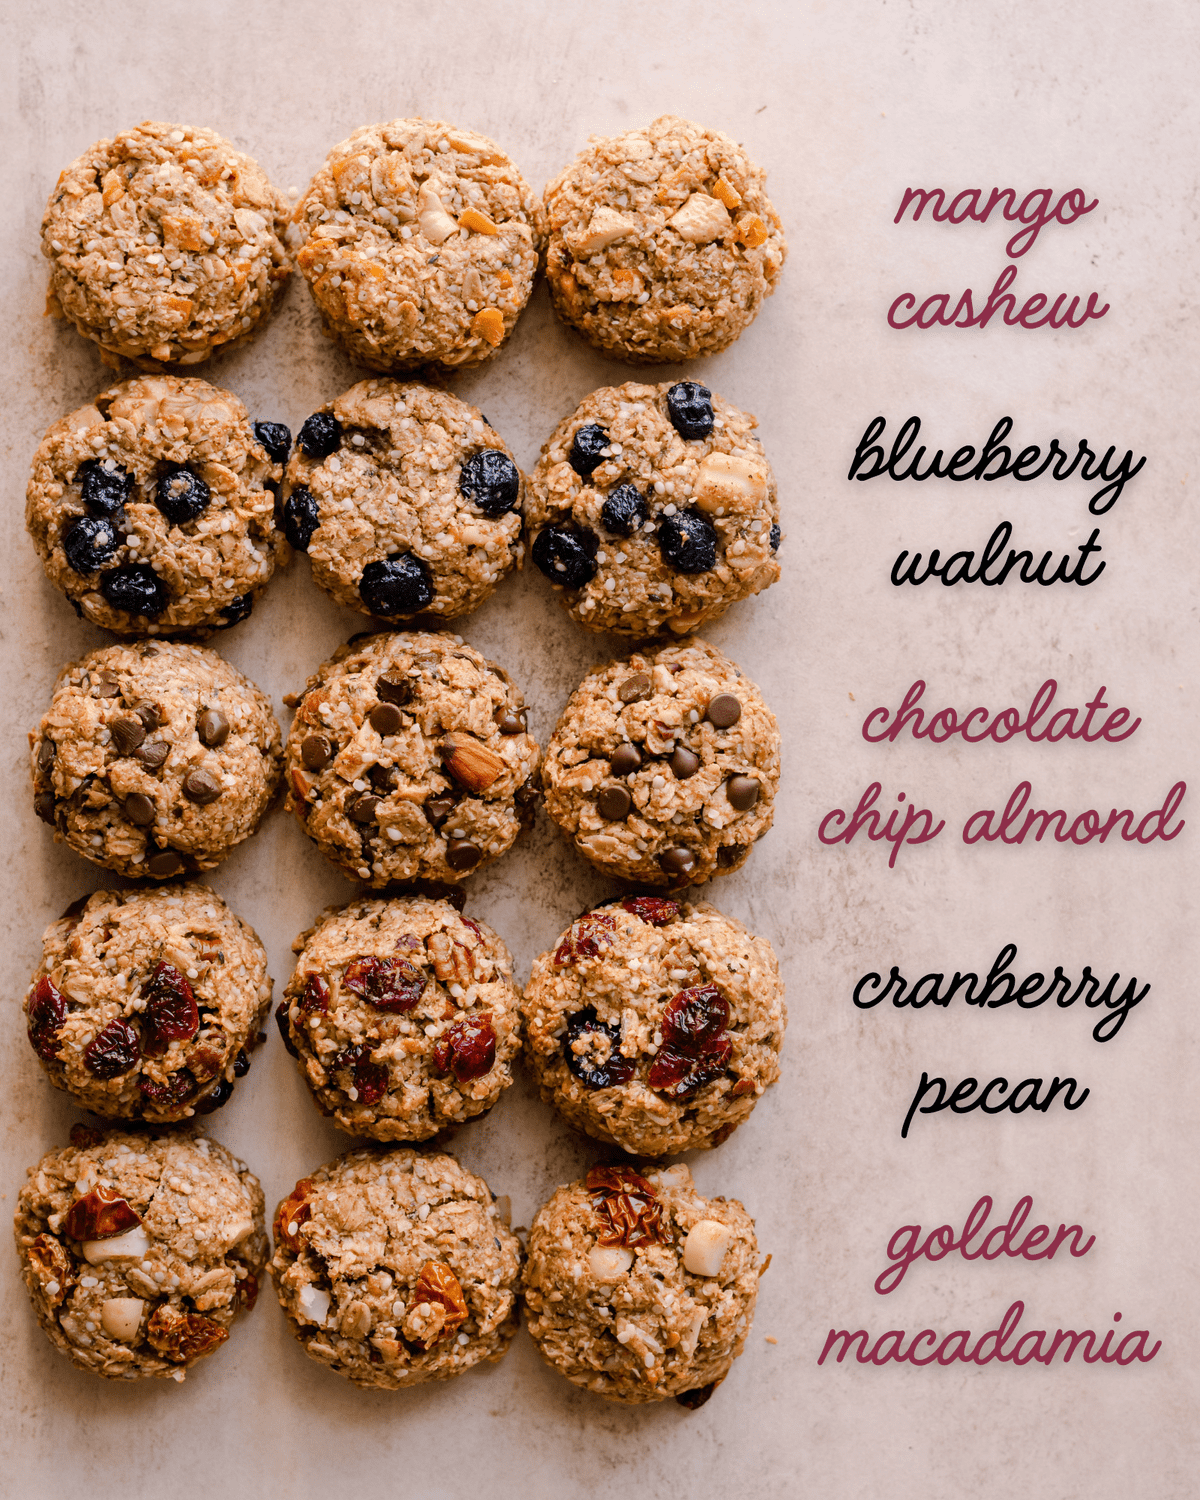
Telling a kid they're having cookies for breakfast is the fastest way to end a morning argument, and that's genuinely the appeal of these. They're built on mashed ripe banana and nut butter, which does all the heavy lifting for both binding and natural sweetness — no refined sugar, no flour. You stir in oats, seeds, dried fruit, whatever you have, and bake them into soft, chewy rounds that hold together surprisingly well. They're not a dessert cookie, but they're satisfying enough that nobody complains.
Ingredients
- 2 large ripe bananas, mashed well (about ¾ cup)
- ½ cup nut butter (peanut, almond, or sunflower seed butter)
- 1½ cups rolled oats
- 2 tablespoons honey or maple syrup
- 1 teaspoon vanilla extract
- ½ teaspoon cinnamon
- Pinch of salt
- ¼ cup mix-ins: mini chocolate chips, raisins, dried cranberries, pumpkin seeds, or chopped nuts
Instructions
- Preheat oven to 350°F. Line a baking sheet with parchment paper.
- In a large bowl, mash the bananas until smooth. Add nut butter, honey, vanilla, cinnamon, and salt. Stir to combine.
- Fold in the oats and your chosen mix-ins. The dough will be soft and sticky — that's normal. Let it sit for 5 minutes so the oats absorb some moisture.
- Scoop about 2 tablespoons of dough per cookie onto the prepared sheet. Flatten each one gently with the back of a spoon — these cookies don't spread on their own.
- Bake for 12–14 minutes until the edges look set and the tops are no longer glossy. Cool on the pan for 10 minutes before moving — they firm up as they cool.
Tips
- Tip: The riper your bananas the better — brown-spotted ones are sweeter and mash smoother, which means you need less added sweetener and the cookies hold together better.
- Tip: Don't skip flattening them before baking — I forgot this the first time and ended up with thick doughy lumps that were raw in the center even after 18 minutes.
- Tip: Store in the fridge in a sealed container — at room temperature they go soft and sticky after about a day, but refrigerated they stay perfectly chewy for 5 days.
25. Keto Haystack Cookies (Gluten Free & Vegan)
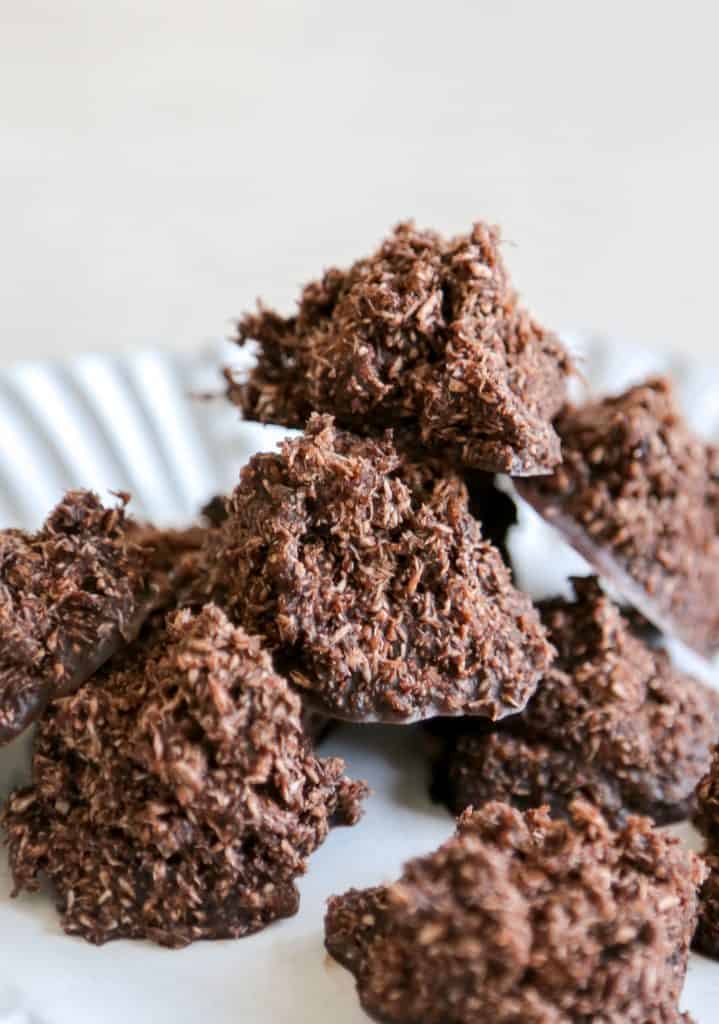
We're closing out this list with something that covers a lot of ground at once: no baking, no gluten, no dairy, no refined sugar, and honestly one of the crunchiest, most satisfying snacks in this entire roundup. These haystack cookies are made by melting dark chocolate with almond butter, stirring in shredded coconut and whatever crunchy low-carb add-ins you like, then dropping spoonfuls onto parchment to set. They look like a proper treat, they taste like one, and nobody needs to know they're actually pretty clean.
Ingredients
- 1 cup sugar-free dark chocolate chips (or 85%+ dark chocolate, chopped)
- ¼ cup almond butter (smooth, no added sugar)
- 1 tablespoon coconut oil
- 2 tablespoons honey or sugar-free maple syrup (use maple syrup to keep it vegan)
- 1 cup unsweetened shredded coconut
- ½ cup roughly chopped almonds or pecans
- ½ teaspoon vanilla extract
- Pinch of flaky salt for topping (optional but recommended)
Instructions
- Line a baking sheet or large plate with parchment paper and set aside.
- In a medium microwave-safe bowl, combine chocolate chips, almond butter, and coconut oil. Microwave in 30-second intervals, stirring between each, until fully melted and smooth — usually 2–3 rounds.
- Stir in the honey (or sugar-free syrup) and vanilla extract. Then fold in the shredded coconut and chopped nuts until everything is evenly coated in the chocolate mixture.
- Drop heaped tablespoons onto the prepared parchment, shaping them loosely into mounds. Sprinkle with flaky salt if using.
- Refrigerate for at least 30 minutes until fully set and firm. Store in the fridge in an airtight container for up to 2 weeks, or freeze for up to 2 months.
Tips
- Tip: Work quickly once the coconut and nuts are folded in — the chocolate mixture starts to thicken as it cools and becomes hard to scoop into neat mounds if you take too long.
- Tip: If you're not keeping these keto, regular dark chocolate chips from Trader Joe's or Costco work perfectly and cost a lot less than the sugar-free versions.
- Tip: The flaky salt on top isn't just decoration — it cuts through the richness of the chocolate and makes the whole thing taste more complex. Don't skip it if you have it.
Twenty-five snacks is a lot, I know. But that's genuinely how many I needed before I stopped scrambling every Sunday night trying to figure out what to pack for Saad and Zainab. The ones that made this list all passed the same test: they travel well, they don't require a long ingredient list, and my kids actually eat them instead of trading them away at lunch. That last part was harder to achieve than I expected.
If you're just getting started, pick two or three from this list and make them on a Sunday. See which ones your kids reach for first. In my kitchen it took a few weeks of trial and error before I figured out the rotation that works for us — the energy balls almost always disappear by Tuesday, the veggie pinwheels last all week. Your kids will tell you what sticks, even if they tell you by ignoring everything else in the lunchbox. I also double-batch almost everything on this list because a single batch disappears faster than I expect every single time.
I hope something here makes your back-to-school mornings a little less chaotic. Even one less "what's for snack?" moment at 7am is a win in my book. 🎒🍎✨
More Recipes You Might Like
- Easy Lunchbox Ideas — practical combinations that go together fast on weekday mornings
- Healthy Snacks for Kids — more snack ideas when you need something different mid-week
- Meal Prep for Beginners — how I batch-cook on Sundays so weekday mornings aren't a disaster
- No-Bake Desserts — for when you want something sweet without turning the oven on
- Quick Weeknight Dinners — because after a long school day, dinner needs to be just as easy
Frequently Asked Questions
How far ahead can I prep these back-to-school snacks?
Most of these snacks hold up well for 3 to 5 days in the fridge, which means a Sunday prep session covers you through Thursday at minimum. Energy balls and granola bars actually get better after a day or two once everything firms up. Anything with fresh fruit or cut vegetables is best made the night before rather than days ahead.
Which snacks are best for kids with nut allergies?
Quite a few on this list are naturally nut-free — veggie pinwheels, cheese quesadilla bites, cucumber rounds with hummus, and most of the fruit-based options don't touch nuts at all. For recipes that use peanut butter or almond butter, sunflower seed butter is a one-to-one swap that works just as well and is safe for most school nut-free policies. Always check your specific school's guidelines before packing.
What's the easiest snack on this list for a beginner?
Honestly, the no-bake energy balls. You mix everything in one bowl, roll them into balls, and refrigerate. There's no cooking, no timing, no way to really mess it up. If you've never done any snack prep before, start there — it takes about 15 minutes and you'll have snacks for most of the week.
Can these snacks be frozen?
Some of them freeze really well — muffins, energy balls, homemade granola bars, and mini pancakes all freeze without any texture loss. Just pull them out the night before and let them thaw in the fridge. I wouldn't freeze anything with fresh vegetables, cream cheese, or yogurt dip, because the texture falls apart once it thaws.
How do I get my kids to actually eat the healthier snacks?
Presentation matters more than I expected. Cutting things into smaller pieces, using a small dipping sauce on the side, or just mixing one new snack in with something they already like goes a long way. I also stopped announcing "this is healthy" — I just put it in the lunchbox and said nothing. That alone improved the odds considerably.
Share This Post!
If any of these snacks made it into your rotation, I'd love to know which ones your kids actually ate. Pin this list for later or share it with another parent who's staring down the same Sunday prep panic. 📌🎒
View More Recipes here Recipe Roundups





Comments
No Comments