
Summer entertaining at our house used to stress me out more than it should have. I'd plan something ambitious, realize halfway through that I'd forgotten to account for the heat, and end up sweating over a stove while everyone was already outside. It took a few seasons of that before I figured out the real secret to summer party food: most of it should be made ahead, most of it should be served cold or at room temperature, and none of it should require you to be stuck indoors while the party is happening without you.
What makes a great outdoor entertaining recipe isn't just that it tastes good — it's that it travels, holds up in heat, doesn't wilt after 20 minutes on a table, and ideally can be prepped the night before so you're not still chopping at noon on the day of. I look for recipes with short ingredient lists, minimal last-minute fuss, and enough variety that there's something for the kids, something for adults, and something for whoever shows up with dietary restrictions you didn't know about. If you're planning a full spread, my post on easy appetizers for a crowd is worth reading alongside this one.
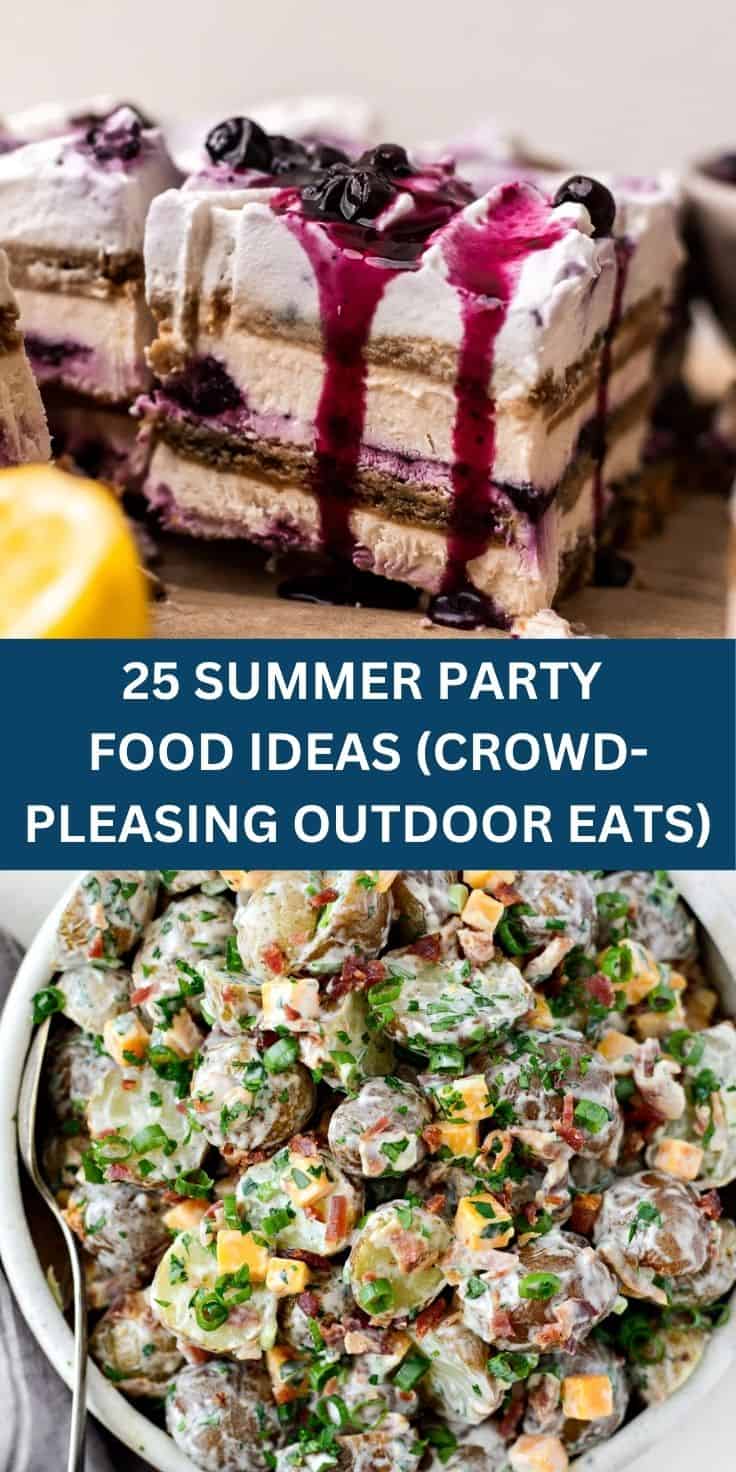
This list has 25 recipes that cover the whole table — grilled mains, cold salads, no-bake desserts, frozen drinks, and snackable apps that guests can grab and wander with. There are things like grilled honey sriracha chicken skewers and a pulled pork slider bar for the meat eaters, a layered Greek dip and grilled veggie flatbread for the vegetarians in the crowd, and frozen strawberry lemonade slushies alongside a strawberry basil sparkling sangria so nobody goes thirsty. I've also linked to my summer salad recipes and no-bake desserts roundups if you want to go deeper on either of those categories.
Here are the 25 recipes I keep coming back to every summer — pick whatever fits your crowd and your afternoon.
Easy Summer Party Recipes Worth Making
25. Grilled Honey Sriracha Chicken Skewers
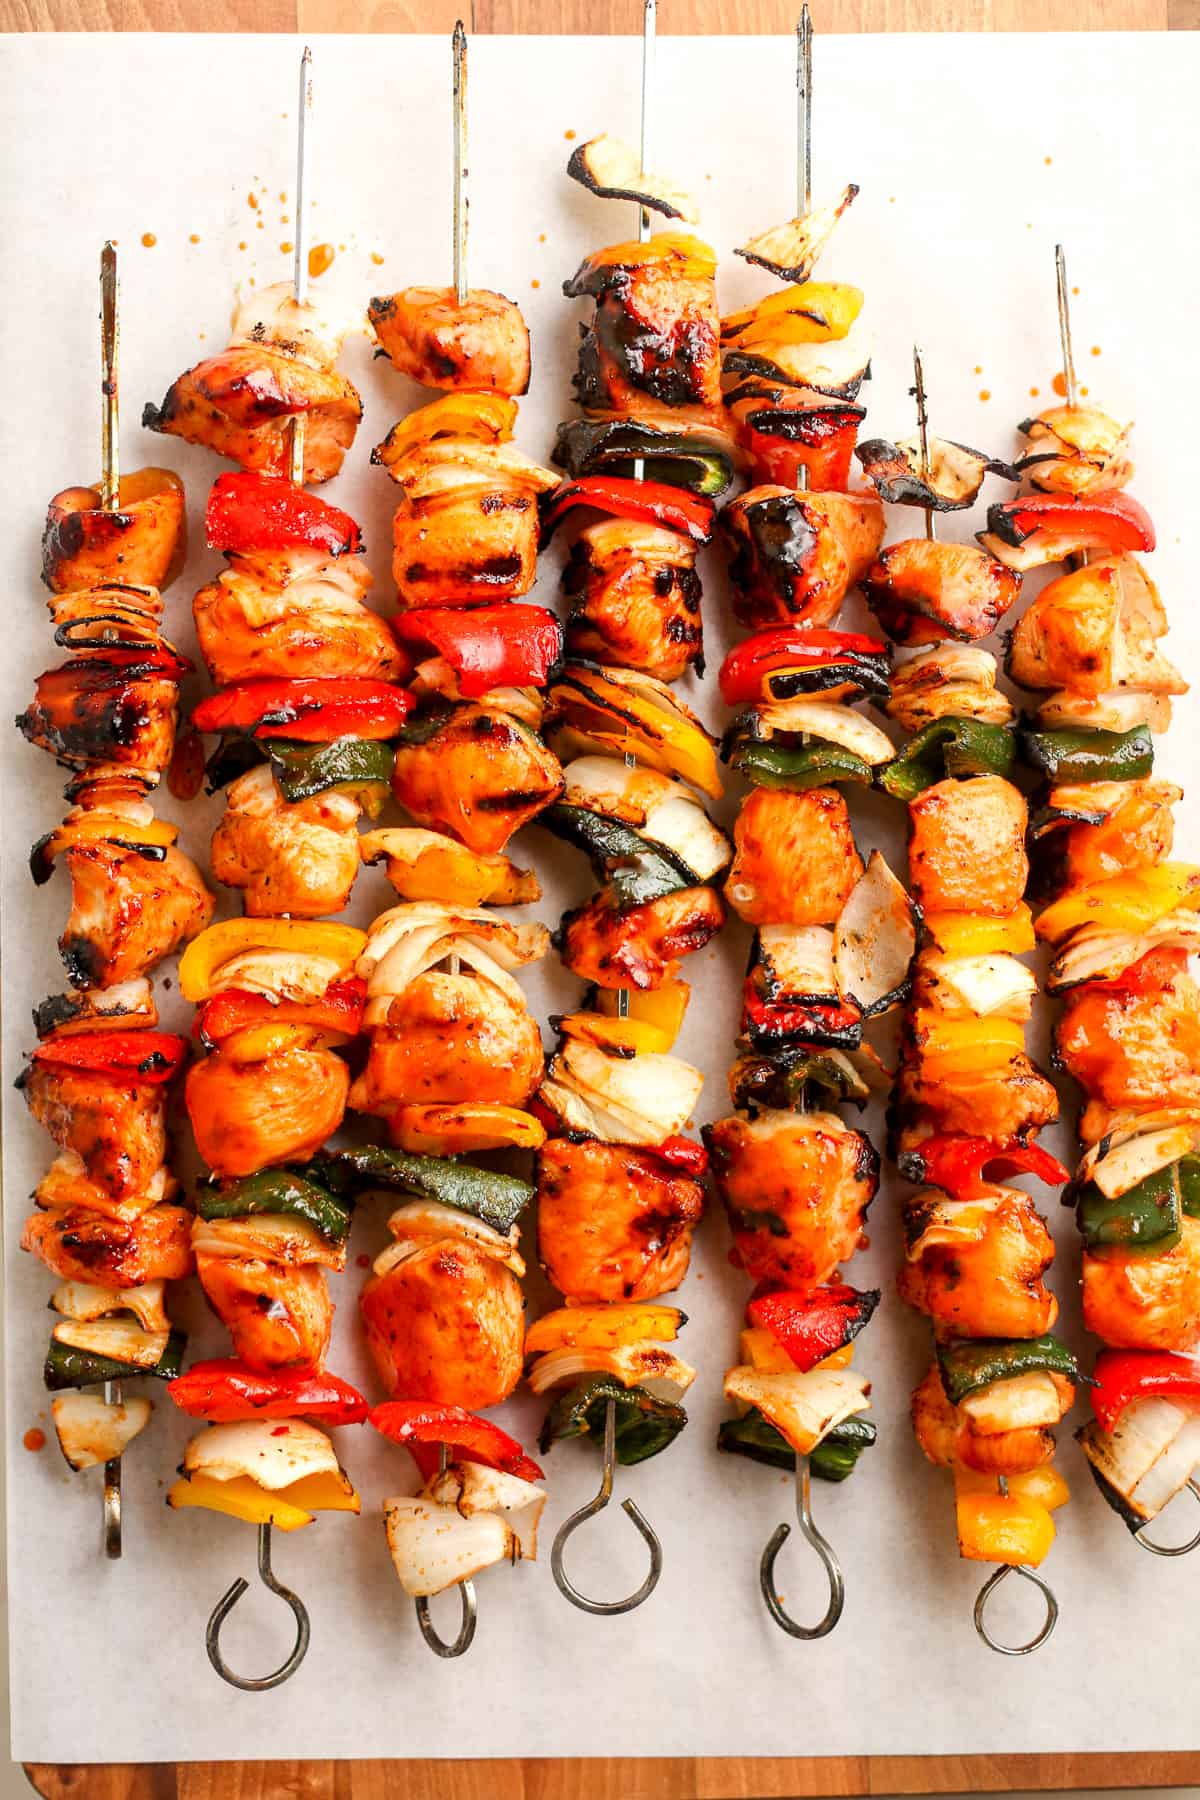
Skewers are the unsung heroes of outdoor entertaining — everyone can grab one, eat standing up, and not need a fork. These honey sriracha ones hit that perfect balance of sweet heat that makes people go back for seconds without quite knowing why. The marinade comes together in about five minutes, and the chicken cooks fast on a hot grill. I made a double batch for a backyard gathering last summer and they were gone before I even sat down.
Ingredients
- 1½ lbs boneless skinless chicken thighs, cut into 1½-inch chunks
- 3 tablespoons honey
- 2 tablespoons sriracha
- 2 tablespoons soy sauce
- 1 tablespoon olive oil
- 3 cloves garlic, minced
- 1 teaspoon rice vinegar
- ½ teaspoon smoked paprika
- Salt and black pepper to taste
- Wooden or metal skewers (if wooden, soak 30 minutes in water)
Instructions
- In a bowl, whisk together honey, sriracha, soy sauce, olive oil, garlic, rice vinegar, smoked paprika, salt, and pepper until combined.
- Add chicken pieces to the marinade, toss to coat, cover, and refrigerate for at least 30 minutes — up to 4 hours if you have the time.
- Thread marinated chicken onto skewers, leaving a small gap between pieces so they cook evenly rather than steaming.
- Heat your grill to medium-high (around 400°F). Grill skewers for 4-5 minutes per side, turning once, until the chicken is cooked through and has good char marks.
- Brush with any remaining marinade in the last minute of cooking for extra glaze. Rest for 2 minutes before serving.
24. Watermelon Feta Mint Salad
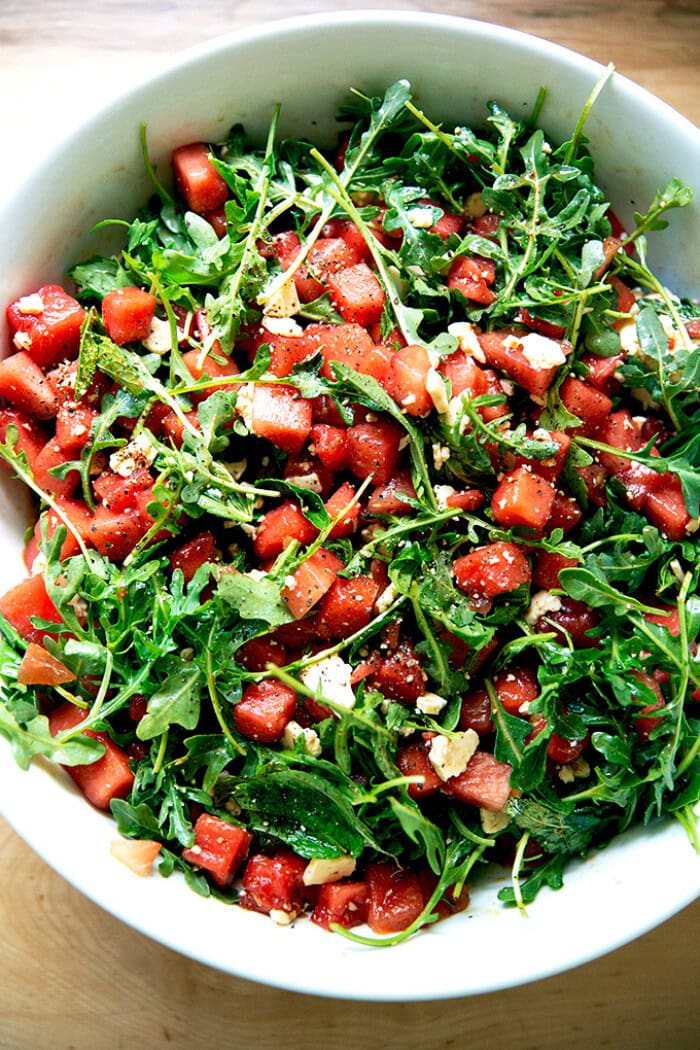
Hot day, no oven, five minutes of work — that's exactly what this salad is. The combination of cold watermelon, salty feta, and fresh mint sounds unusual the first time you hear it, but one bite and it just makes sense. Growing up in Pakistan we ate watermelon plain with a pinch of salt, so the salty-sweet thing isn't new to me — this is just a fancier version of that instinct. It travels well to outdoor parties too, as long as you keep it chilled until serving.
Ingredients
- 6 cups seedless watermelon, cut into 1-inch cubes
- ¾ cup crumbled feta cheese
- ¼ cup fresh mint leaves, roughly torn
- 2 tablespoons fresh lime juice
- 1 tablespoon olive oil
- ¼ teaspoon flaky sea salt (like Maldon)
- Pinch of black pepper
- Optional: thin-sliced red onion, about ¼ cup
Instructions
- Arrange watermelon cubes on a large shallow platter or in a wide bowl — a flat layer shows it off better than piling it high.
- Scatter crumbled feta evenly over the top, followed by the torn mint leaves and red onion if using.
- Drizzle lime juice and olive oil over everything. Finish with flaky salt and black pepper.
- Serve immediately, or refrigerate uncovered for up to 30 minutes before serving. Don't dress it more than an hour ahead or the watermelon will weep and dilute everything.
23. Frozen Strawberry Lemonade Slushies
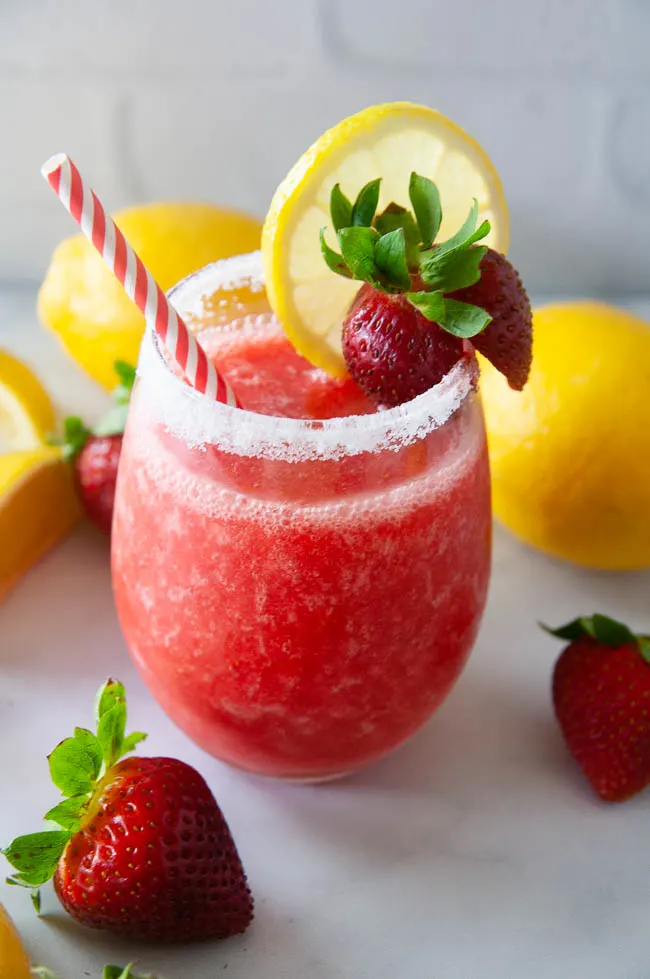
Zainab discovered this one summer when she raided the freezer and the fruit bowl at the same time, and honestly she stumbled onto something good. These slushies come together in a blender in about three minutes flat, and they work for both kids and adults — for adults, a splash of vodka or rosé fits right in. Frozen strawberries from a Costco bag work perfectly here, which means you're not dependent on strawberries being in season. Keep the blender on the counter during a party and let people make their own rounds.
Ingredients
- 2 cups frozen strawberries
- ½ cup fresh lemon juice (about 4 lemons)
- 3 tablespoons granulated sugar, or more to taste
- 1 cup cold water
- 1½ cups ice cubes
- Optional: lemon slices and fresh strawberries for garnish
- Optional for adults: 1½ oz vodka or 4 oz rosé per serving
Instructions
- Add frozen strawberries, lemon juice, sugar, cold water, and ice to a blender. If adding alcohol, add it now.
- Blend on high for 45-60 seconds until completely smooth and slushy. If the mixture is too thick, add water a tablespoon at a time and blend again.
- Taste and add more sugar or lemon juice to balance — strawberry sweetness varies a lot by brand and season.
- Pour into glasses immediately. Garnish with a lemon slice or fresh strawberry on the rim if you want it to look party-ready. Serve right away before it melts.
22. Smoked Bacon Ranch Potato Salad

Classic potato salad is fine, but the moment you add crispy smoked bacon and a ranch-forward dressing, it stops being a side dish and starts being the thing people hover around. The key is cooking your potatoes just to the point of tenderness — not a minute more — so they hold their shape when you toss everything together. I learned the hard way that mushy potatoes turn this into more of a paste, and while it still tastes fine, the texture is a different story. Make this the morning of your party and let it chill for at least two hours; the flavor improves significantly as it sits.
Ingredients
- 2 lbs baby yellow potatoes, halved
- 6 strips smoked bacon, cooked crispy and crumbled
- 3 stalks celery, finely diced
- 3 green onions, sliced thin
- ½ cup mayonnaise (Duke's or Hellmann's)
- ¼ cup sour cream
- 1 packet (1 oz) Hidden Valley Ranch seasoning mix
- 1 tablespoon apple cider vinegar
- Salt and black pepper to taste
- 2 tablespoons fresh dill or chives for garnish (optional)
Instructions
- Place halved potatoes in a large pot of cold salted water. Bring to a boil and cook for 12-15 minutes until fork-tender but still firm. Drain and spread on a sheet pan to cool completely — at least 20 minutes.
- In a large bowl, whisk together mayonnaise, sour cream, ranch seasoning packet, and apple cider vinegar until smooth.
- Add cooled potatoes, celery, and green onions to the bowl. Fold gently to coat without breaking up the potatoes.
- Fold in most of the bacon crumbles, reserving a handful for the top. Taste and adjust salt and pepper.
- Cover and refrigerate for at least 2 hours. Before serving, top with reserved bacon and fresh dill or chives.
21. No-Bake Lemon Cheesecake Bars
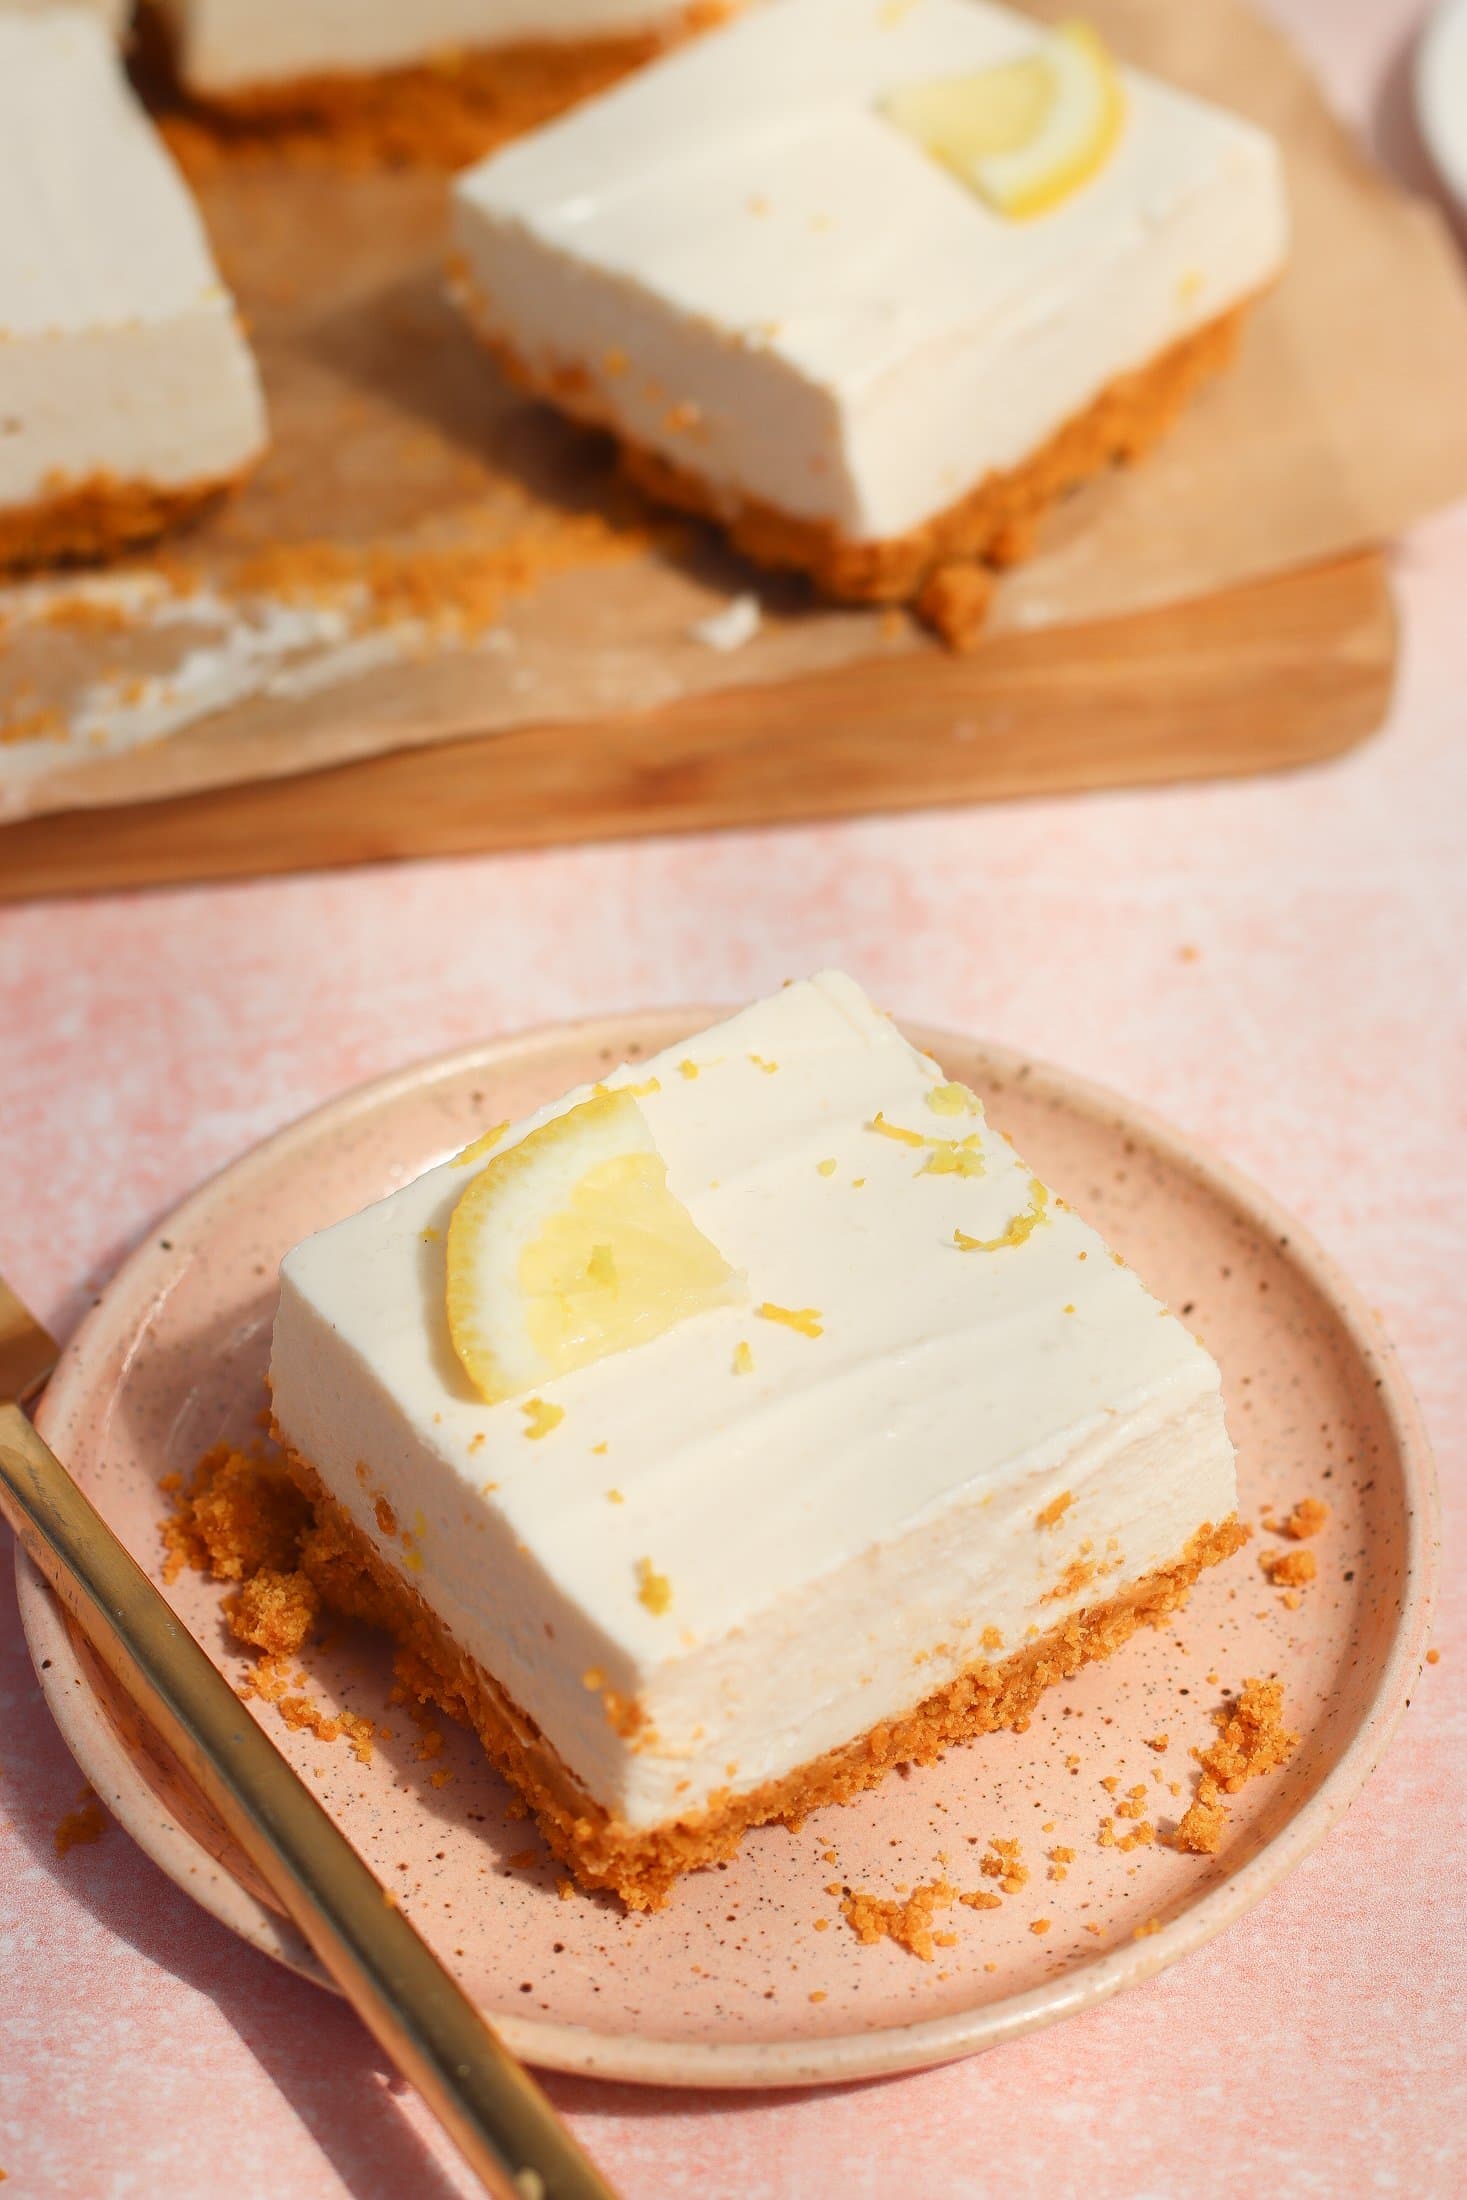
Turning on the oven during a summer party is something I try to avoid at all costs — the kitchen heats up, the house heats up, and suddenly everyone wants to leave. These no-bake lemon cheesecake bars solve that problem entirely. The filling is tangy, creamy, and genuinely lemony (not the fake lemon flavor you get from extract), and the graham cracker crust holds together without any baking needed. Make them the night before, keep them in the fridge, and slice just before serving — they're much easier to cut when cold and firm.
Ingredients
- 2 cups graham cracker crumbs (about 14 full crackers, crushed)
- 6 tablespoons unsalted butter, melted
- 2 tablespoons granulated sugar
- 16 oz (2 blocks) full-fat cream cheese, room temperature
- 1 cup powdered sugar, sifted
- ⅓ cup fresh lemon juice (about 3 lemons)
- 1 tablespoon lemon zest
- 1 teaspoon vanilla extract
- 1 cup heavy whipping cream, whipped to stiff peaks
Instructions
- Line a 9x13-inch baking dish with parchment paper, leaving overhang on the sides to lift the bars out later.
- Mix graham cracker crumbs, melted butter, and granulated sugar together until the mixture resembles wet sand. Press firmly and evenly into the bottom of the prepared dish. Refrigerate while you make the filling.
- Beat room-temperature cream cheese with an electric hand mixer (or by hand with real effort) until completely smooth with no lumps — cold cream cheese will leave lumps, so don't skip the room-temp step.
- Mix in powdered sugar, lemon juice, lemon zest, and vanilla until fully incorporated and smooth.
- Fold whipped cream into the cream cheese mixture in two additions, keeping it as light as possible. Spread evenly over the chilled crust.
- Refrigerate for at least 4 hours or overnight. Lift out using parchment, slice into bars, and serve cold.
20. Grilled Corn Elote Street Style

Elote — Mexican street corn — is one of those things where once you've had it done right, plain buttered corn feels like a missed opportunity. The combination of charred corn, creamy cotija-spiked mayo, chili, and lime is genuinely hard to stop eating. This isn't the most authentic version you'll ever find — I'm not a Mexican cook and I'll say that plainly — but it's a solid, delicious, backyard-friendly take that works on a regular home grill. If you can't find cotija cheese at your usual grocery store, finely crumbled feta is a reasonable substitute.
Ingredients
- 6 ears of corn, husks removed
- ¼ cup mayonnaise
- ¼ cup sour cream
- ½ cup cotija cheese, crumbled (or feta as substitute)
- 1 teaspoon chili powder
- ½ teaspoon smoked paprika
- ¼ teaspoon cayenne pepper (optional, for heat)
- 2 limes, cut into wedges
- Fresh cilantro, chopped, for serving
- Salt to taste
Instructions
- Heat grill to medium-high (around 400°F). Place husked corn directly on the grates and grill, turning every 2-3 minutes, for about 10-12 minutes total until kernels are charred in spots and tender throughout.
- While corn grills, stir together mayonnaise and sour cream in a small bowl until combined.
- In a separate shallow dish, mix cotija, chili powder, smoked paprika, and cayenne together.
- While corn is still hot, brush or spread the mayo-sour cream mixture generously over each ear, then roll or sprinkle the cheese-spice mixture over the top so it sticks to the coating.
- Finish each ear with a squeeze of fresh lime juice, a scatter of cilantro, and a pinch of salt. Serve immediately with extra lime wedges on the side.
19. Blender Frozen Mango Margaritas
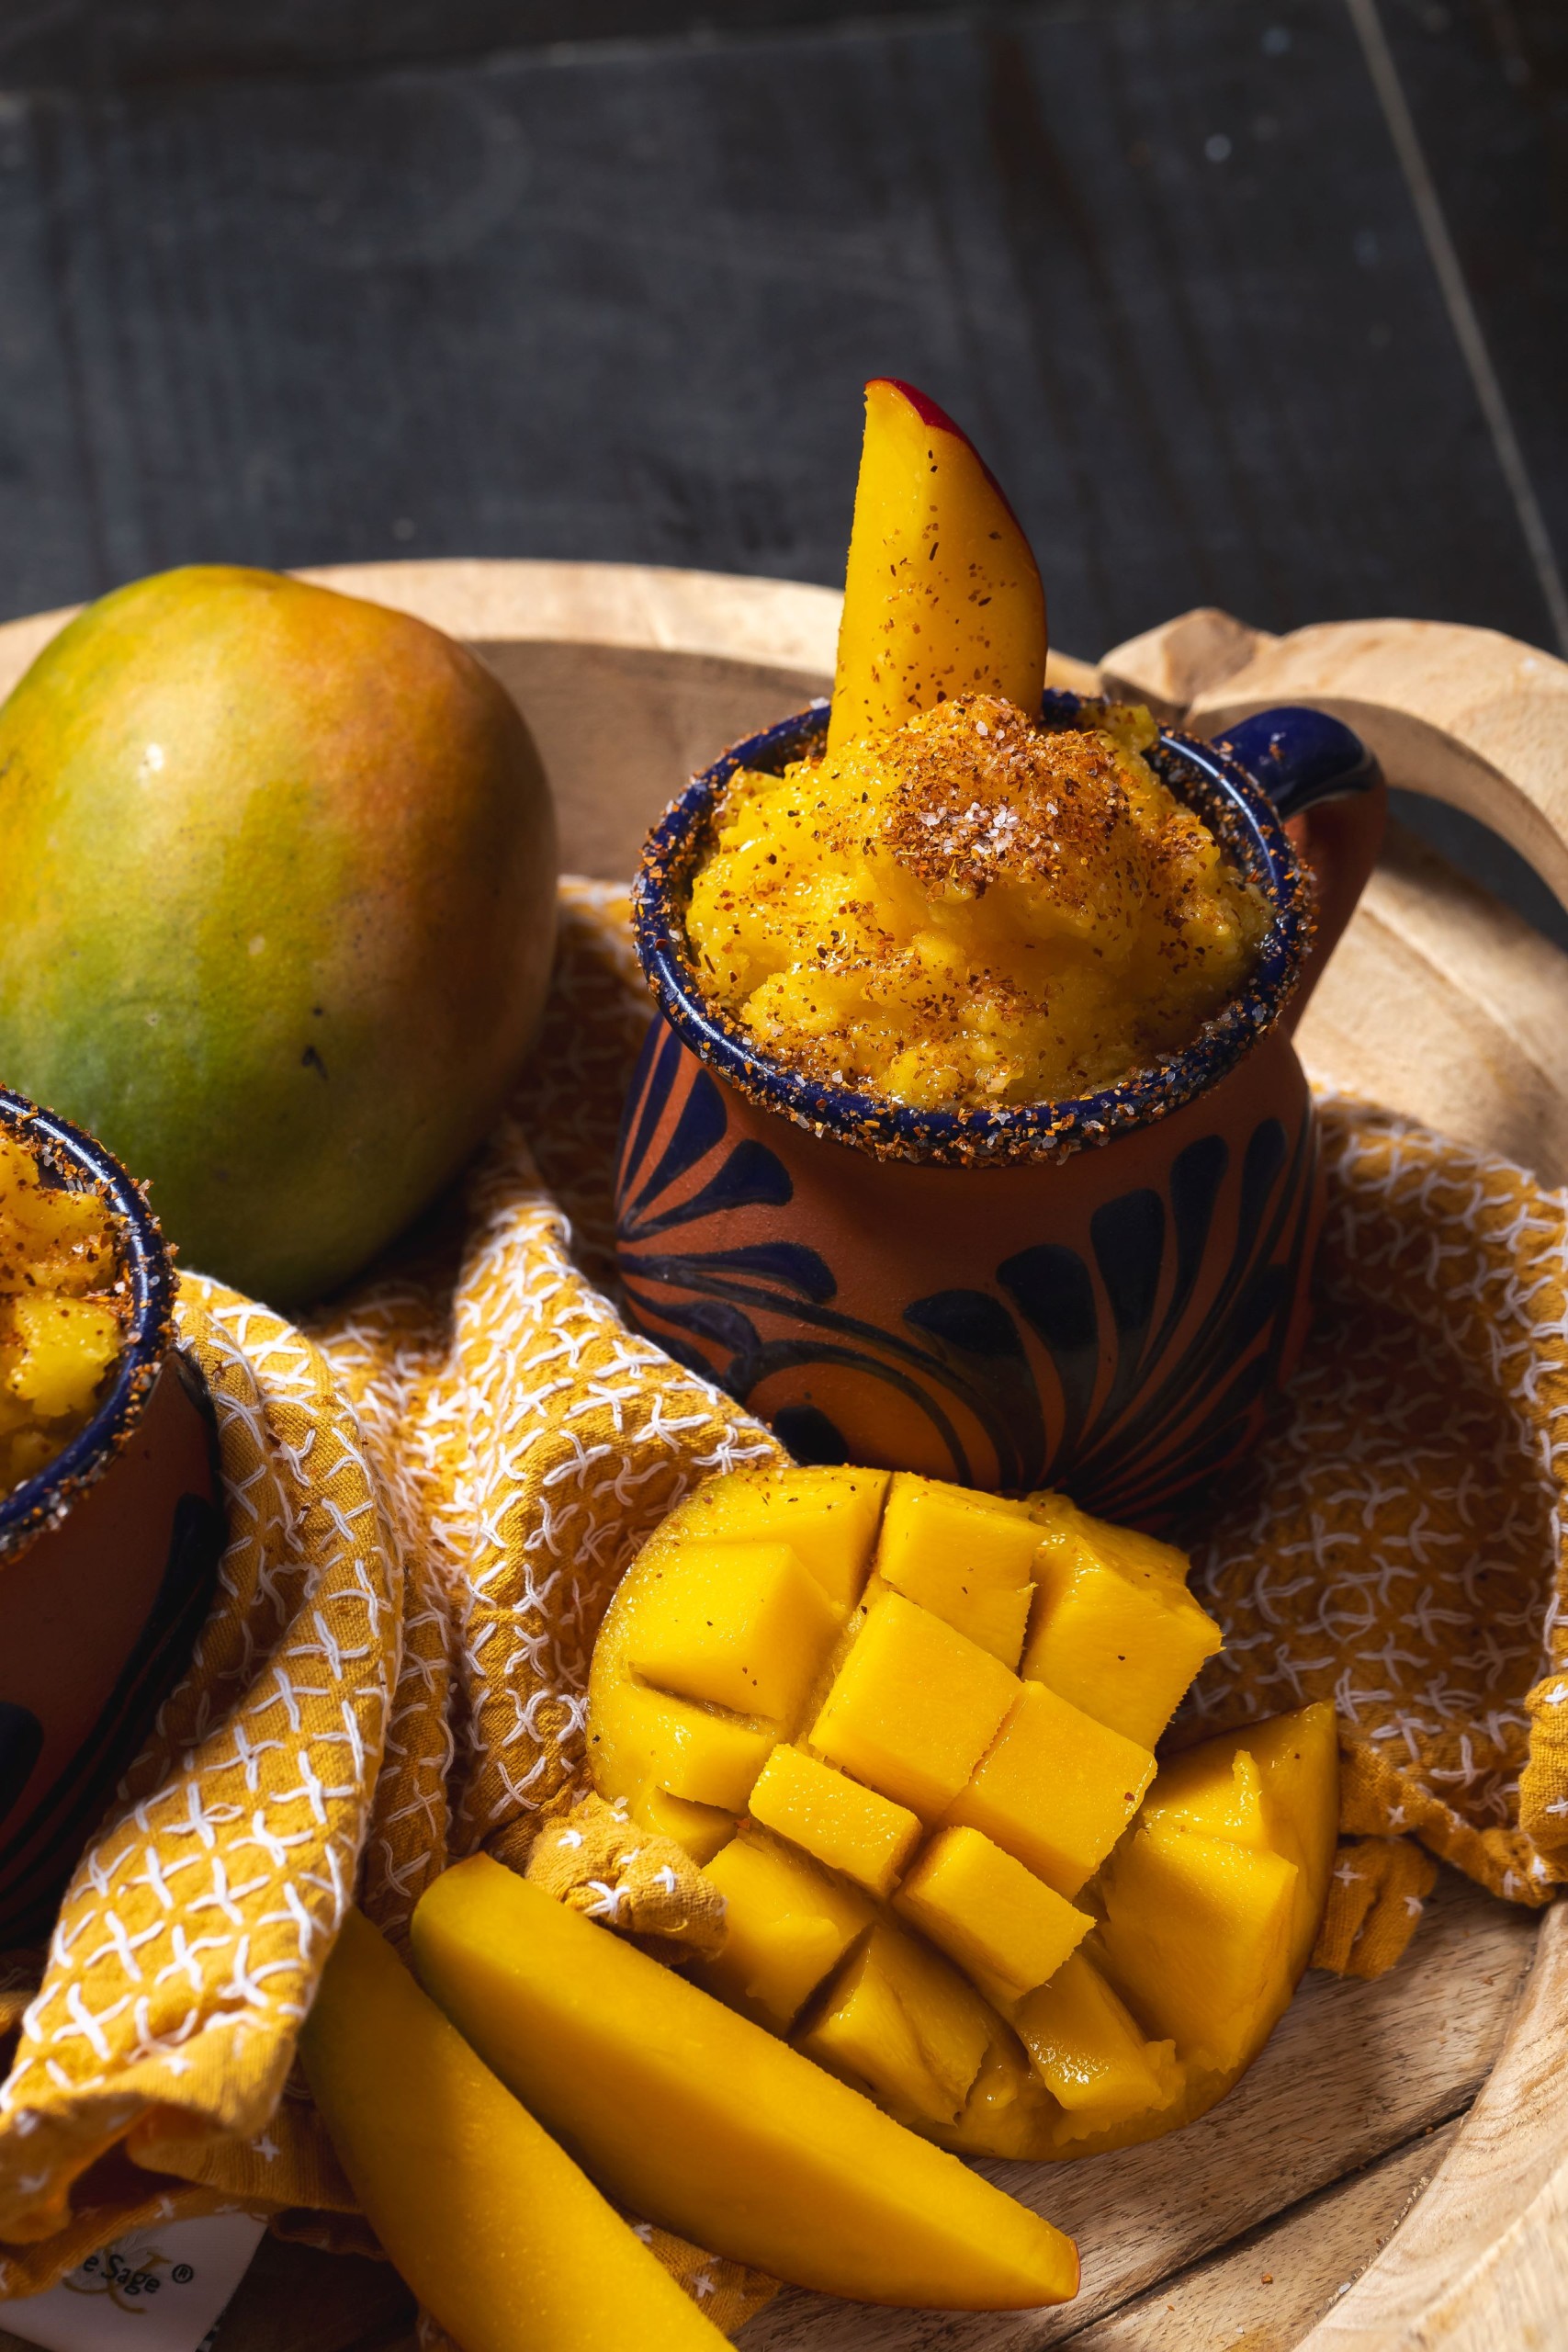
Mango margaritas hit differently at an outdoor summer party — they're tropical, they're cold, and they take about two minutes to make if you've got frozen mango on hand. I keep bags of frozen Ataulfo mango from Costco in the freezer specifically for this and for smoothies, so whenever a last-minute gathering happens, I'm ready. The ratio here makes a pitcher worth, which is really the only sensible way to do it for a group. If you want a non-alcoholic version for the kids or non-drinking guests, just swap out the tequila and triple sec for mango nectar and a splash of sparkling water — still great.
Ingredients
- 3 cups frozen mango chunks
- 4 oz (½ cup) silver tequila
- 2 oz triple sec or Cointreau
- 3 tablespoons fresh lime juice
- 2 tablespoons agave syrup or simple syrup
- 1 cup ice cubes
- Salt or Tajín for rim (optional)
- Lime slices and mango chunks for garnish
Instructions
- If rimming glasses, run a lime wedge around the rim of each glass, then dip into salt or Tajín spread on a small plate. Set aside.
- Add frozen mango, tequila, triple sec, lime juice, agave syrup, and ice to a blender.
- Blend on high for 60 seconds until completely smooth. If the mixture is too thick for your blender to handle, add a splash of cold water and blend again.
- Taste — adjust lime juice if you want more tartness, or agave if you want more sweetness. The sweetness of frozen mango varies by brand.
- Pour into prepared glasses over fresh ice if desired, or serve straight from the blender. Garnish with a lime slice and a mango chunk on the rim.
18. Caprese Skewers with Balsamic Glaze
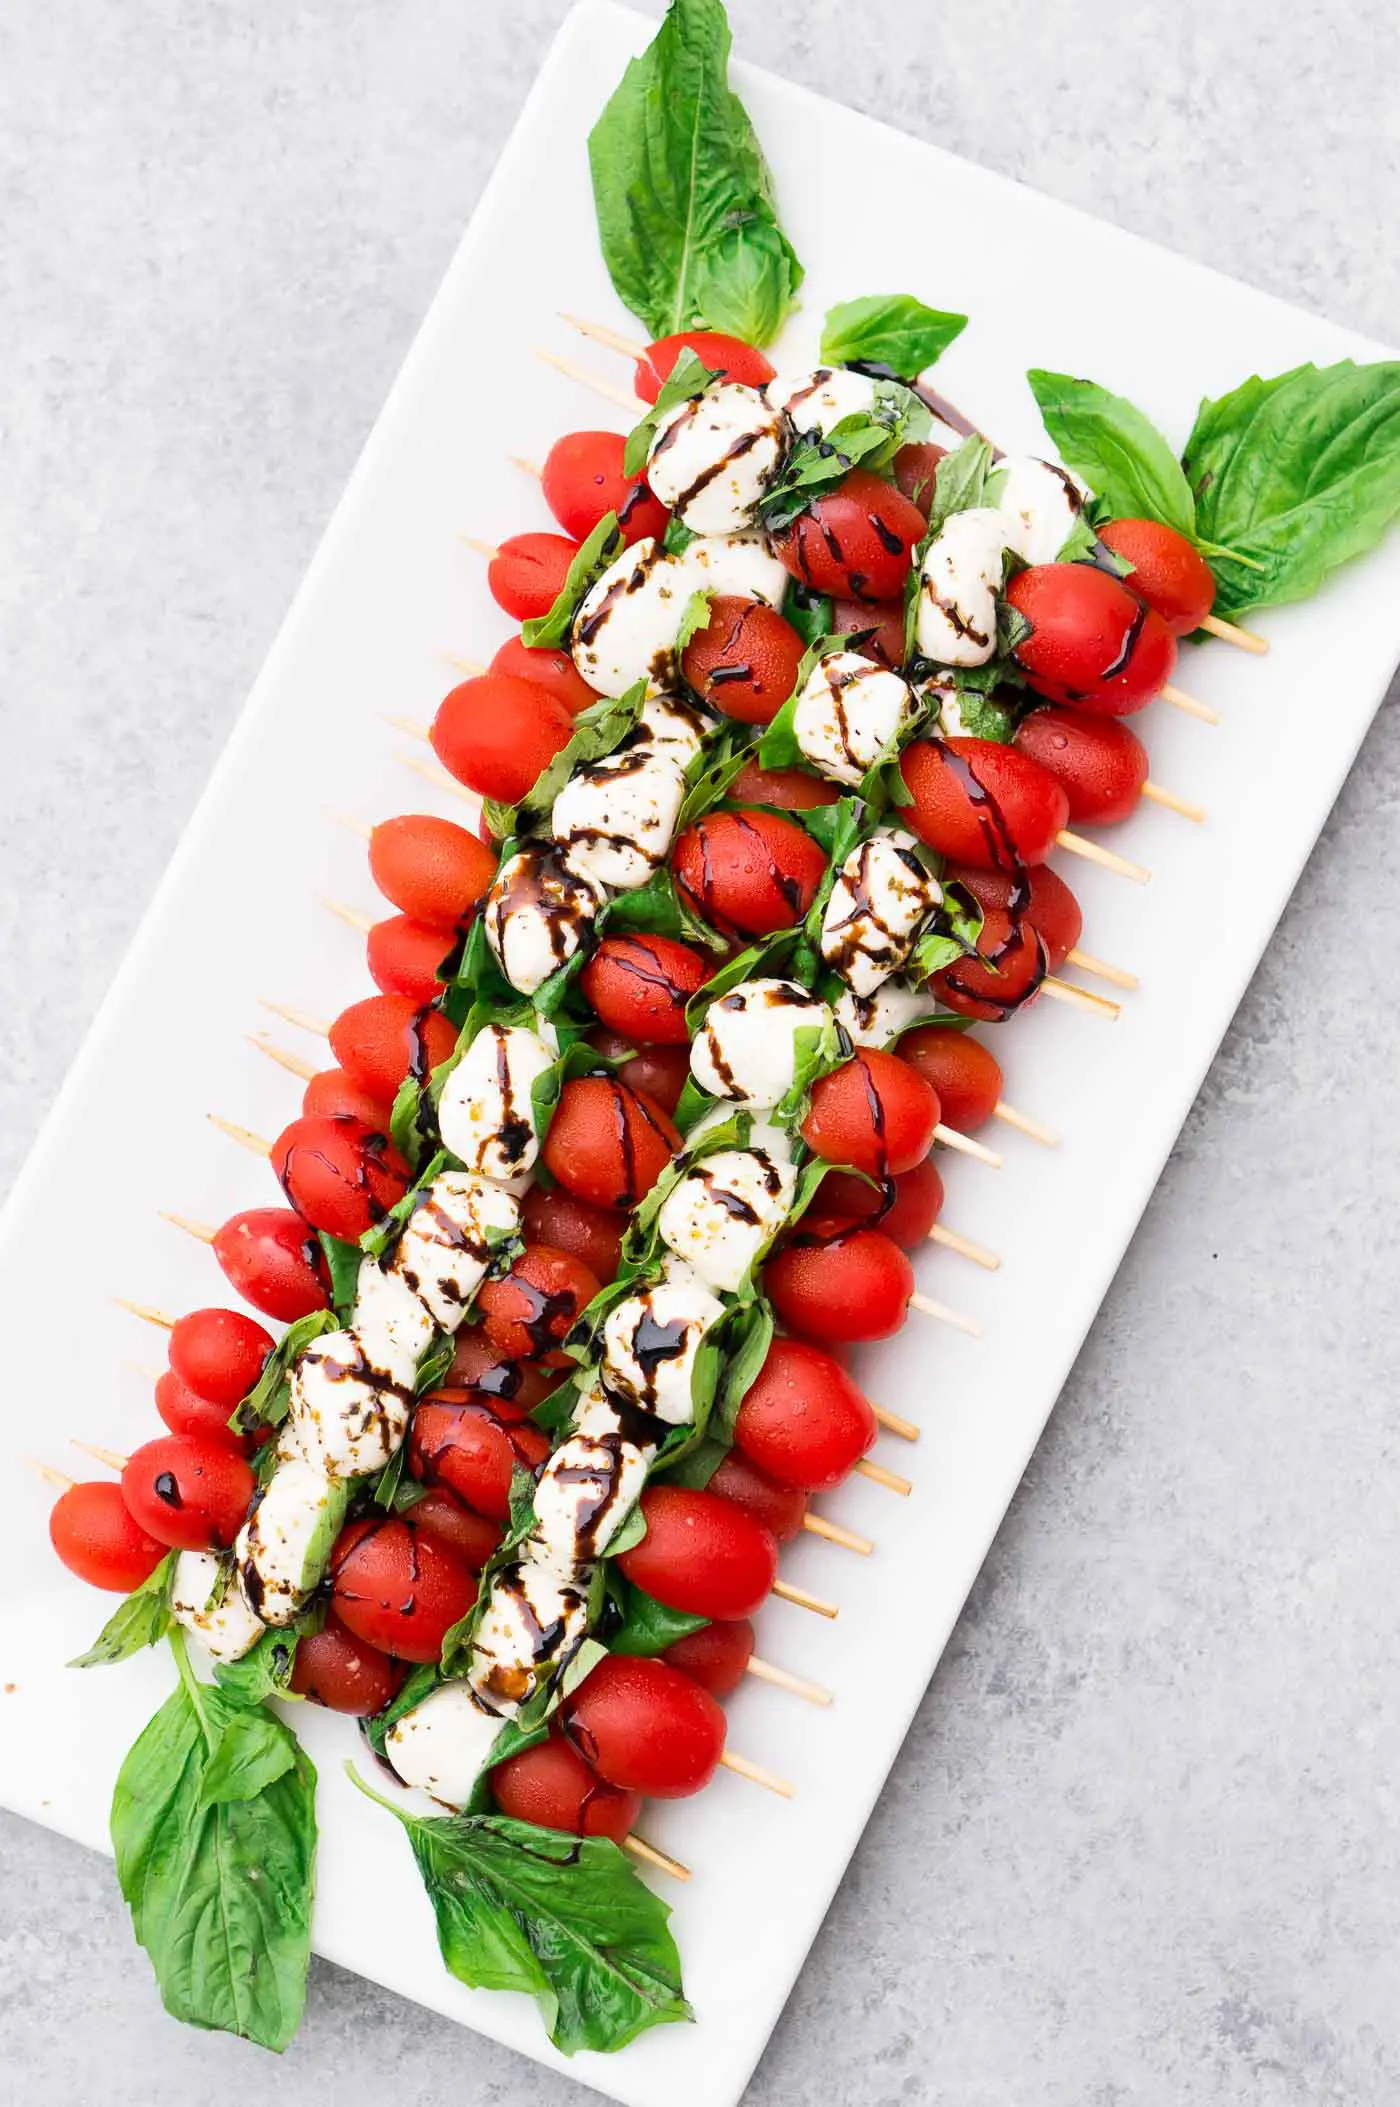
Some party food is complicated. This is not that. Caprese skewers are the kind of thing you can assemble in ten minutes, put on a platter, and watch disappear before you've finished setting out the rest of the food. The balsamic glaze is the move here — it adds a sticky-sweet depth that plain balsamic vinegar doesn't quite achieve. You can buy pre-made balsamic glaze at most grocery stores (Trader Joe's and Walmart both carry it), or make a quick reduction yourself in about five minutes on the stove. Either way, don't skip it.
Ingredients
- 1 pint cherry tomatoes (mixed colors look great)
- 8 oz fresh mozzarella balls (ciliegine or bocconcini size)
- 1 bunch fresh basil leaves
- 3 tablespoons good olive oil
- ¼ cup balsamic glaze (store-bought or homemade)
- Flaky sea salt and cracked black pepper
- Small appetizer skewers or toothpicks
Instructions
- If making balsamic glaze from scratch: pour ½ cup balsamic vinegar into a small saucepan over medium heat. Simmer for 5-6 minutes, stirring occasionally, until it reduces by half and coats the back of a spoon. Cool before using.
- Thread each skewer in this order: one cherry tomato, one folded basil leaf, one mozzarella ball. Repeat until all ingredients are used up.
- Arrange finished skewers on a serving platter. Drizzle olive oil over all of them.
- Just before serving, drizzle balsamic glaze over the top and finish with flaky salt and cracked black pepper. Don't drizzle the glaze too far in advance or it pools at the bottom and the presentation suffers.
17. Pulled Pork Slider Bar Setup
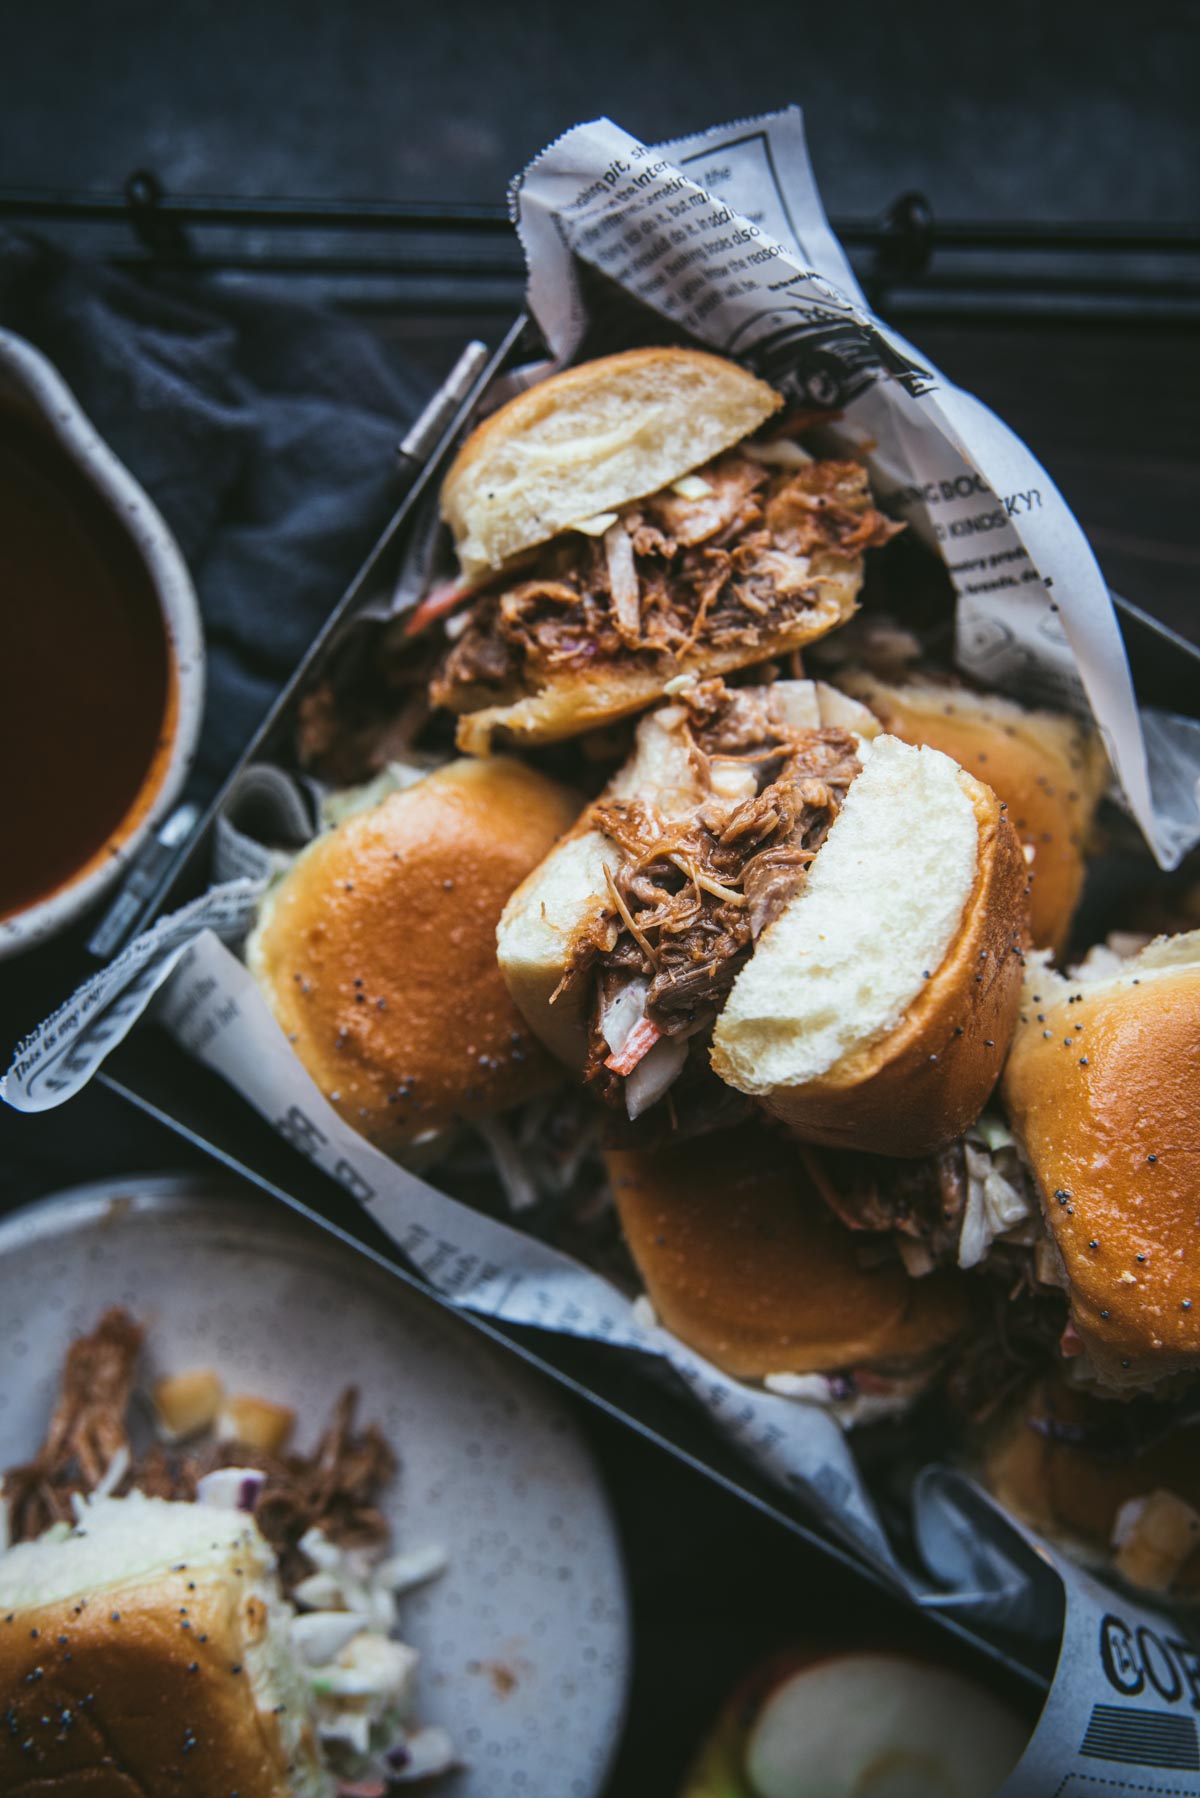
A slider bar is one of those party setups that looks like you put in way more effort than you actually did. You slow-cook a big batch of pulled pork, set out the toppings, and let everyone build their own — which also means no one's complaining that you put too much slaw on theirs. I made this for a backyard birthday last summer and people went back three times. The key is getting the pork genuinely tender, which means low and slow whether you're using a slow cooker or your oven. Don't rush the cook time — that's the one thing that'll make or break the whole setup.
Ingredients
- 3–4 lbs bone-in pork shoulder (Boston butt)
- 2 tablespoons brown sugar
- 1 tablespoon smoked paprika
- 1 teaspoon garlic powder
- 1 teaspoon onion powder
- 1 teaspoon salt
- ½ teaspoon black pepper
- ½ teaspoon cayenne pepper (optional)
- 1 cup barbecue sauce (store-bought is fine — Sweet Baby Ray's works well)
- ¼ cup apple cider vinegar
- 12–16 slider buns
- For the bar: coleslaw, sliced pickles, sliced jalapeños, extra barbecue sauce
Instructions
- Mix brown sugar, paprika, garlic powder, onion powder, salt, pepper, and cayenne together. Rub the mixture all over the pork shoulder, coating every surface.
- Place the pork in a slow cooker. Pour the apple cider vinegar around the base (not over the rub). Cook on LOW for 8–10 hours or HIGH for 5–6 hours, until the pork falls apart when you press it with a fork.
- Remove the pork and shred it using two forks, discarding any large pieces of fat or bone. Pour off most of the cooking liquid, leaving about ¼ cup in the pot.
- Return the shredded pork to the slow cooker, add the barbecue sauce, and stir to combine. Keep on WARM until serving.
- Set out slider buns and toppings in separate bowls — coleslaw, pickles, jalapeños, extra sauce — and let guests build their own sliders.
16. Creamy Cucumber Dill Tea Sandwiches
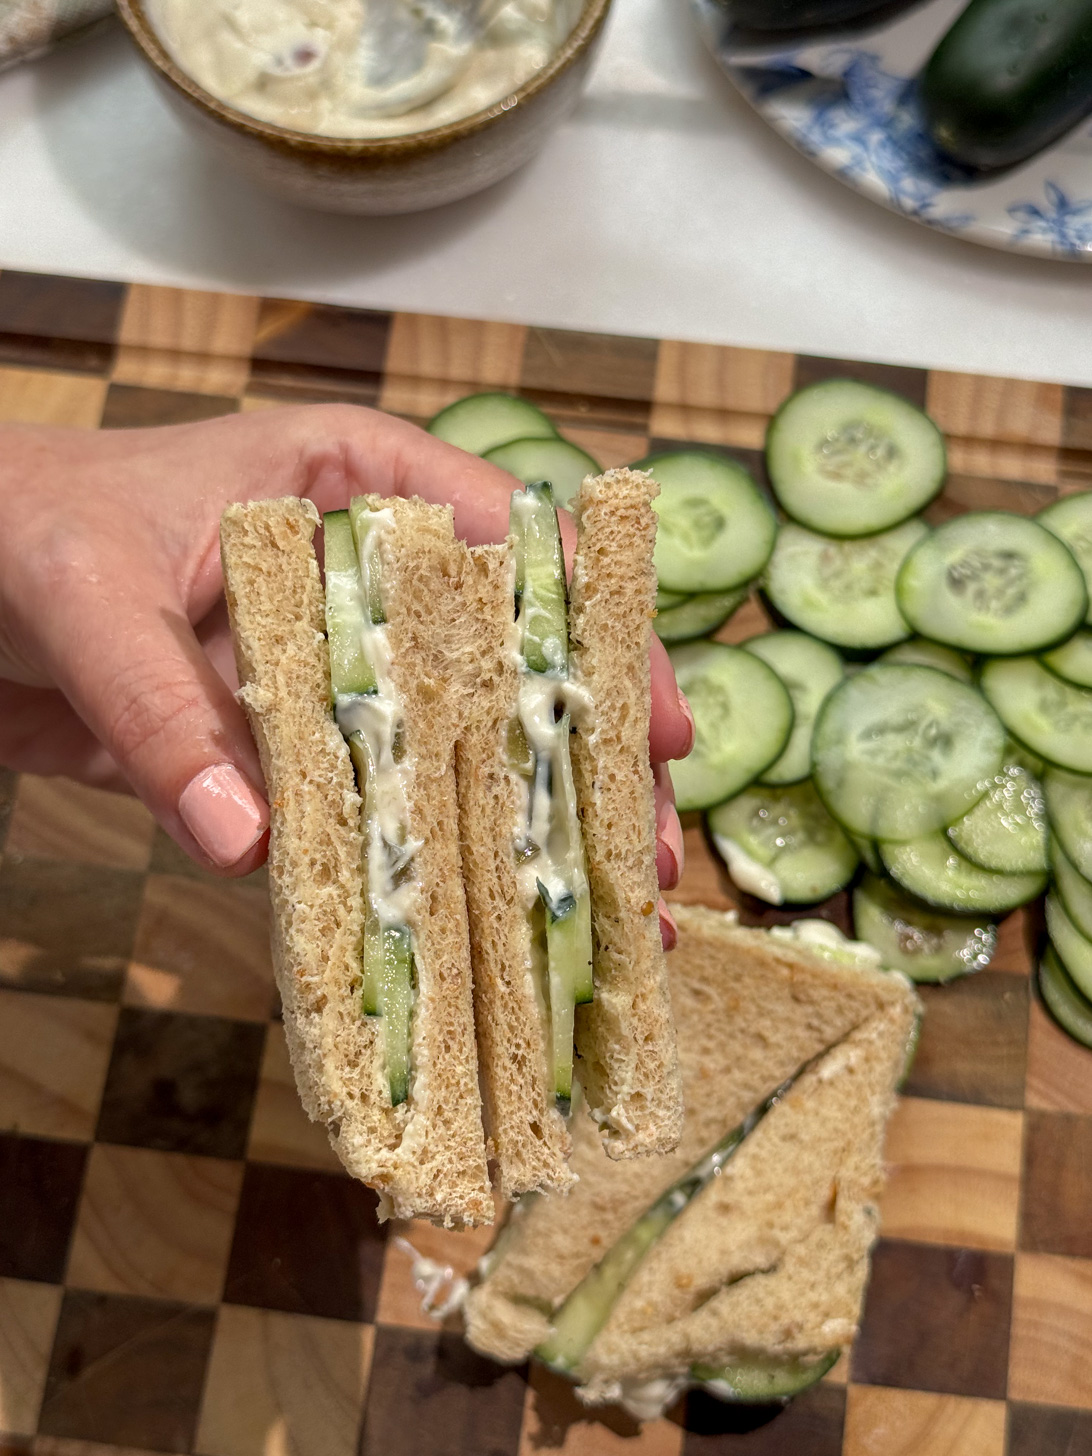
Not every summer party needs to be burgers and chips. Sometimes you want something light, cool, and a little bit elegant — and these cucumber dill tea sandwiches are exactly that. They come together in about 20 minutes and they disappear faster than almost anything else on the table, which always surprises people. The cream cheese spread is what makes them — don't skip the fresh dill, dried just isn't the same here. I use thin-sliced white sandwich bread from the store, cut the crusts off, and slice them diagonally. Simple as that.
Ingredients
- 8 oz cream cheese, softened to room temperature
- 3 tablespoons fresh dill, finely chopped
- 1 tablespoon lemon juice
- 1 garlic clove, minced (or ¼ teaspoon garlic powder)
- ¼ teaspoon salt
- ¼ teaspoon black pepper
- 1 large English cucumber, very thinly sliced
- 16 slices thin white or whole wheat sandwich bread
Instructions
- Let the cream cheese sit out for at least 15 minutes before starting — cold cream cheese tears the bread when you spread it. Mix it with the fresh dill, lemon juice, garlic, salt, and pepper until smooth and well combined.
- Pat the cucumber slices dry with paper towels. This step matters — wet cucumber will make the bread soggy if the sandwiches sit for any length of time.
- Spread the cream cheese mixture generously on one side of each bread slice.
- Layer cucumber slices in a single, slightly overlapping layer on half the bread slices. Top with the remaining slices, cream cheese side down, and press gently.
- Trim the crusts off with a sharp knife, then cut each sandwich diagonally into triangles (or into three fingers for a classic tea sandwich look). Arrange on a platter and keep refrigerated until serving.
15. Tropical Coconut Shrimp with Dipping Sauce
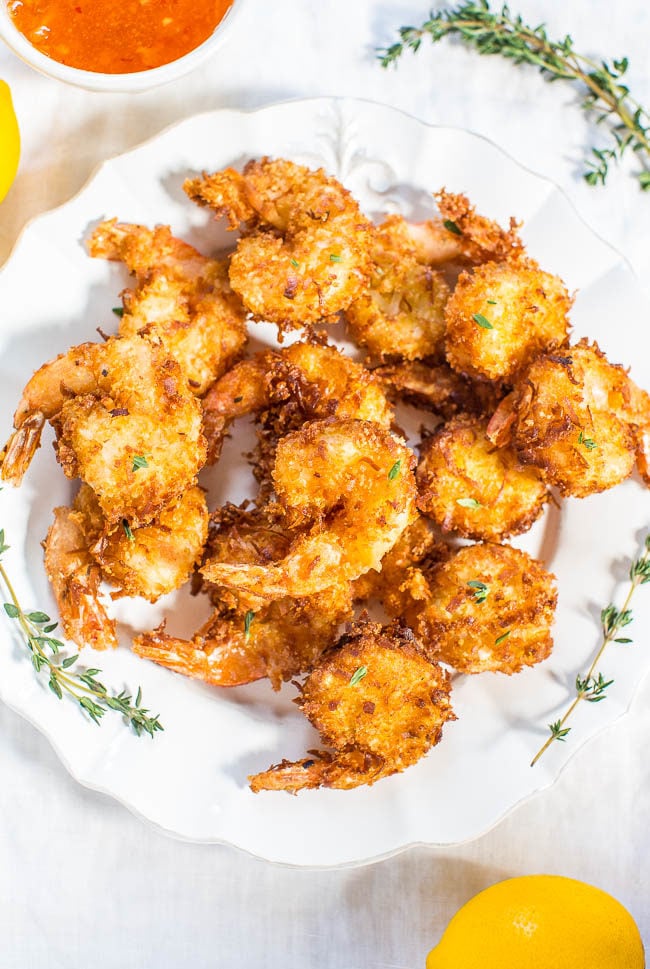
Coconut shrimp feels fancy but it's genuinely one of the easier party appetizers once you get your breading station set up. The shrimp fry up golden and crispy in about two minutes per side, and the sweet chili dipping sauce takes thirty seconds to mix together. My husband asks for these every time we have people over — he's convinced they taste like something from a restaurant, which I take as a compliment even though they're honestly not difficult. Use large shrimp, at least 21/25 count, so they stay juicy inside while the coating gets crispy outside. Frozen shrimp from Costco or Walmart work perfectly here, just thaw them fully and pat them very dry before you start.
Ingredients
- 1 lb large shrimp (21/25 count), peeled and deveined, tails on
- ½ cup all-purpose flour
- ½ teaspoon salt
- ½ teaspoon garlic powder
- 2 large eggs, beaten
- 1 cup sweetened shredded coconut
- ½ cup panko breadcrumbs
- Vegetable oil for frying (about 2 cups)
- For dipping sauce: ½ cup sweet chili sauce, 2 tablespoons pineapple preserves or apricot jam, 1 teaspoon lime juice
Instructions
- Mix the dipping sauce ingredients together in a small bowl and refrigerate until needed. Pat shrimp completely dry with paper towels.
- Set up a breading station: flour mixed with salt and garlic powder in one shallow bowl, beaten eggs in a second, and coconut mixed with panko in a third.
- Working one shrimp at a time, dredge in the flour (shake off excess), dip into the egg, then press firmly into the coconut-panko mixture, coating all sides. Set aside on a plate.
- Heat about 1½ inches of vegetable oil in a heavy skillet over medium-high heat until it reaches 350°F (or until a small piece of coconut dropped in sizzles immediately).
- Fry shrimp in batches — don't crowd the pan — for about 2 minutes per side until deep golden. Drain on a paper towel-lined plate and serve immediately with the dipping sauce.
14. Cold Brew Sweet Tea Punch

Every outdoor party needs at least one big batch drink that isn't just lemonade from a powder mix. This cold brew sweet tea punch is that drink — it's smooth, slightly sweet, naturally caffeinated, and you can make it the night before which is one less thing to think about on party day. Cold brewing the tea overnight gives you a much smoother, less bitter base than hot-brewing and chilling it, and it's genuinely zero effort — you just put it in a pitcher and walk away. Add a few sliced lemons and fresh mint to the punch bowl and it looks like something from a catering spread.
Ingredients
- 8 black tea bags (Lipton or similar)
- 8 cups cold water (divided)
- ½ cup granulated sugar (adjust to taste)
- ¼ cup fresh lemon juice (about 2 lemons)
- 2 cups peach nectar or peach juice
- 2 cups ginger ale or sparkling water (added just before serving)
- Ice, lemon slices, and fresh mint for serving
Instructions
- The night before: place all 8 tea bags in a large pitcher with 8 cups of cold water. Cover and refrigerate for at least 8 hours (or up to 12). Remove and discard the tea bags without squeezing them — squeezing releases bitterness.
- Make a simple syrup by combining the sugar with ½ cup of hot water (taken from a separate source, not the tea). Stir until fully dissolved, then let it cool completely.
- Stir the simple syrup, lemon juice, and peach nectar into the cold-brewed tea. Taste and adjust sweetness.
- When ready to serve, pour the tea into a large punch bowl or beverage dispenser over plenty of ice. Add the ginger ale or sparkling water and stir gently.
- Garnish with lemon slices and fresh mint sprigs. Serves 10–12.
13. Layered Greek Dip with Pita Chips
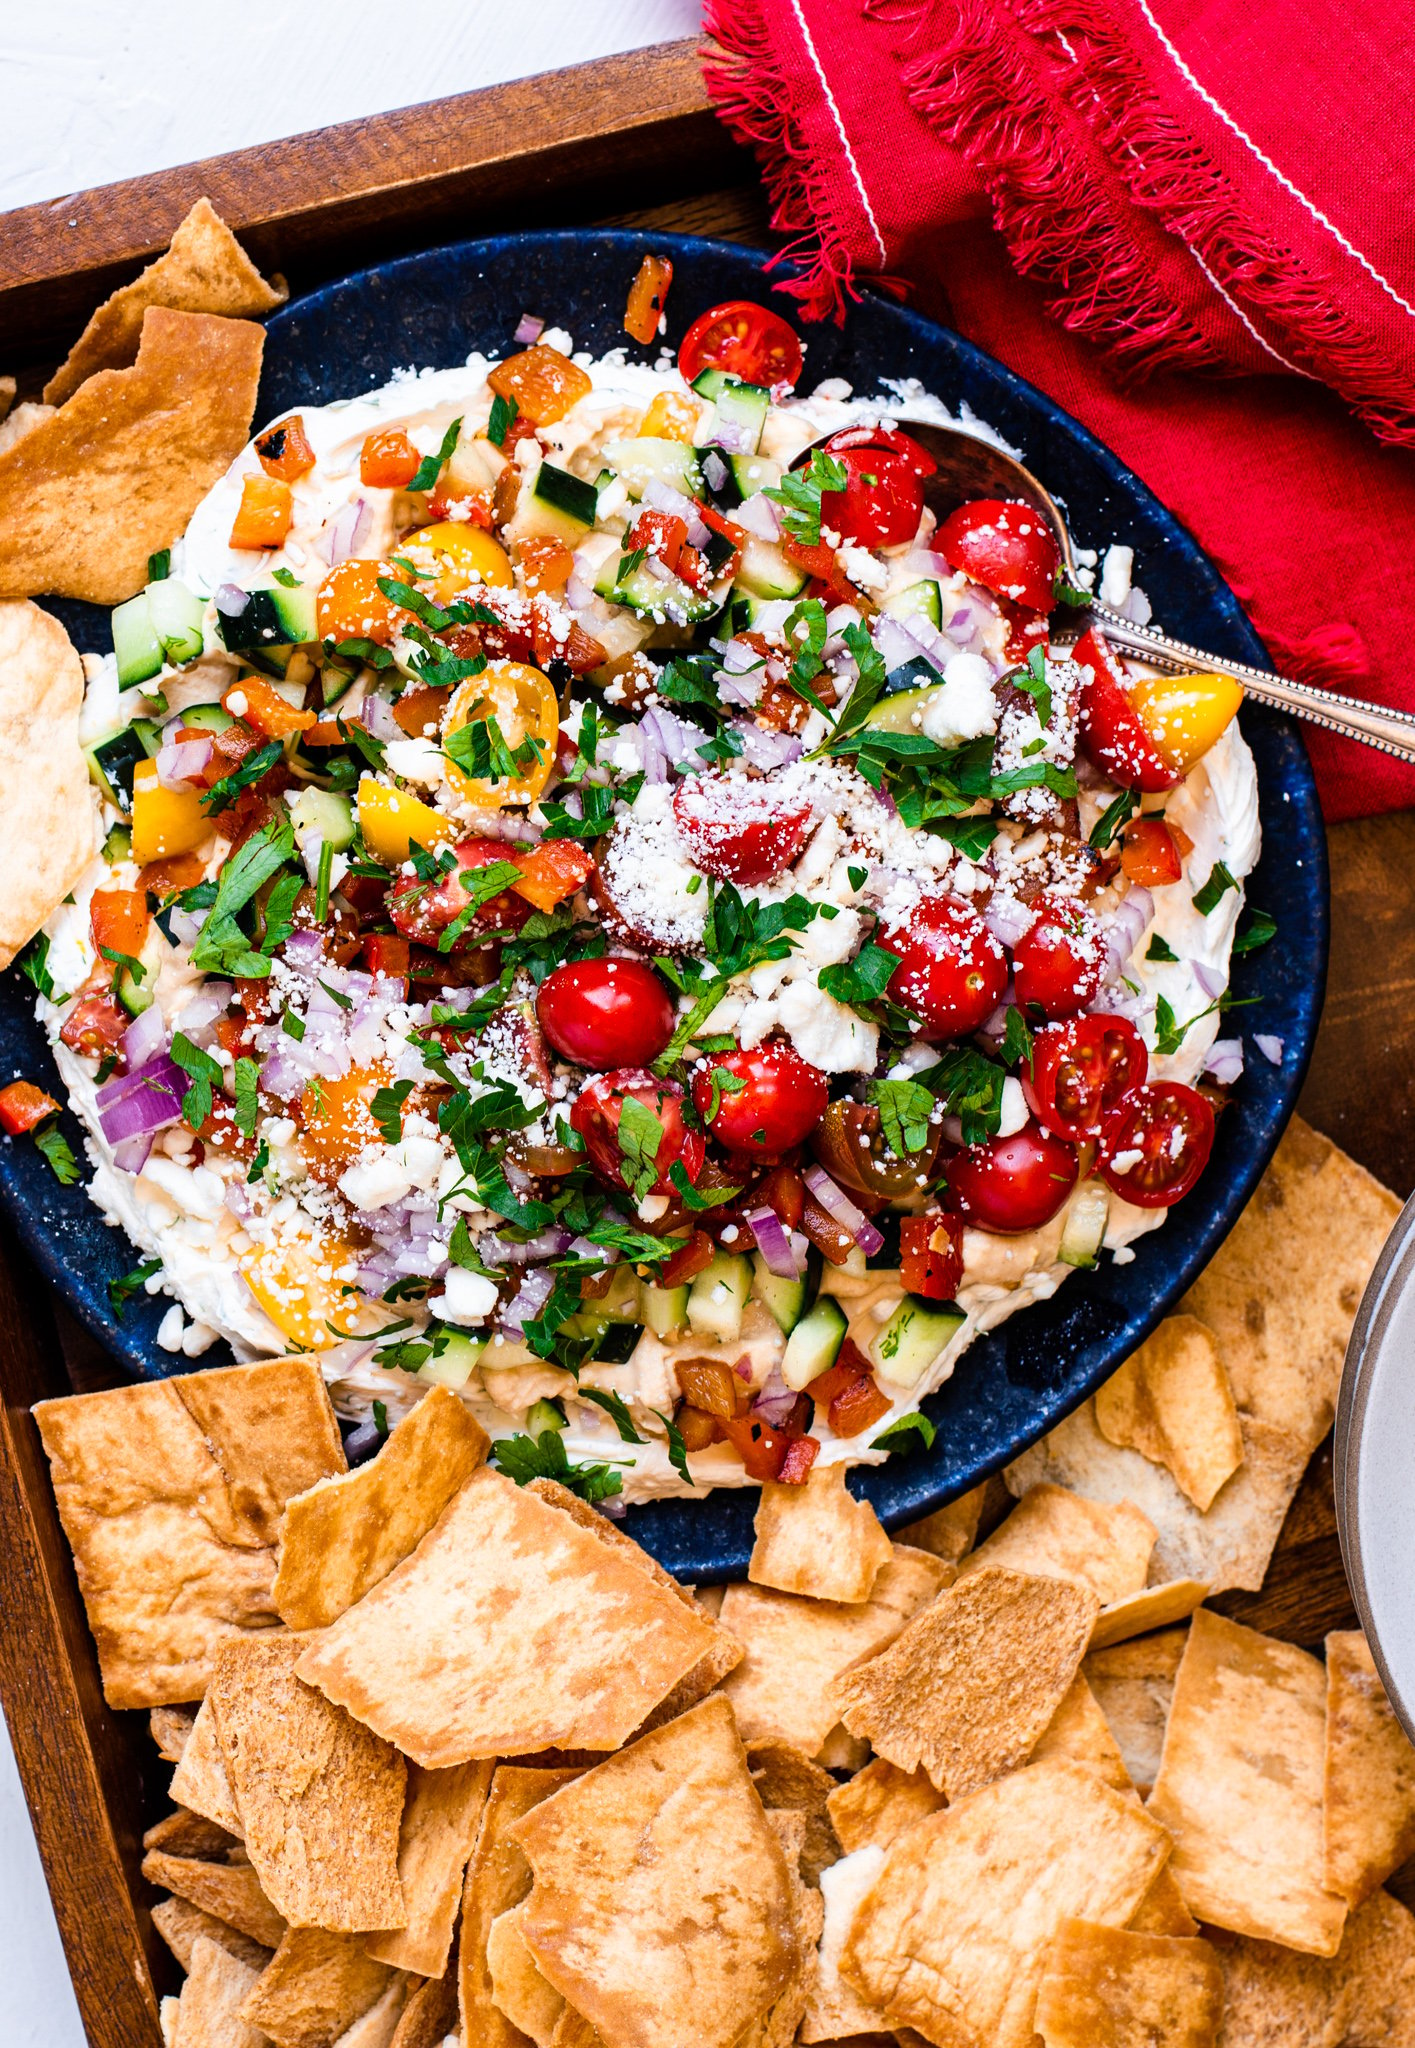
Seven-layer dip is a party classic, but this Greek version is the one I keep coming back to for summer specifically — it's lighter, it holds up better in the heat than sour cream-heavy dips, and the flavors are just cleaner and brighter. You build it in a clear dish so everyone can see the layers, and it looks genuinely impressive even though you're essentially just opening containers and spreading things. Chill it for at least an hour before serving so the layers settle and the hummus firms up a bit. Saad had never tried hummus until I started making this dip and now he eats it straight from the container, which I consider a win.
Ingredients
- 16 oz store-bought hummus (plain or roasted garlic)
- 1 cup plain Greek yogurt
- 1 teaspoon dried oregano
- ½ teaspoon garlic powder
- 1 cup cherry tomatoes, quartered
- 1 cup English cucumber, diced small
- ½ cup Kalamata olives, sliced
- ½ cup crumbled feta cheese
- ¼ cup red onion, finely diced
- 2 tablespoons fresh parsley, chopped
- Pita chips or warm pita triangles for serving
Instructions
- Mix the Greek yogurt with oregano and garlic powder in a small bowl. Set aside.
- Spread the hummus in an even layer across the bottom of a 9x13-inch dish or large shallow bowl.
- Spread the seasoned Greek yogurt over the hummus in an even layer.
- Scatter the tomatoes and cucumber over the yogurt layer, then add the olives and red onion.
- Top with crumbled feta and a sprinkle of fresh parsley. Cover with plastic wrap and refrigerate for at least 1 hour before serving. Serve with pita chips alongside.
12. Grilled Peach Burrata Bruschetta
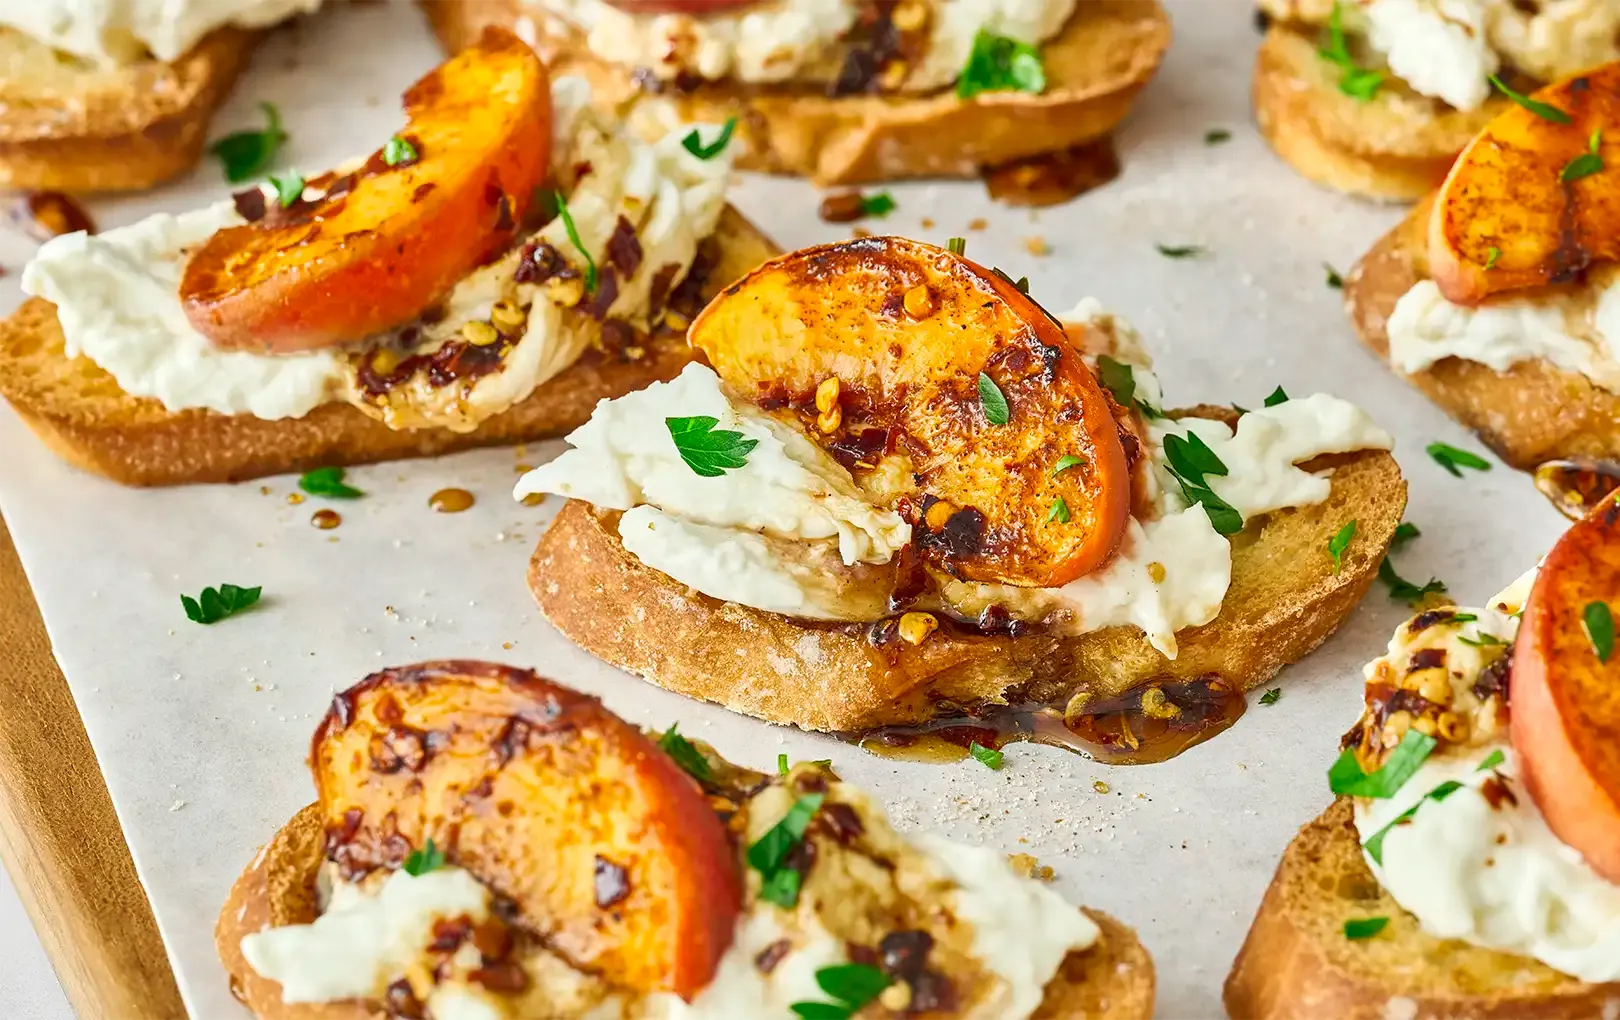
When peaches are actually good — that narrow window in midsummer when they're ripe and fragrant and juicy — this bruschetta is something else entirely. Grilling the peaches for just a couple minutes caramelizes the sugars and adds a smokiness that pairs beautifully with the cool, creamy burrata. It's the kind of appetizer that gets people asking for the recipe before they've finished their first piece. The bread matters here — use a good crusty sourdough or ciabatta, not soft sandwich bread. If you don't have a grill, a cast iron grill pan on the stove works just as well for both the bread and the peaches.
Ingredients
- 1 large sourdough or ciabatta loaf, sliced ¾-inch thick
- 3 ripe but firm peaches, halved and pitted
- 2 tablespoons olive oil (plus more for brushing bread)
- 8 oz fresh burrata cheese (2 balls)
- 2 tablespoons balsamic glaze
- ¼ cup fresh basil leaves, torn
- Flaky sea salt and black pepper
- 1 garlic clove, halved (for rubbing the bread)
Instructions
- Preheat your grill or grill pan to medium-high heat. Brush the bread slices and peach halves with olive oil on all sides.
- Grill the peach halves cut-side down for 3–4 minutes until grill marks appear and they soften slightly. Remove and slice into ½-inch wedges when cool enough to handle.
- Grill the bread slices for about 2 minutes per side until golden and crispy with grill marks. While still hot, rub the top of each slice with the cut side of the garlic clove.
- Tear the burrata over the grilled bread, spreading it gently. It'll be soft and creamy — don't stress about making it perfect.
- Top with grilled peach slices, torn basil, a drizzle of balsamic glaze, and a pinch of flaky salt and black pepper. Serve immediately.
11. No-Cook Gazpacho with Crusty Bread
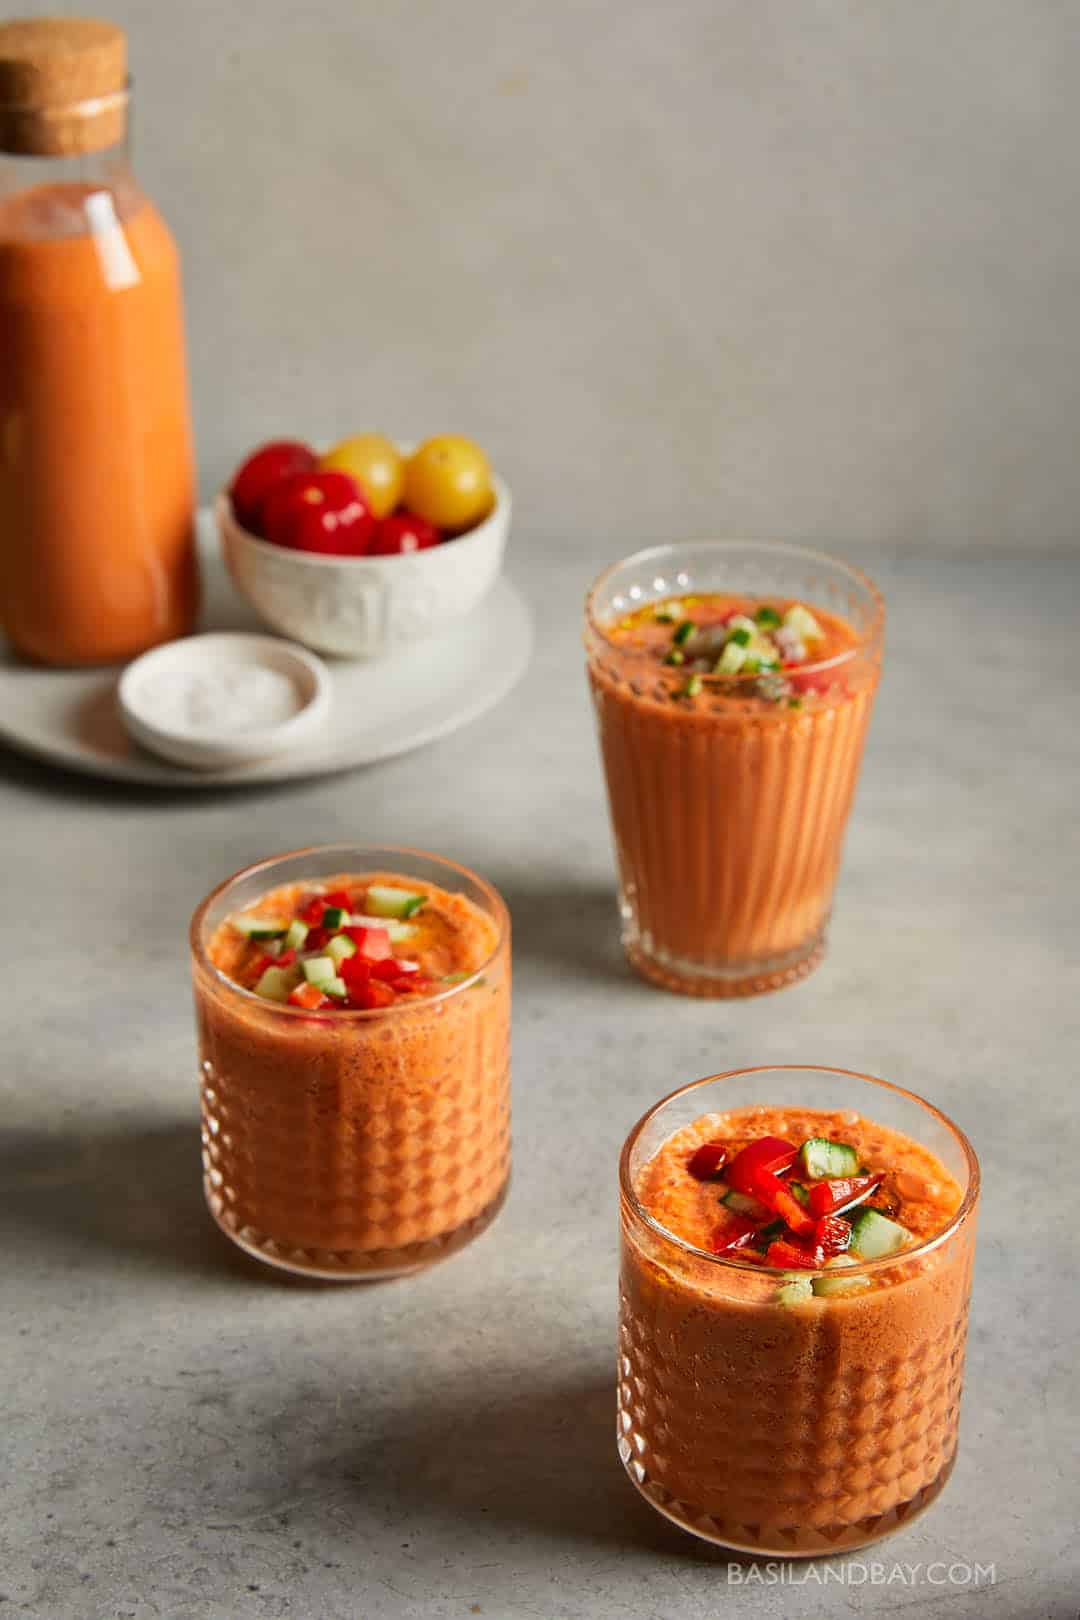
Gazpacho is one of those recipes I resisted for years because I assumed cold soup was a weird concept — and honestly it is, until the first time you eat a bowl on a genuinely hot day and realize it's basically the most refreshing thing possible. No stove, no heat, nothing cooking. You blend raw vegetables with olive oil and vinegar and refrigerate it, and that's the recipe. The one thing I learned the hard way: make it at least two hours ahead, preferably overnight. Fresh-blended gazpacho tastes flat and a little harsh. Rested gazpacho tastes like summer in a bowl. Serve it in small cups as an appetizer or in bowls with crusty bread alongside.
Ingredients
- 2 lbs ripe tomatoes (about 4–5 large), roughly chopped
- 1 large English cucumber, peeled and roughly chopped (divided)
- 1 red bell pepper, seeded and roughly chopped
- ½ small red onion, roughly chopped
- 2 garlic cloves
- 3 tablespoons red wine vinegar
- ¼ cup extra-virgin olive oil (plus more for drizzling)
- 1 teaspoon salt
- ½ teaspoon black pepper
- ½ teaspoon cumin (optional but good)
- Crusty bread for serving
Instructions
- Set aside about ¼ of the cucumber — dice it finely and refrigerate separately. This will be your garnish.
- Add the tomatoes, remaining cucumber, red bell pepper, red onion, and garlic to a blender. Blend on high for about 1 minute until very smooth.
- With the blender running, drizzle in the olive oil slowly. Add the red wine vinegar, salt, pepper, and cumin. Blend for another 30 seconds.
- Taste and adjust seasoning — it may need more vinegar or salt depending on how ripe your tomatoes are. Pour through a fine mesh strainer if you want a very smooth texture, or leave it as-is for a more rustic version.
- Refrigerate for at least 2 hours (overnight is better). Serve in chilled bowls or cups, drizzled with olive oil and topped with the reserved diced cucumber. Crusty bread on the side is non-negotiable.
10. Homemade Italian Beef Sub Platter

An Italian beef sub platter is the kind of thing that feeds a crowd without requiring you to stand at the grill the whole time — the beef braises in the oven low and slow, you slice it thin and pile it back into the juices, and then it basically takes care of itself in a slow cooker while everyone eats. Piled into toasted hoagie rolls with giardiniera and provolone, this is genuinely crowd food. Slice the beef as thin as possible — a sharp knife and slightly cooled beef makes this much easier. This isn't authentic Chicago Italian beef (that's a whole different process), but it's a solid home version that works for a party and doesn't require a deli slicer.
Ingredients
- 3 lbs beef chuck roast
- 1 tablespoon Italian seasoning
- 1 teaspoon garlic powder
- 1 teaspoon onion powder
- 1 teaspoon salt
- ½ teaspoon black pepper
- 2 cups beef broth
- 1 cup pepperoncini peppers with 2 tablespoons of their brine
- 1 teaspoon Worcestershire sauce
- 8–10 hoagie rolls, toasted
- 8 oz provolone cheese slices
- 1 cup giardiniera, drained (mild or hot — your call)
Instructions
- Preheat oven to 300°F. Mix Italian seasoning, garlic powder, onion powder, salt, and pepper. Rub all over the beef chuck roast.
- Place the beef in a Dutch oven or heavy oven-safe pot. Pour in the beef broth, pepperoncini peppers and brine, and Worcestershire sauce. Cover tightly with a lid or foil.
- Braise in the oven for 3½–4 hours until the beef is very tender and shreds easily with a fork. Remove the beef and let it rest for 15 minutes.
- Slice or shred the beef as thin as possible using a sharp knife or two forks. Return it to the cooking juices in the pot and keep warm over low heat (or transfer everything to a slow cooker on WARM).
- To serve: toast the hoagie rolls, lay a slice of provolone on the bottom, pile on a generous serving of beef with some of the cooking juices (called "dipping" — it should be a little wet), and top with giardiniera. Serve immediately. Set out extra jus on the side for dunking.
9. Chilled Orzo Pasta Primavera Salad
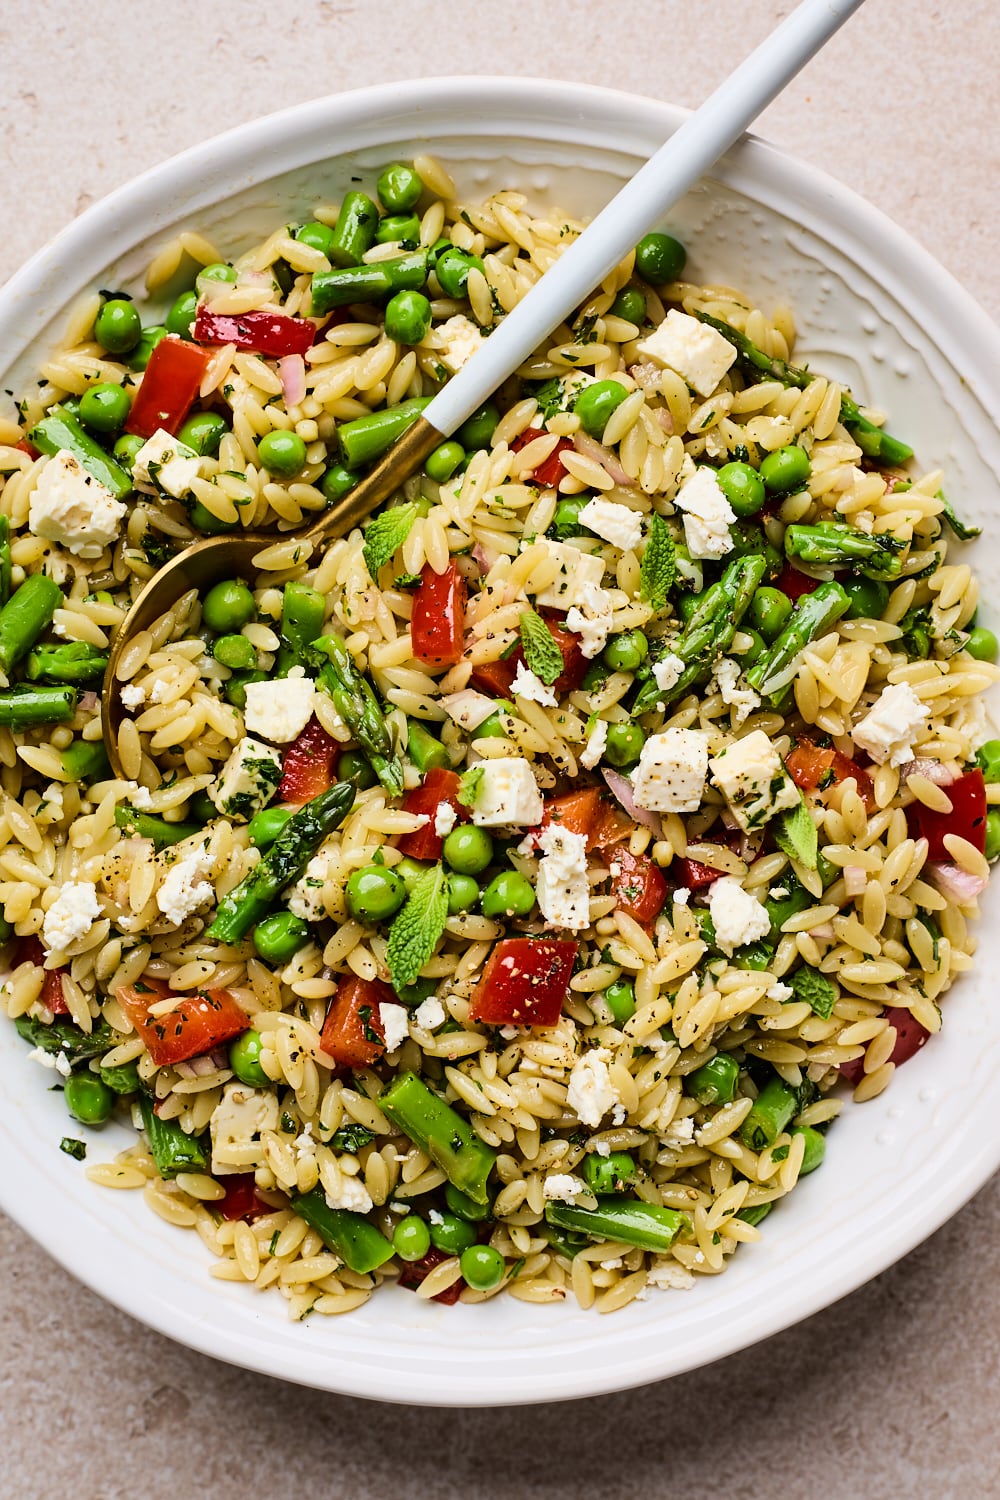
Pasta salad is one of those things that sounds simple until you make a bad one — and I made plenty of bad ones before landing on this version. The trick is dressing the orzo while it's still warm so it actually absorbs the vinaigrette instead of sitting in a pool of it. Orzo works so well here because it's small enough to scoop easily with a spoon at a party, and it holds up in the fridge without going mushy the way bigger pasta shapes do. Load it with whatever vegetables look good at the market — I usually go with zucchini, cherry tomatoes, asparagus, and peas, but this is genuinely flexible. Make it the night before and it only gets better.
Ingredients
- 1½ cups dry orzo pasta
- 1 cup cherry tomatoes, halved
- 1 medium zucchini, diced small
- 1 cup asparagus, trimmed and cut into 1-inch pieces
- ½ cup frozen peas, thawed
- ¼ cup red onion, finely diced
- ⅓ cup crumbled feta cheese
- ¼ cup fresh basil, torn
- 3 tablespoons olive oil
- 2 tablespoons red wine vinegar
- 1 teaspoon Dijon mustard
- 1 garlic clove, minced
- Salt and black pepper to taste
Instructions
- Cook orzo according to package directions in well-salted water. Drain and transfer to a large bowl immediately — don't rinse it.
- Whisk together olive oil, red wine vinegar, Dijon mustard, minced garlic, salt, and pepper. Pour half the dressing over the warm orzo and toss to coat. Let it cool for 15 minutes.
- While orzo cools, blanch the asparagus pieces in boiling water for 90 seconds, then transfer to an ice bath to stop cooking. Drain well.
- Add cherry tomatoes, zucchini, asparagus, peas, and red onion to the orzo. Toss everything together with the remaining dressing.
- Fold in feta and basil. Taste and adjust salt and pepper — cold food needs more seasoning than you think.
- Refrigerate for at least 1 hour before serving. Give it another toss and a small drizzle of olive oil right before putting it out.
8. Frozen Nutella Banana Ice Cream Bites
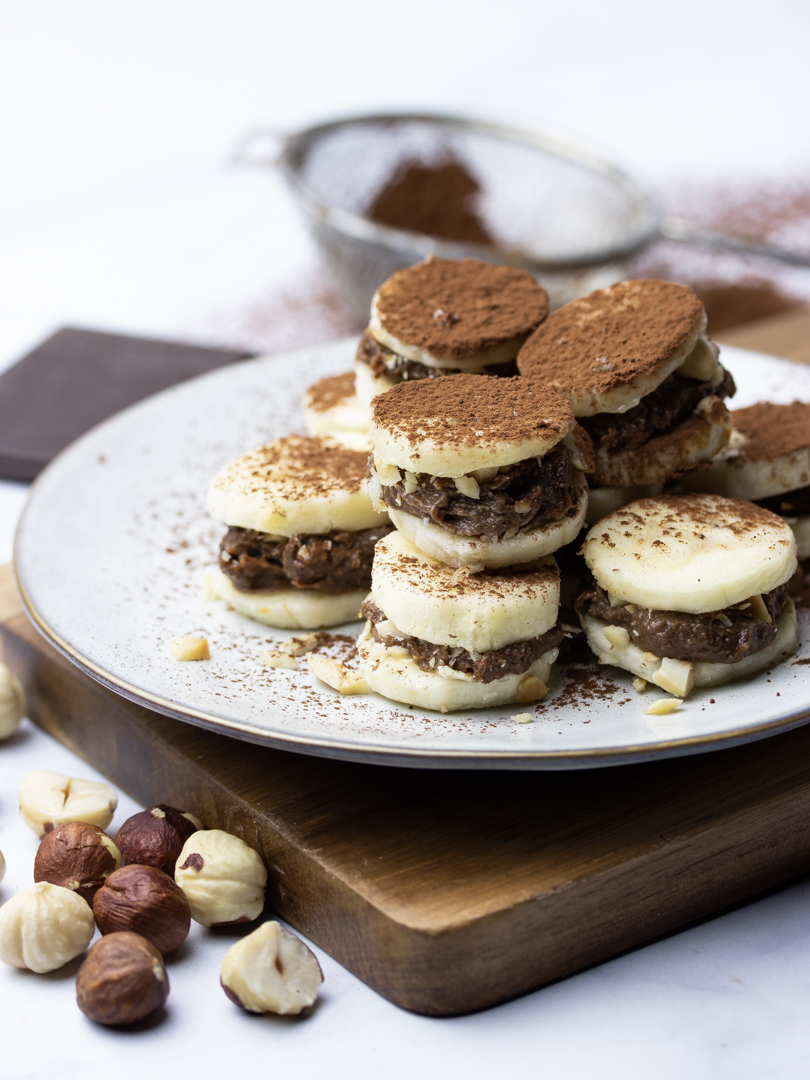
Saad discovered these by accident when he saw me prepping them for a party and assumed I was making them just for him — which honestly was partly true. Four ingredients, no oven, no special equipment, and they come out of the freezer looking like something from a dessert shop. The banana slices act as a natural base and top, the Nutella layer in the middle is creamy and cold, and if you dip them in chocolate they turn into proper little party bites. These need to go into the freezer at least two hours before your guests arrive, so plan ahead — but the actual hands-on time is maybe fifteen minutes.
Ingredients
- 3 large ripe but firm bananas
- ½ cup Nutella (or any chocolate hazelnut spread)
- 1 cup semi-sweet chocolate chips
- 1 tablespoon coconut oil
- Optional toppings: crushed hazelnuts, sea salt flakes, rainbow sprinkles
Instructions
- Line a baking sheet with parchment paper. Slice bananas into ½-inch rounds — you'll need an even number of slices since they pair up as sandwiches.
- Spread about ½ teaspoon of Nutella onto one banana slice and press a second slice on top to make a sandwich. Repeat with all slices.
- Place the sandwiches on the lined baking sheet and freeze for at least 1 hour until firm.
- Melt chocolate chips and coconut oil together in a microwave-safe bowl in 30-second intervals, stirring between each, until smooth.
- Working quickly, dip each frozen banana sandwich into the melted chocolate, letting the excess drip off. Return to the parchment-lined sheet and immediately add any toppings you want.
- Freeze for another 30–60 minutes until the chocolate shell is fully set. Keep frozen until right before serving — they soften fast on a hot day.
7. Smashed Guacamole Deviled Eggs
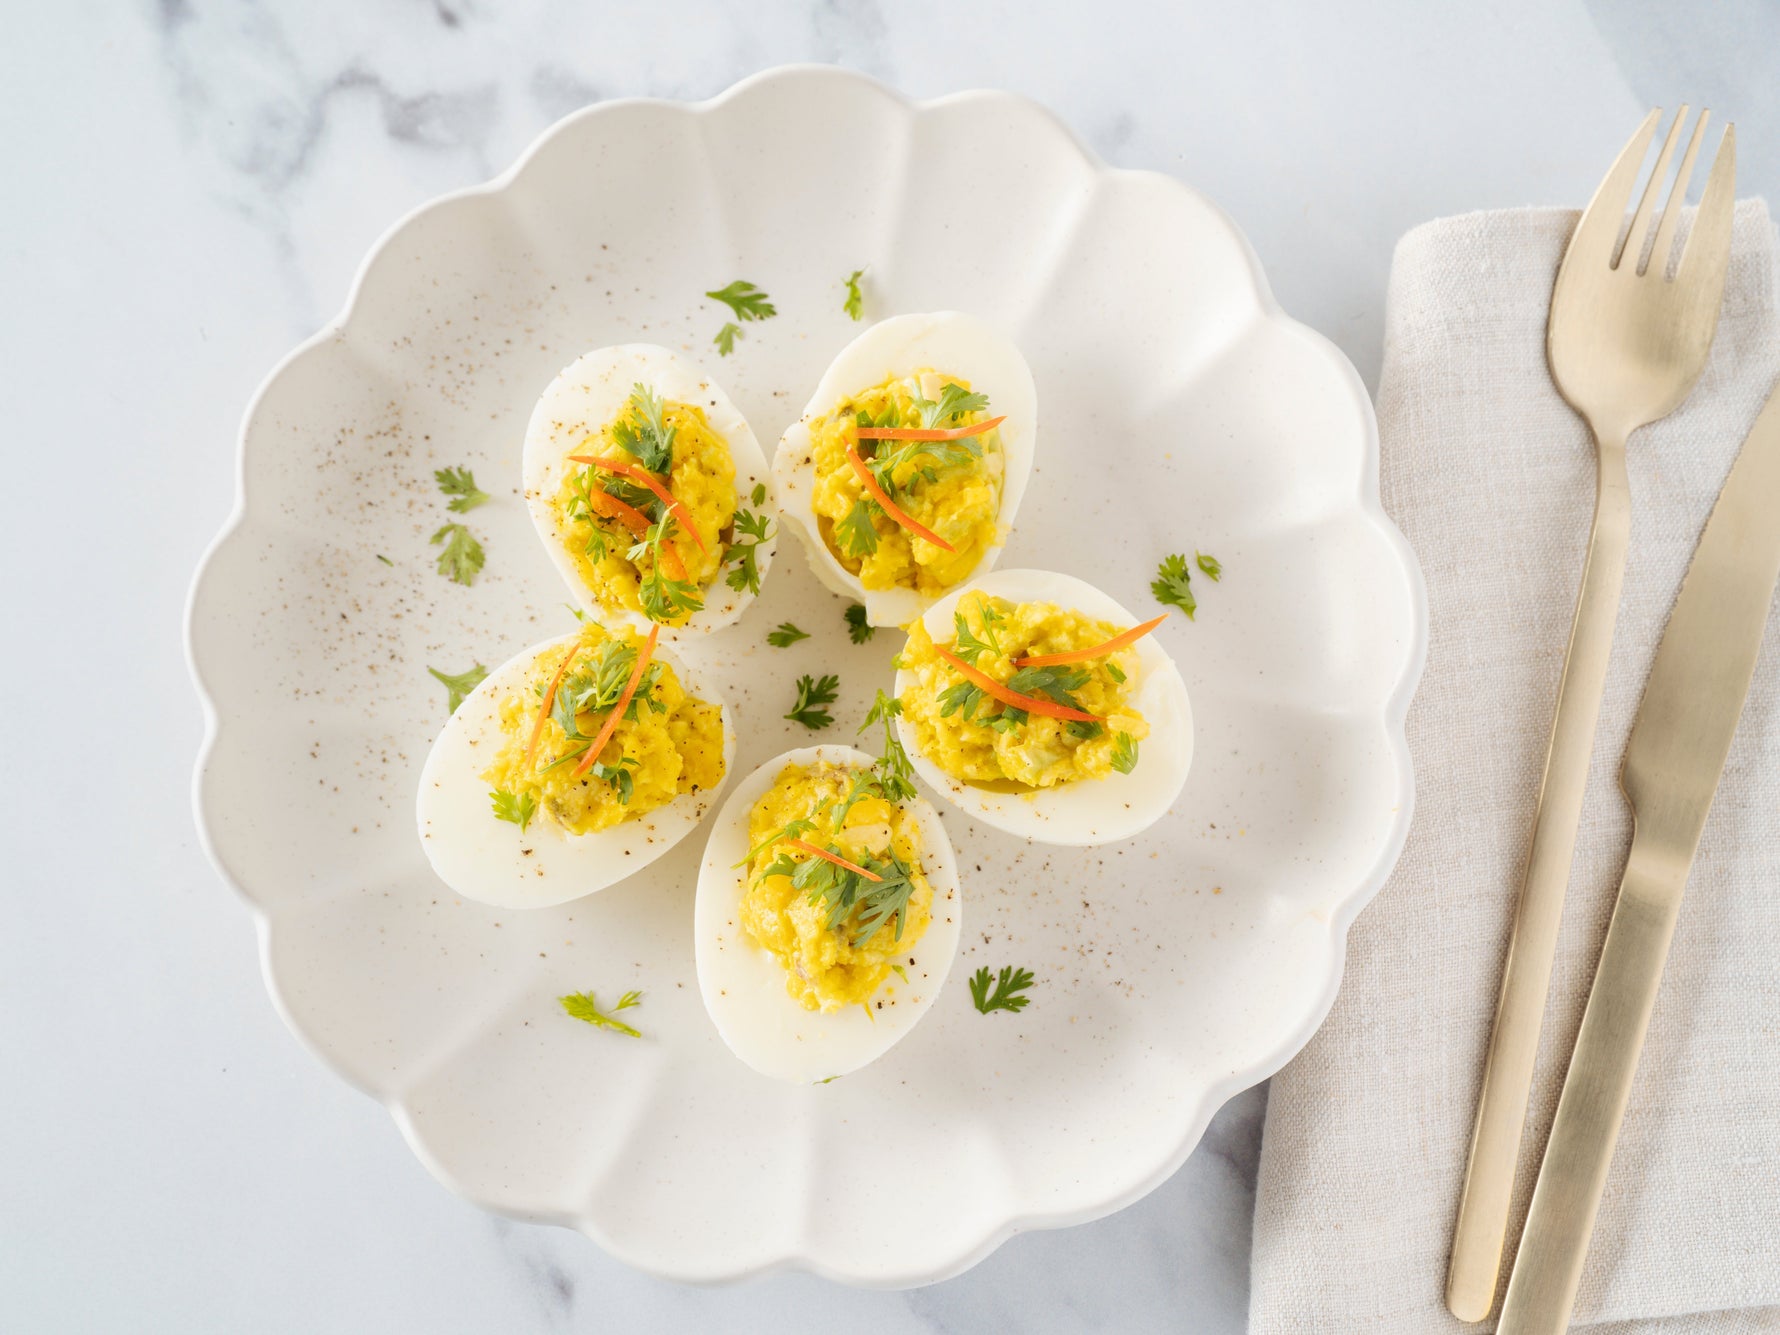
Regular deviled eggs are fine. These are better. Replacing the mayo-heavy filling with a punchy guacamole mixture means they're brighter, fresher, and way more interesting on a summer table. The avocado keeps the filling creamy without feeling heavy, and the lime and jalapeño give it just enough edge to keep people reaching back for seconds. The one thing I learned the hard way: make these no more than two hours before serving, and keep them refrigerated until the last minute. Avocado oxidizes fast, and nobody wants gray deviled eggs. A quick sprinkle of smoked paprika and a few cilantro leaves on top makes them look like you spent real effort.
Ingredients
- 12 large eggs
- 2 ripe avocados
- 2 tablespoons fresh lime juice
- 1 small jalapeño, seeded and finely minced
- 2 tablespoons red onion, finely diced
- 2 tablespoons fresh cilantro, chopped (plus extra for garnish)
- ½ teaspoon garlic powder
- Salt and black pepper to taste
- Smoked paprika for garnish
Instructions
- Hard boil eggs using your preferred method. I do 10 minutes in boiling water, then straight into an ice bath for 10 minutes. Peel carefully and slice in half lengthwise.
- Pop the yolks out into a bowl. Set the egg white halves aside on your serving platter.
- Mash the avocados into the yolks until combined — a fork works perfectly here, you don't want it completely smooth. A little texture is good.
- Stir in lime juice, jalapeño, red onion, cilantro, and garlic powder. Season well with salt and pepper. Taste it — it should be bright and well-seasoned.
- Spoon or pipe the guacamole filling into each egg white half. A zip-lock bag with the corner snipped works if you don't have a piping bag.
- Garnish with a pinch of smoked paprika and a small cilantro leaf. Refrigerate until serving.
6. Sheet Pan Honey Garlic Salmon
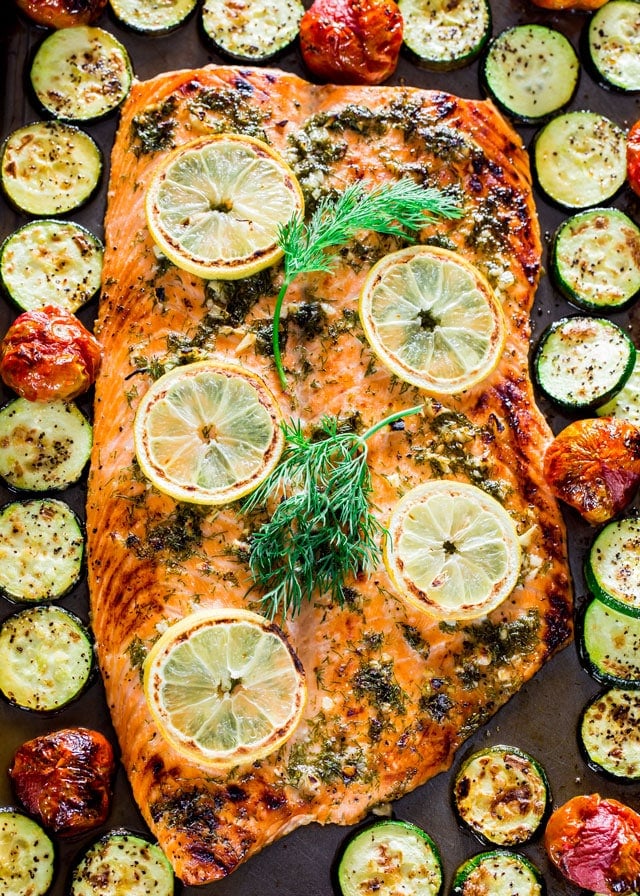
When you're hosting a crowd and you want something that feels a little elevated without standing at a grill the entire time, this sheet pan salmon is the answer. The honey garlic glaze caramelizes in the oven and turns slightly sticky and golden at the edges — it looks impressive and takes maybe ten minutes of actual hands-on work. I usually buy a whole salmon fillet from Costco when I'm feeding a group, which is dramatically cheaper per pound than individual portions. Roast it on the same pan with some green beans or asparagus and you've got a complete dish. Cut it into portions after cooking, right on the pan — nobody needs to see the work, just the result.
Ingredients
- 2 lbs salmon fillet, skin-on (one large piece or individual portions)
- 3 tablespoons honey
- 3 garlic cloves, minced
- 2 tablespoons soy sauce (or tamari for gluten-free diet)
- 1 tablespoon olive oil
- 1 tablespoon fresh lemon juice
- 1 teaspoon Dijon mustard
- ½ teaspoon black pepper
- 1 lb green beans or asparagus, trimmed
- Lemon slices and fresh parsley for serving
Instructions
- Preheat oven to 400°F. Line a large sheet pan with foil and lightly oil it.
- Whisk together honey, minced garlic, soy sauce, olive oil, lemon juice, Dijon mustard, and black pepper in a small bowl.
- Place salmon skin-side down on one side of the sheet pan. Toss green beans or asparagus with a drizzle of olive oil and salt, then spread on the other side of the pan.
- Spoon the honey garlic glaze generously over the salmon — use all of it, don't hold back.
- Roast for 12–15 minutes depending on thickness, until salmon flakes easily with a fork and the glaze is caramelized at the edges. For a crispier top, switch to broil for the last 2 minutes — watch it closely.
- Transfer to a serving platter, scatter fresh parsley on top, and add lemon slices around the edges. Slice into portions at the table.
5. Strawberry Basil Sparkling Sangria
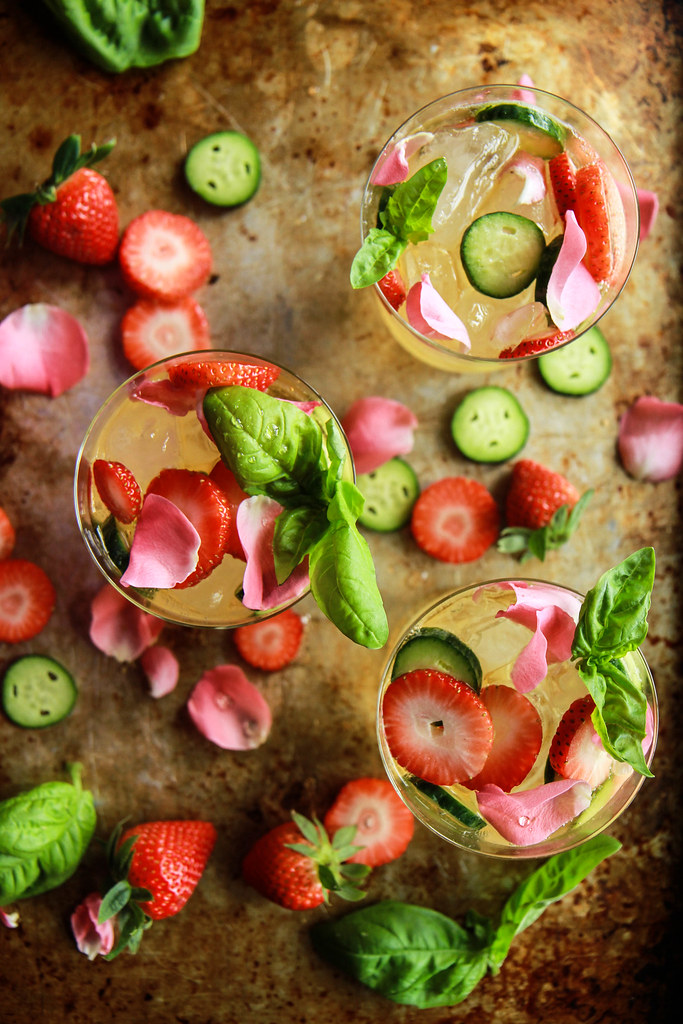
A big pitcher of sangria on a summer table does something to the atmosphere that no other drink quite manages. This version leans into fresh strawberries and basil in a way that feels distinctly summery — the basil sounds unusual but it works the same way it does in a strawberry lemonade, just adding a faint herby note that makes people ask what's in it. Use a dry rosé or a light white wine as your base; I usually pick up a bottle from Trader Joe's or Aldi and nobody's ever complained. Make the fruit-and-wine mixture several hours ahead so the strawberries soften and sweeten the whole thing, then add the sparkling water right before pouring so it stays fizzy.
Ingredients
- 1 bottle (750ml) dry rosé or light white wine (Pinot Grigio works well)
- 2 cups fresh strawberries, hulled and sliced
- ¼ cup fresh basil leaves, lightly torn
- ¼ cup orange liqueur (Triple Sec or Cointreau) — or orange juice for a non-alcoholic swap
- 2 tablespoons honey or simple syrup, adjust to taste
- 1 cup sparkling water or club soda
- Ice for serving
- Extra strawberry slices and basil sprigs for garnish
Instructions
- Combine wine, sliced strawberries, torn basil, orange liqueur, and honey in a large pitcher. Stir gently to dissolve the honey.
- Refrigerate for at least 3 hours, or overnight. The longer it sits, the better the strawberry flavor develops in the wine.
- Right before serving, stir in the sparkling water. Taste and add a little more honey if it needs it — sweetness level depends on your wine.
- Fill glasses with ice, pour sangria over (letting a few strawberry slices fall into each glass), and garnish with a fresh basil sprig.
4. Loaded Nacho Bar with Toppings
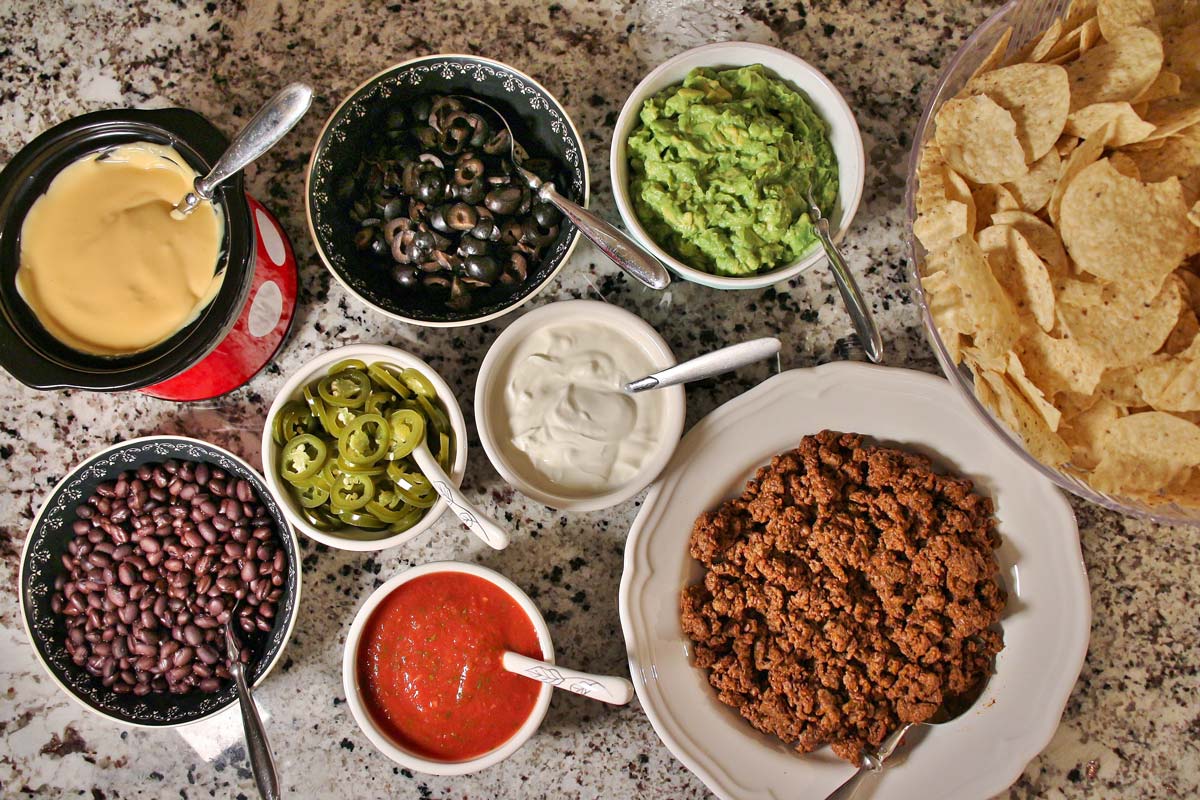
A nacho bar is one of the smartest things you can set up for a crowd because you do the work ahead of time and then step back and let people build their own plates. The base — chips, seasoned beef or beans, and warm cheese sauce — comes together fast, and then you just line up bowls of toppings and let guests go. I always make a double batch of the cheese sauce because it disappears. The key is keeping the chips and toppings separate rather than assembling one giant tray ahead of time; soggy nachos are a party tragedy. Set everything out in bowls and let the table do the work.
Ingredients
- 2 large bags (about 16 oz each) tortilla chips
- 1 lb ground beef or ground turkey
- 1 packet (1 oz) taco seasoning
- 1 can (15 oz) black beans, drained and rinsed
- 2 cups shredded cheddar or Monterey Jack cheese
- 1 can (10 oz) diced tomatoes with green chiles (like rotel)
- ½ cup sour cream
- 1 cup guacamole (store-bought is fine)
- 1 cup salsa or pico de gallo
- 1 jalapeño, sliced into rings
- ½ cup sliced black olives
- ¼ cup fresh cilantro, chopped
- 2 limes, cut into wedges
Instructions
- Brown ground beef in a skillet over medium-high heat, breaking it up as it cooks. Drain excess fat, then add taco seasoning and ¼ cup water. Stir and simmer 2 minutes until absorbed. Keep warm.
- Warm black beans in a small saucepan with a pinch of cumin and salt, just until heated through.
- Make a simple queso: combine shredded cheese and the can of Rotel in a small saucepan over low heat. Stir constantly until melted and smooth. Add a splash of milk if it's too thick.
- Arrange all toppings in individual bowls or small dishes: sour cream, guacamole, salsa, jalapeños, olives, cilantro, lime wedges.
- Set out the chips in a large bowl or basket. Put the warm meat, beans, and queso in serving dishes with spoons alongside.
- Let guests build their own plates — chips first, then toppings in whatever order they like. Keep the queso warm in a small slow cooker if you have one, or reheat on the stove as needed.
3. No-Bake S'mores Rice Crispy Treats
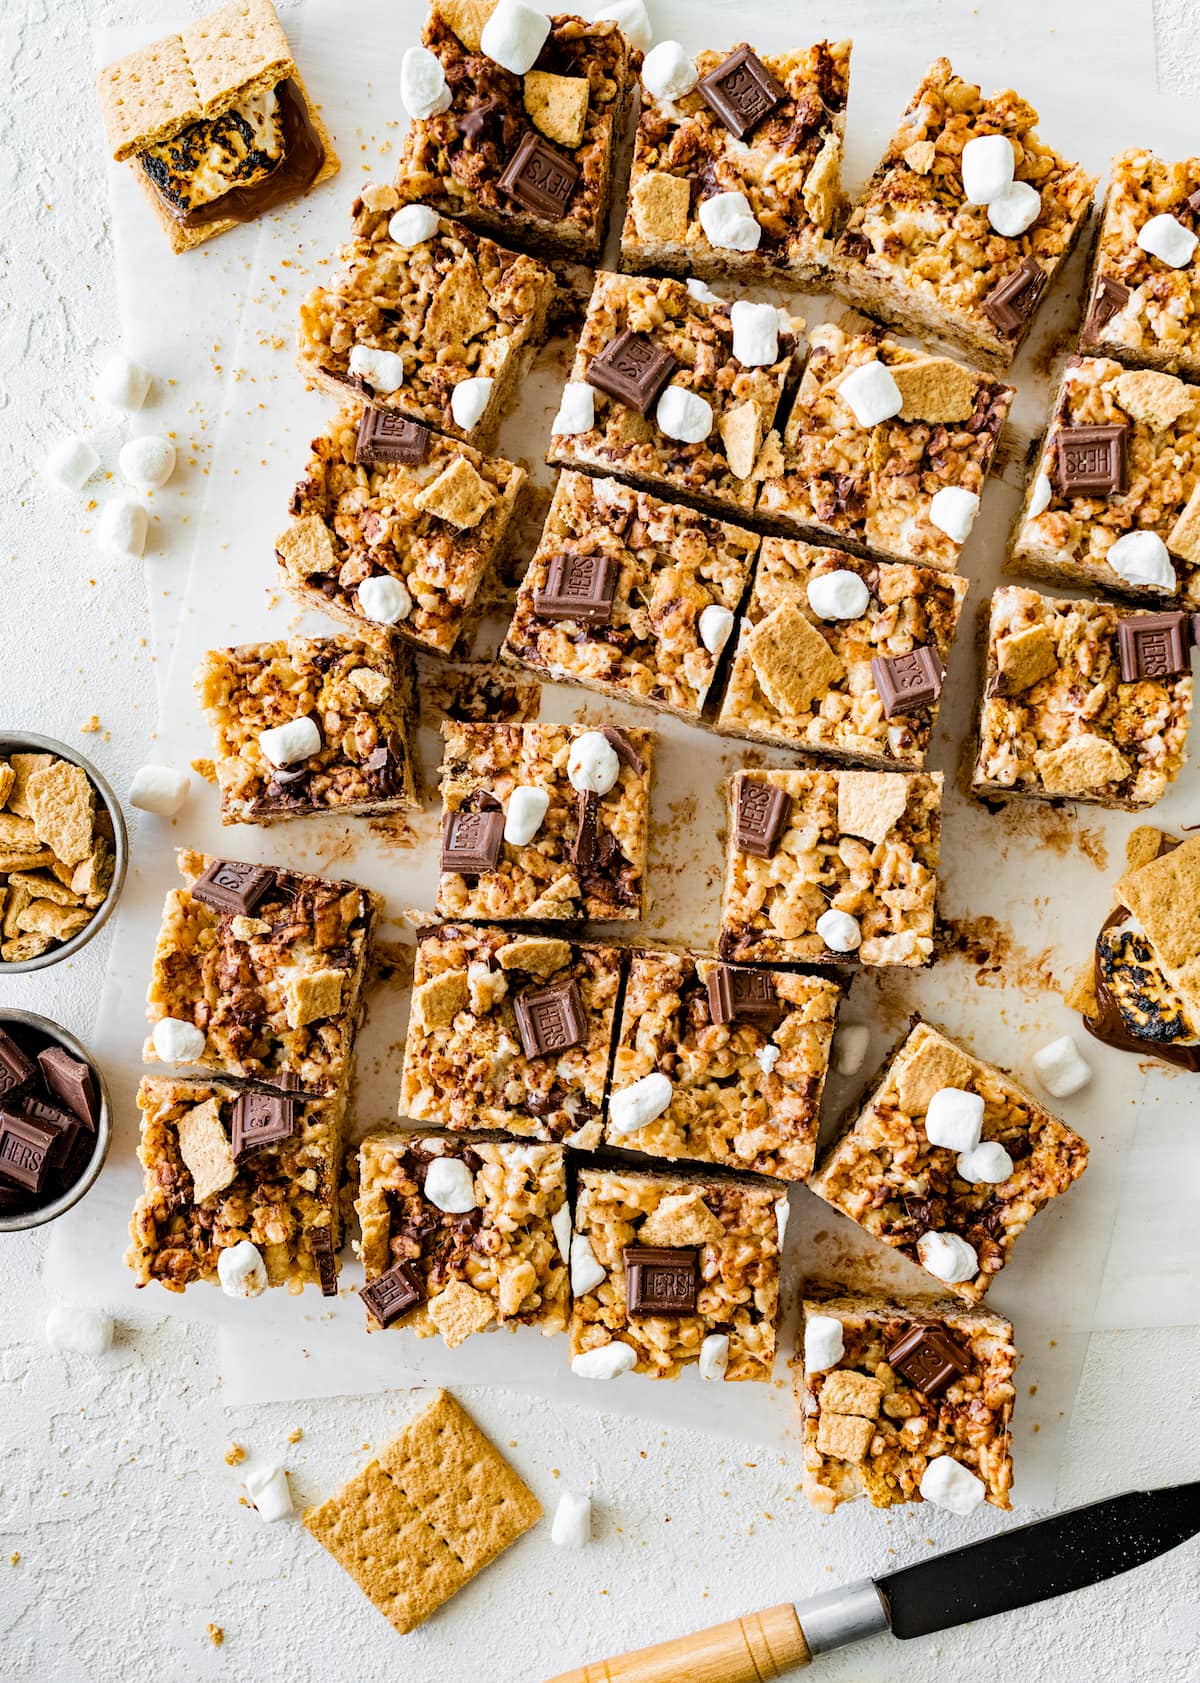
Every summer party needs at least one thing that's purely fun with zero pretension, and this is mine. These are rice crispy treats taken in a s'mores direction — graham cracker crumbs folded into the mixture, a layer of melted chocolate on top, and toasted mini marshmallows finished under the broiler for thirty seconds. They take about twenty minutes start to finish and you don't need to turn on the oven beyond that brief broil at the end. Cut them into squares and pile them on a plate and they'll be gone before anything else on the table. Make a double batch. I'm not joking — I learned this after showing up with one pan for fourteen people.
Ingredients
- 6 tablespoons unsalted butter
- 1 bag (10 oz) regular marshmallows
- 6 cups rice crispy cereal
- 1 cup graham cracker crumbs (about 8 full crackers, crushed)
- 1 teaspoon vanilla extract
- 1 cup semi-sweet chocolate chips
- 1 tablespoon coconut oil or butter
- 1 cup mini marshmallows (for topping)
Instructions
- Grease a 9x13-inch baking pan with butter or cooking spray. Set aside.
- Melt butter in a large pot over medium-low heat. Add the bag of marshmallows and stir until completely melted and smooth. Remove from heat and stir in vanilla extract.
- Quickly fold in the rice crispy cereal and graham cracker crumbs until everything is evenly coated — work fast before the mixture stiffens.
- Press the mixture firmly and evenly into the prepared pan using greased hands or the back of a buttered spatula.
- Melt chocolate chips with coconut oil in the microwave in 30-second bursts, stirring until smooth. Pour over the rice crispy layer and spread evenly.
- Scatter mini marshmallows over the chocolate layer. Place under the broiler for 30–45 seconds, watching constantly, until marshmallows are lightly golden. Let cool completely before cutting into squares.
2. Grilled Veggie Flatbread with Hummus

For anyone at your party who isn't eating meat, this flatbread pulls real weight. Charred vegetables on top of a thick hummus base, finished with crumbled feta and a drizzle of good benefits of olive oil — it's the kind of thing that looks elegant but comes together entirely on the grill. Use store-bought flatbreads (naan works perfectly, or the flatbread rounds from Walmart or Trader Joe's) and store-bought hummus as your base; there's no shame in that when you're feeding a crowd. The magic is in taking five minutes to grill the vegetables directly on the grates before they go on top — that char and smoke flavor is what makes this more than just a dip platter dressed up.
Ingredients
- 4 flatbreads or large naan rounds
- 1 cup store-bought hummus
- 1 medium zucchini, sliced lengthwise into thin planks
- 1 red bell pepper, quartered
- 1 small red onion, sliced into ½-inch rounds
- 1 cup cherry tomatoes
- 3 tablespoons olive oil, divided
- Salt and black pepper to taste
- ½ cup crumbled feta cheese
- ¼ cup fresh basil or parsley, torn
- 1 teaspoon red pepper flakes (optional)
- Lemon wedges for serving
Instructions
- Preheat grill to medium-high heat. Toss zucchini, bell pepper, and red onion with 2 tablespoons olive oil, salt, and pepper.
- Grill the vegetables in a single layer for 3–4 minutes per side until tender with visible char marks. Grill cherry tomatoes in a grill basket or on foil for 5 minutes until blistered. Remove everything from the grill and chop into bite-sized pieces.
- Brush both sides of the flatbreads lightly with remaining olive oil. Grill for 1–2 minutes per side just until warmed and slightly crisp with grill marks.
- Spread a generous layer of hummus over each flatbread — don't be shy with it.
- Top with grilled vegetables, then scatter crumbled feta and torn herbs over everything. Add red pepper flakes if using.
- Drizzle lightly with a little extra olive oil, cut into pieces, and serve immediately with lemon wedges alongside.
1. Blueberry Lemonade Icebox Cake
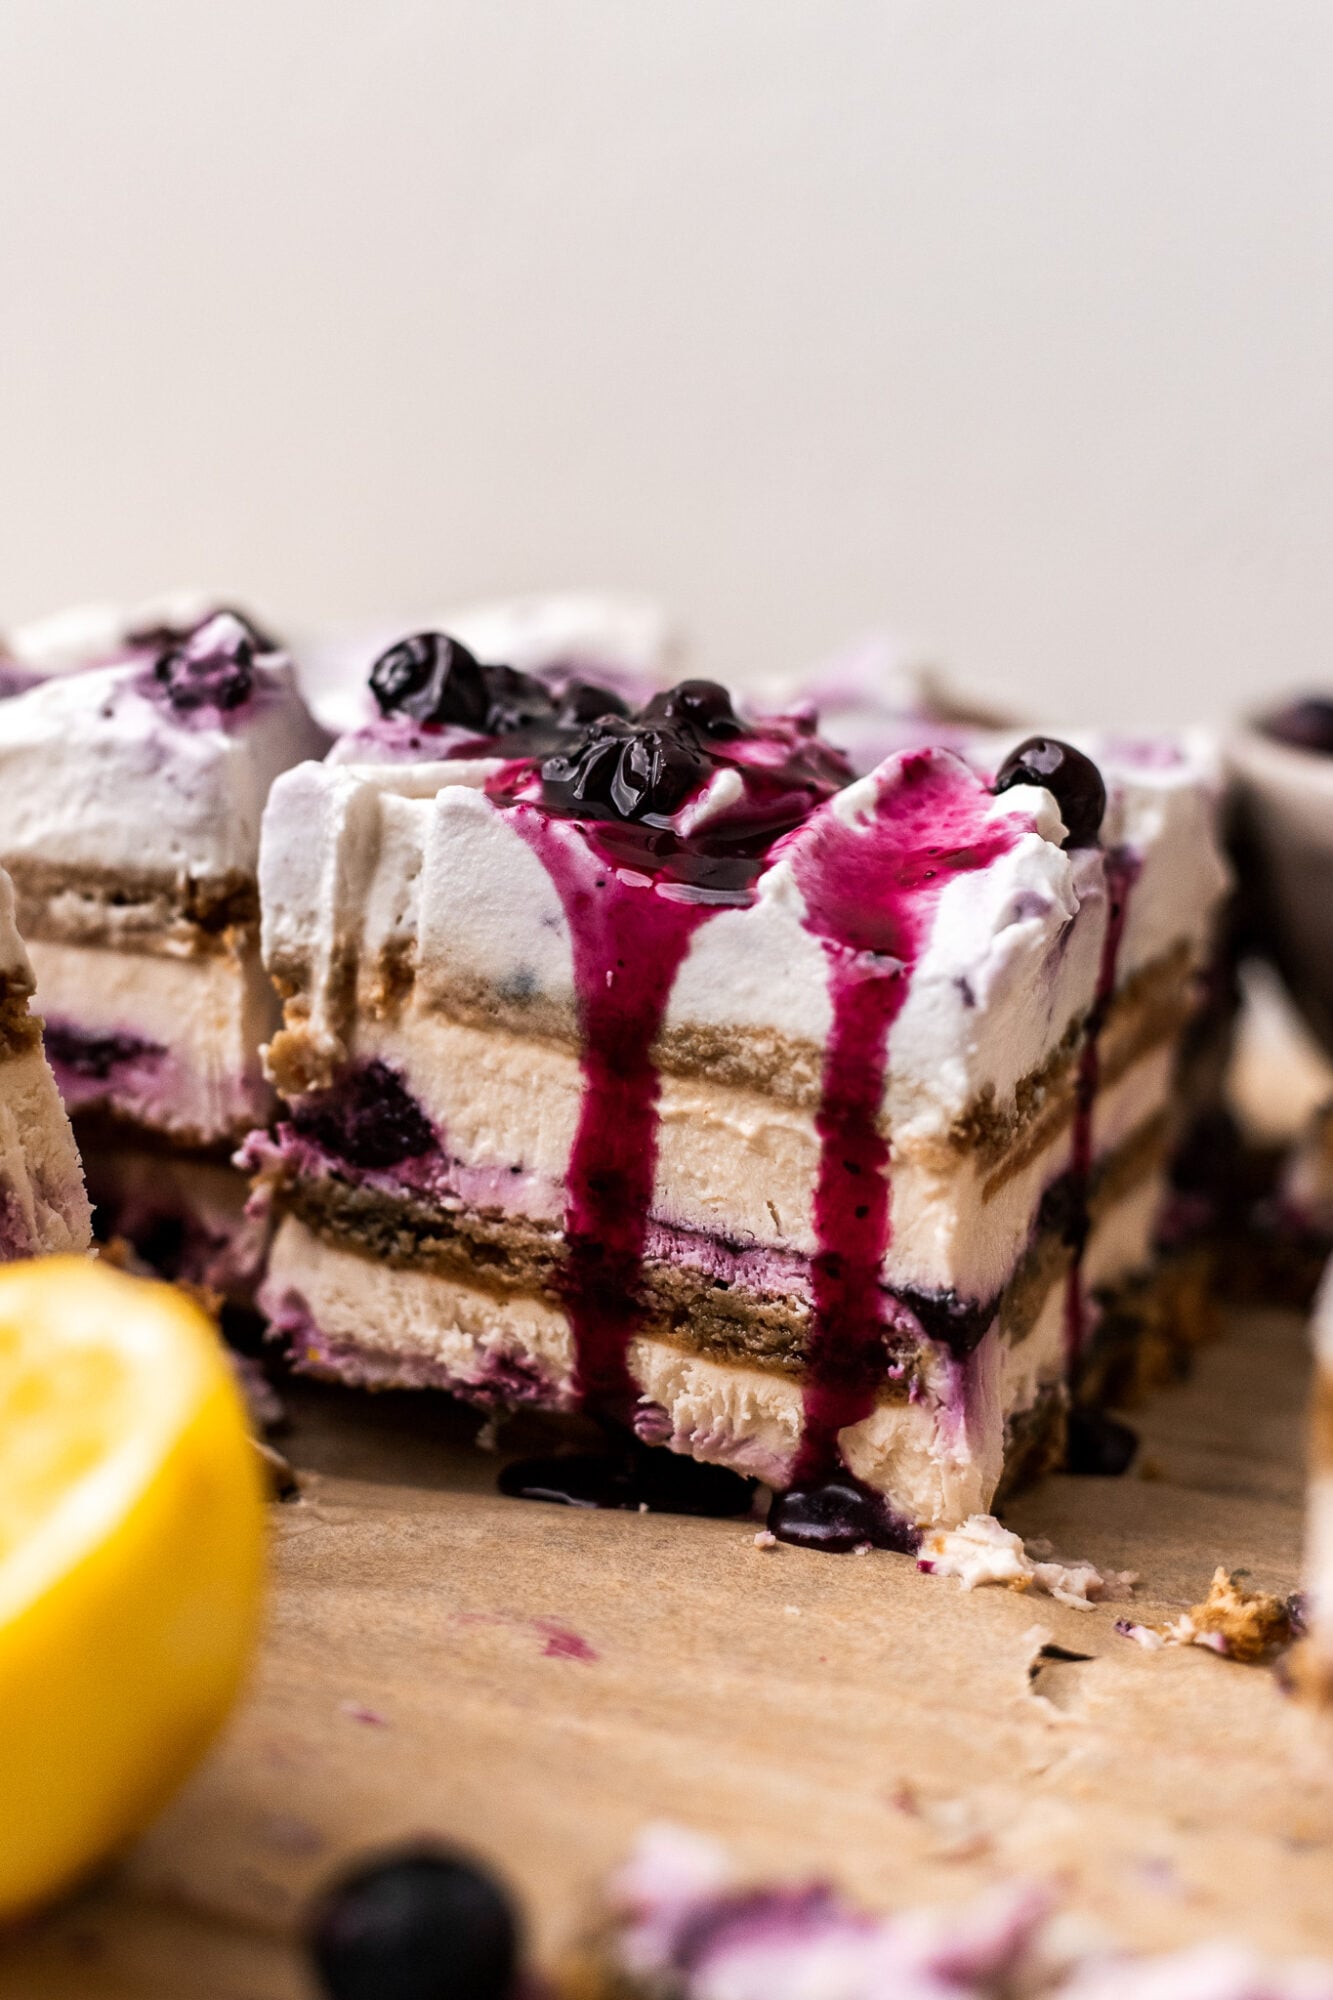
Summer desserts at outdoor parties live or die by one rule: they cannot require the oven. This icebox cake has been my go-to for the last three summers running — no baking, no fussing, just layers of lemony whipped cream and fresh blueberries stacked between graham crackers that soften overnight into something that genuinely tastes like a proper cake. I made this for a backyard get-together last July and someone asked me for the recipe before they'd even finished their slice.
The trick is the lemon — you want actual zest in the cream, not just lemon extract. The zest is where the flavor lives. Zainab is not usually a fruit-dessert person but she kept coming back for more of this one, which tells you something. You assemble it the night before, refrigerate it, and by party time it's sliceable and cold and ready to go. In the heat of summer, that make-ahead quality is everything.
Ingredients
- 2 cups heavy whipping cream, cold
- 8 oz cream cheese, softened to room temperature
- ¾ cup powdered sugar
- Zest of 2 large lemons
- 3 tablespoons fresh lemon juice
- 1 teaspoon vanilla extract
- 14 oz box graham crackers (about 3 sleeves)
- 2 cups fresh blueberries, rinsed and dried
- 2 tablespoons lemon curd, for drizzling on top (store-bought is fine)
Instructions
- Beat the softened cream cheese with the powdered sugar in a large bowl until smooth and lump-free, about 2 minutes. Add the lemon zest, lemon juice, and vanilla and mix until combined.
- In a separate bowl, whip the cold heavy cream to stiff peaks — this takes about 3-4 minutes with a hand mixer. Fold the whipped cream gently into the cream cheese mixture in two additions, keeping it light and airy.
- Spread a thin layer of the lemon cream on the bottom of a 9x13-inch baking dish. This keeps the first layer of crackers from sliding around.
- Lay a single layer of graham crackers across the bottom, breaking them to fill gaps as needed. Spread about one-third of the remaining lemon cream evenly over the crackers, then scatter a generous handful of blueberries across the top.
- Repeat the layers — crackers, cream, blueberries — two more times, finishing with a top layer of cream and the remaining blueberries arranged however you like.
- Drizzle lemon curd over the top in thin ribbons for extra color and tang. Cover tightly with plastic wrap and refrigerate for at least 6 hours, or overnight — overnight gives better results because the crackers fully soften into a cake-like texture.
- Slice into squares and serve cold straight from the fridge. If you're transporting it to a party, keep it in the dish with the lid on and slice at the location.
That's all 25 of them — and honestly, putting this list together made me want to host a backyard gathering this weekend. Whether you're feeding ten people or forty, grilling for a crowd or setting up a no-cook spread, there's something here that fits. These are the kinds of recipes where you're not chained to the kitchen while everyone else is outside having fun. That's the whole point of summer entertaining.
My advice: pick two or three recipes from this list, make them the night before or early in the morning, and give yourself actual time to enjoy the party. I always say the host should eat too — and with food like this, you absolutely will. Saad and Zainab always disappear into the backyard the second guests arrive, and I love that I can follow them instead of standing over a stove all afternoon.
If you found a few ideas here that you're excited to try, save this post or share it with whoever's hosting next. And if you're looking for more inspiration beyond the backyard, check out my Recipe Roundups — there's plenty more where this came from. Happy summer. 🌞🍉🎉
Frequently Asked Questions
How far in advance can I make these summer party recipes?
Most of these recipes are designed with make-ahead in mind. Dips, slaws, pasta salads, and skewers can typically be prepped the night before and refrigerated. I'd save anything grilled or fried for day-of, but the cold and room-temperature dishes hold up beautifully overnight.
Which recipes on this list work best for a large crowd?
Any of the sheet pan, slow cooker, or big-batch cold salad recipes scale up really easily — just double the quantities. I'd lean toward the pasta salads, dips with chips, and anything skewered when I'm feeding more than twenty people. They're low-maintenance once the prep is done and guests can serve themselves.
What are good no-cook options for summer parties?
There are quite a few no-cook or minimal-cook options scattered through this list — think cold dips, fruit skewers, wraps, and chilled pasta salads. On really hot days I lean hard into the no-cook category because the last thing anyone wants is a hot kitchen in July. Most of the cold recipes just need a quick assembly and time in the fridge.
Can I serve these recipes indoors if the weather doesn't cooperate?
Absolutely. Every single recipe on this list works just as well inside — the outdoor setting is just a bonus. I've made most of these for indoor gatherings too and they land exactly the same. Don't let a cloudy sky derail your party plans.
Are any of these recipes kid-friendly?
Most of them, honestly. The finger foods, skewers, sliders, and cold pasta salads tend to be the biggest hits with kids in my experience — mine included. I'd skip anything with a heavy spice level for the little ones, but the majority of this list is mild enough that kids will eat it without complaint.
Related Recipes
Share This Post!
If this list gave you ideas for your next backyard gathering, save it to Pinterest or share it with a friend who loves to host — it might be exactly what they needed. 🌞🍉
View More Recipes here Recipe Roundups





Comments
No Comments