
Strawberry season in our house is a whole event. The moment I spot those deep red, actually-fragrant punnets at the market — not the pale, flavorless ones from February, but the real ones — I buy too many and then spend the next three days figuring out what to do with all of them. That's honestly how this list came together. Not from research. From a kitchen full of fresh strawberries and a family that was very willing to eat their way through my experiments.
A good strawberry dessert doesn't need to be complicated — it needs to let the fruit do the work. That's the one rule I kept coming back to when I was testing these. If a recipe drowns out the strawberry with too much sugar or too many competing flavors, it's off the list. The ones that made it here are either beautifully simple or clever enough that the strawberry stays front and center. If you're looking for ways to use up a seasonal haul, you might also want to check out my favorite fresh strawberry recipes for savory ideas too.
This list covers a lot of ground on purpose. There are no-bake options for the days it's too hot to turn the oven on, frozen desserts, baked classics, and a few things that look impressive but genuinely aren't hard to pull off. You'll find everything from a dead-simple three-ingredient sorbet to a proper strawberry basil pavlova for when you want to put something beautiful on the table. If you love fruity summer desserts in general, my summer dessert roundup and my no-bake desserts collection are worth a look too.
Here are the 23 strawberry desserts I keep coming back to — pick whichever one matches your mood, your time, and how many strawberries you've got sitting on the counter.
Easy Strawberry Dessert Recipes Worth Making
23. Strawberry Shortcake with Whipped Cream
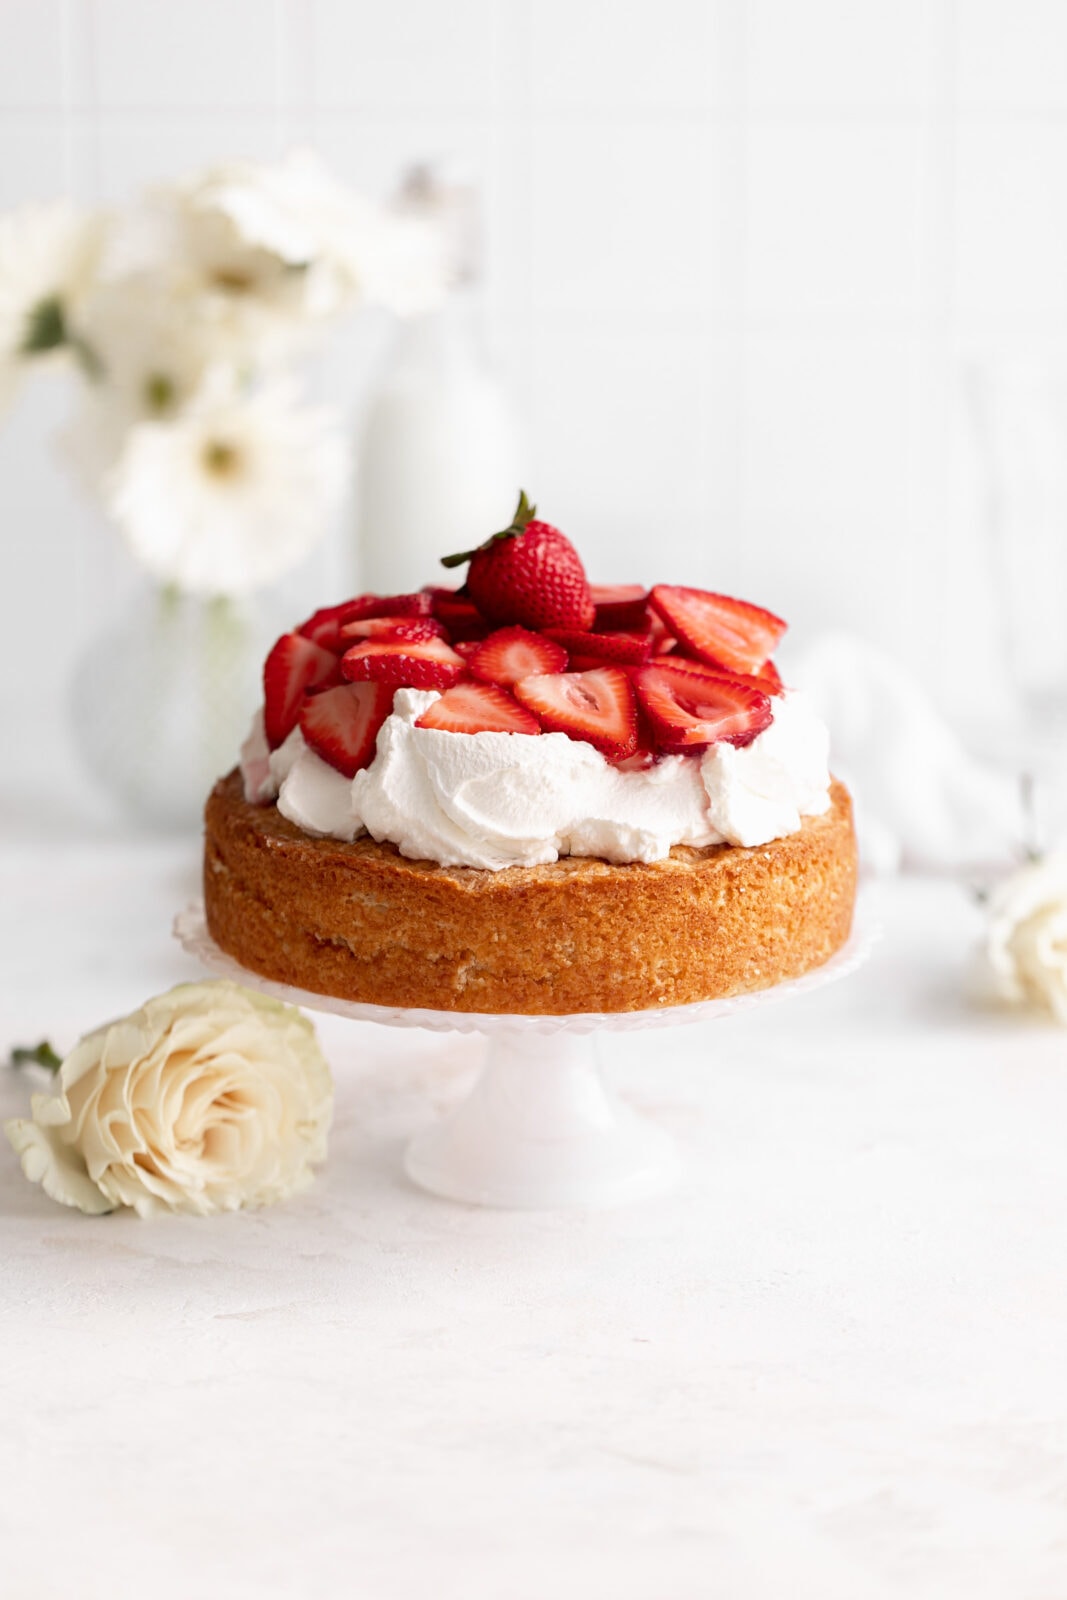
Few desserts are as unapologetically summer as strawberry shortcake — tender, buttery biscuits split open and piled high with juicy macerated strawberries and cloud-like whipped cream. My version skips the store-bought sponge rounds completely. A proper shortcake biscuit should be slightly crumbly, golden on the outside, and soft enough to soak up all those strawberry juices from the bottom up. I let the strawberries sit with sugar for at least 20 minutes before assembling — that's the step most people rush, and it makes a massive difference. The syrup that forms is honestly the best part of the whole thing.
Ingredients
- 2 cups all-purpose flour
- 2 tablespoons granulated sugar, plus ¼ cup for macerating strawberries
- 1 tablespoon baking powder
- ½ teaspoon salt
- 6 tablespoons cold unsalted butter, cubed
- ¾ cup cold heavy cream, plus more for brushing
- 1 lb fresh strawberries, hulled and sliced
- 1 cup heavy whipping cream
- 2 tablespoons powdered sugar
- 1 teaspoon pure vanilla extract
Instructions
- Preheat oven to 425°F. Combine flour, 2 tablespoons sugar, baking powder, and salt in a bowl. Cut in cold butter using a pastry cutter or your fingers until the mixture looks like coarse crumbs — visible butter chunks are fine and actually what you want.
- Pour in ¾ cup cold heavy cream and stir just until the dough comes together. Don't overwork it or your biscuits will be tough.
- Turn dough onto a lightly floured surface, pat to about 1-inch thickness, and cut into rounds using a 3-inch biscuit cutter. Place on a parchment-lined baking sheet, brush tops with a little cream, and bake 13–15 minutes until golden.
- While biscuits bake, toss sliced strawberries with ¼ cup granulated sugar and let them sit at room temperature. They'll release their juices and become glossy and syrupy.
- Beat heavy whipping cream with powdered sugar and vanilla until soft peaks form. Don't go past medium peaks — you want it billowy, not stiff.
- Split warm or cooled biscuits, spoon strawberries and their juices over the bottom half, add a generous dollop of whipped cream, and place the top half slightly askew. Serve immediately.
22. No-Bake Strawberry Cheesecake Bars
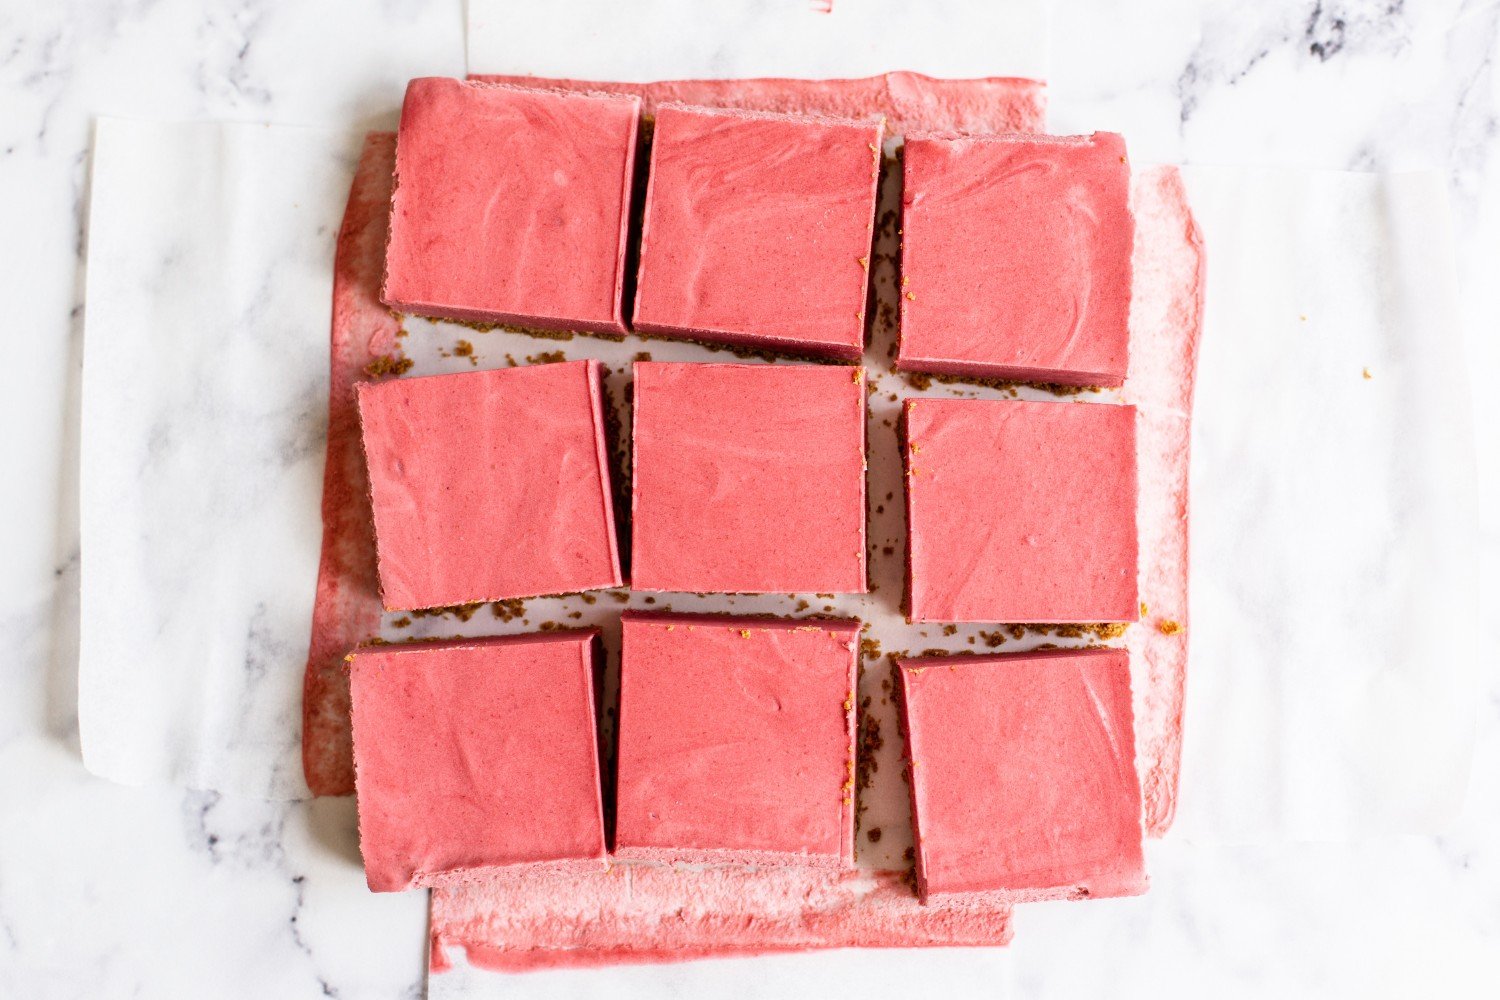
When the summer heat makes turning on the oven feel like a punishment, no-bake bars are the answer. These strawberry cheesecake bars have a buttery graham cracker crust, a thick and creamy cream cheese filling, and a bright strawberry topping that sets firm enough to slice cleanly. The key is making sure your cream cheese is fully at room temperature before you mix — cold cream cheese gives you lumps no matter how long you beat it, and I learned that the hard way more than once. These need a solid 4 hours in the fridge, so I usually make them the night before. Zainab requests these for almost every gathering we go to in summer.
Ingredients
- 2 cups graham cracker crumbs (about 14 full crackers)
- 6 tablespoons unsalted butter, melted
- 3 tablespoons granulated sugar
- 16 oz cream cheese, fully at room temperature
- ¾ cup powdered sugar
- 1 teaspoon vanilla extract
- 1 cup heavy whipping cream, whipped to stiff peaks
- 1½ cups fresh strawberries, hulled and diced
- 3 tablespoons strawberry jam
- 1 teaspoon lemon juice
Instructions
- Line an 8x8-inch baking pan with parchment paper, leaving overhang on two sides for easy lifting. Mix graham cracker crumbs, melted butter, and granulated sugar until the mixture resembles wet sand. Press firmly into the bottom of the pan and refrigerate while you make the filling.
- Beat room-temperature cream cheese with powdered sugar and vanilla until completely smooth — scrape the sides of the bowl at least twice. Fold in the whipped cream in two additions, using a spatula to keep it light and airy.
- Spread the cheesecake filling evenly over the chilled crust. Smooth the top as flat as you can get it.
- Stir together the diced strawberries, strawberry jam, and lemon juice in a small bowl. Spoon the strawberry mixture evenly over the top of the cheesecake layer.
- Refrigerate for at least 4 hours, or overnight. Lift the bars out using the parchment overhang, slice into squares with a sharp knife wiped clean between cuts, and serve cold.
21. Frozen Strawberry Lemonade Pie
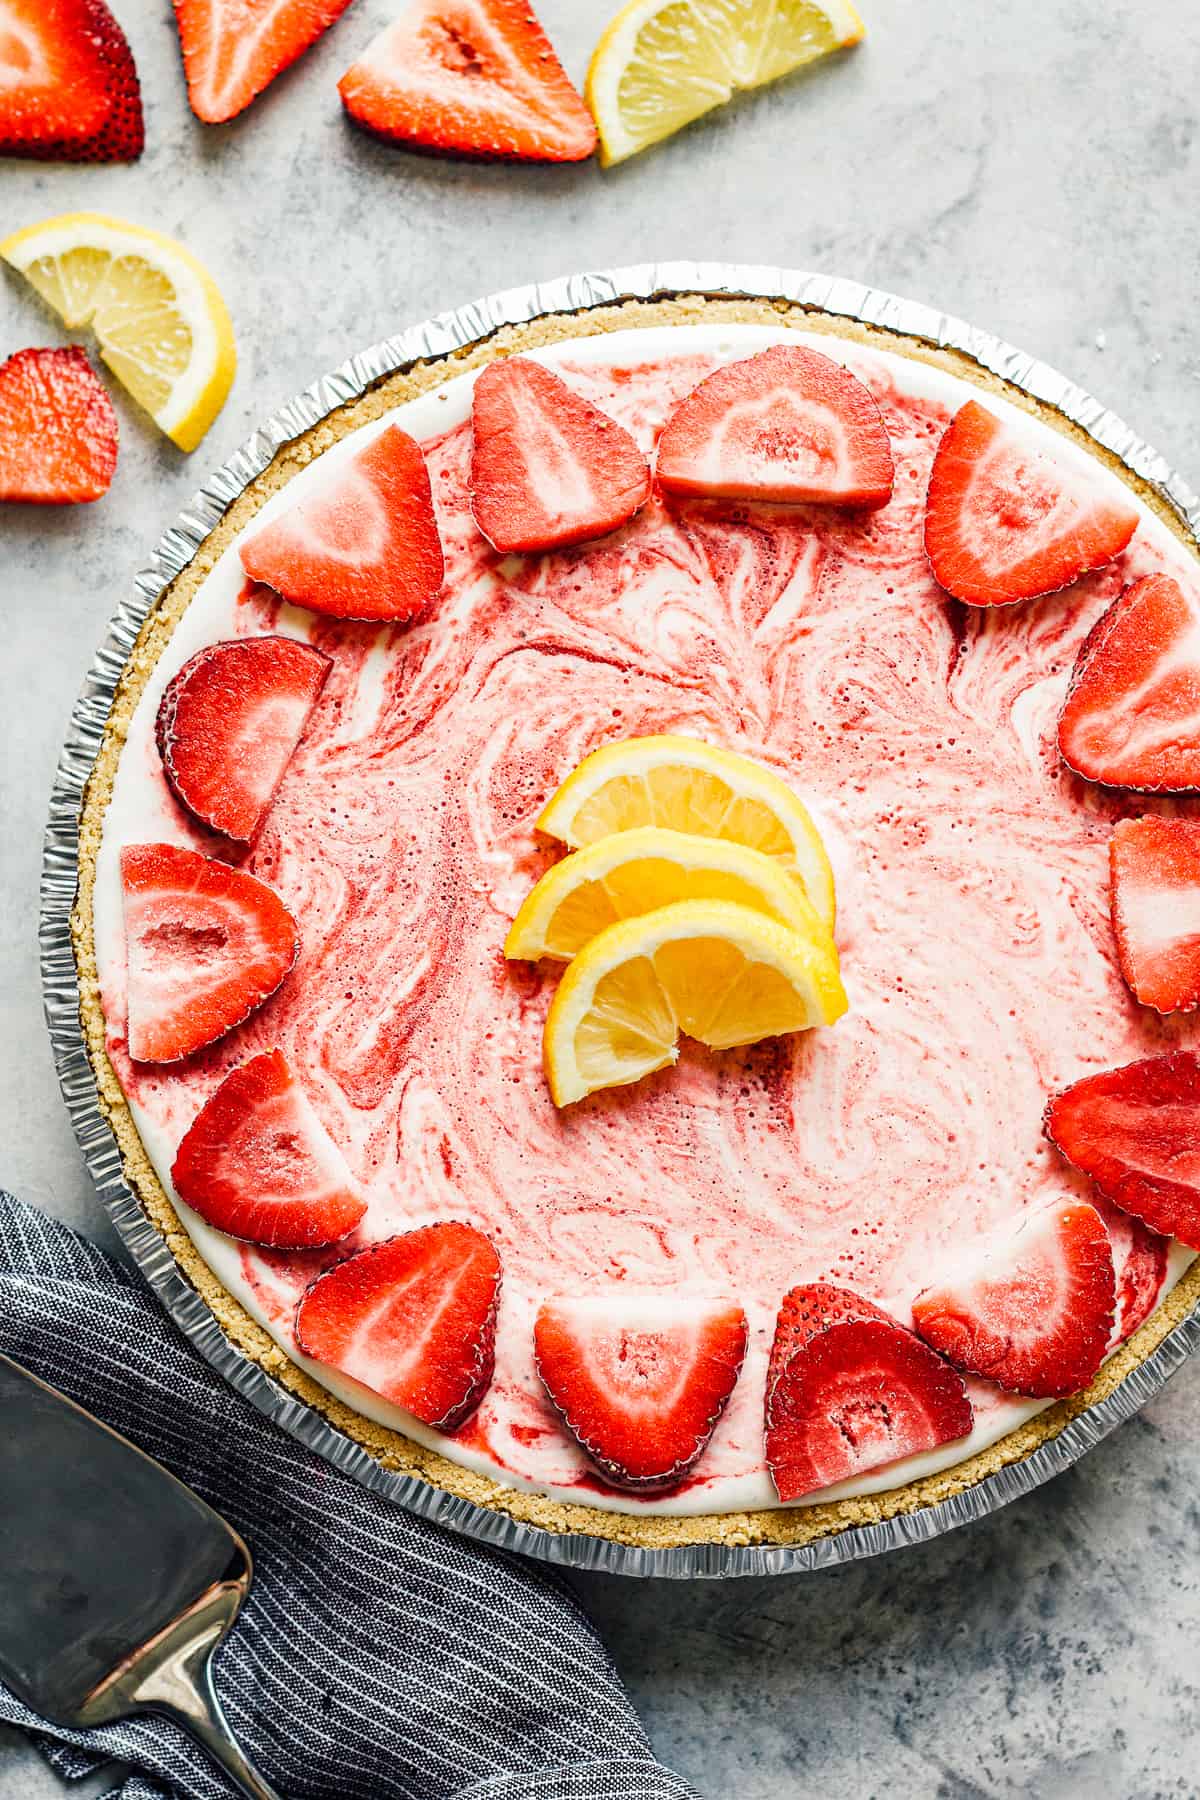
Somewhere between a pie and an ice cream cake, this frozen strawberry lemonade pie is one of those desserts that looks way more impressive than the effort it takes. The filling is tangy, creamy, and bright — real lemon juice and fresh strawberries do the heavy lifting here, no artificial flavor needed. A graham cracker or pretzel crust both work well (I prefer pretzel for the salty contrast), and the whole thing just needs a few hours in the freezer to firm up. Pull it out about 10 minutes before slicing so it cuts cleanly without cracking. This is my go-to when we have people over in July and I don't want to spend the whole day in the kitchen.
Ingredients
- 1½ cups pretzel crumbs (or graham cracker crumbs)
- 5 tablespoons unsalted butter, melted
- 2 tablespoons brown sugar
- 8 oz cream cheese, softened
- 1 cup fresh strawberries, hulled and pureed (about 1½ cups whole berries)
- ⅓ cup fresh lemon juice (about 2–3 lemons)
- 1 tablespoon lemon zest
- ¾ cup powdered sugar
- 8 oz Cool Whip or 2 cups homemade whipped cream, stiff peaks
- Sliced fresh strawberries for topping
Instructions
- Mix pretzel crumbs, melted butter, and brown sugar. Press firmly into the bottom and up the sides of a 9-inch pie plate. Freeze for 15 minutes while you prepare the filling.
- Beat softened cream cheese until smooth. Add strawberry puree, lemon juice, lemon zest, and powdered sugar, and beat until fully combined and silky.
- Fold in the Cool Whip or whipped cream gently until no white streaks remain. The mixture should be light pink and fluffy.
- Pour filling into the frozen crust and smooth the top. Cover loosely with plastic wrap and freeze for at least 4 hours, or until completely firm.
- Remove from the freezer 8–10 minutes before serving. Top with fresh sliced strawberries, slice with a sharp knife, and serve immediately.
20. Strawberry Cream Cheese Danish
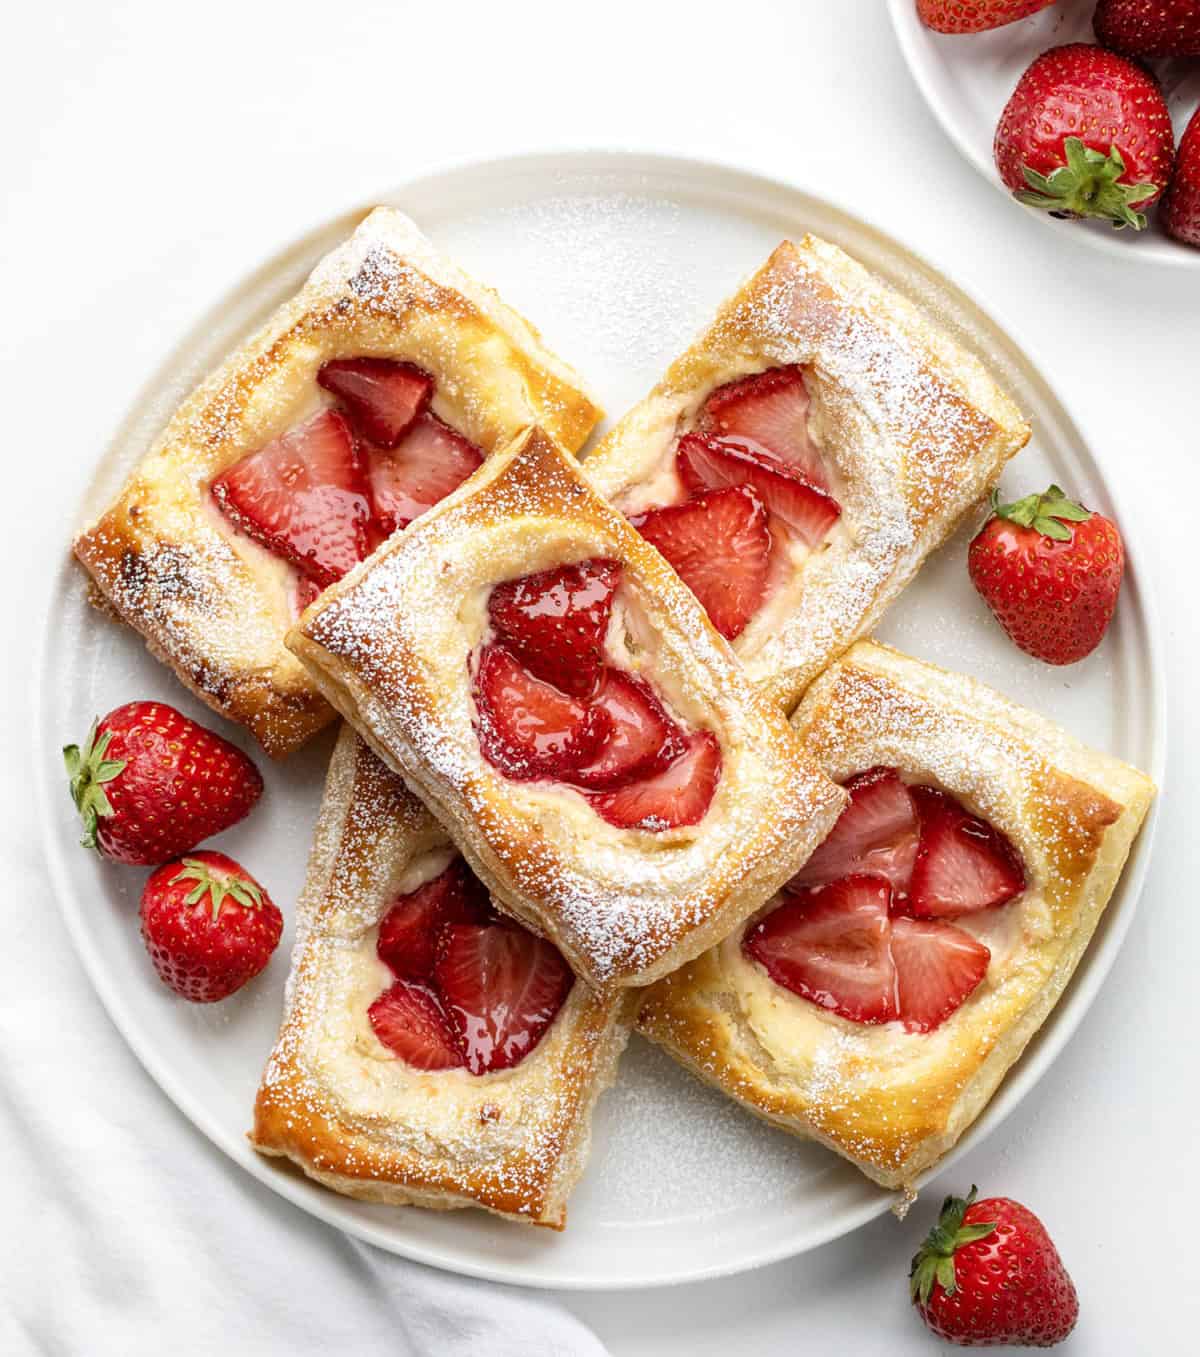
Store-bought puff pastry is one of those ingredients that makes you look like you spent hours in the kitchen when you really didn't. These strawberry cream cheese danishes come together in under 45 minutes total, and the result is flaky, golden pastry wrapped around a sweet cream cheese center with fresh strawberries on top. The cream cheese filling gets a little lemon zest stirred in, which keeps it from being overly sweet and pairs beautifully with the fruit. I've made these as a weekend breakfast treat and as a dessert for guests — they work for both. Pepperidge Farm puff pastry sheets from the freezer section are exactly what you need here.
Ingredients
- 1 sheet frozen puff pastry, thawed (such as Pepperidge Farm)
- 6 oz cream cheese, softened
- 3 tablespoons granulated sugar
- 1 teaspoon vanilla extract
- 1 teaspoon lemon zest
- 1 cup fresh strawberries, hulled and sliced thin
- 1 egg, beaten (for egg wash)
- 2 tablespoons powdered sugar mixed with 1 tablespoon milk (for glaze)
Instructions
- Preheat oven to 400°F. Line a baking sheet with parchment paper. Unfold the thawed puff pastry sheet on a lightly floured surface and cut into 6 equal rectangles.
- Mix softened cream cheese with granulated sugar, vanilla, and lemon zest until smooth and creamy.
- Score a border about ½ inch from the edge of each pastry rectangle using a knife — don't cut all the way through. This creates the raised edge that holds the filling in. Brush the border with beaten egg.
- Spoon a heaping tablespoon of cream cheese filling into the center of each rectangle and spread within the scored border. Lay 4–5 strawberry slices over the cream cheese.
- Bake for 18–22 minutes until the pastry is deeply golden and puffed around the edges. Cool on the pan for 5 minutes, then drizzle with the powdered sugar glaze and serve warm or at room temperature.
19. Grilled Strawberries with Brown Sugar
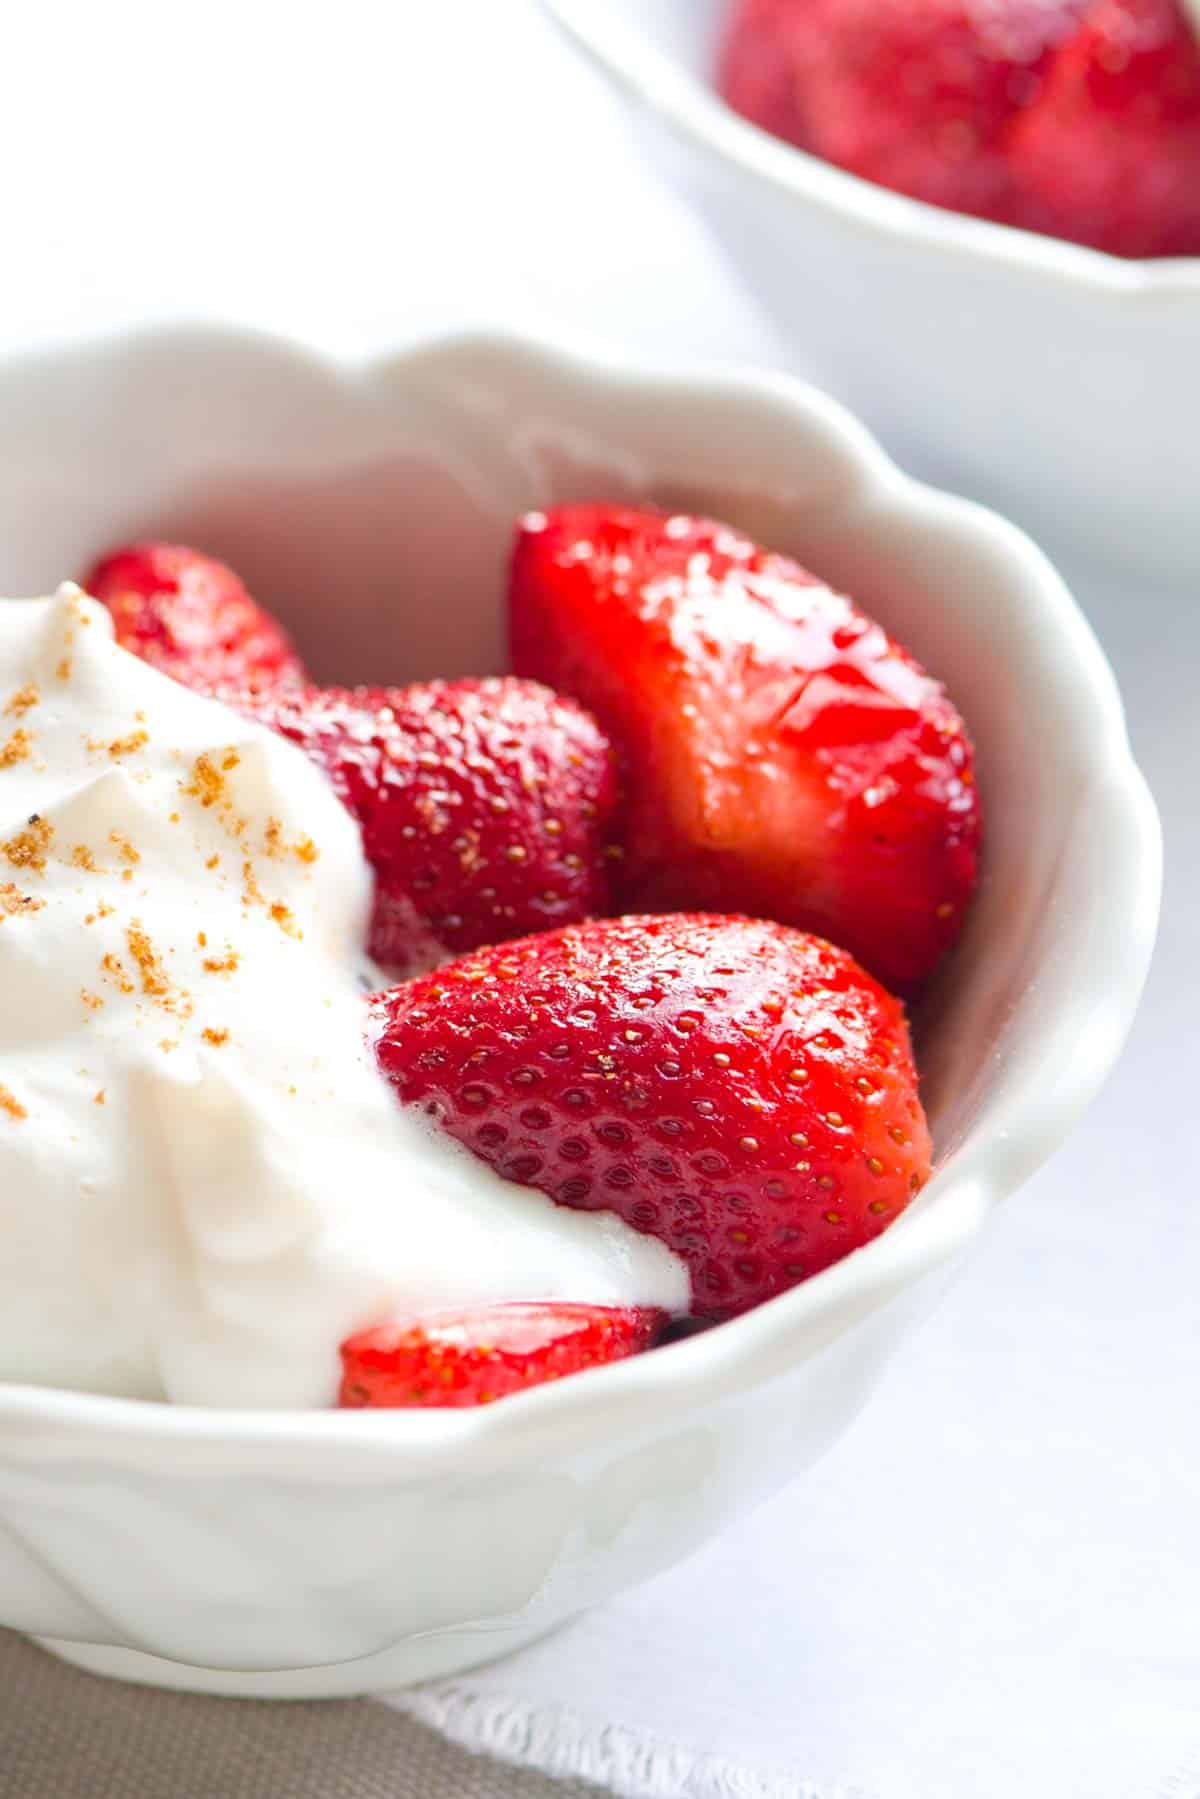
Heat does something remarkable to strawberries — it concentrates their flavor, caramelizes their natural sugars, and gives them a jammy, almost wine-like depth that raw berries just don't have. Grilling them with a little brown sugar takes about 6 minutes and turns an ordinary bowl of fruit into a proper dessert. Serve them over vanilla ice cream, pound cake, or thick Greek yogurt, and you have something genuinely special with almost no effort. If you don't have an outdoor grill going, a cast iron grill pan on the stovetop works perfectly — I use that route most weeknights. The key is keeping the strawberries whole or halved at most, so they hold their shape on the grates.
Ingredients
- 1 lb fresh strawberries, hulled and halved if large
- 2 tablespoons brown sugar, packed
- 1 tablespoon unsalted butter, melted
- ½ teaspoon balsamic vinegar (optional but worth it)
- Pinch of salt
- Vanilla ice cream or pound cake, for serving
- Fresh mint leaves for garnish (optional)
Instructions
- Preheat a grill or grill pan to medium-high heat. If using an outdoor grill, thread strawberries onto skewers to keep them from falling through the grates. If using a grill pan, you can place them directly cut-side down.
- Toss strawberries gently with melted butter, brown sugar, balsamic vinegar if using, and a pinch of salt. Let them sit for 5 minutes so the sugar begins to dissolve.
- Place strawberries cut-side down on the grill. Cook for 2–3 minutes without moving — you want those grill marks and caramelization. Flip and cook another 2 minutes until softened and slightly charred at the edges.
- Remove from heat. The strawberries will release a caramel-like syrup — spoon every bit of it over your serving. Serve immediately over ice cream, pound cake, or yogurt, garnished with fresh mint if you have it.
18. Strawberry Icebox Cake
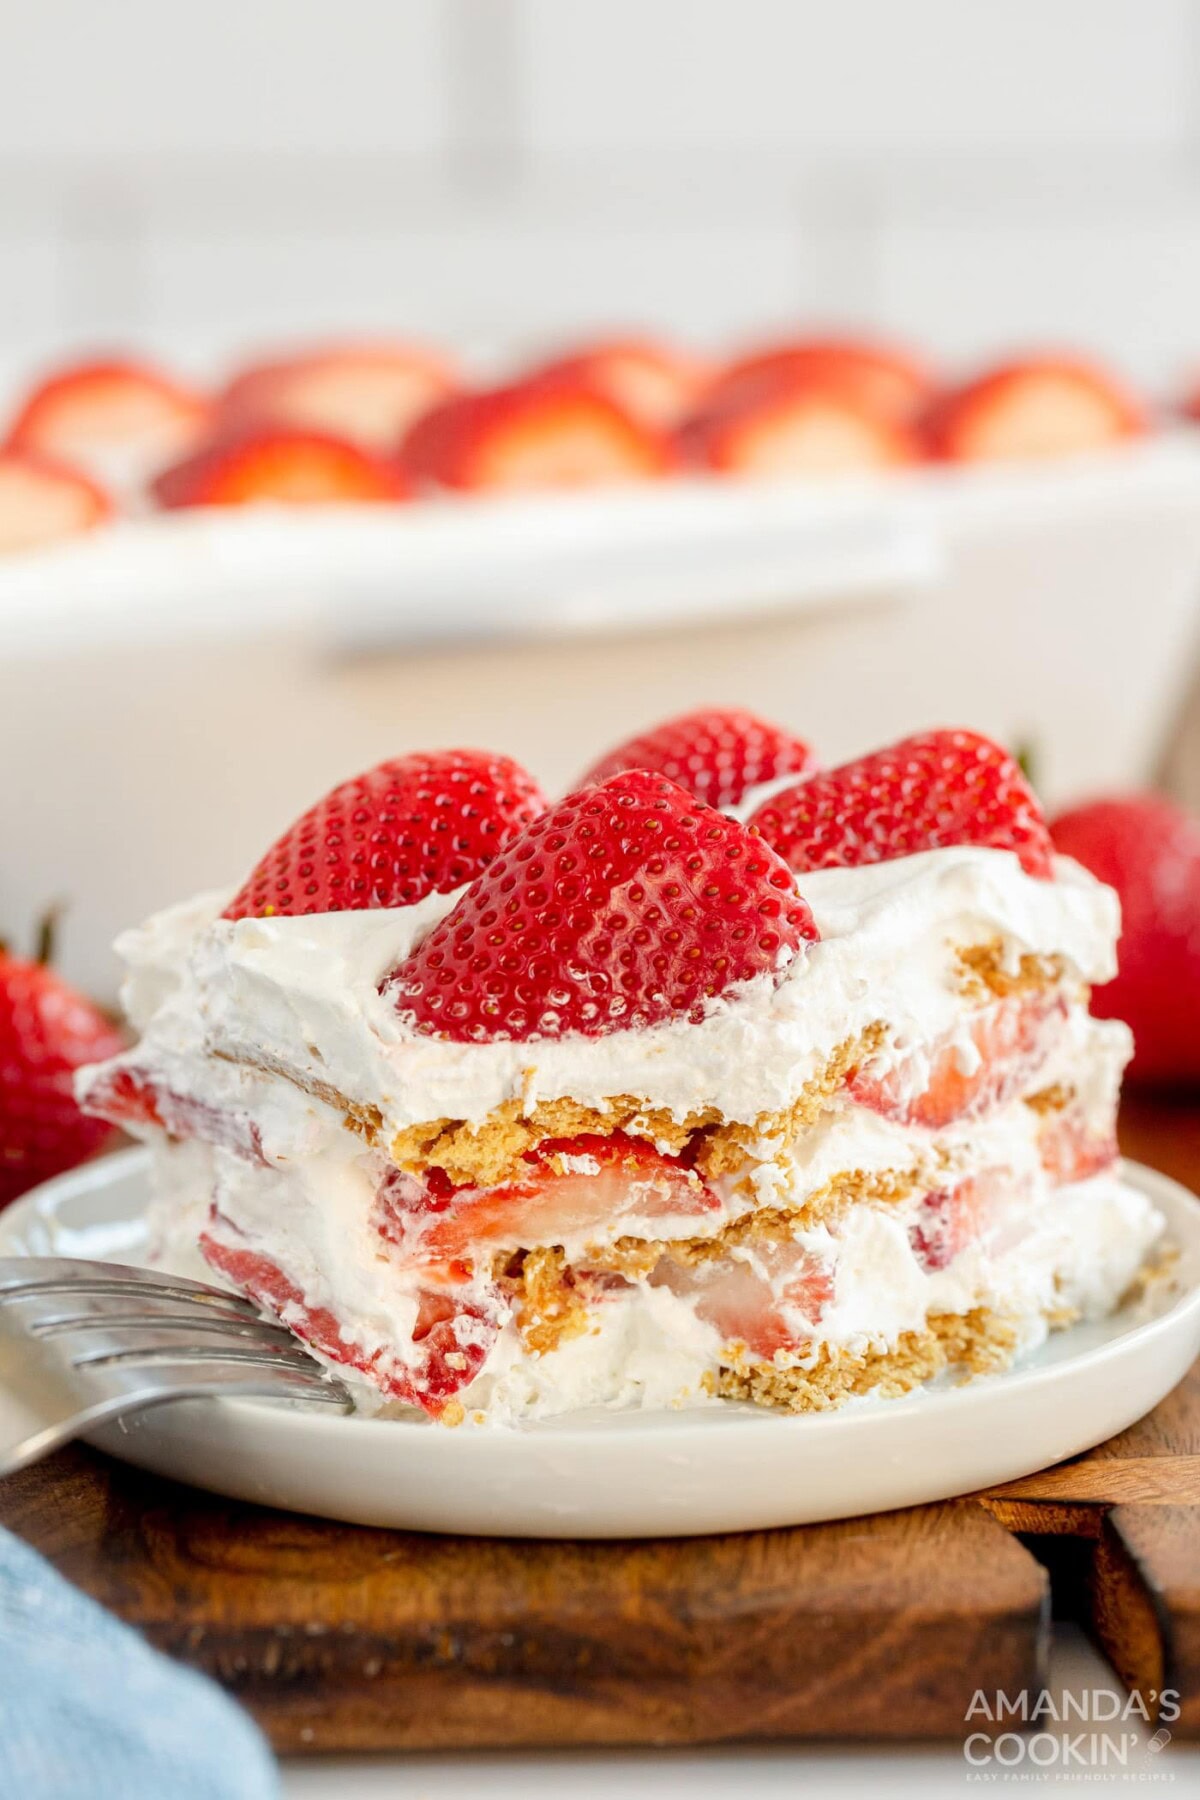
An icebox cake is one of those old-fashioned no-bake desserts that still works perfectly because the concept is genuinely clever — layers of whipped cream and cookies sit in the fridge overnight, and the cookies absorb moisture and soften into something that tastes remarkably like cake layers. With fresh strawberries added between each layer, this version is bright and creamy and feels right for summer. I use Nabisco Famous Chocolate Wafers for the deepest contrast, but graham crackers work too if that's what you have. Make a double batch of whipped cream — I always run short the first time around. The whole thing needs at least 6 hours in the fridge, so overnight is ideal.
Ingredients
- 2 cups heavy whipping cream
- 3 tablespoons powdered sugar
- 1 teaspoon vanilla extract
- 1 package (9 oz) Nabisco Famous Chocolate Wafers (or 2 sleeves graham crackers)
- 1½ lbs fresh strawberries, hulled and sliced thin
- 2 tablespoons granulated sugar (for macerating strawberries)
Instructions
- Toss sliced strawberries with granulated sugar and let sit 15 minutes until juicy. Beat heavy cream with powdered sugar and vanilla to stiff peaks.
- Spread a thin layer of whipped cream on the bottom of a 9x13-inch dish or a loaf pan. This keeps the first layer of cookies from sliding.
- Layer cookies in a single layer over the cream, then spread a generous layer of whipped cream over the cookies, then a layer of macerated strawberries. Repeat — cookies, cream, strawberries — until you run out of ingredients, finishing with a thick layer of whipped cream on top.
- Cover tightly with plastic wrap and refrigerate for at least 6 hours, or overnight. The cookies will soften completely into a cake-like texture.
- Before serving, decorate the top with a few fresh strawberry slices. Scoop and serve with a large spoon — it won't cut into neat slices, and that's perfectly fine.
17. Fresh Strawberry Galette with Vanilla Custard

A galette is basically a pie for people who don't want to worry about getting the crust perfect — and that's exactly why I love it. You roll the dough into a rough circle, pile the fruit in the middle, fold the edges over, and bake. The imperfections are the point. Adding a thin layer of vanilla custard under the strawberries keeps the crust from going soggy and gives each bite a rich, creamy base that makes this feel more elevated than a simple fruit tart. The custard layer is just egg yolks, a little sugar, cream, and vanilla — it takes about 5 minutes to mix together. This is the kind of dessert that looks like you really tried even when you didn't stress over it at all.
Ingredients
- 1 store-bought refrigerated pie crust (or homemade single-crust pastry)
- 2 egg yolks
- 3 tablespoons granulated sugar, divided
- 2 tablespoons heavy cream
- ½ teaspoon vanilla extract
- 1 tablespoon cornstarch
- 1¼ lbs fresh strawberries, hulled and halved
- 1 tablespoon lemon juice
- 1 egg beaten with 1 tablespoon water (for egg wash)
- 1 tablespoon turbinado sugar for sprinkling
Instructions
- Preheat oven to 400°F. Line a baking sheet with parchment. Roll the pie crust into a rough 12-inch circle on the parchment — don't stress about it being neat.
- Whisk together egg yolks, 1½ tablespoons sugar, heavy cream, vanilla, and cornstarch until smooth. This is your custard layer.
- Spread the custard mixture over the center of the crust, leaving a 2-inch border all around.
- Toss strawberries with remaining 1½ tablespoons sugar and lemon juice. Arrange them over the custard layer, overlapping slightly.
- Fold the pastry border up and over the edge of the fruit, pleating as you go. Brush the folded crust with egg wash and sprinkle with turbinado sugar.
- Bake 35–40 minutes until the crust is deep golden and the strawberry juices are bubbling. Cool at least 20 minutes before slicing — the custard needs time to set up slightly.
16. Strawberry Pretzel Salad Dessert
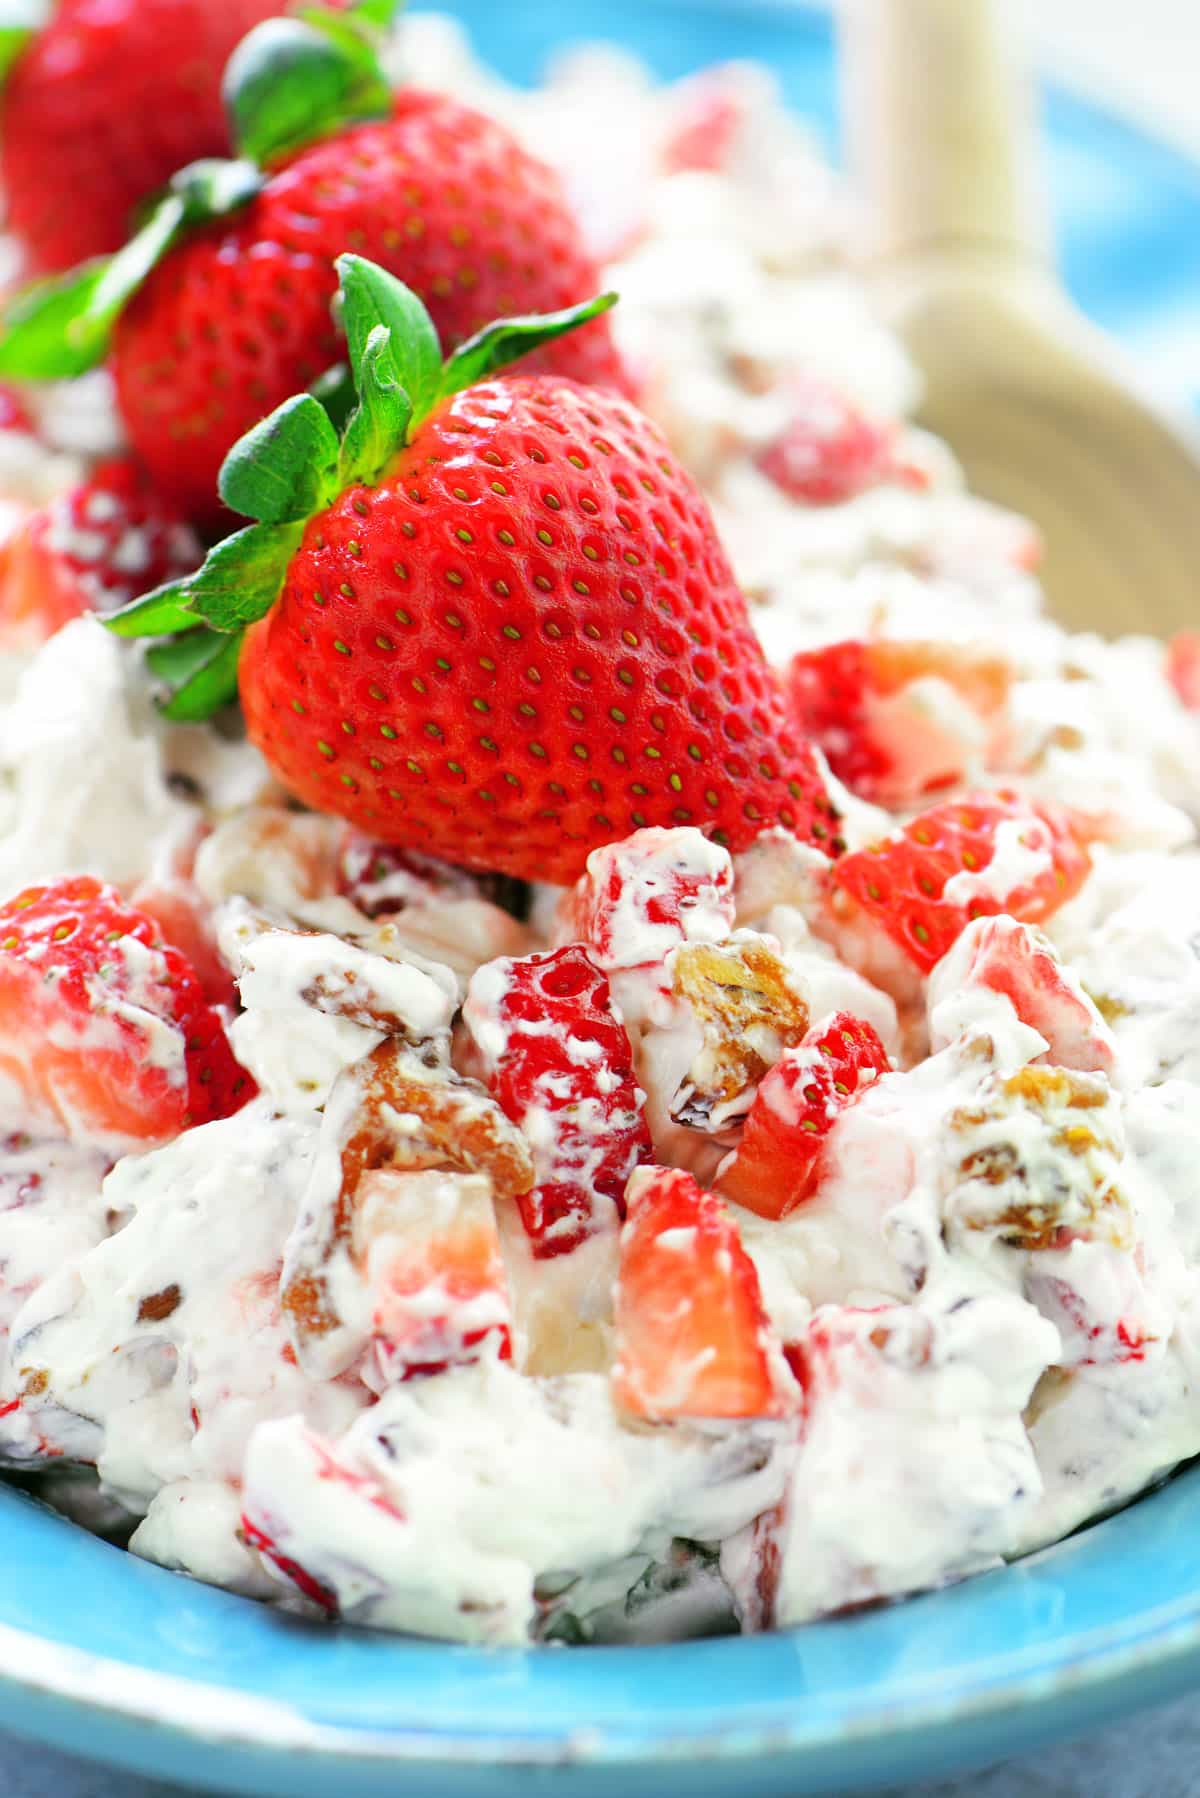
Despite being called a salad, this is absolutely a dessert — salty pretzel crust on the bottom, creamy sweetened cream cheese layer in the middle, and a strawberry gelatin topping that sets up glossy and bright. It's a classic American potluck dessert that I came across years ago and couldn't stop thinking about after the first bite. The sweet-salty combination is genuinely addictive. The only rule you can't break: let the cream cheese layer chill and set completely before you pour the gelatin on top. If you rush that step, the gelatin seeps through and the layers collapse — I did this the first time I made it, and the whole thing looked like a swamp. Beautiful layers are worth the wait.
Ingredients
- 2 cups crushed pretzels (not too fine — leave some texture)
- ¾ cup unsalted butter, melted
- 3 tablespoons granulated sugar
- 8 oz cream cheese, softened
- 1 cup powdered sugar
- 8 oz Cool Whip, thawed (or 2 cups whipped cream, stiff peaks)
- 1 package (6 oz) strawberry Jell-O
- 2 cups boiling water
- 2 cups fresh strawberries, hulled and sliced (or 16 oz frozen, thawed and drained)
Instructions
- Preheat oven to 350°F. Mix crushed pretzels, melted butter, and granulated sugar. Press firmly into the bottom of a 9x13-inch baking dish. Bake 10 minutes until set. Cool completely before adding the next layer.
- Beat softened cream cheese with powdered sugar until smooth. Fold in Cool Whip until fully combined and fluffy. Spread this layer evenly over the completely cooled pretzel crust, making sure it reaches all the edges to seal the crust — this barrier prevents the gelatin from soaking through.
- Refrigerate the cream cheese layer for at least 1 hour until firm.
- Dissolve strawberry Jell-O in 2 cups boiling water, stirring for 2 minutes. Stir in sliced strawberries. Let the mixture cool at room temperature for 30 minutes — it should be cool but not yet set.
- Gently pour the cooled strawberry gelatin over the set cream cheese layer. Refrigerate for at least 3 hours until the gelatin is fully firm. Slice into squares and serve cold.
15. Blender Strawberry Sorbet Three Ingredients
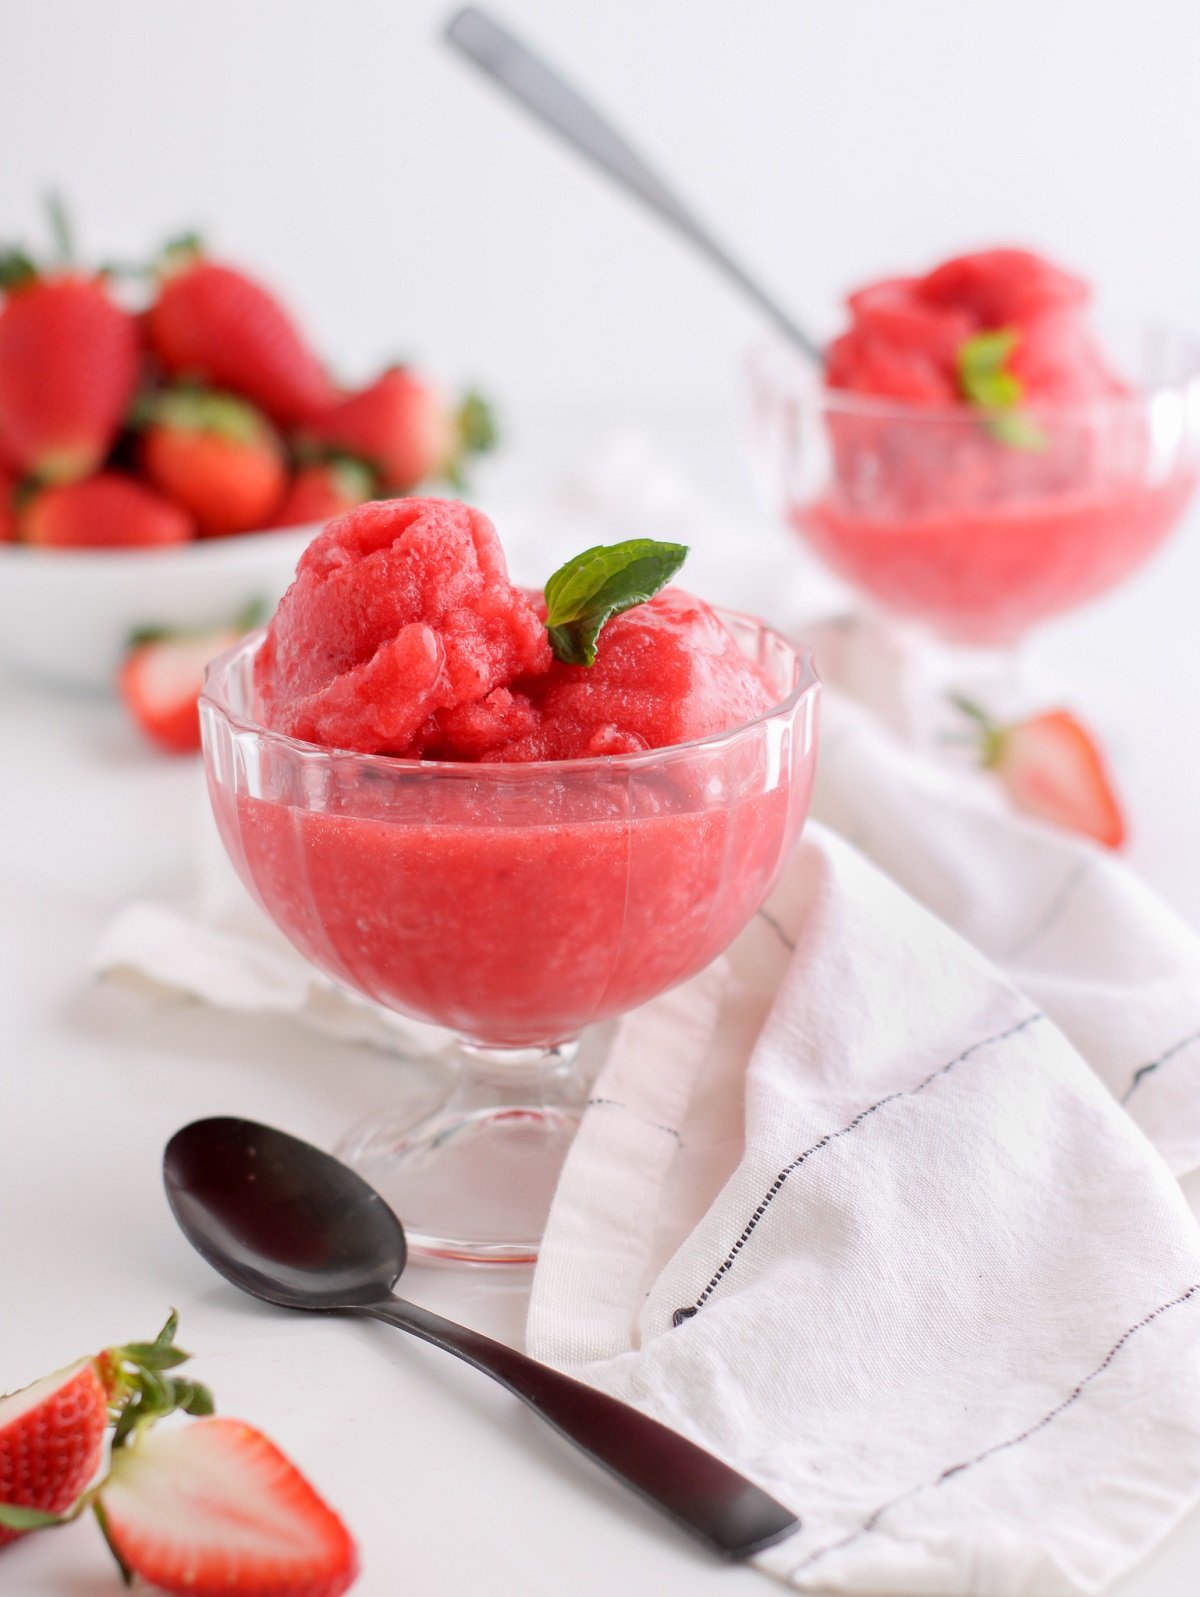
Three ingredients, a blender, and frozen strawberries you probably already have in the back of your freezer — that's the whole recipe. No ice cream machine, no churning, no special equipment. I make a double batch because Saad and Zainab go through it embarrassingly fast on hot days, and the second batch is always gone before I've even cleaned up the blender. The texture lands somewhere between a granita and a proper sorbet — a little icy, very bright, genuinely refreshing. If your strawberries are on the tart side, add the honey gradually and taste as you go.
Ingredients
- 4 cups frozen strawberries
- 3 tablespoons honey (or maple syrup)
- 2 tablespoons fresh lemon juice
Instructions
- Remove frozen strawberries from the freezer and let them sit at room temperature for 5 minutes — just enough to soften slightly so your blender doesn't strain.
- Add strawberries, honey, and lemon juice to a high-powered blender or food processor. Blend on high, stopping to scrape down the sides as needed, until completely smooth and creamy, about 2–3 minutes.
- Taste and adjust sweetness with more honey if needed.
- Serve immediately as a soft-serve consistency sorbet, or transfer to a loaf pan, cover tightly with plastic wrap, and freeze for 1–2 hours for a firmer scoop.
- If freezing food safely ahead, let it sit out for 5–10 minutes before scooping — it firms up quite solid overnight.
14. Strawberry Basil Pavlova
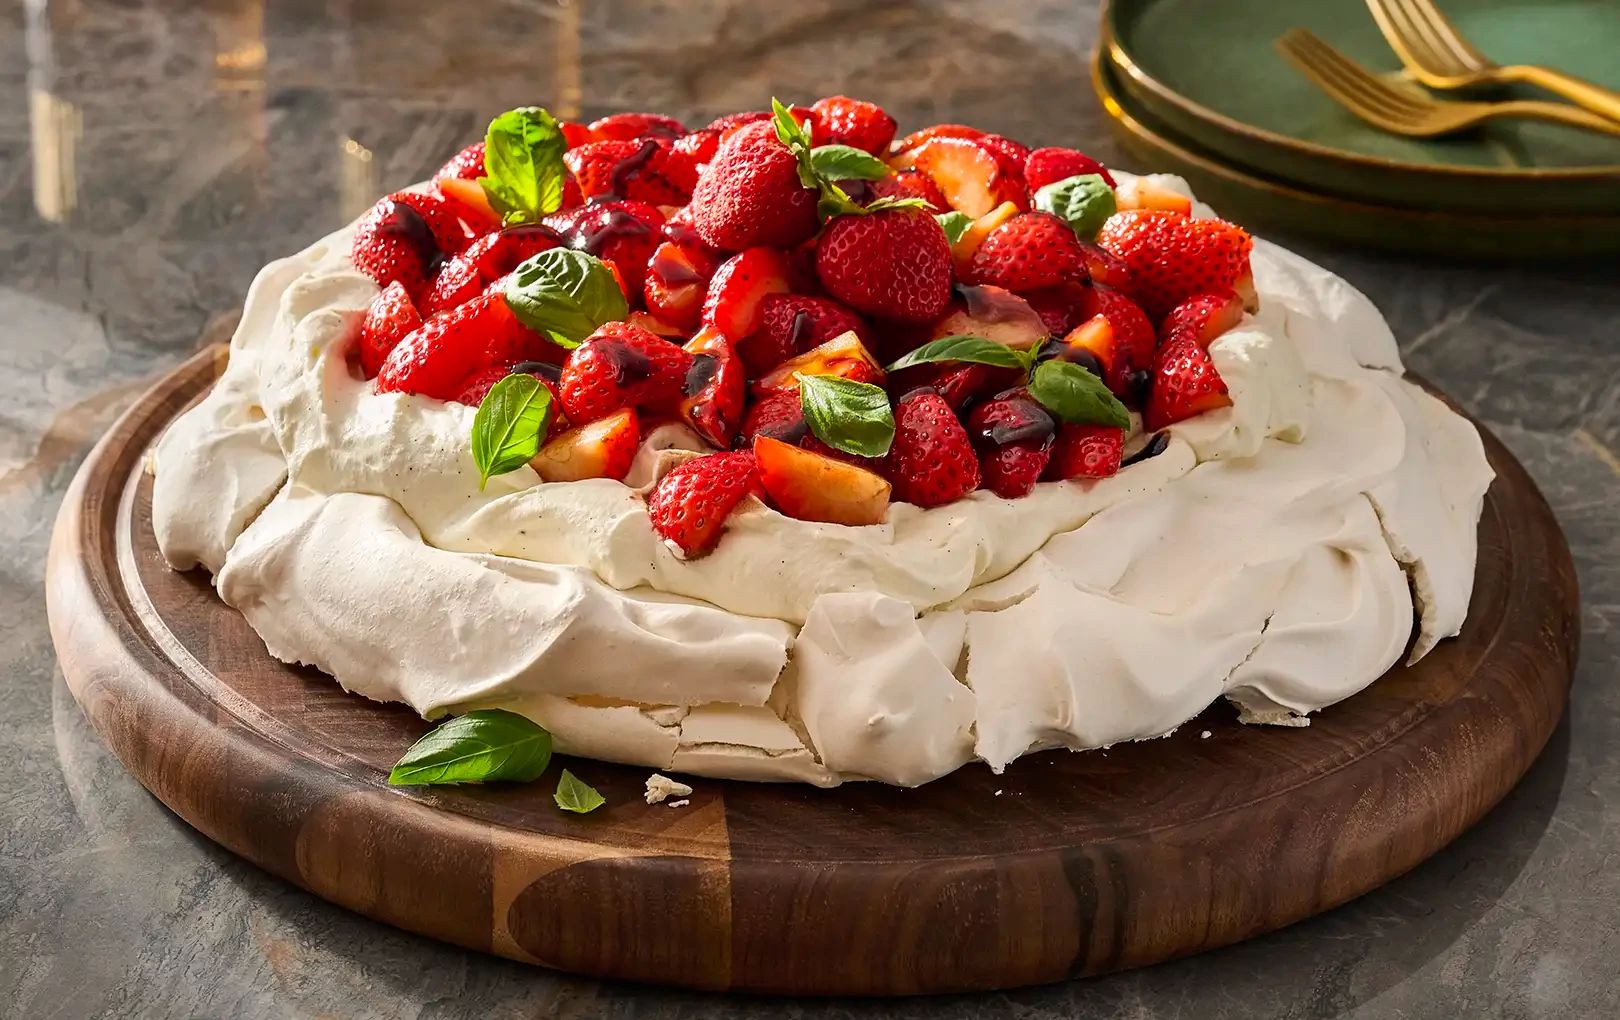
Pavlova looks like something you'd order at a fancy restaurant, but the method is actually forgiving once you understand one thing: don't rush the drying. The meringue shell goes into a low oven and then stays there as the oven cools — that slow process is what gives you that crackling crust with a marshmallowy center. The basil here isn't a gimmick; it genuinely lifts the strawberries and makes the whole dessert feel more interesting than plain whipped cream and fruit. I ruined my first pavlova by opening the oven too early and it collapsed completely — now I bake it overnight and walk away.
Ingredients
- 4 large egg whites, at room temperature
- 1 cup granulated sugar
- 1 teaspoon white vinegar
- 1 teaspoon cornstarch
- 1 teaspoon vanilla extract
- 1½ cups heavy whipping cream
- 2 tablespoons powdered sugar
- 2 cups fresh strawberries, hulled and sliced
- 8–10 fresh basil leaves, thinly sliced or torn
- 1 tablespoon balsamic glaze (optional but good)
Instructions
- Preheat oven to 300°F. Line a baking sheet with parchment paper and draw a 9-inch circle on it as a guide, then flip the paper over.
- In a very clean, dry bowl, beat egg whites with a hand mixer on medium speed until soft peaks form. Gradually add granulated sugar one tablespoon at a time, beating on high until stiff, glossy peaks form and the sugar is fully dissolved — rub a bit between your fingers; it should feel smooth, not gritty.
- Fold in vinegar, cornstarch, and vanilla gently with a spatula. Spread the meringue onto your parchment circle, building up the edges slightly to create a shallow well in the center.
- Place in the oven, immediately reduce temperature to 250°F, and bake for 75 minutes. Turn the oven off and leave the pavlova inside with the door closed for at least 2 hours or overnight. Do not open the oven early.
- Just before serving, whip the heavy cream with powdered sugar until soft peaks form. Spoon into the pavlova shell.
- Toss strawberries with basil and drizzle over the cream. Add a drizzle of balsamic glaze if using, and serve immediately.
13. White Chocolate Strawberry Bark
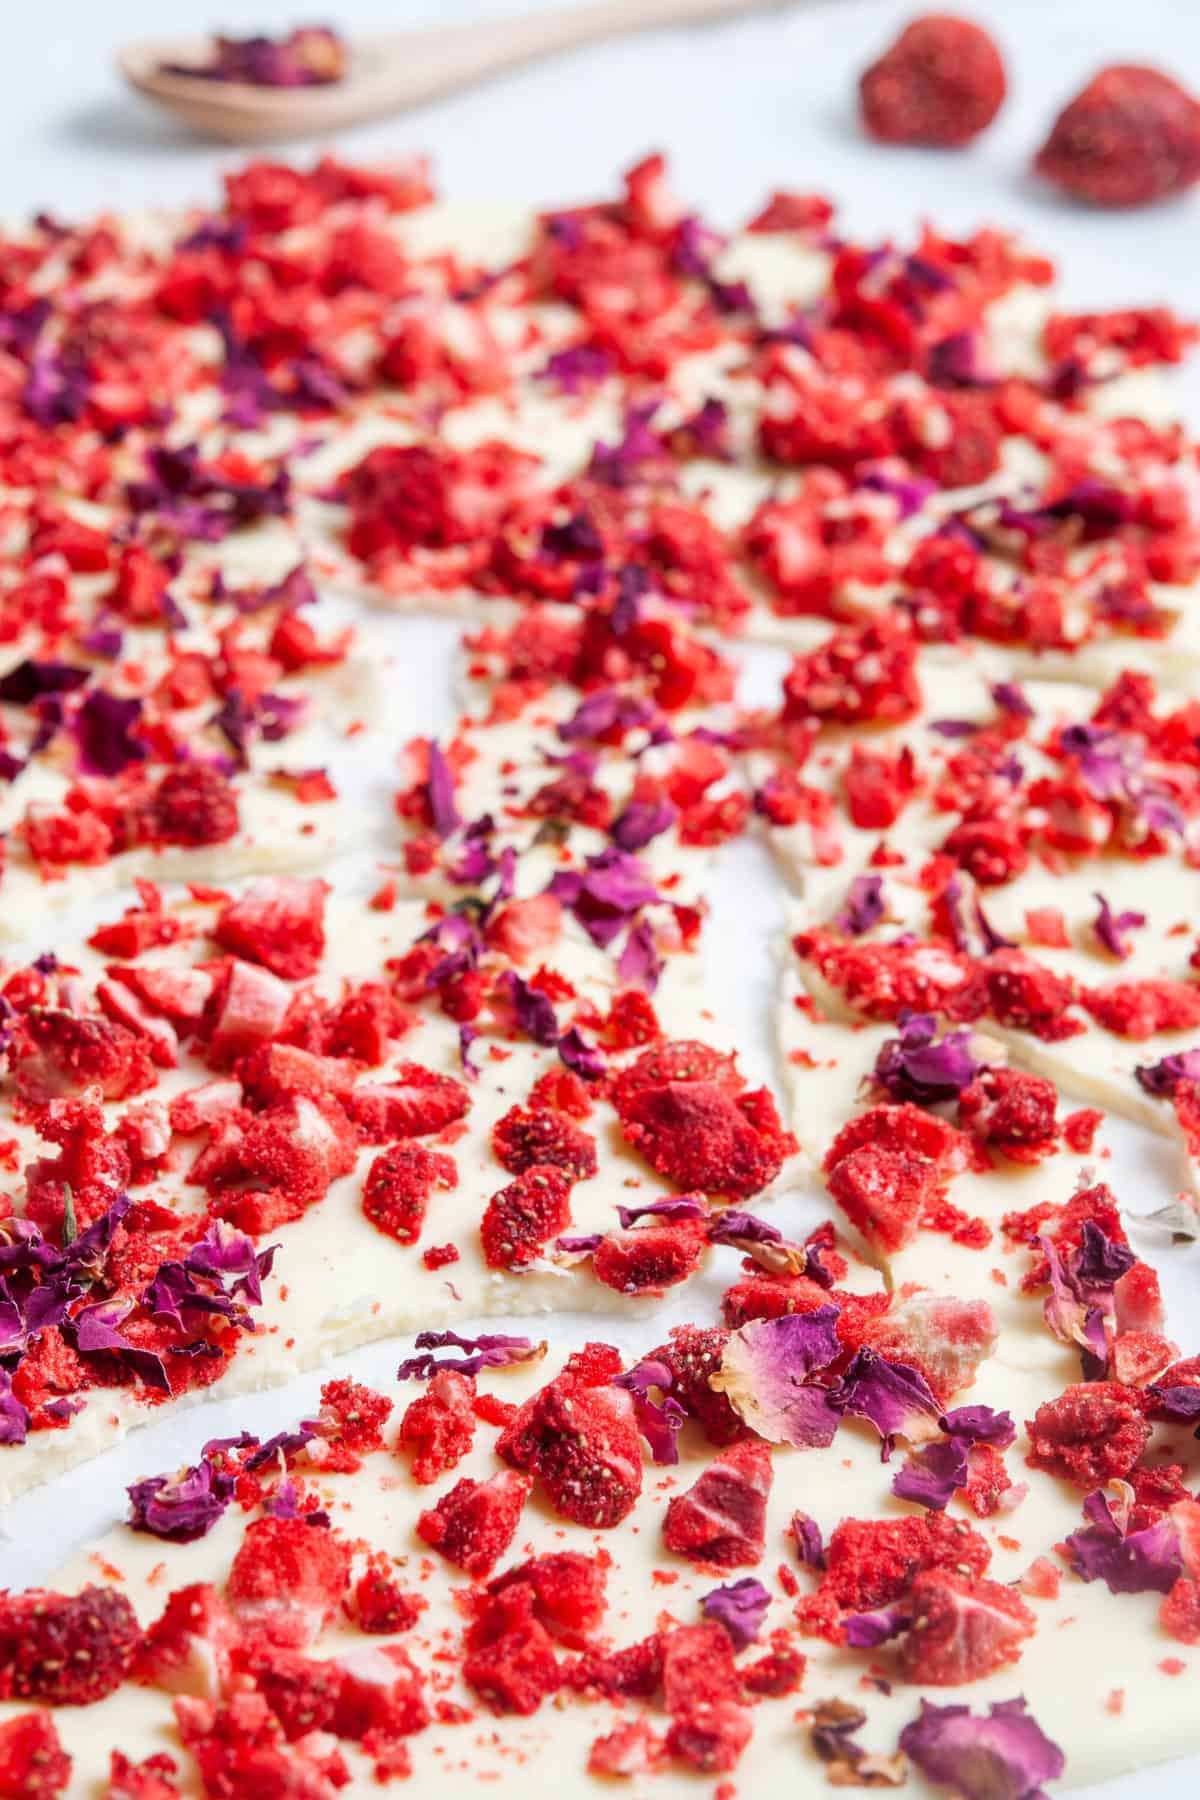
Bark is one of those recipes that sounds almost too simple, but the result looks genuinely impressive — especially if you get the toppings right. Freeze-dried strawberries are the key here rather than fresh ones; fresh fruit adds moisture that makes the chocolate seize and go soft as it sets. You'll find freeze-dried strawberries at Trader Joe's, Target, or even Walmart in the snack aisle. This is the kind of thing I make when I need a last-minute gift or a dessert plate that looks like I tried harder than I did. It sets in under an hour in the freezer and breaks into satisfying, jagged pieces.
Ingredients
- 12 oz good-quality white chocolate chips or a white chocolate bar, chopped
- 1 teaspoon coconut oil
- 1 cup freeze-dried strawberries, lightly crushed
- 2 tablespoons sprinkles or crushed pistachios (optional)
- Pinch of flaky sea salt
Instructions
- Line a large baking sheet with parchment paper and set aside.
- Melt white chocolate and coconut oil together in a microwave-safe bowl in 30-second intervals, stirring between each, until fully smooth. Don't overheat — white chocolate scorches faster than dark.
- Pour the melted chocolate onto the prepared baking sheet and spread into an even layer about ¼ inch thick using an offset spatula or the back of a spoon.
- Immediately scatter freeze-dried strawberries evenly over the top, pressing them in very gently. Add sprinkles or pistachios if using, then finish with a pinch of flaky sea salt.
- Transfer to the freezer for 30–45 minutes until completely set. Break into pieces by hand and store in an airtight container in the fridge for up to one week.
12. Strawberry Trifle with Angel Food Cake
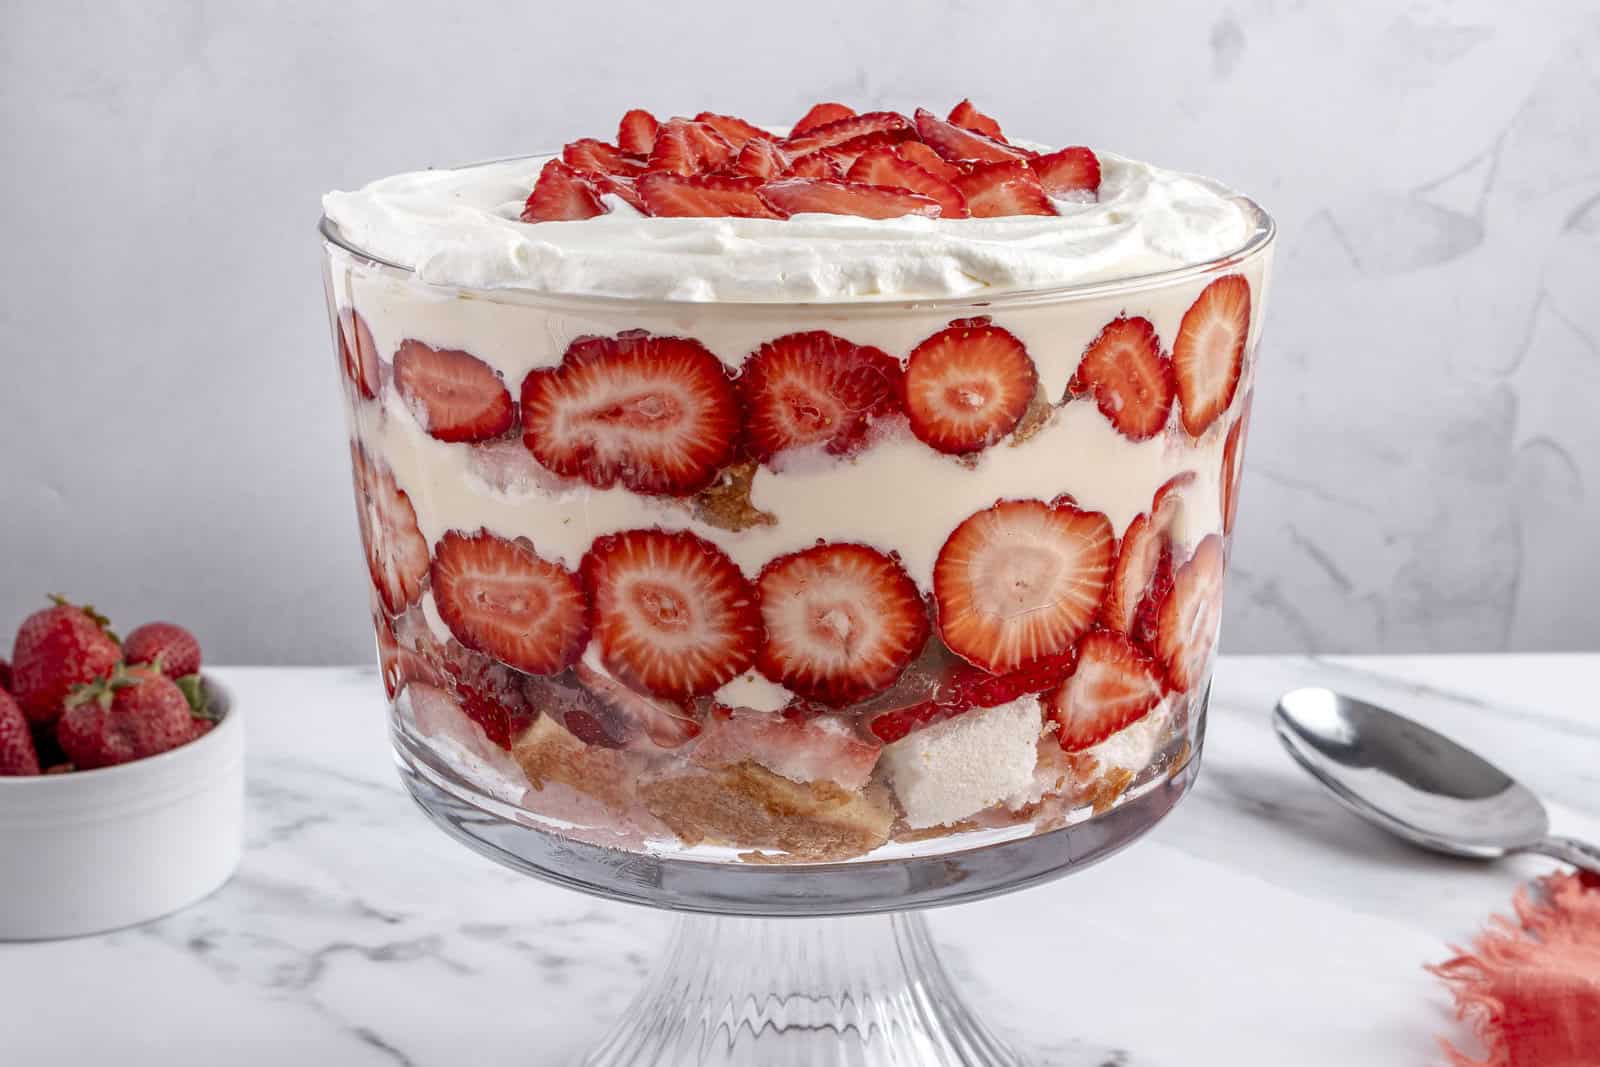
A trifle might be the most practical summer dessert there is — it uses store-bought angel food cake (no shame), comes together in about 20 minutes, and actually gets better after sitting in the fridge for a few hours. The layers soak together and turn into something that's more than the sum of its parts. Growing up in Pakistan, trifle was always the one Western dessert that showed up at family gatherings, layered in a big glass bowl, so there's some nostalgia in this one for me. Use a clear glass trifle bowl or even a large glass salad bowl so the layers show — that's half the appeal.
Ingredients
- 1 store-bought angel food cake (about 12 oz), cut into 1-inch cubes
- 2 lbs fresh strawberries, hulled and sliced
- 3 tablespoons granulated sugar
- 1 tablespoon lemon juice
- 2 cups heavy whipping cream
- 3 tablespoons powdered sugar
- 1 teaspoon vanilla extract
- One 8 oz block cream cheese, softened (optional, for a richer cream layer)
Instructions
- Combine sliced strawberries with granulated sugar and lemon juice in a bowl. Stir and set aside for at least 15 minutes to macerate — the strawberries will release their juices and become syrupy.
- If using cream cheese, beat softened cream cheese until smooth. In a separate bowl, whip heavy cream with powdered sugar and vanilla until stiff peaks form, then fold into the cream cheese until combined. If skipping cream cheese, just whip the cream with powdered sugar and vanilla until stiff peaks form.
- Begin layering: place half the angel food cake cubes in the bottom of your trifle bowl. Spoon over half the macerated strawberries and their juices. Spread half the cream mixture over the strawberries.
- Repeat the layers with remaining cake, strawberries, and cream.
- Cover and refrigerate for at least 2 hours before serving. The longer it sits, the better the layers meld together. Top with a few fresh strawberry slices right before serving.
11. Baked Strawberry Crumble Bars
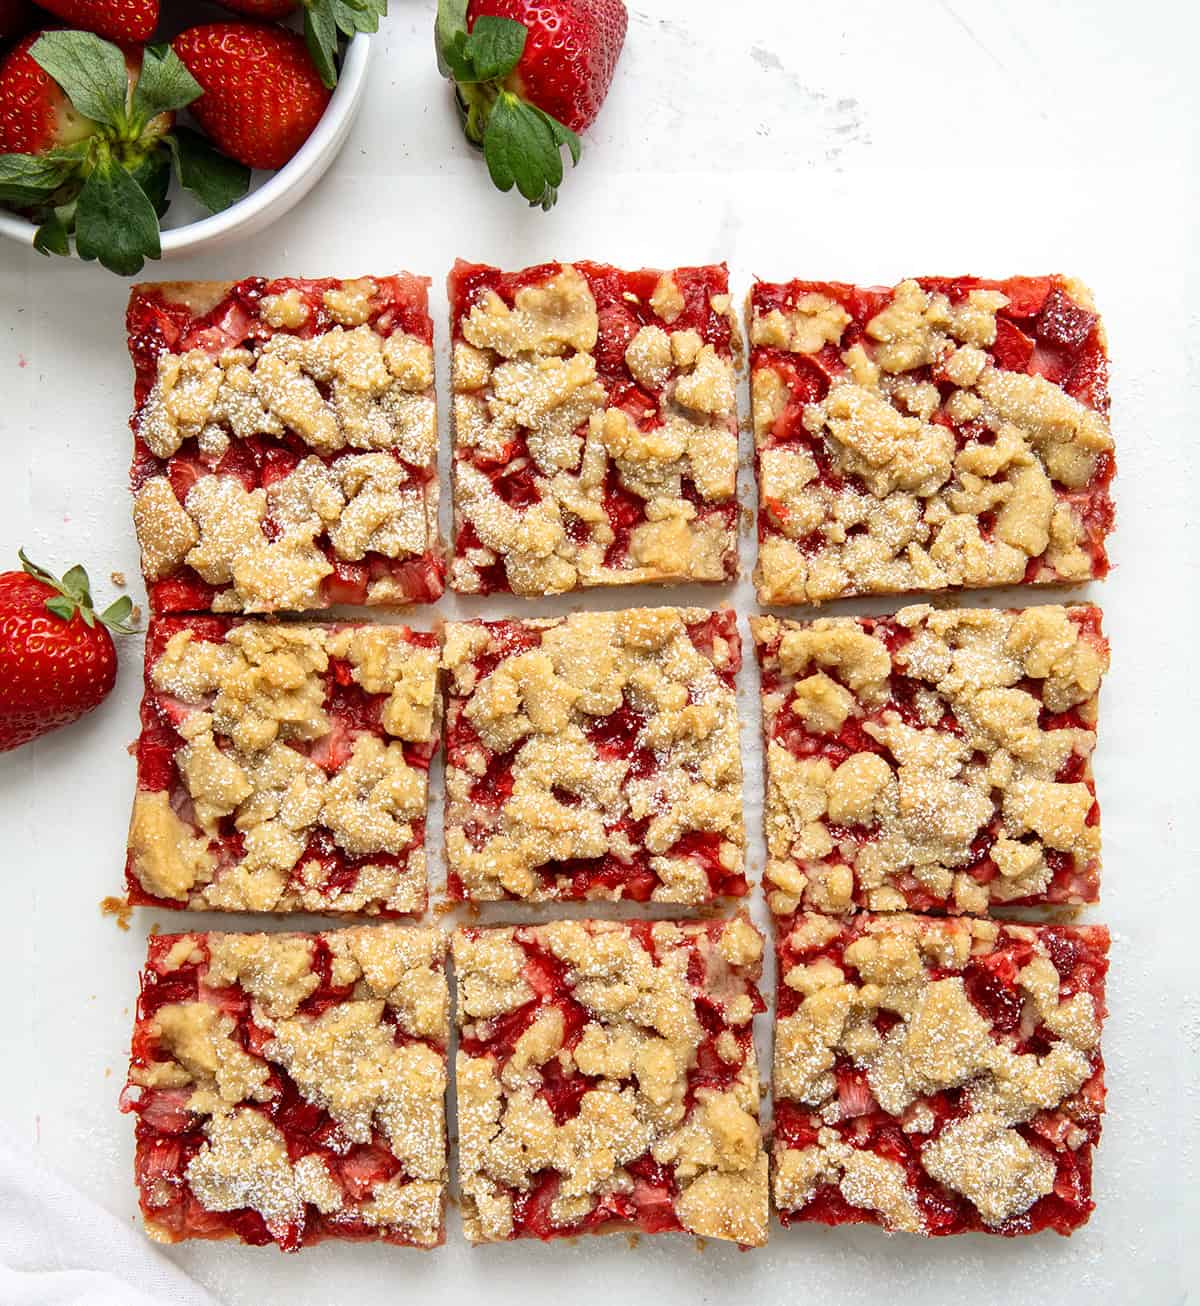
Somewhere between a pie and a cookie, these bars have a buttery oat base, a jammy strawberry middle, and a crumble top that bakes into something golden and slightly crispy at the edges. They hold together well enough to eat by hand once fully cooled — which matters if you're packing them for a picnic or a lunchbox. The first time I made these I pulled them out too early and the filling was liquid; let them cool completely in the pan before cutting or you'll have a delicious mess. They're also good at room temperature the next day, which means they're an actual make-ahead option.
Ingredients
- 2 cups fresh strawberries, hulled and diced small
- 2 tablespoons granulated sugar (for the filling)
- 1 tablespoon cornstarch
- 1 tablespoon lemon juice
- 1½ cups old-fashioned rolled oats
- 1 cup all-purpose flour
- ½ cup packed light brown sugar
- ¼ teaspoon salt
- ½ teaspoon cinnamon
- ½ cup (1 stick) unsalted butter, melted
Instructions
- Preheat oven to 350°F. Grease an 8x8-inch baking pan and line with parchment paper, leaving overhang on two sides for easy lifting.
- In a small bowl, toss diced strawberries with granulated sugar, cornstarch, and lemon juice. Set aside.
- In a large bowl, combine oats, flour, brown sugar, salt, and cinnamon. Pour in melted butter and mix until the mixture resembles wet sand and clumps when pressed together.
- Press about two-thirds of the oat mixture firmly and evenly into the bottom of the prepared pan to form the base layer.
- Spoon the strawberry filling evenly over the base. Scatter the remaining oat mixture loosely over the top — don't press it down; you want it crumbly.
- Bake for 35–40 minutes until the topping is golden brown and the filling is bubbling at the edges. Cool completely in the pan (at least 1 hour) before lifting out and slicing into bars.
10. Strawberry Mousse in Chocolate Cups
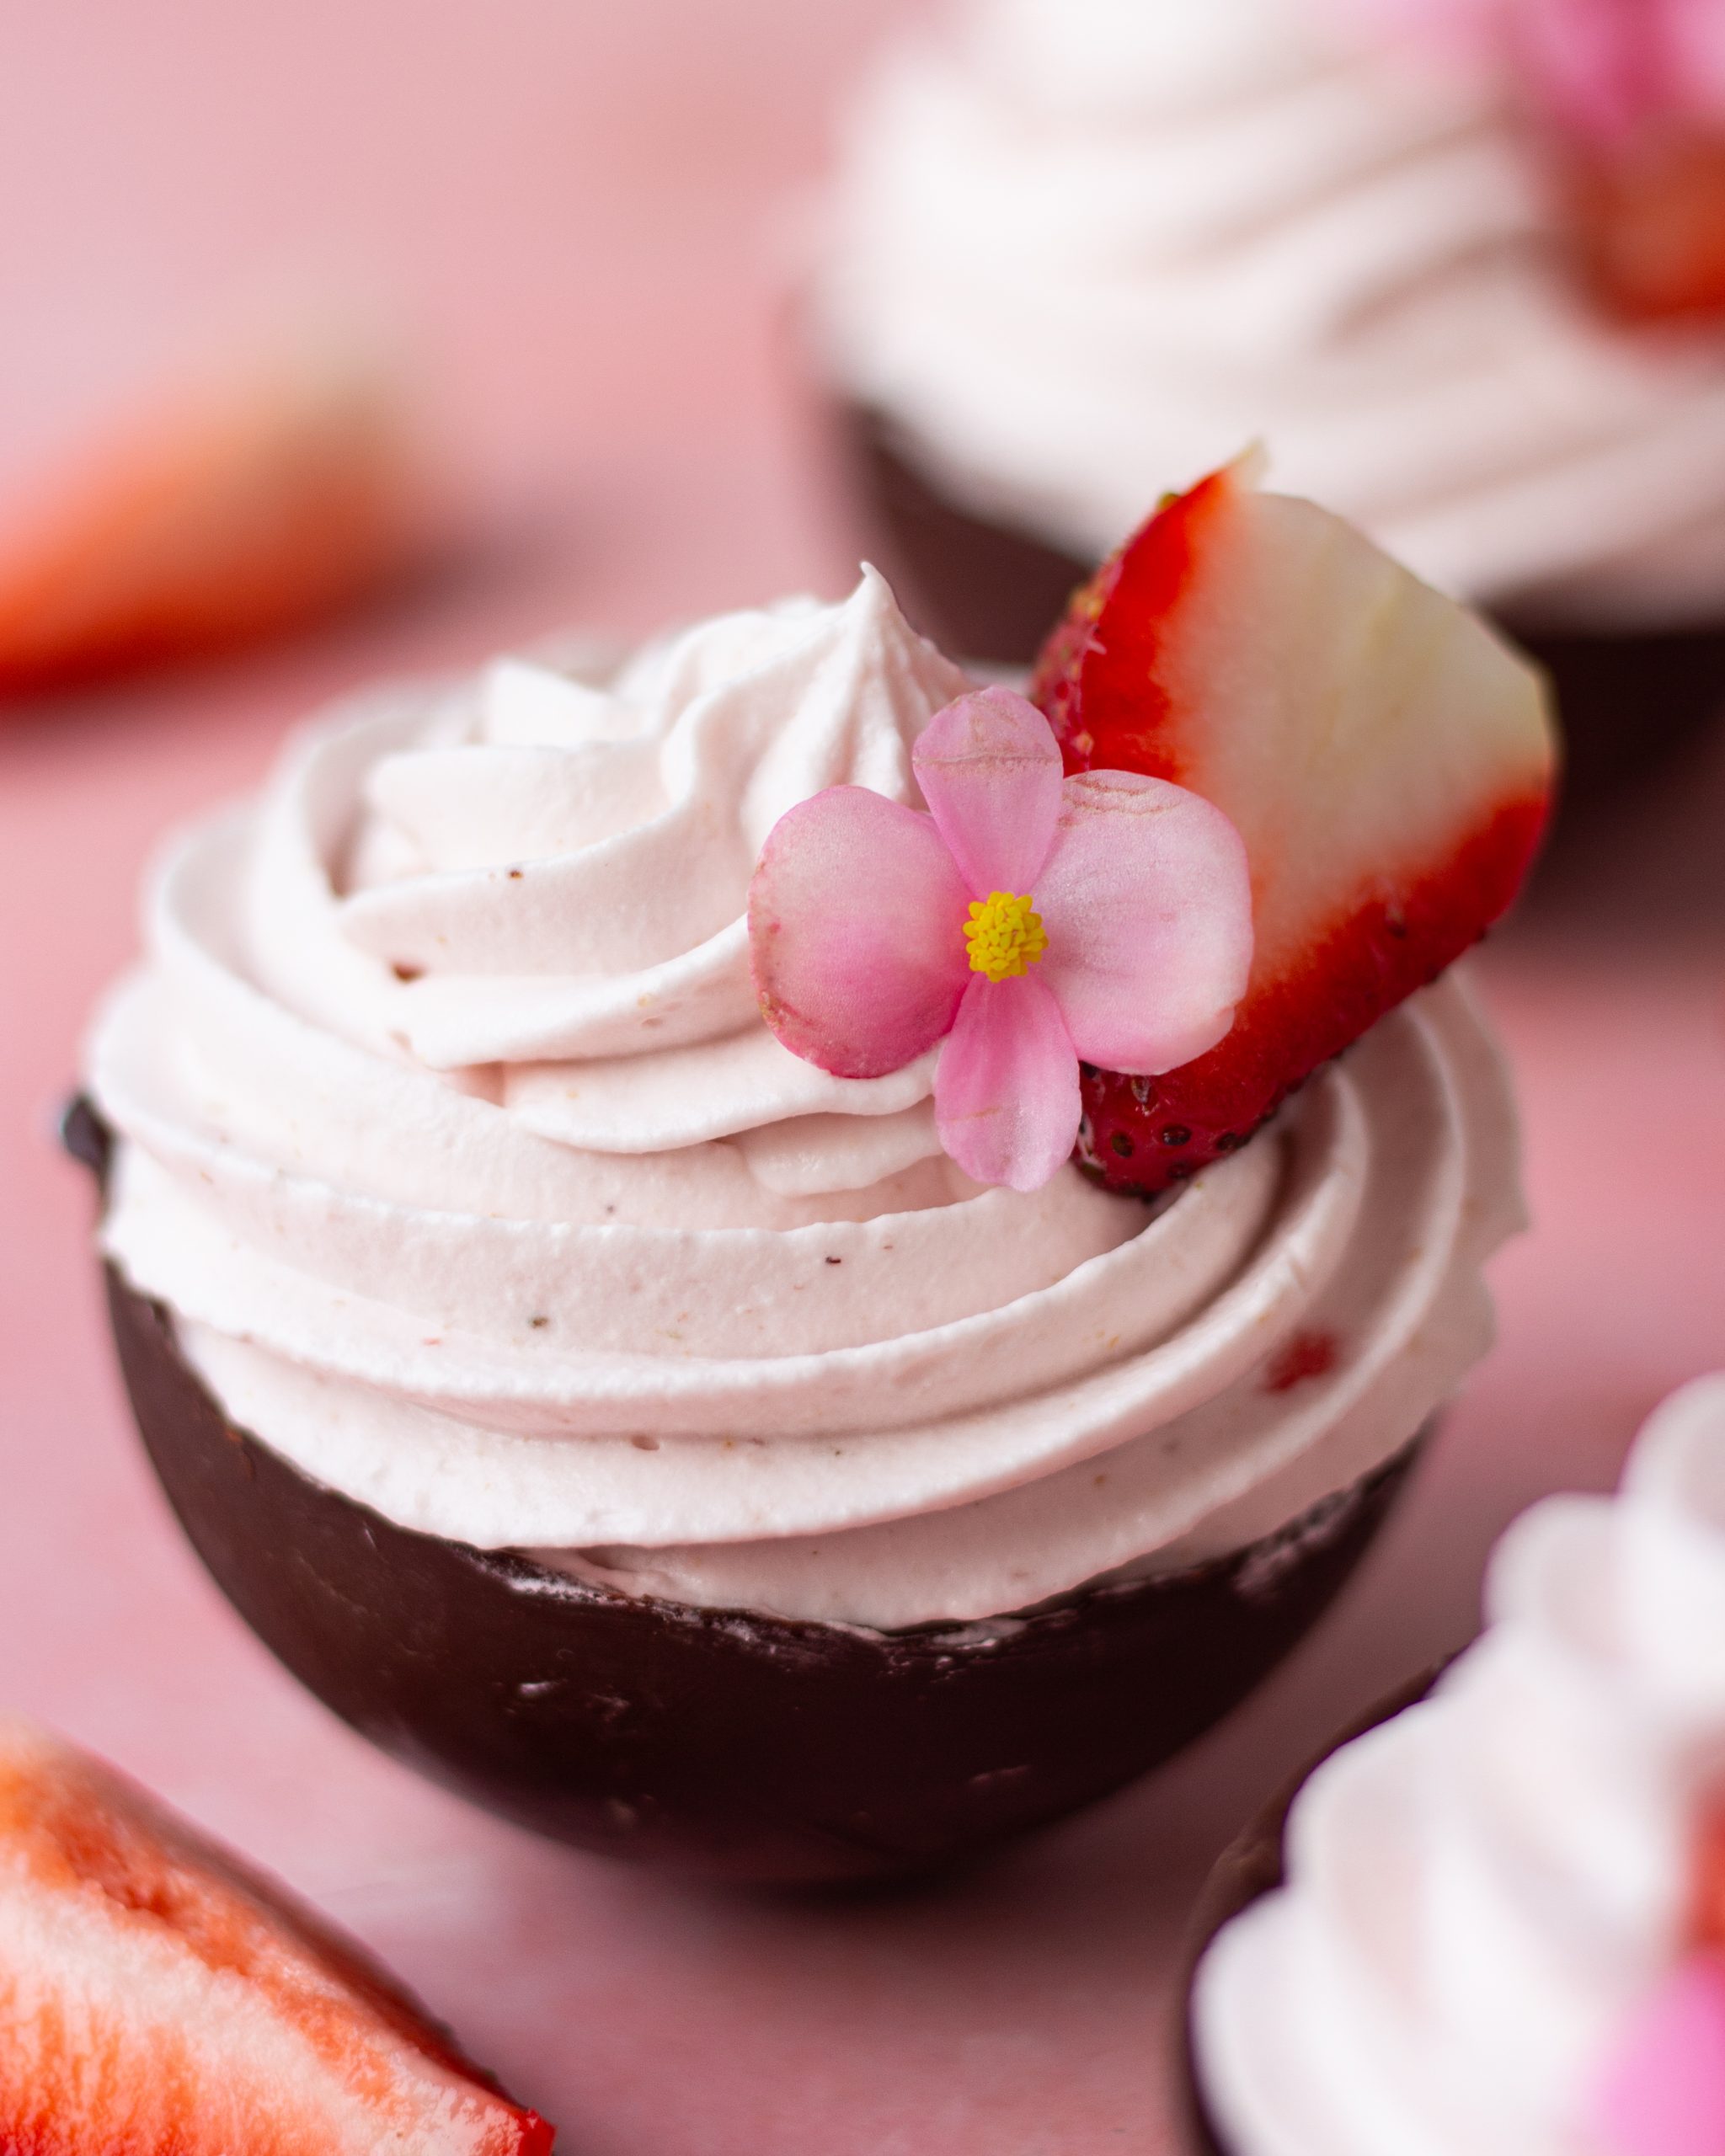
Individual chocolate cups filled with strawberry mousse look like serious pastry work, but the cups are made by brushing melted chocolate into a silicone muffin mold — no tempering, no special skills required. The mousse itself is just whipped cream folded into a fresh strawberry purée, set lightly with gelatin so it holds its shape when you unmold the cups. These are the kind of dessert you bring out when you want people to think you've been in the kitchen for hours. I won't correct them. Silicone muffin molds cost under $10 at Walmart and make this completely doable.
Ingredients
- 8 oz dark or semi-sweet chocolate chips
- 1 teaspoon coconut oil
- 1½ cups fresh strawberries, hulled
- 3 tablespoons powdered sugar
- 1 teaspoon unflavored gelatin powder
- 2 tablespoons cold water
- 1 cup heavy whipping cream
- ½ teaspoon vanilla extract
Instructions
- Melt chocolate chips and coconut oil together in the microwave in 30-second bursts, stirring until smooth. Using a pastry brush, coat the inside of 6 silicone muffin cup cavities with a thick, even layer of chocolate. Refrigerate for 15 minutes, then apply a second coat. Refrigerate until fully set, about 30 minutes.
- Sprinkle gelatin over cold water in a small bowl and let it bloom for 5 minutes. Then microwave for 10 seconds to dissolve completely — it should be clear liquid with no granules.
- Blend strawberries and powdered sugar in a blender until smooth. Pour into a bowl, stir in dissolved gelatin, and let cool to room temperature.
- Whip heavy cream with vanilla until stiff peaks form. Gently fold the strawberry purée into the whipped cream in two additions until just combined — don't deflate it.
- Carefully peel the chocolate cups out of the silicone mold. Fill each cup with strawberry mousse and refrigerate for at least 1 hour until set. Garnish with a small slice of fresh strawberry before serving.
9. Strawberry Rhubarb Hand Pies
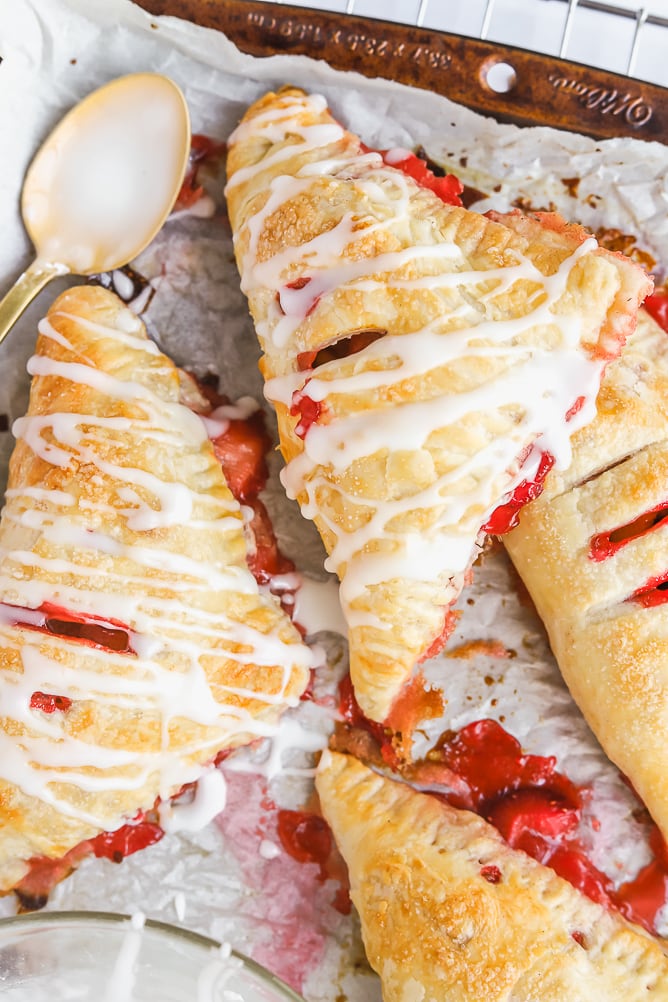
Rhubarb and strawberry together is one of those combinations that just makes sense — the tartness of rhubarb keeps the filling from being cloying, and the strawberry softens rhubarb's sharp edge. Hand pies are easier than a full pie because you're working with small portions of dough, which means less chance of a soggy bottom or a crust that shrinks badly. Store-bought pie dough works perfectly here — Pillsbury refrigerated pie crusts from Walmart are exactly what I use and I'm not apologetic about it. Fresh rhubarb shows up at most grocery stores in late spring and early summer; if you can't find it, frozen works fine.
Ingredients
- 1 cup fresh strawberries, hulled and diced small
- 1 cup rhubarb, trimmed and diced small (fresh or frozen and thawed)
- ⅓ cup granulated sugar
- 1 tablespoon cornstarch
- 1 teaspoon lemon zest
- 2 store-bought refrigerated pie crusts (or 1 box Pillsbury, which contains 2)
- 1 egg, beaten (for egg wash)
- 2 tablespoons coarse sugar (for topping)
Instructions
- Preheat oven to 400°F. Line a baking sheet with parchment paper.
- In a small saucepan over medium heat, combine strawberries, rhubarb, sugar, cornstarch, and lemon zest. Cook, stirring frequently, for about 5 minutes until the mixture thickens and the fruit softens. Remove from heat and let cool for 15 minutes — don't fill the pies with hot filling or the dough will go soggy.
- Roll out pie crusts on a lightly floured surface and cut into 4-inch circles using a round cutter or the rim of a wide glass. Re-roll scraps to get as many circles as possible (usually 8–10 total).
- Place a heaping tablespoon of filling in the center of half the circles. Brush the edges with egg wash, then top with a second circle of dough. Press edges together firmly with a fork to seal. Cut two small slits in the top of each pie.
- Brush tops with egg wash and sprinkle with coarse sugar. Bake for 20–22 minutes until golden brown. Cool on the pan for 10 minutes before eating.
8. Strawberry Tiramisu No Bake
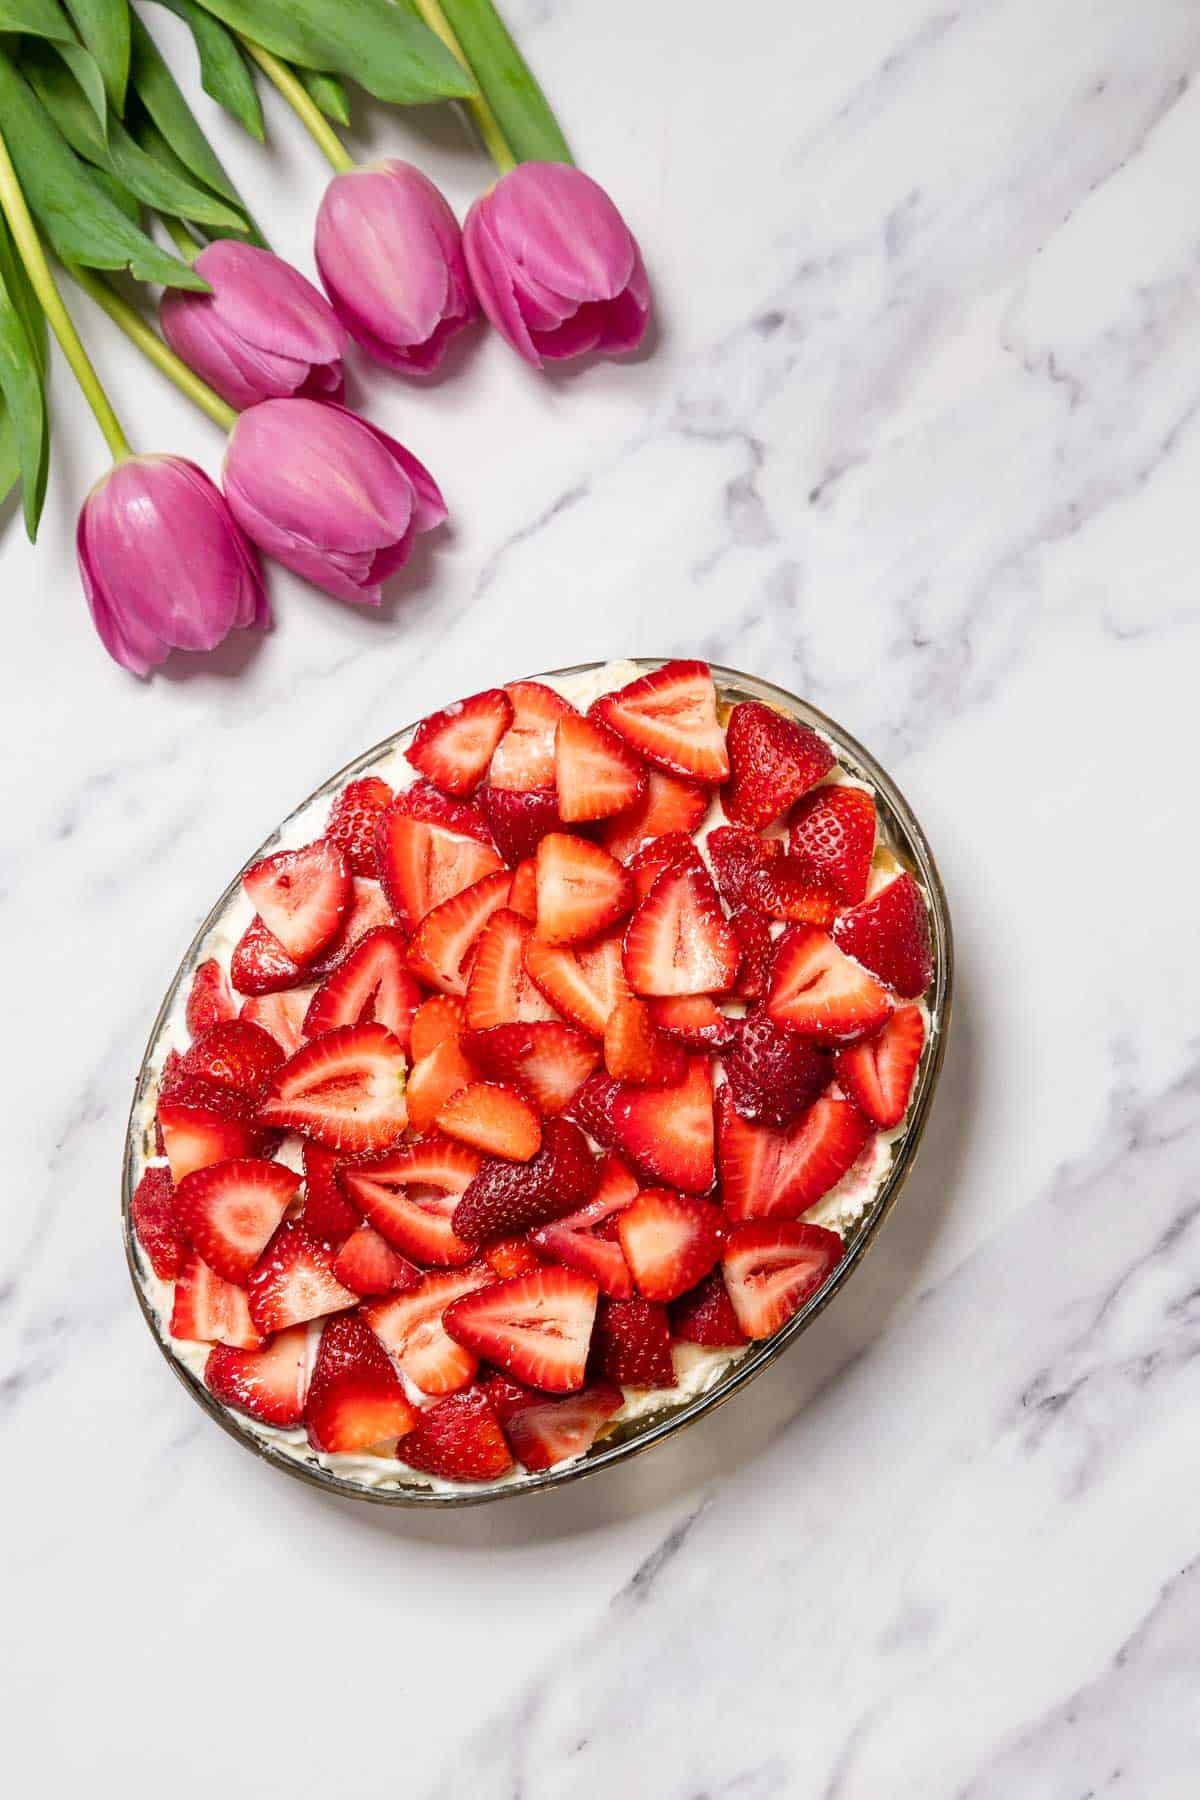
This isn't authentic italian tiramisu and I'm not going to pretend otherwise — it swaps the espresso and coffee liqueur for a fresh strawberry soak, which makes it completely kid-friendly and honestly better suited to summer. The mascarpone cream layer is the real star: rich, barely sweet, with vanilla running through it. Ladyfinger cookies (find them in the cookie aisle at most grocery stores, or Aldi usually carries them) absorb the strawberry soak quickly, so don't let them sit in the liquid too long or they turn to mush. I've made this the night before and it sets up beautifully in the fridge — the layers firm up and slice cleanly.
Ingredients
- 2 cups fresh strawberries, hulled (divided)
- 2 tablespoons granulated sugar (for the soak)
- 2 tablespoons lemon juice
- 8 oz mascarpone cheese, at room temperature
- 1 cup heavy whipping cream
- ¼ cup powdered sugar
- 1 teaspoon vanilla extract
- 24–30 ladyfinger cookies (savoiardi)
- Extra sliced strawberries for topping
Instructions
- Blend 1 cup of strawberries with granulated sugar and lemon juice until smooth. Strain through a fine mesh sieve into a shallow bowl to remove seeds — this is your strawberry soak. Slice the remaining 1 cup of strawberries and set aside.
- Beat mascarpone cheese in a large bowl until smooth. In a separate bowl, whip heavy cream with powdered sugar and vanilla until stiff peaks form. Fold whipped cream into mascarpone in two additions until just combined and fluffy.
- Working quickly, dip each ladyfinger into the strawberry soak for just 1–2 seconds per side — they absorb fast. Arrange a single layer of soaked ladyfingers in the bottom of an 8x8-inch dish or a similar-sized serving dish.
- Spread half the mascarpone cream over the ladyfingers. Scatter half the sliced strawberries over the cream. Repeat with another layer of soaked ladyfingers, remaining cream, and remaining sliced strawberries.
- Cover tightly with plastic wrap and refrigerate for at least 4 hours, or overnight. Dust with a little powdered sugar right before serving if you like, or add a few fresh strawberry slices on top.
7. Skillet Strawberry Cobbler Cast Iron
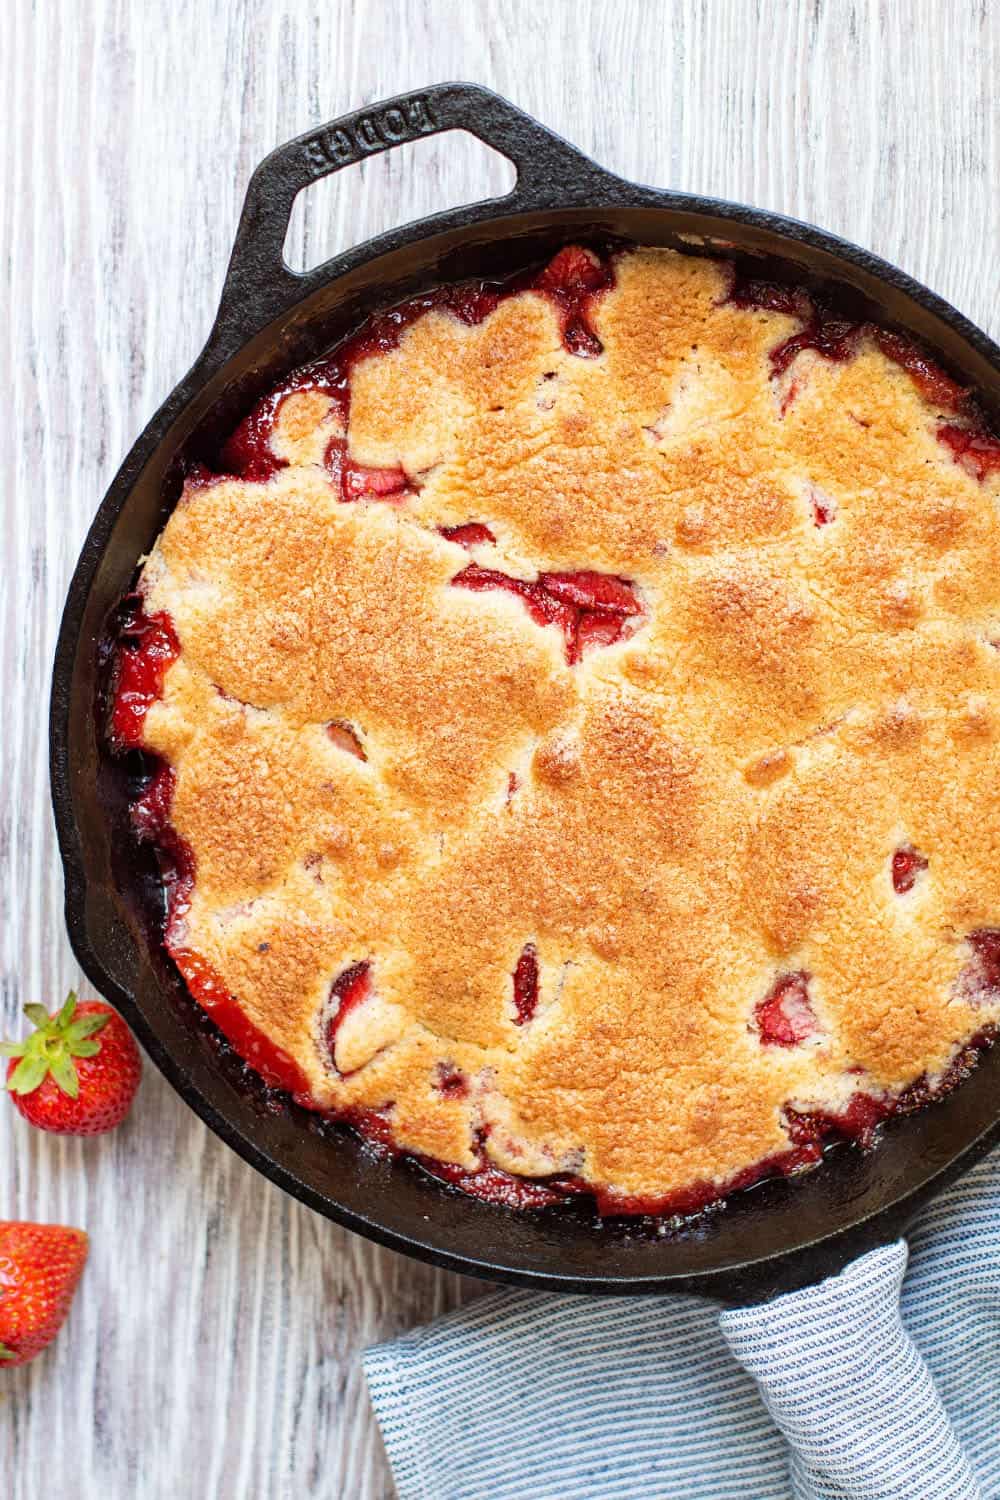
Cast iron makes cobbler better — full stop. The edges get this caramelized, almost crispy biscuit situation that a regular baking dish just doesn't give you, and the strawberry filling bubbles up around it in the most satisfying way. I make a double batch when strawberries are in season because one skillet disappears before it even cools down properly. Serve it warm with vanilla ice cream and you have dessert that looks like you tried way harder than you did.
Ingredients
- 4 cups fresh strawberries, hulled and halved
- ⅓ cup granulated sugar (for filling)
- 1 tablespoon lemon juice
- 1 tablespoon cornstarch
- 1 cup all-purpose flour
- 2 tablespoons granulated sugar (for biscuit topping)
- 1½ teaspoons baking powder
- ¼ teaspoon salt
- 4 tablespoons cold unsalted butter, cubed
- ⅔ cup whole milk or buttermilk
- 1 tablespoon turbinado sugar (for sprinkling on top)
Instructions
- Preheat your oven to 375°F. Place a 10-inch cast iron care skillet on the stovetop over medium heat. Add strawberries, ⅓ cup sugar, lemon juice, and cornstarch, stirring gently until the sugar dissolves and the mixture just starts to bubble, about 3 minutes. Remove from heat.
- In a medium bowl, whisk together flour, 2 tablespoons sugar, baking powder, and salt. Cut in the cold butter using a pastry cutter or your fingertips until the mixture looks like rough crumbs with some pea-sized butter pieces remaining.
- Pour in the milk and stir just until a shaggy dough comes together — don't overwork it or the biscuits will be tough.
- Drop large spoonfuls of dough over the strawberry filling in the skillet, leaving a few gaps so the fruit can peek through. Sprinkle turbinado sugar over the top.
- Bake for 28–32 minutes until the biscuit topping is golden and the filling is bubbling up through the gaps. Let it rest 10 minutes before serving — the filling thickens as it cools slightly.
6. Strawberry Coconut Milk Popsicles
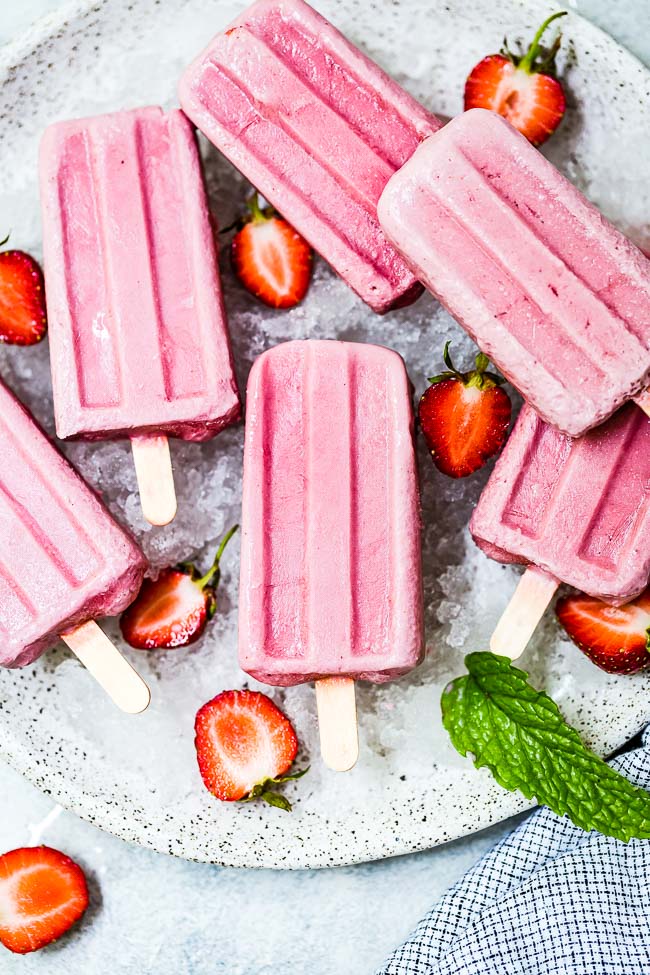
Zainab went through a phase where she wanted popsicles every single day after school, and these became my answer to that because I could feel good about what was in them. Full-fat coconut milk gives them a creamy, almost tropical richness that pairs beautifully with fresh strawberry — and the color alone is enough to make kids (and adults) excited. You only need a popsicle mold and about 10 minutes of hands-on work, then the freezer does everything else. If you don't have a proper mold, small paper cups with wooden sticks work just fine.
Ingredients
- 2 cups fresh strawberries, hulled
- 1 can (13.5 oz) full-fat coconut milk
- 3 tablespoons honey or maple syrup
- 1 teaspoon vanilla extract
- 1 tablespoon lime juice
- Pinch of salt
Instructions
- Add strawberries, coconut milk, honey, vanilla, lime juice, and salt to a blender. Blend on high until completely smooth, about 60 seconds.
- Taste the mixture — if your strawberries were a little tart, add another teaspoon of honey and blend briefly.
- Pour the mixture into popsicle molds, leaving about ¼ inch at the top for expansion. Insert sticks and tap the molds gently on the counter to release any air bubbles.
- Freeze for at least 5 hours, or overnight. To unmold, run the outside of the mold briefly under warm water for 10–15 seconds and pull gently.
- Store popsicles in the molds or wrapped individually in plastic wrap in a zip-top bag in the freezer for up to 2 weeks.
5. Strawberry Shortbread Sandwich Cookies
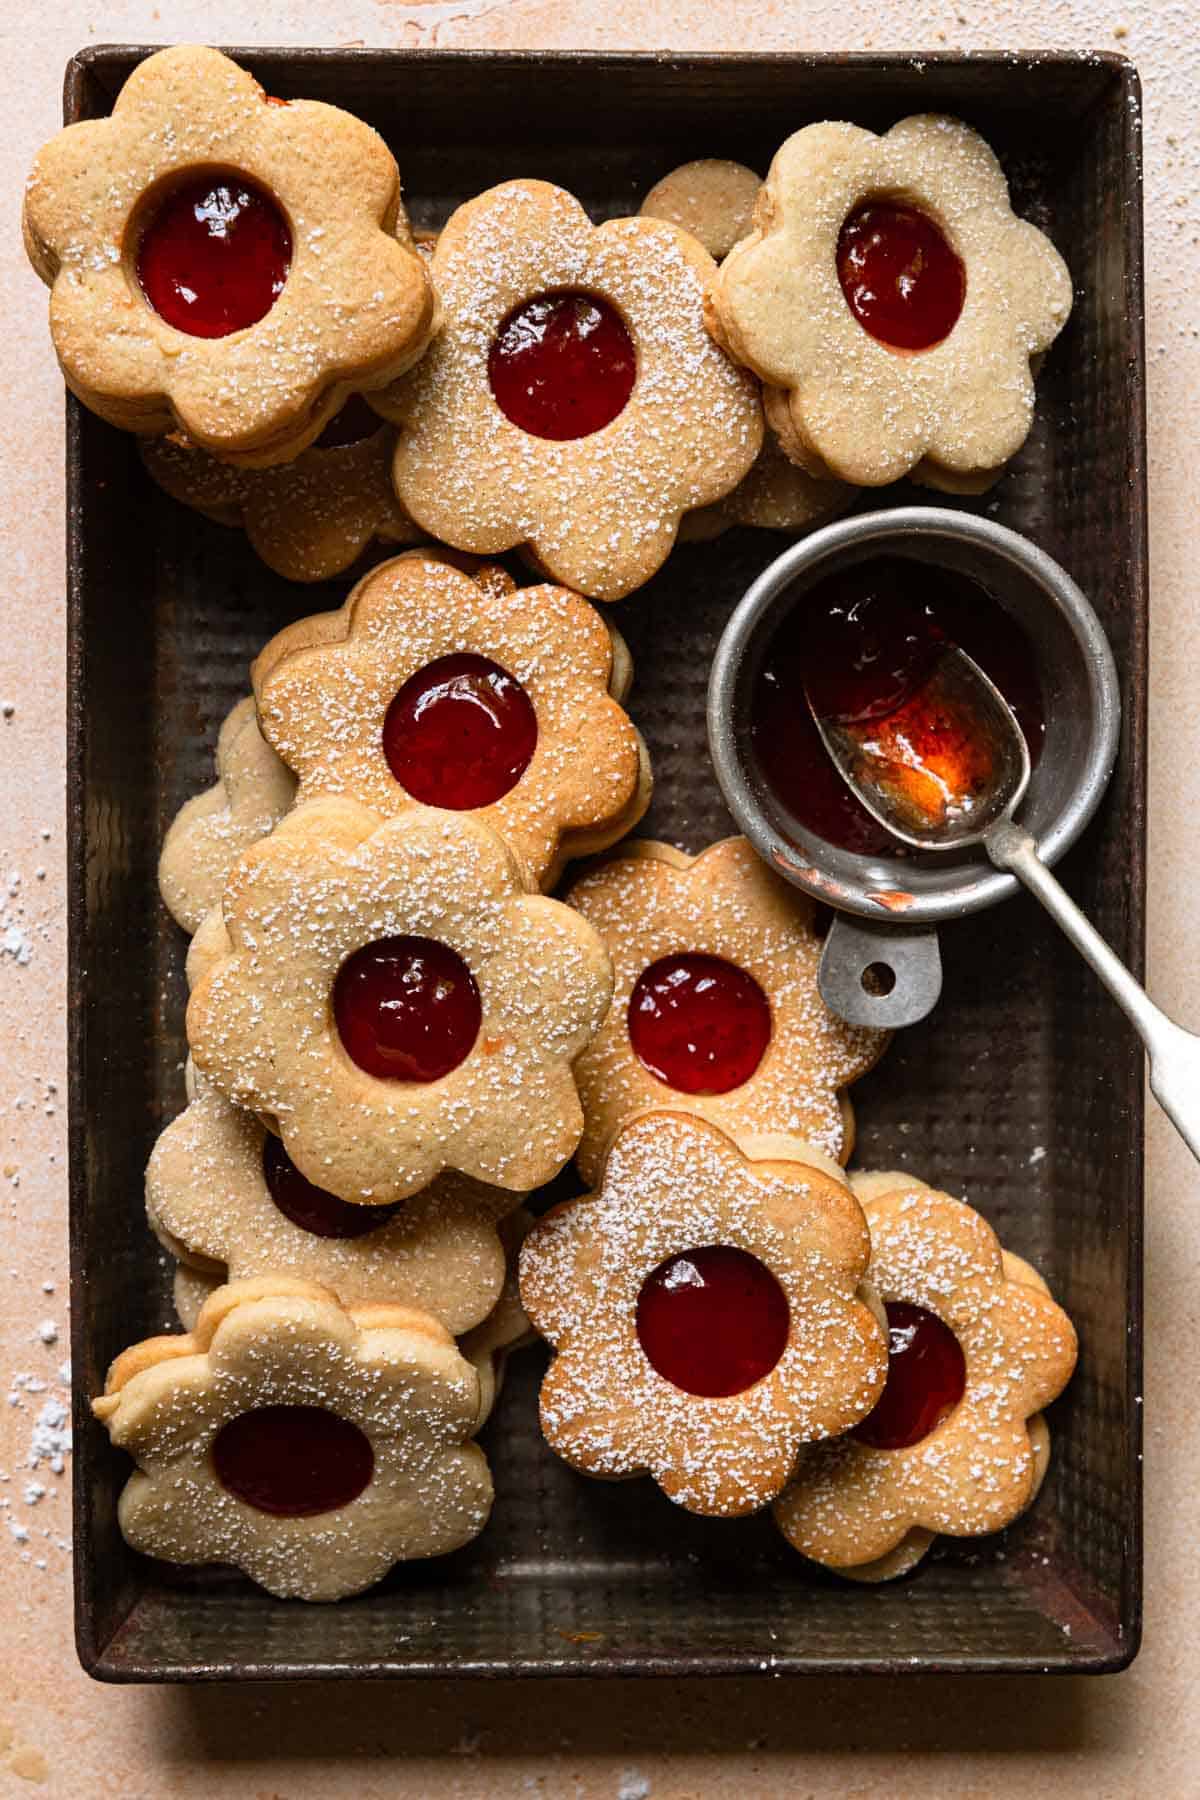
Buttery, crumbly shortbread with a strawberry cream filling sandwiched in the middle — these are the kind of cookies you make when you want to impress someone without spending hours in the kitchen. The shortbread dough comes together fast and rolls out cleanly if you let it chill properly first. I learned the hard way that skipping the chill step means the cookies spread into flat puddles, so don't rush it. The filling is just cream cheese, powdered sugar, and strawberry jam — no complicated technique, just good flavor.
Ingredients
- 1 cup (2 sticks) unsalted butter, softened
- ½ cup powdered sugar, plus more for dusting
- 1 teaspoon vanilla extract
- 2 cups all-purpose flour
- ¼ teaspoon salt
- 4 oz cream cheese, softened
- ¾ cup powdered sugar (for filling)
- 3 tablespoons strawberry jam
- 1 teaspoon vanilla extract (for filling)
Instructions
- Beat butter and ½ cup powdered sugar together until light and fluffy, about 2 minutes. Mix in vanilla. Add flour and salt, mixing until a soft dough forms. Flatten into a disk, wrap in plastic, and refrigerate for 45 minutes minimum.
- Preheat oven to 325°F. Line two baking sheets with parchment paper. On a lightly floured surface, roll dough to ¼-inch thickness and cut into rounds using a 2-inch cookie cutter. Place on prepared sheets.
- Bake for 12–14 minutes until the edges are just barely golden — they should look pale. Let cool completely on the pan before moving them.
- Make the filling: beat cream cheese until smooth, then mix in ¾ cup powdered sugar, strawberry jam, and vanilla until combined and fluffy.
- Pair up cookies by size. Pipe or spoon filling onto the flat side of one cookie and press its pair gently on top. Dust with powdered sugar before serving.
4. Strawberry Banana Smoothie Bowl
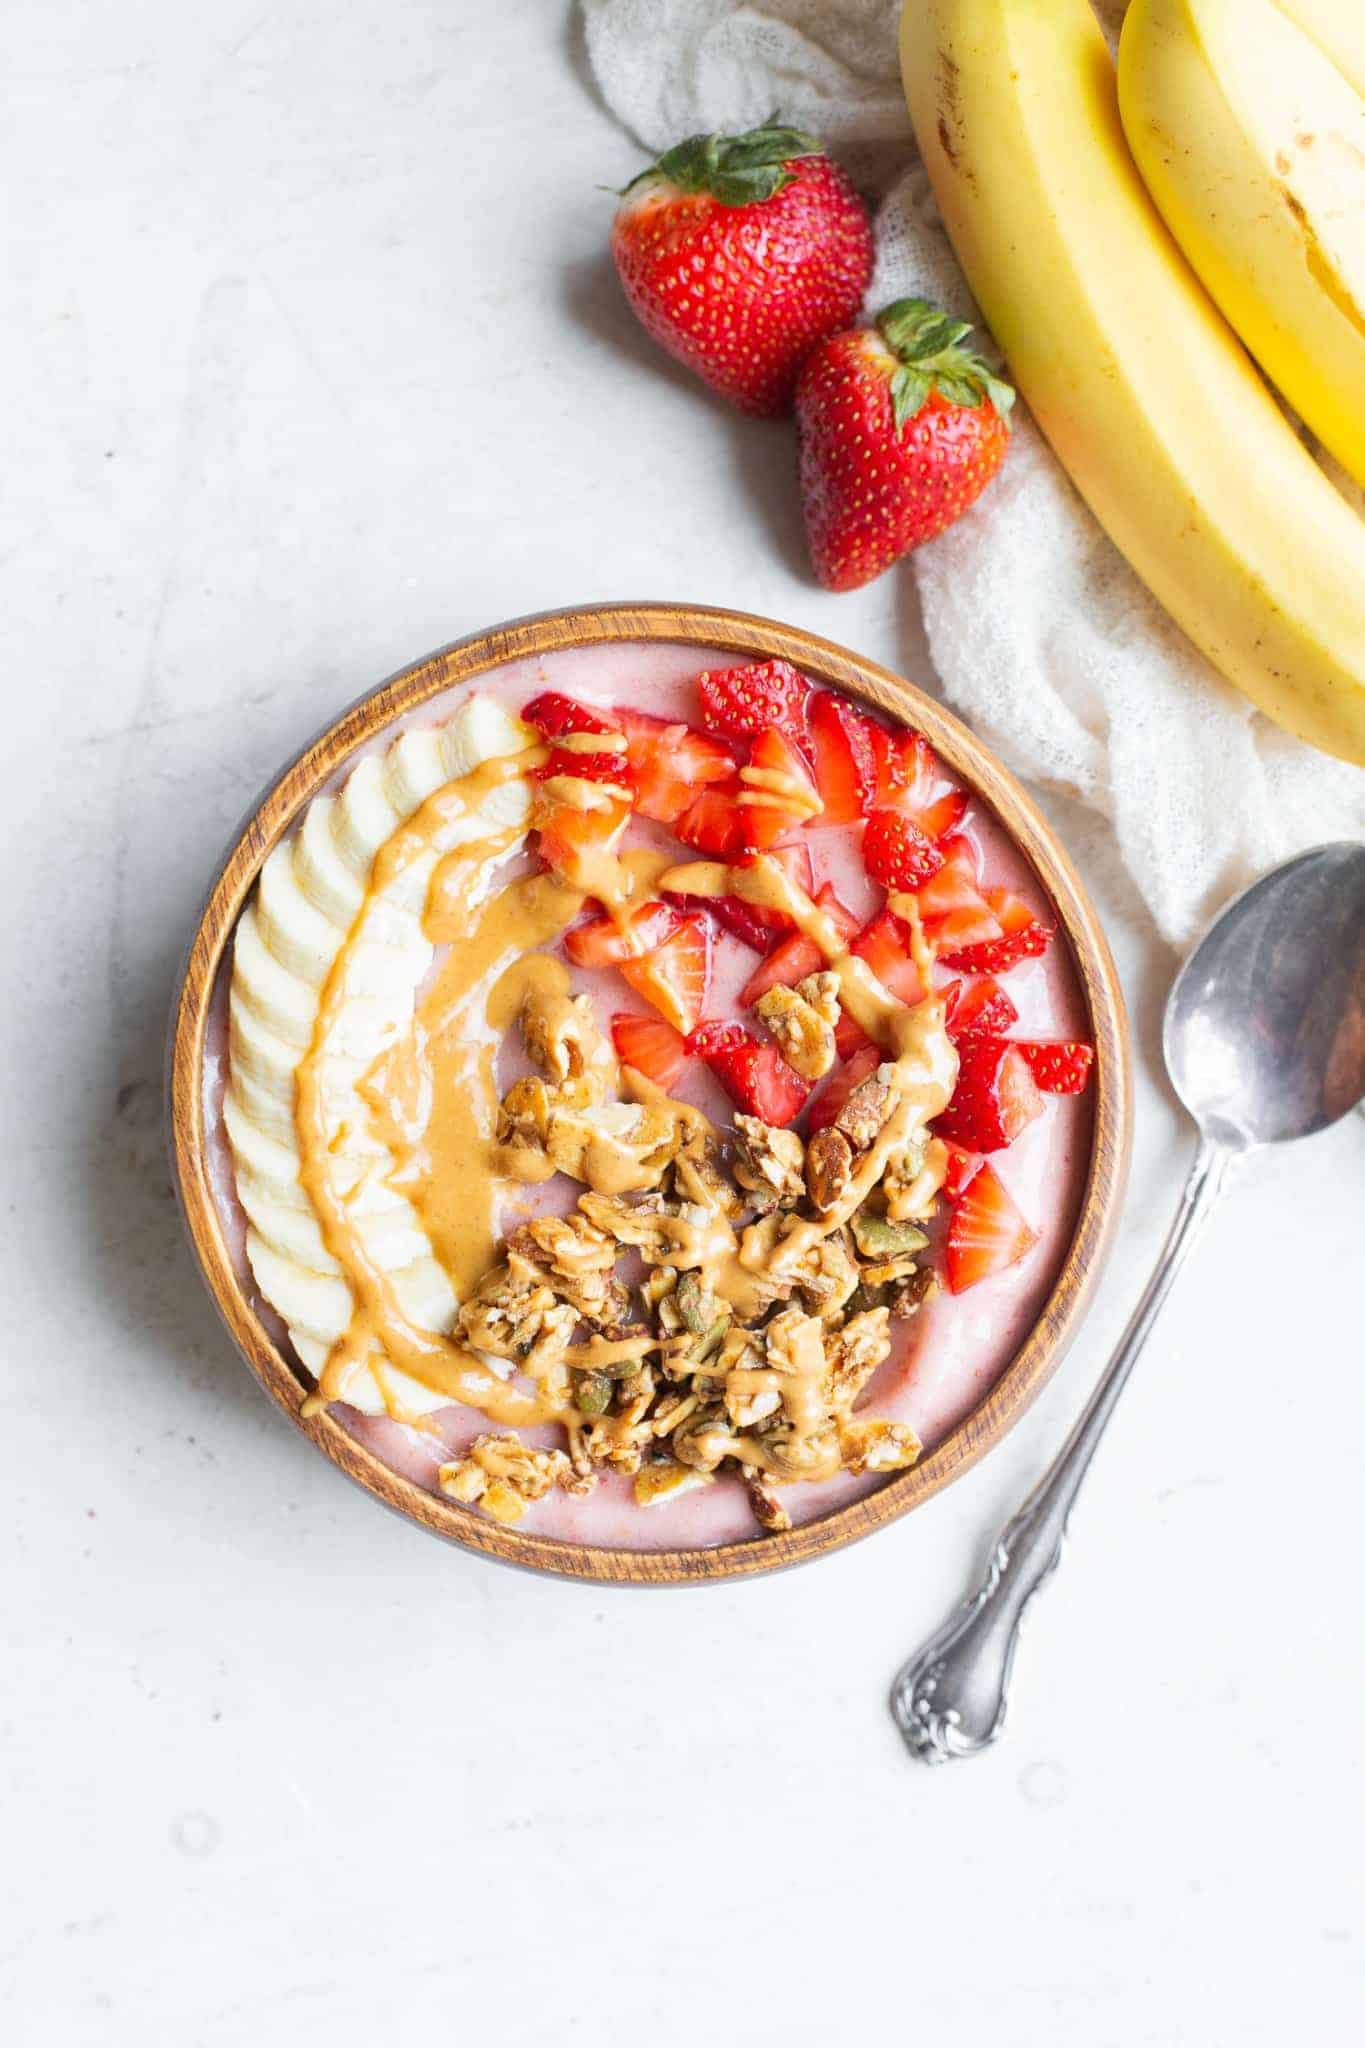
Some mornings this doubles as breakfast and dessert, and I'm completely fine with that. The key to a smoothie bowl that actually has the right thick, scoopable texture — rather than just a thin smoothie you put in a bowl — is frozen banana. Use fully ripe, frozen banana and keep the liquid minimal. Toppings are where you make it feel like a treat: fresh strawberry slices, granola for crunch, a drizzle of honey, maybe some coconut flakes if you have them. Saad asks for this on weekends and calls it "strawberry ice cream breakfast," which, honestly, is not wrong.
Ingredients
- 2 medium bananas, sliced and frozen overnight
- 1½ cups frozen strawberries
- ¼ cup Greek yogurt
- 2–3 tablespoons milk (just enough to blend)
- 1 tablespoon honey
- ½ cup fresh strawberries, sliced (for topping)
- ¼ cup granola (for topping)
- 1 tablespoon chia seeds (for topping)
- Drizzle of honey to finish
Instructions
- Add frozen banana, frozen strawberries, Greek yogurt, milk, and honey to a blender. Blend, stopping to scrape down the sides as needed. Add milk only one tablespoon at a time — you want it thick enough to hold toppings, not pourable.
- Blend until smooth and creamy. If it's struggling to blend, add one more tablespoon of milk and try again.
- Pour into a wide, shallow bowl and smooth the top with a spoon.
- Arrange toppings: lay fresh strawberry slices along one side, add a cluster of granola, sprinkle chia seeds, and finish with a light drizzle of honey. Serve immediately — it melts faster than you'd expect.
3. Strawberry Jam Thumbprint Cookies

Thumbprint cookies are one of those recipes that look charming and bakery-made but take almost no skill once you've done them once. A buttery, slightly nutty cookie base — I use almond extract in mine and it makes a real difference — with a jewel-bright strawberry jam center that sets perfectly in the oven. The trick I picked up after a few batches: press the thumbprint indent twice — once before baking and once halfway through — because the dough puffs up and closes the well if you only do it once. Grab a good strawberry jam here; since it's the star of the cookie, the quality actually matters.
Ingredients
- 1 cup (2 sticks) unsalted butter, softened
- ⅔ cup granulated sugar
- 2 egg yolks
- 1 teaspoon almond extract (or vanilla extract)
- 2¼ cups all-purpose flour
- ¼ teaspoon salt
- ½ cup strawberry jam, stirred until smooth
Instructions
- Preheat oven to 350°F. Line two baking sheets with parchment paper. Beat butter and sugar together until pale and fluffy, about 3 minutes. Add egg yolks and almond extract, mixing until combined.
- Add flour and salt, mixing on low until a soft dough forms. If the dough feels too sticky to roll, refrigerate for 20 minutes.
- Roll dough into 1-inch balls and place 2 inches apart on prepared baking sheets. Press your thumb firmly into the center of each to make a deep well.
- Bake for 8 minutes, then remove from oven and press the centers down again with the back of a small spoon — they puff up and need a second indent. Fill each well with about ½ teaspoon of strawberry jam.
- Return to oven and bake another 6–8 minutes until edges are light golden. Cool on the pan for 5 minutes before transferring — they're fragile when hot.
2. Strawberry Ricotta Sheet Cake
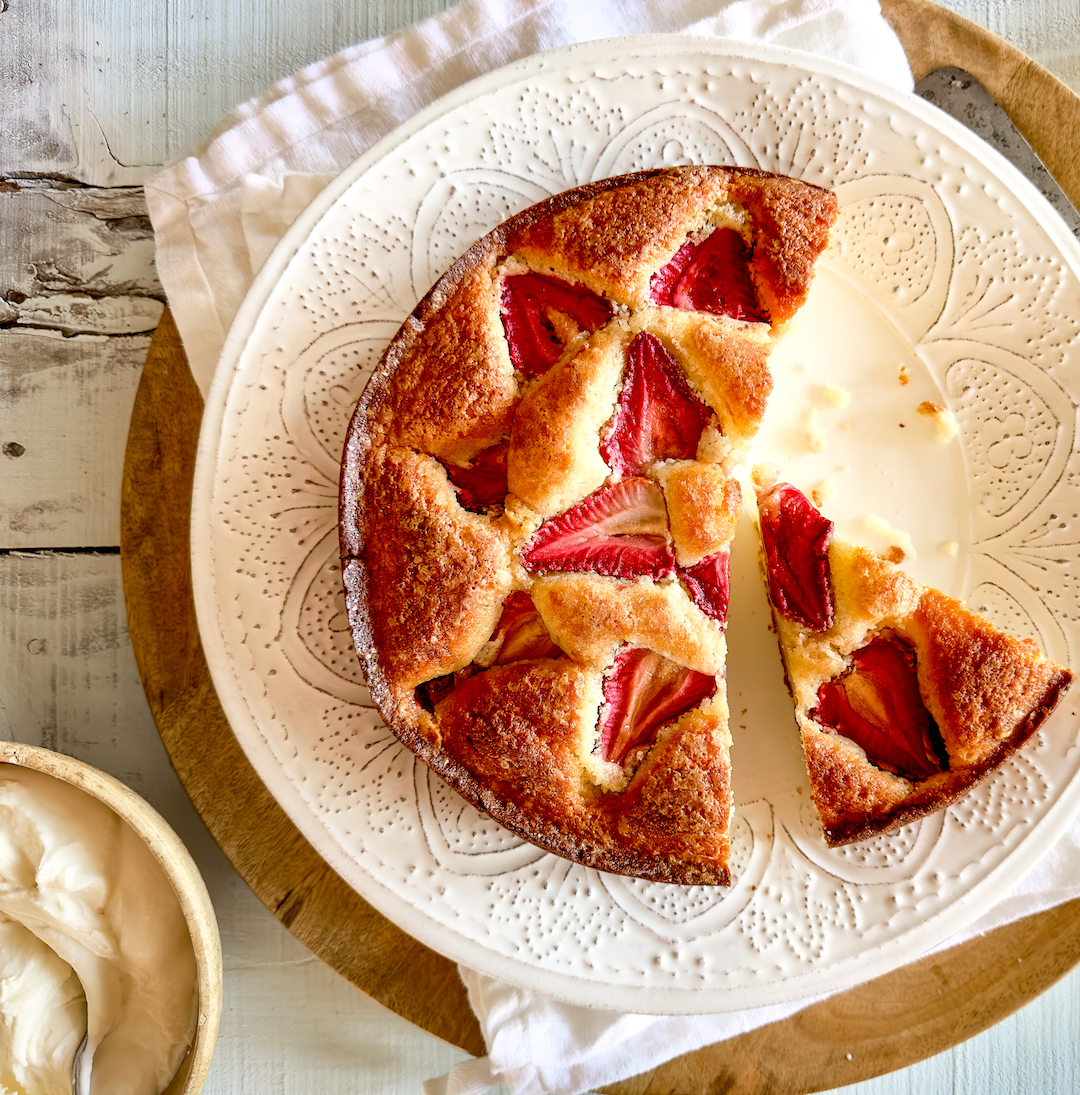
Ricotta in cake batter sounds unusual until you taste the result — incredibly moist, tender crumb with a subtle richness that regular butter cake doesn't quite achieve. This is a simple, unfussy sheet cake that comes together in one bowl and bakes in a 9x13 pan, which means it feeds a crowd without any layering or stacking stress. Fresh strawberries go into the batter and on top, so every slice has that jammy, sweet berry running through it. A dusting of powdered sugar is all the finishing it needs, though a dollop of whipped cream on the side never hurt.
Ingredients
- 1½ cups whole milk ricotta cheese
- 3 large eggs
- 1 cup granulated sugar
- ½ cup unsalted butter, melted and cooled
- 1 teaspoon vanilla extract
- 1 teaspoon lemon zest
- 1½ cups all-purpose flour
- 2 teaspoons baking powder
- ¼ teaspoon salt
- 2 cups fresh strawberries, hulled and roughly chopped, divided
- Powdered sugar for dusting
Instructions
- Preheat oven to 350°F. Grease a 9x13-inch baking pan and line with parchment paper, leaving some overhang on the sides for easy removal.
- In a large bowl, whisk together ricotta, eggs, sugar, melted butter, vanilla, and lemon zest until smooth and well combined.
- Add flour, baking powder, and salt to the wet ingredients and fold together with a spatula until just combined — a few streaks of flour are fine. Fold in 1½ cups of the chopped strawberries.
- Pour batter into the prepared pan and spread evenly. Scatter the remaining ½ cup strawberries over the top, pressing them in lightly.
- Bake for 35–40 minutes until the top is golden and a toothpick inserted in the center comes out clean. Cool completely in the pan before dusting with powdered sugar and slicing.
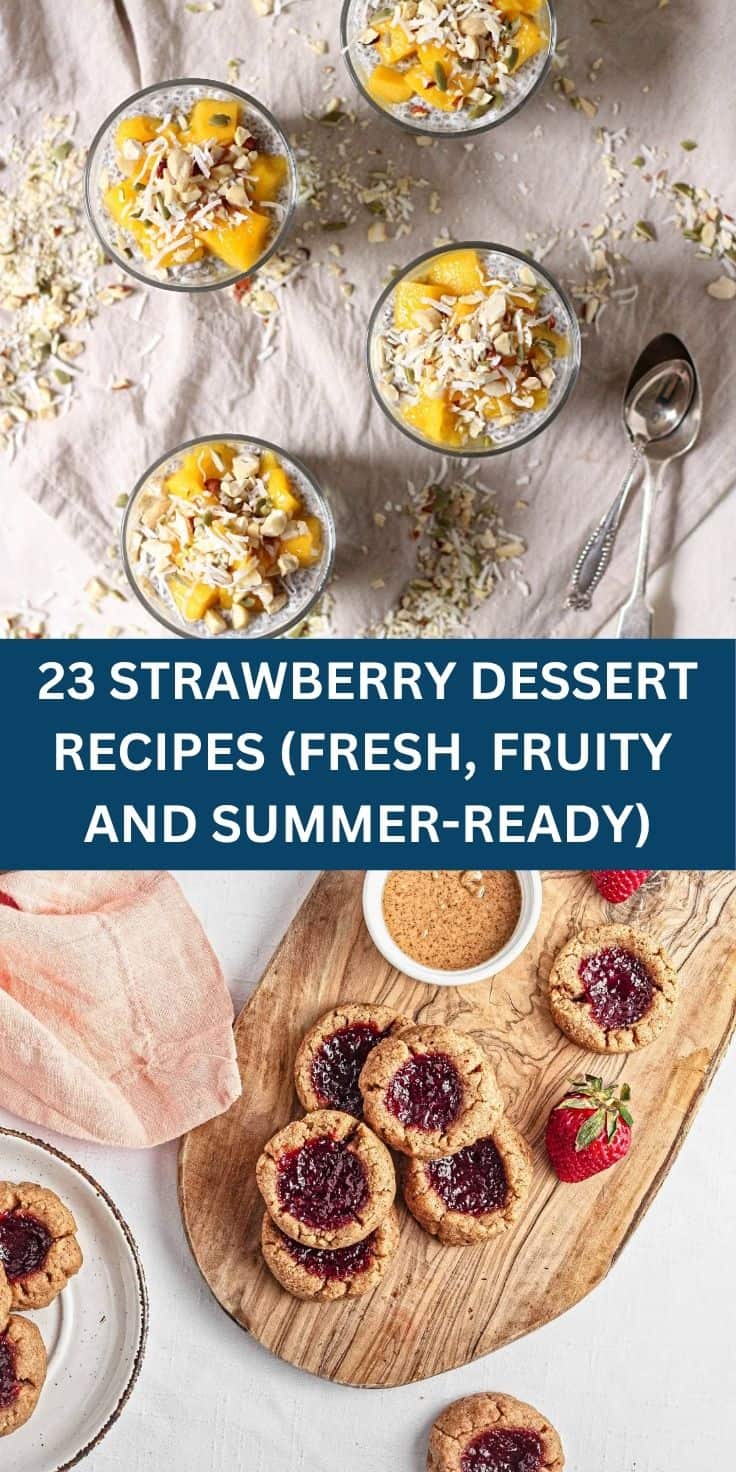
1. Strawberry Mango Chia Seed Parfait

This is the recipe that earns the top spot because it does everything right for summer — it's cold, it's layered with real fruit, it requires zero oven time, and it can be made ahead the night before so you're not standing in a hot kitchen at dessert time. Chia pudding made with coconut milk forms the creamy base, then fresh strawberries and mango go on top in alternating layers with a honey drizzle pulling it all together. Growing up in Pakistan, mango was always around in summer, and pairing it with strawberry feels like the best of both worlds to me. Make these in individual glasses and they look genuinely beautiful on a table.
Ingredients
- 1 can (13.5 oz) full-fat coconut milk
- ¼ cup chia seeds
- 2 tablespoons honey or maple syrup
- 1 teaspoon vanilla extract
- 1½ cups fresh strawberries, hulled and diced
- 1½ cups fresh mango, diced (about 1 large mango)
- 1 tablespoon lime juice
- ¼ cup granola (optional, for texture)
- Extra honey for drizzling
Instructions
- Make the chia pudding: whisk together coconut milk, chia seeds, honey, and vanilla in a bowl or jar. Stir well, then let sit for 5 minutes and stir again — this prevents clumping. Cover and refrigerate for at least 4 hours or overnight until thick and set.
- Toss diced strawberries and mango separately with lime juice to brighten the flavor. You can keep them mixed or keep them separate for prettier layering.
- When ready to assemble, give the chia pudding a good stir. It should be thick and spoonable — if it's too stiff, stir in 1–2 tablespoons of coconut milk to loosen slightly.
- Layer in individual glasses: start with a spoonful of chia pudding, then strawberries, then mango, then more chia pudding. Repeat until the glass is full, finishing with fruit on top.
- Sprinkle granola over the top if using (add it right before serving so it stays crunchy), drizzle with honey, and serve cold. These can be assembled and refrigerated up to 8 hours ahead — just add the granola at the last minute.
There you have it — 23 strawberry dessert recipes that cover everything from lazy Sunday afternoons to proper occasions where you want to set something beautiful on the table. Some of these I've made so many times I could do them with my eyes closed. Others I tried once and immediately knew they were keepers. The common thread is that they all start with strawberries doing what strawberries do best: being bright, a little tart, and sweet enough to make everyone stop talking and start eating.
If I had to pick where to start, I'd say go with whatever your strawberries look like right now. Perfect, deep red berries? Make the shortcake or the galette — let them shine with minimal fuss. Slightly overripe or softer than you'd like? Those go straight into a crumble, a jam-filled bar, or a smoothed-out mousse where texture doesn't matter. I make a double batch of the sauce every time because it disappears on everything — ice cream, pancakes, plain yogurt at 7am when no one's watching.
Save whichever ones catch your eye and come back to them when the craving hits. And if you try one and it turns out differently than expected — adjust, taste, try again. That's how every recipe on this list found its way into my regular rotation. 🍓✨
Related Recipes You Might Like
- Browse All Recipe Roundups on ForFoodieFriends
- Easy Summer Dessert Recipes
- No-Bake Dessert Recipes for Hot Days
- Fresh Fruit Desserts Worth Making
- Easy Cake Recipes for Every Occasion
Frequently Asked Questions
When is the best time of year to make strawberry desserts?
Late spring through early summer is when fresh strawberries are at their peak — deeply red, fragrant, and actually sweet rather than watery. In the US, that's roughly May through July depending on where you are. That said, frozen strawberries work well in cooked and blended desserts year-round, so you don't have to wait for peak season to make most of these recipes.
Can I use frozen strawberries instead of fresh in these recipes?
For most baked goods, sauces, mousses, and ice creams — yes, frozen works fine. Thaw them first and drain off the extra liquid, otherwise your batter ends up too wet. For recipes where raw strawberries are the star (like shortcake or a simple tart), fresh is genuinely better. Frozen strawberries tend to get soft and a bit mushy once thawed, which shows in no-cook applications.
How do I store strawberry desserts so they don't get soggy?
The main rule is: keep the wet components and dry components separate until serving where possible. Shortcake, trifles, and layered bars all get soggy fast once assembled. If you're making ahead, store the components separately and put them together right before serving. Fully baked items like crumbles and cakes store fine covered at room temperature for a day, then refrigerate after that.
Which of these strawberry desserts is easiest for a beginner?
Honestly, strawberry shortcake and a basic strawberry crumble are probably the most forgiving starting points. Neither requires precise technique — the crumble especially is very hard to ruin. Strawberry sauce is also a good first project: four ingredients, one pot, done in 15 minutes, and it makes everything else taste better. Start there and build up to the layer cakes and tarts once you're comfortable.
Can I make any of these strawberry desserts ahead of time for a party?
Several of them are actually better made the day before. Strawberry mousse, cheesecake, panna cotta, and ice cream all need time to set properly — you can't really rush them. Bars and cookies hold well for 2-3 days in an airtight container. For anything with fresh whipped cream or assembled layers, I'd prep the components a day ahead and do the final assembly the morning of the party. It saves a lot of last-minute stress.
Share This Post!
If any of these recipes are going on your summer baking list, pin this post so you can find it when strawberry season hits. 🍓📌
View More Recipes here Recipe Roundups





Comments
No Comments