
High protein, low carb eating doesn't have to mean grilled chicken breast every single night. I went through a phase — probably two years ago — where I was trying to cut back on carbs for a few months and I was so bored by week three that I nearly gave up entirely. The recipes I was following were bland, repetitive, and honestly depressing. So I started building my own list: high protein low carb meals that actually taste like food I want to eat, not food I'm tolerating for a goal.
What makes a good high protein low carb recipe, in my opinion, is that it has to hold up as a real dinner — not a sad plate of plain protein with nothing going on. I'm looking for bold seasoning, real texture, and enough variety that you're not eating the same thing on rotation. A recipe that also happens to be gluten-free or paleo-friendly is a bonus, but the baseline requirement is that my family will actually eat it. For more dinners that fit a lighter approach, my healthy dinner recipes roundup has a lot of overlap with what I reach for on busy nights.
This list covers a real range — there's Pan-Seared Halibut with Dill Sauce for nights when I want something a little elegant, Kafta Lebanese Beef Kebabs because ground beef deserves more credit than it gets, Keto Cauliflower Lasagna for when my brain is screaming pasta but my body disagrees, and Air Fryer Bacon Wrapped Jalapeño Poppers because sometimes dinner can also be fun. If you're specifically cooking for the air fryer, my air fryer recipes collection is worth bookmarking too. And if sheet pan meals are your weeknight move, check out my sheet pan dinners for more ideas that require minimal cleanup.
Here are the 20 recipes I keep coming back to — pick whichever one matches what you have in the fridge tonight.
Top 20 High Protein Low Carb Recipes
21. Keto Cauliflower Lasagna

The first time I tried making low-carb lasagna, I used zucchini sheets and ended up with a watery, sad mess. Cauliflower works so much better — it holds up to the sauce, soaks in the flavor, and doesn't release half a cup of liquid into your baking dish. This keto cauliflower lasagna layers tender cauliflower with a rich ground beef and crushed tomato sauce, then gets blanketed in mozzarella until it's properly bubbly. It's the kind of dish that makes you forget you're eating something with fewer carbs than a slice of bread.
Ingredients
- 1 medium head cauliflower, sliced into thin flat sheets
- 1 lb ground beef
- 1 can (14 oz) crushed tomatoes
- ½ cup beef stock
- ½ cup heavy cream
- 1½ cups shredded mozzarella cheese
- 2 tablespoons olive oil
- 1 teaspoon Italian seasoning
- Salt and black pepper to taste
- Fresh parsley, chopped, for garnish
Instructions
- Preheat oven to 375°F. Slice the cauliflower head into flat sheets about ¼ inch thick — they don't have to be perfect, just flat enough to layer.
- Heat olive oil in a skillet over medium-high heat. Brown the ground beef, breaking it up as it cooks. Season with salt, pepper, and Italian seasoning.
- Add crushed tomatoes and beef stock to the skillet. Stir in the heavy cream and let the sauce simmer for 8–10 minutes until slightly thickened.
- In a greased 9x13 baking dish, layer cauliflower sheets, meat sauce, and mozzarella. Repeat layers, finishing with a generous layer of mozzarella on top.
- Cover with foil and bake for 25 minutes. Remove foil and bake another 10–15 minutes until the cheese is golden and bubbly. Rest for 10 minutes before slicing, then scatter fresh parsley on top.
Tips
- Tip: Pat your cauliflower sheets dry with paper towels before layering — this is the single most important step to avoid a watery lasagna.
- Tip: Let the lasagna rest a full 10 minutes after baking before you cut into it. It holds together much better once it's settled.
- Tip: This reheats well the next day — actually tastes better once everything melds together overnight in the fridge.
20. Easy Keto Tuna Fritters (Low Carb, Whole30, Gluten-Free)

Canned tuna doesn't get enough credit. I used to overlook it completely — it sat in the back of my pantry for months — until I tried making fritters with it and realized how well it crisps up in a hot pan. These keto tuna fritters come together in under 20 minutes, use pantry staples, and work equally well as a quick weeknight dinner or a protein-heavy lunch. The almond flour and coconut flour keep them completely gluten-free, and if you're doing Whole30, just make sure your olives and canned tuna are compliant brands (I've found good options at Trader Joe's and Costco).
Ingredients
- 2 cans (5 oz each) tuna in water, drained and flaked
- 2 large eggs
- ¼ cup almond flour
- 1 tablespoon coconut flour
- ¼ cup black or green olives, roughly chopped
- 2 tablespoons fresh chives, chopped
- 1 tablespoon fresh dill, chopped (or 1 teaspoon dried)
- ½ teaspoon sea salt
- ¼ teaspoon black pepper
- 2 tablespoons olive oil, for frying
Instructions
- In a large bowl, combine the drained tuna, eggs, almond flour, coconut flour, olives, chives, dill, salt, and pepper. Mix until everything holds together — the mixture should be firm enough to shape into patties.
- Divide the mixture into 6–8 equal portions and press each into a round patty about ½ inch thick. If the mix feels too wet, add a little more almond flour one teaspoon at a time.
- Heat olive oil in a non-stick skillet over medium heat. Cook the fritters for 3–4 minutes per side without pressing down on them — let them develop a crust before you flip.
- Transfer to a plate lined with paper towels and serve immediately with a squeeze of lemon or a simple herb dip.
Tips
- Tip: Drain the tuna really well — press it in a fine mesh strainer or against the can lid. Wet tuna makes fritters that fall apart in the pan.
- Tip: Don't rush the flip. Give each side a full 3–4 minutes on medium heat so a proper crust forms before you turn them over.
- Tip: These keep in the fridge for up to 3 days and reheat well in a dry skillet or the air fryer — they crisp back up nicely.
19. Spicy Thai Red Curry Chicken Drumsticks
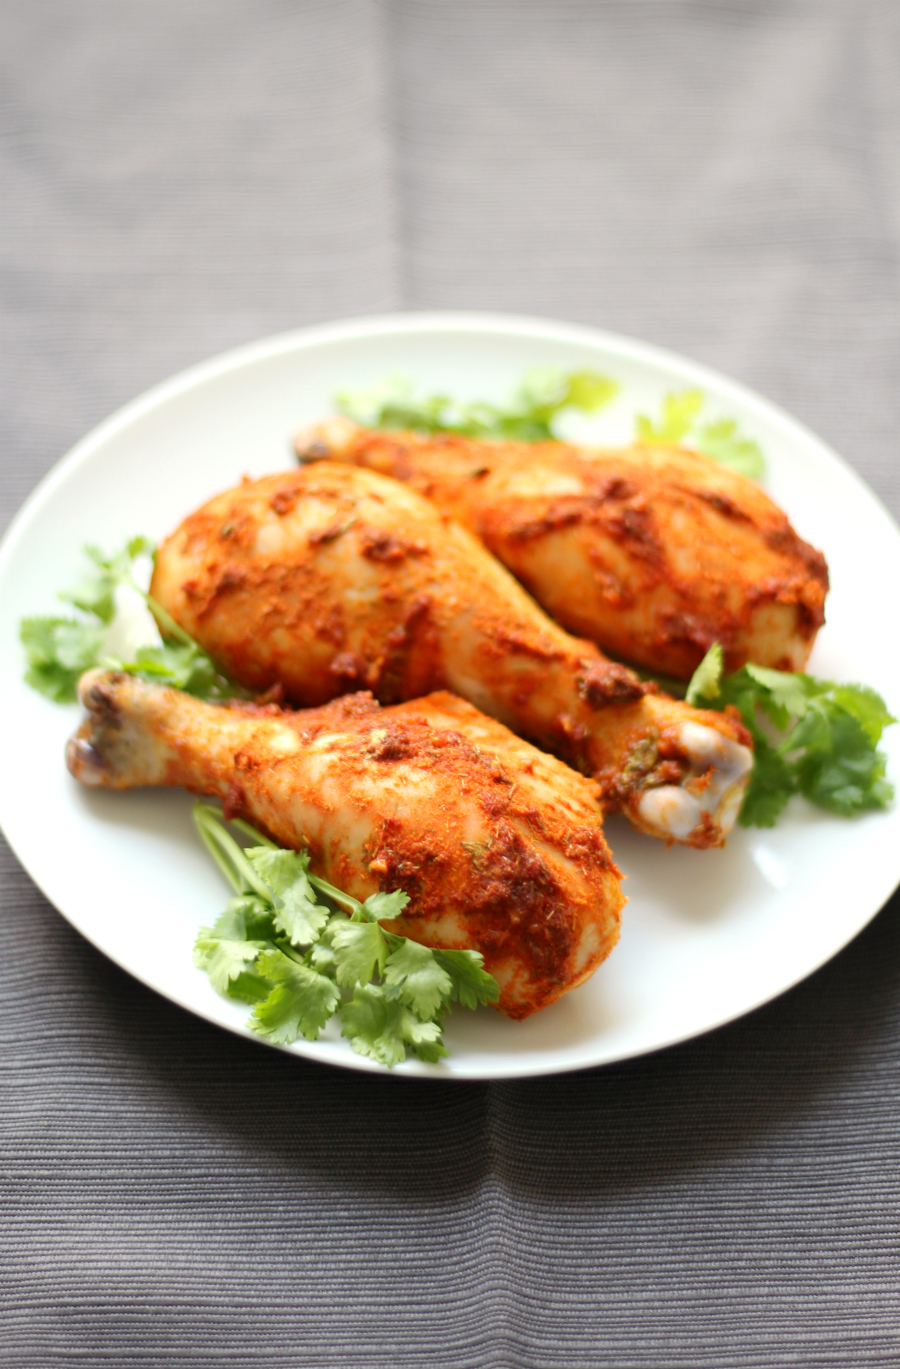
I grew up eating chicken in every form of Pakistani curry, so I have a high baseline for what well-spiced chicken should taste like — and these Thai red curry drumsticks genuinely deliver. The marinade is built around Thai red curry paste, coconut, lemongrass, and fresh ginger, which gives the meat a deep, fragrant heat that goes all the way to the bone. Drumsticks are forgiving — they don't dry out the way breast meat does — so this is actually a hard recipe to mess up. Naturally gluten-free and paleo-friendly, with no obscure ingredients you'd struggle to find at a regular grocery store.
Ingredients
- 2 lbs chicken drumsticks (about 6–8 pieces)
- 3 tablespoons Thai red curry paste
- ½ cup full-fat coconut milk
- 1 stalk lemongrass, finely minced (or 1 teaspoon lemongrass paste)
- 3 cloves garlic, minced
- 1 teaspoon fresh ginger, grated
- ½ teaspoon onion powder
- Juice of 1 lime
- Salt to taste
- Fresh cilantro, for serving
Instructions
- In a large bowl, whisk together the red curry paste, coconut milk, lemongrass, garlic, ginger, onion powder, lime juice, and salt. Add the drumsticks and toss to coat thoroughly. Marinate for at least 1 hour in the fridge, or overnight for deeper flavor.
- When ready to cook, preheat oven to 425°F. Line a baking sheet with foil and place a wire rack on top. Arrange the drumsticks on the rack — this lets the hot air circulate so the skin crisps up instead of steaming.
- Bake for 35–40 minutes, turning once halfway through, until the skin is caramelized and the internal temperature reaches 165°F.
- Rest for 5 minutes, then scatter fresh cilantro on top and serve with extra lime wedges on the side.
Tips
- Tip: Thai red curry paste varies a lot by brand — Mae Ploy is spicier, Thai Kitchen is milder. Taste your paste before marinating and adjust the amount accordingly.
- Tip: The wire rack is important here. If you lay the drumsticks directly on the foil, they'll sit in their own juices and the skin won't crisp properly.
- Tip: If you can't find fresh lemongrass, the paste in a tube works fine — it's available at most large grocery stores near the fresh herbs section.
18. Slow Cooker Salsa Chicken (Gluten-Free, Paleo)
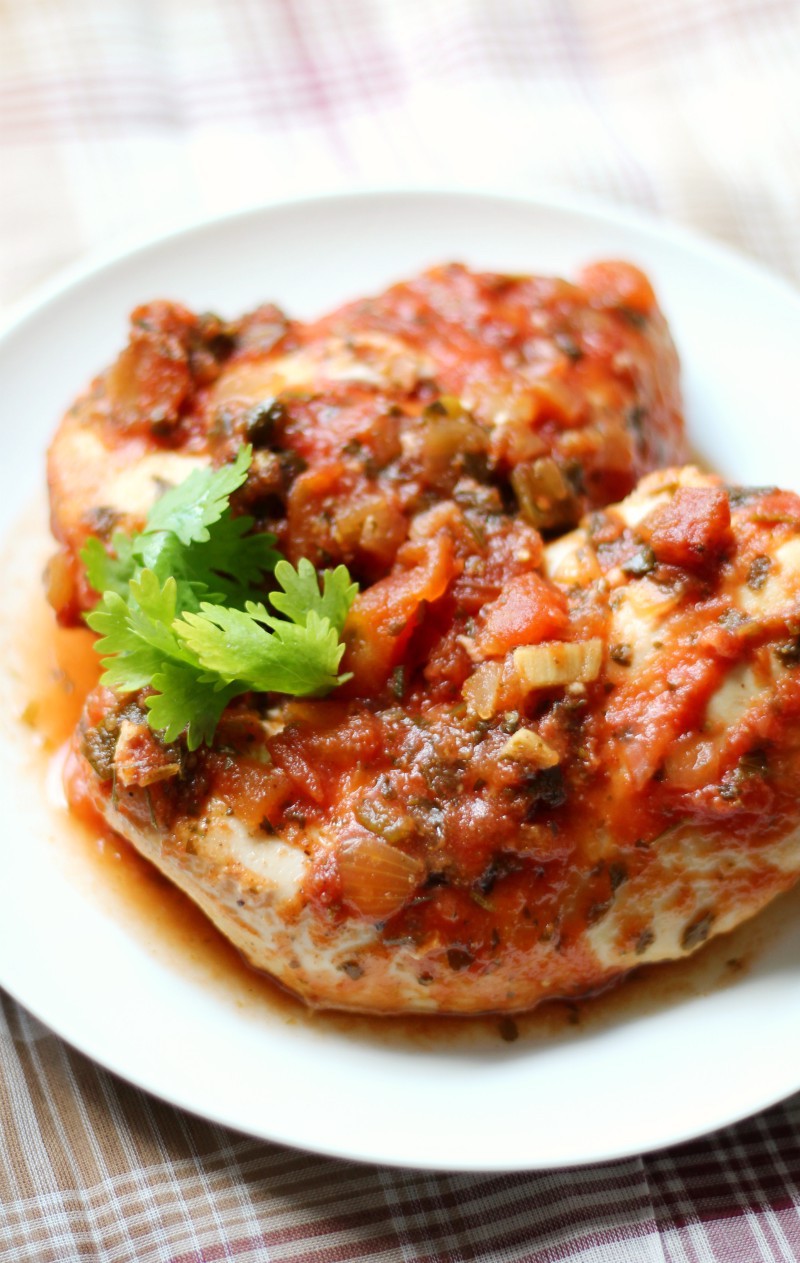
This one earns its place in this roundup on effort-to-result ratio alone. You put chicken breasts and a jar of salsa in a slow cooker, walk away for six hours, and come back to meat that shreds apart with two forks and tastes like it took much longer. I make a double batch on Sundays because it disappears fast — my husband eats it over cauliflower rice, the kids pile it into lettuce wraps, and I usually eat it straight from the pot while I'm shredding it. The spice blend of smoked paprika, garlic powder, and oregano gives it more depth than just plain salsa on its own.
Ingredients
- 2 lbs boneless skinless chicken breasts
- 1 jar (16 oz) mild salsa (or medium if you like heat)
- ¼ cup water
- 1 teaspoon garlic powder
- 1 teaspoon onion powder
- 1 teaspoon smoked paprika
- ½ teaspoon dried oregano
- Salt and black pepper to taste
- Fresh cilantro and parsley, for serving
Instructions
- Place chicken breasts in the slow cooker. Sprinkle garlic powder, onion powder, smoked paprika, oregano, salt, and pepper directly over the chicken.
- Pour the salsa and water over the top. No stirring needed — just put the lid on and cook on LOW for 6–7 hours or HIGH for 3–4 hours.
- Once the chicken is cooked through and very tender, use two forks to shred it directly in the slow cooker. Stir everything together so the chicken absorbs the salsa sauce.
- Serve topped with fresh cilantro and parsley. Works in lettuce cups, over cauliflower rice, or just in a bowl on its own.
Tips
- Tip: Don't use thick restaurant-style salsa — it tends to be chunky and doesn't break down as well. A standard jarred salsa like Pace or Trader Joe's Chunky works perfectly here.
- Tip: If there's too much liquid after shredding, remove the lid and cook on HIGH for another 20–30 minutes to let it reduce slightly.
- Tip: This freezes really well in zip-lock bags — portion it out after shredding, freeze flat, and you've got ready-made protein for the rest of the month.
17. Vietnamese Egg Omelette

This is not your standard two-egg scramble. The Vietnamese egg omelette is a properly layered, pan-fried omelette with glass noodles, shallots, and a touch of fish sauce folded through the egg — it has real texture and savory depth that a plain omelette just doesn't deliver. I'll be honest, the glass noodles do add a small amount of carbs, so keep the portion modest if you're strict about macros. But as a high-protein, lower-carb breakfast or light dinner, it holds its own on this list easily. Use a non-stick pan and don't rush the flip — that's the one thing that makes or breaks it.
Ingredients
- 4 large eggs
- 1 oz dried glass noodles (mung bean vermicelli), soaked in warm water for 10 minutes then drained and roughly chopped
- 2 shallots, thinly sliced
- 2 cloves garlic, minced
- 2 green onions, chopped
- 1 tablespoon fish sauce (use coconut aminos to keep it Whole30)
- ¼ teaspoon salt
- 2 tablespoons vegetable oil, for frying
Instructions
- Beat the eggs in a bowl. Add the soaked and drained glass noodles, shallots, garlic, green onions, fish sauce, and salt. Mix until combined.
- Heat vegetable oil in a non-stick skillet over medium heat until shimmering. Pour in the egg mixture and spread it into an even circle.
- Cook undisturbed for 3–4 minutes until the edges are set and the bottom is golden brown. Carefully flip using a wide spatula and cook the other side for 2–3 minutes.
- Slide onto a plate, cut into wedges, and serve immediately — it's best eaten hot straight from the pan.
Tips
- Tip: A non-stick pan is non-negotiable here — stainless steel will tear the omelette when you flip. Use your best non-stick and make sure the oil is fully hot before you pour in the egg.
- Tip: Glass noodles (mung bean vermicelli) are widely available at Asian grocery stores and even Walmart in the international foods aisle — don't substitute with regular pasta.
- Tip: If the omelette feels too thick to flip confidently, use a plate to help — slide the omelette onto a plate, then invert the pan over it and flip both together.
16. Sheet Pan Oven Baked Sausage and Peppers
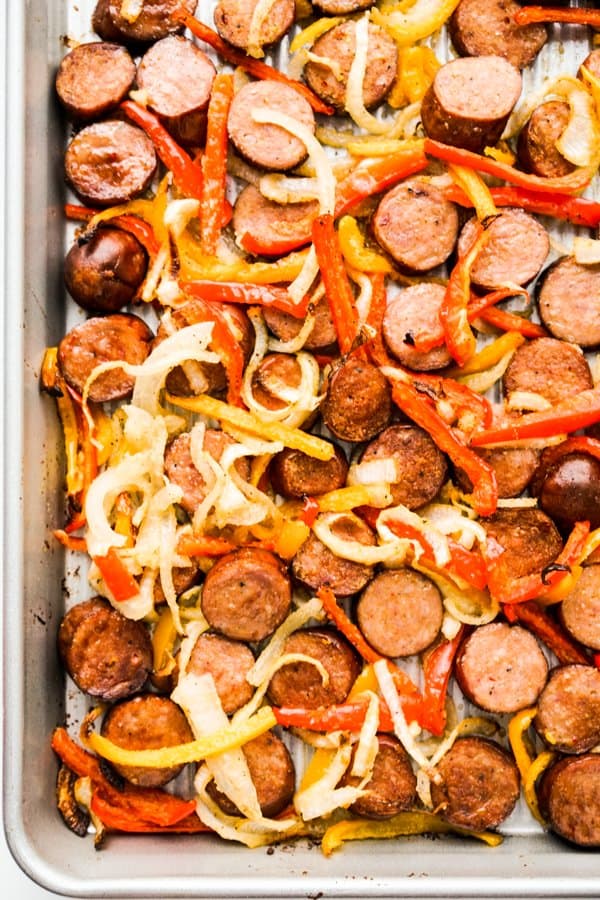
Sheet pan dinners are either overrated or underrated — there's rarely an in-between — but this one is genuinely worth keeping in rotation. Smoked sausage, bell peppers, and white onions roast together at high heat until the edges are slightly caramelized and the sausage has that split-skin crispness that only the oven can give you. Everything goes on one pan, takes about 30 minutes, and the cleanup is one sheet of foil. Saad, who normally pushes anything with peppers to the side of his plate, actually ate three pieces of sausage and picked up the peppers without complaining — so I'm counting that as a win.
Ingredients
- 1½ lbs smoked sausage (kielbasa or andouille), sliced into 1-inch rounds
- 3 bell peppers (mixed colors), cut into 1-inch strips
- 1 large white onion, sliced into half-moons
- 3 tablespoons olive oil
- 1 teaspoon garlic powder
- 1 teaspoon onion powder
- ½ teaspoon black pepper
- ½ teaspoon salt
Instructions
- Preheat oven to 400°F. Line a large sheet pan with foil and set aside.
- Spread the sausage slices, bell pepper strips, and onion on the sheet pan. Drizzle with olive oil, then sprinkle garlic powder, onion powder, salt, and pepper over everything. Toss directly on the pan until evenly coated.
- Spread everything into a single layer — don't pile it up, or it'll steam instead of roast. Roast for 20 minutes, then toss and roast for another 10–15 minutes until the edges are caramelized and the sausage is lightly browned.
- Serve straight from the pan. No sides needed, but it's also good over cauliflower rice if you want to bulk it out.
Tips
- Tip: Don't overcrowd the pan. Use your largest sheet pan, or split across two if needed. Crowded vegetables steam instead of caramelizing and you lose all the good browning.
- Tip: Andouille sausage adds a spicier, smokier flavor than regular kielbasa — both work, just pick based on how much heat your household can handle.
- Tip: This works in an air fryer too — cook at 380°F for 15–18 minutes, shaking the basket halfway through, for an even crispier result on the sausage.
11. Baked Cod with Cajun Garlic Butter (Easy 15 Min Meal)

Cod is one of those fish I kept ignoring for years because I didn't know what to do with it beyond frying. Then I tried it baked with a simple Cajun garlic butter and now it shows up on our table at least twice a month. The whole thing takes maybe 15 minutes start to finish, which on a weeknight is basically a miracle. The butter keeps the fish from drying out, and the Cajun seasoning gives it just enough heat without being aggressive. My husband eats it straight off the pan — no plate required, apparently.
Ingredients
- 4 cod fillets (about 6 oz each), patted dry
- 3 tablespoons unsalted butter, melted
- 3 garlic cloves, minced
- 1½ teaspoons Cajun seasoning (store-bought or homemade)
- ½ teaspoon smoked paprika
- ½ teaspoon salt
- ¼ teaspoon black pepper
- Fresh parsley, chopped, for garnish
- Lemon wedges, for serving
Instructions
- Preheat your oven to 400°F. Line a baking sheet with foil and give it a light spray of cooking oil.
- In a small bowl, stir together the melted butter, minced garlic, Cajun seasoning, smoked paprika, salt, and pepper.
- Place the cod fillets on the prepared baking sheet. Spoon or brush the Cajun butter generously over each fillet, coating the tops completely.
- Bake for 12–14 minutes, until the fish flakes easily with a fork and the edges look slightly golden. Don't overbake — cod dries out fast.
- Scatter fresh parsley over the top and serve immediately with lemon wedges on the side.
Tips
- Tip: Pat the cod completely dry before adding the butter mixture — any moisture on the surface will steam the fish instead of letting it develop that slightly golden edge.
- Tip: If your Cajun seasoning already has salt in it (most store-bought blends do), skip the added salt or you'll end up with a very salty fillet.
- Tip: Frozen cod works fine here — just thaw it overnight in the fridge and pat it very dry before using.
12. Air Fryer Boneless Skinless Chicken Thighs
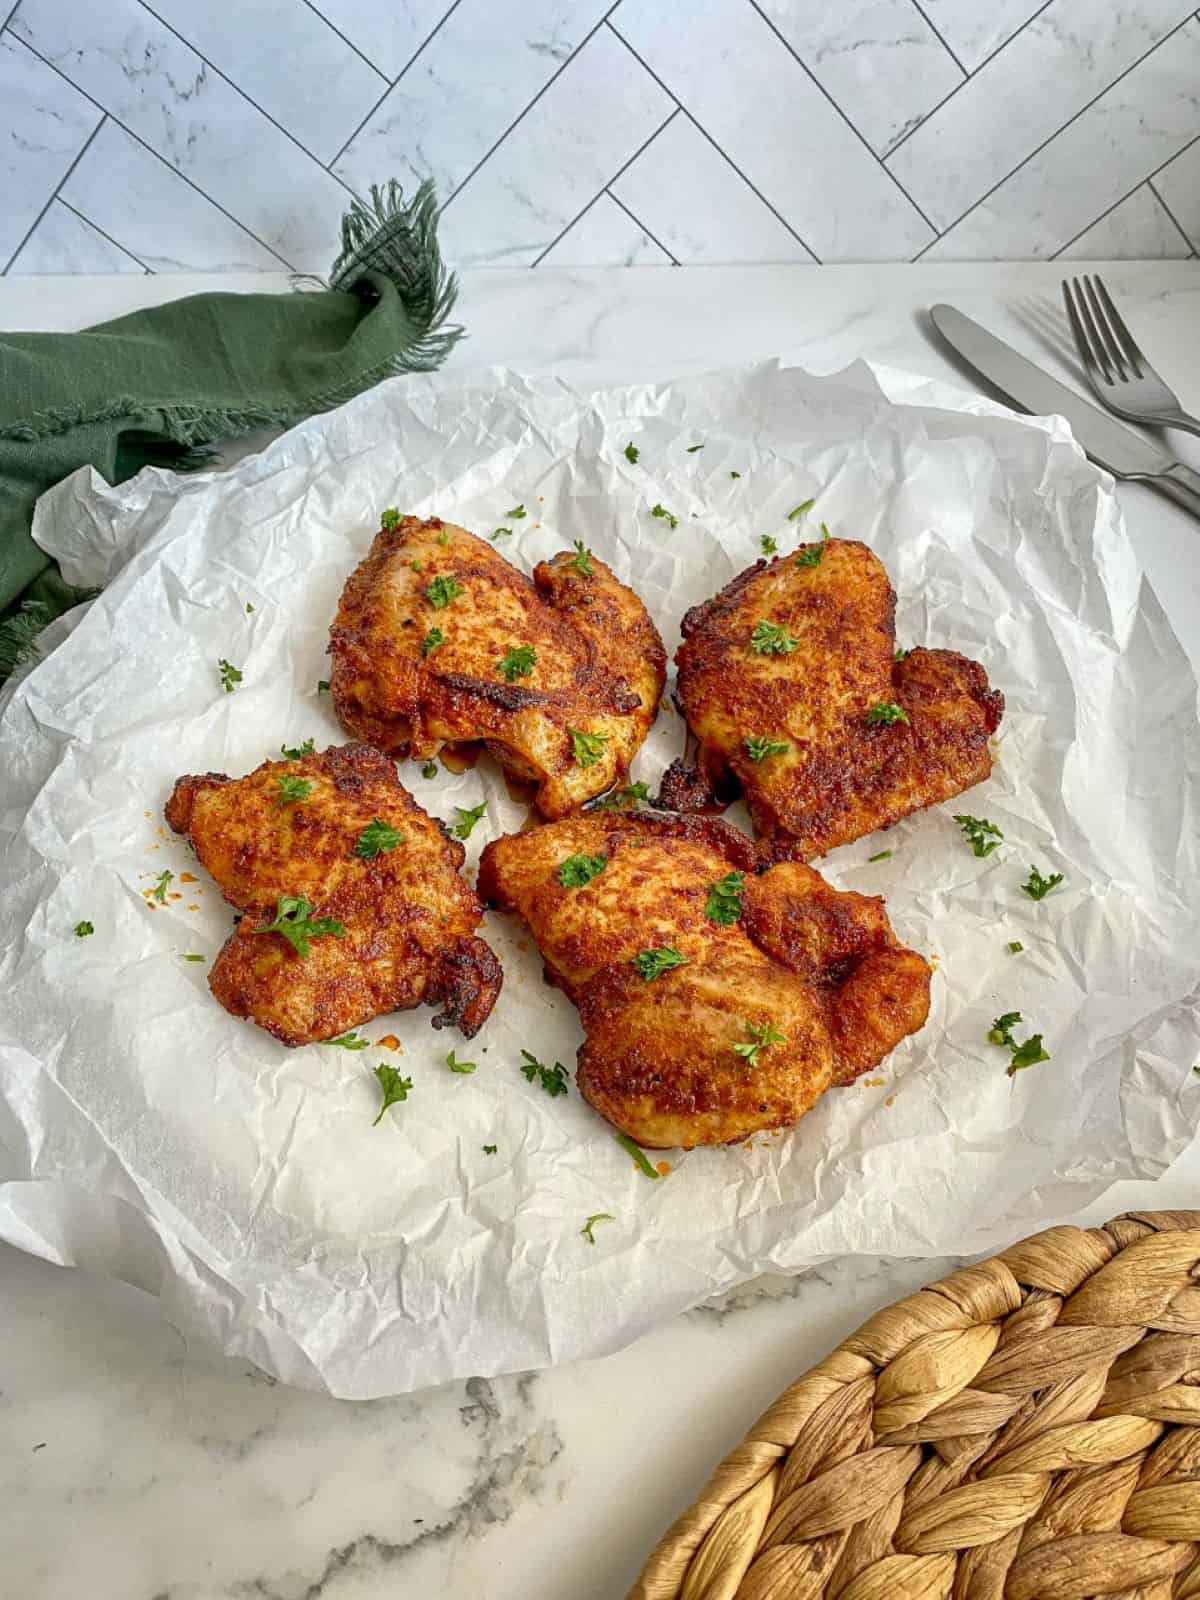
Chicken thighs in the air fryer are something I resisted for a long time because I assumed the air fryer was only good for reheating leftovers. I was wrong. Boneless skinless thighs come out genuinely juicy inside with slightly crisp edges, and the seasoning blend here — paprika, garlic powder, onion powder — is simple enough that even Zainab will eat it without complaint. The whole cook time is under 20 minutes, and you only need one bowl to mix the seasoning. If you're building a high-protein meal prep week, these are the backbone of it.
Ingredients
- 1½ lbs boneless skinless chicken thighs (about 4–5 pieces)
- 1 tablespoon olive oil
- 1 teaspoon smoked paprika
- 1 teaspoon garlic powder
- ½ teaspoon onion powder
- 1 teaspoon brown sugar (optional — skip if strict low-carb)
- ¾ teaspoon salt
- ¼ teaspoon black pepper
Instructions
- Pat the chicken thighs dry with paper towels. This step matters — dry chicken gets a better exterior in the air fryer.
- In a large bowl, combine olive oil, paprika, garlic powder, onion powder, brown sugar (if using), salt, and pepper. Add the chicken and toss until every piece is well coated.
- Preheat your air fryer to 400°F for 3 minutes. Arrange the chicken thighs in a single layer — don't stack them or they'll steam instead of crisp.
- Air fry for 16–18 minutes, flipping halfway through, until the internal temperature reaches 165°F.
- Let them rest for 3 minutes before cutting in — this keeps the juices inside where they belong.
Tips
- Tip: Don't skip the resting time — cutting into the chicken immediately after cooking pushes all the juices out onto the cutting board.
- Tip: These store really well in the fridge for up to 4 days, making them ideal for meal prep. Slice them cold and throw them into salads or lettuce wraps.
- Tip: No air fryer? Bake at 425°F on a wire rack set over a sheet pan for about 22–25 minutes — the wire rack helps air circulate underneath so you get similar results.
13. Kafta (Lebanese Beef Kebabs)
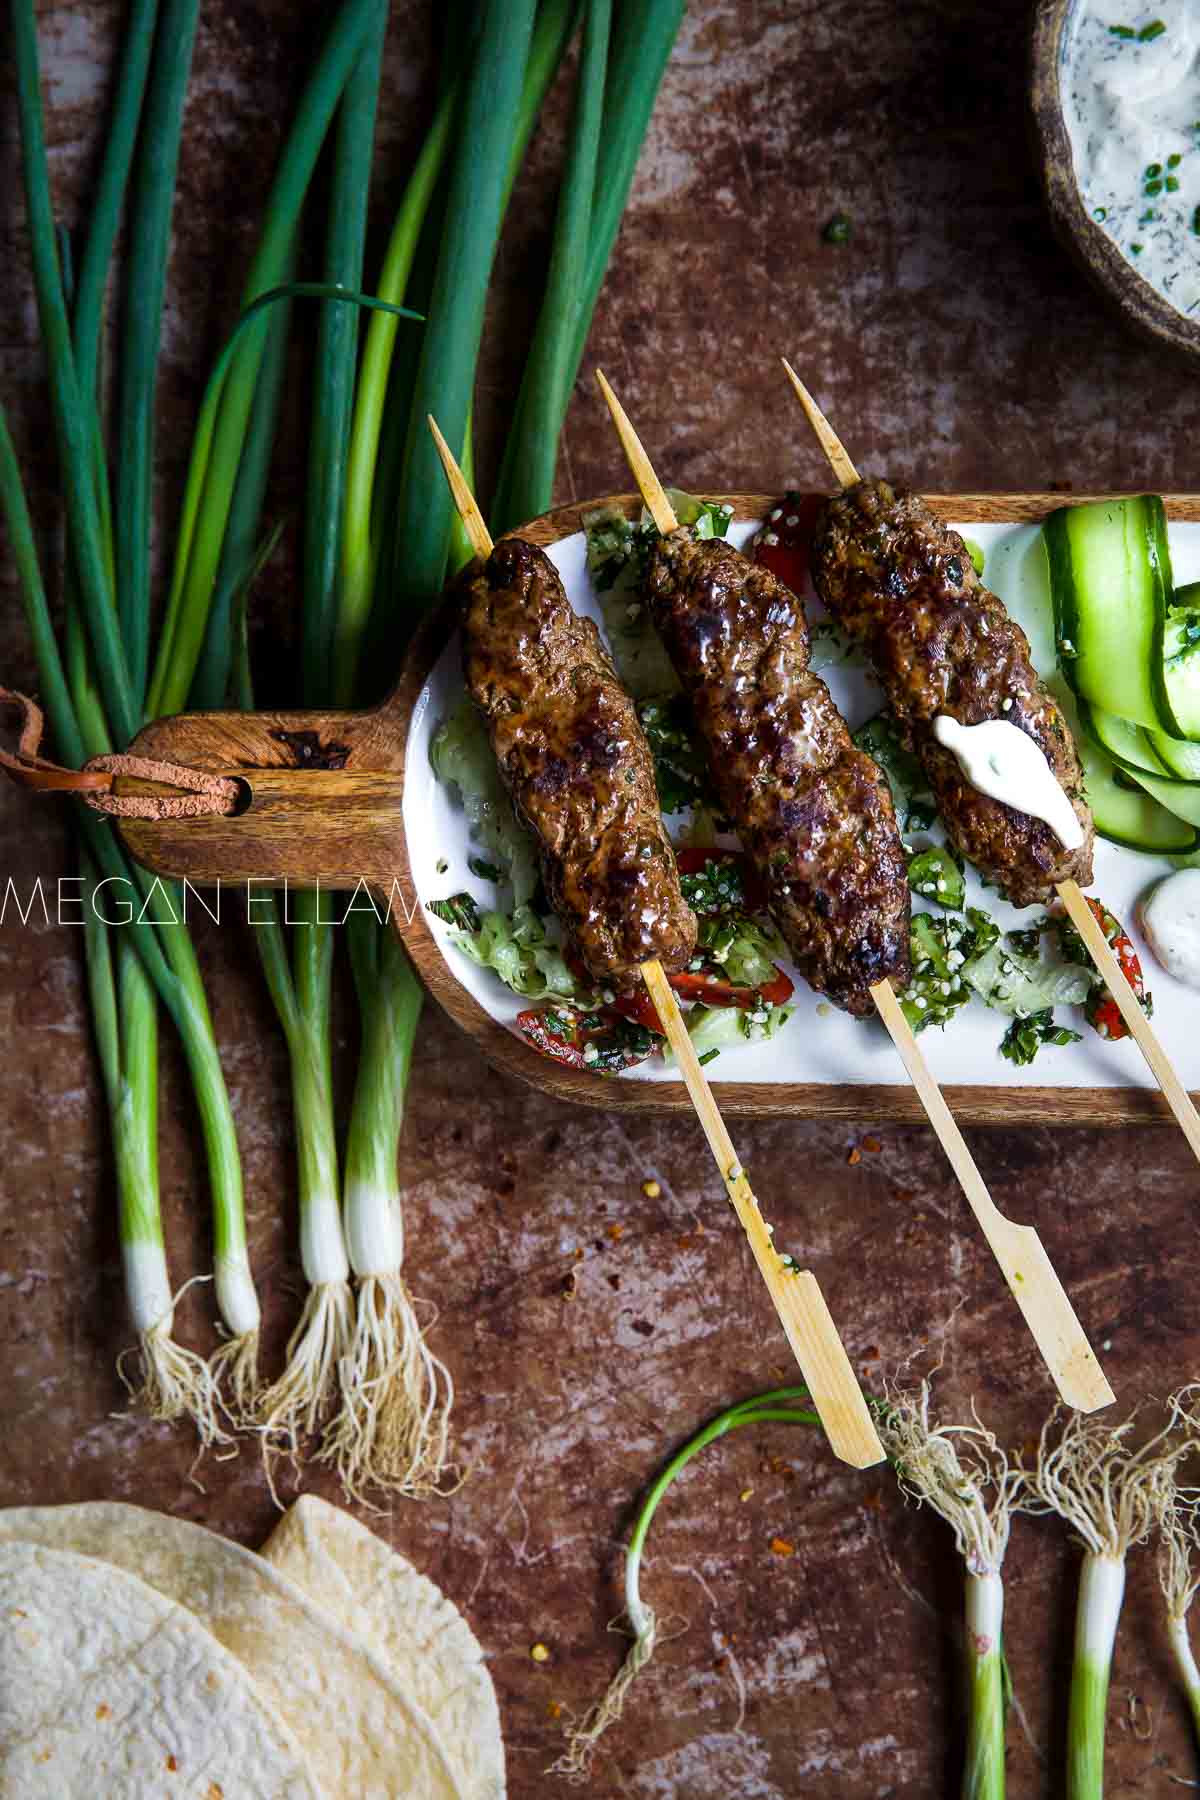
Growing up in Pakistan, we made kofta constantly — but Lebanese kafta is its own thing and I love it just as much. The seasoning is different: Lebanese seven spice (a warm blend of allspice, black pepper, cinnamon, coriander, cloves, nutmeg, and cumin) gives the beef a depth that's hard to place but impossible to forget. What I appreciate most is how minimal the ingredient list is — four things, and you're done. You can grill these on an outdoor grill or bake them in the oven, and both methods work well. They're low-carb and naturally keto, which makes them easy to fit into almost any eating plan.
Ingredients
- 1 lb ground beef (80/20 for best flavor and moisture)
- 1 small yellow onion, grated or very finely minced
- ¼ cup fresh flat-leaf parsley, finely chopped
- 1½ teaspoons Lebanese seven spice (find it at Middle Eastern grocers or Amazon; or substitute allspice)
- ¾ teaspoon salt
- ¼ teaspoon black pepper
- Metal or soaked wooden skewers
Instructions
- Combine ground beef, grated onion, parsley, seven spice, salt, and pepper in a bowl. Mix with your hands until everything is evenly distributed — don't overwork it or the texture gets tough.
- Divide the mixture into 6–8 equal portions. Shape each portion around a skewer into a long, thin log about ¾ inch thick, pressing firmly so it holds.
- To grill: cook over medium-high heat for 3–4 minutes per side until cooked through and slightly charred. To bake: place on a foil-lined baking sheet at 425°F for 18–20 minutes, turning once halfway.
- Serve with a simple cucumber-tomato salad, plain yogurt, or just on their own. They don't need much.
Tips
- Tip: Squeeze out as much liquid as possible from the grated onion before mixing — too much moisture makes the kafta fall apart on the skewer.
- Tip: If you can't find Lebanese seven spice, mix equal parts allspice, cinnamon, and black pepper — it's not exactly the same but gets you close enough for a weeknight dinner.
- Tip: These freeze well raw — shape them on the skewers, freeze on a tray, then transfer to a zip bag. Cook straight from frozen, just add a few extra minutes.
14. Air Fryer Bacon Wrapped Jalapeño Poppers
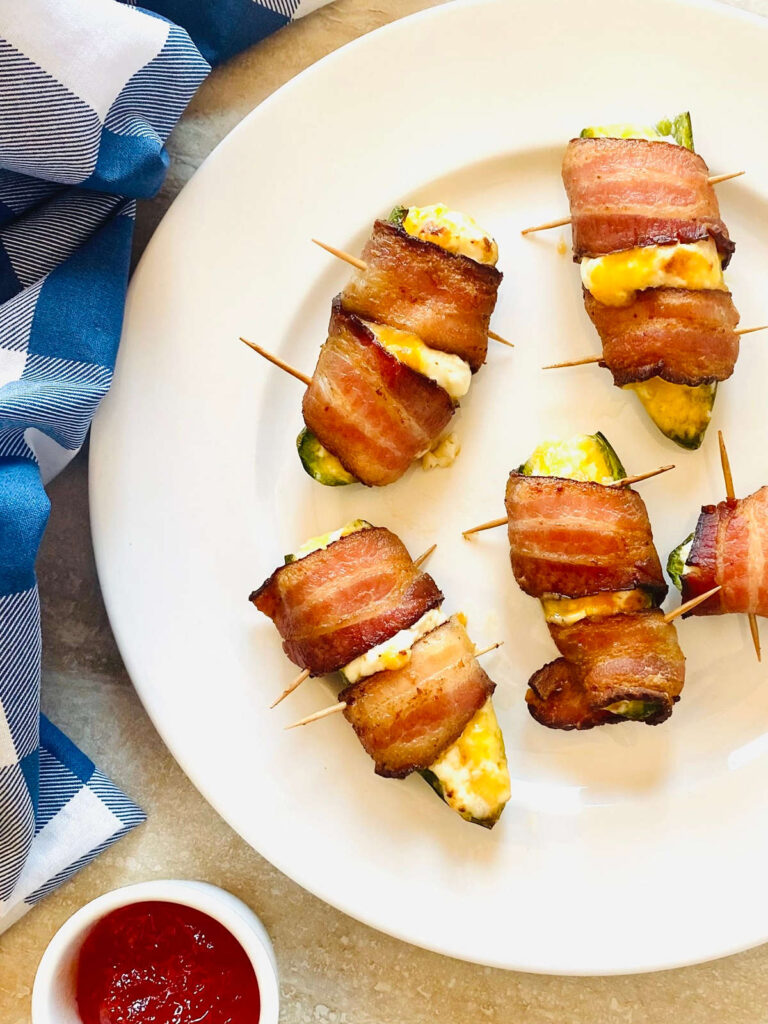
Four ingredients. Ten minutes. That's the whole pitch for these, and honestly it holds up. Jalapeños filled with cream cheese and cheddar, wrapped in bacon, and blasted in the air fryer until everything is melty and slightly crisp — these are the kind of thing that disappears before you can even plate them properly. I made them for a game night last year and my husband looked at me like I'd done something impressive. I had not. I had opened a package of bacon and a block of cream cheese. The heat level is moderate — the cream cheese tones down the jalapeños a lot — so even people who claim they can't handle spice usually manage these fine.
Ingredients
- 10 fresh jalapeños, halved lengthwise and seeded
- 4 oz cream cheese, softened to room temperature
- ½ cup shredded sharp cheddar cheese
- 10 strips bacon, cut in half (so you have 20 half-strips)
- Toothpicks, to secure the bacon
Instructions
- In a small bowl, mix the softened cream cheese and shredded cheddar together until combined. Letting the cream cheese sit out 15 minutes first makes this much easier — cold cream cheese just clumps.
- Fill each jalapeño half generously with the cheese mixture, mounding it slightly.
- Wrap each filled jalapeño half with a half-strip of bacon and secure with a toothpick. Make sure the ends of the bacon overlap on the bottom so they don't unravel during cooking.
- Preheat the air fryer to 375°F. Arrange the poppers in a single layer — work in batches if needed. Air fry for 8–10 minutes until the bacon is crispy and the cheese is bubbling.
- Let them cool for 2 minutes before eating — the filling is volcanic straight out of the air fryer.
Tips
- Tip: Wear gloves when seeding the jalapeños — or at minimum don't touch your face for an hour afterward. I've made this mistake more than once.
- Tip: Thin-cut bacon works better here than thick-cut — it crisps up in the same time the filling needs to melt, so everything finishes together.
- Tip: No air fryer? Bake at 400°F on a wire rack over a foil-lined sheet pan for 18–20 minutes until the bacon is done to your liking.
15. Easy Marry Me Chicken
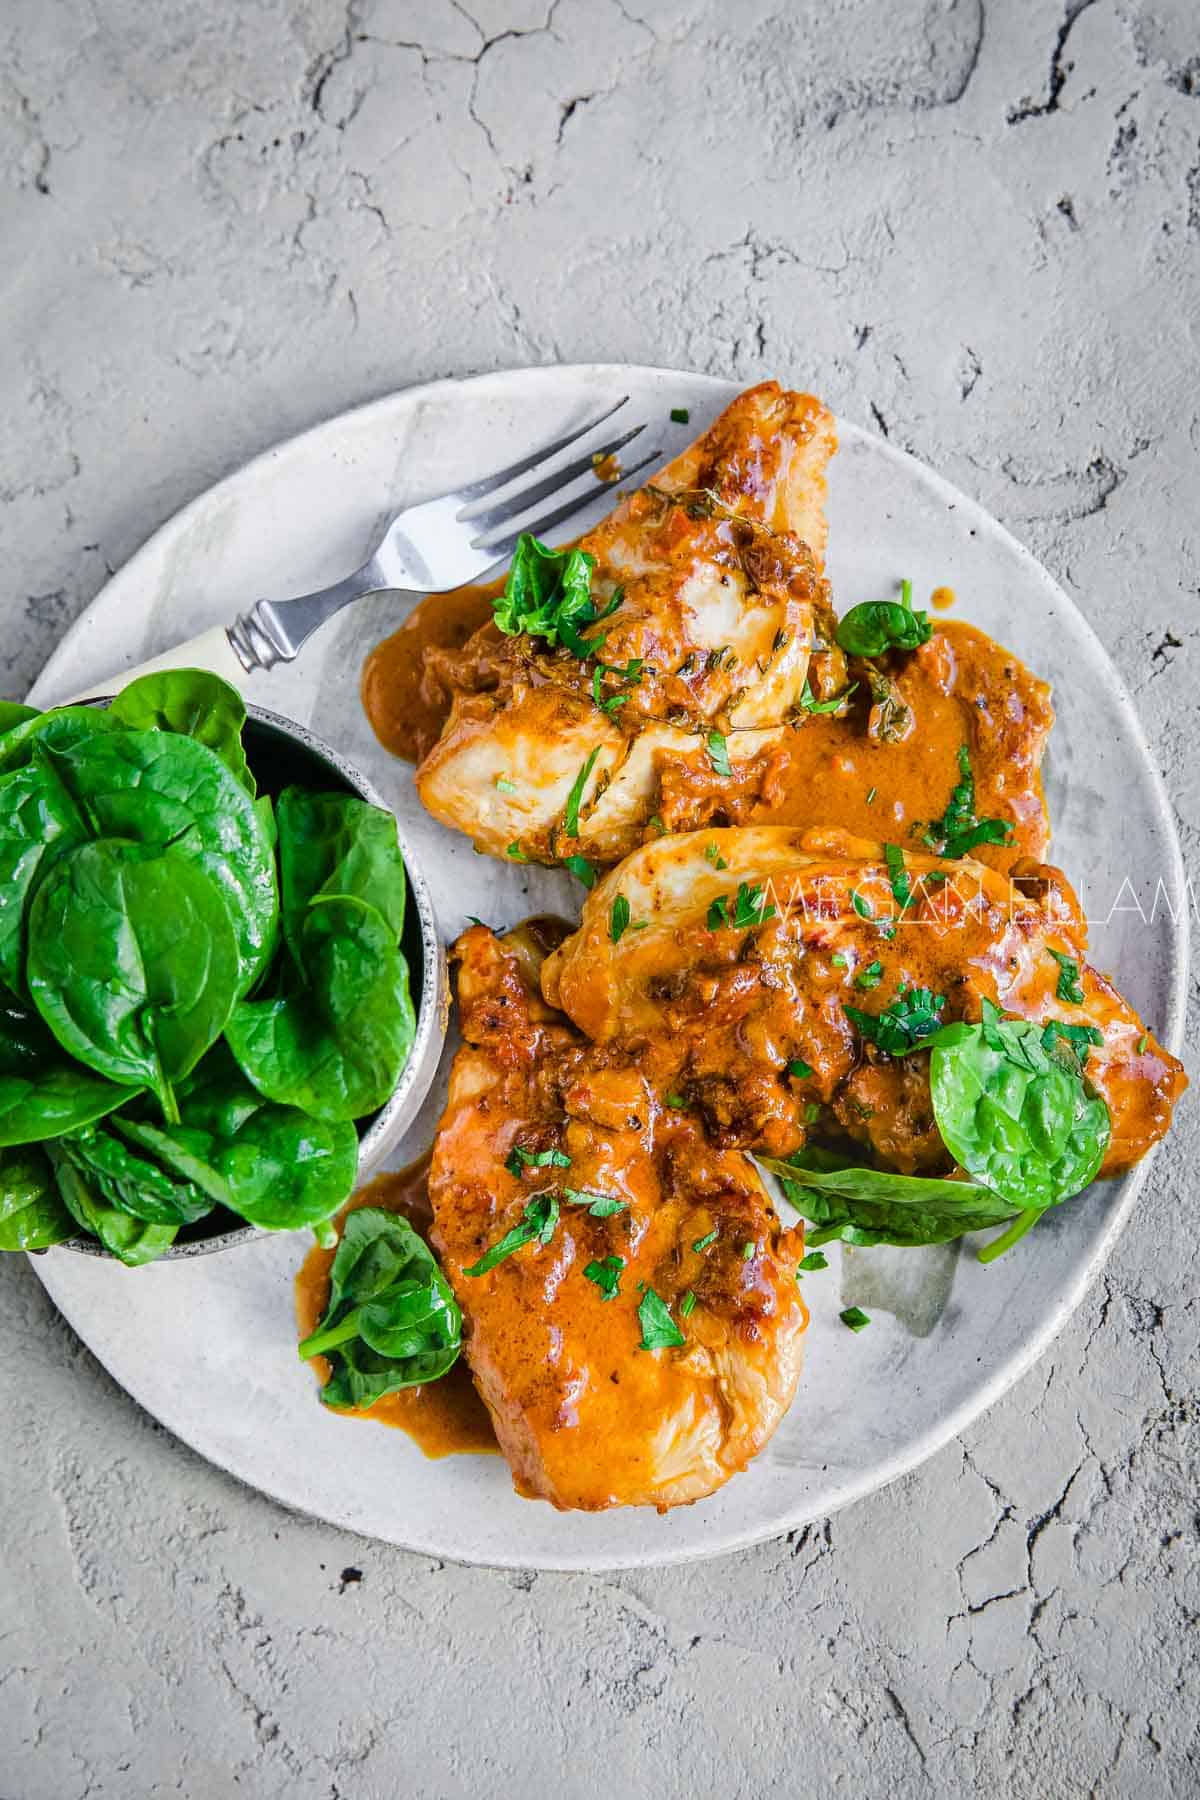
The name is a bit dramatic but the recipe earns it. Marry Me Chicken is basically chicken breasts cooked in a creamy sun-dried tomato sauce with parmesan and herbs — it sounds fancy but comes together in one skillet in about 30 minutes. I made this on a random Tuesday and my husband asked if we were celebrating something. We were not. The sauce is rich and a little tangy from the sun-dried tomatoes, and the parmesan thickens everything just enough without being heavy. It fits easily into a low-carb way of eating — serve it over cauliflower rice or zucchini noodles if you're keeping carbs down, or just eat it with a fork straight from the pan if it's been a long day.
Ingredients
- 4 boneless skinless chicken breasts, pounded to even thickness
- 2 tablespoons olive oil
- 3 garlic cloves, minced
- ½ cup low-sodium chicken broth
- ¾ cup heavy cream
- ½ cup grated parmesan cheese
- ⅓ cup sun-dried tomatoes in oil, drained and roughly chopped
- 1 teaspoon dried thyme
- 1 teaspoon smoked paprika
- 2 tablespoons basil pesto (store-bought is fine)
- Salt and black pepper to taste
Instructions
- Season the chicken breasts on both sides with salt, pepper, and smoked paprika. Heat olive oil in a large skillet over medium-high heat.
- Sear the chicken for 4–5 minutes per side until golden brown. The chicken doesn't need to be cooked through yet — it finishes in the sauce. Set aside on a plate.
- In the same skillet, reduce heat to medium and add the minced garlic. Cook for 30 seconds, then pour in the chicken broth, scraping up any browned bits from the bottom — that's flavor, don't waste it.
- Stir in the heavy cream, parmesan, sun-dried tomatoes, thyme, and pesto. Let the sauce simmer for 2–3 minutes until it starts to thicken slightly.
- Return the chicken to the skillet, nestling it into the sauce. Reduce heat to medium-low, cover, and cook for another 8–10 minutes until the chicken is cooked through (165°F internal temp).
- Taste the sauce, adjust salt if needed, and serve immediately — over cauliflower rice, zucchini noodles, or just on its own.
Tips
- Tip: Pounding the chicken to an even thickness is worth the 2 minutes it takes — uneven breasts mean one end dries out before the other end is cooked through.
- Tip: If the sauce looks too thick after adding the parmesan, splash in a tablespoon or two of extra broth and stir — it loosens right up.
- Tip: Leftovers reheat well on low heat with a small splash of broth or cream to bring the sauce back — don't microwave it on high or the cream sauce will separate.
10. Cheeseburger Bowl

Everything you love about a cheeseburger — seasoned beef, crisp lettuce, tomatoes, pickles, and that tangy burger sauce — sitting in a bowl with zero bun required. My husband was skeptical the first time I put this in front of him. He asked where the bread was. By the time he finished, he was asking when I'd make it again. The homemade burger sauce is what ties everything together, and it takes about two minutes to mix up, so don't skip it.
Ingredients
- 1 lb ground beef (80/20)
- 1 tablespoon avocado oil (or any neutral oil)
- 1 teaspoon paprika
- ½ teaspoon chili powder
- ½ teaspoon salt, plus more to taste
- 3 cups romaine lettuce, chopped
- 1 cup cherry tomatoes, halved
- ½ cup dill pickle slices
- ½ cup shredded cheddar cheese
- 3 tablespoons mayonnaise, 1 tablespoon ketchup, 1 teaspoon mustard, 1 teaspoon pickle brine (burger sauce)
Instructions
- Mix together the mayo, ketchup, mustard, and pickle brine in a small bowl. Set aside in the fridge while you cook the beef.
- Heat the avocado oil in a skillet over medium-high heat. Add the ground beef, breaking it up as it cooks. Season with paprika, chili powder, and salt. Cook for 7-8 minutes until browned and cooked through. Drain any excess fat.
- Divide the chopped lettuce between two bowls. Top with the warm beef, cherry tomatoes, pickles, and shredded cheddar.
- Drizzle the burger sauce over the top and serve immediately.
Tips
- Tip: Add the warm beef right on top of cold lettuce — the contrast of temperatures actually makes this better, not worse.
- Tip: A sliced avocado on top adds healthy fat and makes the bowl more filling if you need it to carry you through a long afternoon.
- Tip: The burger sauce keeps in the fridge for up to a week, so make a double batch and use it on salads or grilled chicken too.
9. Ranchera Meat (Carne Asada)
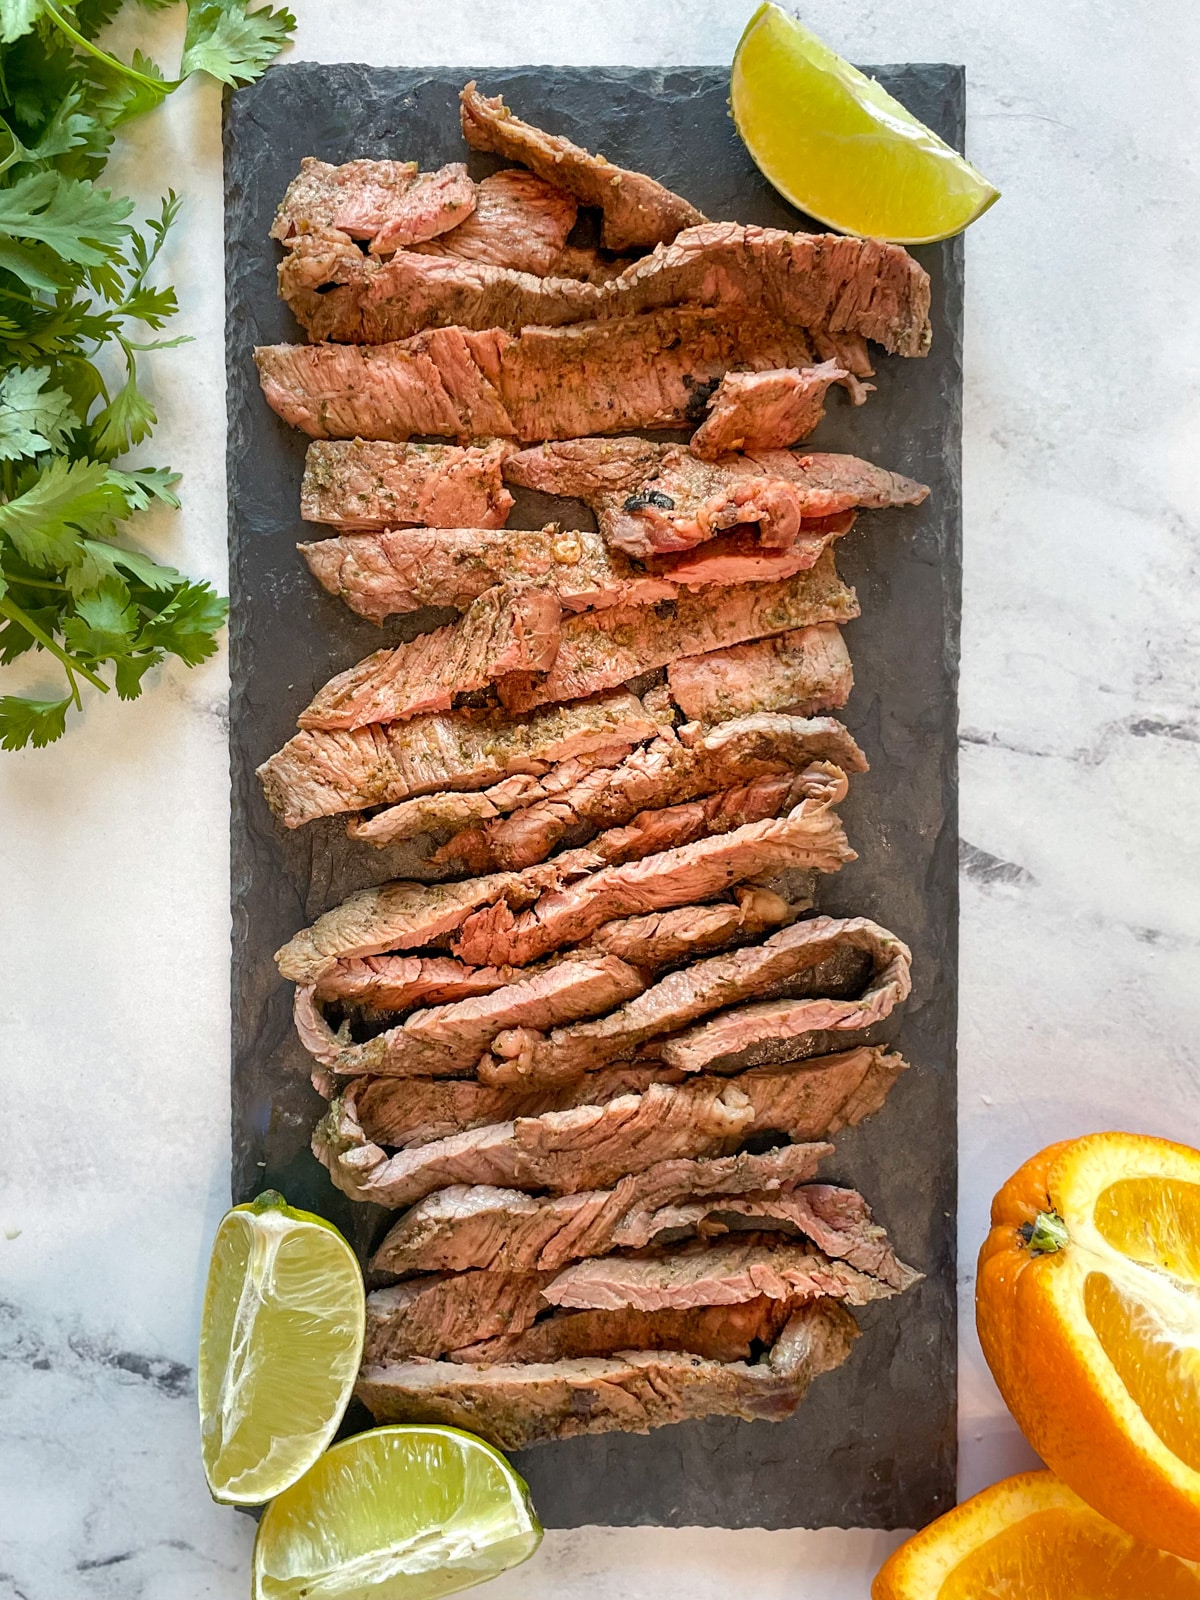
Ranchera meat — also called flap steak — is the cut used for proper carne asada, and once you try it this way, you'll understand why it has such a following. The marinade does serious work here: citrus from orange and lime, heat from jalapeño, depth from beer and soy sauce. It's not a quick weeknight thing — you want to marinate this for at least four hours — but the hands-on time is almost nothing. Just mix, marinate, and grill.
Ingredients
- 1½ lbs ranchera meat (flap steak or skirt steak)
- Juice of 1 orange
- Juice of 2 limes
- ½ white onion, roughly chopped
- 1 jalapeño, seeded and chopped
- 4 cloves garlic, minced
- ¼ cup fresh cilantro, chopped
- ½ cup beer (any light lager works)
- 2 tablespoons olive oil
- 2 tablespoons soy sauce
- 1 teaspoon cumin
- 1 teaspoon chili powder
Instructions
- Combine all marinade ingredients — orange juice, lime juice, onion, jalapeño, garlic, cilantro, beer, olive oil, soy sauce, cumin, and chili powder — in a large zip-lock bag or bowl. Mix well.
- Add the ranchera meat to the marinade, making sure it's fully coated. Seal and refrigerate for at least 4 hours, ideally overnight.
- When ready to cook, remove the meat from the marinade and let it come to room temperature for 20 minutes. Pat it dry — this helps you get a proper sear.
- Grill over high heat (or use a cast iron skillet) for 3-4 minutes per side for medium. Let it rest for 5 minutes before slicing against the grain.
Tips
- Tip: Always slice against the grain — this cut can turn chewy fast if you slice it the wrong way. Look for the direction of the muscle fibers and cut perpendicular to them.
- Tip: If you can't find ranchera/flap steak at your regular grocery store, skirt steak from Walmart or Costco works just as well with this marinade.
- Tip: Serve over cauliflower rice to keep it low carb, or just eat it straight with a squeeze of lime and some sliced avocado on the side.
8. Easy Air Fryer Portobello Pizzas
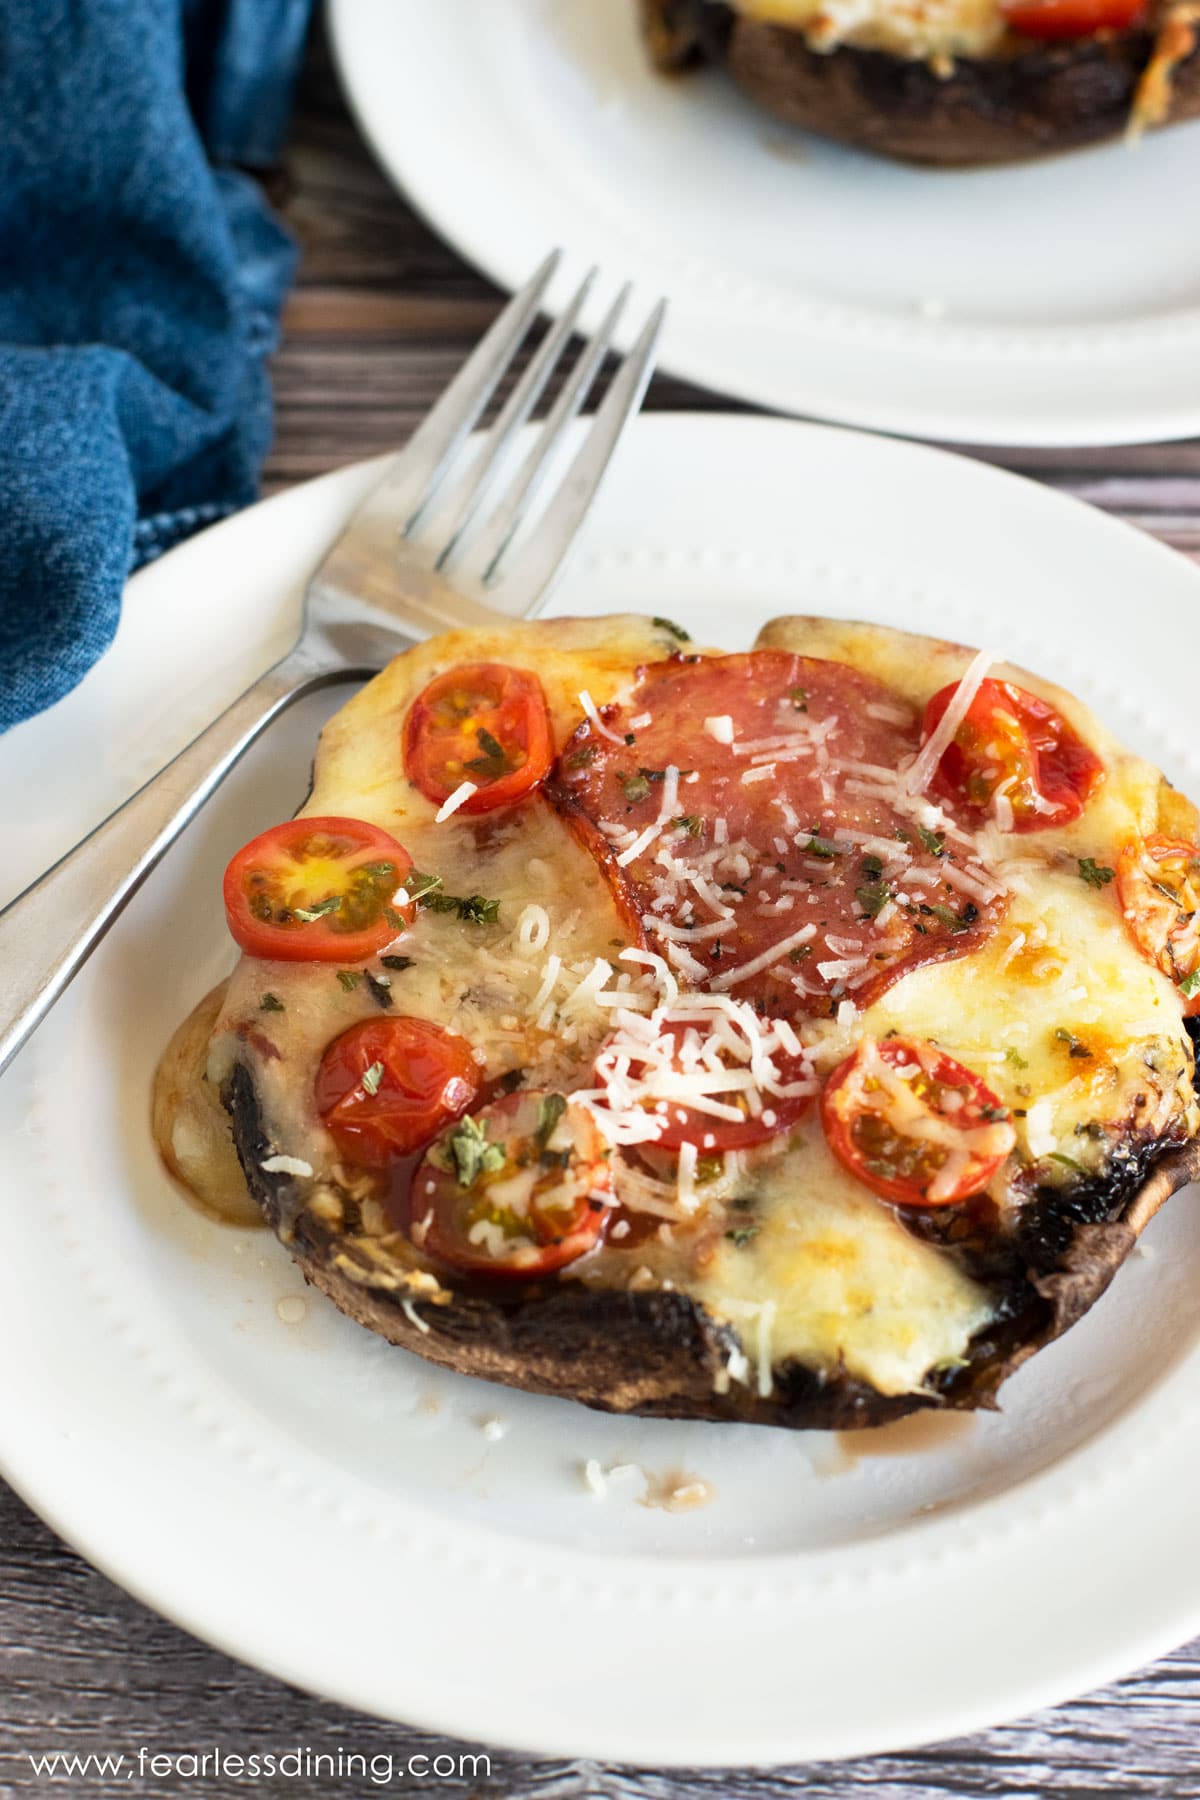
Zainab goes through phases where she refuses anything without melted cheese on top, and these portobello pizzas became my go-to answer on nights when I wasn't making actual pizza dough. The mushroom cap acts as the base — firm enough to hold toppings, with that earthy depth that actually complements the sauce and cheese rather than fighting it. Fifteen minutes in the air fryer and they come out with crispy edges and bubbling cheese. The trick is to scrape out the gills first and pat the caps dry so they don't steam and get soggy.
Ingredients
- 4 large portobello mushroom caps, stems removed
- 1 tablespoon olive oil
- ½ cup pizza sauce (store-bought or homemade)
- 1 cup shredded mozzarella cheese
- ½ cup mini pepperoni or cooked Italian sausage crumbles
- ¼ cup sliced bell pepper or any vegetables you like
- ½ teaspoon Italian seasoning
- Red pepper flakes, to taste
Instructions
- Use a spoon to scrape out the dark gills from the underside of each mushroom cap. Pat the caps dry with paper towels — this step matters for texture.
- Brush the outside of each cap lightly with olive oil. Place them gill-side up in the air fryer basket and cook at 375°F for 4 minutes to pre-cook slightly and release some moisture.
- Pat any liquid out of the caps again, then spoon 2 tablespoons of pizza sauce into each one. Top with mozzarella, your chosen toppings, and a sprinkle of Italian seasoning.
- Air fry at 375°F for another 6-8 minutes until the cheese is melted and bubbly and the edges of the mushroom are starting to brown. Serve immediately.
Tips
- Tip: Don't skip the pre-cook step — portobellos release a surprising amount of water and if you load them up with toppings straight away, you end up with a watery mess.
- Tip: No air fryer? These work in a regular oven at 400°F for about 12-15 minutes total — just keep an eye on the cheese.
- Tip: Keep the sauce layer thin — a heavy hand with the sauce makes the base soggy faster than anything else.
7. Gluten-Free Shake and Bake Pork Chops
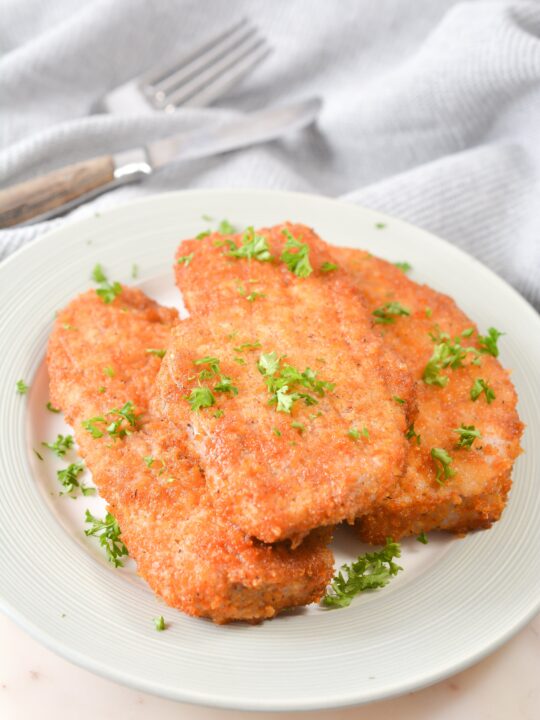
The original shake-and-bake concept — coat the meat in seasoned crumbs, bake until crispy — is genius. This version swaps the breadcrumbs for pork rind crumbs, which makes it naturally gluten-free, low carb, and keto-friendly all at once. The coating crisps up beautifully in the oven and the pork chops stay juicy inside. I was genuinely surprised the first time I tried this swap — I expected it to taste weird, but the pork rind crumbs just taste like a really well-seasoned, crunchy coating. Also dairy-free, if that matters to you.
Ingredients
- 4 bone-in pork chops (about 1 inch thick)
- 1 tablespoon olive oil
- 1 cup pork rind crumbs (crush plain pork rinds in a bag)
- 1 teaspoon paprika
- ½ teaspoon celery salt
- ½ teaspoon garlic powder
- ½ teaspoon salt
- ¼ teaspoon black pepper
- ¼ teaspoon dried basil
- ¼ teaspoon dried oregano
Instructions
- Preheat your oven to 400°F. Line a baking sheet with a wire rack if you have one — it helps the bottom of the chops crisp up rather than steam.
- Mix the pork rind crumbs with all the seasonings in a shallow bowl or a large zip-lock bag.
- Brush each pork chop lightly with olive oil on both sides, then press into the seasoned crumb mixture (or shake in the bag) until fully coated.
- Place on the prepared baking sheet and bake for 20-25 minutes, until the coating is golden and the internal temperature reads 145°F. Let rest for 3 minutes before serving — don't skip the rest or they'll dry out.
Tips
- Tip: Do not overcook these. Pork chops go from juicy to dry very fast — pull them at 145°F internal temperature and let carryover cooking do the rest.
- Tip: Plain pork rinds from Walmart or Aldi crush down into perfect crumbs — just seal them in a zip-lock bag and roll over them with a rolling pin.
- Tip: Boneless chops work too, but they cook a few minutes faster, so start checking at 18 minutes.
6. Easy Creamy Chicken Skillet
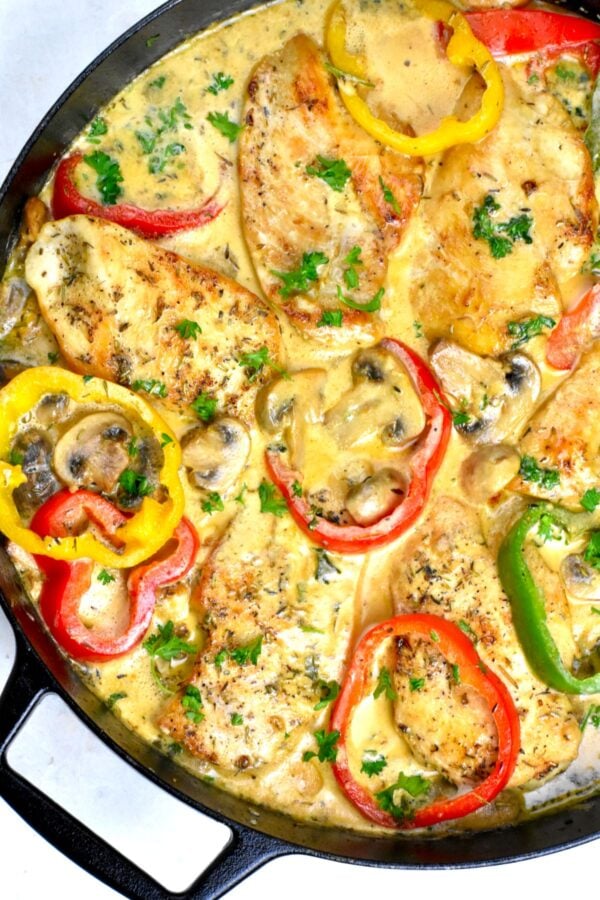
One skillet, 30 minutes, golden-seared chicken sitting in a cream sauce that tastes like you spent way longer on it than you did. I make this on weeknights when I need something that feels substantial without a lot of cleanup. The key is getting a proper golden crust on the chicken before you add anything else to the pan — don't rush that step, and don't move the chicken around once it's down. That sear is where the flavor lives, and it carries into the sauce when you deglaze the pan.
Ingredients
- 1½ lbs boneless skinless chicken breasts (or thighs)
- 1 tablespoon olive oil
- Salt and black pepper, to season the chicken
- 1 cup cremini or button mushrooms, sliced
- ½ cup bell pepper, any color, sliced
- 4 cloves garlic, minced
- 1 cup heavy cream
- ½ cup chicken broth
- ¼ cup grated parmesan cheese
- 1 teaspoon Italian seasoning
- Fresh parsley, chopped, for serving
Instructions
- Season the chicken generously with salt and pepper on both sides. Heat the olive oil in a large skillet over medium-high heat until shimmering.
- Add the chicken and cook without moving it for 5-6 minutes until a deep golden crust forms. Flip and cook another 5-6 minutes. Remove to a plate — it doesn't need to be fully cooked through yet.
- In the same skillet, add the mushrooms and bell pepper. Cook for 3-4 minutes until softened. Add the garlic and cook for 1 minute more until fragrant.
- Pour in the chicken broth and scrape up any browned bits from the bottom of the pan. Stir in the heavy cream, parmesan, and Italian seasoning. Let it simmer for 3 minutes.
- Return the chicken to the skillet. Reduce heat to medium-low, cover, and cook for another 8-10 minutes until the chicken is cooked through and the sauce has thickened slightly. Garnish with fresh parsley and serve.
Tips
- Tip: Let the parmesan come to room temperature before adding it to the sauce — cold cheese straight from the fridge can clump instead of melting smoothly.
- Tip: Chicken thighs are more forgiving than breasts here — they stay juicy even if you cook them a minute or two longer, which is useful on a hectic weeknight.
- Tip: This sauce is good enough to eat with a spoon. If you're not strictly low carb, a piece of crusty bread to mop up the pan is not a bad idea at all.
17. Creamy Skillet Tomato Spinach Chicken Breasts
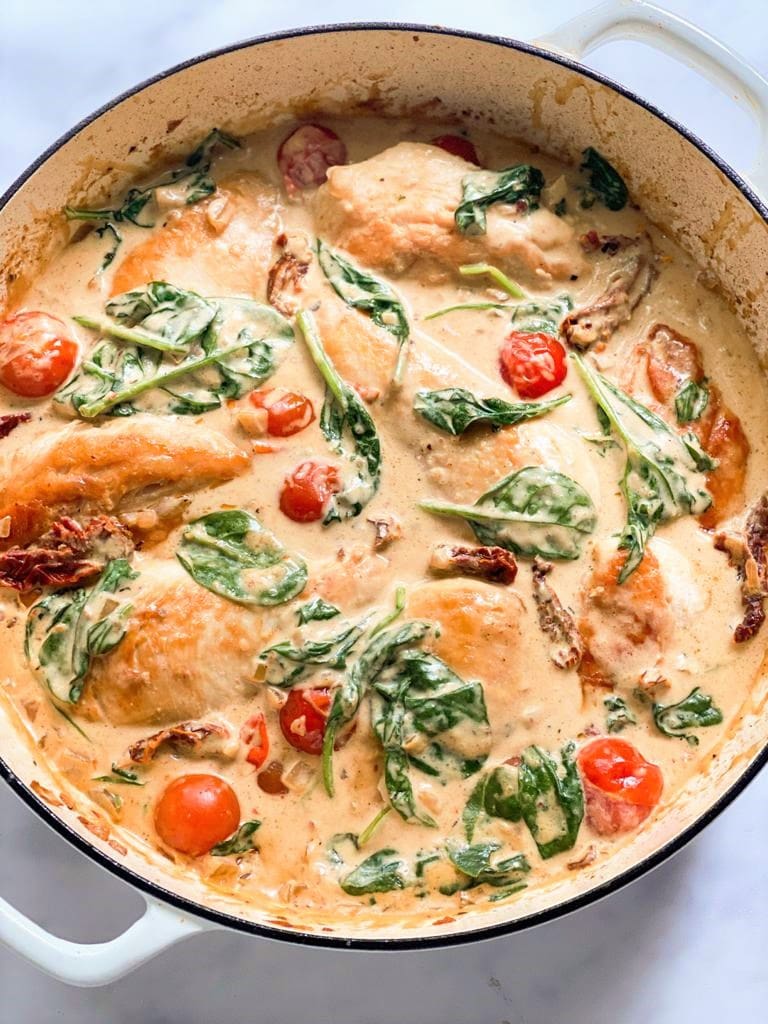
This one-pan creamy skillet chicken is basically my weeknight savior. It comes together in about 30 minutes, it tastes like you spent way longer, and the sauce — sundried tomatoes, heavy cream, garlic, parmesan, wilted baby spinach — is the kind of thing you want to mop up with something. It's often called a quick Tuscan chicken, and the label fits. Everything cooks in a single skillet, which means less washing up. That alone earns its spot here.
Ingredients
- 2 large chicken breasts, sliced in half horizontally to make 4 thin pieces
- 2 tablespoons olive oil
- 3 cloves garlic, minced
- ¼ cup dry white wine (or chicken stock if you prefer)
- ⅓ cup sundried tomatoes in oil, drained and roughly chopped
- ½ cup chicken stock
- ¾ cup heavy cream
- ⅓ cup grated parmesan
- 2 cups baby spinach
- Salt and black pepper to taste
Instructions
- Season the chicken pieces generously with salt and pepper on both sides. Heat olive oil in a large skillet over medium-high heat and sear the chicken for 3–4 minutes per side until golden and cooked through. Remove and set aside.
- In the same skillet, lower the heat to medium and sauté the garlic for about 30 seconds until fragrant. Pour in the white wine and let it reduce for 1 minute, scraping up any browned bits from the bottom — that's all flavor.
- Add the sundried tomatoes and chicken stock. Stir, then pour in the heavy cream. Let the sauce simmer for 3–4 minutes until it starts to thicken slightly.
- Stir in the parmesan until melted, then add the baby spinach and let it wilt for about a minute. Taste and adjust salt and pepper.
- Return the chicken to the skillet, spoon the sauce over it, and heat through for another 2 minutes. Serve immediately.
Tips
- Tip: Slicing the chicken breasts in half horizontally gives you thinner pieces that cook faster and more evenly — no dried-out edges.
- Tip: If you can't find sundried tomatoes, a handful of cherry tomatoes halved and cooked down works in a pinch — the sauce will be a little lighter but still good.
- Tip: Don't add the parmesan when the heat is too high or it can clump rather than melt smoothly into the sauce. Drop the heat to low first.
18. Air Fryer Boneless Skinless Chicken Thighs
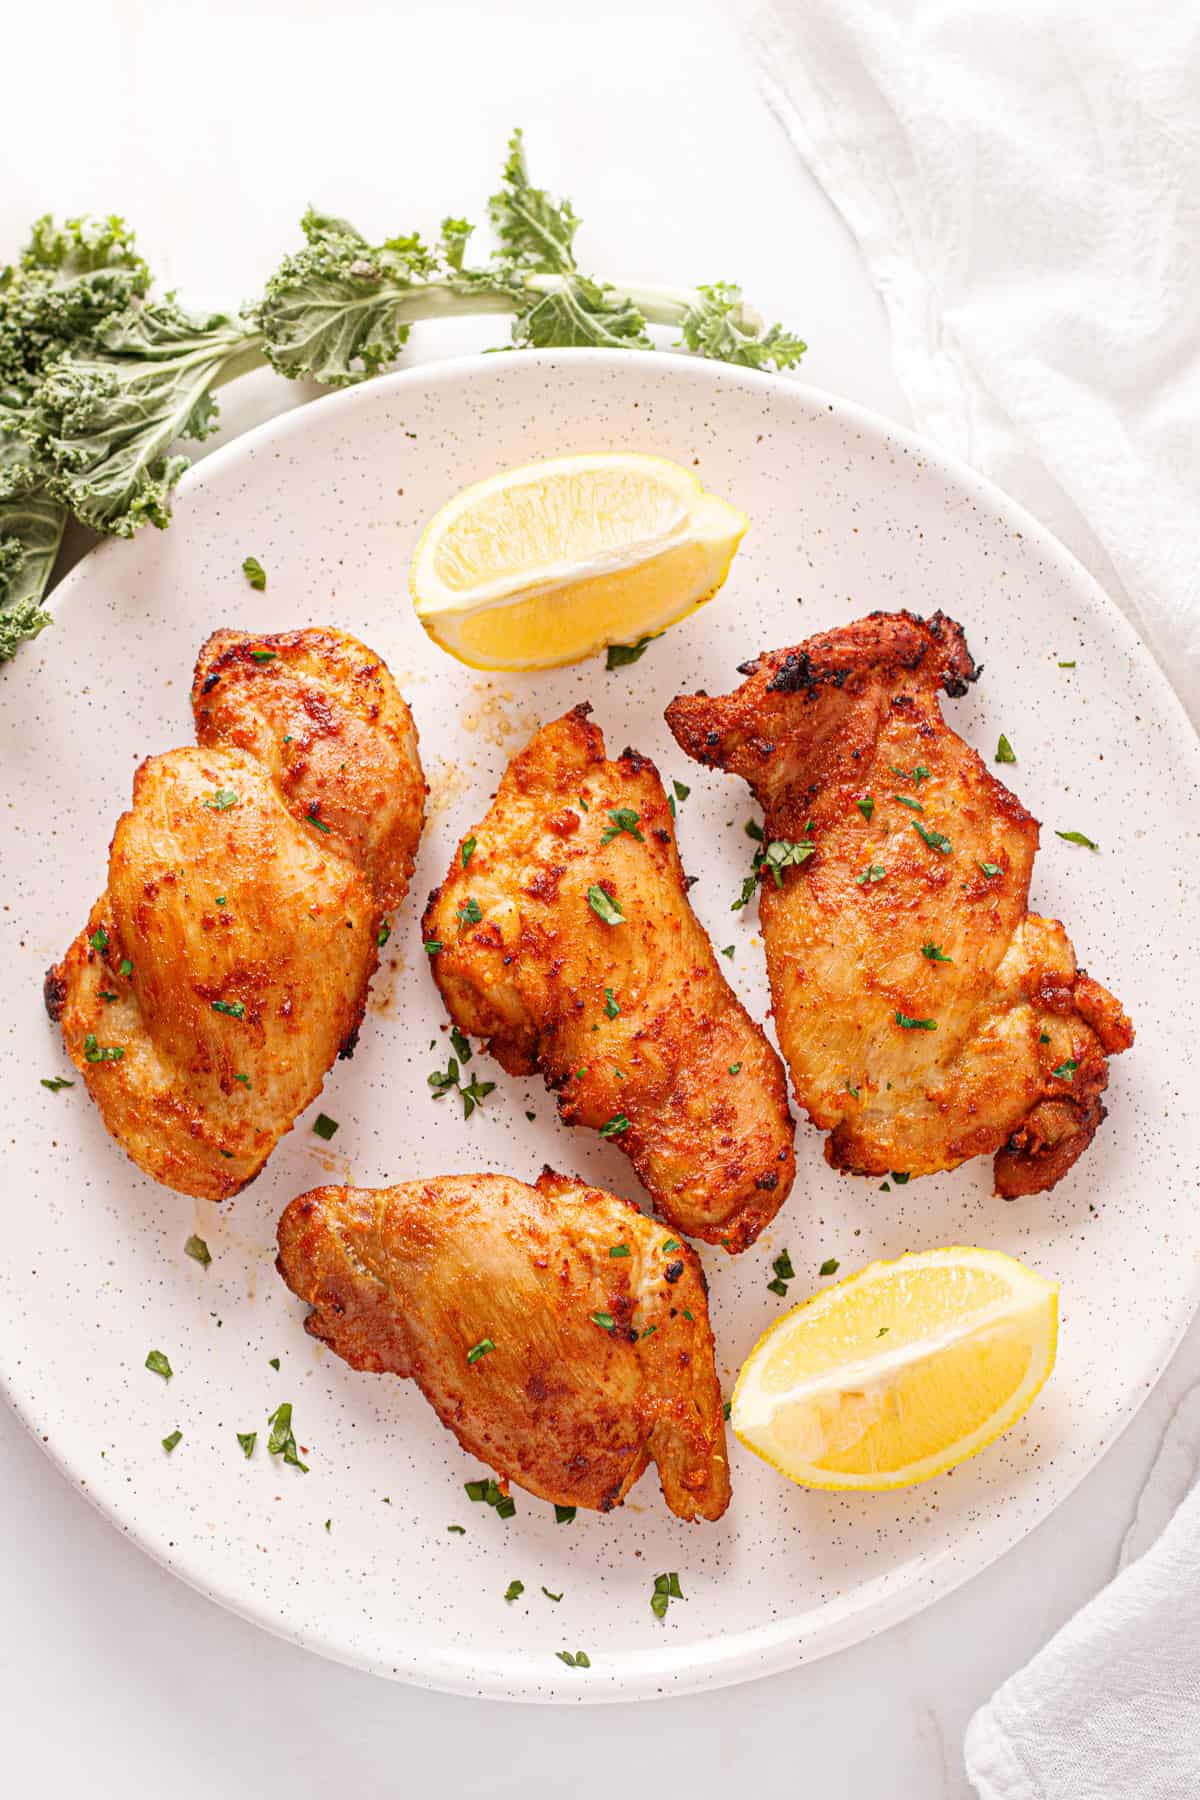
Chicken thighs in the air fryer might sound basic, but I keep coming back to this because it genuinely works every single time. Thirty minutes start to finish, the outside gets this slightly crisp edge, and the inside stays juicy. Thighs are naturally higher in fat than breasts which helps keep them moist, and the smoked paprika and garlic powder in the seasoning give them real depth without any complicated prep. On a rushed weeknight, this is the one I reach for.
Ingredients
- 4 boneless skinless chicken thighs (about 1½ lbs total)
- 1 tablespoon olive oil
- 1 teaspoon smoked paprika
- 1 teaspoon garlic powder
- ½ teaspoon onion powder
- ¼ teaspoon white pepper (or black pepper)
- ¾ teaspoon salt
- 1 tablespoon lemon juice
Instructions
- Pat the chicken thighs dry with paper towels — this step matters for getting a slightly crisp exterior rather than steamed meat. Preheat your air fryer to 400°F for 3 minutes.
- In a bowl, mix together the olive oil, smoked paprika, garlic powder, onion powder, white pepper, salt, and lemon juice. Add the chicken thighs and coat them thoroughly.
- Place the thighs in a single layer in the air fryer basket. Don't overlap them — cook in batches if needed. Air fry at 400°F for 18–20 minutes, flipping halfway through.
- Check that the internal temperature has reached 165°F. Let them rest for 3 minutes before serving so the juices redistribute.
Tips
- Tip: These store really well — refrigerate leftovers for up to 4 days and slice them cold over salads or reheat quickly in the air fryer at 350°F for 4 minutes.
- Tip: Drying the chicken with paper towels before seasoning is the difference between a slightly crisp surface and a soggy one. Don't skip it.
- Tip: If you want to meal prep these, double the batch. They reheat without drying out, which is more than I can say for chicken breasts.
19. Keto Chicken Alfredo Casserole
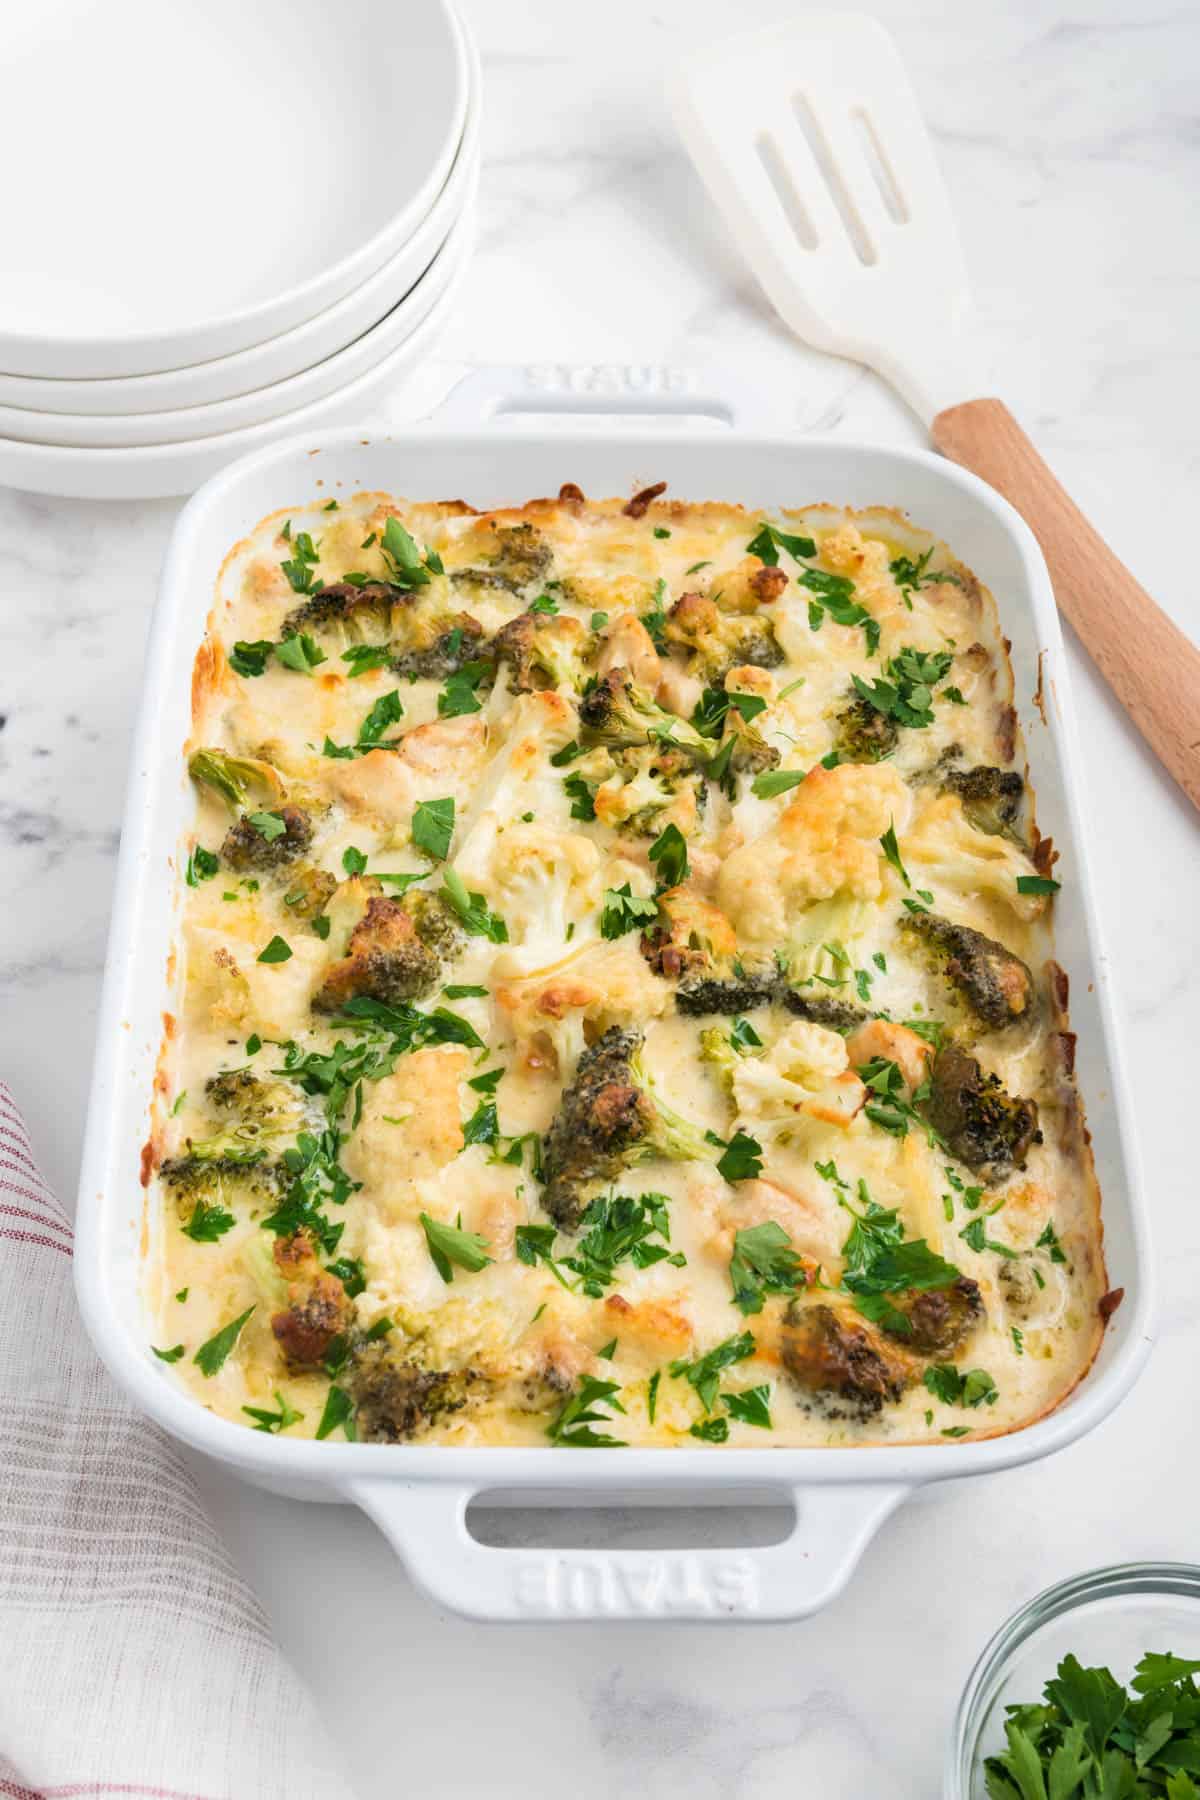
I'll be honest — the first time I made a keto casserole I was skeptical. No pasta, no starch, how could it actually feel satisfying? But this one won me over. The base is broccoli and cauliflower florets in a rich Alfredo sauce made with butter, heavy cream, cream cheese, and both mozzarella and parmesan. Shredded chicken gets folded in and the whole thing bakes until bubbly and golden on top. It has the comfort of a pasta bake without any of the carbs, and it works well for a family dinner or as make-ahead lunches for the week. If you want more casserole ideas, I have a Thanksgiving casserole roundup worth checking out.
Ingredients
- 2 cups cooked chicken, shredded (rotisserie chicken works great here)
- 2 cups broccoli florets, cut small
- 2 cups cauliflower florets, cut small
- 2 tablespoons butter
- 4 oz cream cheese, softened
- 1 cup heavy cream
- ½ cup grated parmesan
- 1½ cups shredded mozzarella, divided
- 1 teaspoon garlic powder
- Salt and black pepper to taste
Instructions
- Preheat your oven to 375°F. Lightly steam the broccoli and cauliflower florets for about 4 minutes — you want them just slightly tender, not fully cooked, since they'll continue cooking in the oven. Drain well.
- In a saucepan over medium heat, melt the butter. Add the cream cheese and stir until smooth. Pour in the heavy cream and whisk until combined. Add the parmesan, garlic powder, salt, and pepper. Stir until the sauce thickens slightly, about 3–4 minutes. Remove from heat and stir in 1 cup of the mozzarella.
- In a large baking dish, combine the shredded chicken and the steamed vegetables. Pour the Alfredo sauce over everything and stir gently to coat.
- Scatter the remaining ½ cup of mozzarella over the top. Bake uncovered for 20–25 minutes until the top is golden and bubbling at the edges.
- Let it rest for 5 minutes before serving — the sauce thickens up a bit as it cools and slices more cleanly.
Tips
- Tip: Make sure the cream cheese is fully softened before making the sauce — cold cream cheese doesn't melt smoothly and you'll end up with lumps. Let it sit out for 15 minutes first.
- Tip: Drain the steamed vegetables really well before adding them to the baking dish. Extra moisture will thin out the sauce.
- Tip: This casserole reheats well the next day — cover with foil and warm at 325°F for about 15 minutes so the top doesn't overbrown.
20. Pan-Seared Salmon with Spinach and Fennel

Salmon with fennel is one of those combinations that sounds fancier than it is to make. The fennel softens and sweetens as it cooks, the spinach wilts down in about a minute, and the whole-grain mustard pulls everything together into something that tastes genuinely restaurant-level with about 20 minutes of actual effort. I serve this over a simple quinoa salad bowl when I want to keep it light, or just on its own when I don't have time for a side. Either way it's high protein, low carb, and genuinely satisfying rather than feeling like "diet food."
Ingredients
- 2 salmon fillets (about 6 oz each), skin on
- 1 small fennel bulb, thinly sliced (fronds reserved for garnish)
- 2 cups baby spinach
- 2 tablespoons olive oil, divided
- 1 tablespoon butter
- 2 cloves garlic, minced
- 1 teaspoon whole-grain mustard
- Salt and black pepper to taste
Instructions
- Pat the salmon fillets dry and season both sides with salt and pepper. Heat 1 tablespoon of olive oil in a skillet over medium-high heat until shimmering. Place salmon skin-side down and press gently for the first 30 seconds so the skin stays flat. Sear for 4 minutes without moving it.
- Flip the salmon, add the butter to the pan, and cook for another 2–3 minutes depending on thickness. You want the center to be just slightly translucent — it will carry-cook off the heat. Remove and set aside.
- In the same pan over medium heat, add the remaining tablespoon of olive oil. Sauté the sliced fennel for 4–5 minutes, stirring occasionally, until it softens and starts to turn golden at the edges.
- Add the garlic and cook for 30 seconds, then stir in the whole-grain mustard. Add the baby spinach and toss until wilted, about 1 minute. Taste and adjust seasoning.
- Plate the spinach and fennel mixture and lay the salmon on top. Garnish with any reserved fennel fronds if you have them.
Tips
- Tip: Don't move the salmon while it's searing skin-side down. Leaving it alone is what gives you crisp skin and a clean sear — fidgeting with it causes sticking.
- Tip: If fennel feels unfamiliar, it has a mild anise flavor that mellows significantly with heat. Once it's cooked down it just tastes sweet and savory — nothing sharp about it.
- Tip: Whole-grain mustard adds texture and a gentle tang without overpowering the salmon. If you only have Dijon, use half the amount since it's stronger.
21. Pan-Seared Halibut with Dill Sauce

Halibut isn't something I grew up eating — fish in Pakistan looked very different from a thick white halibut fillet. But I started making this a couple of years ago and it's become one of those meals I genuinely look forward to on cool evenings. The fish is firm and meaty, the dill sauce is creamy and delicate, and the leeks add a gentle sweetness that ties everything together. My husband was skeptical about the dill the first time, but he cleaned his plate. If you can't find halibut, thick cod fillets work well here too and are usually cheaper at Walmart or Costco.
Ingredients
- 2 halibut fillets (about 6 oz each), skin removed
- 1 tablespoon olive oil
- Salt and black pepper to taste
- 1 tablespoon butter
- 1 small leek, white and light green parts only, thinly sliced
- 1 small shallot, finely diced
- ¼ cup dry white wine
- ½ cup heavy cream
- 2 tablespoons whole milk (or substitute vegetable stock for a lighter sauce)
- 2 tablespoons fresh dill, roughly chopped (or 1 teaspoon dried dill)
- ¼ cup grated parmesan or gruyère
Instructions
- Season the halibut fillets on both sides with salt and pepper. Heat olive oil in a skillet over medium-high heat. Sear the halibut for 3–4 minutes per side until the outside is golden and the fish flakes easily when pressed with a fork. Remove and keep warm.
- In the same pan, reduce the heat to medium and melt the butter. Add the shallot and leek and cook gently for 4–5 minutes until softened. They should be translucent and sweet-smelling, not browned.
- Pour in the white wine and let it reduce by half, about 2 minutes. Add the heavy cream and milk (or vegetable stock) and stir. Simmer for 3–4 minutes until the sauce coats the back of a spoon.
- Stir in the parmesan and dill. Taste and adjust salt and pepper. The sauce should be creamy, herby, and lightly tangy from the wine.
- Plate the halibut fillets and spoon the dill sauce generously over each one. Serve immediately.
Tips
- Tip: Halibut dries out quickly if overcooked. Pull it off the heat the moment it flakes — it will finish cooking in the residual heat of the pan while you make the sauce.
- Tip: If white wine isn't something you keep on hand, substitute vegetable stock with a small squeeze of lemon juice to mimic that acidity.
- Tip: Fresh dill makes a noticeable difference in this sauce — if you can find it at your grocery store, it's worth using. Dried works but the flavor is less bright.
Twenty recipes later and I still haven't gotten tired of eating this way — which honestly surprised me. When I first started paying attention to protein and cutting back on carbs, I assumed every meal would feel like a punishment. It didn't. Once I figured out that the trick is building around real ingredients — actual chicken, eggs, good cheese, fresh vegetables — and not around sad diet food substitutes, everything clicked. These twenty recipes are proof that eating with intention doesn't have to mean eating without pleasure.
My husband works through most of these without realizing they're on the lighter side — which I take as the highest compliment. Saad still asks where the rice is sometimes, but even he'll clean his plate when I make the egg dishes or anything with ground beef. That's the real test in my house. If my family eats it without complaints, it earns a permanent spot in the rotation. Every recipe on this list has passed that test at least once.
Start with whatever looks easiest to you — maybe a simple skillet dish or a sheet pan dinner — and work your way through. You don't have to overhaul everything at once. Even swapping two or three weeknight meals over to this style makes a real difference over time. Bookmark this page, come back when you need dinner ideas, and don't overthink it. Good food doesn't have to be complicated. 🥩🥦✨
More Recipes You Might Like
- Healthy Dinner Recipes — a wider collection of nutritious weeknight meals when you want more variety
- Easy Chicken Dinner Recipes — if chicken is your go-to protein, this list has plenty of ideas to keep things interesting
- Low Calorie Meals — good overlap with this list, plus some lighter options for when you want something a little less heavy
- Meal Prep Recipes — most of these high protein dishes batch-cook well, and this post shows you how to make that work for the week
- Ground Beef Recipes — ground beef is one of the best affordable high-protein ingredients and this roundup makes the most of it
Frequently Asked Questions
How much protein should I aim for in a high protein meal?
Most nutrition guidance puts a solid high-protein meal somewhere in the range of 25 to 40 grams of protein per serving — roughly what you'd get from a palm-sized portion of chicken, beef, or fish plus eggs or cheese. I don't count obsessively, but I do make sure there's a real protein source at the center of every meal rather than treating it as a side thought. That shift alone makes a noticeable difference in how long you stay full.
Can I meal prep these recipes in advance?
Most of them, yes. Skillet dishes, baked chicken, ground meat bowls, and egg-based recipes all hold up well in the fridge for three to four days. I usually batch-cook two or three dishes on Sunday and portion them into containers — it saves so much decision fatigue during the week. The ones that don't reheat as well (anything with delicate greens or a crispy finish) are better made fresh, but they tend to be the quick ones anyway.
What counts as low carb — is there a specific number I should stay under?
There's no single universal number, and it genuinely depends on your goals. Strict keto usually means staying under 20 to 30 grams of net carbs per day. A more general low-carb approach might allow 50 to 100 grams. For this roundup I focused on meals where the carbs come from vegetables and whole ingredients rather than bread, pasta, rice, or added sugar — which is a reasonable place to start without getting too rigid about the numbers.
Are these recipes suitable for someone who doesn't eat red meat?
Quite a few of them, yes. There are several chicken-based dishes, egg recipes, and seafood options in this list that work perfectly well without ever touching beef or lamb. For the ground beef recipes specifically, ground turkey is an easy one-to-one swap that barely changes the cooking process. I use it myself when I want something a little lighter.
Which recipe on this list is the easiest for a complete beginner?
Anything egg-based is where I'd point a beginner first — scrambled eggs with vegetables, a simple frittata, or baked eggs take almost no technique and come together in under fifteen minutes. After that, a basic sheet pan chicken with whatever vegetables you have on hand is hard to get wrong. Season it, put it in the oven, take it out when it's cooked through. That's really all there is to it.
Share This Post!
If this list helped you figure out what's for dinner this week, share it with someone who could use the ideas — pin it, send it, do whatever you do. 🥩✨





Comments
No Comments