
Graduation season in our house means one thing: I'm feeding a crowd with zero time to fuss. Last summer when my niece graduated, I had exactly four hours between picking up the cake and the first guests arriving — and I still needed to get forty-some appetizers on the table. That kind of pressure teaches you fast which recipes actually hold up and which ones turn into a mess the moment you scale them up. graduation party appetizers live or die by two things: can you make them in large quantities without losing your mind, and will they still taste good sitting out while people circle the table for an hour?
What I look for in a party appetizer is pretty straightforward. It has to make sense at scale — doubling or tripling the recipe shouldn't require buying a second oven or three extra mixing bowls. It needs to survive the table. Nothing that wilts in twenty minutes or needs to be served piping hot the second it comes out. And it has to work for a mixed crowd, because graduation parties always have kids running around, adults who don't eat spice, and at least one person who doesn't eat meat. crowd-friendly finger foods that cover a range of flavors are the whole point.
This list pulls together twenty appetizers I've either made for parties myself or tested in my kitchen specifically for this post — everything from a slow cooker spinach artichoke dip that practically makes itself to cold options like cucumber cream cheese rolls that you can prep the night before and just pull from the fridge. There are sliders, skewers, stuffed mushrooms, dips, crostini, and a few things that cross into light-meal territory. If you're also planning drinks for the party, I have a whole roundup of graduation party punch and drinks that pair well with all of this.
Here are the twenty I keep coming back to — pick whatever fits your crowd size, your prep time, and how much oven space you're actually working with.
Easy Graduation Party Appetizers Worth Making

20. Baked Buffalo Chicken Sliders with Coleslaw
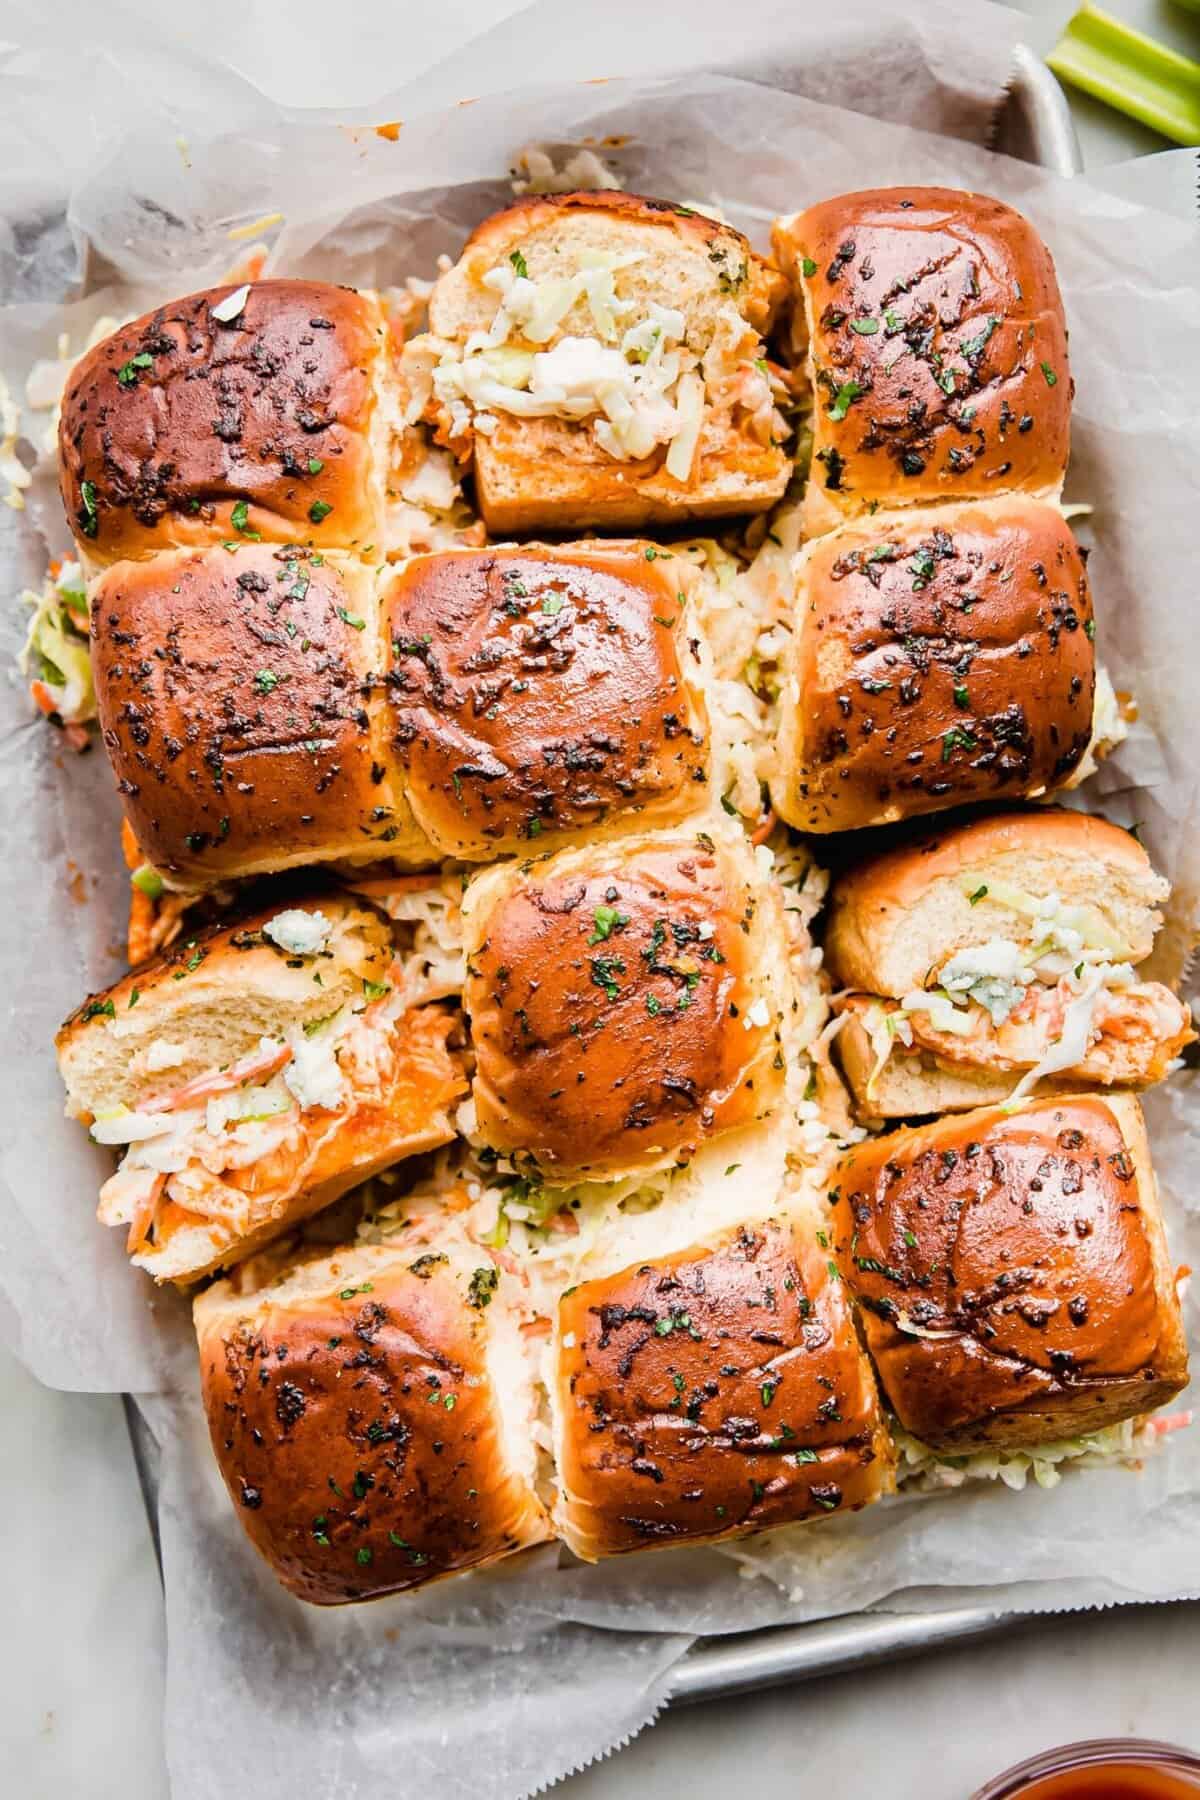
Buffalo chicken sliders are the appetizer that disappears before everything else on the table — every single time. I've made these for three different graduation parties now, and I always kick myself for not doubling the batch. The trick is shredding rotisserie chicken instead of cooking it from scratch, which cuts your prep time down to almost nothing. The coleslaw on top isn't optional — that crunch against the saucy chicken is the whole point.
Ingredients
- 3 cups shredded rotisserie chicken (about 1 whole rotisserie chicken)
- ½ cup Frank's RedHot Buffalo sauce (or your preferred hot sauce)
- 2 tablespoons unsalted butter, melted
- 12 Hawaiian slider rolls (King's Hawaiian brand works well)
- 6 slices provolone or Monterey Jack cheese
- 1½ cups pre-made coleslaw mix (bagged, from Walmart or Costco)
- 3 tablespoons mayonnaise
- 1 tablespoon apple cider vinegar
- Salt and pepper to taste
- 2 tablespoons melted butter mixed with ½ teaspoon garlic powder (for topping)
Instructions
- Preheat your oven to 350°F. In a bowl, toss the shredded chicken with the buffalo sauce and 2 tablespoons melted butter until fully coated.
- In a separate small bowl, mix the coleslaw mix with mayonnaise, apple cider vinegar, salt, and pepper. Set aside in the fridge.
- Slice the slider rolls in half horizontally without separating the individual rolls — keep them connected as one slab. Place the bottom halves in a 9x13 baking dish.
- Layer the cheese slices over the bottom rolls, then spread the buffalo chicken mixture evenly over the top. Replace the top half of the rolls.
- Brush the garlic butter over the tops of the rolls. Cover loosely with foil and bake for 15 minutes, then uncover and bake another 5 minutes until the tops are golden.
- Remove from the oven, lift the top layer of rolls, spoon the cold coleslaw over the chicken, and replace the tops. Slice into individual sliders and serve immediately.
19. Cold Shrimp Cocktail Platter with Zesty Dipping Sauce

A shrimp cocktail platter is one of those appetizers that looks like you put in a lot more effort than you actually did. Buy a bag of pre-cooked frozen shrimp from Costco, thaw it overnight in the fridge, and most of your work is done. The homemade cocktail sauce is what makes this worth doing yourself — the jarred stuff never has enough horseradish. I add a splash of lime juice to mine, which wakes the whole thing up.
Ingredients
- 2 lbs large cooked frozen shrimp (31/40 count), thawed and peeled with tails on
- 1 cup ketchup
- 2 tablespoons prepared horseradish (more if you like heat)
- 1 tablespoon fresh lemon juice
- 1 tablespoon fresh lime juice
- 1 teaspoon Worcestershire sauce
- ½ teaspoon hot sauce (Tabasco or Frank's)
- Crushed ice for serving
- Lemon wedges for garnish
- Fresh parsley for garnish (optional)
Instructions
- Thaw the shrimp overnight in the refrigerator, or for a quick thaw, place in a colander under cold running water for 10-15 minutes. Pat completely dry with paper towels.
- Whisk together the ketchup, horseradish, lemon juice, lime juice, Worcestershire sauce, and hot sauce in a small bowl. Taste and adjust horseradish or hot sauce to your preference.
- Cover the cocktail sauce and refrigerate for at least 30 minutes — this lets the flavors come together properly.
- To assemble, fill a large rimmed platter or wide shallow bowl with crushed ice. Arrange the shrimp around the edges, tails pointing outward.
- Place the cocktail sauce in a small bowl in the center of the platter. Tuck lemon wedges around the shrimp and scatter parsley if using. Keep the whole platter refrigerated until 10 minutes before serving.
18. Sheet Pan Caprese Flatbread with Fresh Basil
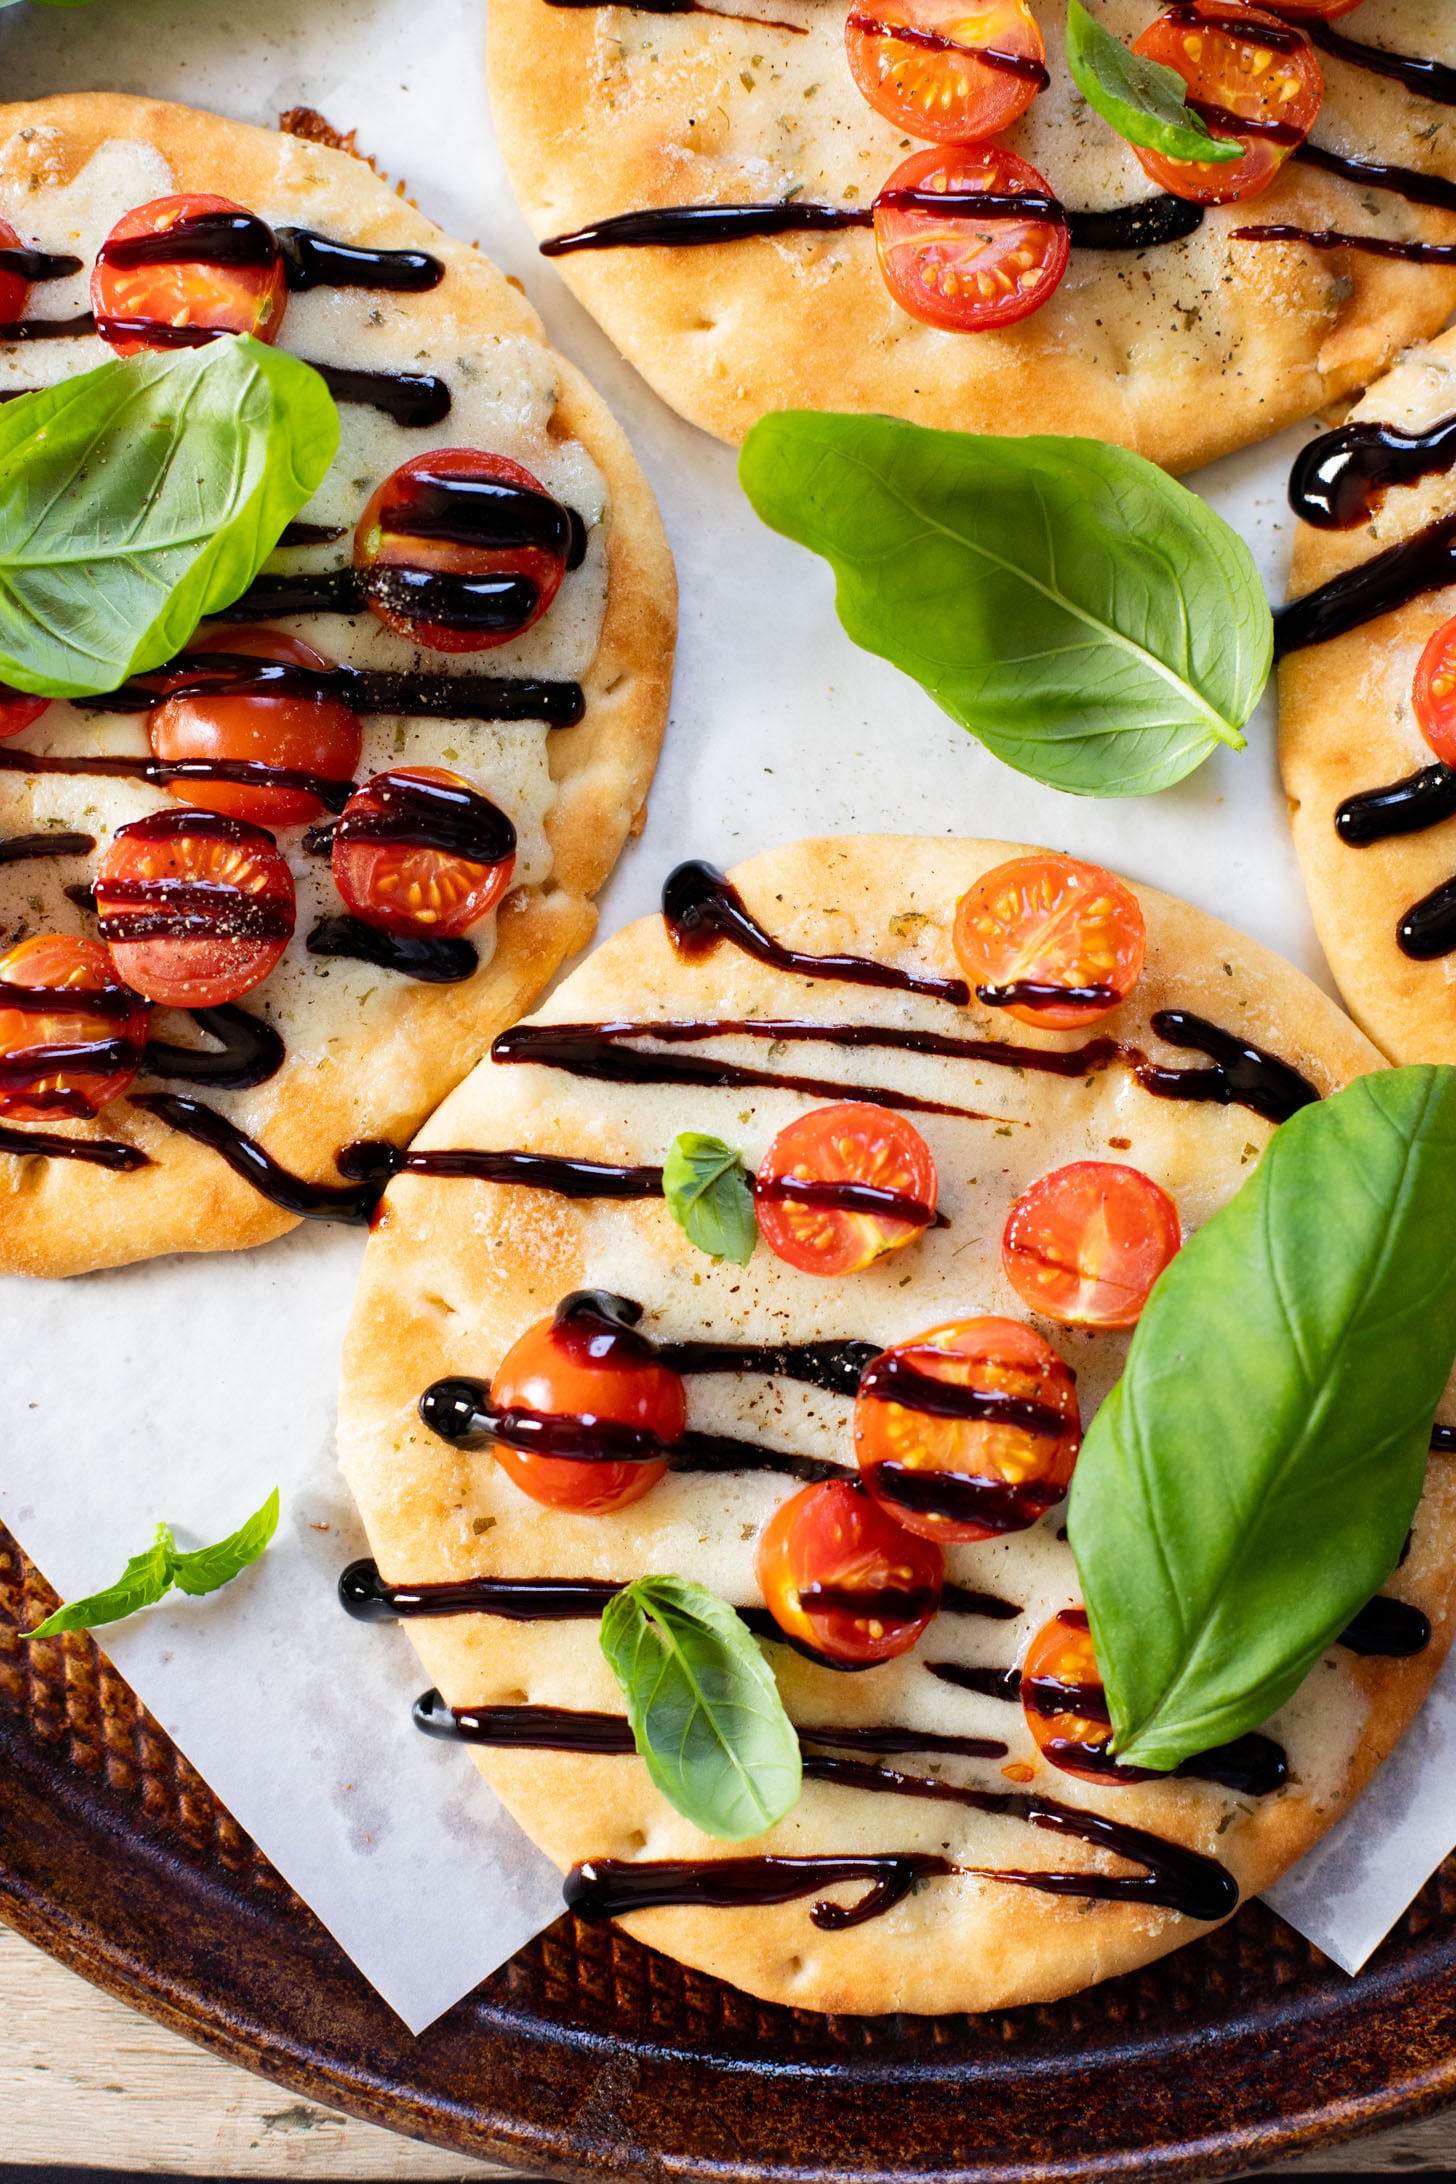
Flatbread appetizers are ideal for a crowd because you can cut them into as many pieces as you need — eight guests or thirty, same amount of work. I use store-bought naan from Trader Joe's or Walmart as the base, which means no dough, no rolling, no stress. The key is getting the tomatoes as dry as possible before they go on — wet tomatoes make the flatbread soggy, and I learned that the first time I made this when half the platter went limp within ten minutes of coming out of the oven.
Ingredients
- 4 large store-bought naan breads (or 2 thin pizza crusts)
- 3 tablespoons olive oil
- 2 garlic cloves, minced
- 2 cups cherry tomatoes, halved and patted dry
- 8 oz fresh mozzarella, sliced into rounds
- ½ teaspoon salt
- ¼ teaspoon black pepper
- ¼ teaspoon red pepper flakes (optional)
- ½ cup fresh basil leaves
- 2 tablespoons balsamic glaze (store-bought is fine)
Instructions
- Preheat oven to 400°F. Line two sheet pans with parchment paper and lay the naan breads flat.
- Mix benefits of olive oil with minced garlic and brush generously over each naan all the way to the edges.
- Pat the halved cherry tomatoes thoroughly dry with paper towels — this step matters. Scatter them over the naan, then lay the mozzarella slices on top. Season with salt, pepper, and red pepper flakes if using.
- Bake for 12-15 minutes until the edges of the naan are crispy and the mozzarella is melted and just starting to bubble.
- Remove from the oven and immediately scatter fresh basil leaves over the top. Drizzle with balsamic glaze, slice into bite-sized pieces, and serve within a few minutes while the crust is still crisp.
17. Slow Cooker Spinach Artichoke Dip

The slow cooker is genuinely underrated as a party tool — you dump everything in, walk away for two hours, and come back to a hot dip that stays warm on its own throughout the entire party. No babysitting, no oven space occupied. I've brought this to every graduation party on this list at some point, and Saad always asks if there's any left for him when I get home (there never is). Serve it with tortilla chips, sliced baguette, or pita — all three work.
Ingredients
- 2 (8 oz) blocks cream cheese, softened and cubed
- 1 cup sour cream
- ½ cup mayonnaise
- 1 (14 oz) can artichoke hearts, drained and roughly chopped
- 1 (10 oz) package frozen chopped spinach, thawed and squeezed very dry
- 1½ cups shredded mozzarella cheese, divided
- ½ cup grated Parmesan cheese
- 3 garlic cloves, minced
- ½ teaspoon onion powder
- Salt and pepper to taste
Instructions
- Squeeze every bit of moisture you can out of the thawed spinach — use a clean kitchen towel or paper towels and really wring it out. Excess water will make the dip thin and watery.
- Add the cubed cream cheese, sour cream, and mayonnaise to the slow cooker. Add the spinach, artichoke hearts, 1 cup of mozzarella, Parmesan, garlic, onion powder, salt, and pepper.
- Stir everything together as best you can, then cook on LOW for 2 hours or HIGH for 1 hour, stirring once halfway through, until the cream cheese is fully melted and everything is combined.
- Sprinkle the remaining ½ cup mozzarella over the top, replace the lid, and let it melt for another 10 minutes. Switch to the WARM setting for serving. Stir before serving and keep the lid on between servings to maintain temperature.
16. Crispy Baked Jalapeño Popper Bites
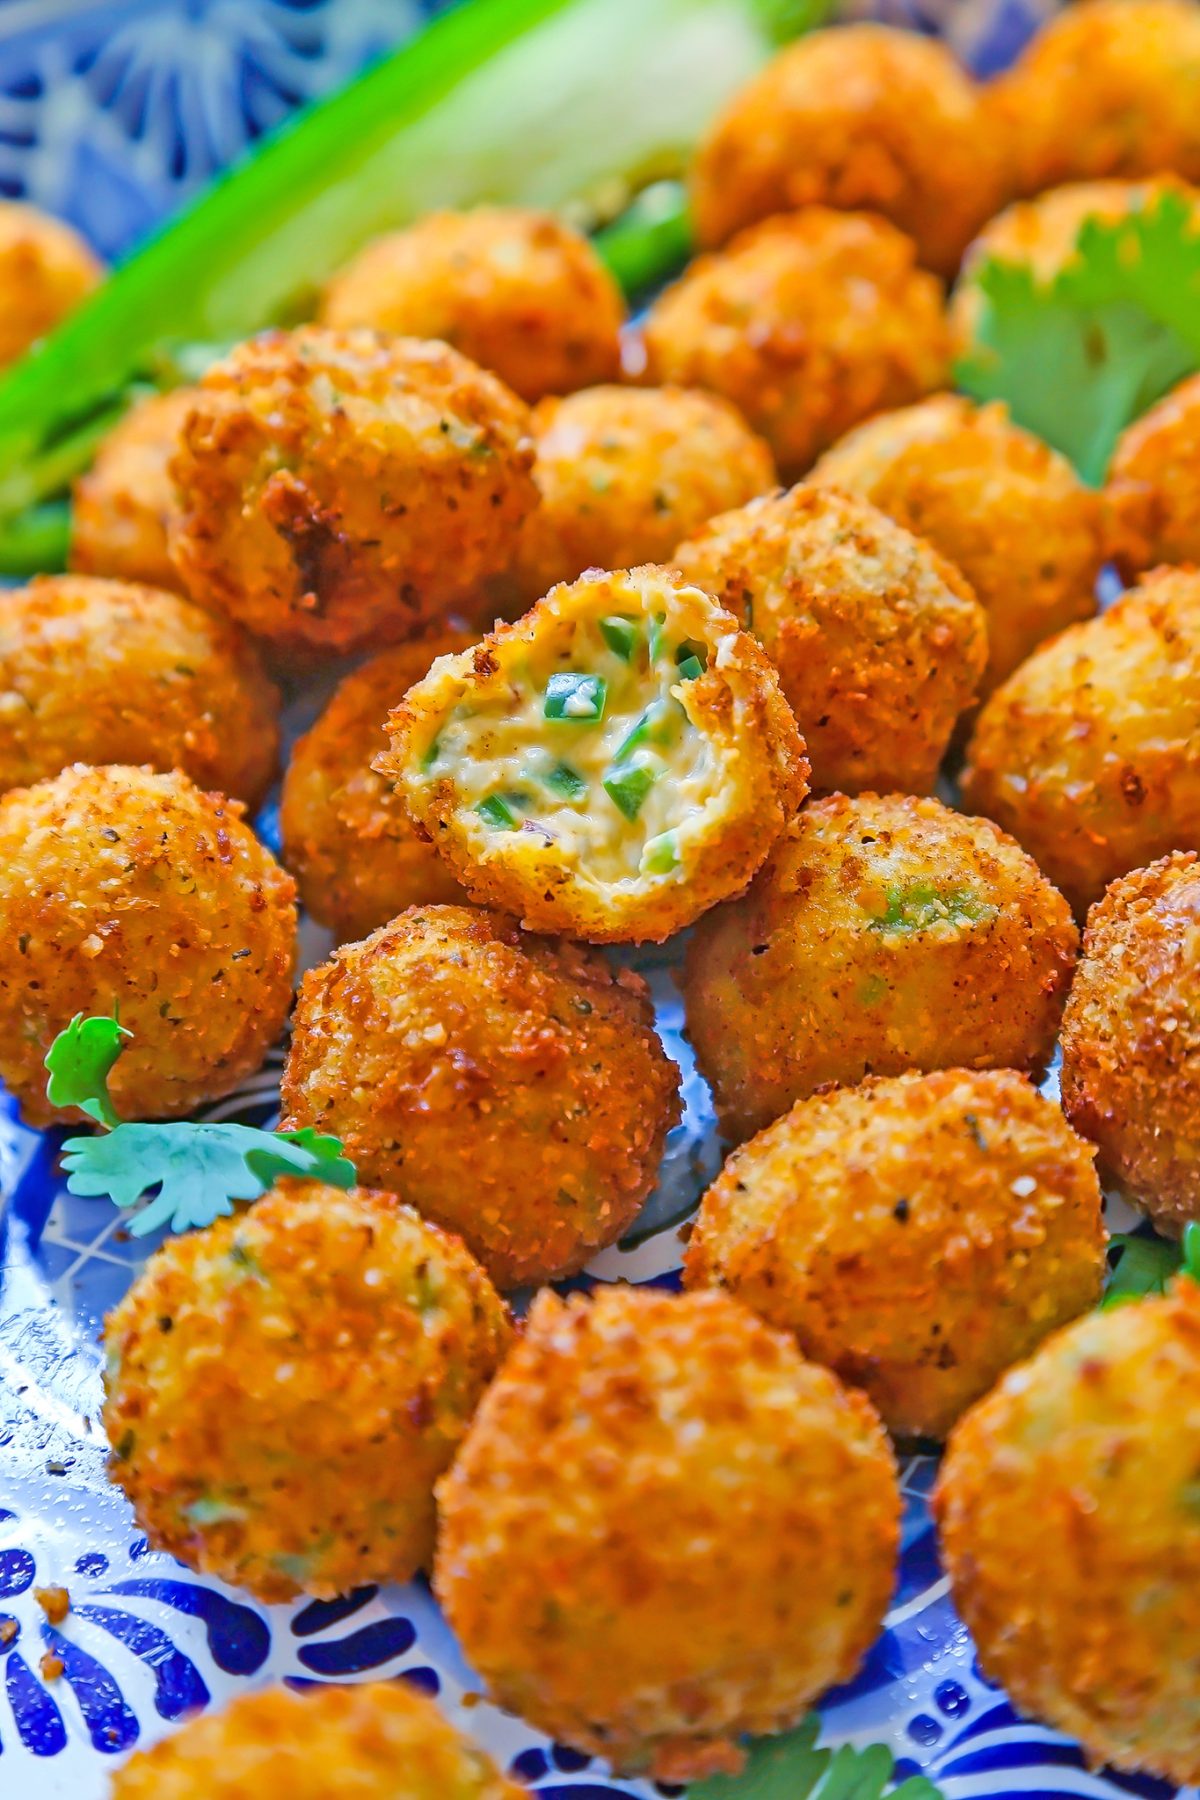
Classic jalapeño poppers are great, but halving and stuffing each pepper individually gets tedious when you're feeding forty people. These bites solve that — you mix the same filling, bread it into balls, and bake them, which is both faster and easier to eat standing up. The cream cheese filling stays creamy inside while the panko crust crisps up beautifully. They're mildly spicy, not face-melting, so most guests can handle them — but if your crowd skews heat-sensitive, swap half the jalapeños for mini sweet peppers.
Ingredients
- 8 oz cream cheese, softened
- 1 cup shredded sharp cheddar cheese
- 4 jalapeños, seeded and finely diced (about ½ cup)
- ½ teaspoon garlic powder
- ½ teaspoon onion powder
- ¼ teaspoon smoked paprika
- Salt to taste
- 2 eggs, beaten
- 1 cup panko breadcrumbs
- ½ cup all-purpose flour
- Cooking spray
Instructions
- Preheat oven to 400°F. Line a sheet pan with parchment paper and spray lightly with cooking spray.
- Mix the softened cream cheese, cheddar, diced jalapeños, garlic powder, onion powder, smoked paprika, and salt together until well combined. Refrigerate the mixture for 20 minutes — cold filling is much easier to roll into balls.
- Set up a breading station: flour in one shallow bowl, beaten eggs in a second, panko in a third.
- Scoop out about 1½ tablespoons of the chilled filling and roll into a ball. Roll in flour, dip in egg, then coat thoroughly in panko. Place on the prepared sheet pan. Repeat with remaining filling.
- Spray the tops of the bites lightly with cooking spray and bake for 18-20 minutes, flipping once halfway through, until deep golden brown on all sides. Serve warm with ranch or sour cream for dipping.
15. No-Bake Cucumber Cream Cheese Rolls
:max_bytes(150000):strip_icc():format(webp)/EW-Cucumber-Cream-Cheese-Roll-hero-1x1-0636-2b2894af4afb486eb51db88bf2c345cd.jpg)
Every party table needs at least one thing that's cool, light, and not hot or greasy — and this is that thing. You use a vegetable peeler to make long, thin cucumber ribbons, spread them with herbed cream cheese, and roll them up into neat little bites. No oven, no stove, just a cutting board and ten minutes. They look elegant for almost zero effort, which is exactly what you want when you're also managing a dozen other things. Make them the morning of the party and keep them covered in the fridge — they hold perfectly for several hours.
Ingredients
- 3 large English cucumbers
- 8 oz cream cheese, softened
- 2 tablespoons fresh dill, finely chopped (or 1 teaspoon dried dill)
- 1 tablespoon fresh chives, finely chopped
- 1 teaspoon lemon zest
- 1 tablespoon lemon juice
- 1 small garlic clove, minced or ½ teaspoon garlic powder
- Salt and pepper to taste
- Smoked salmon or thin-sliced deli ham (optional, for filling)
Instructions
- Using a vegetable peeler, peel long flat ribbons from each cucumber, working lengthwise. Discard the first and last ribbons (mostly skin). Lay the ribbons on paper towels and pat them dry — this is important so the cream cheese doesn't slide.
- Beat the softened cream cheese with dill, chives, lemon zest, lemon juice, garlic, salt, and pepper until smooth and spreadable.
- Spread a thin, even layer of the cream cheese mixture over each cucumber ribbon. If using smoked salmon or ham, lay a small piece at the wide end of the ribbon.
- Starting from the wide end, roll each ribbon up firmly but gently. Secure with a toothpick through the center.
- Arrange on a platter, cover with plastic wrap, and refrigerate until serving. These keep well for up to 6 hours in the fridge.
14. Grilled Teriyaki Chicken Skewers with Peanut Sauce

Skewers are one of the smartest party foods because they're already portioned, easy to pick up, and require zero plates. The teriyaki marinade here is pantry-staple simple — soy sauce, honey, garlic, ginger — and the chicken can marinate overnight so there's nothing to do the day of except grill. The peanut sauce is what earns this recipe a spot on the list; it's rich and slightly nutty and people always ask for the recipe. If you don't have an outdoor grill, a heavy cast iron grill pan on the stovetop works just fine.
Ingredients
- 2 lbs boneless skinless chicken thighs, cut into 1½-inch chunks
- ⅓ cup soy sauce (low sodium preferred)
- 3 tablespoons honey
- 2 tablespoons rice vinegar
- 3 garlic cloves, minced
- 1 teaspoon fresh ginger, grated (or ½ teaspoon ground ginger)
- 1 tablespoon sesame oil
- For the peanut sauce:
- ½ cup creamy peanut butter
- 3 tablespoons soy sauce
- 2 tablespoons lime juice
- 1 tablespoon honey
- 1 teaspoon sriracha (optional)
- 3-4 tablespoons warm water to thin
- Wooden skewers, soaked in water 30 minutes
Instructions
- Whisk together soy sauce, honey, rice vinegar, garlic, ginger, and sesame oil. Add the chicken pieces, toss to coat, cover, and marinate in the refrigerator for at least 2 hours or overnight.
- Make the peanut sauce by whisking peanut butter, soy sauce, lime juice, honey, and sriracha together. Add warm water one tablespoon at a time until you reach a pourable but not watery consistency. Set aside.
- Thread the marinated chicken pieces onto the soaked wooden skewers, about 4-5 pieces per skewer.
- Grill over medium-high heat for 5-6 minutes per side, until cooked through and slightly charred at the edges. Internal temperature should reach 165°F.
- Arrange on a platter and serve the peanut sauce in a small bowl alongside for dipping. Garnish with sesame seeds and sliced scallions if desired.
13. Mini Caprese Skewers with Balsamic Glaze
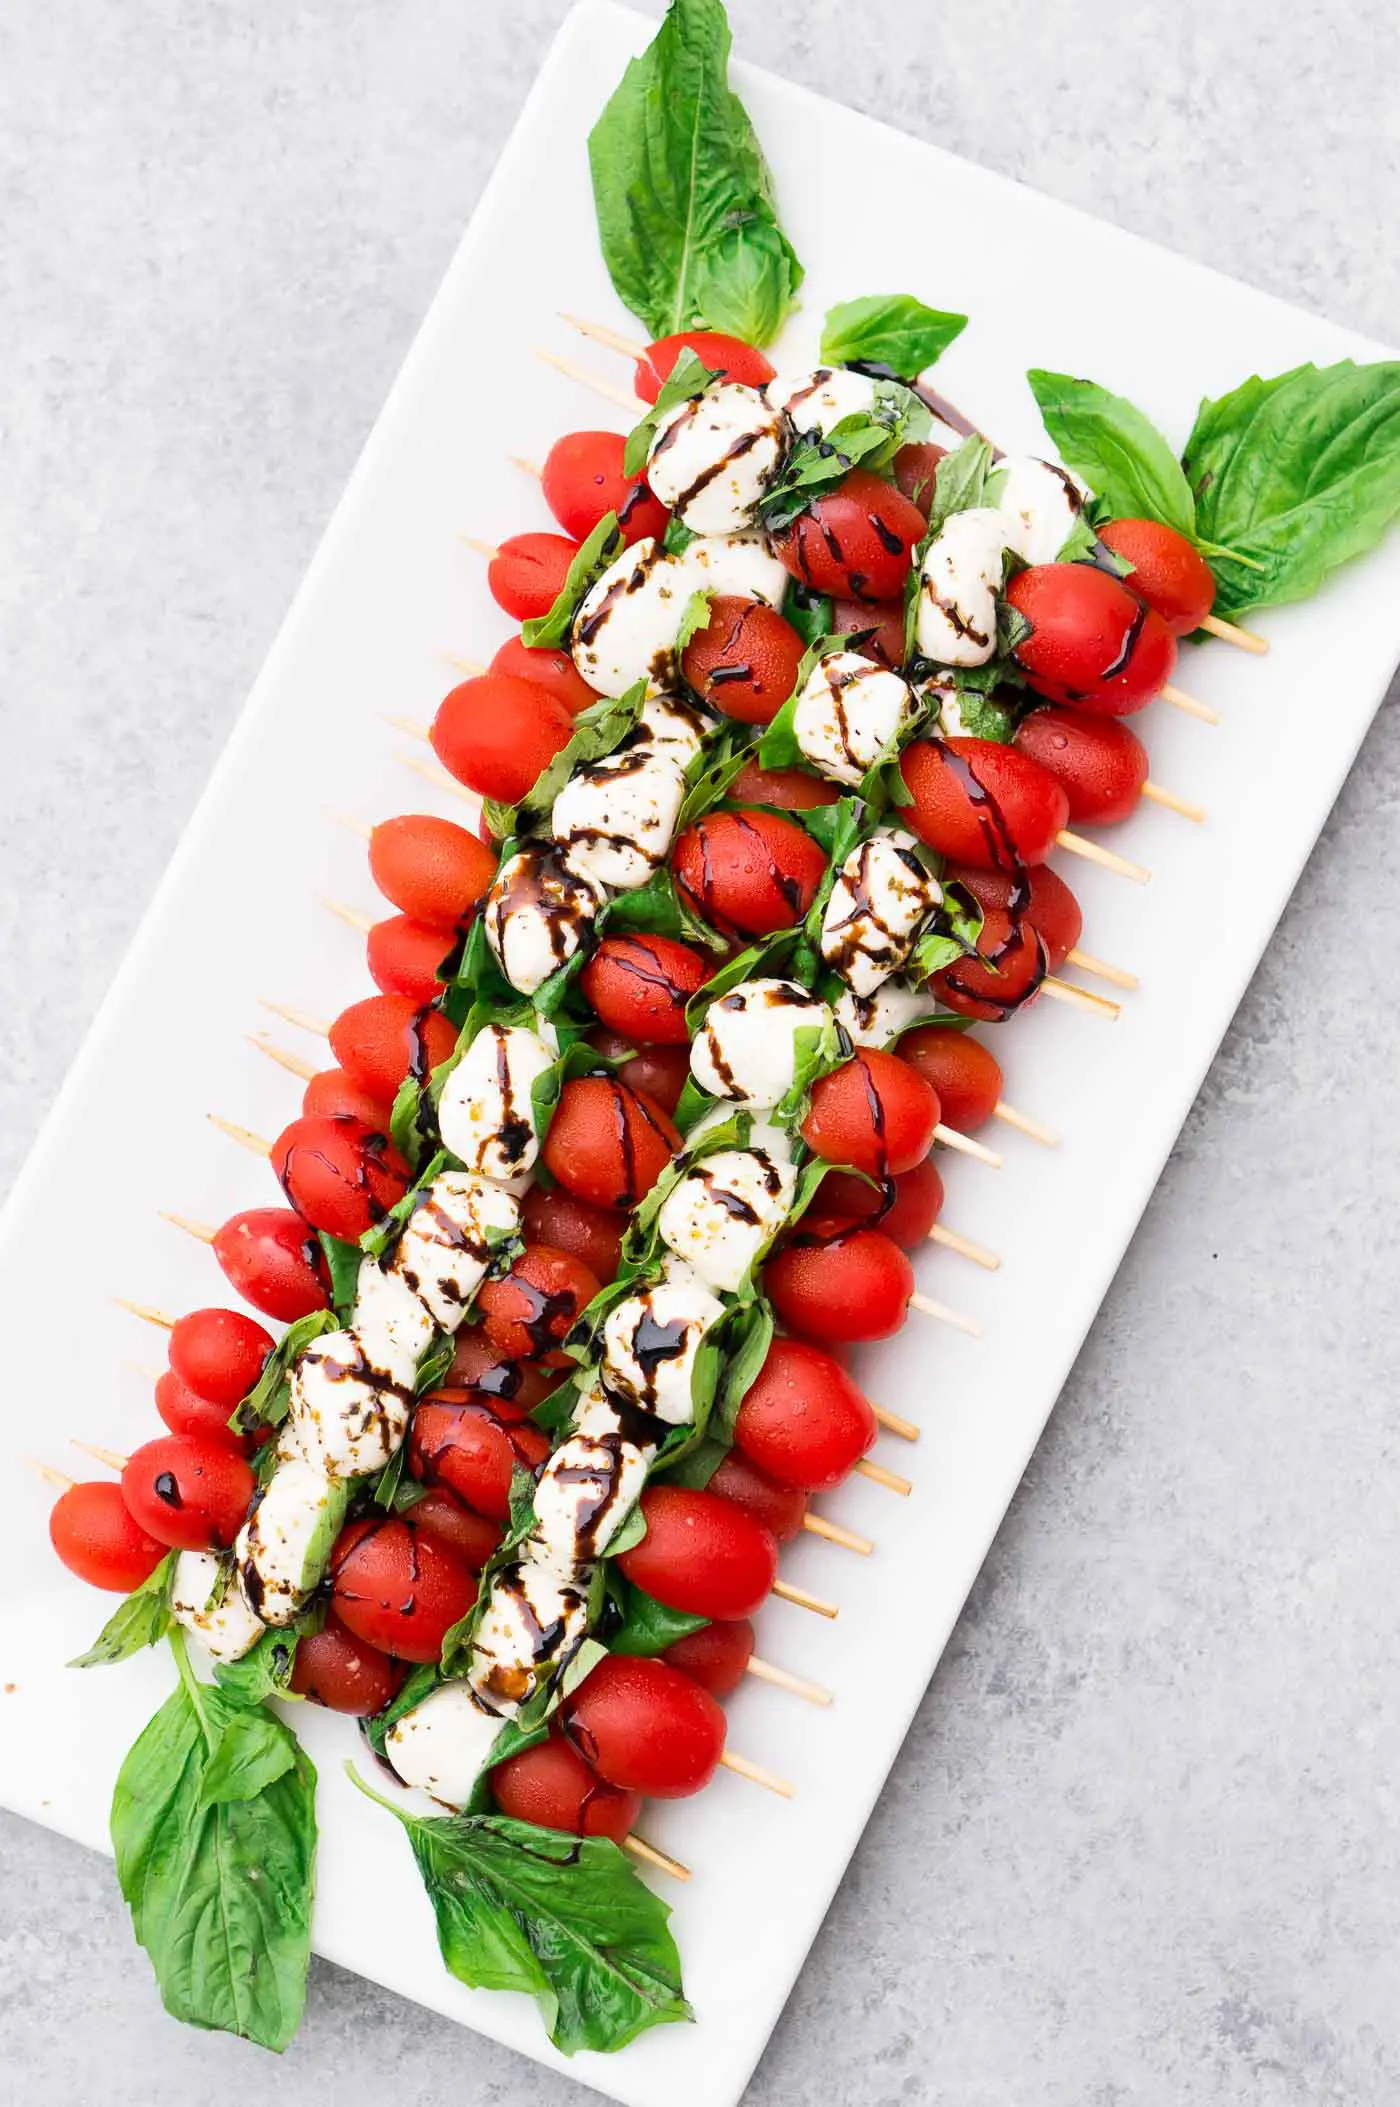
When you need something that looks impressive but genuinely takes fifteen minutes start to finish, this is your answer. Three ingredients on a toothpick, drizzled with balsamic glaze — that's the whole recipe. The secret is using fresh mozzarella balls (ciliegine or bocconcini size) rather than shredded or block mozzarella, and letting the tomatoes be at room temperature so they actually taste like something. I keep the balsamic glaze in a small squeeze bottle for easy drizzling without making a mess, which makes plating fast when you're trying to get twenty things ready at once.
Ingredients
- 2 pints cherry tomatoes or grape tomatoes
- 16 oz fresh mozzarella ciliegine or bocconcini (small balls), drained
- 1 large bunch fresh basil leaves
- 3 tablespoons extra virgin olive oil
- ¼ teaspoon flaky sea salt
- ¼ teaspoon black pepper
- ¼ cup balsamic glaze (store-bought, such as Trader Joe's or Aldi brand)
- Small appetizer toothpicks or 4-inch skewers
Instructions
- Drain the mozzarella balls well and pat dry with paper towels. Let the tomatoes come to room temperature for at least 20 minutes before assembling — cold tomatoes taste like nothing.
- Fold a basil leaf in half or thirds so it fits neatly on a skewer. Thread one tomato onto a toothpick, followed by the folded basil leaf, then one mozzarella ball.
- Arrange the assembled skewers on a large flat platter in rows.
- Drizzle olive oil lightly over the entire platter, then season with flaky sea salt and black pepper.
- Just before serving, drizzle the balsamic glaze over the top in a zigzag pattern. Don't dress them more than 15 minutes ahead or the basil will darken and wilt.
12. Blender Roasted Red Pepper Hummus Cups
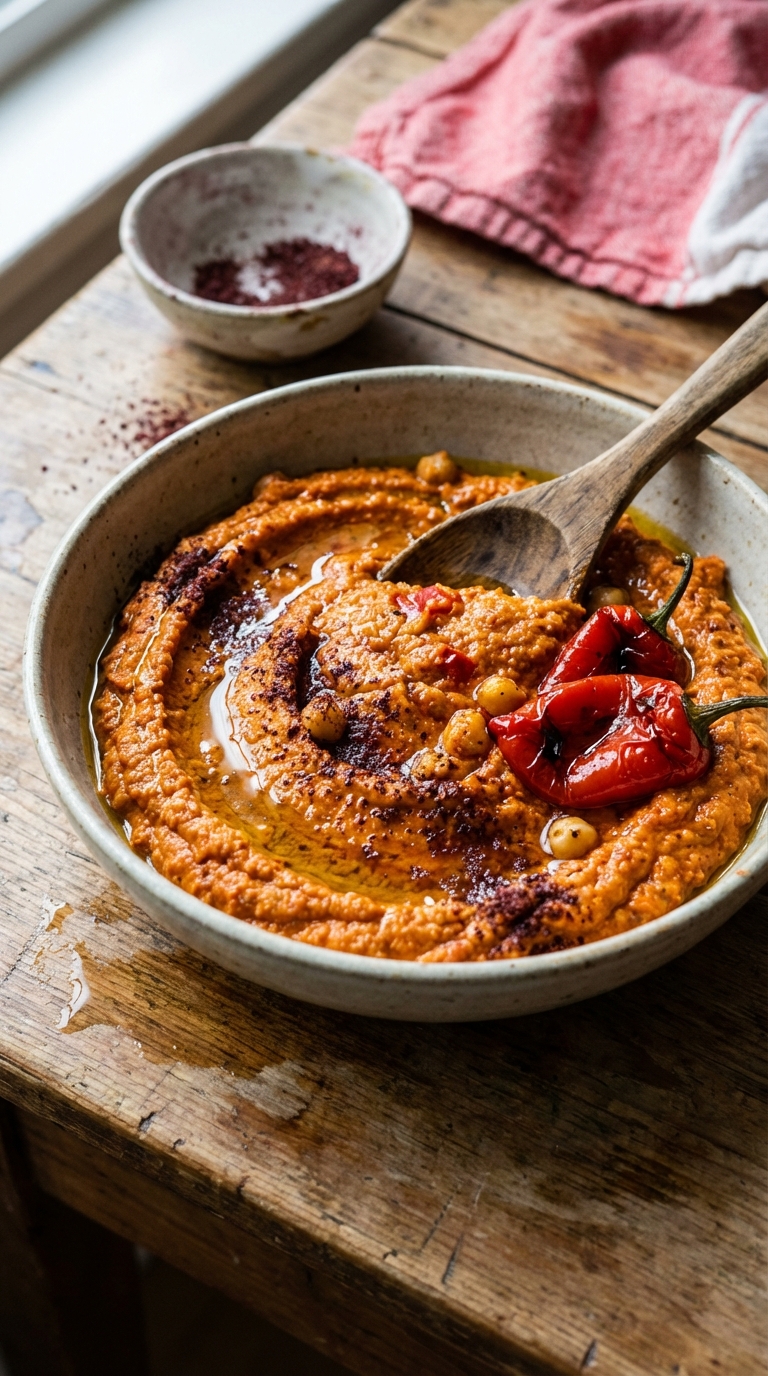
Hummus cups are one of those appetizers that look far more put-together than the effort they require. You blend the hummus, spoon it into small cups or shot glasses, top with a drizzle of olive oil and a pinch of smoked paprika, and you're done. The roasted red pepper version has a slightly smoky, sweet flavor that plain hummus just doesn't have — and it photographs beautifully, which matters when your graduation table needs to look like you tried. I make a double batch of the hummus because it disappears faster than any other dip on the table. Serve with pita chips tucked into each cup or alongside a platter of crudités.
Ingredients
- 2 cans (15 oz each) chickpeas, drained and rinsed
- 1 jar (12 oz) roasted red peppers, drained
- 3 tablespoons tahini
- 3 tablespoons fresh lemon juice (about 2 lemons)
- 2 cloves garlic
- ½ teaspoon smoked paprika, plus more for topping
- ½ teaspoon salt
- 3 tablespoons olive oil, plus more for drizzling
- 2–4 tablespoons cold water (to thin)
- Mini pita chips or vegetable sticks, for serving
Instructions
- Add chickpeas, roasted red peppers, tahini, lemon juice, garlic, smoked paprika, salt, and olive oil to a blender or food processor. Blend on high for 1–2 minutes until completely smooth.
- With the blender running, add cold water one tablespoon at a time until the hummus reaches a creamy, spoonable consistency — not too stiff, not runny.
- Taste and adjust salt or lemon juice as needed. Blend again briefly after adjusting.
- Spoon or pipe the hummus into small plastic cups, shot glasses, or mini bowls — about 3 tablespoons per cup.
- Drizzle a small amount of olive oil over each cup and dust lightly with smoked paprika. Tuck a pita chip or two into each cup for presentation.
- Cover and refrigerate until serving. The hummus holds well for up to 3 days in advance.
11. Crowd-Size Seven-Layer Mexican Dip
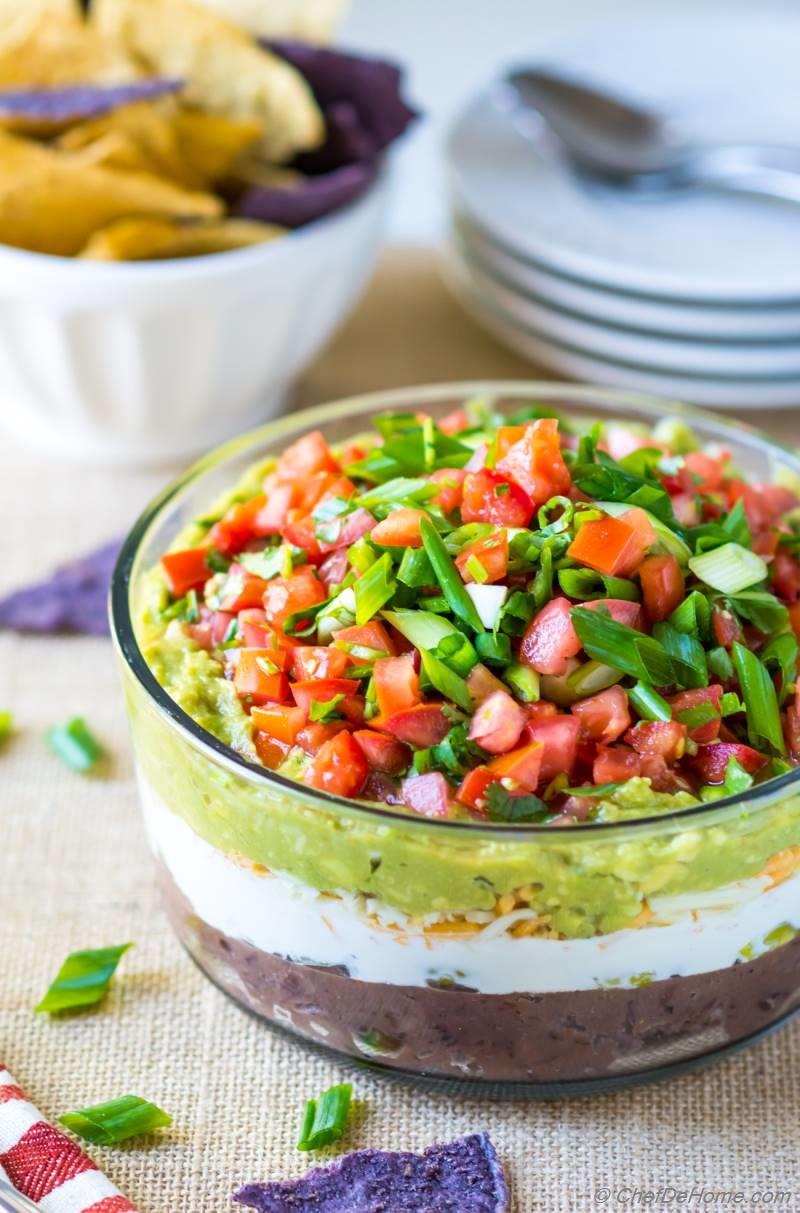
Every graduation party I've attended in the last five years has had some version of seven-layer dip on the table — and it's always the first thing to run out. There's a reason for that. The layers hit every note at once: creamy refried beans, cool sour cream, sharp cheddar, bright salsa, ripe avocado, olives, green onions. When you build it in a 9x13 dish, it feeds a serious crowd and you can prep it entirely the night before. The key is layering in the right order so nothing gets soggy — I've made the mistake of putting salsa directly on sour cream and ending up with a watery mess. Beans first, always.
Ingredients
- 2 cans (16 oz each) refried beans
- 1 packet (1 oz) taco seasoning
- 2 cups sour cream
- 3 ripe avocados, mashed
- 2 tablespoons fresh lime juice
- ½ teaspoon garlic salt
- 1½ cups prepared salsa (medium heat)
- 2 cups shredded Mexican blend cheese
- 1 can (2.25 oz) sliced black olives, drained
- 4 green onions, sliced thin
- 1 cup diced Roma tomatoes (seeds removed)
- Tortilla chips, for serving
Instructions
- Stir the taco seasoning into the refried beans until combined. Spread evenly across the bottom of a 9x13 inch dish as your first layer.
- Spread sour cream evenly over the bean layer using the back of a spoon or offset spatula.
- Mash avocados with lime juice and garlic salt until mostly smooth. Spread this guacamole layer over the sour cream.
- Spoon the salsa over the guacamole in an even layer. Use a slotted spoon to drain excess liquid before spooning — this prevents a watery base.
- Sprinkle shredded cheese evenly over the salsa, then scatter black olives, diced tomatoes, and sliced green onions across the top.
- Cover tightly with plastic wrap and refrigerate for at least 1 hour before serving. Serve cold with tortilla chips alongside.
10. Smoked Salmon and Cream Cheese Crostini
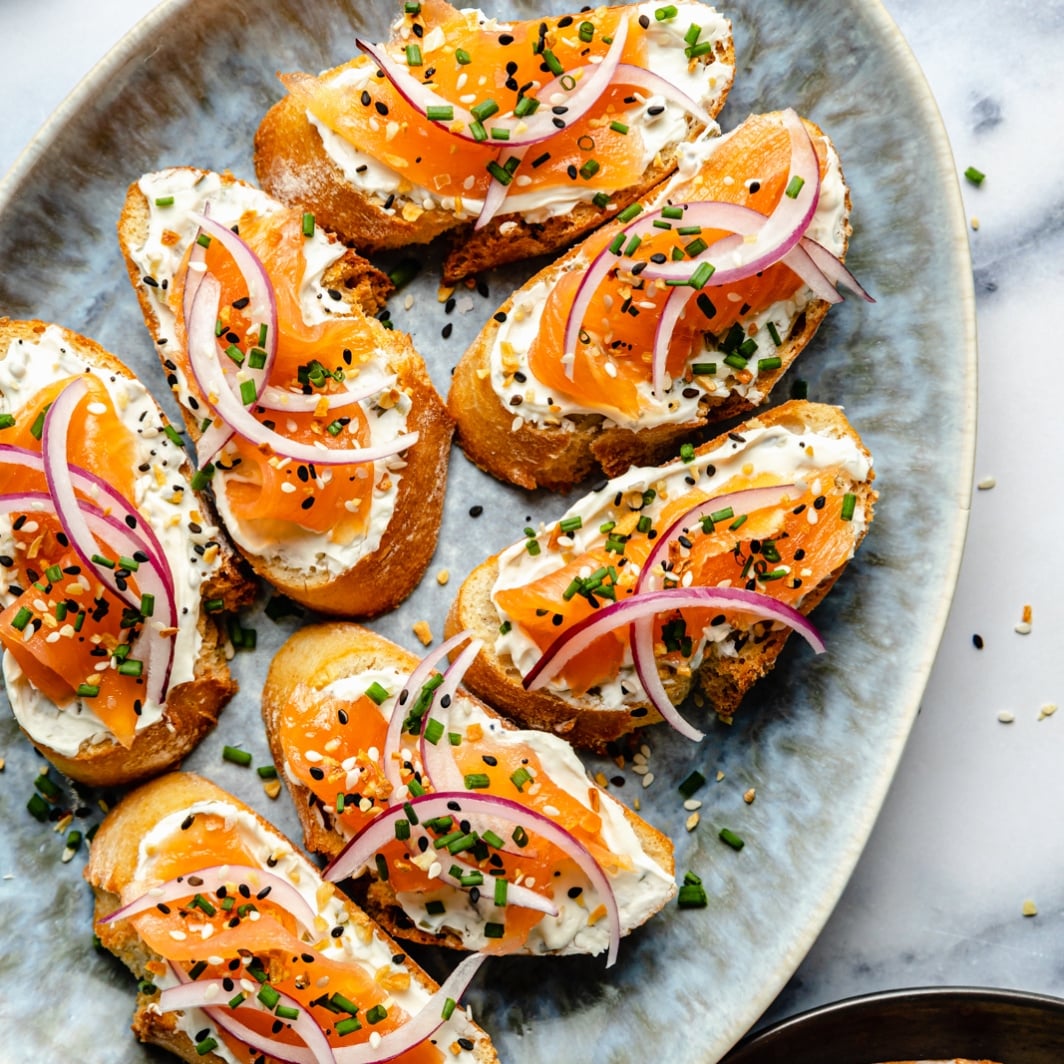
When you want the appetizer table to feel a little elevated without actually spending all day cooking, smoked salmon crostini are the answer. Toasted baguette slices, a swipe of herbed cream cheese, a fold of smoked salmon, a few capers, a thin slice of red onion — that's it. The whole assembly takes maybe 20 minutes once the bread is toasted. Smoked salmon from Costco or Trader Joe's works perfectly here and keeps the cost manageable when you're feeding a crowd. These disappear fast, so plan on at least 2–3 per person and don't put them all out at once — bring a fresh tray out halfway through the party.
Ingredients
- 1 French baguette, sliced into ½-inch rounds (about 30 slices)
- 3 tablespoons olive oil
- 8 oz cream cheese, softened to room temperature
- 2 tablespoons fresh dill, chopped (plus sprigs for garnish)
- 1 tablespoon fresh lemon juice
- ½ teaspoon garlic powder
- 8 oz smoked salmon, sliced
- 3 tablespoons capers, drained
- ¼ small red onion, sliced paper thin
- Lemon zest, for finishing
Instructions
- Preheat oven to 400°F. Arrange baguette slices in a single layer on a sheet pan and brush both sides lightly with olive oil.
- Bake for 8–10 minutes, flipping once halfway, until golden and crisp at the edges. Remove and let cool completely — they crisp up further as they cool.
- In a small bowl, beat softened cream cheese with dill, lemon juice, and garlic powder until smooth and spreadable.
- Spread about 1 teaspoon of the herbed cream cheese onto each cooled crostini.
- Fold a small piece of smoked salmon onto each one, then top with 2–3 capers and a sliver of red onion.
- Finish with a pinch of lemon zest and a small sprig of fresh dill. Arrange on a platter and serve within 1 hour of assembly for best texture.
9. Honey Garlic Meatballs in the Crockpot
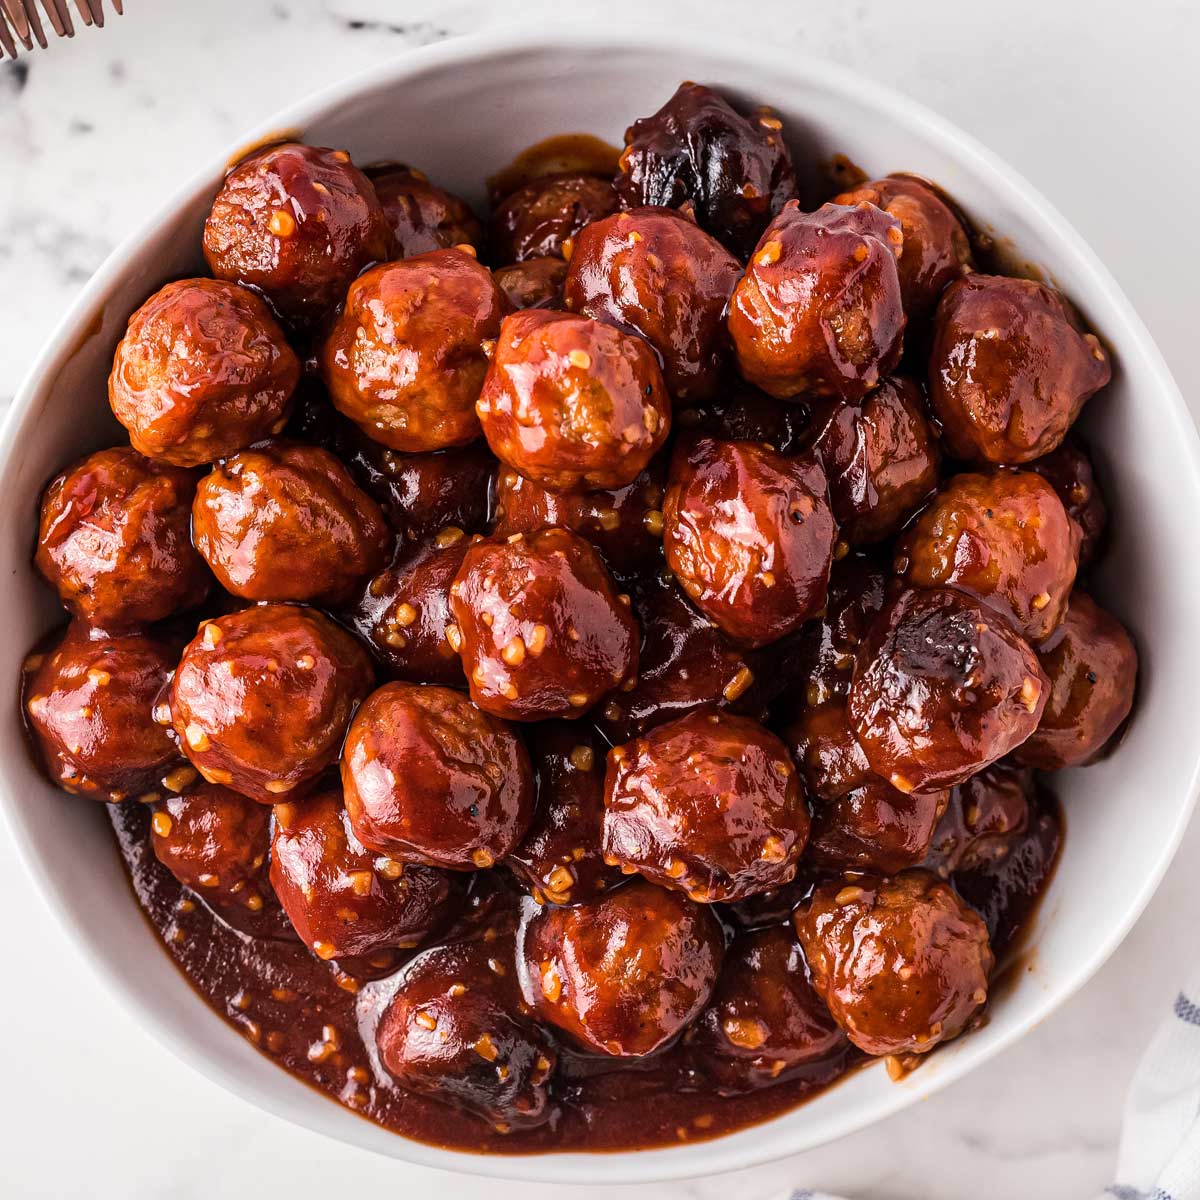
crockpot meatballs are the party host's best friend, full stop. You dump everything in, set it, and three hours later you have saucy, sticky, deeply flavored meatballs keeping themselves warm while you deal with the rest of party prep. The honey garlic sauce here is savory-sweet with just a little heat from red pepper flakes — it's the kind of sauce that makes people hover near the slow cooker with toothpicks. Saad asked me to put these out at his cousin's birthday party last year and they were completely gone before dinner was even announced. I use frozen pre-made meatballs from Walmart or Costco to keep it simple — no shame in that at all.
Ingredients
- 2 lbs frozen fully cooked meatballs (cocktail size)
- ⅓ cup honey
- ¼ cup low-sodium soy sauce
- 4 cloves garlic, minced
- 2 tablespoons ketchup
- 1 tablespoon rice vinegar (or apple cider vinegar)
- ½ teaspoon red pepper flakes (adjust to taste)
- 1 tablespoon cornstarch
- 2 tablespoons cold water
- Sliced green onions and sesame seeds, for garnish
Instructions
- Add frozen meatballs directly to the crockpot — no need to thaw.
- In a small bowl, whisk together honey, soy sauce, minced garlic, ketchup, vinegar, and red pepper flakes. Pour the sauce over the meatballs and stir gently to coat.
- Cover and cook on HIGH for 2½–3 hours or LOW for 4–5 hours, stirring once halfway through.
- About 20 minutes before serving, whisk cornstarch with cold water in a small bowl until smooth. Stir into the crockpot and replace the lid. Cook on HIGH for 15–20 more minutes until the sauce thickens and coats the meatballs.
- Switch to WARM setting for serving. Garnish with sliced green onions and a sprinkle of sesame seeds. Set out toothpicks alongside.
8. Puff Pastry Pigs in a Blanket

There's a meaningful upgrade between crescent roll pigs in a blanket and puff pastry pigs in a blanket, and it's worth knowing about before your next party. Puff pastry gives you these shatteringly flaky, buttery layers that crescent dough just can't match — and they look genuinely impressive on a platter even though the technique is nearly identical. The whole process is roll, wrap, brush with egg wash, and bake. You can assemble them the night before, keep them unbaked in the fridge, and slide them straight into the oven right before guests arrive. That make-ahead step alone makes them worth choosing over almost anything else on this list.
Ingredients
- 2 sheets frozen puff pastry (17.3 oz package), thawed overnight in fridge
- 1 package (14 oz) cocktail-size smoked sausages (such as Lit'l Smokies)
- 2 tablespoons Dijon mustard
- 1 egg, beaten
- 1 tablespoon water
- Everything bagel seasoning or sesame seeds, for topping
- Honey mustard or ketchup, for dipping
Instructions
- Preheat oven to 400°F. Line two large sheet pans with parchment paper.
- Unfold one puff pastry sheet on a lightly floured surface. Spread a thin layer of Dijon mustard across the surface, then cut the sheet into strips about 1 inch wide and 3 inches long.
- Place a cocktail sausage at one end of each strip and roll it up, pressing the seam gently to seal. Place seam-side down on the prepared sheet pan. Repeat with remaining pastry and sausages.
- Whisk egg with water. Brush the egg wash over each pastry roll, then sprinkle with everything bagel seasoning or sesame seeds.
- Bake for 18–22 minutes until puffed, deep golden brown, and cooked through. Rotate the pans halfway through baking for even color.
- Let cool for 5 minutes before transferring to a platter. Serve warm with dipping sauces on the side.
7. Avocado BLT Bites on Toast Rounds

A BLT is one of the most satisfying flavor combinations that exists — bacon, tomato, crisp lettuce — and turning it into a one-bite appetizer is one of the smarter party moves I've come across. You use a small round cookie cutter to punch circles out of sandwich bread, toast them until sturdy, then layer on mashed avocado, a small leaf of romaine, a diced tomato piece, and a strip of crispy bacon. The avocado acts as both the spread and the flavor anchor, replacing mayo with something fresher. These need to be assembled right before serving or the bread softens, so I prep all the components ahead and do a quick assembly about 20 minutes before guests arrive.
Ingredients
- 1 loaf white or sourdough sandwich bread (about 20 slices)
- 3 ripe avocados
- 2 tablespoons fresh lime juice
- ½ teaspoon salt
- ¼ teaspoon garlic powder
- 12 strips bacon, cooked until crispy, broken into small pieces
- 2 cups cherry tomatoes, quartered and patted dry
- 1 head romaine lettuce, small inner leaves separated
- Flaky sea salt, for finishing
Instructions
- Using a 2-inch round cookie cutter, cut 2 circles from each slice of bread. Arrange on sheet pans in a single layer.
- Toast at 375°F for 8–10 minutes until light golden and firm. Let cool completely — they'll continue to crisp up off the heat.
- Mash avocados with lime juice, salt, and garlic powder in a bowl until mostly smooth with some texture remaining. Cover with plastic wrap pressed directly onto the surface to prevent browning until ready to use.
- Cook bacon in a large skillet over medium heat until crispy. Drain on paper towels and break or cut into small bite-size pieces.
- To assemble: spread about 1 teaspoon of mashed avocado onto each toast round, press a small piece of romaine on top, add 2–3 tomato pieces, and finish with a piece of bacon.
- Finish with a tiny pinch of flaky sea salt on each bite. Arrange on a platter and serve within 30 minutes of assembly.
6. Cheesy Spinach Stuffed Mushrooms
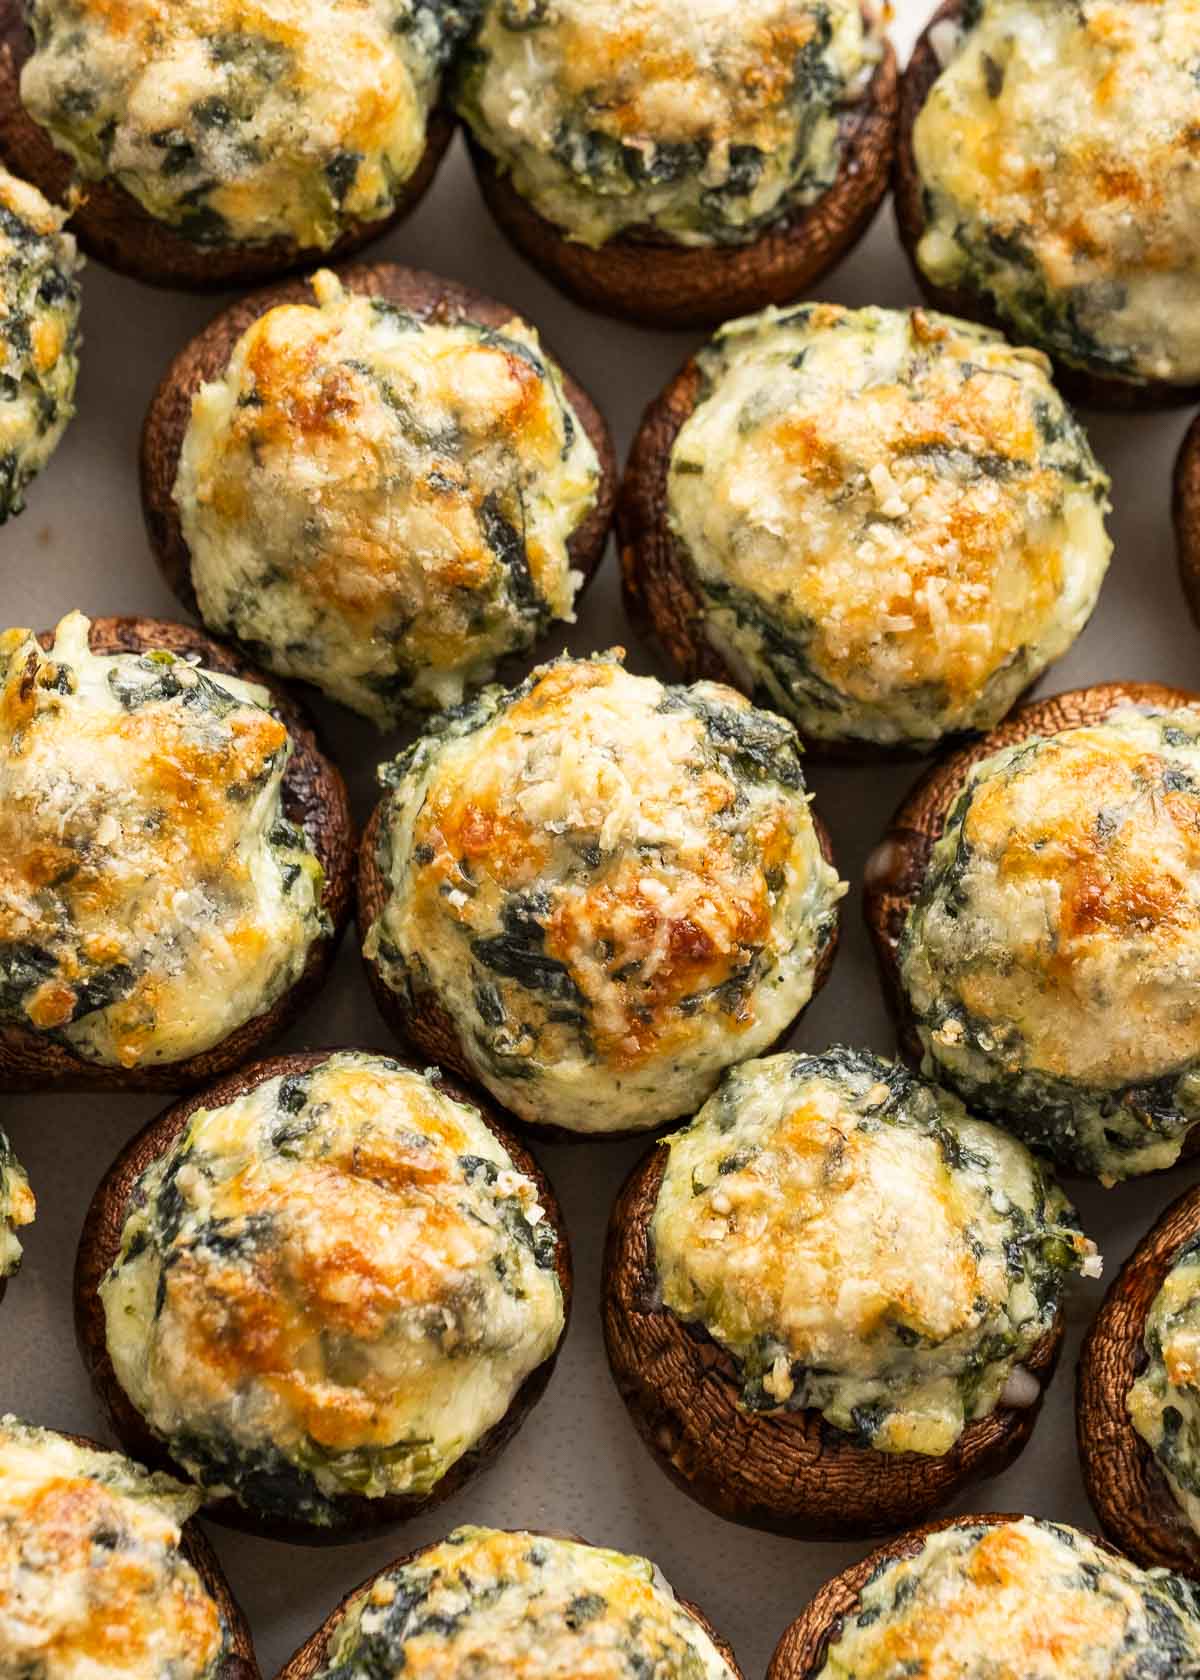
stuffed mushrooms earn their place at a graduation party because they feel substantial — they're not just a cracker with a smear of something on top. The filling here is cream cheese, sautéed spinach, garlic, and Parmesan, all loaded into baby bella mushroom caps and baked until golden and bubbling at the edges. The mushrooms release some liquid as they cook, which is normal — just don't overcrowd the pan or they'll steam instead of roast. The first time I made these I used regular white button mushrooms and they collapsed too easily; baby bellas hold their shape much better. These can be fully assembled and refrigerated a day ahead, then baked off fresh right before the party.
Ingredients
- 24 baby bella mushrooms, stems removed and reserved
- 2 tablespoons olive oil, divided
- 3 cloves garlic, minced
- 2 cups fresh baby spinach, roughly chopped
- 8 oz cream cheese, softened
- ½ cup grated Parmesan cheese, divided
- ¼ teaspoon onion powder
- ¼ teaspoon black pepper
- ½ teaspoon salt
- ¼ cup shredded mozzarella, for topping
Instructions
- Preheat oven to 400°F. Brush mushroom caps inside and out with 1 tablespoon of olive oil and arrange them cavity-side up on a large rimmed sheet pan.
- Finely chop the reserved mushroom stems. Heat remaining olive oil in a skillet over medium heat. Add garlic and chopped stems and cook for 3 minutes until softened. Add spinach and stir until wilted, about 2 minutes. Remove from heat and let cool slightly.
- In a bowl, beat softened cream cheese until smooth. Stir in the cooked spinach mixture, ¼ cup Parmesan, onion powder, salt, and pepper until fully combined.
- Spoon or pipe the filling generously into each mushroom cap, mounding it slightly above the rim. Top each with a pinch of shredded mozzarella and remaining Parmesan.
- Bake for 20–25 minutes until the mushrooms are tender, the filling is set, and the tops are golden and bubbly.
- Let rest for 5 minutes before transferring to a serving platter — they're very hot straight from the oven.
5. Frozen Lemonade Punch Bowl Floats
:max_bytes(150000):strip_icc():format(webp)/punch-orange-pineapple-18-56a8be043df78cf772a03c2b.jpg)
Technically this is a drink, not an appetizer — but it belongs on this list because at every graduation party, the punch bowl is a destination, and this one genuinely stops people in their tracks. Scoops of lemon sorbet or vanilla ice cream float in a base of lemonade and ginger ale, turning the whole punch bowl into something between a drink and a dessert. It's cold, it's refreshing, it handles itself without a bartender, and it's completely non-alcoholic so everyone from the graduate's little sibling to the grandparents can have a glass. Set it out in a wide bowl with a ladle and let guests help themselves — the ice cream melts slowly into the punch over time and honestly it gets better as the party goes on.
Ingredients
- 2 quarts (½ gallon) lemon sorbet or vanilla ice cream (or one of each)
- 2 cans (12 oz each) frozen lemonade concentrate, thawed
- 4 cups cold water
- 2 liters ginger ale, chilled
- 1 cup fresh lemon juice (about 6–8 lemons)
- Lemon slices and fresh mint, for garnish
- Ice ring or ice block (optional, keeps it cold without watering it down)
Instructions
- In a large punch bowl, combine thawed lemonade concentrate, cold water, and fresh lemon juice. Stir well.
- Slowly pour the chilled ginger ale down the side of the bowl to preserve the carbonation. Stir gently just once to combine.
- Using a large ice cream scoop, drop generous scoops of lemon sorbet and/or vanilla ice cream directly into the punch bowl — aim for 12–15 scoops across the surface.
- If using an ice ring, add it now to keep the punch cold. Otherwise, add a few large ice cubes to the punch base before adding the sorbet scoops.
- Garnish the surface with thin lemon slices and fresh mint sprigs. Set out a ladle and punch cups alongside, and remind guests to scoop a bit of the floating sorbet into each cup.
4. Greek Pasta Salad with Kalamata Olives
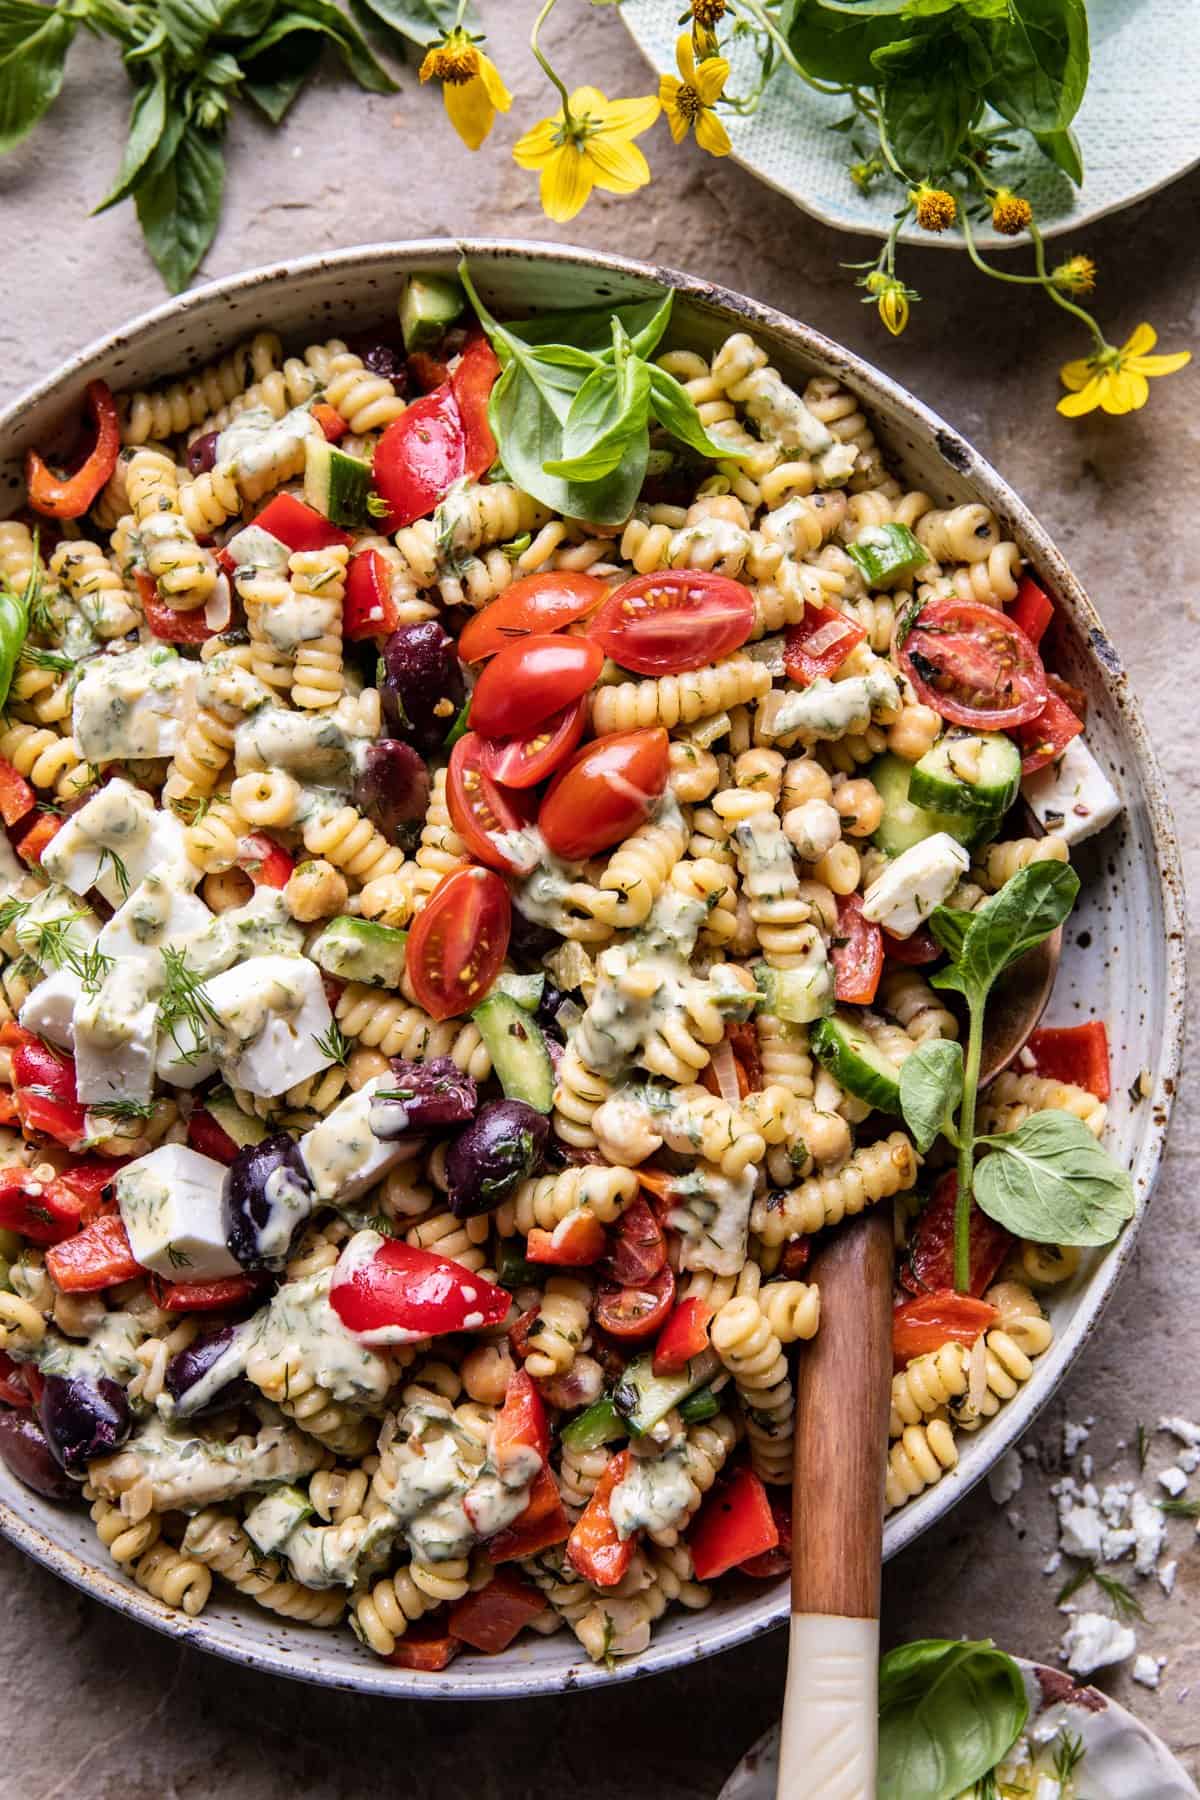
Pasta salads are graduation party workhorses — they travel well, hold up for hours on a buffet table, and people pile their plates high without thinking twice. This one earns its spot because the kalamata olives and feta give it enough punch to stand out from the usual mayo-heavy versions. I make it the night before so the pasta has time to soak up the dressing, and honestly it tastes better the next day anyway. Make-ahead pasta salads like this one are the reason I don't lose my mind at big gatherings.
Ingredients
- 12 oz rotini pasta
- 1 cup kalamata olives, halved
- 1 cup cherry tomatoes, halved
- 1 English cucumber, diced
- ½ red onion, thinly sliced
- 1 cup crumbled feta cheese
- 1 cup roasted red peppers, chopped (jarred is fine)
- ⅓ cup olive oil
- 3 tablespoons red wine vinegar
- 1 teaspoon dried oregano
- ½ teaspoon garlic powder
- Salt and black pepper to taste
Instructions
- Cook the rotini in heavily salted boiling water according to package directions until al dente. Drain and rinse under cold water to stop the cooking, then let it cool completely.
- In a small bowl, whisk together the olive oil, red wine vinegar, oregano, garlic powder, salt, and pepper to make the dressing.
- In a large bowl, combine the cooled pasta, olives, cherry tomatoes, cucumber, red onion, and roasted red peppers.
- Pour the dressing over the salad and toss well to coat everything evenly. Fold in the feta last so it doesn't break down too much.
- Cover and refrigerate for at least 1 hour before serving, or overnight for best flavor. Give it a quick toss and taste for seasoning right before putting it out — it sometimes needs a pinch more salt after sitting.
3. Crispy Parmesan Zucchini Fritters

Zucchini fritters taught me something I now apply to every fritter and veggie pancake I make: squeeze out the moisture like your life depends on it. The first batch I ever made was soggy and flat because I skipped that step. Once I started wringing the grated zucchini in a clean kitchen towel until it looked almost dry, the fritters came out golden and crisp and people couldn't stop eating them. They work as a party appetizer because they're just as good at room temperature as they are hot off the pan, which makes them low-stress for a buffet table.
Ingredients
- 3 medium zucchini, grated (about 3 cups grated)
- 1 teaspoon salt (for drawing out moisture)
- 2 large eggs, lightly beaten
- ⅓ cup all-purpose flour
- ½ cup grated Parmesan cheese
- 2 cloves garlic, minced
- ¼ teaspoon black pepper
- ¼ teaspoon red pepper flakes (optional)
- 2 tablespoons olive oil, for frying
- Sour cream or Greek yogurt, for serving
Instructions
- Toss the grated zucchini with 1 teaspoon salt in a colander and let it sit for 10 minutes. Then transfer it to a clean kitchen towel and squeeze firmly until as much liquid as possible is removed — this step is non-negotiable for crispy fritters.
- In a large bowl, combine the squeezed zucchini, eggs, flour, Parmesan, garlic, black pepper, and red pepper flakes if using. Stir until a cohesive batter forms.
- Heat 1 tablespoon olive oil in a large skillet over medium heat. Drop heaping tablespoons of batter into the pan and flatten slightly with the back of a spoon.
- Cook for 3–4 minutes per side until deeply golden and crisp. Don't rush flipping — if they stick, they need another minute. Work in batches and add more oil as needed.
- Transfer to a plate lined with paper towels. Serve warm or at room temperature with sour cream or Greek yogurt on the side for dipping.
2. Sweet and Spicy Candied Bacon Crackers

Every party needs one thing on the table that makes people stop mid-conversation and ask what it is. These crackers are that thing. Buttery crackers topped with candied bacon — bacon that's been coated in brown sugar and a hit of cayenne and baked until lacquered and slightly crisp — disappear faster than anything else I put out. My husband, who normally skips party food and goes straight for the main meal, stood at the counter eating these one by one while I was still arranging the platter. They look impressive but the ingredient list is embarrassingly short.
Ingredients
- 1 sleeve Ritz crackers (about 30–35 crackers)
- 1 lb thin-cut bacon, strips cut in half crosswise
- ½ cup light brown sugar, packed
- ¼ teaspoon cayenne pepper (adjust to taste)
- ½ teaspoon black pepper
- 1 teaspoon Dijon mustard (optional, adds depth)
Instructions
- Preheat your oven to 350°F. Line a large rimmed baking sheet with foil and place a wire rack on top. The rack is important — it lets the fat drip away so the bacon crisps properly.
- In a small bowl, mix together the brown sugar, cayenne, and black pepper. If using Dijon, stir it in here too.
- Arrange the Ritz crackers in a single layer on the wire rack. Lay one half-strip of bacon on top of each cracker.
- Press a generous pinch of the brown sugar mixture onto each bacon-topped cracker, coating the bacon well.
- Bake for 20–25 minutes until the bacon is cooked through and the sugar has caramelized into a shiny glaze. Watch closely in the last 5 minutes — the sugar can go from caramelized to burnt quickly.
- Let them cool on the rack for at least 5 minutes before serving. The glaze firms up as it cools and gets that satisfying crunch.
1. Mini Chicken Caesar Lettuce Wraps
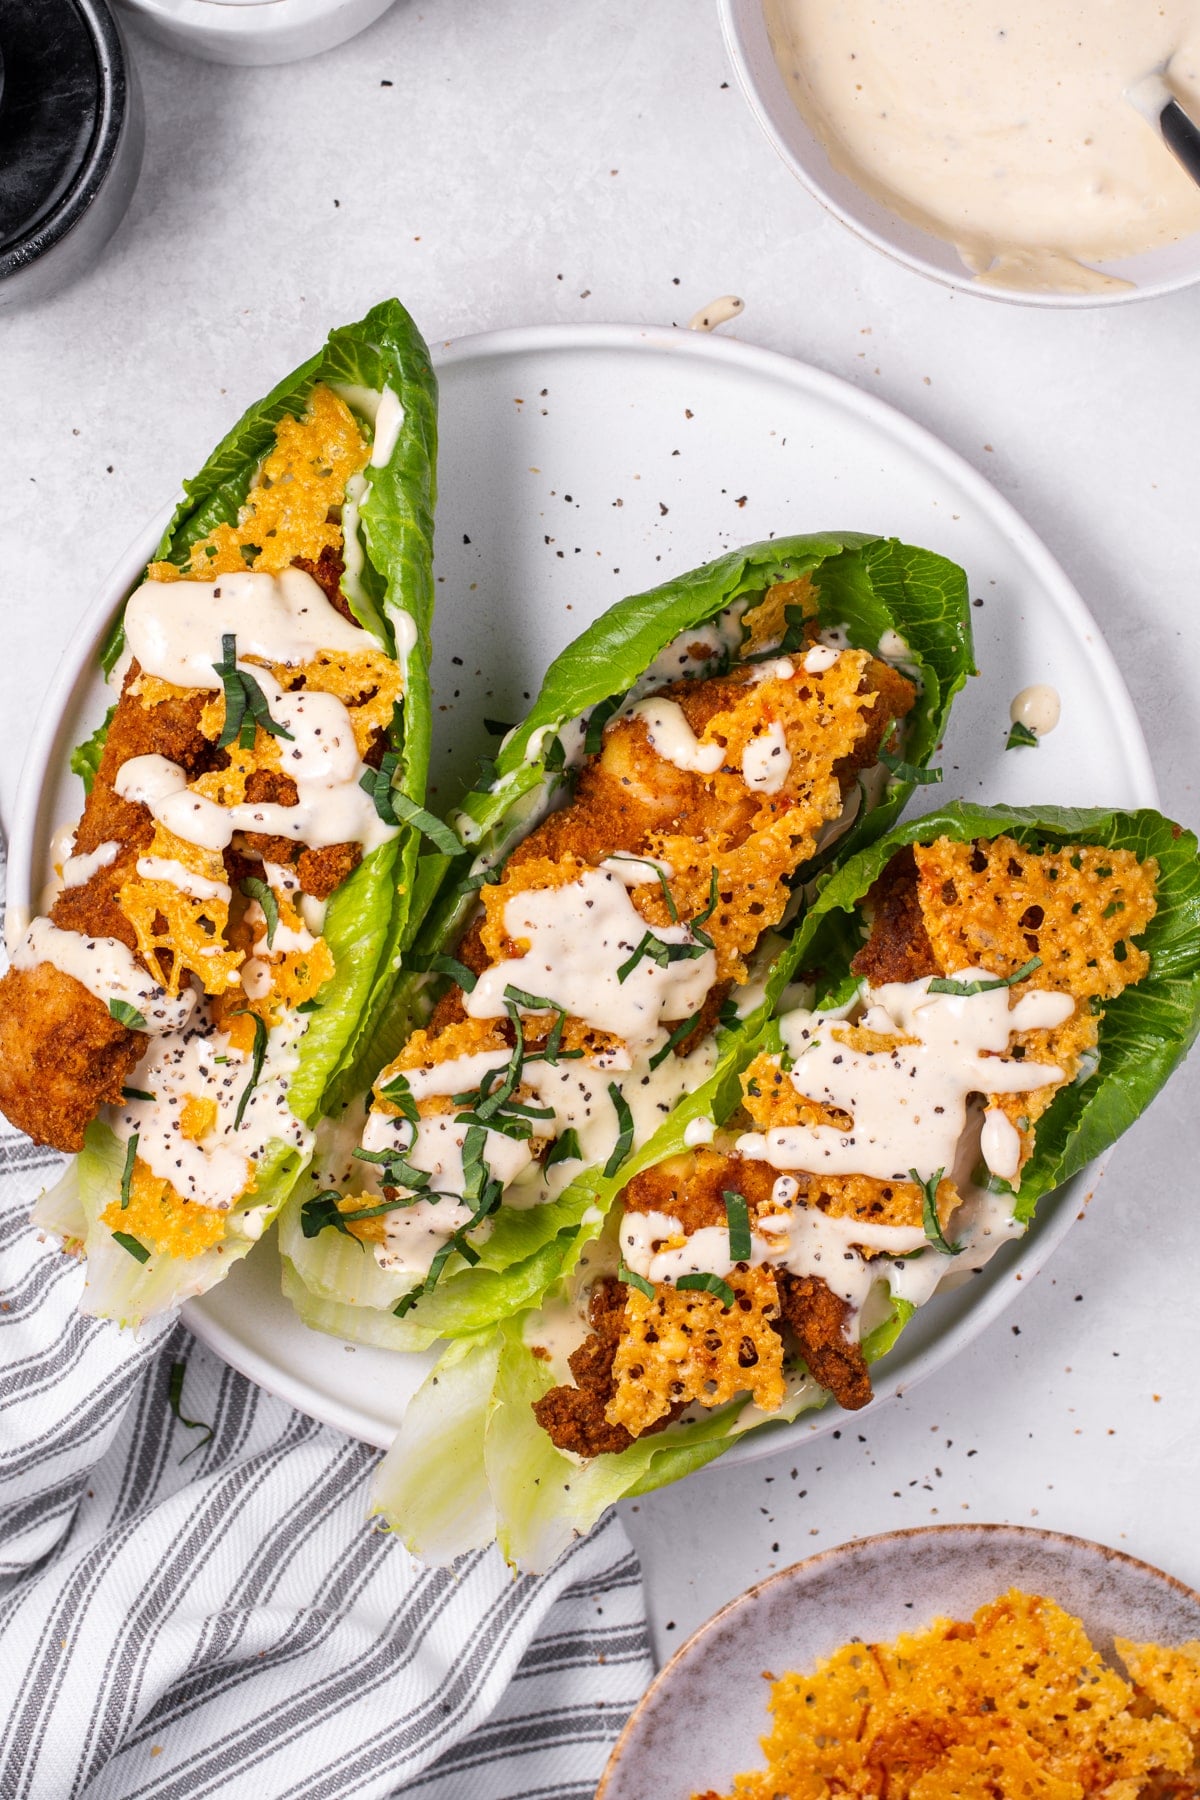
Saving the top spot for these because they check every box for a graduation party: easy to eat standing up, no utensils needed, endlessly refillable, and genuinely satisfying rather than just snack food. Romaine hearts are sturdy enough to hold a scoop of Caesar-dressed chicken without collapsing, and the whole thing comes together in under 20 minutes if you use a rotisserie chicken — which I always do for parties. Saad asks me to make these even on regular weeknights now, which tells you everything you need to know. Set out the components separately if you want guests to assemble their own; it keeps the lettuce from getting soggy and gives people something to do.
Ingredients
- 1 rotisserie chicken, shredded (about 3 cups chicken)
- ½ cup Caesar dressing (store-bought works great)
- ¼ cup grated Parmesan cheese
- 1 cup croutons, roughly crushed
- 2 hearts of romaine lettuce, leaves separated and trimmed into cups
- 1 teaspoon lemon juice
- Black pepper to taste
- Extra Parmesan for topping
Instructions
- Shred the rotisserie chicken into bite-sized pieces, discarding the skin and bones. You want pieces small enough to sit neatly inside a lettuce cup.
- In a large bowl, toss the shredded chicken with the Caesar dressing, Parmesan, lemon juice, and a few cracks of black pepper. Taste and adjust — some store-bought dressings are saltier than others.
- Separate the romaine leaves and trim the bottoms so each leaf forms a neat cup. Pat them dry with paper towels so the dressing doesn't slide off.
- Spoon 2–3 tablespoons of the Caesar chicken mixture into each lettuce cup. Top with a pinch of crushed croutons and extra Parmesan right before serving so the croutons stay crunchy.
- Arrange on a platter and serve immediately, or set out the chicken mixture, lettuce cups, and toppings separately for a self-serve station — this is the move if you're setting up the table more than 30 minutes ahead.
Twenty appetizers is a lot of options, and honestly that's the point. Graduation parties don't follow a script — sometimes you've got 15 people, sometimes 50 show up. Having a solid list of crowd-friendly bites means you can mix and match based on your headcount, your budget, and how much time you actually have the day of the party. I've leaned on lists like this more times than I can count, and the ones that earn repeat spots are always the ones that travel well, feed more people than you expect, and don't require you to be hovering over them constantly.
My honest advice: pick two or three from this list and make double batches instead of trying to make ten different things. The first time I hosted a big party, I made seven appetizers thinking variety would impress everyone. I was exhausted before the guests even arrived. Now I pick things that can be prepped the night before, set out in big trays, and refilled without much fuss. These twenty recipes are built for exactly that kind of practical hosting.
Whether the grad loves comfort food classics or you're trying to put out something that looks a little more put-together, there's something here that'll work for your table. Save this list, share it with whoever's helping you host, and go enjoy the party instead of stressing in the kitchen. That's what this is all for. 🎓✨🥳
Related Recipes
- Browse All Recipe Roundups
- More Party Food Ideas on For Foodie Friends
- Easy Crowd-Pleaser Recipes for Every Occasion
Frequently Asked Questions
How far in advance can I make graduation party appetizers?
Most of these appetizers can be fully or partially prepped the night before, which is exactly what I'd recommend. Dips, meatballs, and anything baked can be made ahead and reheated. Anything with fresh herbs or delicate toppings is best assembled day-of, but you can have all the components ready to go.
How much food do I need for a graduation party of 50 people?
A general rule I follow is 8 to 10 bite-sized pieces per person if appetizers are the main food, or 4 to 6 pieces if you're also serving a main dish. For 50 people eating appetizers as the main spread, I'd pick 4 to 5 recipes from this list and make a double batch of each. That usually covers everyone without running out.
Which appetizers on this list are easiest to make for a large crowd?
Anything you can bake in large batches on sheet pans is your best friend for big groups — think meatballs, pinwheels, and stuffed mushrooms. Dips are also incredibly easy to scale up and keep warm in a slow cooker so you don't have to babysit them. I'd start with those if you're nervous about the logistics.
Can I serve these appetizers outdoors in warm weather?
Some yes, some you'll want to be careful with. Anything with mayo, cream cheese, or dairy-based dips shouldn't sit out for more than two hours in warm weather. For outdoor parties, I keep those in a bowl set over ice or bring them out in smaller batches. Drier appetizers like pinwheels and bruschetta hold up much better outside.
What are good make-ahead graduation appetizers that don't need reheating?
Pinwheels, caprese skewers, cucumber rounds with toppings, and cold dips like hummus are all great options that taste just as good at room temperature. I love having at least two or three no-reheat options at any party because it means less running back to the kitchen and more time actually being present with your guests.





Comments
No Comments