
Keto meal prep doesn't have to drain your grocery budget. I know that sounds like a contradiction — keto already feels expensive with all the salmon and almond flour and specialty snacks — but I've been doing this long enough to know that cheap keto meal prep is absolutely doable if you plan around the right ingredients. Ground beef, chicken thighs, cabbage, zucchini, cauliflower, eggs — these are the workhorses of a budget-friendly keto week, and they're all sitting at Walmart or Aldi for very reasonable prices.
What makes a keto meal prep recipe actually worth making on a Sunday? For me it comes down to three things: it has to reheat well (nobody wants sad, rubbery chicken on Thursday), it has to use ingredients you can buy in bulk without waste, and it has to be filling enough that you're not hungry again an hour later. Fat and protein do that job — which is exactly why keto and meal prep are such a natural match. If you're just getting started with low-carb cooking, my post on easy keto dinner recipes is a good place to get your bearings first.
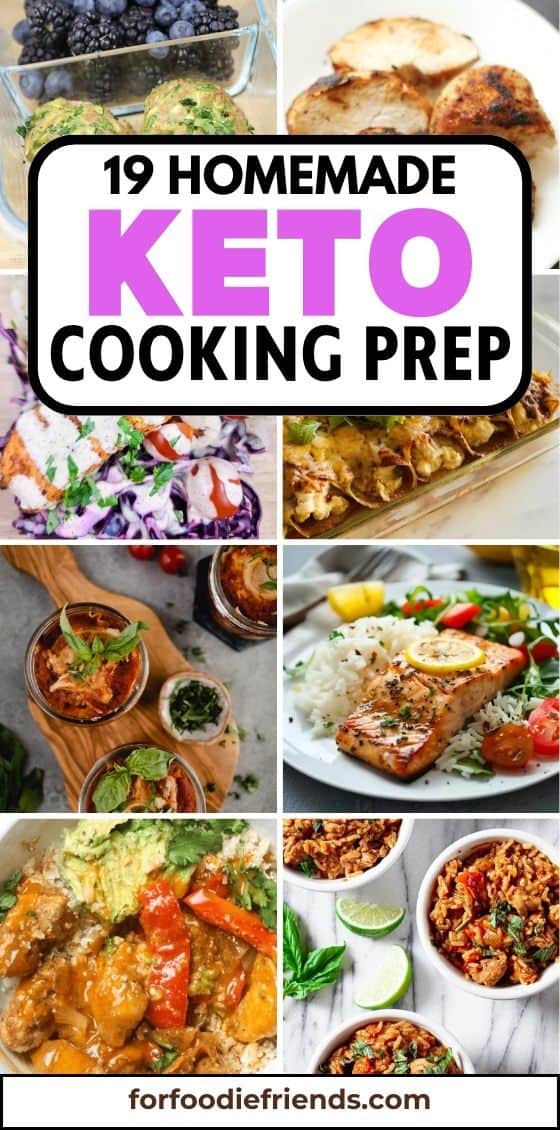
This list pulls together 19 recipes that cover a serious range — we're talking Dutch Oven Beef Stew, Keto Kung Pao Chicken, Chipotle Salmon with Cauliflower Rice, White Chicken Chili, and even a Cheesy Garlic Brussels Sprout Bake that my husband requests more than I expected. There are slow cooker options, sheet pan options, and a few stovetop recipes that come together in under 30 minutes. If you want more ideas for filling the fridge on a budget, my roundup of cheap dinner recipes has a lot of overlap with what works here. And if you're a fan of the one-pan approach, check out my one pan dinner recipes too.
Here are the 19 recipes I keep coming back to — pick whichever fits your week and your freezer space.
Top 19 Cheap Keto Meal Prep Recipes
19. Pan Seared Salmon
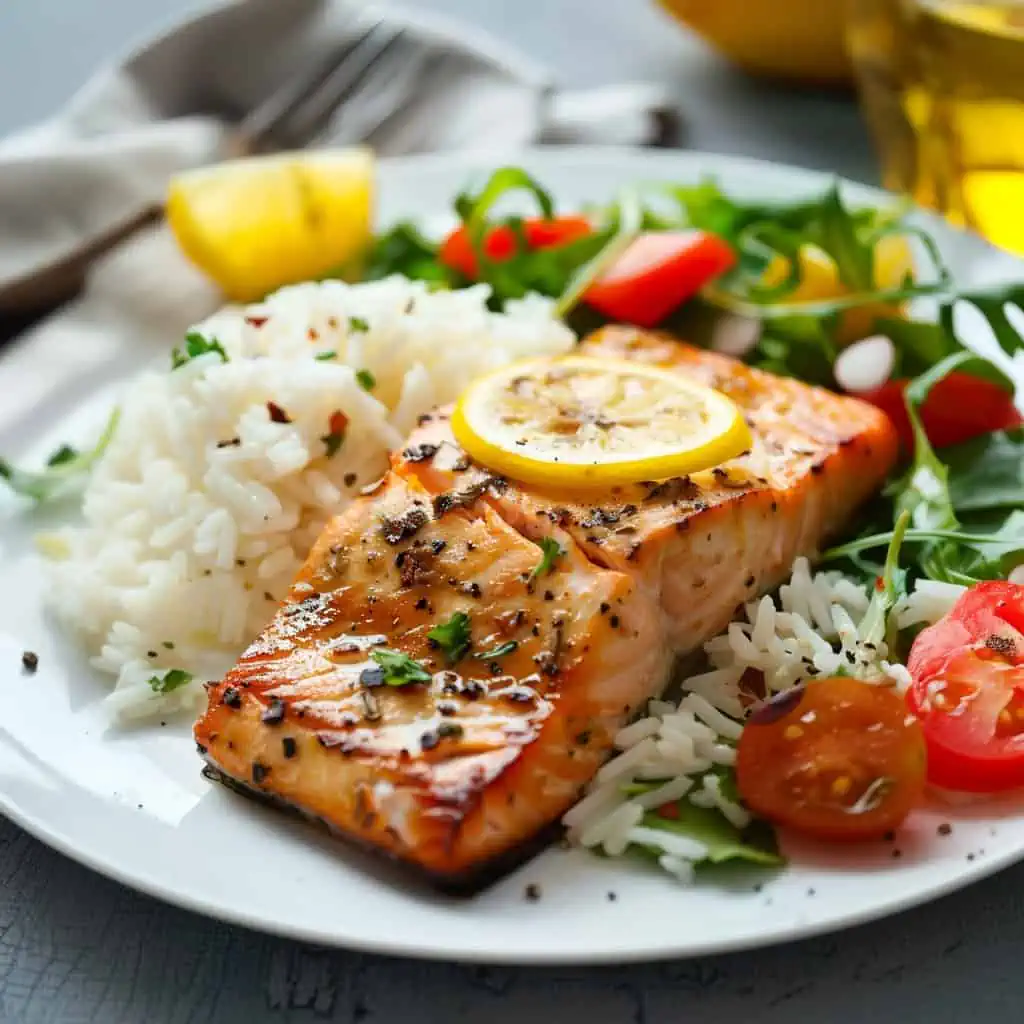
Salmon is one of those proteins that looks impressive but genuinely takes about 10 minutes start to finish. I meal prep this on Sundays and it holds up well in the fridge for three days — flake it over salad greens, eat it cold with sliced cucumber, or reheat it with whatever vegetables you have on hand. The key is a properly hot pan and not fussing with it while it sears. Let it do its thing and you'll get that crispy skin that makes the whole thing worth it.
Ingredients
- 4 salmon fillets (about 6 oz each), skin-on
- 1 tablespoon olive oil
- 1 teaspoon garlic powder
- 1 teaspoon smoked paprika
- ½ teaspoon salt
- ¼ teaspoon black pepper
- 1 lemon, sliced into rounds for serving
Instructions
- Pat the salmon fillets completely dry with paper towels — this is what actually gets you a crispy sear, not the oil. Season all over with garlic powder, smoked paprika, salt, and pepper.
- Heat olive oil in a heavy skillet over medium-high heat until shimmering. Place salmon fillets skin-side down and press gently for the first 10 seconds so the skin makes full contact with the pan.
- Cook without moving for 4 minutes, then flip and cook another 2-3 minutes depending on thickness. The salmon is done when it flakes easily with a fork and the center is just barely opaque.
- Let rest for 2 minutes before serving or packing into meal prep containers. Store in the fridge for up to 3 days.
Tips
- Tip: If you're buying salmon at Costco or Walmart, the frozen Atlantic salmon fillets work perfectly here — just thaw overnight in the fridge.
- Tip: Don't move the salmon while it sears. Resistance means it's still releasing — when it releases easily, it's ready to flip.
- Tip: To reheat without drying it out, cover loosely with a damp paper towel and microwave at 50% power for 90 seconds.
18. Cheesy Garlic Brussels Sprout Bake
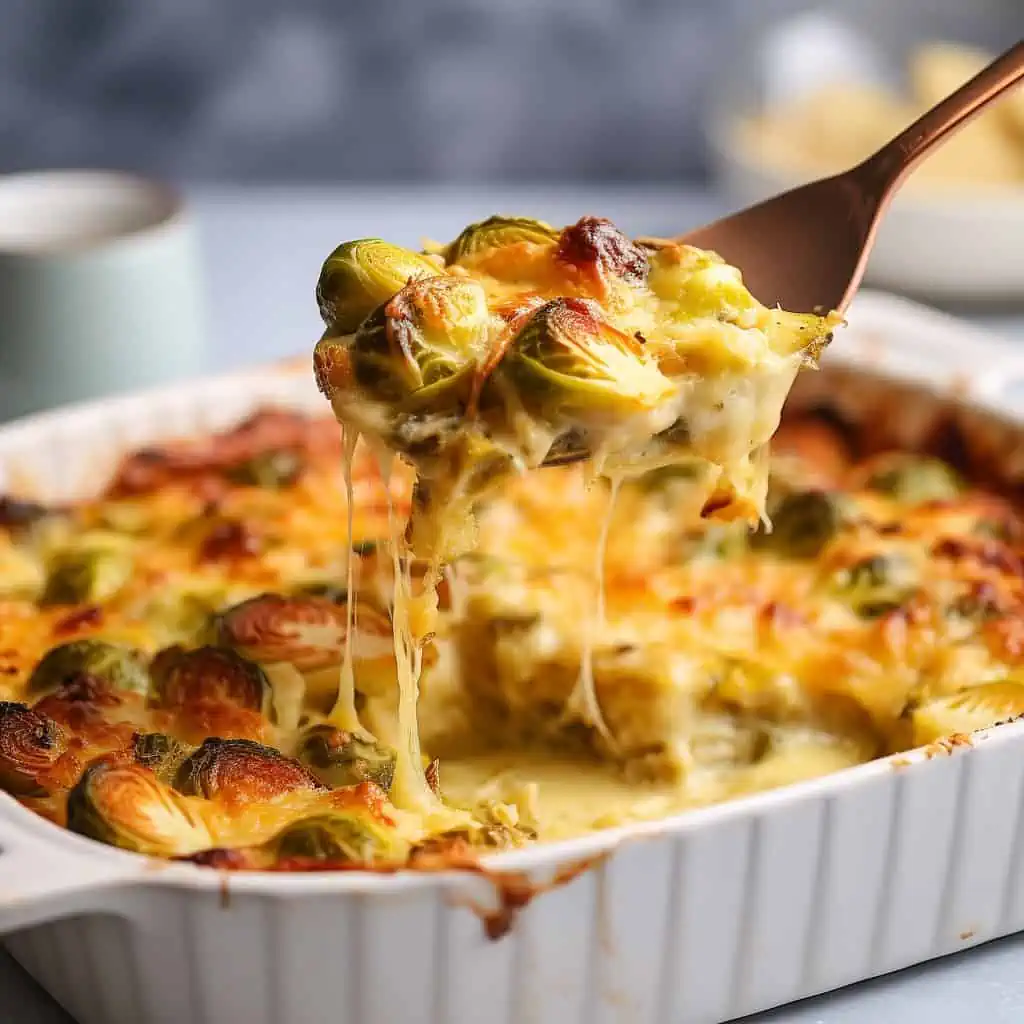
I know Brussels sprouts have a reputation, but this bake has converted more than a few skeptics in my house. Zainab used to push them to the side of her plate — she doesn't anymore, not when they come out of the oven smelling like garlic butter and melted cheese. It's a proper side dish that doubles as a low-carb main if you add some protein on top. The roasting is what makes the difference: the outer leaves get a little crispy while the centers stay tender, and the cheese bubbles up into all those little gaps.
Ingredients
- 1½ lbs Brussels sprouts, trimmed and halved
- 4 cloves garlic, minced
- 2 tablespoons olive oil
- ½ teaspoon salt
- ¼ teaspoon black pepper
- ¼ teaspoon red pepper flakes (optional)
- ¾ cup shredded mozzarella
- ¼ cup grated Parmesan
Instructions
- Preheat oven to 400°F. Toss halved Brussels sprouts with olive oil, minced garlic, salt, pepper, and red pepper flakes if using. Spread cut-side down in a single layer on a sheet pan — don't crowd them or they'll steam instead of roast.
- Roast for 20 minutes until the cut sides are golden and starting to caramelize. Pull the pan out and sprinkle mozzarella and Parmesan evenly over the top.
- Return to oven and bake another 8-10 minutes until the cheese is melted and bubbly with golden spots. Serve immediately or let cool before portioning into meal prep containers.
Tips
- Tip: Make sure the Brussels sprouts are as dry as possible before tossing with oil — any moisture will prevent proper browning.
- Tip: This reheats well in a 375°F oven for 8 minutes, which keeps the cheese from turning rubbery the way microwaving does.
- Tip: Add cooked crumbled bacon on top before the cheese goes on if you want to turn this into a more filling keto main.
17. Easy Gluten-Free Paleo Tahini Chicken Salad (Keto)
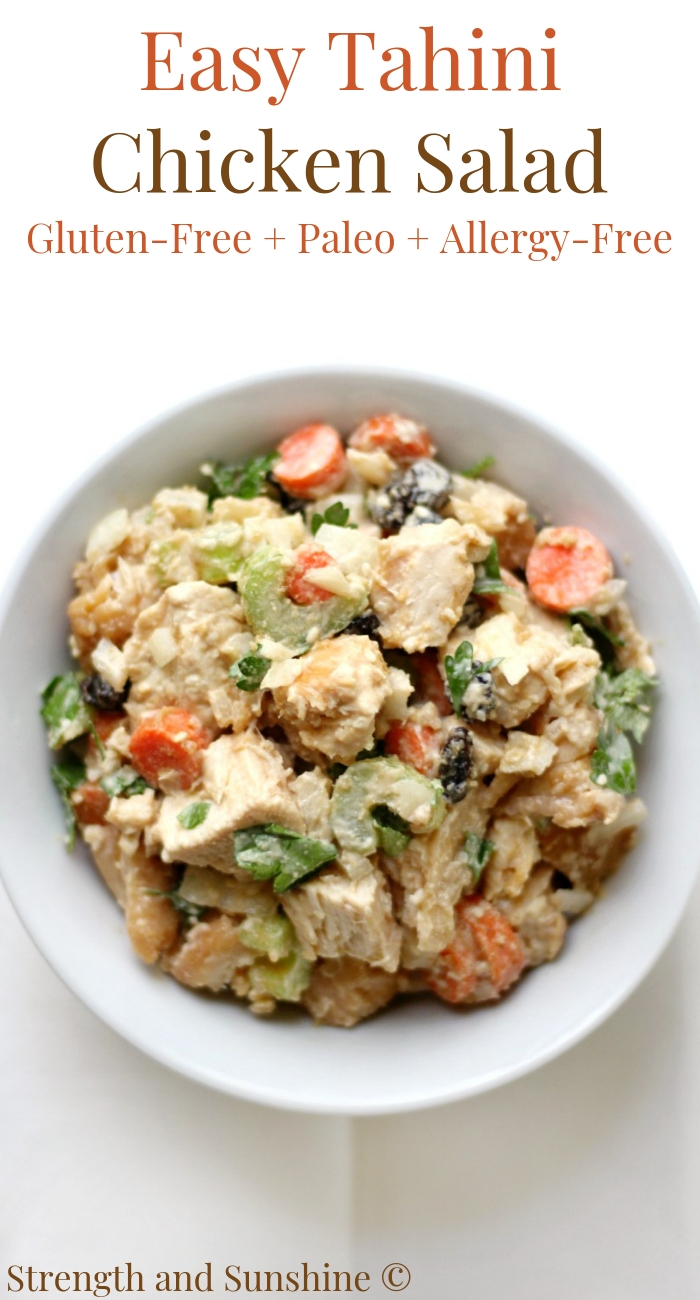
Tahini in a chicken salad sounds unusual if you grew up with the mayo-and-celery version, but it genuinely works — and it works better for meal prep because it doesn't get watery or separate the way mayo-based salads sometimes do. Growing up in Pakistan, tahini was something we used in hummus or drizzled on roasted vegetables, so using it as a salad dressing felt like a natural crossover. This version is simple: shredded chicken, crunchy vegetables, and a lemony tahini dressing that ties it all together. No cooking involved once the chicken is done.
Ingredients
- 2 cups cooked chicken breast, shredded
- 1 cup celery, thinly sliced
- ½ cup red onion, finely diced
- ½ cup cucumber, diced
- 3 tablespoons tahini
- 2 tablespoons lemon juice (about 1 lemon)
- 1 tablespoon olive oil
- 1 clove garlic, minced
- Salt and pepper to taste
- Fresh parsley for garnish (optional)
Instructions
- Whisk together tahini, lemon juice, olive oil, and minced garlic in a small bowl. If the dressing is too thick, add water one teaspoon at a time until it reaches a pourable consistency. Season with salt and pepper.
- Combine shredded chicken, celery, red onion, and cucumber in a large bowl. Pour the tahini dressing over the top and toss until everything is evenly coated.
- Taste and adjust salt and lemon as needed. Garnish with fresh parsley if using. Serve immediately or divide into containers — it keeps well in the fridge for up to 4 days.
Tips
- Tip: Rotisserie chicken from Costco or Walmart is the easiest shortcut here — shred it while still warm and it pulls apart in seconds.
- Tip: Tahini thickens in the fridge, so the salad may look dry after a day. Add a quick squeeze of lemon and a splash of water before eating and it loosens right back up.
- Tip: Serve over lettuce leaves or sliced cucumber rounds to keep it fully keto — or just eat it straight from the container, which is what I usually do at lunch.
16. The Greatest Grilled Chicken...EVER!
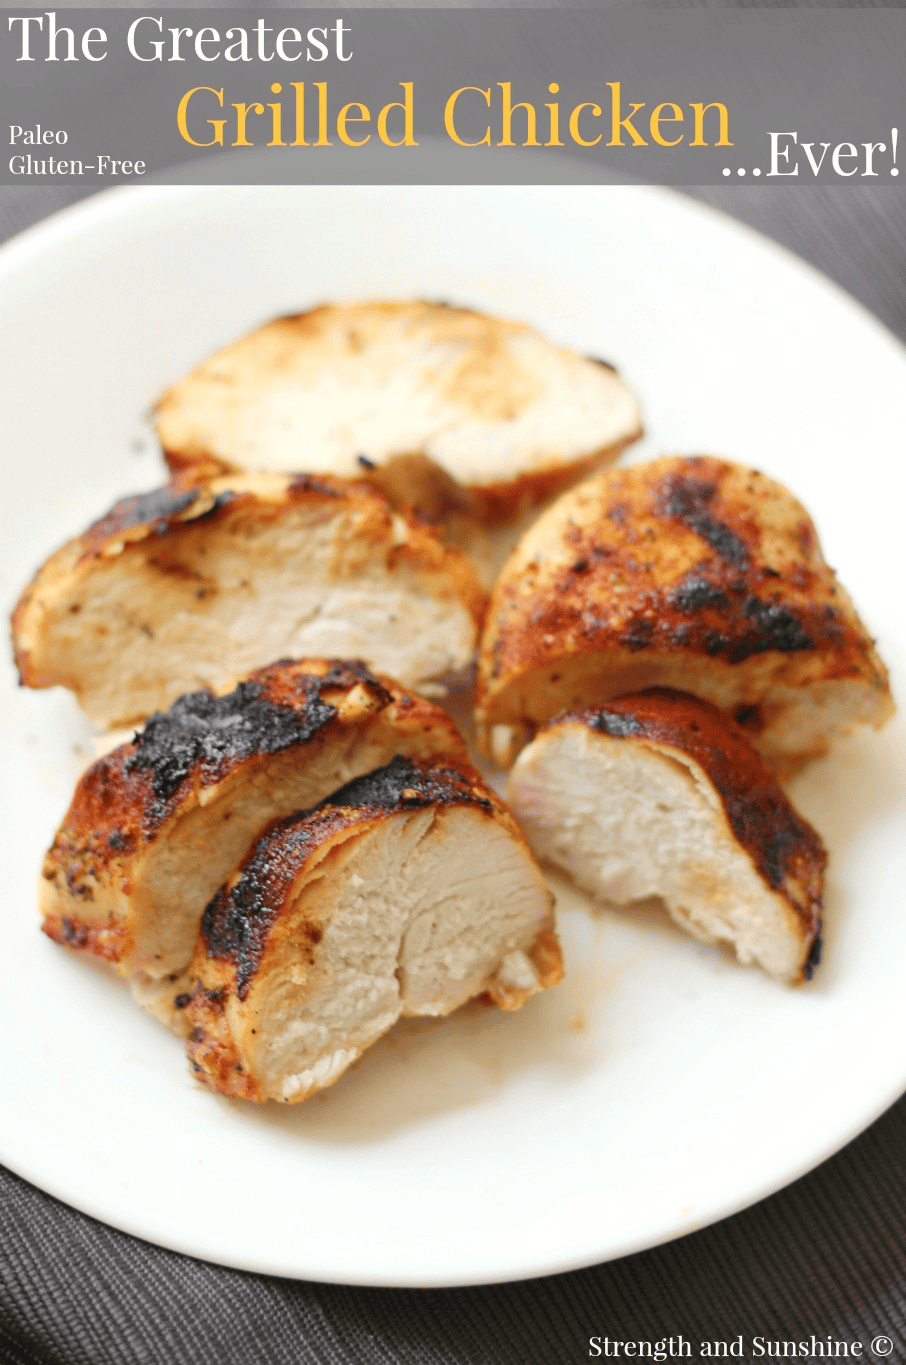
I've made a lot of grilled chicken over the years and the honest truth is most of it was fine but not memorable. This version changed that. The marinade is the difference — it's got enough acid to tenderize, enough fat to keep things juicy, and enough seasoning that the chicken actually tastes like something on its own without needing a sauce. I make a double batch every single time because it disappears too fast. My husband eats it sliced over salad, Saad puts it in a wrap, and I usually just eat it straight off the cutting board while I'm packing the containers.
Ingredients
- 2 lbs boneless skinless chicken breasts or thighs
- 3 tablespoons olive oil
- 3 tablespoons lemon juice
- 4 cloves garlic, minced
- 1 teaspoon smoked paprika
- 1 teaspoon cumin
- 1 teaspoon dried oregano
- 1 teaspoon salt
- ½ teaspoon black pepper
Instructions
- Whisk together olive oil, lemon juice, garlic, smoked paprika, cumin, oregano, salt, and pepper in a bowl or zip-lock bag. Add chicken and coat well. Marinate for at least 30 minutes — overnight in the fridge is even better.
- Take the chicken out of the fridge 15 minutes before cooking so it cooks more evenly. Preheat your grill or grill pan to medium-high heat. Brush the grates lightly with oil.
- Grill chicken breasts 6-7 minutes per side (thighs need about 5-6 minutes per side) until the internal temperature reads 165°F. Don't press down on the chicken — that pushes out the juices.
- Rest the chicken on a cutting board for 5 minutes before slicing. This step matters — cutting too early loses all that juice you worked to keep in. Store in meal prep containers for up to 4 days.
Tips
- Tip: If you don't have a grill, a heavy cast iron skillet works perfectly — heat it until smoking hot, then cook the same way.
- Tip: Chicken thighs are cheaper than breasts and stay juicier during meal prep — they're my default choice for this recipe.
- Tip: Pound thick chicken breasts to an even thickness before marinating so they cook through at the same rate without drying out the thinner end.
15. Smoothie Freezer Packs – DIY Meal Prep

Sunday afternoons I'll spend 20 minutes portioning fruit and vegetables into zip-lock bags, stack them in the freezer, and then the whole week's breakfasts are basically done. No chopping at 7am, no thinking, just dump a bag into the blender with some liquid and go. For keto, the trick is keeping the fruit low-sugar — berries are your best friend here. Spinach or kale adds volume and nutrients without affecting the carb count much, and frozen avocado makes everything creamy without needing banana. These packs last up to three months in the freezer, so batch hard when you have time.
Ingredients
- ½ cup frozen strawberries
- ¼ cup frozen blueberries
- ¼ cup frozen avocado chunks (or ¼ fresh avocado, frozen)
- 1 large handful fresh spinach (about 1 cup, packed)
- 1 tablespoon chia seeds or ground flaxseed
- 1 tablespoon almond butter or peanut butter (optional, for fat)
- 1–1½ cups unsweetened almond milk (added at blending time, not packed in the bag)
Instructions
- Lay out as many zip-lock freezer bags as you want to prep. Label each bag with the date and contents so you know what's in there three weeks later.
- Divide the strawberries, blueberries, avocado, spinach, chia seeds, and almond butter between the bags. Press out as much air as possible, seal tightly, and freeze flat. They keep for up to 3 months.
- When ready to use, dump the contents of one bag directly into a blender — no thawing needed. Add 1 to 1½ cups unsweetened almond milk and blend on high for 60 seconds until completely smooth. Drink immediately.
Tips
- Tip: Add a scoop of unflavored or vanilla collagen peptides or keto-friendly protein powder to boost the protein without adding carbs.
- Tip: Fresh spinach freezes fine directly in the bag — no blanching needed. It blends completely smooth and you won't taste it at all.
- Tip: If your blender struggles with frozen ingredients, let the bag sit on the counter for 5 minutes before blending to take the edge off the freeze.
10. Best Keto Chicken Enchiladas
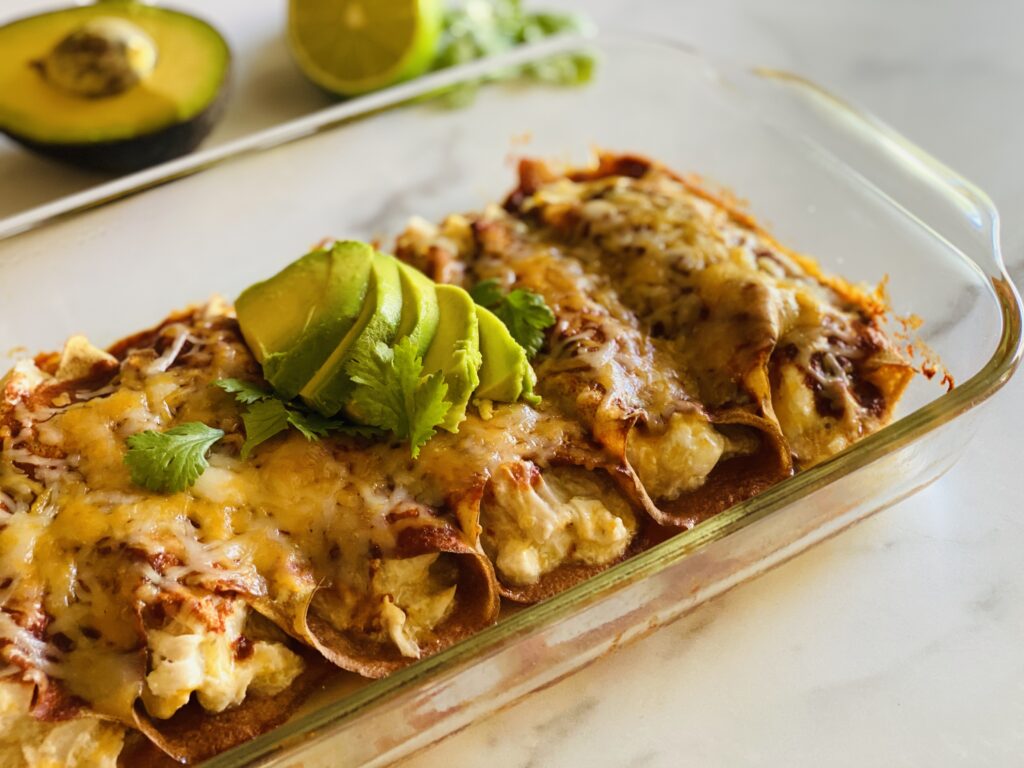
Enchiladas were one of the first things I tried to recreate when I started eating lower carb, and I went through a few failed attempts before landing on this approach. The trick is using Crepini egg thins instead of flour tortillas — they roll without cracking and hold up through baking better than any low-carb wrap I've tried. Grab a rotisserie chicken from Costco or Walmart, shred it up, and you've got the hardest part done. These prep beautifully in individual containers and reheat well all week.
Ingredients
- 2 cups shredded rotisserie chicken
- 8 Crepini egg thin wraps (find them at Costco or Trader Joe's)
- 1 cup red enchilada sauce (check the label — some are surprisingly low carb)
- 1½ cups shredded Mexican blend cheese, divided
- ½ cup sour cream
- 1 teaspoon cumin
- ½ teaspoon garlic powder
- Salt and pepper to taste
Instructions
- Preheat oven to 375°F. Mix shredded chicken with sour cream, cumin, garlic powder, ½ cup of the cheese, salt, and pepper until combined.
- Spread 2 tablespoons of enchilada sauce across the bottom of a 9x13 baking dish.
- Place about ¼ cup of the chicken mixture into each egg thin wrap, roll it up tightly, and set seam-side down in the baking dish.
- Pour remaining enchilada sauce over the top and sprinkle with the remaining 1 cup of cheese.
- Bake uncovered for 20–25 minutes until cheese is melted and bubbly. Let cool for 5 minutes before portioning into meal prep containers.
Tips
- Tip: If you can't find Crepini egg thins, look for low-carb Mission tortillas — they're widely available and work similarly here.
- Tip: These keep well in the fridge for up to 4 days. Reheat covered with a damp paper towel so the wraps don't dry out.
- Tip: Add a spoonful of sour cream and sliced jalapeños on top when serving — it makes reheated leftovers feel like a fresh meal.
11. Mini Lasagna Recipe (Single Serve Lasagna)
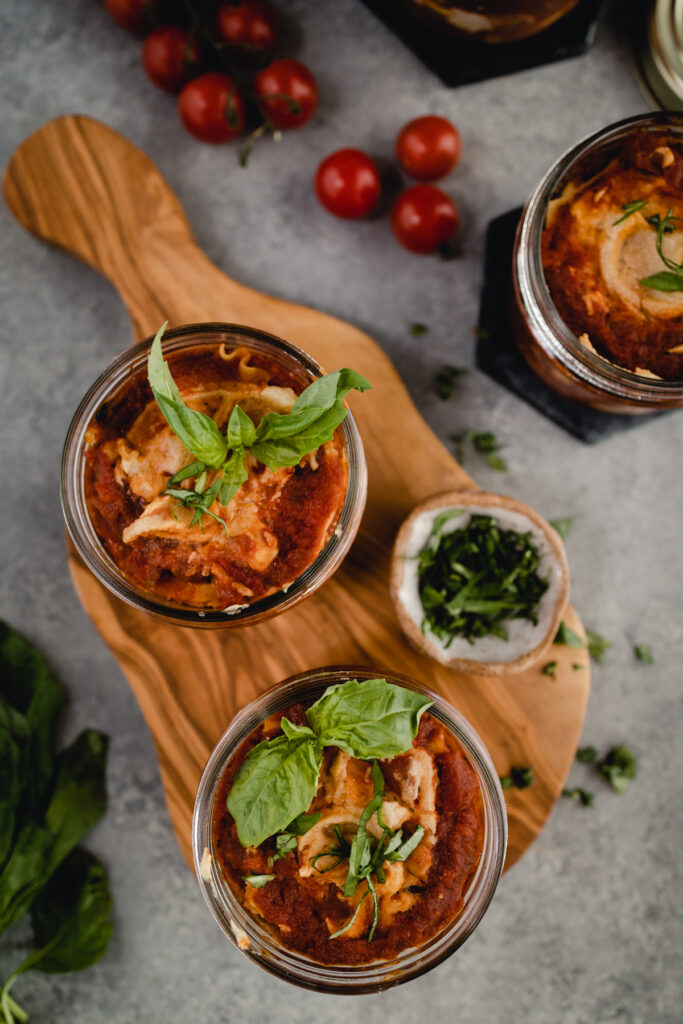
I love this idea more than I expected to. Individual lasagnas built right into mason jars — layered with cashew ricotta, meat sauce, and noodles (or zucchini slices for a keto version) — means everyone gets their own portion and there's no fighting over who got the corner piece. They seal up and go straight into the fridge. My husband thinks they look like restaurant food, which entertains me because I made them in about 40 minutes on a Sunday afternoon. For a proper keto build, swap the pasta sheets for thinly sliced zucchini — just salt them and pat dry first so they don't make everything watery.
Ingredients
- 2 medium zucchini, sliced lengthwise into thin strips (or 8 regular lasagna noodles, cooked)
- 1 lb ground beef or Italian sausage
- 1½ cups marinara sauce (choose a low-sugar version for keto)
- 1 cup raw cashews, soaked in water 2 hours and drained
- 3 tablespoons lemon juice
- 2 tablespoons nutritional yeast
- 1 garlic clove
- Salt and pepper to taste
- 1 cup shredded mozzarella
Instructions
- Make the cashew ricotta: blend soaked cashews, lemon juice, nutritional yeast, garlic, salt, and pepper in a blender until smooth and thick. Set aside.
- Brown the ground meat in a skillet over medium-high heat, drain fat, and stir in marinara sauce. Simmer 5 minutes.
- If using zucchini, salt the strips, let sit 10 minutes, then pat very dry with paper towels.
- Layer into wide-mouth pint mason jars: start with a spoonful of meat sauce, then a zucchini strip (folded to fit), then cashew ricotta, then mozzarella. Repeat until jars are full, finishing with meat sauce and mozzarella on top.
- Bake jars (lids off) in the oven at 375°F for 20 minutes until bubbling. Cool, seal with lids, and refrigerate up to 4 days.
Tips
- Tip: If you don't have a blender for the cashew ricotta, use regular ricotta cheese — it's not vegan but it's much easier and still low carb.
- Tip: Don't skip salting and drying the zucchini — skipping that step is how you end up with watery, soggy lasagna, which I learned the hard way the first time I made this.
- Tip: Reheat in the microwave with the lid off for about 2 minutes — the jar retains heat well so it stays warm longer than a regular container.
12. Mini Pot Pies Recipe (Veggie Packed)
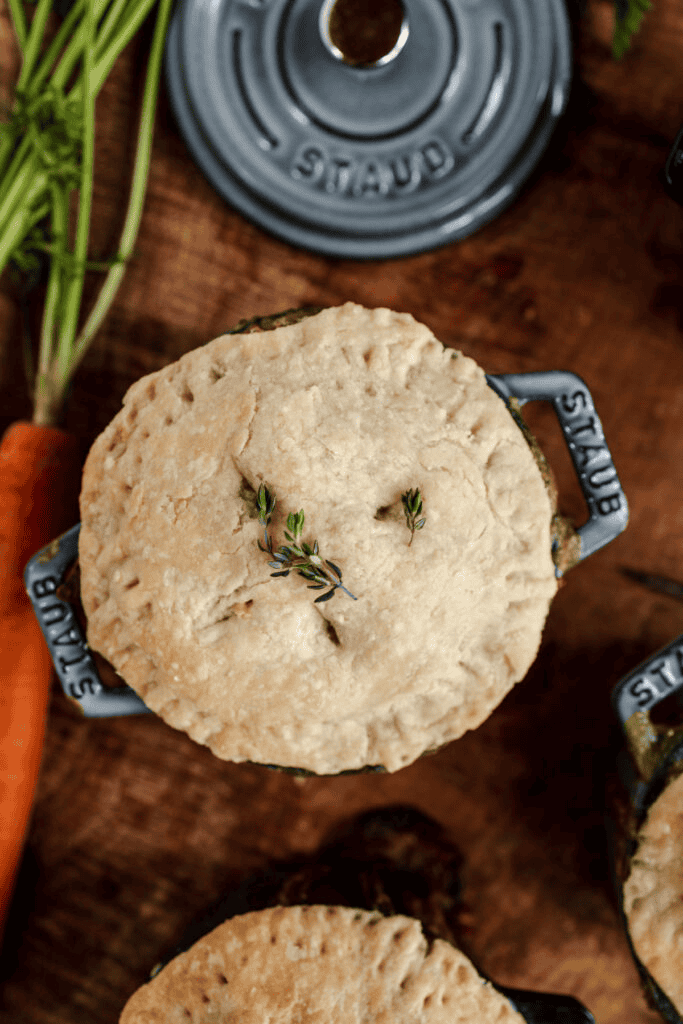
These mini pot pies solve one of my biggest meal prep frustrations — vegetables that feel like an afterthought. This version packs in cauliflower, broccoli, peas, and carrots in a creamy filling, all tucked into individual portions that you can refrigerate or freeze. For keto, skip the pastry top and bake the filling in ramekins instead — you still get that cozy, filling meal without the carbs. The filling itself is thick and satisfying, and it reheats really well without turning to mush.
Ingredients
- 1 cup cauliflower florets, chopped small
- 1 cup broccoli florets, chopped small
- ½ cup frozen peas and carrots
- ½ cup diced onion
- 2 garlic cloves, minced
- 1½ cups vegetable or chicken broth
- ¾ cup heavy cream
- 2 tablespoons butter
- 1 teaspoon xanthan gum (keto thickener — find it at Walmart or Whole Foods)
- Salt, pepper, and dried thyme to taste
Instructions
- Preheat oven to 375°F. Melt butter in a large skillet over medium heat. Sauté onion and garlic for 3–4 minutes until softened.
- Add all the vegetables and cook for 5 minutes, stirring occasionally. Pour in the broth and heavy cream, and bring to a gentle simmer.
- Sprinkle in xanthan gum a little at a time, stirring constantly, until the filling thickens. Season with salt, pepper, and thyme.
- Divide filling evenly into 4 ramekins or oven-safe bowls. Place on a sheet pan and bake for 20 minutes until the tops are golden and the filling is bubbling at the edges.
- Let cool completely before covering and refrigerating. Keeps for up to 4 days.
Tips
- Tip: If you don't have xanthan gum, substitute 1 tablespoon of cornstarch mixed with 2 tablespoons cold water — note this adds a small amount of carbs but it's still much lower than traditional pot pie.
- Tip: Add shredded rotisserie chicken to the filling to make it more substantial — it turns this into a full protein-packed meal.
- Tip: These freeze really well for up to 2 months. Thaw overnight in the fridge and reheat in the oven at 350°F for 15 minutes.
13. Meal Prep Chipotle Salmon with Cauliflower Rice
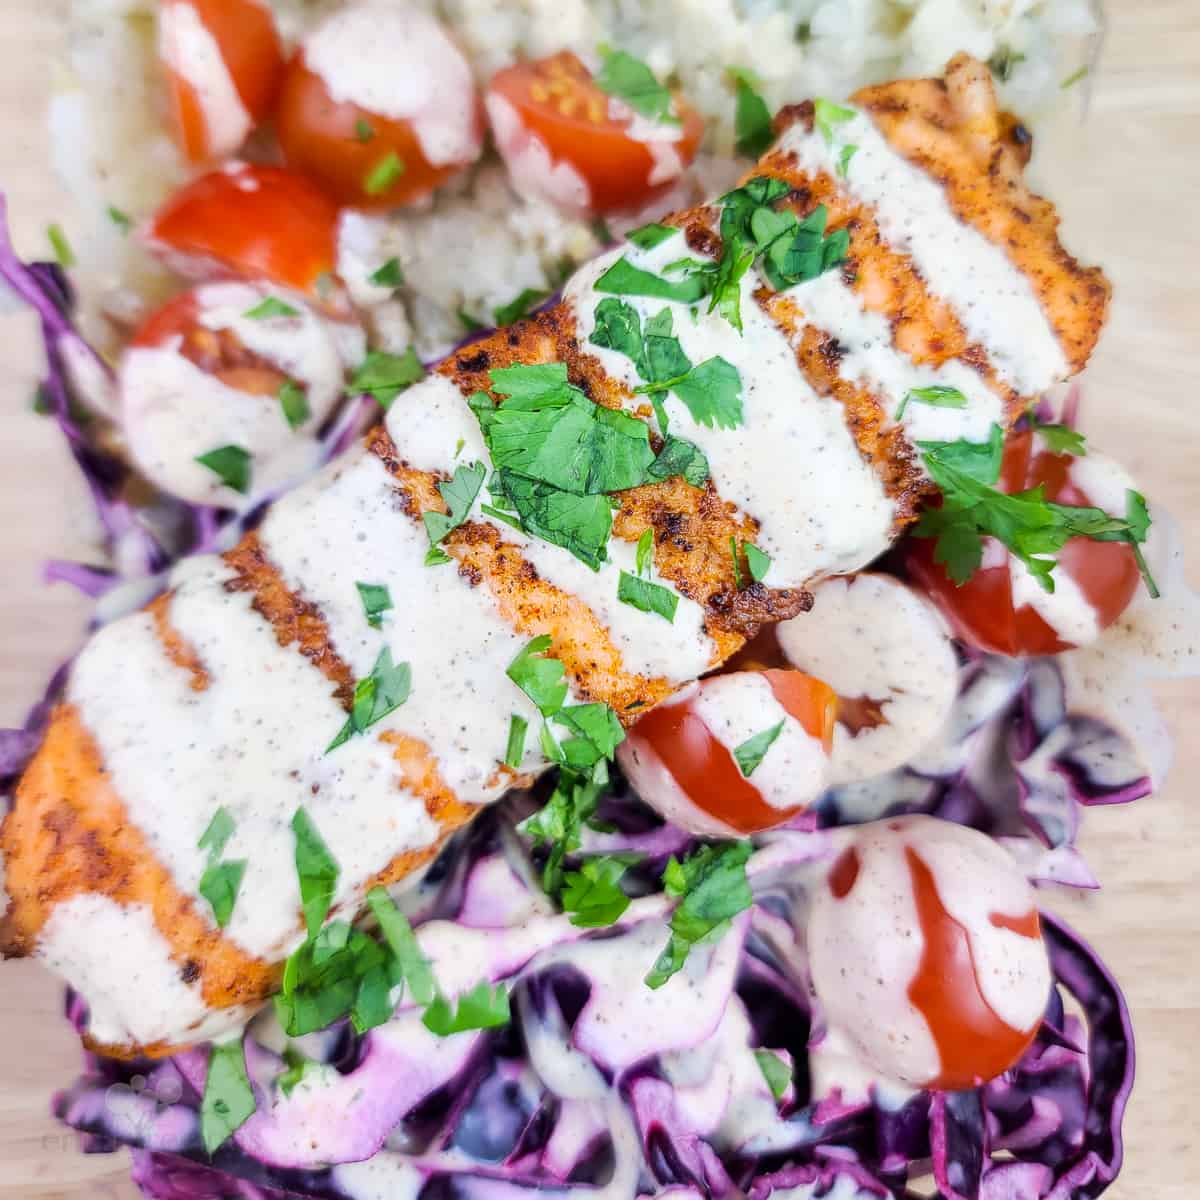
Salmon is one of those ingredients that feels fancy but is actually really reasonable when you buy it in bulk from Costco — and this recipe makes it feel worth the effort. The chipotle marinade takes about 5 minutes to mix up and does all the flavor work while the fish sits. Paired with cauliflower rice and a drizzle of chipotle-lime dressing, each container tastes genuinely good cold or reheated, which is not something I can say about most fish meal preps. Zainab won't touch it, but that just means more for me.
Ingredients
- 4 salmon fillets (about 5–6 oz each)
- 2 tablespoons olive oil
- 2 teaspoons chipotle chili powder (or 1 chipotle pepper in adobo, minced)
- 1 teaspoon cumin
- 1 teaspoon garlic powder
- Juice of 1 lime
- Salt to taste
- 4 cups cauliflower rice (fresh or frozen — frozen from Walmart is completely fine)
- 2 tablespoons butter or olive oil (for cooking the cauliflower rice)
- ¼ cup sour cream or Greek yogurt, for the dressing
- 1 teaspoon chipotle chili powder and lime juice — for the dressing
Instructions
- Mix olive oil, chipotle chili powder, cumin, garlic powder, lime juice, and salt in a bowl. Coat salmon fillets and let them marinate for at least 15 minutes (or up to 2 hours in the fridge).
- Heat a heavy skillet over medium-high heat. Cook salmon 3–4 minutes per side until cooked through and nicely charred on the edges. Set aside to cool.
- In the same skillet, melt butter over medium heat and cook cauliflower rice for 5–6 minutes, stirring occasionally, until tender and slightly golden. Season with salt and pepper.
- Stir together sour cream, chipotle chili powder, and a squeeze of lime to make the dressing. Thin with a teaspoon of water if needed.
- Divide cauliflower rice into 4 meal prep containers, place one salmon fillet on each, and drizzle with chipotle dressing. Seal and refrigerate up to 3 days.
Tips
- Tip: Salmon is best reheated gently — cover loosely and microwave at 60% power for about 90 seconds so it doesn't dry out.
- Tip: Store the chipotle dressing separately in a small container and add it just before eating — it keeps the salmon from getting soggy.
- Tip: Can't find chipotle chili powder? Use regular chili powder plus a pinch of smoked paprika — it's not identical but it gets you most of the way there.
14. Turkey Zucchini Meatballs
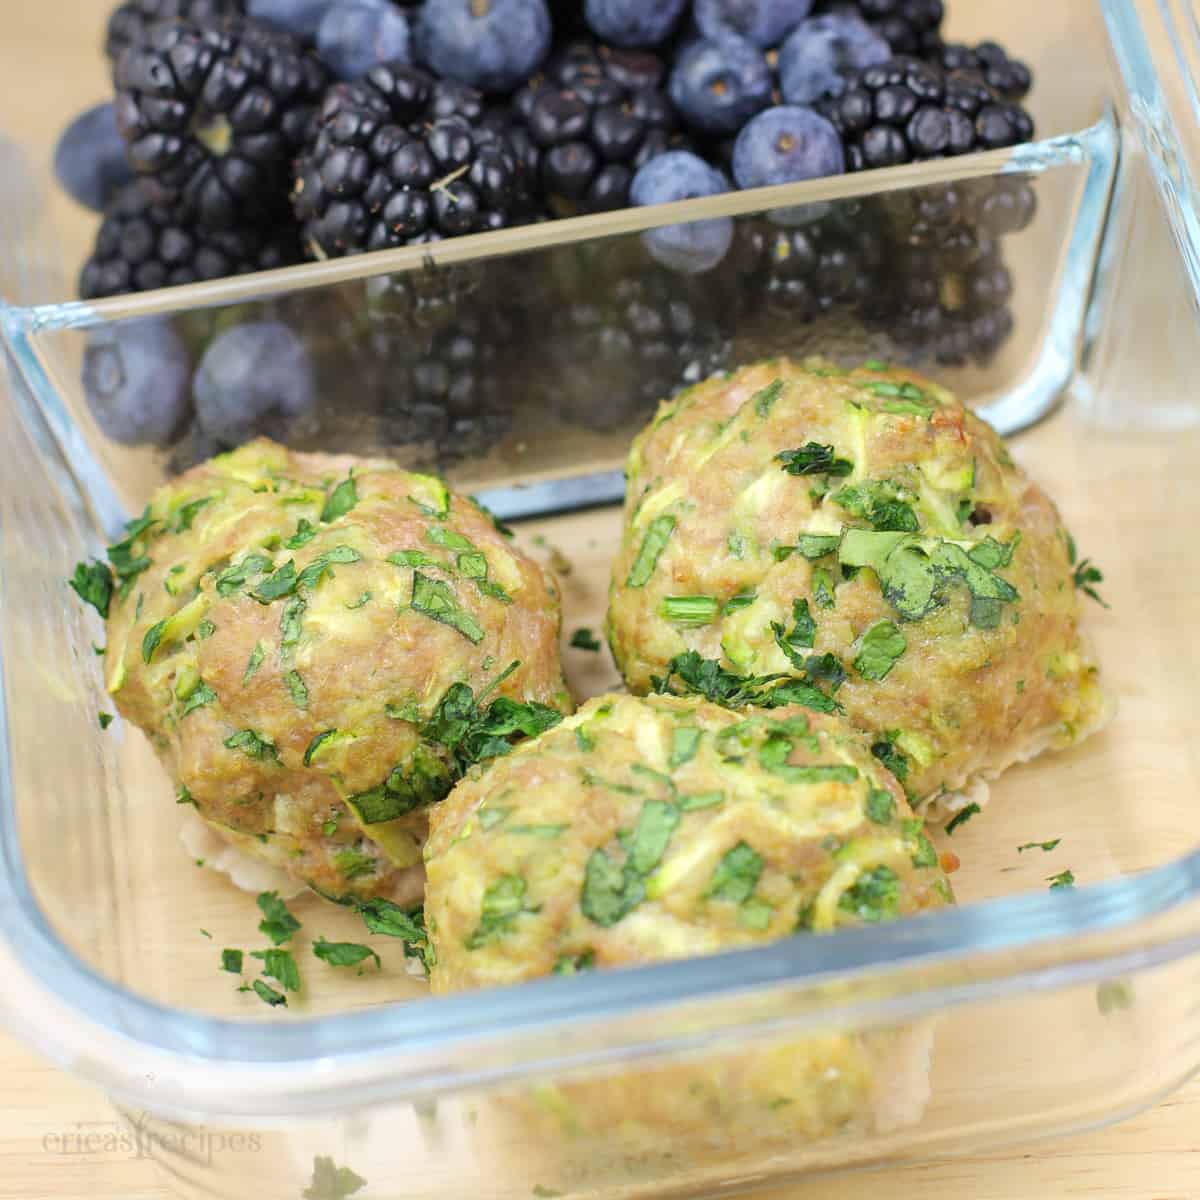
Ground turkey on its own can go dry fast, which is why grating zucchini into the mix is such a good move — it keeps the meatballs moist without adding carbs. These are gluten-free, dairy-free, and keto, which makes them one of the most flexible things in this whole list. I make a double batch because they disappear fast — eat some with marinara sauce for dinner, throw the rest into a salad the next day, or just eat them cold from the fridge as a snack. They hold their shape well and the texture stays good even after a few days in the fridge.
Ingredients
- 1 lb ground turkey
- 1 medium zucchini, grated and squeezed very dry in a clean towel
- 1 egg
- 2 garlic cloves, minced
- ¼ cup finely diced onion
- 1 teaspoon Italian seasoning
- ½ teaspoon salt
- ¼ teaspoon black pepper
- ¼ teaspoon red pepper flakes (optional)
- 2 tablespoons olive oil (for pan frying)
Instructions
- Grate the zucchini on the large holes of a box grater. Gather it in a clean kitchen towel and squeeze out as much liquid as possible — this step is non-negotiable or your meatballs will fall apart.
- In a large bowl, combine ground turkey, squeezed zucchini, egg, garlic, onion, Italian seasoning, salt, pepper, and red pepper flakes. Mix with your hands until just combined — don't overmix or the meatballs get tough.
- Roll mixture into balls about 1½ inches in diameter — you should get around 20 meatballs.
- Heat olive oil in a large skillet over medium heat. Cook meatballs in batches, turning every 2–3 minutes, until browned on all sides and cooked through — about 10–12 minutes total. Or bake at 400°F for 18–20 minutes on a lined sheet pan if you'd rather not stand at the stove.
- Cool completely, then divide into meal prep containers. Refrigerate up to 4 days or freeze for up to 2 months.
Tips
- Tip: The single most important thing in this recipe is squeezing the zucchini dry. If you skip it, the mixture is too wet to roll and the meatballs won't hold together in the pan.
- Tip: These are great served over zucchini noodles with marinara, or just on their own with a side of tzatziki for a Mediterranean twist.
- Tip: If you only have 93% lean ground turkey, that's fine — but don't go leaner than that or the texture gets rubbery even with the zucchini moisture.
5. White Chicken Chili Recipe (CrockPot)
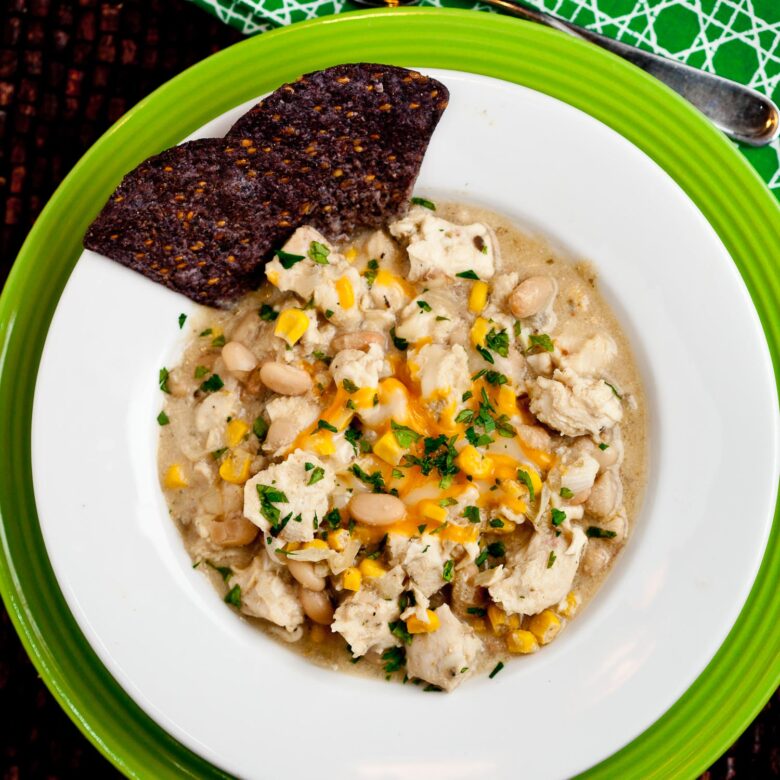
Sunday afternoons in my kitchen usually mean something bubbling in the slow cooker while I catch up on laundry. This white chicken chili is exactly the kind of recipe I reach for on those days — dump everything in, walk away, come back to dinner. It's creamy from the cream cheese, has real depth from the green chiles and cumin, and reheats beautifully all week. I make a full batch on Sunday and it's gone by Wednesday between lunches and dinners.
Ingredients
- 1½ lbs boneless, skinless chicken breasts
- 1 can (15 oz) white beans, drained and rinsed (skip or reduce if strict keto)
- 1 can (4 oz) diced green chiles
- 2 cups chicken broth
- 1 teaspoon ground cumin
- 1 teaspoon garlic powder
- ½ teaspoon onion powder
- 4 oz cream cheese, cubed and softened
- ½ cup sour cream
- Salt and black pepper to taste
Instructions
- Place chicken breasts in the bottom of the crockpot. Add white beans, green chiles, chicken broth, cumin, garlic powder, and onion powder. Stir briefly to combine.
- Cook on LOW for 6-7 hours or HIGH for 3-4 hours, until the chicken is cooked through and shreds easily.
- Remove the chicken, shred it with two forks, then return it to the pot.
- Add the cubed cream cheese and sour cream to the crockpot. Stir until fully melted and incorporated — this takes about 10 minutes on HIGH with the lid off.
- Taste for salt and pepper. Serve hot, topped with shredded cheese or sliced avocado if you like.
Tips
- Tip: For strict keto, skip the beans entirely — the chili is still thick and filling from the cream cheese and shredded chicken alone.
- Tip: Cold cream cheese won't melt smoothly — let it sit out for 20 minutes before adding it, or it'll leave lumps in the broth.
- Tip: This freezes well in individual containers. Reheat on the stovetop over low heat and stir in a splash of broth if it thickens too much.
6. 30-Minute Chili Mac Recipe
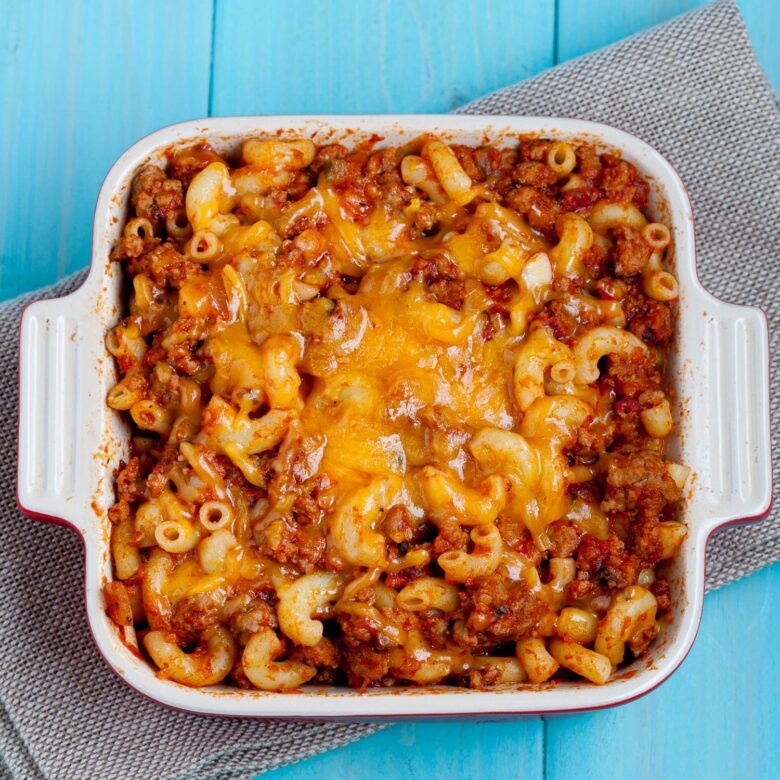
I want to be upfront: this one is not strict keto. But if you're doing lazy keto or just keeping things lower-carb without counting every gram, a small portion of chili mac prepped for the week is absolutely worth it. The trick is to use a high-protein pasta like chickpea pasta or keep the pasta portion small and load up the meat and cheese. It's a one-pan, 30-minute meal that my family eats without complaint — which in my house is the real achievement.
Ingredients
- 1 lb ground beef (80/20 works great)
- 1 cup elbow pasta (or chickpea pasta for lower carb)
- 1 can (15 oz) diced tomatoes
- 1 can (15 oz) kidney beans, drained (optional — skip for lower carb)
- 1½ cups beef broth
- 2 tablespoons chili powder
- 1 teaspoon cumin
- ½ teaspoon smoked paprika
- 1 cup shredded cheddar cheese
- Salt and black pepper to taste
Instructions
- Brown the ground beef in a large deep skillet over medium-high heat, breaking it up as it cooks. Drain excess fat if needed.
- Add the chili powder, cumin, smoked paprika, salt, and pepper. Stir to coat the meat in the spices and cook for 1 minute.
- Add the diced tomatoes, beans (if using), beef broth, and dry pasta. Stir everything together and bring to a boil.
- Reduce heat to medium-low, cover, and cook for 12-15 minutes, stirring occasionally, until the pasta is cooked through and the broth has mostly absorbed.
- Remove from heat, top with shredded cheddar, cover for 2 minutes to melt, then serve directly from the pan.
Tips
- Tip: If you're keeping this keto-friendly, swap the pasta for cauliflower florets — add them at the same stage and cook until just tender, about 8 minutes.
- Tip: Don't lift the lid too often while the pasta cooks — it needs the steam to cook evenly without drying out.
- Tip: Meal prep this in individual containers without the cheese on top — add the cheese fresh when reheating so it doesn't go rubbery.
7. Pepper Crusted Roast Beef
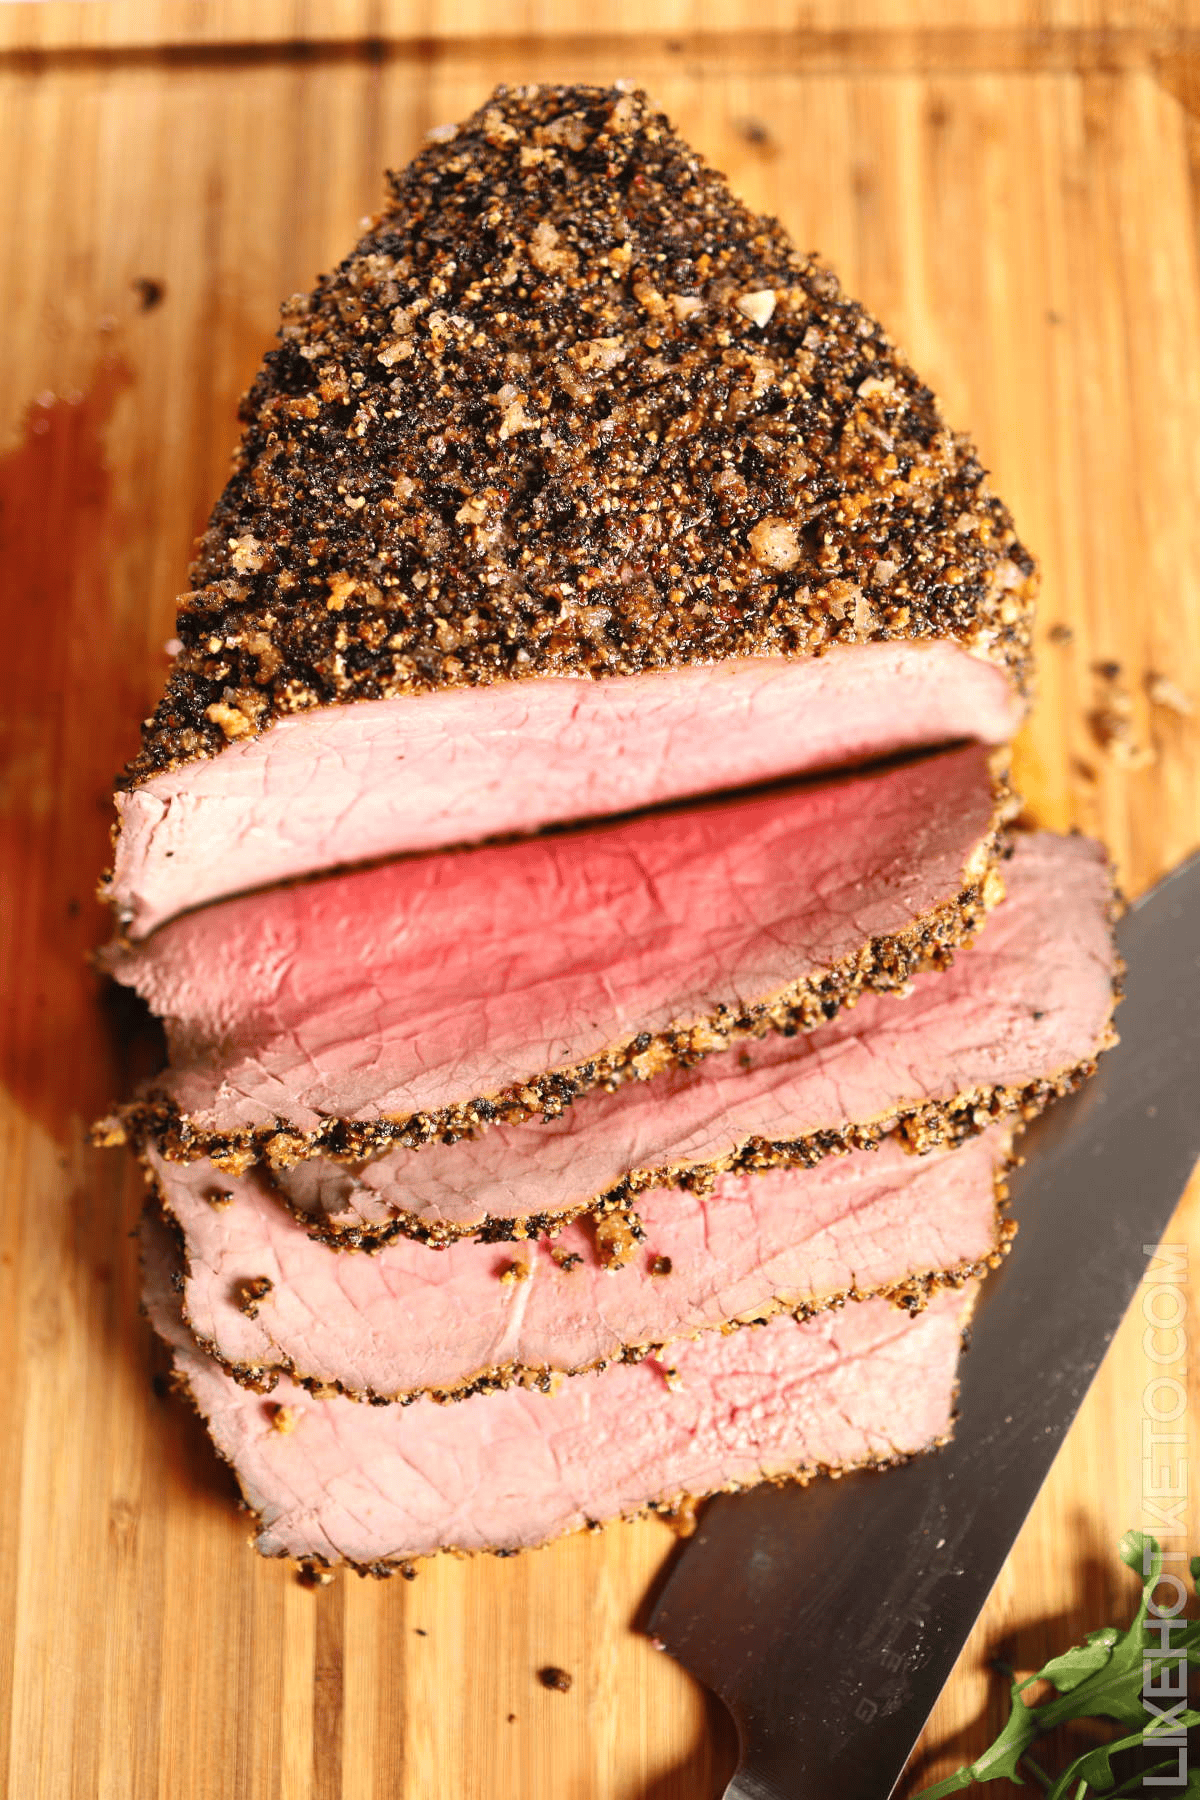
Four ingredients and a hot oven — that's genuinely all this takes. I was skeptical the first time I made it because I kept waiting for a complicated step that never came. The pepper crust forms a gorgeous dark exterior while the inside stays pink and juicy, and because you cook it at high heat from start to finish, there's no fussing with temperature adjustments mid-roast. Slice it thin, pack it into containers, and you've got protein for five days of lunches. It's also completely zero-carb, which makes it one of the most keto-reliable recipes in this entire list.
Ingredients
- 2–3 lb beef eye of round or top round roast
- 2 tablespoons coarsely ground black pepper
- 1 tablespoon kosher salt
- 2 tablespoons olive oil
Instructions
- Take the roast out of the fridge 30 minutes before cooking — bringing it closer to room temperature helps it cook more evenly. Preheat your oven to 450°F.
- Pat the roast completely dry with paper towels. Rub it all over with olive oil, then press the black pepper and salt firmly onto every surface to form a crust.
- Place the roast on a rack in a roasting pan or oven-safe skillet. Roast at 450°F for 15 minutes per pound for medium-rare (about 30-45 minutes total depending on size).
- Check internal temperature — 130°F for medium-rare, 145°F for medium. Remove from the oven and tent loosely with foil.
- Rest for at least 15 minutes before slicing. Slice thin against the grain for the most tender result.
Tips
- Tip: Don't skip resting the meat — if you slice it straight out of the oven, all the juices run out and you end up with dry beef. The 15-minute rest is non-negotiable.
- Tip: A cheap instant-read thermometer (under $15 at Walmart) is the most useful tool for this recipe — guessing by time alone is how you overcook a roast.
- Tip: Sliced roast beef keeps well in the fridge for up to 4 days. Layer it in containers with a piece of parchment between layers if you're stacking slices — makes grabbing portions for lunch much easier.
8. Pressure Cooker Brisket
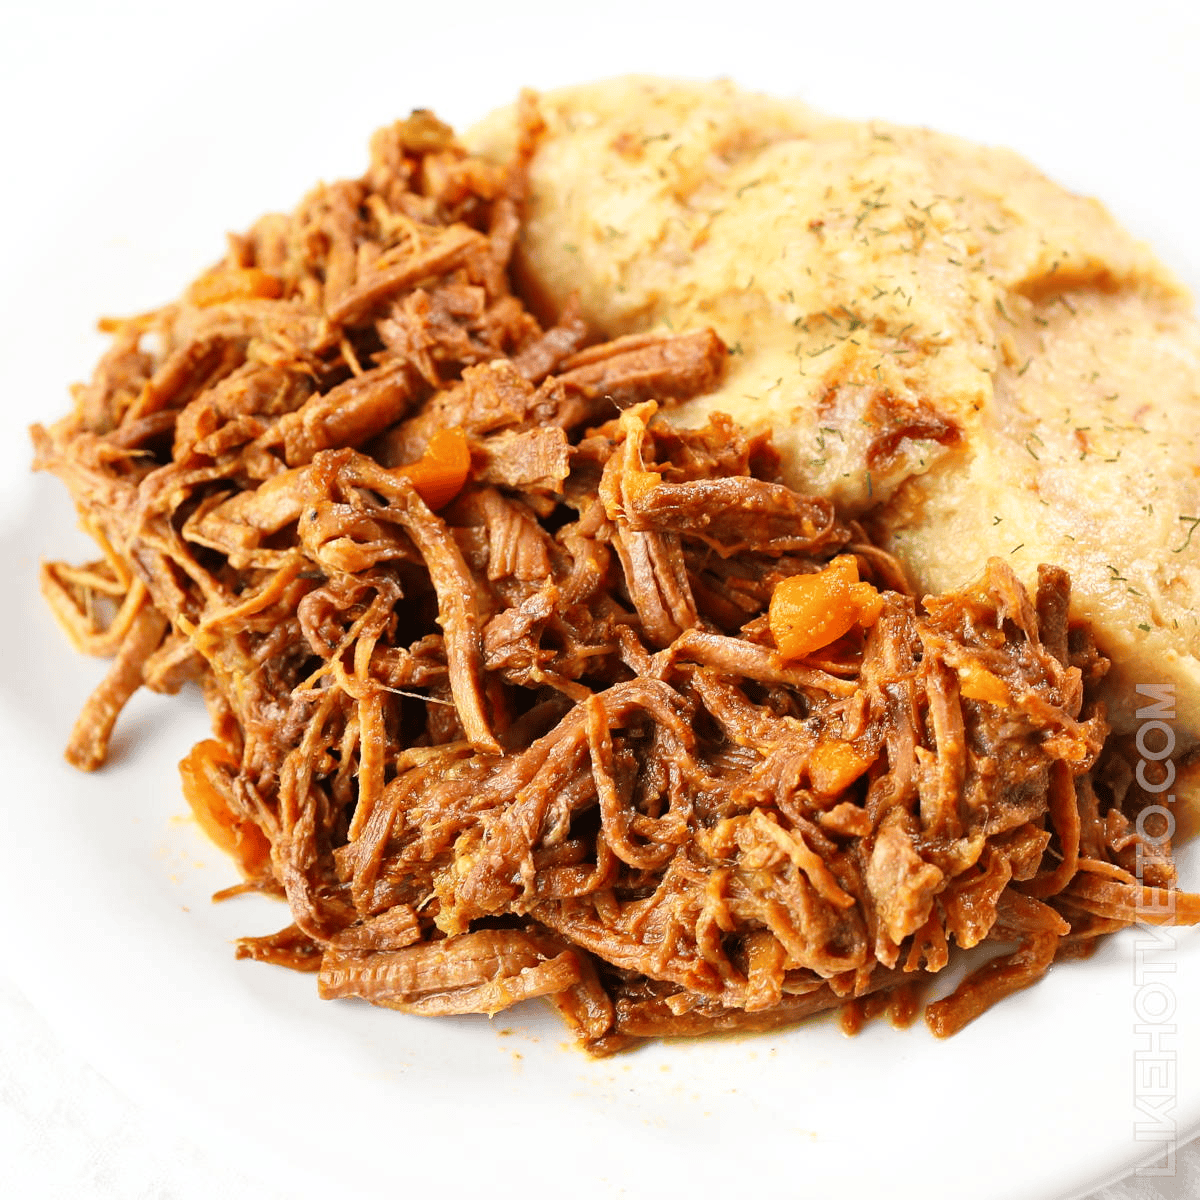
Brisket used to feel like a weekend project I didn't have time for — the kind of thing that takes 6 hours in the oven and requires babysitting. The pressure cooker version changed that completely. You get the same pull-apart, fall-apart tenderness in about 90 minutes total, and the braising liquid turns into a rich, savory sauce that makes everything taste like you worked much harder than you did. This is genuinely one of the best meal prep proteins you can make — it reheats without drying out, and the flavor actually deepens overnight in the fridge.
Ingredients
- 3 lbs beef brisket, flat cut
- 1 tablespoon olive oil
- 1 teaspoon salt
- 1 teaspoon black pepper
- 1 teaspoon garlic powder
- 1 teaspoon smoked paprika
- 1 medium onion, roughly chopped
- 3 cloves garlic, smashed
- 1 cup beef broth
- 2 tablespoons Worcestershire sauce
Instructions
- Pat the brisket dry and rub all over with salt, pepper, garlic powder, and smoked paprika. Set your Instant Pot or pressure cooker to SAUTÉ mode and heat the olive oil.
- Sear the brisket for 3-4 minutes per side until deeply browned — don't skip this step, it builds the flavor base for the whole dish. Remove and set aside.
- Add the onion and garlic to the pot and sauté for 2 minutes. Pour in the beef broth and Worcestershire sauce, scraping up any browned bits from the bottom.
- Return the brisket to the pot. Seal the lid, set to HIGH pressure, and cook for 75 minutes. Allow natural pressure release for 15 minutes, then manually release remaining pressure.
- Remove the brisket and let it rest for 10 minutes before slicing against the grain. Spoon the braising liquid over the top when serving or storing.
Tips
- Tip: Store the brisket submerged in its braising liquid in the fridge — it keeps the meat moist and makes reheating much easier. Just warm it gently in a covered pan.
- Tip: If your brisket is too large to fit, cut it in half before searing — it cooks just as well in two pieces and you won't have to force the lid closed.
- Tip: The braising liquid can be thickened with a little xanthan gum (a keto-friendly thickener) to make a proper gravy — start with ¼ teaspoon whisked in and go from there.
9. Keto Kung Pao Chicken
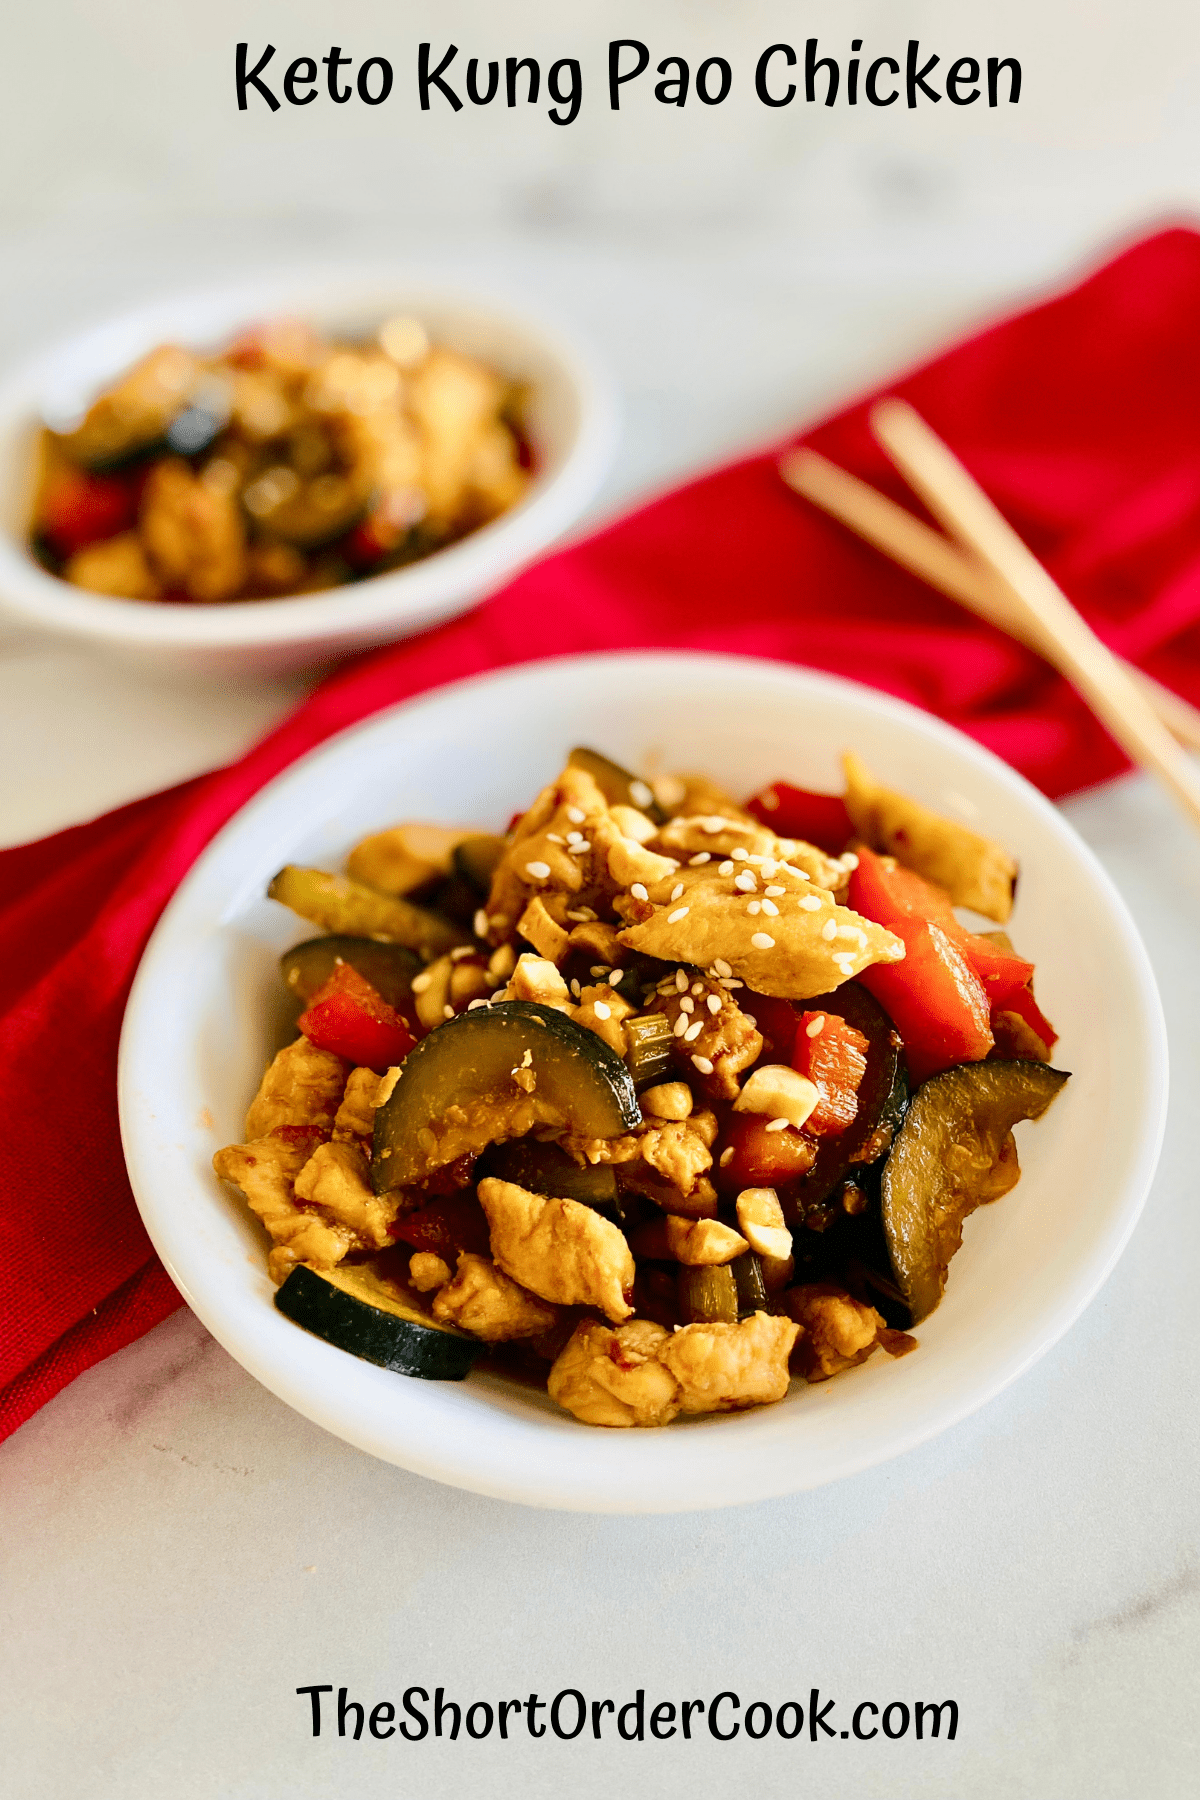
I grew up eating Chinese takeout maybe twice a year as a treat, so when I started cooking it at home I got a little obsessed. This keto kung pao chicken hits that same sweet-spicy-salty combination without the cornstarch slurry and sugar that traditional versions rely on. The sauce uses soy sauce, rice vinegar, and a sugar substitute like Swerve or monk fruit sweetener, and it comes together in under 25 minutes. Meal prep it over cauliflower rice and you have five genuinely satisfying lunches that don't feel like diet food at all.
Ingredients
- 1½ lbs boneless, skinless chicken thighs, cut into 1-inch pieces
- 2 tablespoons avocado oil or vegetable oil
- 3 dried red chili peppers (or ½ teaspoon red pepper flakes)
- 3 cloves garlic, minced
- 1 teaspoon fresh ginger, grated (or ½ teaspoon ground ginger)
- 1 red bell pepper, diced
- 3 tablespoons soy sauce (or tamari for gluten-free)
- 1 tablespoon rice vinegar
- 1 tablespoon Swerve brown sugar substitute (or monk fruit sweetener)
- 1 teaspoon sesame oil
- ⅓ cup roasted unsalted peanuts
- 2 green onions, sliced (for garnish)
Instructions
- Whisk together the soy sauce, rice vinegar, sweetener, and sesame oil in a small bowl. Set the sauce aside — having it ready before you start cooking is important because this dish moves fast once the heat is on.
- Heat the oil in a large skillet or wok over high heat. Add the dried chilies and let them sizzle for 30 seconds to bloom their heat into the oil.
- Add the chicken pieces in a single layer. Cook without stirring for 2-3 minutes to get some color on them, then stir and cook another 2-3 minutes until cooked through.
- Add the garlic, ginger, and bell pepper. Stir-fry for 2 minutes until the pepper softens slightly.
- Pour in the sauce and toss everything together. Cook for 1-2 minutes until the sauce reduces and coats the chicken. Add the peanuts, toss once more, and remove from heat.
- Top with green onions and serve over cauliflower rice for a complete keto meal.
Tips
- Tip: Chicken thighs stay juicier than breast meat in stir-fries and reheat much better for meal prep — I'd strongly recommend thighs here even if you usually prefer breasts.
- Tip: Keep the peanuts separate when meal prepping if you like them crunchy — stir them in when reheating rather than storing them in the sauce where they'll soften.
- Tip: If you can't find monk fruit sweetener or Swerve, a small amount of regular honey (½ teaspoon) adds minimal carbs but still gives you that authentic sweet note in the sauce.
16. Thai Chicken and Rice (One Pan)
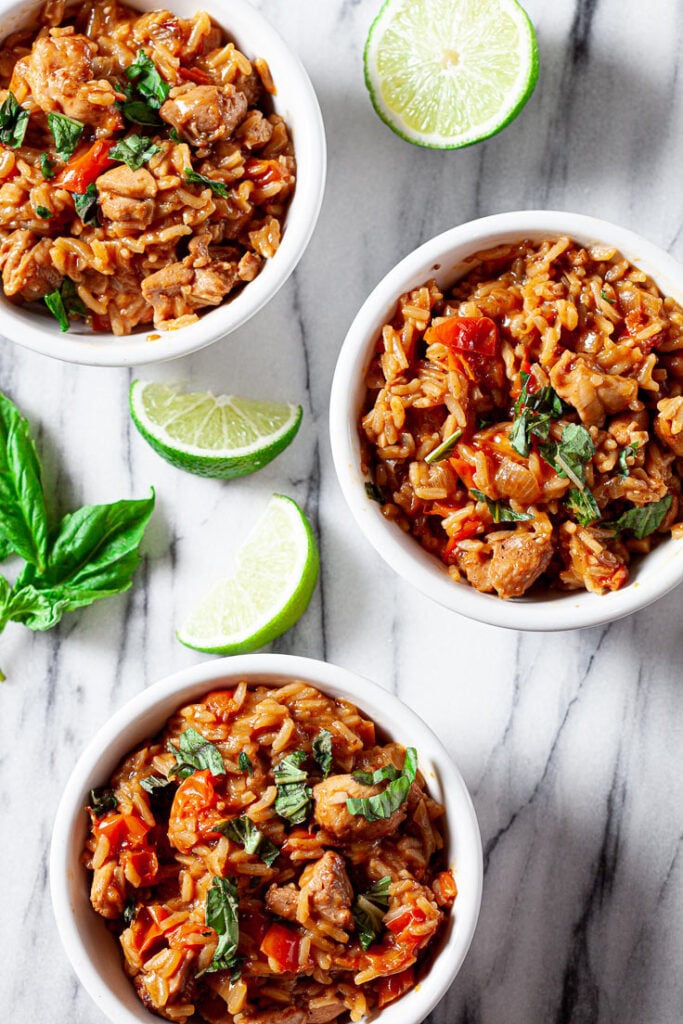
I grew up eating rice with everything, so a Thai-spiced one-pan chicken and rice was an easy sell in my house. The coconut milk soaks into the rice as it cooks, and you end up with this deeply fragrant, slightly creamy pot of food that tastes like you put in way more effort than you actually did. One pan also means one thing to wash, which matters on a Sunday when I'm prepping for the whole week. Divide it into containers and it reheats beautifully — just add a small splash of water before microwaving so the rice doesn't dry out.
Ingredients
- 1½ lbs boneless, skinless chicken thighs, cut into 1-inch pieces
- 1½ cups jasmine rice, rinsed
- 1 can (13.5 oz) full-fat coconut milk
- 1 cup chicken broth
- 3 cloves garlic, minced
- 1 tablespoon fresh ginger, grated (or ½ teaspoon ground ginger)
- 2 tablespoons soy sauce
- 1 tablespoon fish sauce (or an extra tablespoon of soy sauce)
- 1 teaspoon Thai red curry paste
- 1 tablespoon vegetable oil
- Salt and pepper to taste
- Fresh cilantro and lime wedges for serving
Instructions
- Heat oil in a large deep skillet or Dutch oven over medium-high heat. Season chicken with salt and pepper, then sear for 3-4 minutes per side until golden. Remove and set aside — it doesn't need to be fully cooked yet.
- In the same pan, sauté garlic and ginger for about 1 minute until fragrant. Stir in the curry paste and cook for another 30 seconds.
- Add the rinsed rice, coconut milk, chicken broth, soy sauce, and fish sauce. Stir to combine, scraping up any browned bits from the bottom of the pan.
- Nestle the seared chicken back into the pan. Bring to a boil, then reduce heat to low, cover tightly, and cook for 18-20 minutes until the rice is tender and liquid is absorbed.
- Let it sit covered for 5 minutes off heat, then fluff the rice gently. Serve with fresh cilantro and a squeeze of lime.
Tips
- Tip: Rinsing the rice is non-negotiable here — it removes excess starch and keeps the rice from getting gummy in all that coconut milk.
- Tip: If you can't find Thai red curry paste at a regular grocery store, check the international aisle — most Walmart and Kroger stores carry it. A small jar lasts months.
- Tip: This stores well in the fridge for up to 4 days. Pack lime wedges separately so they don't make everything soggy.
17. Crock Pot Salsa Chicken
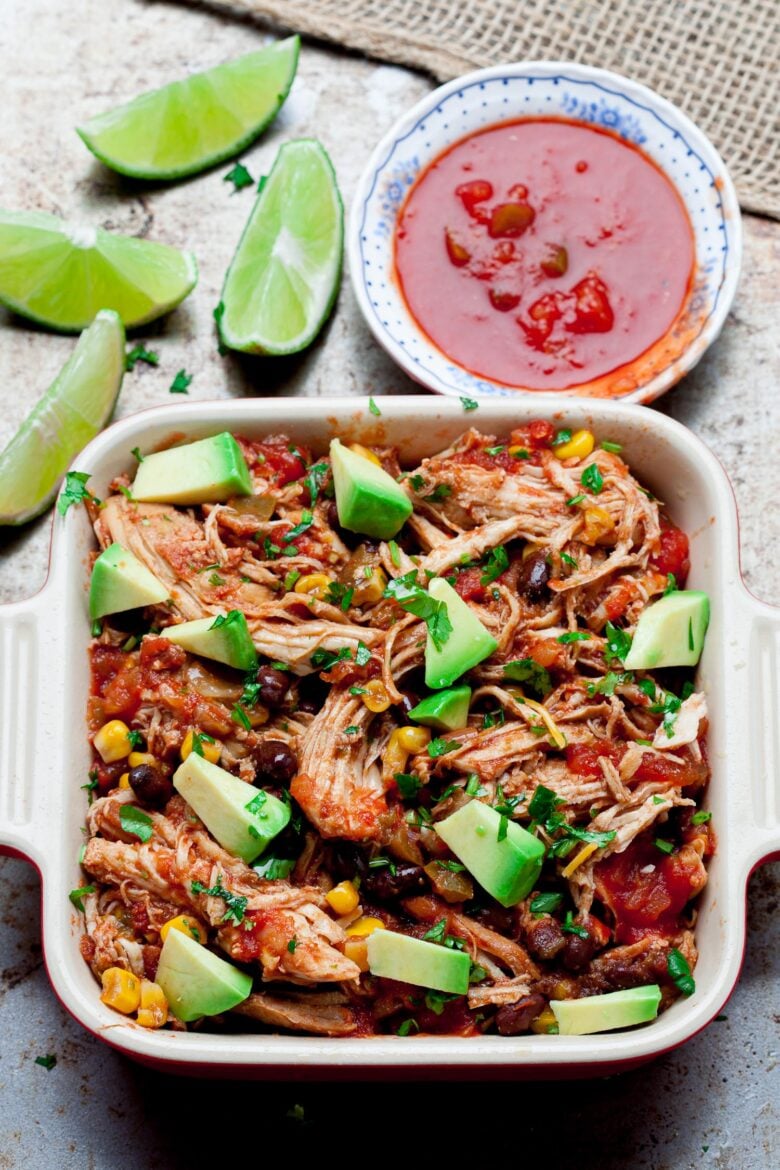
This is the recipe I make when I genuinely have nothing planned and it's already 10 AM. Dump chicken breasts in the slow cooker, pour salsa over them, set it, and walk away. By dinnertime you have incredibly tender, shreddable chicken that works in bowls, wraps, lettuce cups, or just straight from the container with a fork — no judgment. The salsa does all the seasoning work so there's almost nothing to think about. I started making a double batch because one batch disappears too fast, and having extra in the freezer has saved dinner more than once.
Ingredients
- 2 lbs boneless, skinless chicken breasts
- 1½ cups salsa (any jar you like — medium heat is my default)
- 1 teaspoon cumin
- 1 teaspoon garlic powder
- ½ teaspoon chili powder
- ½ teaspoon onion powder
- Salt and pepper to taste
- Optional: 4 oz cream cheese (adds richness, makes it extra creamy)
Instructions
- Place chicken breasts in the bottom of the slow cooker in a single layer. Sprinkle cumin, garlic powder, chili powder, onion powder, salt, and pepper over the top.
- Pour the salsa evenly over the chicken. If using cream cheese, place the block right on top — it'll melt in as it cooks.
- Cook on LOW for 6-7 hours or HIGH for 3-4 hours, until the chicken shreds easily with two forks.
- Shred the chicken directly in the slow cooker and stir everything together so the juices coat every piece. Taste and adjust salt if needed.
- Serve in bowls over cauliflower rice, in lettuce wraps, or with whatever you have. Portion leftovers into airtight containers and refrigerate for up to 5 days.
Tips
- Tip: Use a chunky salsa rather than a thin, watery one — it gives you more texture in the final dish and better flavor overall.
- Tip: This freezes extremely well. Portion into zip-lock bags flat, freeze, then reheat straight from frozen in a pan with a splash of water.
- Tip: Skip the cream cheese to keep it strictly keto and lower in calories — the chicken is still excellent without it.
18. Chicken Fajita Bowls
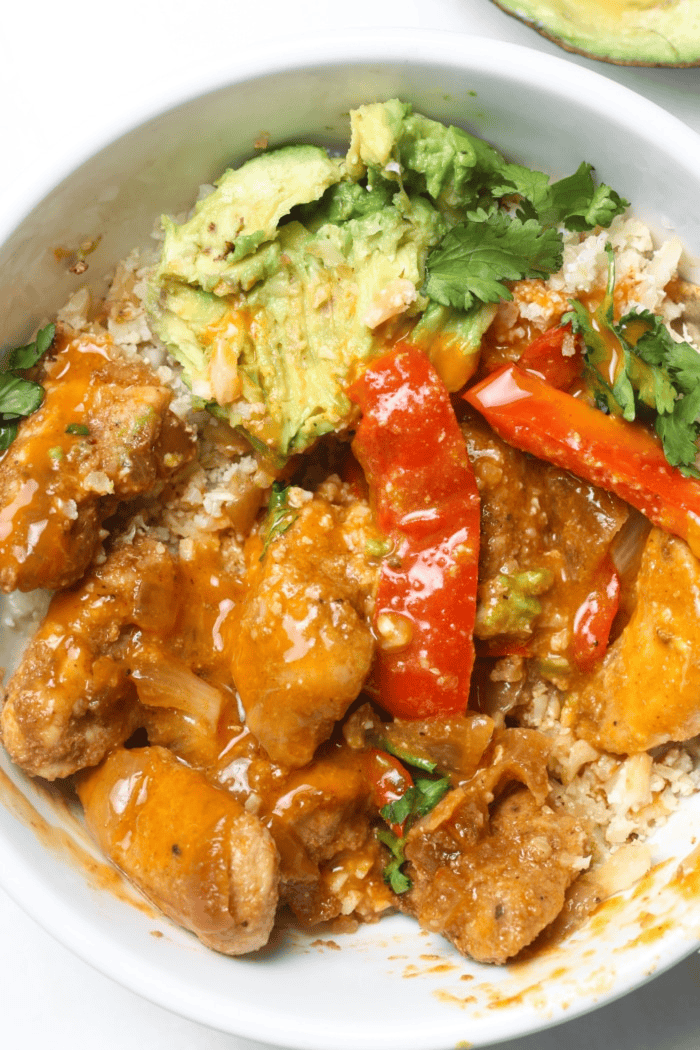
Chicken fajita bowls are what I make when Zainab wants something that looks exciting but I need it done in under 30 minutes. Sliced chicken thighs, bell peppers, onion, and a good hit of fajita seasoning all cooked in one skillet — then piled into bowls over cauliflower rice or just on their own. The char on the peppers is the key detail most people rush past. Let them actually sit against the hot pan for a minute or two before stirring. That's what makes this taste like takeout instead of sad weeknight food.
Ingredients
- 1½ lbs boneless, skinless chicken thighs, sliced into strips
- 3 bell peppers (mixed colors), sliced thin
- 1 medium yellow onion, sliced thin
- 2 tablespoons olive oil, divided
- 2 teaspoons chili powder
- 1 teaspoon cumin
- 1 teaspoon smoked paprika
- ½ teaspoon garlic powder
- ½ teaspoon salt
- Juice of 1 lime
- Optional toppings: avocado, sour cream, shredded cheese, fresh cilantro
Instructions
- In a bowl, toss chicken strips with chili powder, cumin, smoked paprika, garlic powder, salt, and 1 tablespoon olive oil. Let it sit for 10 minutes if you have time — or cook immediately if you don't.
- Heat a large cast-iron or heavy skillet over high heat. Cook the chicken strips in a single layer for 4-5 minutes per side until cooked through and slightly charred. Remove and set aside.
- Add the remaining tablespoon of oil to the same pan. Add peppers and onion and cook over high heat, letting them sit undisturbed for 1-2 minutes at a time to get some char before stirring.
- Return the chicken to the pan, squeeze lime juice over everything, and toss to combine. Cook for another minute.
- Divide into meal prep containers with your chosen base and toppings. Store toppings like avocado and sour cream separately to add fresh when eating.
Tips
- Tip: Don't crowd the pan when cooking the chicken — work in batches if needed. Crowding steams instead of sears, and you lose all that good caramelization.
- Tip: Chicken thighs hold up better than breasts in meal prep — they don't dry out as much when you reheat them throughout the week.
- Tip: To keep this strictly keto, skip the rice base and serve over cauliflower rice or just eat it straight — the peppers and chicken together are filling enough.
19. Dutch Oven Beef Stew
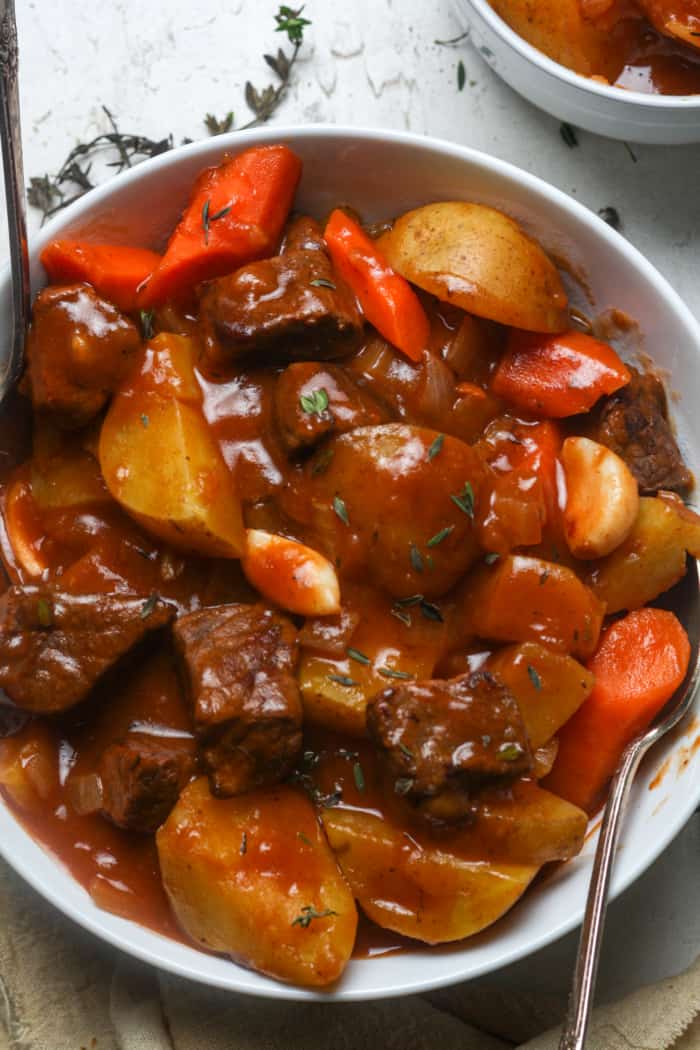
This is the recipe I save for cold Sunday afternoons when I actually want to spend time in the kitchen. A proper Dutch oven beef stew — low and slow, with chunks of beef that fall apart, tender vegetables, and a broth that thickens on its own into something deeply savory. I skip the potatoes to keep it keto-friendly and use turnips instead, which honestly disappear into the stew so well that nobody in my family noticed the swap. Make a big pot and you have lunch sorted for most of the week. It gets better every day it sits.
Ingredients
- 2 lbs beef chuck, cut into 1½-inch cubes
- 2 tablespoons olive oil
- 3 cloves garlic, minced
- 1 medium yellow onion, diced
- 3 medium carrots, cut into chunks
- 2 stalks celery, sliced
- 2 medium turnips, peeled and cubed (substitute for potatoes to keep it keto)
- 2 tablespoons tomato paste
- 3 cups beef broth
- 1 teaspoon Worcestershire sauce
- 1 teaspoon dried thyme
- 1 bay leaf
- Salt and pepper to taste
Instructions
- Pat the beef cubes very dry with paper towels and season generously with salt and pepper. Dry beef browns — wet beef steams. This step matters more than people think.
- Heat olive oil in a Dutch oven over high heat. Sear the beef in batches — don't crowd it — for 2-3 minutes per side until deeply browned. Remove and set aside.
- Reduce heat to medium. Add onion and celery to the same pot and cook for 3-4 minutes until softened. Add garlic and tomato paste and cook for another minute, stirring constantly.
- Return the beef to the pot. Pour in beef broth and Worcestershire sauce. Add carrots, turnips, thyme, and bay leaf. Stir to combine, scraping up the browned bits from the bottom.
- Bring to a boil, then reduce heat to low. Cover and simmer for 1 hour 30 minutes to 2 hours, until the beef is completely fork-tender and the broth has thickened. Remove the bay leaf before serving.
- Cool completely before portioning into airtight containers. Refrigerate for up to 5 days or freeze for up to 3 months.
Tips
- Tip: Don't skip the searing step even when you're in a hurry — that crust on the beef is where most of the flavor in the final stew comes from.
- Tip: Turnips are a solid keto swap for potatoes and they absorb the broth beautifully. If you can't find them, radishes also work — they soften and lose their bite completely after 2 hours of cooking.
- Tip: If your stew broth seems too thin at the end, remove the lid for the last 20-30 minutes and let it reduce — it'll thicken up without needing any cornstarch or flour.
Nineteen recipes is a lot to work through, but that's kind of the point — when you're trying to keep keto going on a real budget, you need options. Not just one or two meals you rotate until you're sick of them, but a solid rotation you can pull from week after week without dreading Sunday meal prep. These recipes cover breakfast, lunch, dinner, and snacks because keto falls apart the moment you're hungry and there's nothing prepped. I've been there. It's not pretty.
The ones I make most often are the egg muffins, the ground beef bowls, and the sheet pan chicken thighs — those three alone can carry a whole week if you batch them properly. Saad is not on keto (he's ten, he doesn't need to be), but he'll eat the chicken thighs without complaint, which is honestly high praise from a kid who usually wants naan with everything. My honest advice: start with two or three recipes from this list, get comfortable with those, then slowly add more. Don't try to prep all nineteen at once unless you have a truly impressive amount of tupperware.
Budget keto is absolutely doable — eggs, cabbage, canned tuna, chicken thighs, ground beef. These are not expensive ingredients. The key is planning before you shop, not after. Pick three to five recipes from this list, write your list, buy only what's on it, and you'll be surprised how far a $50 grocery run can actually take you through the week. 🥚🥦💪
More Recipes You Might Like
- Easy Keto Dinner Recipes — weeknight dinners that keep carbs low without much fuss
- Meal Prep Recipes for the Week — batch cooking ideas for every diet style
- Low Carb Lunch Ideas — packable, prep-friendly lunches that don't feel like a punishment
- Cheap Dinner Recipes — when the budget is tight but you still want a proper meal
- High Protein Meal Prep Ideas — great companion to keto if you're also trying to hit protein goals
Frequently Asked Questions
How long do these keto meal prep recipes keep in the fridge?
Most of the cooked protein dishes — chicken, beef, egg-based recipes — keep well for 4 days in an airtight container. Anything with avocado or fresh greens should be stored separately and added right before eating, otherwise you'll open the container on day three to a sad brown situation. When in doubt, freeze portions on day one rather than day four.
Can I do keto meal prep on a budget of $50 or less per week?
Yes, genuinely. The trick is building your meals around eggs, chicken thighs (not breasts — thighs are cheaper and more forgiving), cabbage, canned fish, and ground beef. These are the backbone of budget keto. Buy them in bulk at Costco or Walmart when you can, and your per-meal cost drops significantly. Pick four recipes from this list and you can eat well for a week on $50.
Which recipe from this list is the easiest for a keto beginner?
The egg muffins are the easiest entry point — you need eggs, whatever protein you have, and a muffin tin. Mix, pour, bake, done. They're forgiving, quick, and you can eat them hot or cold. If you're brand new to keto meal prep and feeling overwhelmed, start there and work your way outward.
Can I freeze these keto meal prep recipes?
Most of the protein-heavy recipes freeze well — cooked ground beef, shredded chicken, soups, and casseroles are all freezer-friendly. Egg-based dishes like the egg muffins also freeze and reheat surprisingly well in the microwave. What doesn't freeze well: anything with raw salad components, cream-based sauces that tend to separate, or zucchini noodles (they turn to mush). Freeze the protein, add the fresh stuff when you reheat.
Do I need special containers for keto meal prep?
Nothing fancy. I use glass containers I found at Walmart for about $3 each, and a set of divided containers from Amazon that cost maybe $15 total. The divided ones are especially useful when you want to keep sauce away from your greens. You don't need a $60 meal prep container set — just anything with a tight lid that won't leak in your bag.
Share This Post!
If this list helped you figure out your week, pin it or share it with someone who's trying to make keto work without spending a fortune. That's exactly the kind of post that's worth passing along. 📌💚
View More Recipes here Recipe Roundups





Comments
No Comments