
Sunday dinner in our house is the meal I actually look forward to cooking. Not because I have extra time — honestly, Sundays are chaotic with Saad's football practice and a pile of laundry that never seems to shrink — but because it's the one meal where I can slow down, try something I've been thinking about all week, and actually sit at the table with my family without someone asking if we can just order pizza. Sunday dinner is where I've learned the most in the kitchen. It's where the slow-roasted things happen, where I've burned the first batch and nailed the second, where my husband has eaten butter chicken next to rigatoni with zero complaints.
A good Sunday dinner recipe has to do a few things right. It should feel a little more special than a Tuesday night pasta — something with depth, something that filled the kitchen with a smell that made people ask "what's cooking?" But it also can't be so complicated that you're still washing dishes at midnight. The best ones are the recipes that look impressive on the table but came together without too much drama. I also think a great Sunday dinner should work for a range of situations: some weeks you want comfort food, some weeks you want something lighter, and some weeks you need something the whole table — including the picky eaters — will actually eat. If you're looking for more inspiration on feeding a crowd, my easy family dinner recipes post has a lot of solid options too.
This list covers a lot of ground on purpose. There's Classic Stuffed Shells and Baked Beef Cannelloni for the pasta lovers, a Slow Cooker Brisket that basically cooks itself, Butter Chicken that I grew up eating and have made probably a hundred times, and even a Vegan Mushroom Wellington for the nights when I want something meatless that still feels like an occasion. I've also included Street-Style Pav Bhaji on this list because in my kitchen, Sunday dinner doesn't have to be Western — some of my best Sunday meals have been completely Pakistani or Indian, and I think more people should try them. If you're into Italian dinner recipes or looking for slow cooker dinner ideas, I've got dedicated posts for those too.
Here are 17 Sunday dinner ideas I keep coming back to — pick whatever fits your mood, your fridge, and how much patience you have today.
Top 17 Sunday Dinner Ideas

13. Rigatoni Boscaiola with Mushrooms and Sausage

Rigatoni Boscaiola is the kind of pasta that tastes like it cooked for hours but actually comes together on a weeknight. The combination of fresh and dried mushrooms with Italian sausage builds a deep, earthy sauce that clings to every ridge of the rigatoni — no fancy technique required. I first made this on a rainy Sunday and my husband went back for thirds, which doesn't happen often. It's hearty enough to stand alone, but a side of crusty bread to mop up the sauce is never a bad idea.
Ingredients
- 12 oz rigatoni pasta
- ¾ lb Italian sausage, casings removed
- 8 oz fresh cremini mushrooms, sliced
- ½ oz dried porcini mushrooms, soaked in 1 cup hot water for 20 minutes
- 3 garlic cloves, minced
- 1 can (14 oz) crushed tomatoes
- ½ cup heavy cream
- ½ cup grated Parmesan cheese, plus more to serve
- 2 tablespoons olive oil
- Salt and black pepper to taste
- Fresh parsley, chopped, to garnish
Instructions
- Soak the dried porcini mushrooms in 1 cup of hot water for 20 minutes. Drain and roughly chop, reserving the soaking liquid — strain it through a fine mesh or paper towel to remove grit and set aside.
- Cook the rigatoni in well-salted boiling water until just al dente. Reserve ½ cup pasta water before draining.
- Heat olive oil in a large skillet over medium-high heat. Add the sausage and break it apart, cooking until browned, about 5 minutes. Remove to a plate, leaving the fat in the pan.
- In the same pan, add the fresh cremini mushrooms and cook undisturbed for 3 minutes until golden. Add garlic and the chopped porcini mushrooms, stir, and cook another 2 minutes.
- Add the crushed tomatoes and reserved porcini soaking liquid. Return the sausage to the pan, bring to a simmer, and cook for 10 minutes until the sauce thickens slightly. Stir in the heavy cream.
- Add the drained rigatoni to the sauce, tossing to coat. Add a splash of pasta water if needed to loosen. Stir in Parmesan, taste for salt and pepper, and serve topped with more Parmesan and fresh parsley.
Tips
- Tip: Don't skip the porcini soaking liquid — it adds the deep, woodsy flavor that makes this sauce taste slow-cooked.
- Tip: If you can't find dried porcini at your regular grocery store, check the international aisle at Walmart or Trader Joe's — they're usually there.
- Tip: This reheats well the next day — add a small splash of water when warming it up so the sauce loosens back up.
14. Slow Cooker Brisket
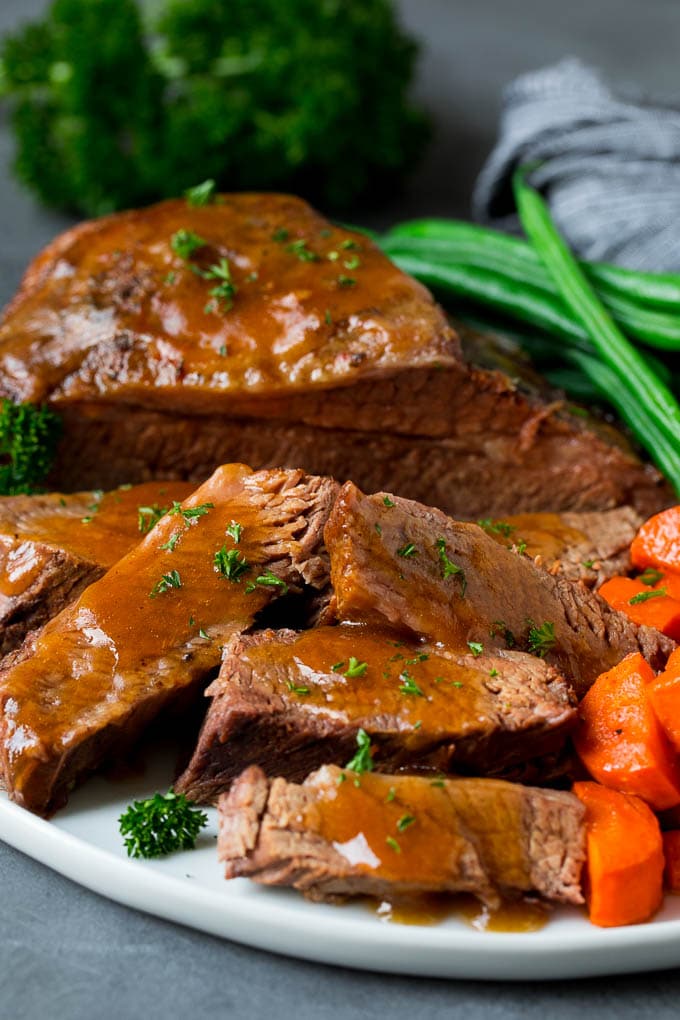
Sunday dinner is exactly when you want a slow cooker brisket going — you set it in the morning, forget about it, and by evening the whole house smells like something incredible is happening. Beef brisket is one of those cuts that rewards patience: the long, low heat breaks down all the tough connective tissue into something fork-tender and deeply savory. I make a double batch when I can because the leftovers make exceptional sandwiches the next day. This is comfort food in the most honest sense.
Ingredients
- 3–4 lb beef brisket, flat cut
- 1 teaspoon garlic powder
- 1 teaspoon onion powder
- 1 teaspoon smoked paprika
- ½ teaspoon black pepper
- 1 teaspoon salt
- 2 tablespoons olive oil
- 1 large onion, sliced into rings
- 4 garlic cloves, smashed
- 1 cup beef broth
- 2 tablespoons Worcestershire sauce
- 2 tablespoons tomato paste
Instructions
- Mix the garlic powder, onion powder, smoked paprika, salt, and pepper together and rub it all over the brisket on both sides.
- Heat olive oil in a large skillet over high heat. Sear the brisket for 3–4 minutes per side until a deep brown crust forms. This step matters — don't skip it or your sauce will lack depth.
- Layer the sliced onions and smashed garlic on the bottom of your slow cooker. Place the seared brisket on top, fat side up.
- Whisk together the beef broth, Worcestershire sauce, and tomato paste. Pour around (not over) the brisket so you don't wash off the crust.
- Cook on LOW for 8–9 hours or HIGH for 5–6 hours, until the meat is fork-tender and pulling apart at the edges.
- Remove brisket and let it rest 10 minutes before slicing against the grain. Spoon the braising juices over the top to serve.
Tips
- Tip: Always slice brisket against the grain — slicing with the grain gives you chewy, stringy pieces no matter how long you cooked it.
- Tip: If you want a thicker sauce, pour the braising liquid into a small saucepan after cooking and simmer it on the stove for 10 minutes while the brisket rests.
- Tip: Brisket is even better the next day once the flavors settle — refrigerate it in the juices overnight and reheat low and slow.
15. Braised Meatballs in Tomato Sauce
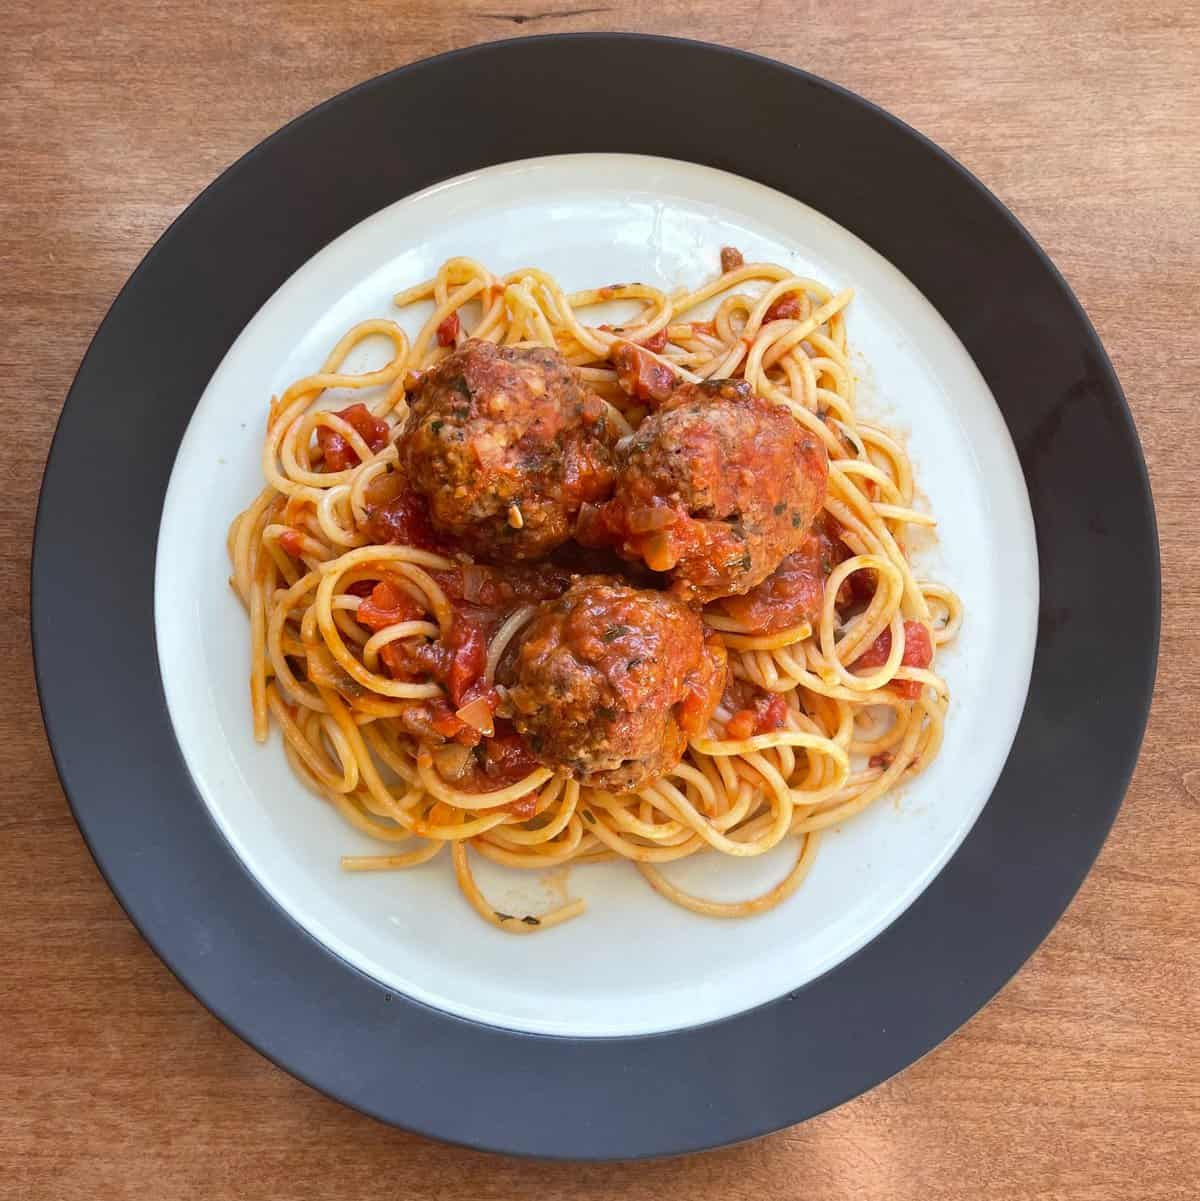
These braised meatballs are what I reach for when I want something that feels genuinely satisfying — the kind of meal where everyone goes quiet at the table because they're too busy eating. The trick is finishing the meatballs in the tomato sauce rather than just placing cooked meatballs on top; they absorb the sauce as they braise and become incredibly tender all the way through. Saad always requests these over spaghetti, and honestly I never argue with that. Sixty to ninety minutes start to finish, and the result tastes like it took all day.
Ingredients
- 1 lb ground beef (80/20)
- ½ cup panko breadcrumbs
- ¼ cup grated Parmesan cheese
- 2 tablespoons pine nuts, roughly chopped
- 1 egg
- 3 garlic cloves, minced (divided)
- 1 teaspoon dried oregano
- Salt and black pepper to taste
- 2 tablespoons olive oil
- 1 can (28 oz) crushed tomatoes
- ½ teaspoon sugar
- 12 oz spaghetti, cooked to serve
Instructions
- Combine ground beef, panko, Parmesan, pine nuts, egg, half the minced garlic, oregano, salt, and pepper in a bowl. Mix gently with your hands — don't overwork it or the meatballs get tough. Roll into balls about 1.5 inches wide.
- Heat olive oil in a wide, deep skillet or Dutch oven over medium-high heat. Brown the meatballs in batches, turning to get color on all sides, about 4–5 minutes total. They don't need to be cooked through — just browned. Remove and set aside.
- In the same pan, add the remaining garlic and cook 30 seconds. Pour in the crushed tomatoes, add the sugar, and season with salt and pepper. Stir and bring to a simmer.
- Nestle the meatballs into the sauce. Cover and braise over low heat for 30–40 minutes, turning once halfway through, until the meatballs are cooked through and the sauce is rich and thick.
- Serve over spaghetti with extra grated Parmesan on top.
Tips
- Tip: Pine nuts add a subtle richness that's worth using here — but if you don't have them, just leave them out. The meatballs are still great.
- Tip: Make a big batch and freeze the meatballs in sauce — they reheat beautifully and taste even better after a day in the fridge.
- Tip: Use a wide pan so the meatballs sit in a single layer in the sauce — they braise more evenly that way.
16. Easy Baked Beef Cannelloni with Spinach

Baked cannelloni is one of those dishes I avoided for years because I assumed it was complicated — stuffing pasta tubes sounds fiddly. It's really not. Once you have the beef and spinach filling ready, you just pipe or spoon it in, cover everything with a simple mozzarella sauce, and the oven does the rest. This isn't authentic Italian; it's my home version, and it's become a real Sunday staple. It also freezes well, which means you can put in the work once and eat well twice.
Ingredients
- 12 cannelloni tubes (dry, uncooked)
- 1 lb ground beef
- 3 cups fresh spinach, roughly chopped (or 1 cup frozen, thawed and squeezed dry)
- 1 small onion, finely diced
- 3 garlic cloves, minced
- ½ cup ricotta cheese
- 1 teaspoon Italian seasoning
- Salt and black pepper to taste
- 1 jar (24 oz) marinara sauce
- 1 cup whole milk
- 2 tablespoons butter
- 2 tablespoons all-purpose flour
- 1 ½ cups shredded mozzarella cheese
Instructions
- Preheat oven to 375°F. Cook onion and garlic in a skillet over medium heat with a drizzle of oil until softened, about 3 minutes. Add ground beef and cook through, breaking it up as it browns. Drain any excess fat.
- Add spinach to the beef and stir until wilted. Remove from heat, stir in ricotta, Italian seasoning, salt, and pepper. Let cool slightly.
- Make a quick béchamel: melt butter in a small saucepan, whisk in flour, cook 1 minute, then gradually whisk in milk. Stir over medium heat until thickened, about 3–4 minutes. Season with salt and remove from heat.
- Spread the marinara sauce across the bottom of a 9x13 inch baking dish. Spoon or pipe the beef filling into each dry cannelloni tube and lay them over the sauce in a single layer.
- Pour the béchamel over the cannelloni, then scatter the mozzarella on top. Cover tightly with foil and bake for 35 minutes. Remove foil and bake a further 10 minutes until the cheese is golden and bubbling.
- Let it rest 10 minutes before serving — this helps the layers hold together when you scoop it out.
Tips
- Tip: Use a zip-lock bag with the corner snipped off to pipe the filling into the tubes — much easier than trying to use a spoon.
- Tip: To freeze, assemble everything before baking, cover tightly, and freeze for up to 3 months. Bake from frozen at 375°F covered for 1 hour, then uncover for the last 15 minutes.
- Tip: Make sure the marinara sauce generously covers the bottom of the dish — the dry pasta tubes absorb moisture as they bake, so don't skimp on it.
17. Vegan Mushroom Wellington
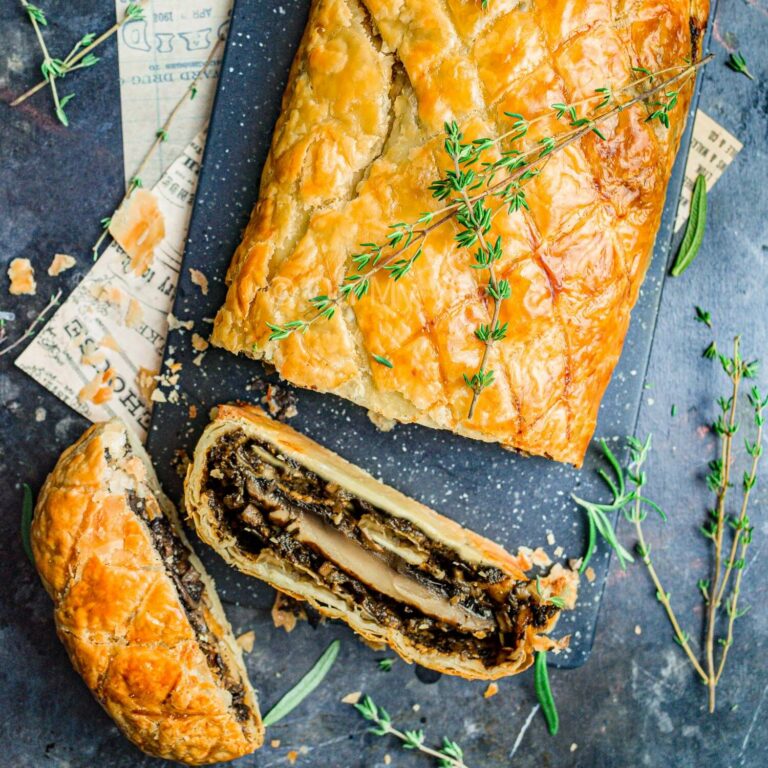
I'll be honest — I was skeptical about a Wellington with no beef. But after making this for the first time with a few vegetarian guests at the table, I was genuinely impressed by how substantial and satisfying it is. Garlicky mushrooms cooked down with spinach, herbs, and walnuts get wrapped in store-bought puff pastry, and the result looks far more impressive than the effort involved. It's a real centerpiece dish for a Sunday dinner, and it works just as well for a holiday table. The pastry browns up beautifully in the oven and slices cleanly — which I always appreciate.
Ingredients
- 1 sheet puff pastry, thawed (most store-bought puff pastry is vegan — check the label)
- 1 lb cremini or portobello mushrooms, finely chopped
- 2 cups fresh spinach
- ½ cup walnuts, finely chopped
- 4 garlic cloves, minced
- 1 small onion, finely diced
- 1 tablespoon fresh thyme leaves (or 1 teaspoon dried)
- 1 tablespoon soy sauce
- 2 tablespoons olive oil
- Salt and black pepper to taste
- 2 tablespoons plant-based milk (for brushing the pastry)
Instructions
- Heat olive oil in a large skillet over medium heat. Cook onion until softened, about 4 minutes. Add garlic and cook 1 minute more.
- Add the finely chopped mushrooms and cook over medium-high heat, stirring occasionally, for 10–12 minutes until all the moisture has evaporated and the mixture is dry and almost paste-like. This step is critical — if the filling is wet, the pastry won't crisp up properly.
- Stir in spinach, walnuts, thyme, and soy sauce. Cook until spinach is wilted, about 2 minutes. Season generously with salt and pepper. Remove from heat and let cool completely before using — at least 30 minutes.
- Preheat oven to 400°F. Unroll the puff pastry on a lightly floured surface. Spoon the cooled mushroom filling down the center of the pastry in a log shape, leaving a 2-inch border on each side.
- Fold the pastry over the filling, sealing the edges by pressing firmly. Place seam-side down on a lined baking sheet. Brush all over with plant-based milk and score the top lightly with a knife.
- Bake for 25–30 minutes until the pastry is deep golden brown. Rest for 5 minutes before slicing — it holds together much better if you give it that time.
Tips
- Tip: The filling must be completely cool before you wrap it — warm filling makes the pastry go soggy before it even hits the oven.
- Tip: You can assemble the Wellington the night before, refrigerate it unbaked, and bake it straight from the fridge the next day — just add 5 extra minutes to the bake time.
- Tip: Pepperidge Farm puff pastry (available at most Walmart and Kroger stores) is accidentally vegan and works perfectly here.
8. Italian Stuffed Peppers
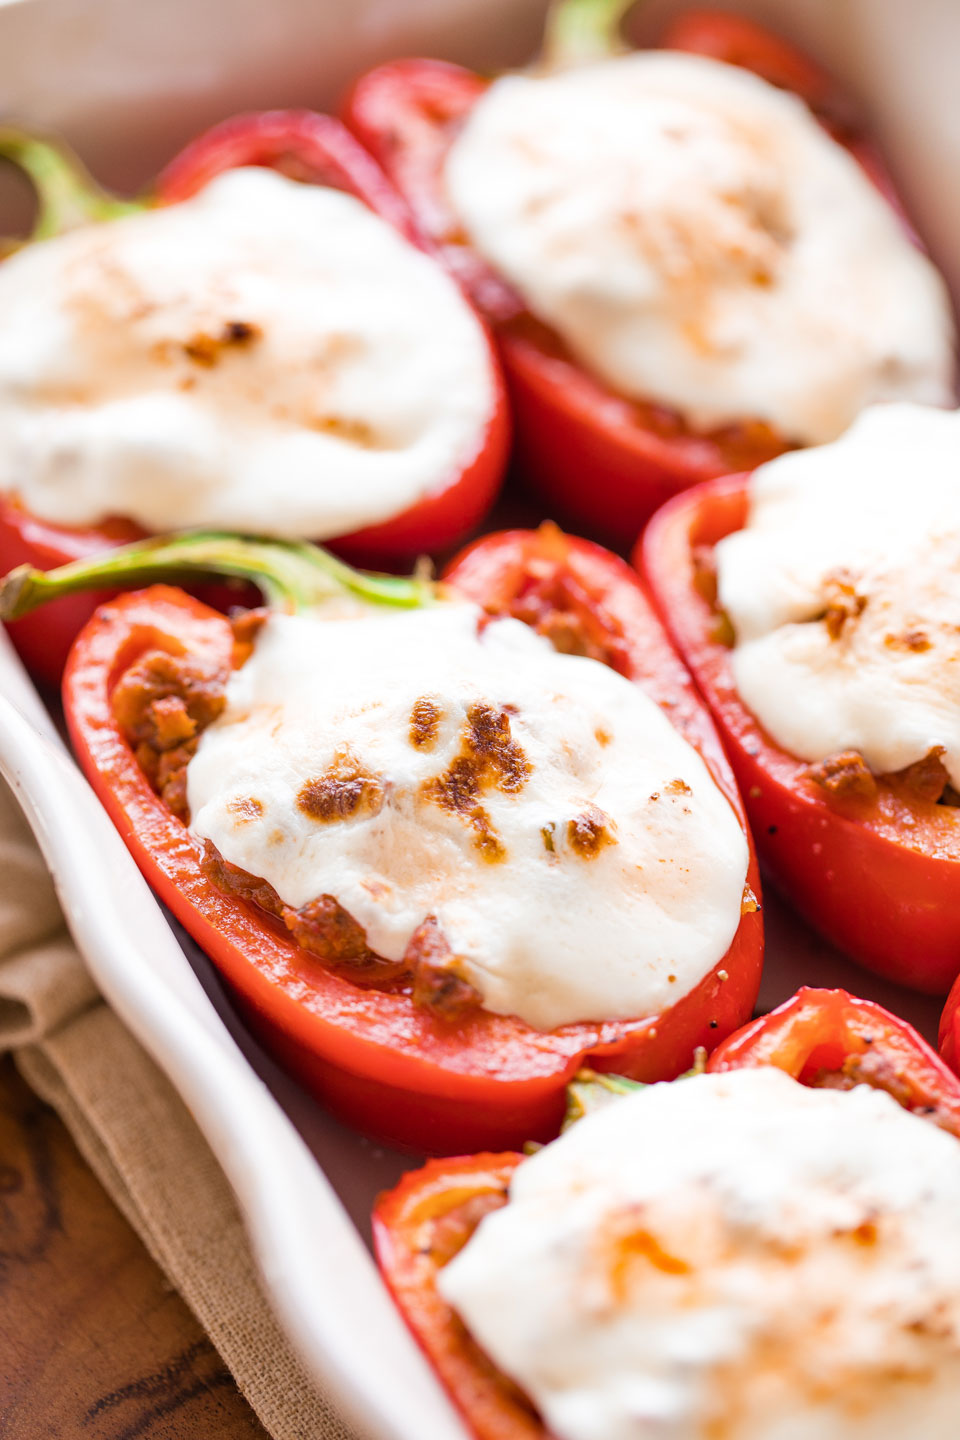
Stuffed peppers have always felt like a Sunday thing to me — they look impressive, they feed the whole family, and they don't actually take that long to pull together. This Italian version leans into sausage, pepperoni, and melted mozzarella instead of the usual ground beef and rice filling, which makes it feel a little more exciting. The bell peppers soften just enough in the oven that they hold their shape but aren't crunchy. My husband clears his plate every single time I make these.
Ingredients
- 4 large bell peppers, any color, tops cut off and seeds removed
- 1 lb Italian sausage, casings removed (sweet or hot, your call)
- ½ cup mini pepperoni slices
- 1 cup marinara sauce (jarred is totally fine)
- ½ cup cooked white rice
- 1 teaspoon Italian seasoning
- ½ teaspoon garlic powder
- 1 cup shredded mozzarella cheese, divided
- Salt and black pepper to taste
Instructions
- Preheat your oven to 375°F. Place the hollowed-out peppers cut-side up in a baking dish — snug is fine, they'll support each other.
- In a skillet over medium heat, cook the Italian sausage, breaking it up as it browns, about 7-8 minutes. Drain any excess fat.
- Remove from heat and stir in the pepperoni, marinara, cooked rice, Italian seasoning, garlic powder, and half the mozzarella. Season with salt and pepper.
- Spoon the filling into each pepper, pressing it down lightly. Top with the remaining mozzarella.
- Cover the dish with foil and bake for 30 minutes, then uncover and bake another 10 minutes until the cheese is bubbly and the peppers are tender. Let sit 5 minutes before serving.
Tips
- Tip: If you want softer peppers, par-boil them in salted water for 3 minutes before stuffing — they come out much more tender.
- Tip: These freeze really well. Stuff the peppers, wrap individually, and freeze before baking. Thaw overnight in the fridge and bake as directed.
- Tip: No leftover rice? Skip it entirely or swap in ¼ cup breadcrumbs — the filling holds together fine either way.
9. Meatloaf Muffins — Mini Old-Fashioned Meatloaf
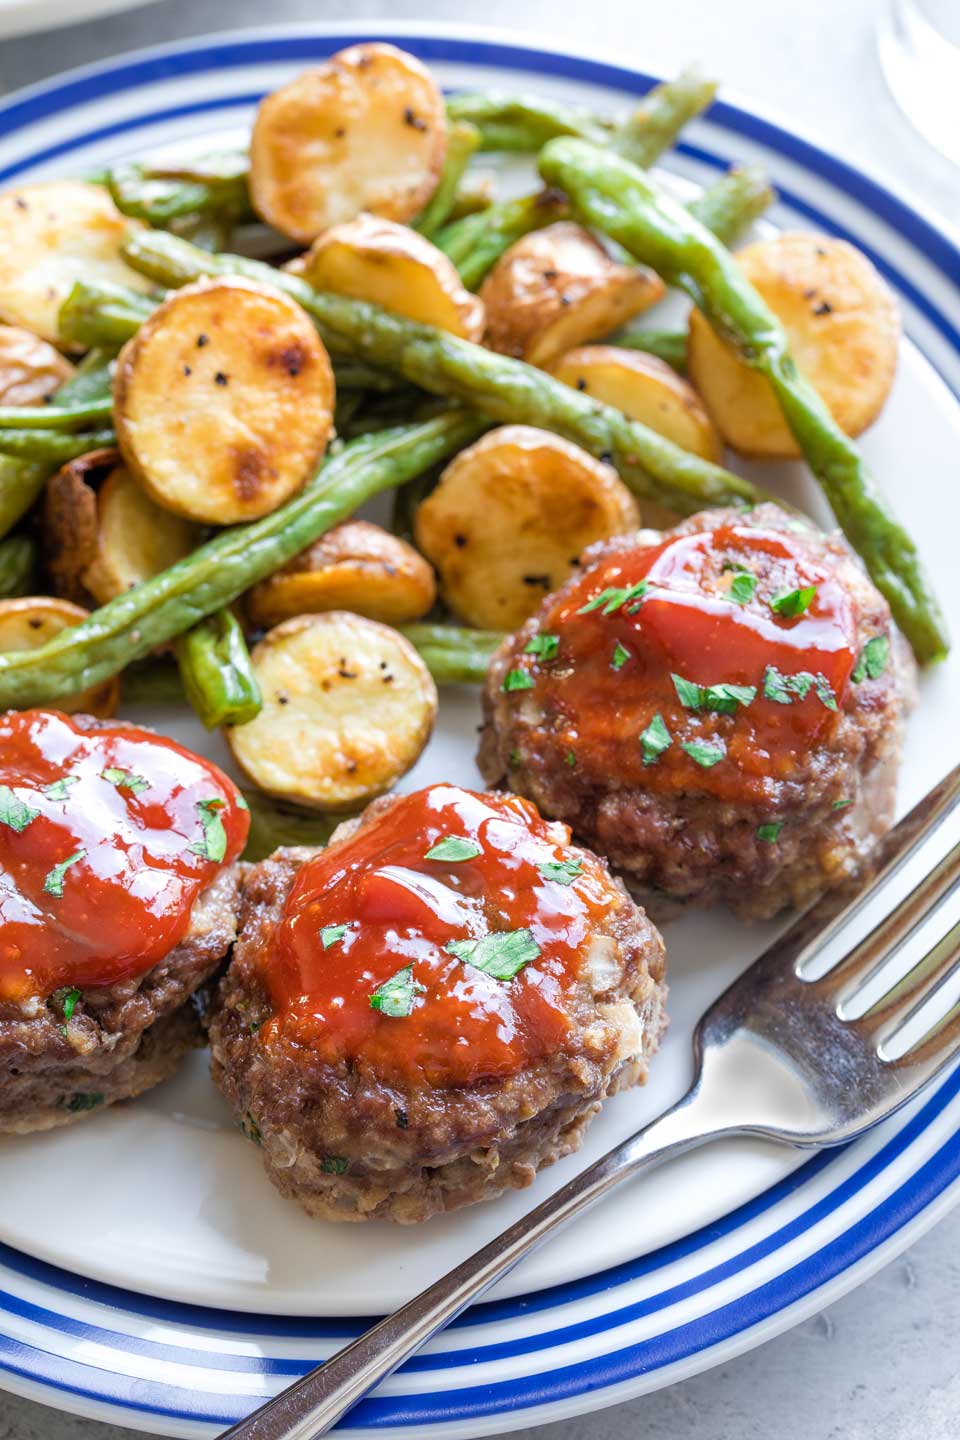
I didn't grow up eating meatloaf — that's very much an American thing — but once I tried making it, I understood the appeal immediately. It's basically a deeply seasoned, saucy beef situation and there's nothing wrong with that. The muffin format is genuinely smart: they bake faster than a full loaf, every single one gets that glazed top, and portioning is already done for you. Saad calls them "meat cupcakes" and asks for them regularly, which tells you everything you need to know.
Ingredients
- 1½ lbs lean ground beef (90/10)
- ½ cup panko breadcrumbs
- ¼ cup whole milk
- 1 large egg
- 1 small onion, finely grated or minced
- 2 cloves garlic, minced
- 1 tablespoon Worcestershire sauce
- 1 teaspoon salt, ½ teaspoon black pepper
- ⅓ cup ketchup (for the glaze)
- 1 tablespoon brown sugar (for the glaze)
- 1 teaspoon apple cider vinegar (for the glaze)
Instructions
- Preheat oven to 375°F. Spray a 12-cup muffin tin generously with nonstick cooking spray.
- In a small bowl, stir together the ketchup, brown sugar, and apple cider vinegar. Set aside — this is your glaze.
- In a large bowl, combine the ground beef, panko, milk, egg, onion, garlic, Worcestershire, salt, and pepper. Mix with your hands until just combined — don't overwork it or the muffins will be dense.
- Divide the mixture evenly among the muffin cups, pressing lightly to fill. Spoon the glaze over the top of each one.
- Bake for 20-22 minutes until cooked through (internal temp 160°F). Let them rest in the pan for 5 minutes before removing — they'll release more easily.
Tips
- Tip: Grating the onion instead of chopping it keeps the texture smooth and the muffins stay moist — this one detail makes a real difference.
- Tip: Serve with mashed potatoes and steamed green beans for a classic plate. The glaze also doubles nicely as a dipping sauce if you make extra.
- Tip: Leftover muffins reheat well in the microwave for 60-90 seconds, or slice and pan-fry them the next morning alongside eggs.
10. Easy One-Pot Italian Ratatouille (Stovetop)

I'll be honest — ratatouille wasn't something I grew up making, and the first time I tried it I underseasoned it badly and served it bland over plain rice. The second time I leaned into the garlic, used good olive oil, and let the vegetables actually cook down and concentrate, and it was a completely different dish. This one-pot stovetop version is genuinely easy, and it works as a meatless Sunday dinner when you want something lighter. Serve it with a thick slice of crusty bread and you won't miss the meat.
Ingredients
- 3 tablespoons olive oil
- 1 medium eggplant, diced into ¾-inch cubes
- 2 medium zucchini, diced
- 1 large yellow onion, diced
- 1 red bell pepper, diced
- 4 cloves garlic, minced
- 1 can (14.5 oz) crushed tomatoes
- 1 teaspoon dried Italian seasoning
- ½ teaspoon red pepper flakes (optional)
- Salt and black pepper to taste
- Fresh basil leaves for serving
Instructions
- Heat the olive oil in a large, heavy pot or Dutch oven over medium-high heat. Add the eggplant with a pinch of salt and cook for 5 minutes, stirring occasionally, until it starts to soften and take on a little color.
- Add the onion and bell pepper. Cook another 5 minutes until the onion is translucent, then stir in the garlic and cook 1 minute more.
- Add the zucchini, crushed tomatoes, Italian seasoning, and red pepper flakes. Stir everything together and season generously with salt and pepper.
- Reduce heat to medium-low, cover, and simmer for 25 minutes, stirring occasionally, until all the vegetables are tender and the sauce has thickened.
- Taste and adjust seasoning. Serve over rice, pasta, or with crusty bread, topped with fresh basil.
Tips
- Tip: Salt the eggplant cubes and let them sit for 15 minutes before cooking if you have the time — it draws out bitterness and helps them cook more evenly.
- Tip: This tastes even better the next day once the flavors have had time to settle — make it Sunday and eat the leftovers Monday without any guilt.
- Tip: A handful of crumbled feta on top right before serving adds a nice salty contrast to the sweet, stewed vegetables.
11. Sunday Gravy (Spaghetti Sauce)
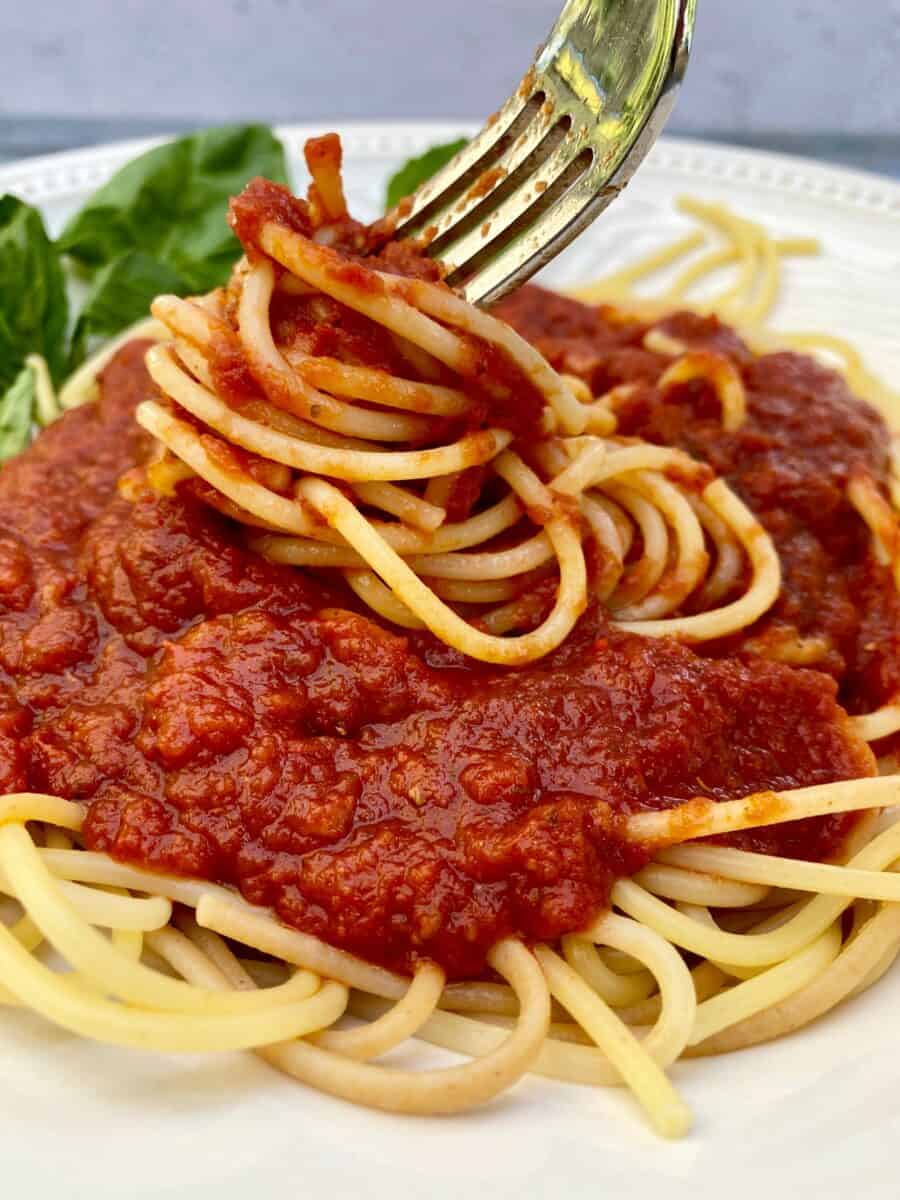
Sunday Gravy is one of those recipes that earns its spot on this list purely because of what slow cooking does to a tomato sauce. You're not just making spaghetti sauce — you're building something over a few hours, and the difference is completely obvious when you taste it. Meatballs, sausage, or a bone-in cut of meat all go in and simmer low and slow until the sauce is dark, rich, and deeply savory. In Pakistan we slow-cook our gravies the same way, so this concept made total sense to me from the first time I tried it.
Ingredients
- 2 tablespoons olive oil
- 1 lb Italian sausage links (sweet or hot)
- 1 lb beef short ribs or bone-in country ribs
- 1 medium onion, finely diced
- 6 cloves garlic, minced
- 2 cans (28 oz each) whole peeled San Marzano tomatoes, crushed by hand
- 1 can (6 oz) tomato paste
- 1 teaspoon dried oregano
- 1 teaspoon dried basil (plus fresh for serving)
- ½ teaspoon red pepper flakes
- Salt and black pepper to taste
- 1 lb spaghetti, cooked to serve
Instructions
- Heat olive oil in a large, heavy-bottomed pot over medium-high heat. Brown the sausage links and ribs on all sides, about 3-4 minutes per side. Remove and set aside — you're building flavor in the pan, not cooking them through.
- In the same pot, reduce heat to medium and cook the onion until soft, about 5 minutes. Add the garlic and tomato paste and cook, stirring, for 2 minutes until the paste darkens slightly.
- Add the crushed tomatoes, oregano, basil, and red pepper flakes. Stir well, season with salt and pepper, and nestle the browned meat back into the pot.
- Bring to a gentle simmer, then reduce heat to low. Cover partially and cook for at least 2½ to 3 hours, stirring every 30 minutes. The sauce should thicken and the meat should be falling-off-the-bone tender.
- Remove the meat, shred or slice, and serve alongside or over spaghetti with a generous ladle of the sauce on top. Finish with fresh basil and grated Parmesan.
Tips
- Tip: I always make a double batch because this sauce disappears fast — freeze half in quart-size zip-lock bags and you have Sunday dinner ready for next week with zero effort.
- Tip: Don't skip browning the meat first — that step builds the depth that separates Sunday Gravy from a regular weeknight tomato sauce.
- Tip: Can't find San Marzano tomatoes? Regular whole peeled tomatoes from Walmart or Aldi work fine — just add a pinch of sugar to balance the acidity.
12. Instant Pot Fettuccine Alfredo
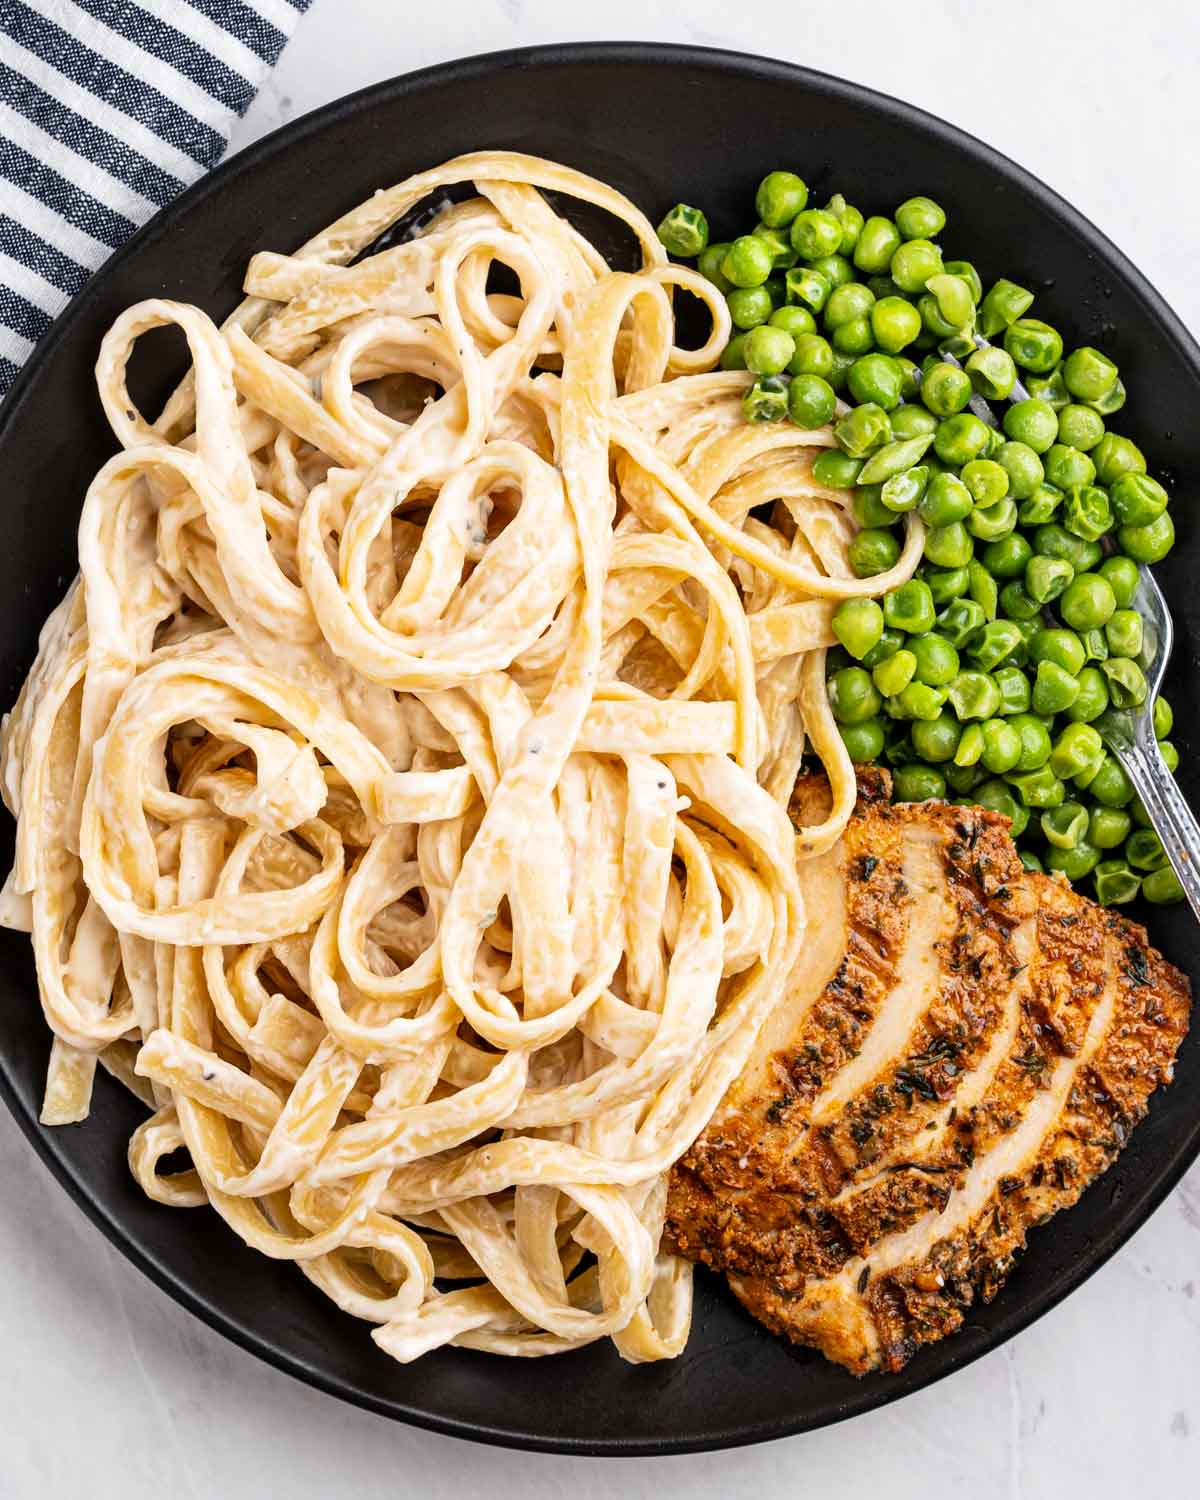
This is the recipe I go to when it's Sunday evening, I'm tired, and everyone is still expecting a proper dinner. The Instant Pot does the heavy lifting here — the pasta cooks right in the liquid and the sauce comes together without you standing at a stove stirring constantly. The result is genuinely creamy and rich, and it takes about 15 minutes start to finish. One thing I learned the hard way: let the cream cheese come to room temperature before adding it, otherwise it clumps and the sauce goes lumpy instead of smooth.
Ingredients
- 12 oz fettuccine pasta, broken in half
- 2 cups chicken broth
- 1½ cups water
- 3 cloves garlic, minced
- 2 tablespoons unsalted butter
- 4 oz cream cheese, softened and cut into cubes
- 1 cup heavy cream (or half-and-half in a pinch)
- 1½ cups freshly grated Parmesan cheese
- Salt and black pepper to taste
- Fresh parsley for garnish
Instructions
- Add the broken fettuccine to the Instant Pot in a loose criss-cross pattern — this prevents clumping. Pour the chicken broth and water over the pasta. Add garlic and butter on top. Do not stir.
- Seal the lid and set to Manual/Pressure Cook on HIGH for 8 minutes. When done, do a quick pressure release immediately.
- Switch to the Sauté function. Stir the pasta to break up any clumps. Add the softened cream cheese and stir until melted, about 2 minutes.
- Pour in the heavy cream and stir to combine. Add the Parmesan in small handfuls, stirring between each addition so it melts smoothly rather than seizing up.
- Season with salt and plenty of black pepper. The sauce will thicken as it sits — serve immediately topped with parsley and extra Parmesan.
Tips
- Tip: Always use freshly grated Parmesan, not the pre-shredded kind from a bag — the anti-caking agents in pre-shredded cheese make the sauce grainy instead of silky.
- Tip: Stir in cooked grilled chicken, shrimp, or steamed broccoli right at the end to turn this into a more complete one-pot meal.
- Tip: If the sauce gets too thick after sitting, add a splash of warm water or broth and stir — it comes right back together.
7. Street-Style Pav Bhaji (with Bread)

Pav Bhaji is Mumbai street food at its absolute best — a thick, deeply spiced vegetable mash served with buttery toasted bread rolls. I grew up eating something similar from a dhaba near my aunt's house, and the smell of that pav bhaji masala hitting a hot pan still does something to me. This is the kind of recipe that sounds simple but has real depth once you get the spice balance right. The trick is cooking the vegetables down long enough that they almost disappear into each other, then finishing with a generous knob of butter and a squeeze of lemon right at the end.
Ingredients
- 2 medium potatoes, boiled and mashed
- 1 cup cauliflower florets, boiled and mashed
- ½ cup frozen peas, thawed
- 1 medium onion, finely chopped
- 1 green bell pepper, finely chopped
- 2 medium tomatoes, finely chopped
- 1 tablespoon ginger-garlic paste
- 2 tablespoons pav bhaji masala (available at most Indian grocery stores or on Amazon; or sub 1 teaspoon garam masala + 1 teaspoon cumin + ½ teaspoon smoked paprika)
- ½ teaspoon red chili powder
- Salt to taste
- 3 tablespoons butter, divided
- 4–6 dinner rolls or slider buns, split
- Fresh cilantro and lemon wedges to serve
Instructions
- Heat 2 tablespoons butter in a heavy skillet or kadai over medium-high heat. Add the onion and cook for 5–6 minutes until it starts to turn golden at the edges.
- Add ginger-garlic paste and cook for 1 minute, then add the bell pepper and tomatoes. Cook everything down for 8–10 minutes, stirring often, until the tomatoes break apart completely.
- Add the pav bhaji masala, chili powder, and salt. Stir to combine, then add the mashed potatoes, cauliflower, and peas. Use the back of your spoon to mash everything together into a thick, chunky paste.
- Add ¼ to ½ cup water to loosen the bhaji to your preferred consistency. Simmer for 5 minutes, stirring, then finish with 1 tablespoon butter and a squeeze of lemon.
- Toast the buns cut-side down in a buttered pan until golden. Serve the bhaji hot, topped with chopped cilantro and onion, with lemon wedges and the toasted buns alongside.
Tips
- Tip: The more you mash and stir the bhaji while it cooks, the better the texture gets — don't rush this step.
- Tip: If you can't find pav bhaji masala locally, the spice blend substitute listed above gets you surprisingly close.
- Tip: Leftover bhaji thickens overnight in the fridge — just add a splash of water when reheating and it's just as good the next day.
6. Meatless Meatloaf
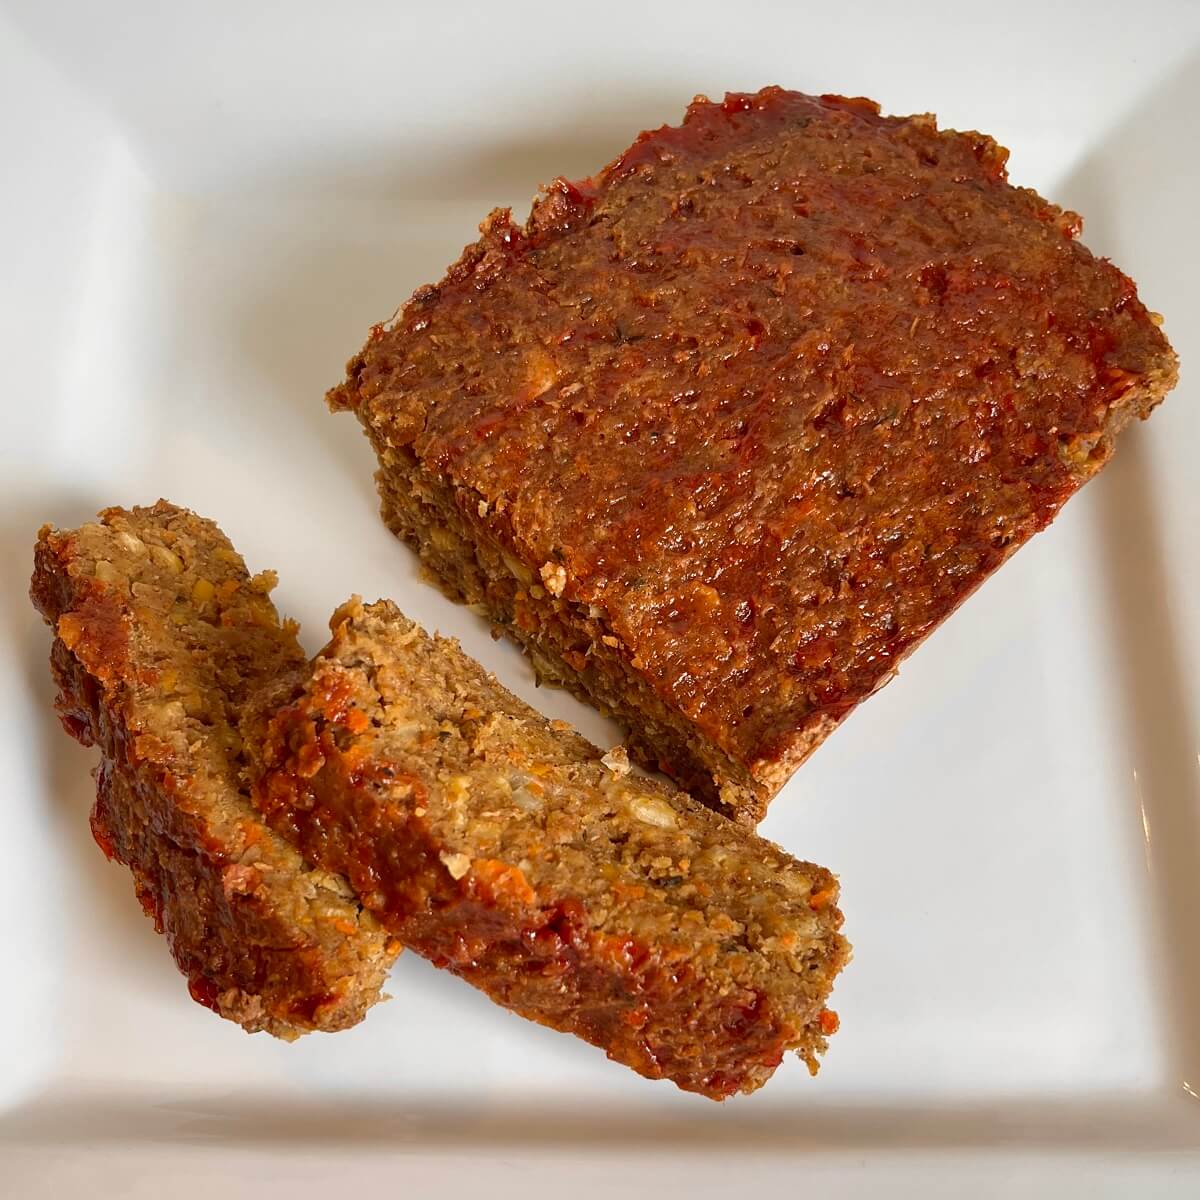
I'll be honest — I was skeptical the first time I made a meatless meatloaf. My husband is not a vegetarian and he eyes anything without meat with open suspicion. But this one, built on a base of chickpeas and whole wheat flour, actually holds together and has a satisfying, hearty texture that surprised both of us. It's not trying to taste like beef — it tastes like its own thing, which I think is the right approach. The almond butter in the mix sounds strange but it adds richness that you'd otherwise be missing.
Ingredients
- 1 can (15 oz) chickpeas, drained and rinsed
- 1 small onion, finely diced
- 3 garlic cloves, minced
- 2 tablespoons almond butter (or peanut butter in a pinch)
- ¾ cup whole wheat flour (or all-purpose flour)
- 2 tablespoons soy sauce
- 1 teaspoon smoked paprika
- ½ teaspoon black pepper
- Salt to taste
- ¼ cup ketchup, for topping
- 1 tablespoon olive oil
Instructions
- Preheat your oven to 375°F. Lightly grease a standard loaf pan with olive oil.
- In a skillet over medium heat, sauté the onion in olive oil for 4–5 minutes until softened. Add the garlic and cook 1 more minute. Remove from heat.
- Add the chickpeas to a large bowl and mash them well with a fork — leave some texture, you don't want a completely smooth paste. Stir in the cooked onion and garlic, almond butter, soy sauce, smoked paprika, black pepper, and salt.
- Add the flour a little at a time, mixing until the mixture holds together when pressed. It should feel firm, not wet. Press the mixture evenly into the prepared loaf pan.
- Spread the ketchup evenly over the top. Bake for 35–40 minutes until the top is set and slightly caramelized. Let it cool in the pan for 10 minutes before slicing — this step matters, it holds together better once it rests.
Tips
- Tip: Don't skip the resting time — slicing too early is the main reason meatless meatloaf crumbles. Ten minutes makes a real difference.
- Tip: This freezes well. Slice it after cooling, wrap individual slices, and freeze for up to 2 months. Reheat in the oven at 350°F for 15 minutes.
- Tip: Add ½ cup finely grated carrot or zucchini to the mix for extra moisture and nutrition — just squeeze out excess water first.
5. Slow-Roasted Duck with Sweet + Sour Sauce
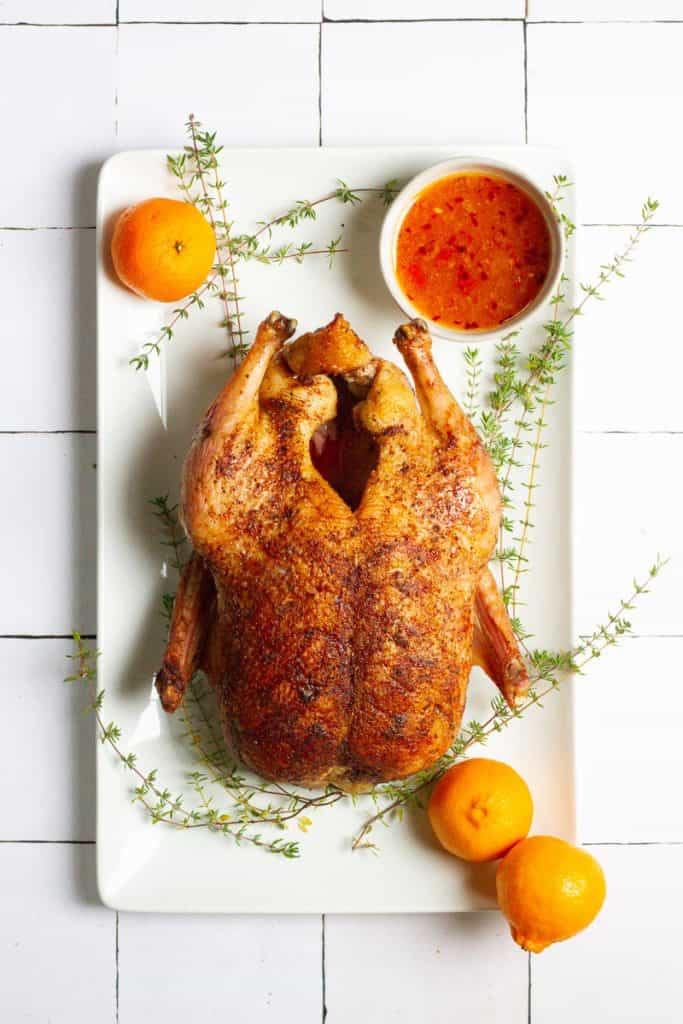
Duck is one of those things I put off making for years because it sounded intimidating, and the first time I tried it I absolutely overcooked it trying to rush the process. The second time I left it alone for four hours at low heat and it was completely different — falling-apart tender, skin slowly rendering into something crisp and golden. Slow roasting is really the only approach that makes sense for duck at home, and the sweet and sour sauce made from the rendered pan drippings is worth every minute of that wait. This is a proper Sunday project recipe.
Ingredients
- 1 whole duck (about 5–6 lbs), thawed if frozen
- 1½ teaspoons salt
- 1 teaspoon black pepper
- 1 teaspoon garlic powder
- 2 tablespoons duck fat or butter (from the pan drippings)
- 3 tablespoons rice vinegar
- 2 tablespoons mango chutney
- 1 tablespoon fish sauce
- 1 teaspoon red chili flakes
- ¼ cup water or chicken stock
Instructions
- Preheat your oven to 300°F. Pat the duck completely dry with paper towels — this is important for the skin to crisp later. Score the skin in a crosshatch pattern without cutting into the meat. Rub all over with salt, pepper, and garlic powder.
- Place the duck breast-side up on a rack set over a roasting pan. Roast at 300°F for 3½ to 4 hours, until the legs pull away easily and the skin is golden. In the last 20 minutes, increase the heat to 425°F to crisp the skin.
- Remove the duck from the oven, tent loosely with foil, and let it rest for 15 minutes. Meanwhile, carefully pour off the pan drippings into a small saucepan, keeping about 2 tablespoons of duck fat.
- For the sauce, heat the duck fat in the saucepan over medium heat. Add rice vinegar, mango chutney, fish sauce, and chili flakes. Stir in the water or stock and simmer for 5–7 minutes until slightly thickened. Taste and adjust salt.
- Carve the duck and serve with the sweet and sour sauce drizzled over or on the side.
Tips
- Tip: Don't throw away the rendered duck fat — strain it and store it in a jar in the fridge. It's incredible for roasting potatoes.
- Tip: Whole duck is available at most Asian grocery stores and many Walmart or Costco locations, especially around the holidays.
- Tip: If you can't find mango chutney, use a tablespoon of apricot jam plus a teaspoon of apple cider vinegar — it gets you a similar sweet-tart balance.
4. Herb Butter Salmon
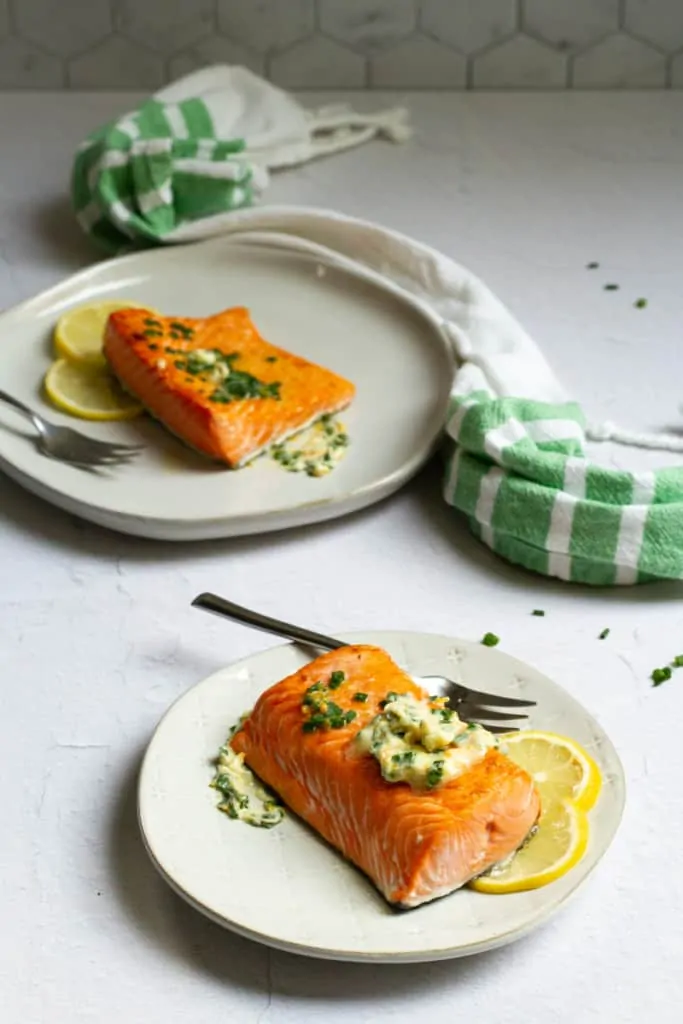
Salmon is one of those weeknight-or-weekend recipes that works for both, and this herb butter version is the one I reach for when I want something that looks like I tried harder than I actually did. The whole thing comes together in under 20 minutes — you sear the salmon skin-side down first to get it crispy, then spoon the herb butter over as it finishes cooking. The combination of fresh herbs, orange zest, and butter creates a sauce that's bright and rich at the same time. My husband asks for this one regularly, which is saying something because he usually wants rice-based meals.
Ingredients
- 4 salmon fillets (about 6 oz each), skin-on
- Salt and black pepper to taste
- 1 tablespoon olive oil
- 3 tablespoons unsalted butter
- 2 garlic cloves, minced
- 2 tablespoons fresh parsley, finely chopped
- 1 tablespoon fresh dill (or ½ teaspoon dried)
- 1 teaspoon fresh thyme leaves
- Zest of 1 orange
- 1 tablespoon fresh orange juice
Instructions
- Pat the salmon fillets dry and season both sides generously with salt and pepper. Heat olive oil in a heavy skillet over medium-high heat until shimmering.
- Place the salmon skin-side down in the pan. Press gently with a spatula for the first 30 seconds so the skin makes full contact with the pan. Cook for 4–5 minutes without moving it.
- Flip the salmon and reduce heat to medium. Add butter to the pan. Once melted, add garlic and let it sizzle for 30 seconds, then add the herbs, orange zest, and orange juice.
- Tilt the pan slightly and use a spoon to baste the salmon repeatedly with the herb butter for 2–3 minutes, until the fish is just cooked through and flakes easily at the thickest part.
- Remove from heat and spoon any remaining herb butter from the pan over the salmon before serving.
Tips
- Tip: Don't move the salmon while the skin side is cooking — patience here is what gives you the crispy skin everyone wants.
- Tip: If you only have dried herbs, use about a third of the quantity — dried herbs are more concentrated and can overwhelm the butter sauce.
- Tip: This pairs really well with roasted asparagus or a simple green salad — you can roast the asparagus on a sheet pan at 400°F while you cook the salmon on the stovetop.
3. Butter Chicken (Murgh Makhani)
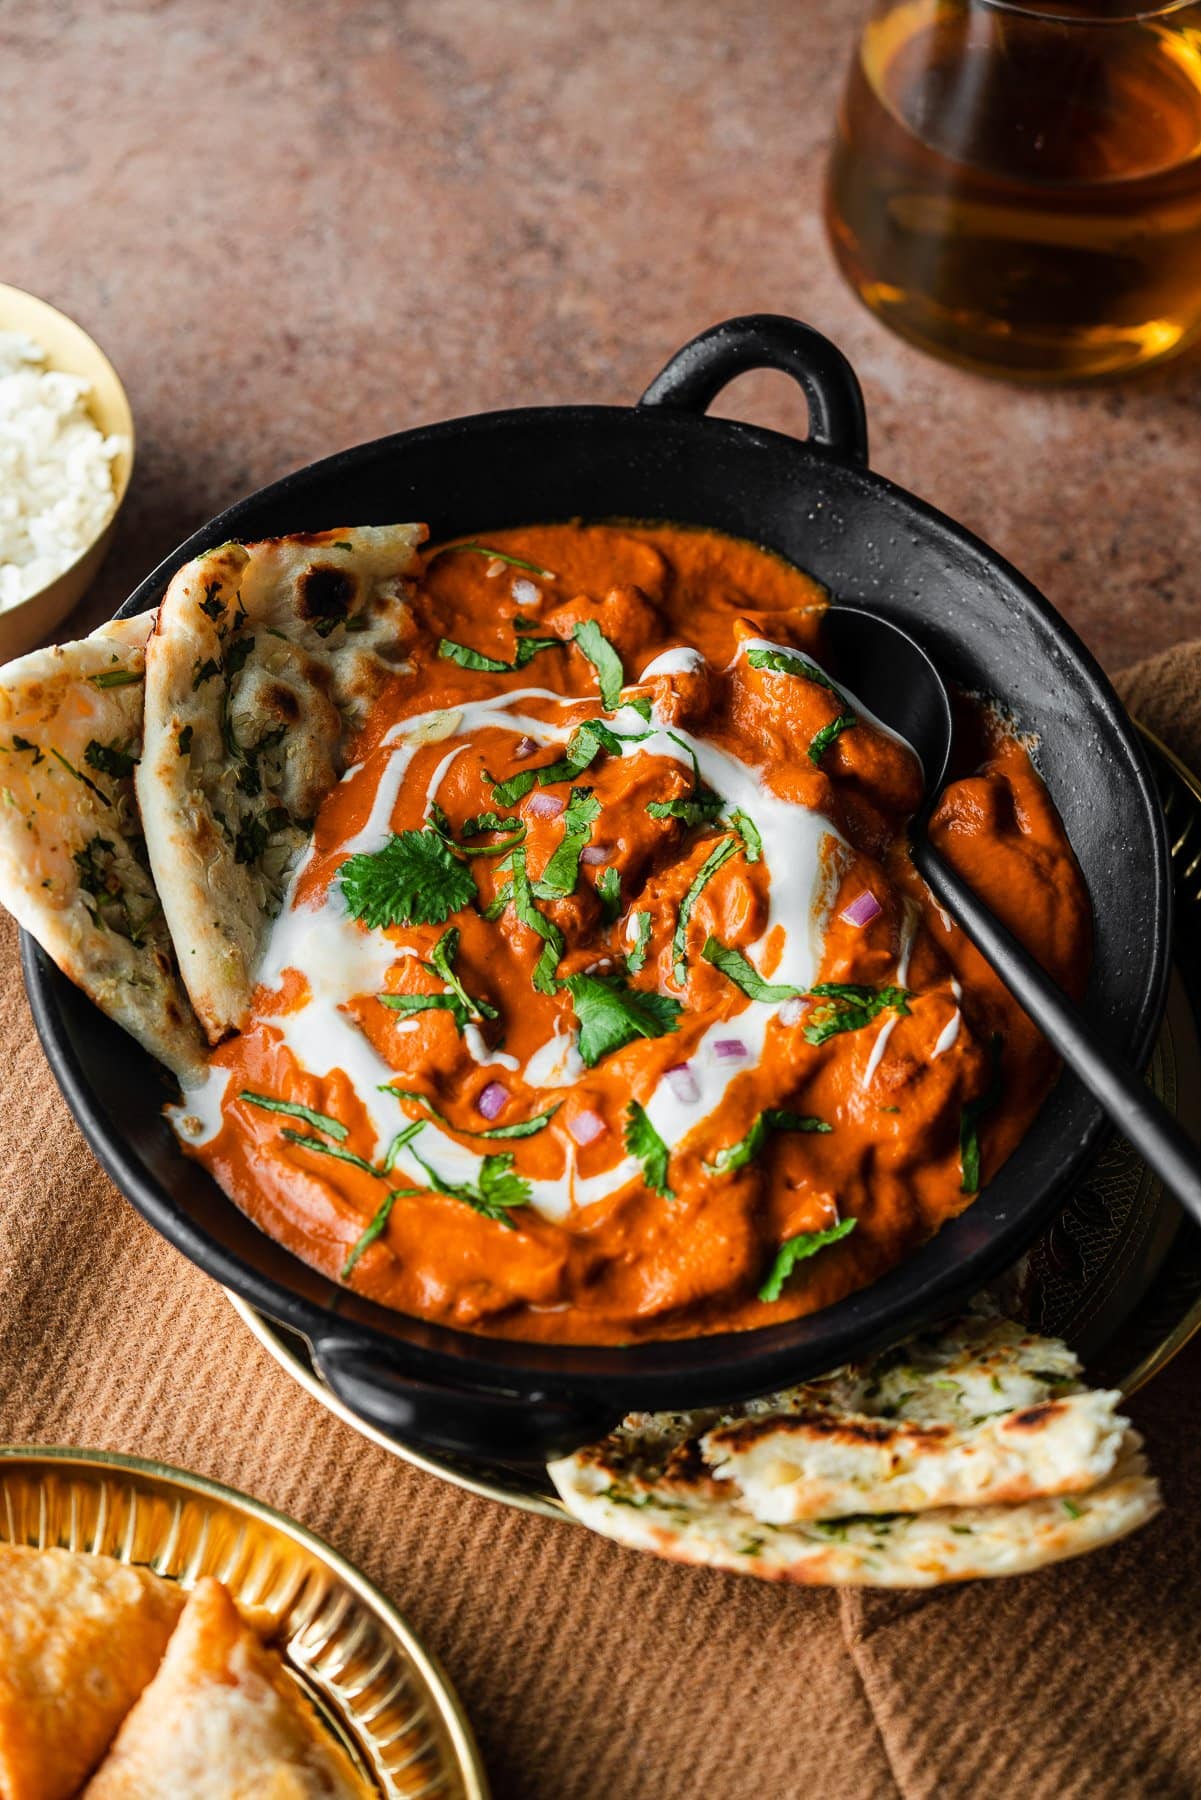
Butter chicken is one of those dishes I've made so many times I could do it half asleep — which is basically the only way I make it on Sunday evenings after a long week. The yogurt marinade is what makes the chicken tender and gives it that slightly charred edge before it goes into the sauce, and I never skip it even when I'm tempted to rush. This version uses pantry spices you can find at any grocery store, no specialty ingredients required. Saad and Zainab both eat it without complaining, which in my house is the highest possible compliment. We serve it with basmati rice and naan — both, always both.
Ingredients
- 1½ lbs boneless skinless chicken thighs, cut into chunks
- ½ cup plain whole-milk yogurt
- 1 tablespoon ginger-garlic paste
- 1 teaspoon garam masala
- 1 teaspoon cumin
- 1 teaspoon smoked paprika
- Salt to taste
- 2 tablespoons butter
- 1 medium onion, finely diced
- 1 can (14 oz) crushed tomatoes
- 1 teaspoon coriander powder
- ½ teaspoon red chili powder (adjust to taste)
- ¾ cup heavy cream
- 1 tablespoon sugar or honey
Instructions
- Mix the chicken with yogurt, ginger-garlic paste, garam masala, cumin, smoked paprika, and salt. Let it marinate for at least 30 minutes, or up to overnight in the fridge.
- Cook the marinated chicken in a hot skillet or under a broiler until slightly charred on the edges and cooked through, about 8–10 minutes. Set aside.
- In the same skillet, melt butter over medium heat. Add the onion and cook for 6–7 minutes until golden. Add coriander powder and chili powder, stir for 30 seconds, then pour in the crushed tomatoes.
- Simmer the tomato sauce for 10 minutes, stirring occasionally. Use an immersion blender (or carefully transfer to a blender) to blend the sauce smooth. Return to the pan.
- Stir in the heavy cream and sugar. Add the cooked chicken and simmer everything together for 10 minutes on low heat until the sauce thickens and coats the chicken. Taste and adjust salt.
Tips
- Tip: Blending the sauce is what gives butter chicken its signature silky texture — don't skip it even if it feels like an extra step.
- Tip: I always make a double batch because this reheats beautifully the next day and the flavor actually deepens overnight.
- Tip: If you don't have heavy cream, full-fat coconut milk works as a substitute — it changes the flavor slightly but it's still really good.
16. Calabrian Chicken Meatballs

I'd never cooked with Calabrian chili peppers until maybe two years ago, and now I don't know what I was doing before them. These meatballs are made with ground chicken, Calabrian chilies, garlic, and parmesan — they've got real heat but it's the kind that builds slowly rather than smacks you upfront. I've served them tossed through spaghetti on Sunday nights, and I've also put them out as an appetizer with toothpicks at family gatherings. Either way, the plate empties fast. If you can't find Calabrian chili paste at your regular store, a small spoonful of red pepper flakes blended with a little olive oil gets you reasonably close.
Ingredients
- 1 lb ground chicken
- 2 tablespoons Calabrian chili paste (or 1 teaspoon red pepper flakes mixed with 1 tablespoon olive oil)
- 3 cloves garlic, minced
- ½ cup grated parmesan
- ¼ cup breadcrumbs
- 1 egg
- ½ teaspoon salt
- ½ teaspoon black pepper
- 2 tablespoons olive oil, for frying
Instructions
- In a large bowl, combine the ground chicken, Calabrian chili paste, garlic, parmesan, breadcrumbs, egg, salt, and pepper. Mix until just combined — don't overwork it or the meatballs get dense.
- Roll the mixture into balls about 1½ inches wide. You should get roughly 18–20 meatballs.
- Heat olive oil in a large skillet over medium-high heat. Add meatballs in a single layer and cook for 3–4 minutes per side until browned all around.
- Reduce heat to medium-low, add ½ cup of water or chicken broth to the pan, cover, and steam for another 5 minutes until cooked through. Internal temperature should reach 165°F.
- Serve immediately over pasta, in sub rolls, or alongside roasted vegetables.
Tips
- Tip: These freeze really well — lay cooked meatballs on a sheet pan to freeze solid first, then transfer to a zip-lock bag. They keep for up to two months and reheat straight from frozen in a covered skillet with a splash of broth.
- Tip: Ground chicken is stickier than beef, so wet your hands slightly before rolling to stop the mixture clinging to your palms.
- Tip: For a saucier version, drop the browned meatballs directly into a pot of simmering marinara and let them finish cooking there — they absorb the sauce and get even better.
17. Classic Stuffed Shells
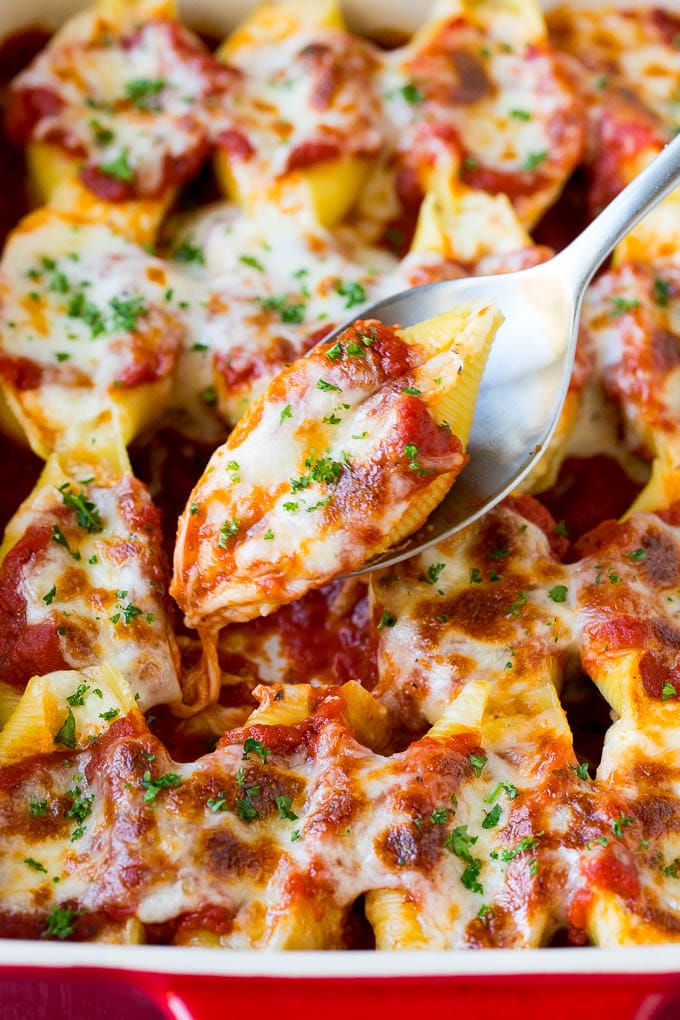
Stuffed shells are one of those Sunday dinners that feel like a real project but actually come together without too much stress once you've done it once. Big pasta shells packed with a ricotta, mozzarella, and parmesan filling, nestled into marinara, and baked until the cheese on top goes golden and slightly crispy at the edges — my husband requests this at least once a month. The first time I made them I overcrowded the pan and half the shells cracked open, so now I use a 9x13 dish and give them space. It's not an authentic Italian recipe by any stretch, but it's the version my family actually clears the whole dish for.
Ingredients
- 20 jumbo pasta shells (cook a few extra — some will break)
- 2 cups ricotta cheese
- 1½ cups shredded mozzarella, divided
- ½ cup grated parmesan
- 1 egg
- 2 cloves garlic, minced
- 1 teaspoon dried Italian seasoning
- ½ teaspoon salt
- 2 cups marinara sauce (store-bought is completely fine — Rao's or Prego both work)
Instructions
- Preheat oven to 375°F. Cook the pasta shells in well-salted boiling water for 1–2 minutes less than the package says — they'll finish cooking in the oven. Drain and lay them out on a sheet pan so they don't stick together.
- In a bowl, mix together ricotta, 1 cup of the mozzarella, parmesan, egg, garlic, Italian seasoning, and salt until combined.
- Spread 1 cup of marinara sauce across the bottom of a 9x13 baking dish. Fill each shell with about 2 tablespoons of the cheese mixture and arrange them in a single layer in the dish.
- Spoon the remaining marinara over the top of the shells, then scatter the remaining ½ cup mozzarella over everything.
- Cover tightly with foil and bake for 25 minutes. Remove foil and bake for another 10–15 minutes until the cheese is bubbly and starting to brown. Let it sit for 5 minutes before serving — this helps them hold together when you scoop them out.
Tips
- Tip: You can assemble the whole dish the night before, cover it, and refrigerate it — just add 10 extra minutes to the covered baking time if going in cold from the fridge.
- Tip: To add protein, stir ½ lb cooked and crumbled Italian sausage or ground beef directly into the ricotta filling before stuffing the shells.
- Tip: A piping bag or zip-lock bag with the corner snipped makes filling the shells much faster and less messy than using a spoon — I learned this after my third frustrating attempt.
View More Recipes here Recipe Roundups
Sunday dinner in our house is never just about the food — it's the one meal of the week where everyone actually sits down together. No rushing, no eating in shifts, no "I'll just grab something later." These 17 recipes are the ones I come back to when I want that feeling: something that fills the kitchen with a real smell, something that takes a little effort but isn't a whole-day project, something that lands on the table and makes people pause before they reach for the serving spoon.
I'll be honest — not every recipe on this list works for every family. My husband leans toward the heavier, saucier ones. Saad will eat whatever has the most bread on the side. Zainab is going through a phase where she inspects everything before it touches her plate. So I rotate. Some Sundays I want a slow-cooked braise that basically takes care of itself. Other weeks I need something that goes from fridge to table in under an hour. This list covers both ends of that spectrum, which is why I put it together the way I did.
Pick one that fits your Sunday — whether that's a slow, quiet afternoon with something in the oven, or a scramble to get dinner on by 6. They all work. 🍽️ 🥘 ✨
More Dinner Ideas from forfoodiefriends.com
- Easy Weeknight Dinners — when Sunday's leftovers run out and you need Monday sorted fast
- One Pot Meals — less washing up, more eating — my kind of cooking
- Comfort Food Recipes — the recipes I reach for when the week has been a lot
- Family Dinner Recipes — crowd-sized portions, tested on actual picky eaters
- Browse All Recipe Roundups — every list I've put together, all in one place
Frequently Asked Questions
What's a good Sunday dinner when you don't want to spend all day cooking?
Honestly, sheet pan meals and one-pot braises are your best friends here. A lot of the recipes on this list only need 20–30 minutes of actual hands-on time — the oven or the stovetop does the rest. I always look for recipes where I can prep, walk away, and come back to something ready.
Can I make any of these Sunday dinner recipes ahead of time?
Most of the braised and stewed dishes on this list actually taste better the next day — the flavors settle in a way they don't right off the stove. I often make those on Saturday evening and just reheat on Sunday. Anything with a crispy finish (roasted chicken skin, fried elements) is better fresh, so I save those for when I have more time day-of.
How do I pick a Sunday dinner recipe for a large family?
Look for recipes that scale easily — anything in a pot, a roasting pan, or a big baking dish. Stews, pasta bakes, roasted meats, and sheet pan dinners are all easy to double. I usually make a double batch of anything saucy because it disappears in one sitting and I want leftovers for Monday.
What sides go well with most of these Sunday dinners?
Crusty bread, roasted vegetables, or a simple green salad work alongside almost everything on this list. In our house it's always either rice or naan — my husband and I were raised that way and old habits stick. But honestly a loaf of good sourdough from the store will make any of these feel complete without any extra work.
Which of these Sunday dinner ideas is best for someone who doesn't cook much?
Start with anything that has a short ingredient list and uses one pan. The fewer moving parts, the better when you're still getting comfortable in the kitchen. Slow cooker recipes are also a great entry point — you add everything, close the lid, and time does most of the work. I learned more from simple recipes done repeatedly than from ambitious ones I only attempted once.
Share This Post!
If this list helped you figure out what's for dinner this Sunday, save it to Pinterest or share it with someone who's always asking that same question. 📌🍽️
View More Recipes here Recipe Roundups





Comments
No Comments