
Halloween baking is one of my favourite things about the season — the one time of year when the more dramatic and unsettling a cookie looks, the more successful it is. These 17 Halloween cookie recipes cover the full range of what Halloween baking can be: from genuinely elegant recipes like homemade Halloween Oreos with orange-tinted cream filling and crunchy chocolate skeleton cookies cut into gingerbread man shapes, to unambiguously chaotic sugar-rush creations like brownie mix monster cookies studded with candy eyeballs and candy corn cookies loaded with white chocolate chips. There is something here for every skill level, every age group, and every level of Halloween commitment.
What I appreciate about this collection is that it includes both cookie baking projects that genuinely require some effort and produce genuinely impressive results — witch finger cookies with their almond fingernails and raspberry jam blood, Halloween pinwheel cookies with their intricate orange and black swirl — and recipes that are practically guaranteed to succeed even when made by children who have never baked before, like the six-ingredient cake mix monster cookies that are done in 22 minutes. The cookie recipes use real, pronounceable ingredients and common decorating supplies — candy eyes, Halloween sprinkles, frosting, and seasonal candy — that are widely available every October.
These recipes work for Halloween parties, school bake sales, trick-or-treat gifts, family baking days with children, and simply for stocking the cookie jar through October with something that feels genuinely festive. Pin your favourites, save this post for the whole spooky season, and let me walk you through every recipe in this collection.
If you enjoy these spooky treats, share the fun with friends and family and pin your favourites for next year's Halloween baking!
17 BEST HALLOWEEN COOKIE RECIPES FOR A SPOOKY TREAT

17. Halloween Witch Finger Cookies
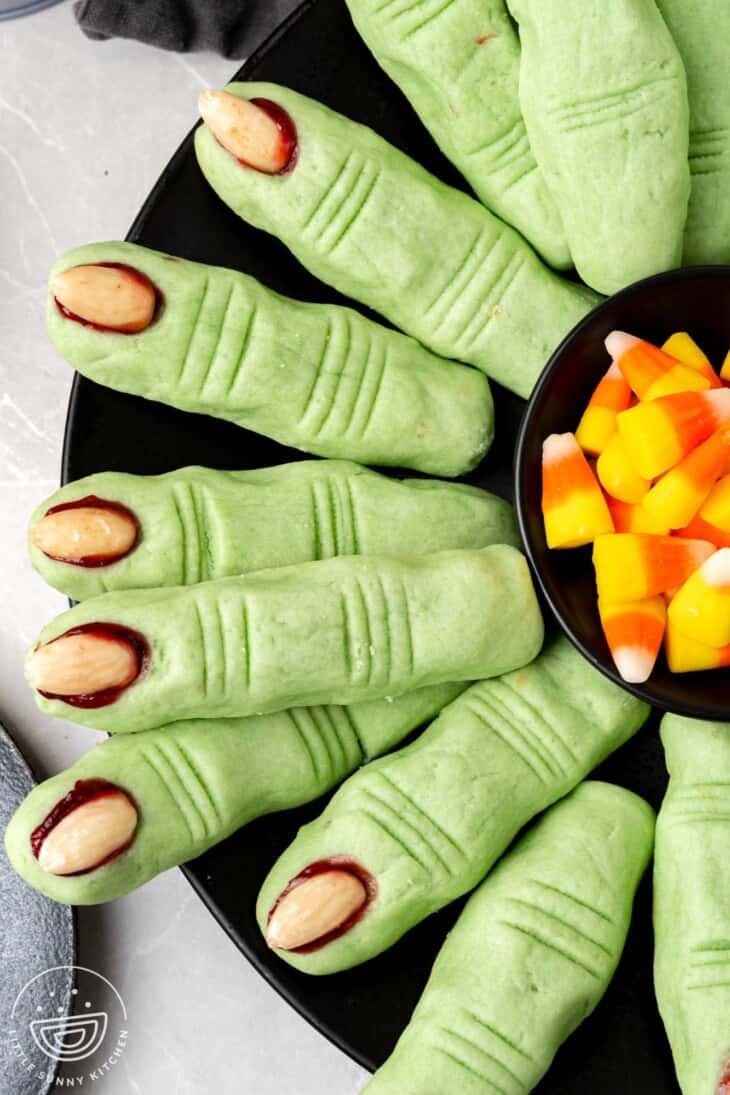
Buttery shortbread cookies shaped into long, knobby fingers, tinted green, fitted with almond fingernails, and served with raspberry jam as "blood" — the most dramatically effective Halloween cookie in this collection. This made the list because witch finger cookies produce the strongest reaction of any Halloween baking project: guests see them and immediately do a double take before reaching for one. The recipe itself is simple — flour, butter, powdered sugar, and almond extract — but the shaping and finishing is what makes them extraordinary. The key detail is squeezing a knuckle indent into each finger before baking and fitting a whole blanched almond into the tip before the cookie goes in the oven so the almond adheres during baking rather than sliding. The raspberry jam is not optional — it is the theatrical finishing touch.
Ingredients:
- 1 cup unsalted butter, softened, 1 cup powdered sugar
- 1 large egg, 1 teaspoon almond extract, 1 teaspoon vanilla extract
- 2¾ cups all-purpose flour, ½ teaspoon baking powder, ½ teaspoon salt
- Green gel food colouring
- Whole blanched almonds (for fingernails)
- Raspberry jam, for serving as "blood"
Instructions:
- Beat butter and powdered sugar until light and fluffy. Add egg, almond and vanilla extract, and green gel colouring until desired witch-green shade is achieved.
- Mix in flour, baking powder, and salt until a soft dough forms. Chill for 30 minutes.
- Roll tablespoon-sized pieces of dough into finger-shaped logs. Press an almond into one end for the fingernail. Squeeze gently at two knuckle positions to create indentations. Score lightly across the knuckle indentations with a knife.
- Bake at 325°F for 20–25 minutes until set but not browned. Cool completely. Dip the almond end briefly in raspberry jam before serving, and pool extra jam on the serving platter as the dramatic "blood" effect.
16. Six-Ingredient Cake Mix Halloween Monster Cookies
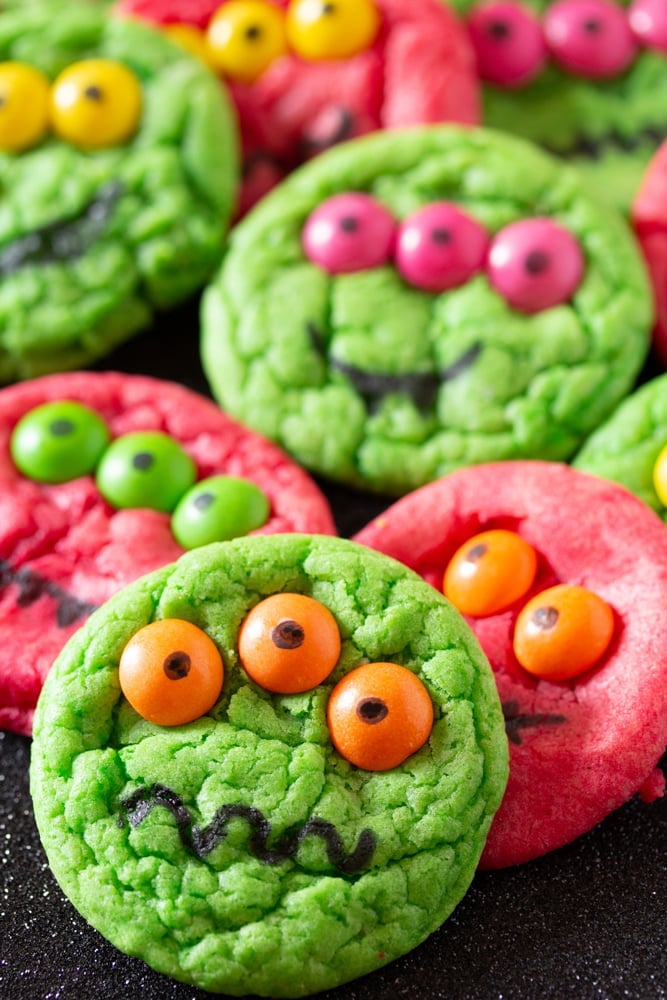
Bright, vivid monster cookies made from boxed cake mix, oil, eggs, and food colouring — customisable with any colours and candy decorations — and ready in 22 minutes from start to finish. This made the list as the most beginner-friendly and child-appropriate baking project in the collection — six ingredients, no creaming, no chilling, and genuinely no way to go wrong. The cake mix base produces a cookie that is soft, slightly cakey, and perfectly sweet, and the food colouring makes every batch look completely different depending on what colour combination the baker chooses. Use purple and black for a classic monster look, green for Frankenstein monsters, or orange and black for pure Halloween spirit. Candy eyes are the essential finishing detail that transforms a coloured sugar cookie into a proper Halloween monster.
Ingredients:
- 1 box (15.25 oz) vanilla or white cake mix
- ⅓ cup neutral oil
- 2 large eggs
- Gel food colouring in Halloween colours
- Candy eyes
- Halloween sprinkles or M&Ms for decoration
Instructions:
- Preheat oven to 350°F. Combine cake mix, oil, and eggs until a thick dough forms.
- Divide the dough into portions and colour each portion a different Halloween colour using gel food colouring, kneading the colour in until uniform.
- Roll tablespoon-sized balls and place on a parchment-lined baking sheet 2 inches apart. Flatten slightly.
- Bake for 10–12 minutes until set but still slightly underdone in the centre — they firm up as they cool. While still warm, press candy eyes and sprinkle decorations onto each cookie. Cool completely before serving.
15. Halloween Sprinkle Cookies
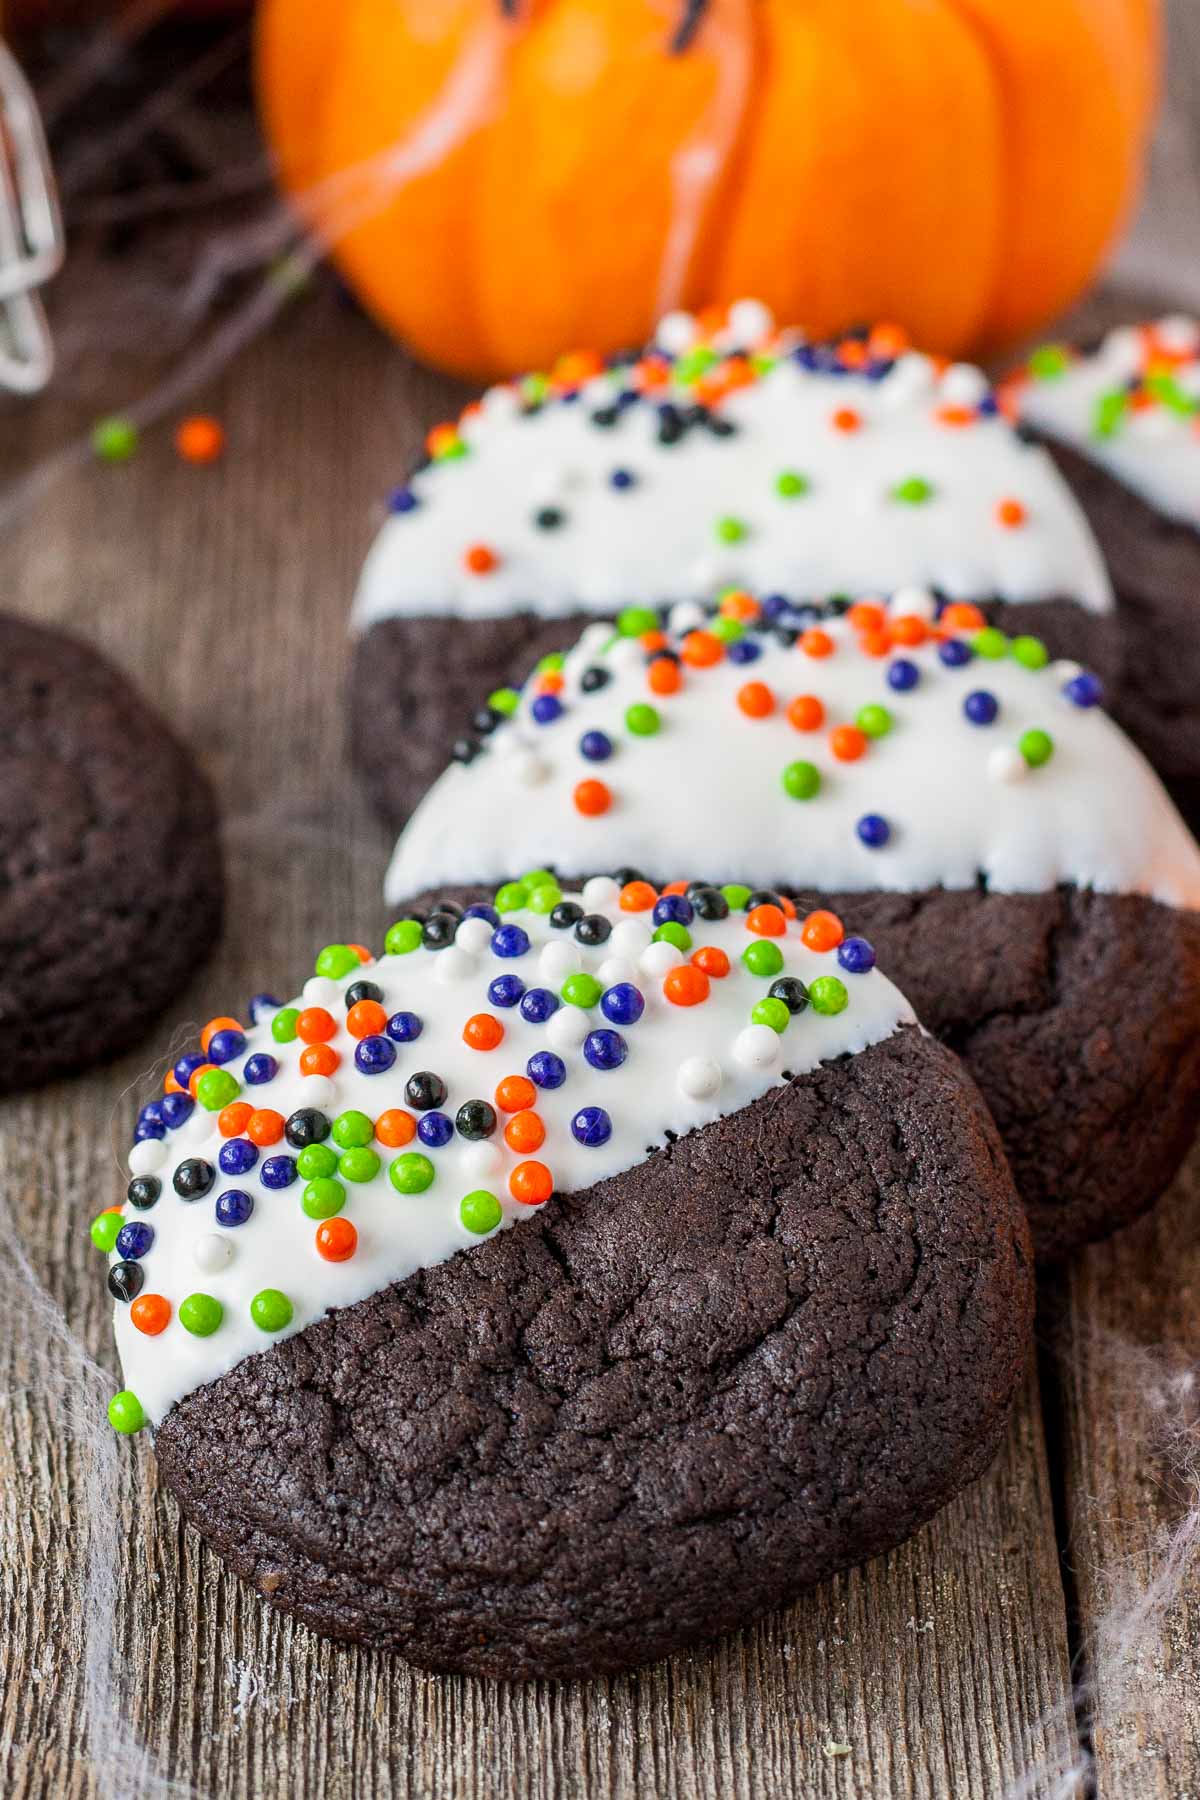
Soft and chewy chocolate cookies with a deep Oreo-like cocoa flavour dipped in white melting chocolate and coated in Halloween sprinkles — a genuinely delicious cookie that looks festive and seasonal without any complex decorating. This made the list because Halloween sprinkle cookies are the no-fail crowd-pleaser of this collection — the chocolate-white chocolate combination is universally loved, the sprinkle coating requires no piping skill or artistic ability, and the finished cookies look consistently professional regardless of experience level. The cocoa base is what makes these stand apart from standard sugar cookies — the depth of chocolate flavour beneath the sweet white chocolate coating and the crunch of the sprinkle coating creates a genuinely satisfying combination in every bite. Use specifically Halloween sprinkle mixes with orange, black, and purple colours for the most visually striking result.
Ingredients:
- 1 cup unsalted butter, softened, 1 cup granulated sugar
- 2 large eggs, 1 teaspoon vanilla extract
- 2 cups all-purpose flour, ¾ cup Dutch process cocoa powder
- 1 teaspoon baking soda, ½ teaspoon salt
- 2 cups white melting chocolate or white chocolate chips
- Halloween sprinkle mix (orange, black, purple)
Instructions:
- Beat butter and sugar until light. Add eggs and vanilla. Mix in flour, cocoa, baking soda, and salt until a soft dough forms. Chill for 1 hour.
- Roll tablespoon-sized balls and place on a parchment-lined sheet. Bake at 350°F for 10–12 minutes until just set. Cool completely.
- Melt the white chocolate in a bowl. Dip the top half of each cooled cookie into the melted chocolate, allowing the excess to drip off.
- Immediately coat the wet white chocolate surface with Halloween sprinkles. Place on parchment and allow the chocolate to set completely before serving.
14. Easy Peanut Butter Fossil Cookies
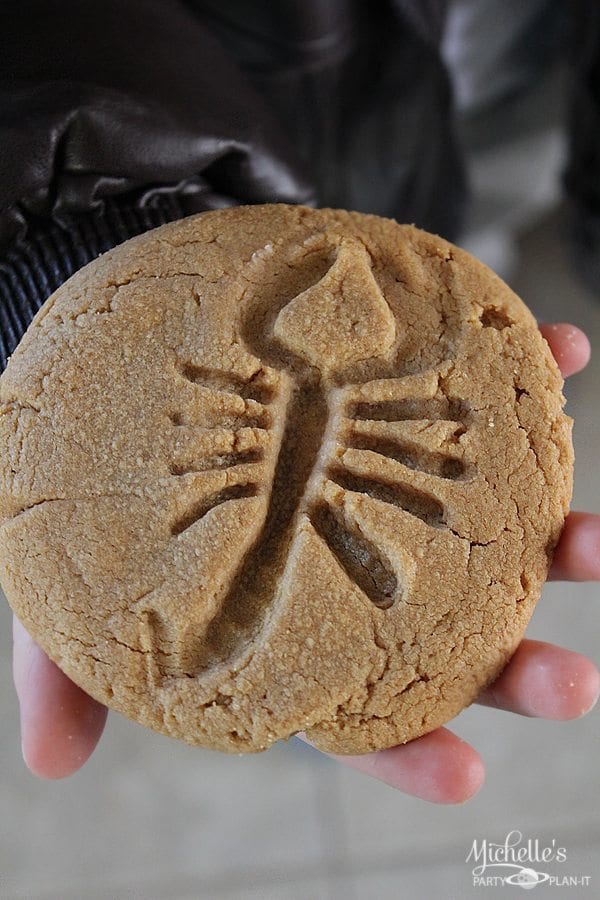
Three-ingredient peanut butter cookies pressed with plastic insects or Halloween shapes before baking to create detailed fossil impressions — an original and deeply child-pleasing Halloween cookie that requires almost no baking experience. This made the list because fossil cookies are genuinely one of the most creative concepts in the collection — the idea of pressing a plastic spider or insect into a soft peanut butter cookie to leave a perfect textured impression is both clever and completely achievable by children. The three-ingredient peanut butter cookie base (peanut butter, sugar, and egg) is one of the most reliable quick-cookie formulas in existence — naturally gluten-free, ready in 20 minutes, and genuinely delicious. Clean plastic Halloween insects are available at any dollar store in October. Flour the insect lightly before pressing to prevent sticking and ensure a clean impression.
Ingredients:
- 1 cup smooth peanut butter
- 1 cup granulated sugar
- 1 large egg
- Clean plastic Halloween insects or spiders (new, food-safe — for pressing impressions only)
- All-purpose flour (for dusting the insects before pressing)
Instructions:
- Preheat oven to 350°F. Combine peanut butter, sugar, and egg in a bowl and mix until a smooth, firm dough forms.
- Roll tablespoon-sized balls and place on a parchment-lined baking sheet.
- Lightly dust the plastic insect with flour. Press it firmly into each cookie ball to flatten the cookie and leave a detailed insect impression. Remove the insect carefully.
- Bake for 10–12 minutes until set and lightly golden at the edges. Cool on the tray for 5 minutes before transferring — these cookies are delicate while warm but firm up beautifully as they cool.
13. Monster Eyeball Cookies
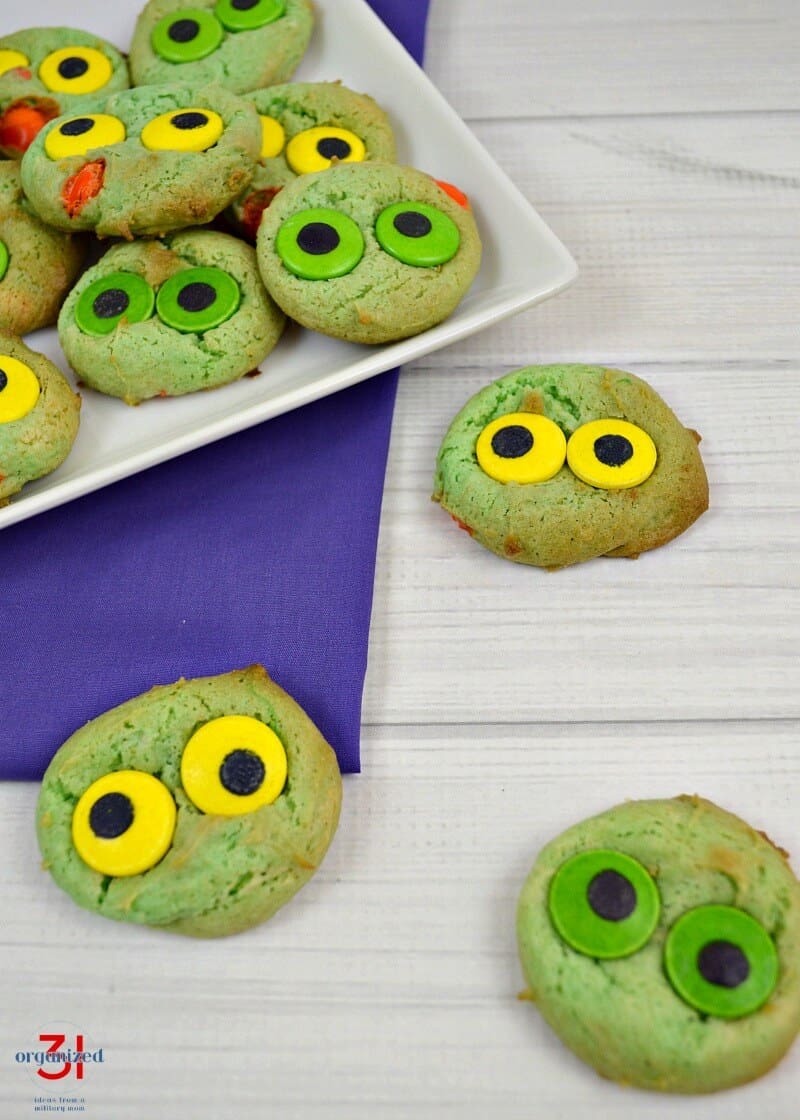
Soft cake mix cookies decorated with M&Ms and candy eyes to look like monster eyeballs — a quick, customisable Halloween cookie that works for any age and any colour scheme. This made the list as the second cake mix Halloween cookie option because it occupies a completely different visual category from the monster cookies above — where those are whole-monster themed with full-body colouring, these are singular eyeball designs where the decoration rather than the colour is the statement. The M&M pupil surrounded by a contrasting candy eye creates a genuinely unsettling eyeball effect on a background cookie, and the format is infinitely customisable — bloodshot effects with red icing drawn on, different M&M colours for different monster species, or a mix of sizes for small and large eyeballs on the same plate. Bake using the same cake mix base and focus the effort on the decoration.
Ingredients:
- 1 box (15.25 oz) white or yellow cake mix
- ⅓ cup neutral oil, 2 large eggs
- Green or purple gel food colouring
- Candy eyeballs and M&Ms (for the eyeball decoration)
- Red decorating icing (for bloodshot vein details — optional)
Instructions:
- Preheat oven to 350°F. Combine cake mix, oil, eggs, and food colouring until a thick, uniform dough forms.
- Roll tablespoon-sized balls, place on a parchment-lined baking sheet, and flatten slightly.
- Bake for 10–12 minutes. Remove while still warm and press 1 candy eyeball directly into the centre of each cookie.
- Press a contrasting M&M directly over the pupil of the candy eye. If making bloodshot eyes, draw thin red icing lines radiating from the eye outward across the cookie surface. Cool completely before serving.
12. Crunchy Chocolate Skeleton Cookies

Dark chocolate cookie dough cut with gingerbread man cutters, baked until crunchy, and decorated with white royal icing to look like skeletons — one of the most elegant Halloween cookies in this collection. This made the list because skeleton cookies represent the higher end of Halloween cookie decorating — they take more effort and more time than the cake mix recipes, but the finished result is genuinely impressive and the dark chocolate dough against the white royal icing creates a visually dramatic contrast that looks professional. The crunchy texture is intentional and part of what makes these distinctive — the higher flour-to-butter ratio produces a snap-worthy cookie rather than a soft, chewy one, which gives the decoration something firm to adhere to. The skeleton design is simple icing piped to suggest bones rather than anatomically precise detail — dots for joints, lines for ribs, a simple skull face.
Ingredients:
- 2½ cups all-purpose flour, ½ cup unsweetened cocoa powder
- 1 cup butter, softened, 1 cup granulated sugar
- 1 large egg, 1 teaspoon vanilla extract, ¼ teaspoon salt
- Royal icing (2 cups powdered sugar + 2–3 tablespoons milk + ½ teaspoon vanilla, whisked until thick and pipeable)
Instructions:
- Beat butter and sugar until combined. Add egg and vanilla. Mix in flour, cocoa, and salt until a firm dough forms. Wrap and chill 1 hour.
- Roll to ¼-inch thickness on a floured surface. Cut with gingerbread man cutters. Place on a parchment-lined sheet and bake at 350°F for 12–15 minutes until firm and set. Cool completely.
- Prepare the royal icing and transfer to a piping bag with a small round tip.
- Pipe skeleton details on each cooled cookie — a circle for the skull head, dots for eyes, a curved line for the smile, ribs across the body, and dots at the joints. Allow the icing to set fully (at least 2 hours) before stacking or serving.
11. Chocolate Cyclops Cookies
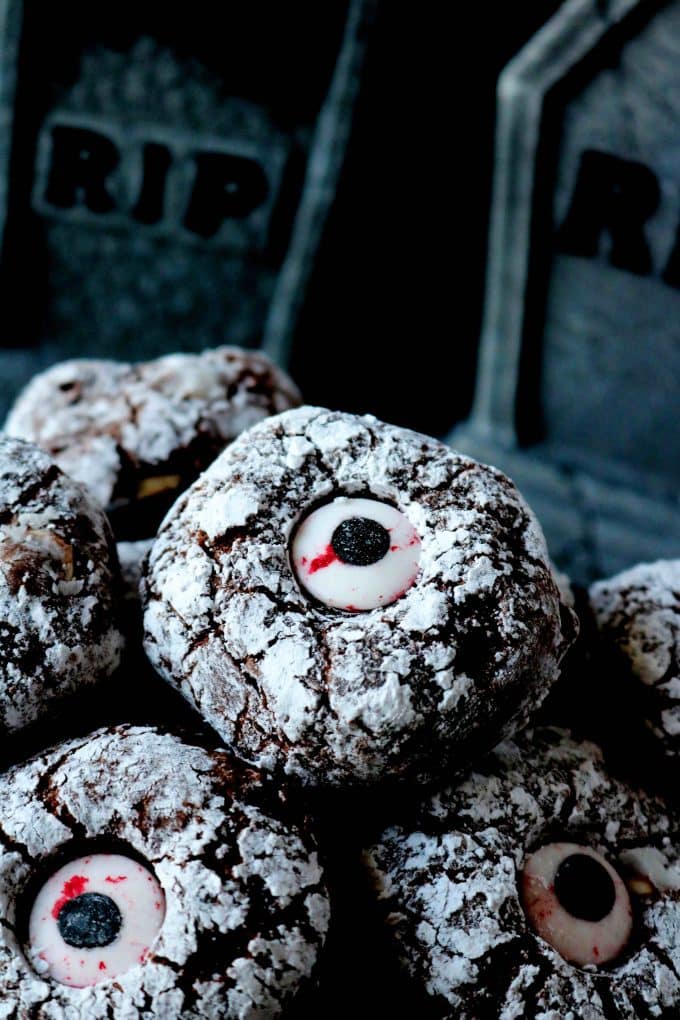
Dense, fudgy brownie-like chocolate cookies dusted with powdered sugar and topped with a single large candy eye in the centre — a minimalist Halloween cookie with maximum impact. This made the list because the cyclops concept is brilliant in its simplicity: one ingredient change (a single eye rather than two) transforms an ordinary decorated chocolate cookie into something genuinely Halloween-specific. The brownie-like texture is the other reason — these cookies have a dense, fudgy interior that is satisfying in a way that cake-mix-based cookies are not. They are also make-ahead and freezer-friendly, requiring only 20 minutes to thaw, which makes them one of the most practical options in this collection for advance preparation. The powdered sugar dusting goes on after baking and before the eye is applied — it creates the pale, spooky surface against which the single candy eye stares most effectively.
Ingredients:
- 1 cup semi-sweet chocolate chips, melted and cooled
- ¼ cup unsalted butter, softened
- ¾ cup granulated sugar, 2 large eggs, 1 teaspoon vanilla
- 1 cup all-purpose flour, ¼ teaspoon baking powder, pinch of salt
- Powdered sugar (for dusting), large candy eyes (one per cookie)
Instructions:
- Beat butter and sugar until combined. Add eggs and vanilla. Stir in melted chocolate. Fold in flour, baking powder, and salt until just combined. Chill the dough for 30 minutes.
- Roll tablespoon-sized balls and place on a parchment-lined sheet. Bake at 350°F for 10–12 minutes until set at the edges but still slightly soft in the centre.
- Cool completely. Dust each cookie surface with powdered sugar through a fine mesh sieve.
- Press one large candy eye firmly into the centre of each dusted cookie. The eye should be the undisputed focal point. Allow the powdered sugar to set before stacking. Freeze in an airtight container and thaw for 20 minutes before serving.
10. Hairy Spider Cookies
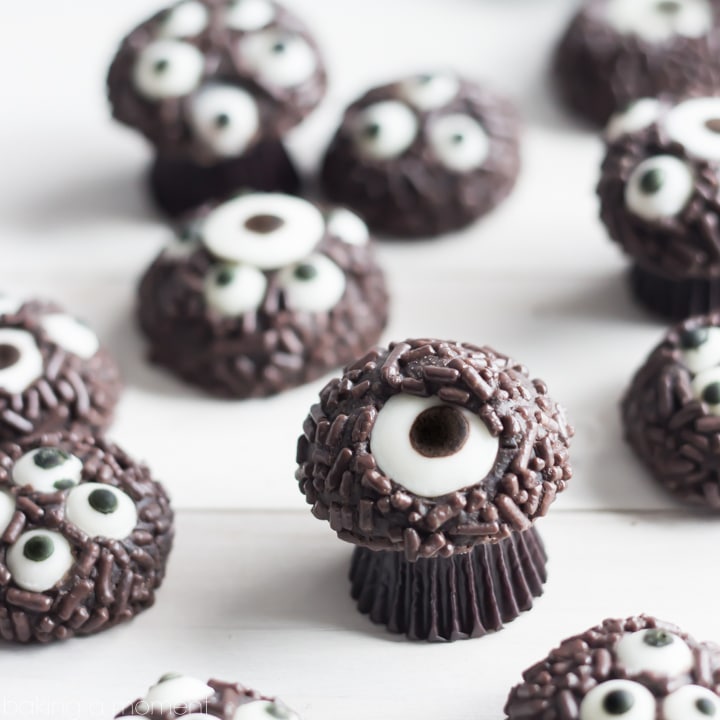
Fudgy dark chocolate dough rolled in chocolate sprinkles to create a hairy spider body texture, then topped with candy eyeballs — a Halloween cookie that is both genuinely delicious and visually unmistakable as a spider. This made the list because hairy spider cookies are genuinely clever in their technique: the chocolate sprinkles rolled onto the unbaked dough balls create a bristly, hair-like exterior when baked, producing a texture and visual that you cannot achieve with any other method. The interior has the same fudgy, Oreo-adjacent flavour that children love, and the candy eyes on top transform each ball into a convincing — and slightly unsettling — spider. No legs are required because the overall round, hairy-textured shape reads as a spider body immediately, which makes these significantly faster to assemble than any cookie requiring piped legs.
Ingredients:
- 1½ cups all-purpose flour, ½ cup unsweetened cocoa powder
- 1 cup butter, softened, 1 cup powdered sugar
- 1 teaspoon vanilla extract, ¼ teaspoon salt
- 1 cup chocolate sprinkles (for rolling)
- Candy eyeballs (2 per cookie)
Instructions:
- Beat butter and powdered sugar until smooth. Add vanilla. Mix in flour, cocoa, and salt until a soft dough forms. Chill for 30 minutes.
- Roll tablespoon-sized balls of dough. Roll each ball in chocolate sprinkles, pressing gently so the sprinkles adhere to the entire surface — cover completely for the fullest hairy spider effect.
- Place on a parchment-lined baking sheet and bake at 325°F for 14–16 minutes until set. Do not overbake — these should remain fudgy inside.
- While still warm, gently press 2 candy eyeballs into the top of each cookie. Cool completely before serving — the eyeballs will set securely as the cookie firms up.
9. Homemade Halloween Oreos
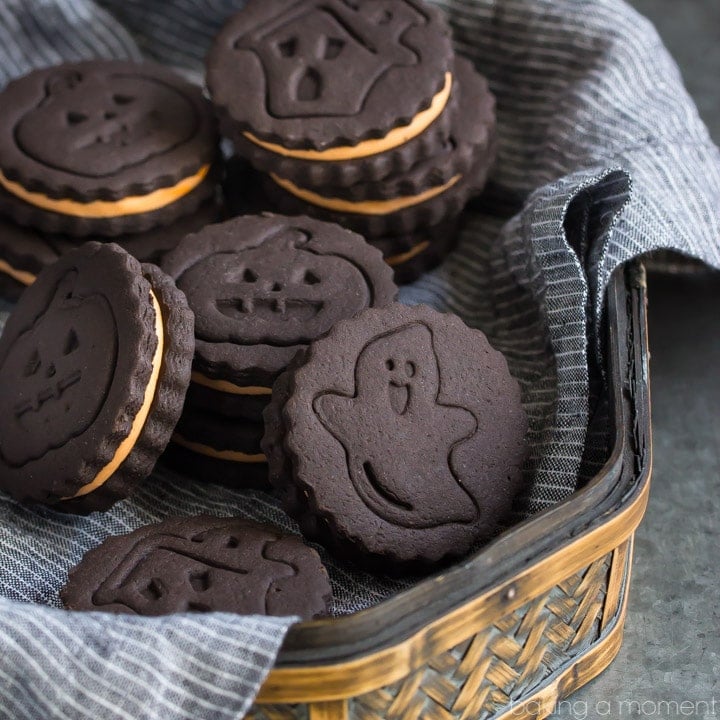
Homemade chocolate shortbread cookies sandwiched with orange-tinted vanilla cream filling — a Halloween Oreo that tastes better than the store-bought version and looks genuinely festive and celebratory. This made the list because homemade Halloween Oreos sit in the elevated tier of this collection — they take more effort than the cake mix cookies but the result is a genuinely superior product that anyone who loves Oreos will appreciate immediately. The deep chocolate flavour of the homemade shortbread base is more nuanced and less sweet than a commercial Oreo, and the orange cream filling is the Halloween visual that makes the whole thing work. Use Halloween-specific cookie stamp embossers for the cookie tops — pumpkin, bat, or ghost stamps create the festive design that makes these look like something from a specialty bakery.
Ingredients:
- 1¼ cups all-purpose flour, ½ cup Dutch process cocoa powder
- ¾ cup unsalted butter, ½ cup powdered sugar, ½ teaspoon salt
- Orange cream filling: ½ cup butter + 1.5 cups powdered sugar + 1 teaspoon vanilla + orange gel food colouring
Instructions:
- Process butter, flour, cocoa, powdered sugar, and salt until a dough forms. Wrap and chill 1 hour.
- Roll to ¼-inch thickness and cut into rounds. Press festive Halloween stamp patterns into half the rounds if desired. Bake at 325°F for 12–14 minutes. Cool completely.
- Beat the filling ingredients together until smooth, bright orange, and fluffy.
- Pipe or spread the orange filling onto the flat bottoms of the plain rounds. Sandwich with the stamped or plain tops, pressing gently. Chill for 30 minutes before serving for the filling to set.
8. Frankenstein Peanut Butter Cookies

Soft, chewy peanut butter cookies rolled in sugar and topped with a green Reese's Franken cup, candy eyes, and chocolate sprinkle hair — a Frankenstein cookie that is as good to eat as it is to look at. This made the list because Frankenstein peanut butter cookies are the only cookie in this collection that uses a seasonal Halloween candy product — Reese's Franken cups, available in October, are the centrepiece of the design and the combination of peanut butter cookie and Reese's peanut butter cup is one of the greatest flavour pairings in Halloween baking. The candy eyes pressed alongside the Franken cup and the chocolate sprinkle bolts on the sides complete the Frankenstein face with minimal decoration effort. Press the Reese's cup into the warm cookie immediately after it comes out of the oven — the heat softens the base of the cup and adheres it permanently to the cookie surface as it cools.
Ingredients:
- 1 cup smooth peanut butter, ½ cup butter, softened
- ½ cup granulated sugar + ½ cup brown sugar
- 1 large egg, 1 teaspoon vanilla
- 1½ cups all-purpose flour, 1 teaspoon baking soda, ¼ teaspoon salt
- Reese's Franken cups (green Halloween edition), candy eyes, chocolate sprinkles
Instructions:
- Beat butter, peanut butter, and both sugars until fluffy. Add egg and vanilla. Mix in flour, baking soda, and salt until a soft dough forms.
- Roll tablespoon-sized balls and roll each in granulated sugar. Place on a parchment-lined sheet.
- Bake at 375°F for 10–12 minutes until just set — do not overbake or the cookies will be too firm for the Reese's cup to embed properly.
- Remove from the oven and immediately press one Reese's Franken cup into the centre of each cookie. While the chocolate is still soft, press 2 candy eyes alongside the cup and press chocolate sprinkles along the sides as Frankenstein bolts. Cool completely.
7. Hocus Pocus Cookies

Soft, fluffy vanilla sugar cookies decorated to represent the iconic Sanderson Sisters from Hocus Pocus — with swirled orange, green, and pink frosting, Halloween sunglasses candy, and spooky candy eyes. This made the list as the pop-culture Halloween cookie for fans of the film — these are immediately recognisable to anyone who loves Hocus Pocus and create enormous excitement at any Halloween gathering where the film is beloved. The swirled frosting in the Sanderson Sisters' signature colour combination is the distinctive detail that makes these identifiable at a glance — use orange for Winifred, green for Mary, and pink for Sarah. The sunglasses candy and candy eyes complete the face design. These are a baking project that rewards slightly more effort with a result that generates the most Instagram-worthy photos of any cookie in this collection.
Ingredients:
- 2½ cups all-purpose flour, ¾ teaspoon baking powder, ¼ teaspoon salt
- 1 cup butter, softened, 1 cup granulated sugar, 1 egg, 1 teaspoon vanilla
- Vanilla buttercream: 2 cups powdered sugar + ½ cup butter + 2 tablespoons cream
- Gel food colouring: orange, green, and pink
- Halloween sunglasses candy shapes, candy eyes, and Halloween sprinkles
Instructions:
- Beat butter and sugar until fluffy. Add egg and vanilla. Mix in flour, baking powder, and salt. Chill for 1 hour. Roll to ¼-inch and cut into circles or oval shapes. Bake at 350°F for 10–12 minutes until just set. Cool completely.
- Divide the buttercream into three bowls and colour each orange, green, and pink respectively.
- Swirl the three coloured frostings together on each cookie using a spoon or offset spatula to create the signature Sisters colour swirl.
- Press a sunglasses candy shape into the swirled frosting, add 2 candy eyes above the sunglasses, and scatter Halloween sprinkles over the surface. Allow the frosting to set before serving.
6. Cars Land Haul-O-Ween Bat Cookies
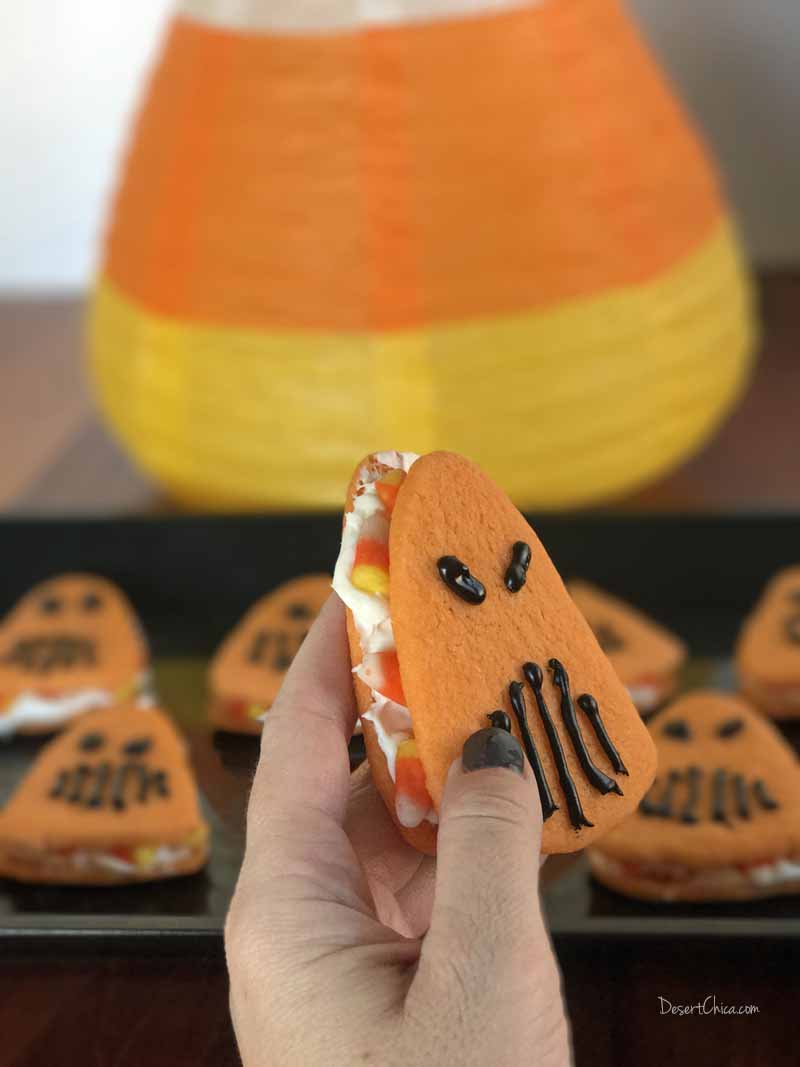
Shortbread cookies inspired by the Disneyland Cars Land Halloween treats — bat-shaped shortbread featuring mini Reese's cups as the bat body and candy eyes for a child-friendly Halloween dessert. This made the list as the family and child-oriented Halloween cookie that draws on beloved Disneyland nostalgia — families who have visited Cars Land at Halloween time will recognise the design immediately, and families who have not will simply see an extremely cute bat cookie that children can help assemble. The shortbread base is simple and easy, children can assist with mixing and shaping, and the candy decoration is straightforward enough for small hands to manage with guidance. Mini Reese's cups pressed into the centre of the bat shape as the body create both a recognisable bat silhouette and an irresistible peanut butter chocolate flavour at the centre of each cookie.
Ingredients:
- 2 cups all-purpose flour, ½ cup powdered sugar, ¼ teaspoon salt
- 1 cup unsalted butter, softened, 1 teaspoon vanilla extract
- Mini Reese's cups, unwrapped (one per cookie)
- Candy eyes (2 per cookie)
- Bat-shaped cookie cutter (or cut bat wings freehand from the dough)
Instructions:
- Beat butter, powdered sugar, and vanilla until smooth. Mix in flour and salt until a shortbread dough forms. Chill for 30 minutes.
- Roll to ¼-inch thickness and cut with a bat-shaped cookie cutter. Place on a parchment-lined sheet.
- Bake at 325°F for 12–15 minutes until just set and very lightly golden at the edges. Cool completely.
- Press one mini Reese's cup upside-down into the centre of each bat cookie as the body. Press 2 candy eyes above the Reese's cup. The eyes should look out from above the bat body. Serve immediately or store in an airtight container for up to 3 days.
5. Candy Corn Cookies
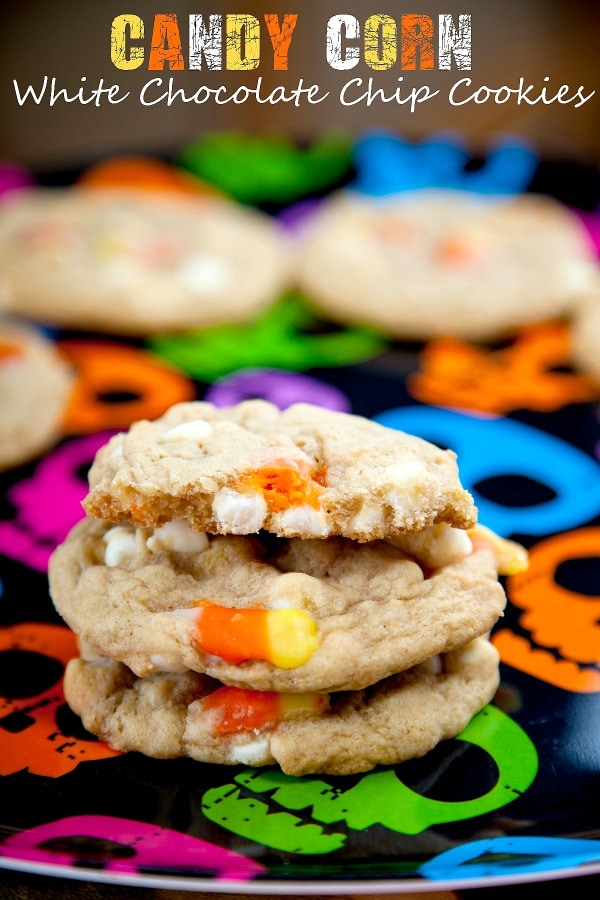
Soft and chewy cookies loaded with white chocolate chips and candy corn — a genuinely satisfying Halloween cookie that doubles as the perfect vehicle for leftover trick-or-treat candy. This made the list because candy corn cookies occupy the quintessential American Halloween flavour space — candy corn is one of the most divisive Halloween candies but as a mix-in to a chewy cookie base it works beautifully, the white chocolate providing creaminess and sweetness that rounds out the waxy candy corn texture. These are the cookies to make with children in the days after Halloween when the candy bowl is overflowing — fold in whatever Halloween candy is available alongside the candy corn for a genuinely everything-Halloween-cookie. The candy corn softens during baking and the bits melt into pockets of orange, yellow, and white sweetness throughout the cookie.
Ingredients:
- 2¼ cups all-purpose flour, 1 teaspoon baking soda, ½ teaspoon salt
- 1 cup butter, softened, ¾ cup granulated sugar + ¾ cup brown sugar
- 2 large eggs, 1 teaspoon vanilla extract
- 1 cup white chocolate chips
- 1 cup candy corn (plus extra for pressing on top before baking)
Instructions:
- Beat butter and both sugars until light and fluffy. Add eggs and vanilla. Mix in flour, baking soda, and salt.
- Fold in white chocolate chips and 1 cup of candy corn gently — fold minimally to prevent the candy corn from breaking apart too much in the dough.
- Scoop tablespoon-sized balls onto a parchment-lined sheet. Press 3–4 additional candy corn pieces onto the top of each ball for visual effect.
- Bake at 375°F for 9–11 minutes until golden at the edges and just set in the centre. Cool on the tray for 5 minutes before transferring — the candy corn needs time to firm back up. Store in an airtight container for up to 5 days.
4. Easy Brownie Mix Halloween Cookies
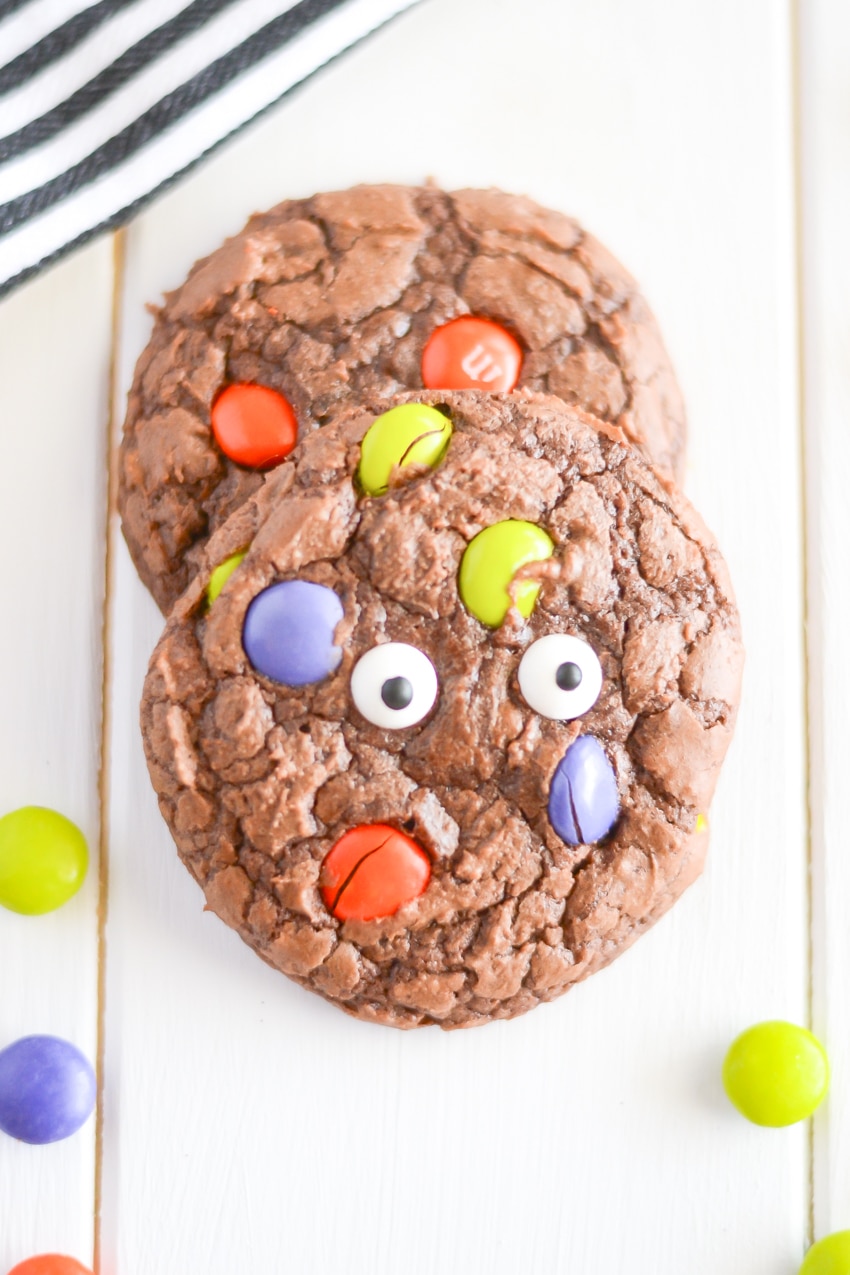
A boxed brownie mix transformed into fudgy, dense Halloween cookies studded with Halloween M&Ms, seasonal candy, and candy eyeballs — a brookie-style cookie that delivers maximum brownie richness with minimum effort. This made the list because brownie mix cookies are one of the most reliably satisfying shortcuts in baking — the brownie mix produces a cookie that is significantly fudgier and more intensely chocolatey than any standard cookie dough, and the format means even someone who has never baked before can produce an impressive result. The Halloween candy additions are entirely customisable based on what is available — any combination of orange M&Ms, black M&Ms, Halloween sprinkles, and candy eyes creates a visually festive cookie. These are the cookies to make when time is short and the need for impressive Halloween baked goods is immediate.
Ingredients:
- 1 box (18–20 oz) brownie mix
- ¼ cup neutral oil
- 2 large eggs
- 2 tablespoons all-purpose flour (for firmer cookie texture)
- Halloween M&Ms, seasonal candy, and candy eyeballs
Instructions:
- Combine brownie mix, oil, eggs, and flour until a thick, sticky dough forms. Do not add water — the reduced liquid is what makes these cookies rather than brownies.
- Fold in half the Halloween M&Ms and candy. The dough will be very thick — this is correct.
- Scoop tablespoon-sized mounds onto a parchment-lined sheet — these spread significantly, so leave at least 3 inches between each cookie.
- Press additional M&Ms and candy eyeballs onto the top of each mound. Bake at 350°F for 10–12 minutes until the edges are set but the centre is still slightly underdone — they will firm as they cool and the fudgy centre is the best part. Cool completely on the tray before serving.
3. Chocolate Chip Halloween Cookie Sandwiches
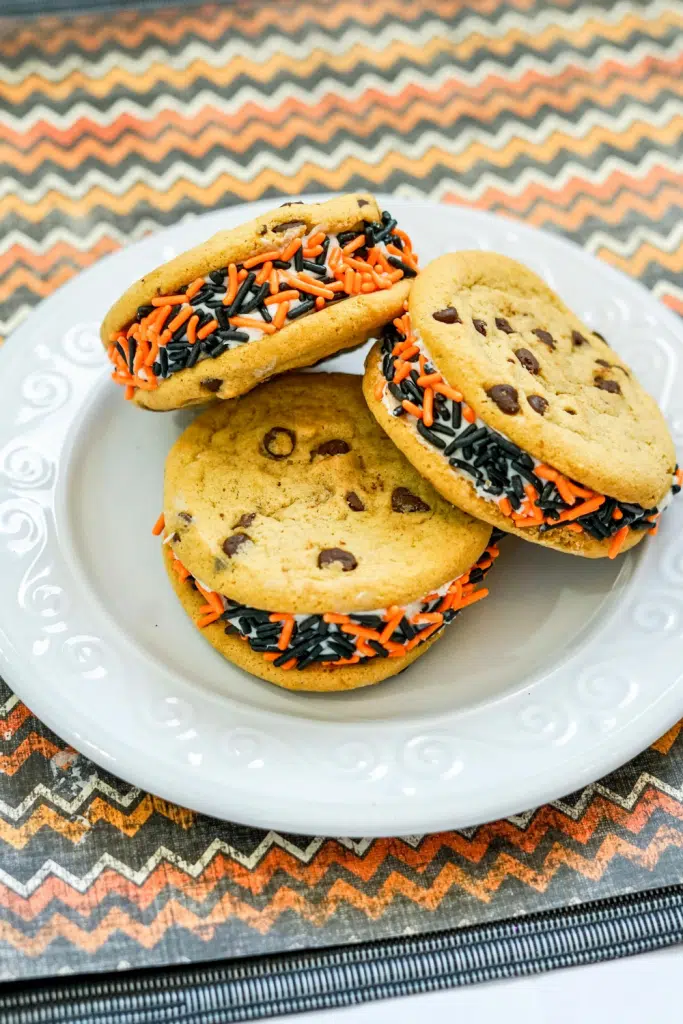
Classic chewy chocolate chip cookies sandwiched with orange Halloween frosting and rolled in Halloween sprinkles — a genuinely irresistible cookie sandwich that transforms a universally beloved recipe into a festive seasonal treat. This made the list because chocolate chip Halloween sandwich cookies solve the party cookie dilemma with elegance — everyone already loves chocolate chip cookies, and the orange frosting and sprinkle coating make them look completely Halloween-specific without introducing any unfamiliar flavour. The sandwich format makes them feel more substantial and special than a standard cookie, and the sprinkle-coated exterior means every batch looks consistent and professional without any individual decoration effort. Match cookie pairs by size before sandwiching for the most uniform and attractive results.
Ingredients:
- 2¼ cups all-purpose flour, 1 teaspoon baking soda, ½ teaspoon salt
- 1 cup butter, softened, ¾ cup granulated sugar + ¾ cup brown sugar
- 2 large eggs, 1 teaspoon vanilla
- 2 cups semi-sweet chocolate chips
- Orange frosting: ½ cup butter + 2 cups powdered sugar + 2 tablespoons cream + orange gel food colouring
- Halloween sprinkle mix
Instructions:
- Make standard chocolate chip cookies — beat butter and sugars, add eggs and vanilla, mix in flour and baking soda, fold in chocolate chips. Scoop into tablespoon-sized balls and bake at 375°F for 9–11 minutes. Cool completely.
- Beat the orange frosting ingredients until smooth, fluffy, and vivid orange.
- Spread or pipe frosting on the flat bottom of one cookie. Press a matching-size cookie on top, flat-side down, and press gently to create a sandwich with frosting visible around the edges.
- Pour Halloween sprinkles onto a plate. Roll the exposed frosting edge of each sandwich in the sprinkles to coat the entire circumference. Refrigerate for 30 minutes before serving to firm up the frosting.
2. Halloween Pinwheel Cookies

Homemade orange and black cookie doughs swirled together, rolled into a log, chilled, and sliced into dramatic pinwheel cookies — a visually stunning Halloween baking project that produces up to 80 cookies from a single batch. This made the list as the most technically satisfying Halloween cookie to make — the swirled dough log looks impressive on the counter before slicing, and each cookie reveals a perfect pinwheel cross-section that looks genuinely complex despite requiring nothing beyond basic dough rolling skills. The black dough is coloured with black gel food colouring and the orange with orange gel, producing the quintessential Halloween colour combination in every single cookie. The refrigerator is what does the technical work — the chilled dough log slices cleanly and maintains the pinwheel pattern perfectly. Make 2–3 days ahead and refrigerate the unbaked log, slicing and baking as needed.
Ingredients:
- 3 cups all-purpose flour, 1 teaspoon baking powder, ½ teaspoon salt
- 1 cup butter, softened, 1 cup granulated sugar
- 1 large egg, 2 teaspoons vanilla extract, 2 tablespoons milk
- Black gel food colouring (enough for deep black)
- Orange gel food colouring
Instructions:
- Beat butter and sugar. Add egg, vanilla, and milk. Mix in flour, baking powder, and salt until a soft dough forms. Divide exactly in half.
- Colour one half black and one half orange with gel food colouring, kneading each thoroughly until the colour is completely uniform.
- Roll each coloured dough into an equal-sized rectangle of identical dimensions — approximately 10×12 inches. Lay the orange rectangle over the black, aligning perfectly. Roll both layers tightly together into a log starting from the long edge. Wrap in plastic wrap and refrigerate for at least 2 hours or overnight.
- Preheat oven to 350°F. Slice the chilled log into ¼-inch rounds with a sharp knife — each slice reveals the pinwheel pattern. Place on a parchment-lined sheet and bake for 10–12 minutes until just set. Cool on the tray.
1. Mummy Milano Cookies
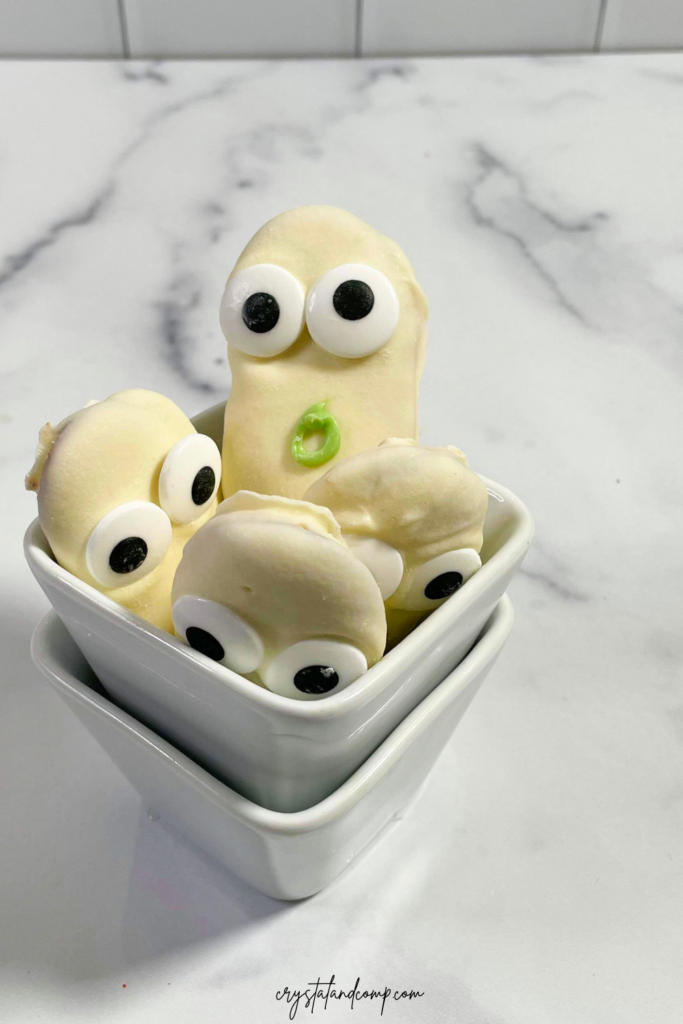
Milano cookies dipped and drizzled in white chocolate to look like mummy wrappings, finished with small candy eyes — the most elegant and effortless Halloween cookie in this collection. This earns the top spot because mummy Milano cookies are genuinely the most impressive-to-effort ratio recipe in the collection: they require no baking, no measuring, and no special skills, yet the finished result looks professional, photographs beautifully, and tastes as good as it looks. The Pepperidge Farm Milano is already a premium cookie — almond-flavoured shortbread sandwiched with chocolate — and the white chocolate mummy treatment transforms it into a genuinely special Halloween treat that looks nothing like the store-bought version. These are also the cookies to put in a cellophane bag with a ribbon for elegant Halloween gifting or to package as classroom treats. The candy eyes pressed into the still-wet white chocolate are the detail that makes each cookie come alive.
Ingredients:
- 1 package Pepperidge Farm Milano cookies
- 2 cups white chocolate chips or white melting wafers
- 1 tablespoon coconut oil or neutral oil (for thinning the chocolate)
- Candy eyes (2 per cookie)
Instructions:
- Melt the white chocolate with the oil in a microwave in 30-second bursts, stirring between each, until completely smooth and pourable. The oil thins the chocolate to a dipping consistency — without it the chocolate sets too thick and does not create clean drizzle lines.
- Dip the bottom half of each Milano cookie in the melted white chocolate, allowing the excess to drip off. Place on a parchment-lined tray.
- Using a spoon or a piping bag with a tiny tip, drizzle thin lines of white chocolate across the undipped top half of each cookie in a criss-cross pattern to simulate mummy bandage wrapping.
- While the chocolate is still wet, press 2 candy eyes into the undipped end of each cookie where the mummy face would be. Allow to set completely at room temperature or refrigerate for 15 minutes for a faster set. These keep in an airtight container for up to 1 week.
Curious for more? Our recipe collection awaits you here!





Comments
No Comments