
Summer BBQ season in our house is less about the grill itself and more about the argument that happens around it — my husband wants meat on every rack, and I'm trying to slide vegetables in wherever I can find space. Over the years I've gotten better at this negotiation, mostly because I've figured out that grilled vegetables don't have to be an afterthought. When they're done right — proper heat, the right oil, enough char — they become the thing people reach for first. I've watched guests pile their plates with grilled corn and mushrooms before they even looked at the burgers.
What makes a grilled vegetable recipe actually worth making? For me it comes down to three things: the vegetable has to be cooked through without turning to mush, there has to be real char and smokiness, and the seasoning has to do some work. A drizzle of olive oil and a pinch of salt is fine, but it's not interesting. The recipes I keep coming back to have a sauce, a drizzle, a spice blend, or a finishing element that makes the vegetable feel like a full dish rather than a side that got forgotten on the grill. If you're looking for more easy summer sides, my summer side dishes post has some good starting points too.
This list covers 17 grilled vegetable recipes that I've tested across multiple BBQ seasons — everything from garlic butter corn and smoky portobello mushrooms to grilled cauliflower steaks with chimichurri and grilled avocado with pico de gallo. There's something here for every kind of cook: quick weeknight grilling, showstopper sides for a crowd, and a few that are hearty enough to stand in as a vegetarian main. I've also included a Mediterranean grilled vegetable flatbread that Zainab now requests every time we fire up the grill. For more ideas on building a full BBQ spread, check out my BBQ side dishes roundup and my post on easy vegetarian dinner recipes.
Here are the ones I keep coming back to every summer — pick whichever fits your grill and your crowd.
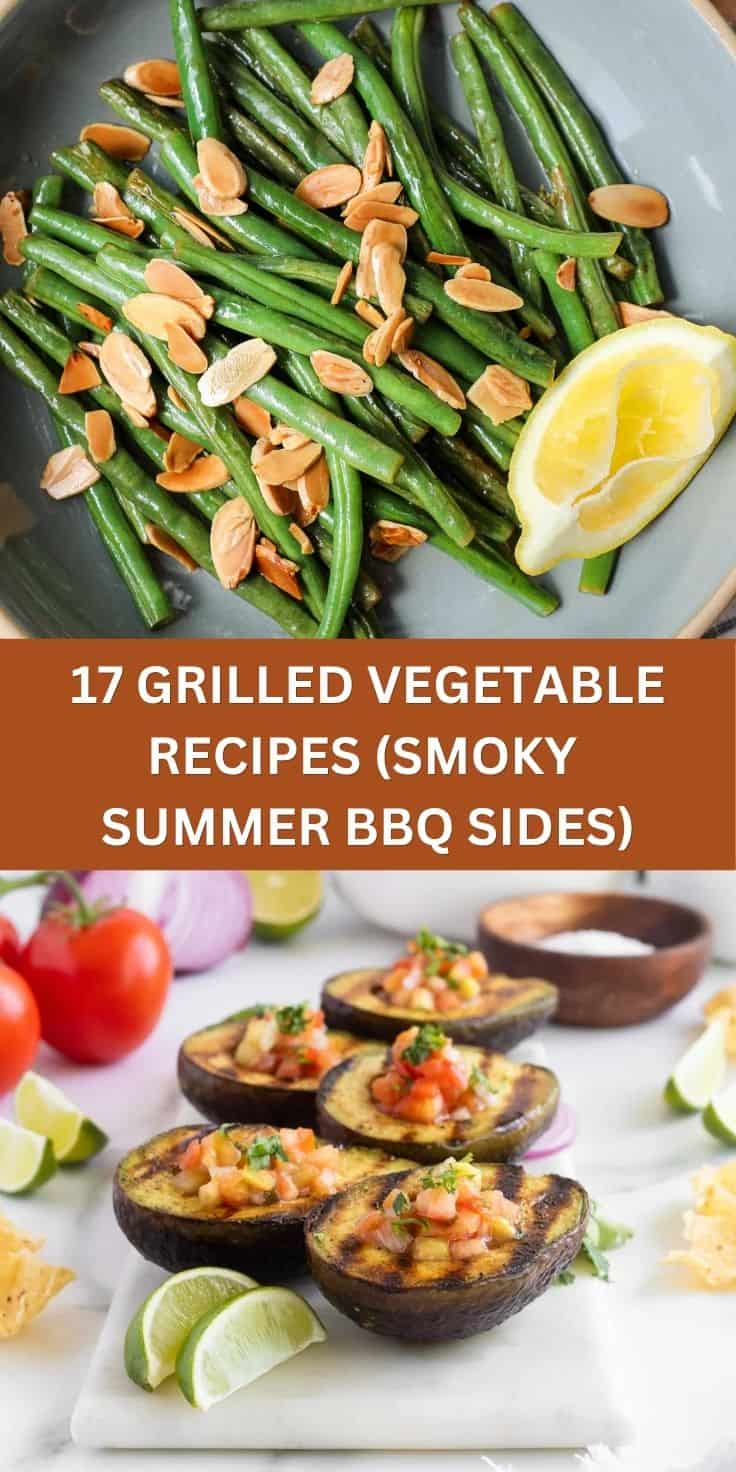
Grilled Vegetable Recipes Worth Making This Summer
17. Garlic Butter Grilled Corn on the Cob

Grilled corn is one of those things that sounds too simple to mention — and yet every time I put it on the table, it disappears before anything else. The secret is the garlic butter baste you brush on while the corn is still on the grill, right when the kernels start showing those dark, smoky char marks. That butter hits the hot cob and sizzles, pulling in the garlic and coating every single kernel. I learned the hard way not to soak the corn first — it steams instead of charring, and you lose that whole smoky edge that makes this worth grilling instead of boiling.
Ingredients
- 4 ears of fresh corn, husked
- 4 tablespoons unsalted butter, melted
- 3 cloves garlic, minced (or ½ teaspoon garlic powder)
- 1 tablespoon olive oil
- ½ teaspoon salt
- ¼ teaspoon black pepper
- 2 tablespoons fresh parsley, chopped (optional)
- Flaky sea salt for finishing
Instructions
- Preheat your grill to medium-high heat (around 400°F). Brush the husked corn lightly with olive oil and season with salt and pepper.
- Place corn directly on the grill grates. Cook for 10–12 minutes total, turning every 2–3 minutes so all sides get color.
- While the corn grills, stir together the melted butter and minced garlic in a small bowl.
- In the last 3 minutes of grilling, brush the garlic butter generously over the corn, turning once more to let it caramelize slightly onto the kernels.
- Remove from the grill, brush with any remaining garlic butter, scatter fresh parsley on top, and finish with a pinch of flaky salt before serving.
16. Smoky Balsamic Grilled Portobello Mushrooms
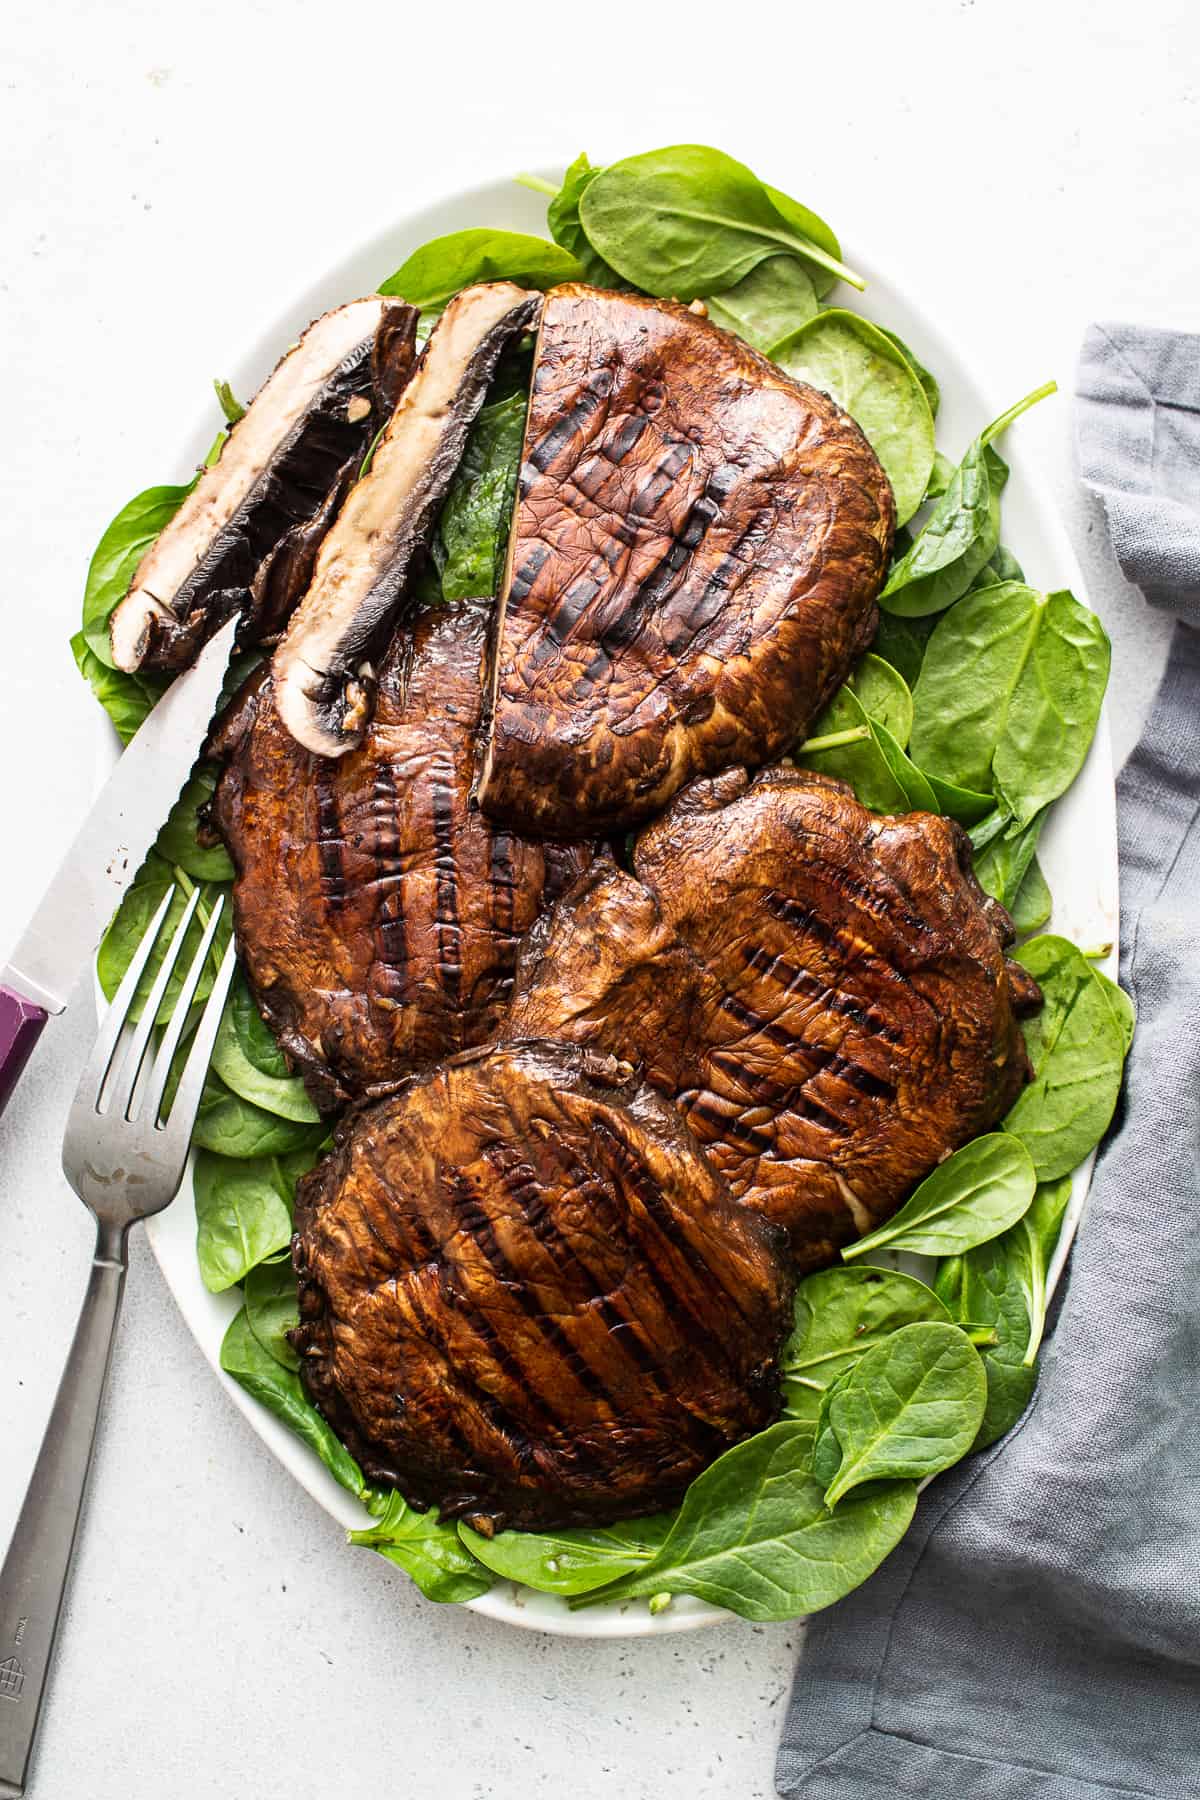
Portobellos are one of the most satisfying things you can throw on a grill — they have this meaty, dense texture that holds up to high heat and actually gets better with char. The balsamic marinade here does two things: it adds a tangy-sweet depth, and it helps the mushroom **caramelize beautifully** on the outside while staying juicy in the middle. I marinate them cap-side down so the gills soak up as much of that flavor as possible — at least 20 minutes, longer if you have time. These work as a side, but honestly, slice them thick and pile them onto a crusty roll and you've got a proper dinner.
Ingredients
- 4 large portobello mushroom caps, stems removed
- 3 tablespoons balsamic vinegar
- 2 tablespoons olive oil
- 2 cloves garlic, minced
- 1 teaspoon soy sauce
- ½ teaspoon smoked paprika
- ½ teaspoon salt
- ¼ teaspoon black pepper
- Fresh thyme or rosemary for serving
Instructions
- Whisk together balsamic vinegar, olive oil, garlic, soy sauce, smoked paprika, salt, and pepper in a shallow dish or zip-lock bag.
- Add the mushroom caps gill-side down into the marinade. Let them sit for at least 20 minutes at room temperature, or up to 2 hours in the fridge.
- Preheat grill to medium-high heat (about 400°F). Remove mushrooms from marinade and shake off excess — don't discard the marinade.
- Grill gill-side up first for 4–5 minutes, then flip and grill another 4–5 minutes until the caps are tender and show good char marks. Brush with remaining marinade halfway through the second side.
- Remove from grill, let rest 2 minutes, then slice or serve whole with fresh thyme scattered on top.
15. Charred Lemon Herb Grilled Asparagus
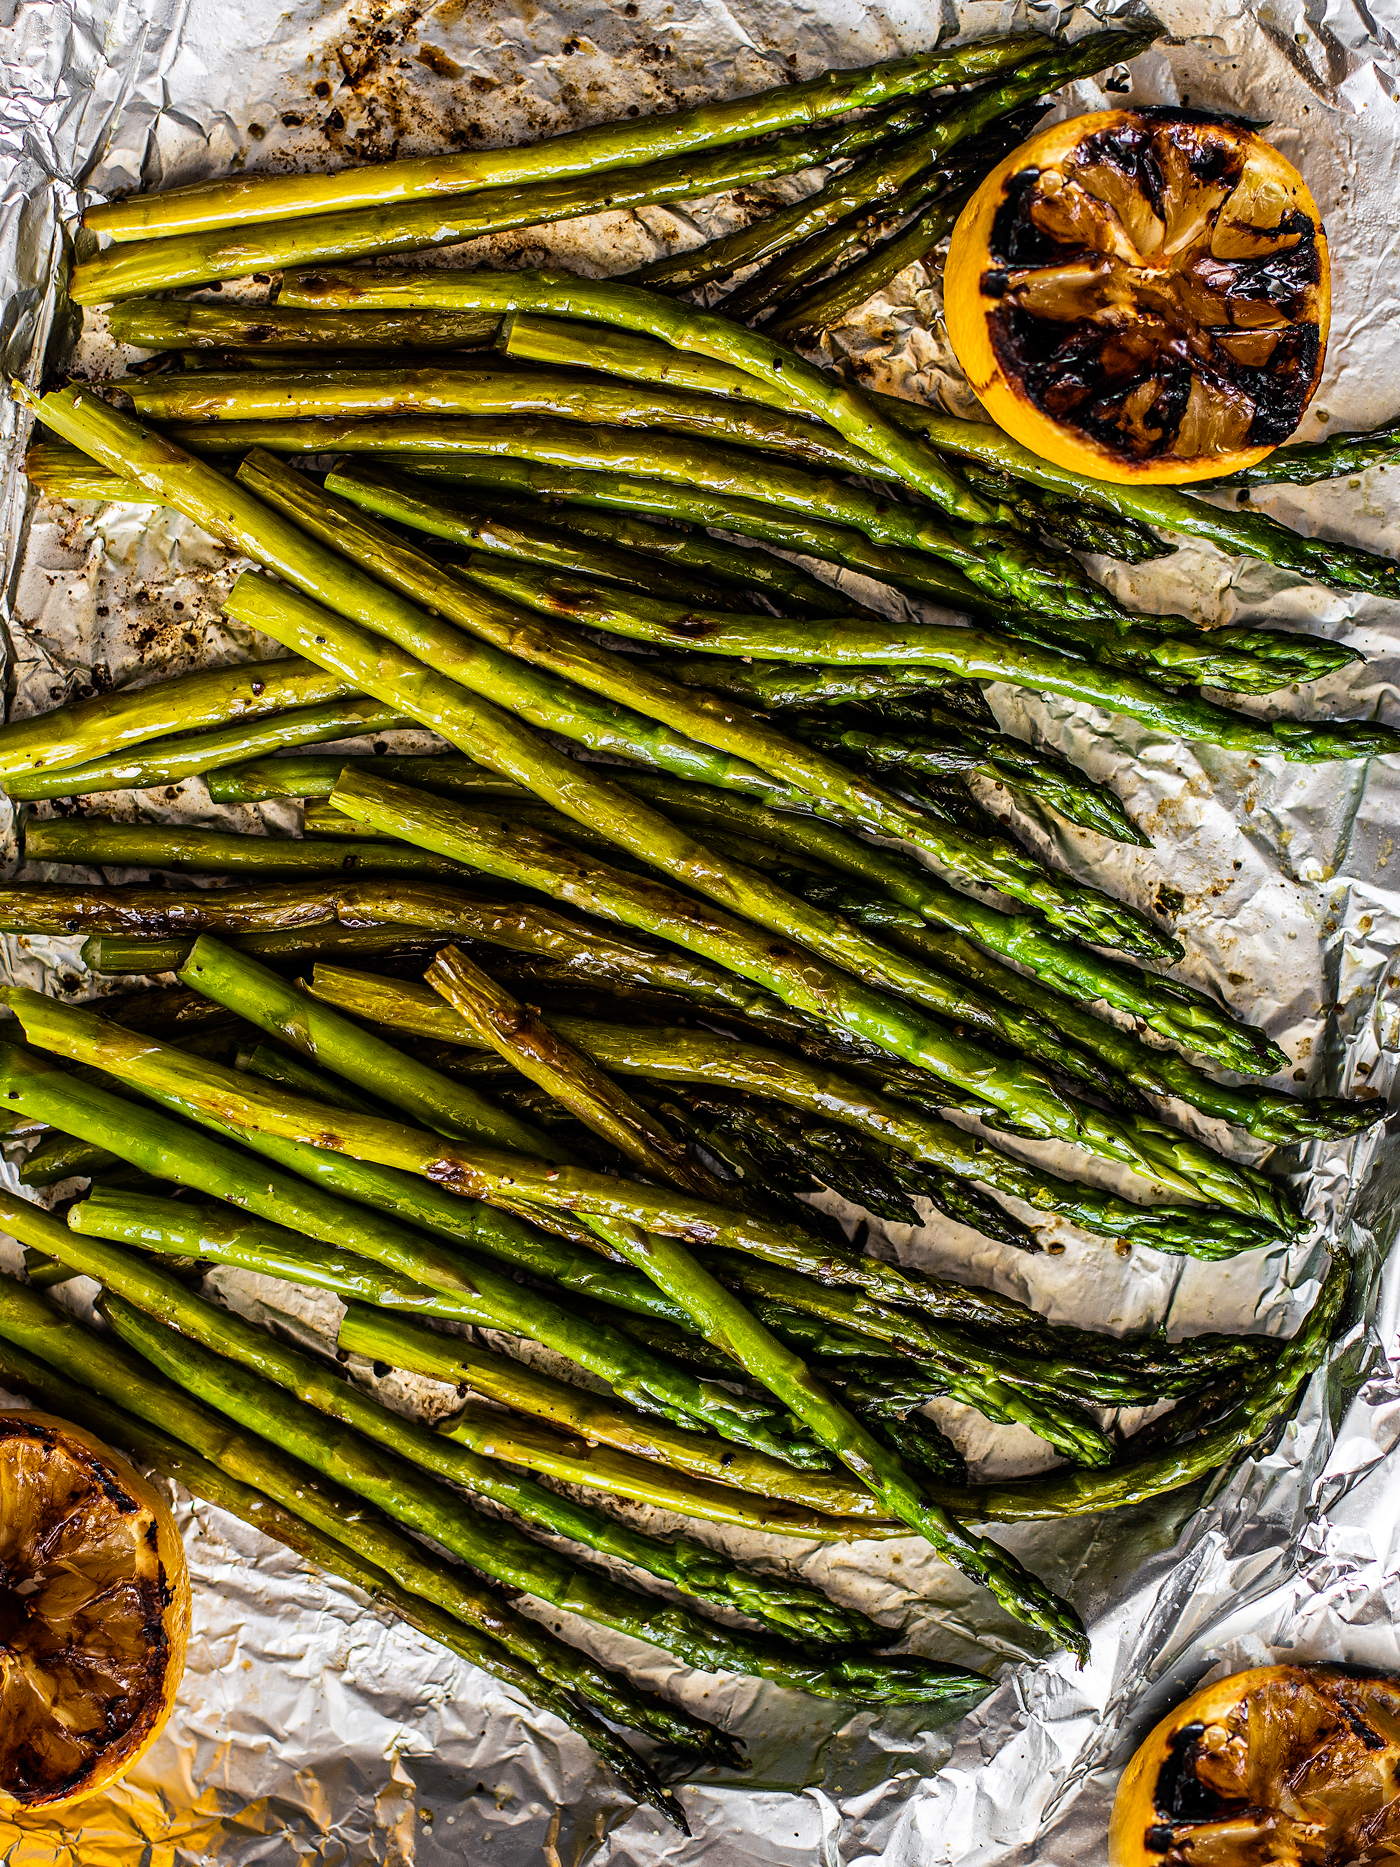
Asparagus on the grill takes maybe eight minutes and looks like something you'd pay for at a restaurant. The key thing most people skip is **grilling the lemon halves cut-side down** alongside the asparagus — when citrus hits a hot grill grate, the sugars caramelize and the juice turns slightly sweet and smoky. Squeezing that over the hot spears right before serving makes a real difference. Pick medium-thick stalks here — the pencil-thin ones fall through the grates or overcook before you can blink, and the very thick ones stay raw in the middle by the time the outside is charred.
Ingredients
- 1 lb asparagus, woody ends trimmed (medium-thick stalks preferred)
- 2 tablespoons olive oil
- 3 cloves garlic, minced
- 1 teaspoon fresh thyme leaves (or ½ teaspoon dried)
- 1 tablespoon fresh flat-leaf parsley, chopped
- ½ teaspoon salt
- ¼ teaspoon black pepper
- 1 lemon, halved
- Parmesan shavings for serving (optional)
Instructions
- Toss trimmed asparagus with olive oil, garlic, thyme, salt, and pepper in a bowl until evenly coated.
- Preheat grill to medium-high (around 400–425°F). Place asparagus perpendicular to the grill grates so they don't fall through. Place lemon halves cut-side down on the grill at the same time.
- Grill asparagus for 3–4 minutes, then roll them over with tongs and grill another 3–4 minutes. They're done when you see good char marks and the stalks are just tender — they should still have a little bite, not be floppy.
- Remove asparagus and lemon from the grill. Immediately squeeze the charred lemon halves over the asparagus.
- Scatter fresh parsley and Parmesan shavings over the top and serve right away.
14. Grilled Zucchini with Parmesan and Basil
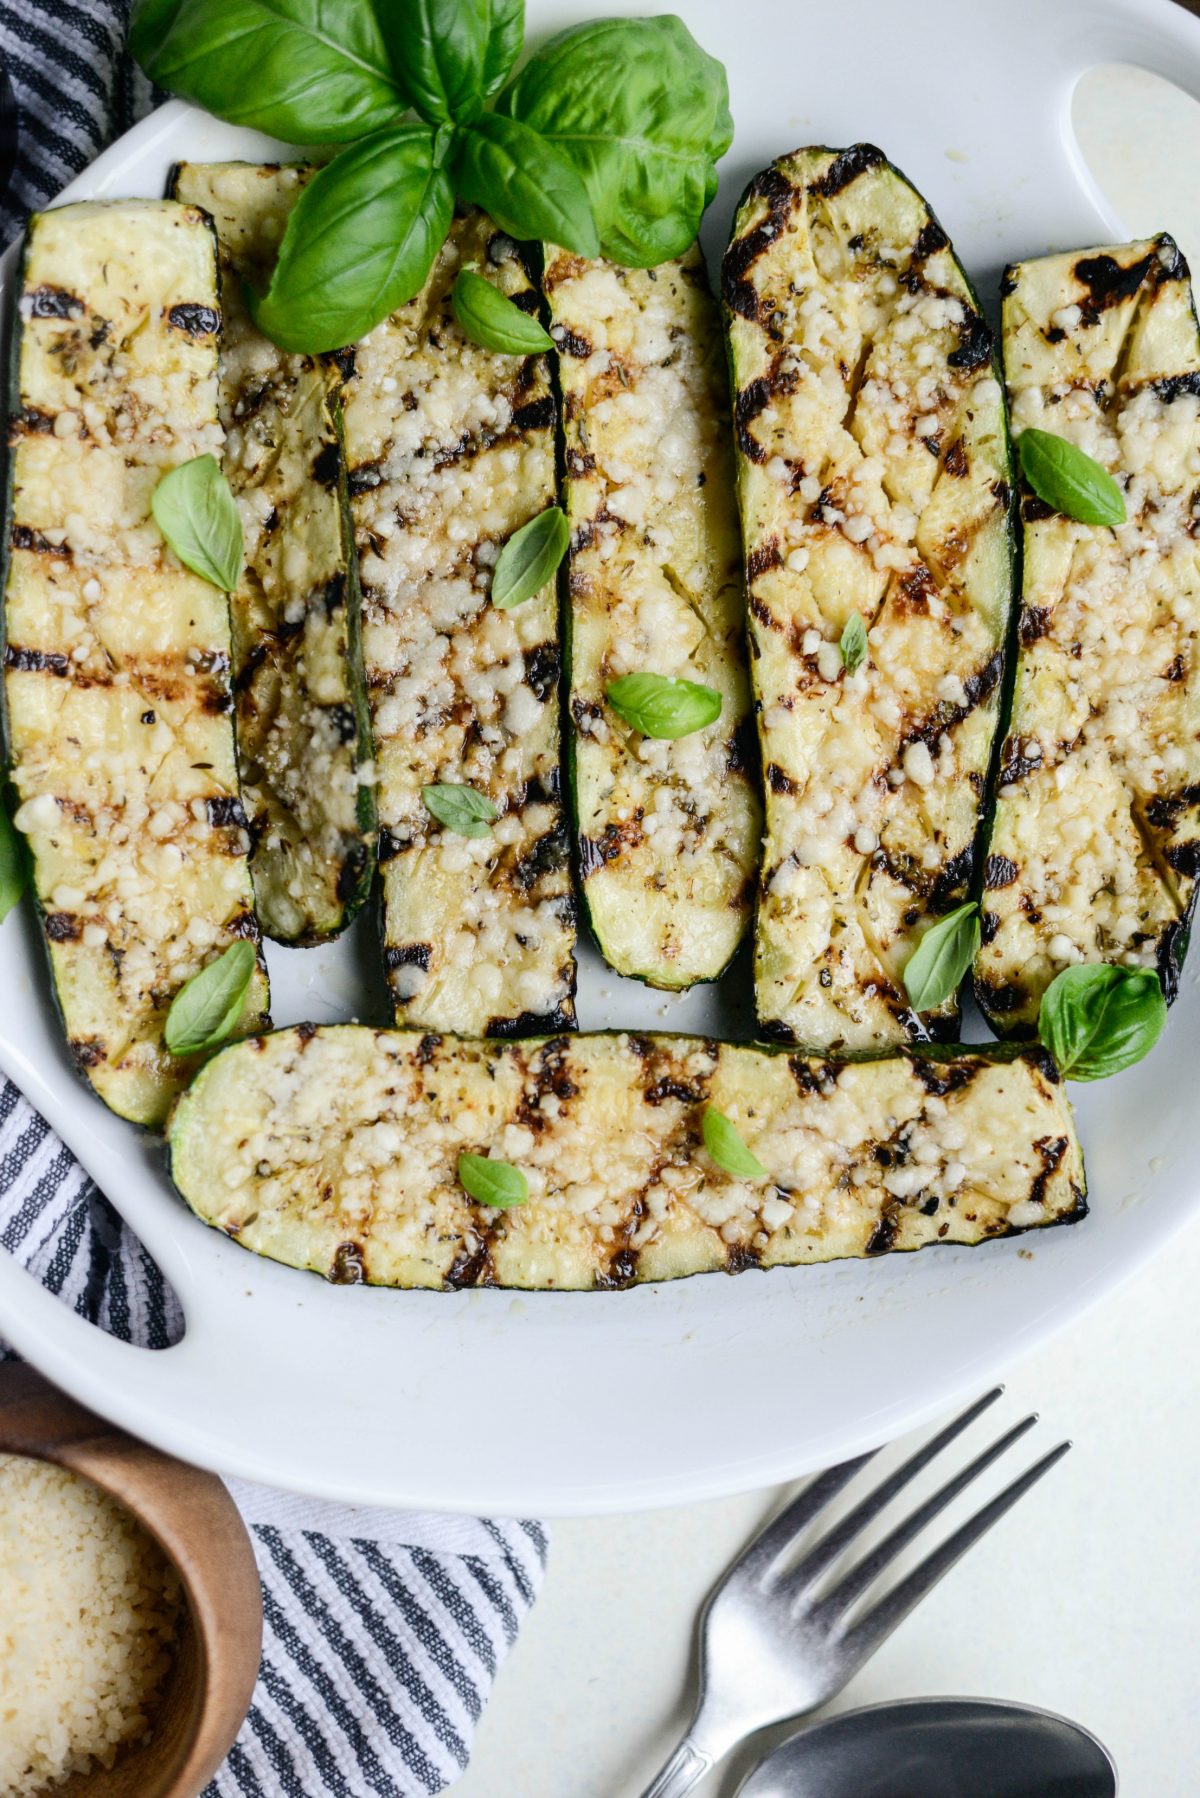
Zucchini is one of those vegetables that needs almost nothing — a hot grill and a little salt do most of the work. What takes it from fine to genuinely good is **salting the slices for 10 minutes before grilling** to draw out excess moisture, patting them dry, and then letting the grill do its job without moving them around. The Parmesan goes on while the slices are still warm and slightly steaming, so it softens just enough to cling to the surface rather than sitting on top like a dry sprinkle. I slice mine on a diagonal — wider slices that won't slip through the grates and have more surface area for char.
Ingredients
- 3 medium zucchini, sliced diagonally ½ inch thick
- 2 tablespoons olive oil
- ½ teaspoon salt (plus extra for drawing out moisture)
- ¼ teaspoon black pepper
- ¼ teaspoon garlic powder
- ¼ cup freshly grated Parmesan
- ¼ cup fresh basil leaves, torn
- 1 teaspoon lemon zest
- Red pepper flakes to taste (optional)
Instructions
- Lay zucchini slices on a sheet pan, sprinkle lightly with salt, and let sit for 10 minutes. Pat completely dry with paper towels — this is what prevents them from steaming on the grill.
- Toss dried zucchini with olive oil, salt, pepper, and garlic powder until coated.
- Preheat grill to medium-high (400°F). Grill zucchini slices for 3–4 minutes per side without moving them, until defined grill marks appear and the slices are tender but not mushy.
- Transfer hot zucchini to a platter. Immediately sprinkle with Parmesan and lemon zest so the cheese softens slightly from the heat.
- Scatter torn basil on top, add red pepper flakes if you like heat, and serve warm.
13. Spicy Grilled Broccoli with Sesame Drizzle

Broccoli on the grill was something I resisted for a long time — I was convinced it would just burn on the outside and stay raw in the middle. Turns out the trick is cutting your florets larger than you think you need to (bigger surface area, slower burn) and keeping the heat at medium rather than blasting it. The sesame drizzle here is a simple mix of toasted sesame oil, soy sauce, and a little rice vinegar that you spoon over the hot florets right off the grill. It soaks into the charred edges and ties the whole thing together. Saad, who normally refuses most vegetables that aren't corn, actually ate a full serving of this. That alone earned it a permanent spot in our rotation.
Ingredients
- 1 large head broccoli, cut into large florets (stems on)
- 2 tablespoons olive oil
- ½ teaspoon chili flakes (or more to taste)
- ½ teaspoon garlic powder
- ½ teaspoon salt
- 1 tablespoon toasted sesame oil
- 1 tablespoon soy sauce
- 1 teaspoon rice vinegar
- 1 teaspoon honey
- 1 tablespoon sesame seeds, toasted
Instructions
- Toss broccoli florets with olive oil, chili flakes, garlic powder, and salt. Make sure the florets are large enough not to fall through the grates — if in doubt, use a grill basket or skewers.
- In a small bowl, whisk together sesame oil, soy sauce, rice vinegar, and honey. Set aside.
- Preheat grill to medium heat (around 375°F). Grill broccoli for 4–5 minutes per side, turning once, until charred in spots and just tender when pierced with a fork.
- Transfer florets to a serving plate. Spoon the sesame drizzle over the top while they're still hot.
- Scatter toasted sesame seeds over everything and serve immediately.
12. Sweet Chili Grilled Bell Pepper Skewers
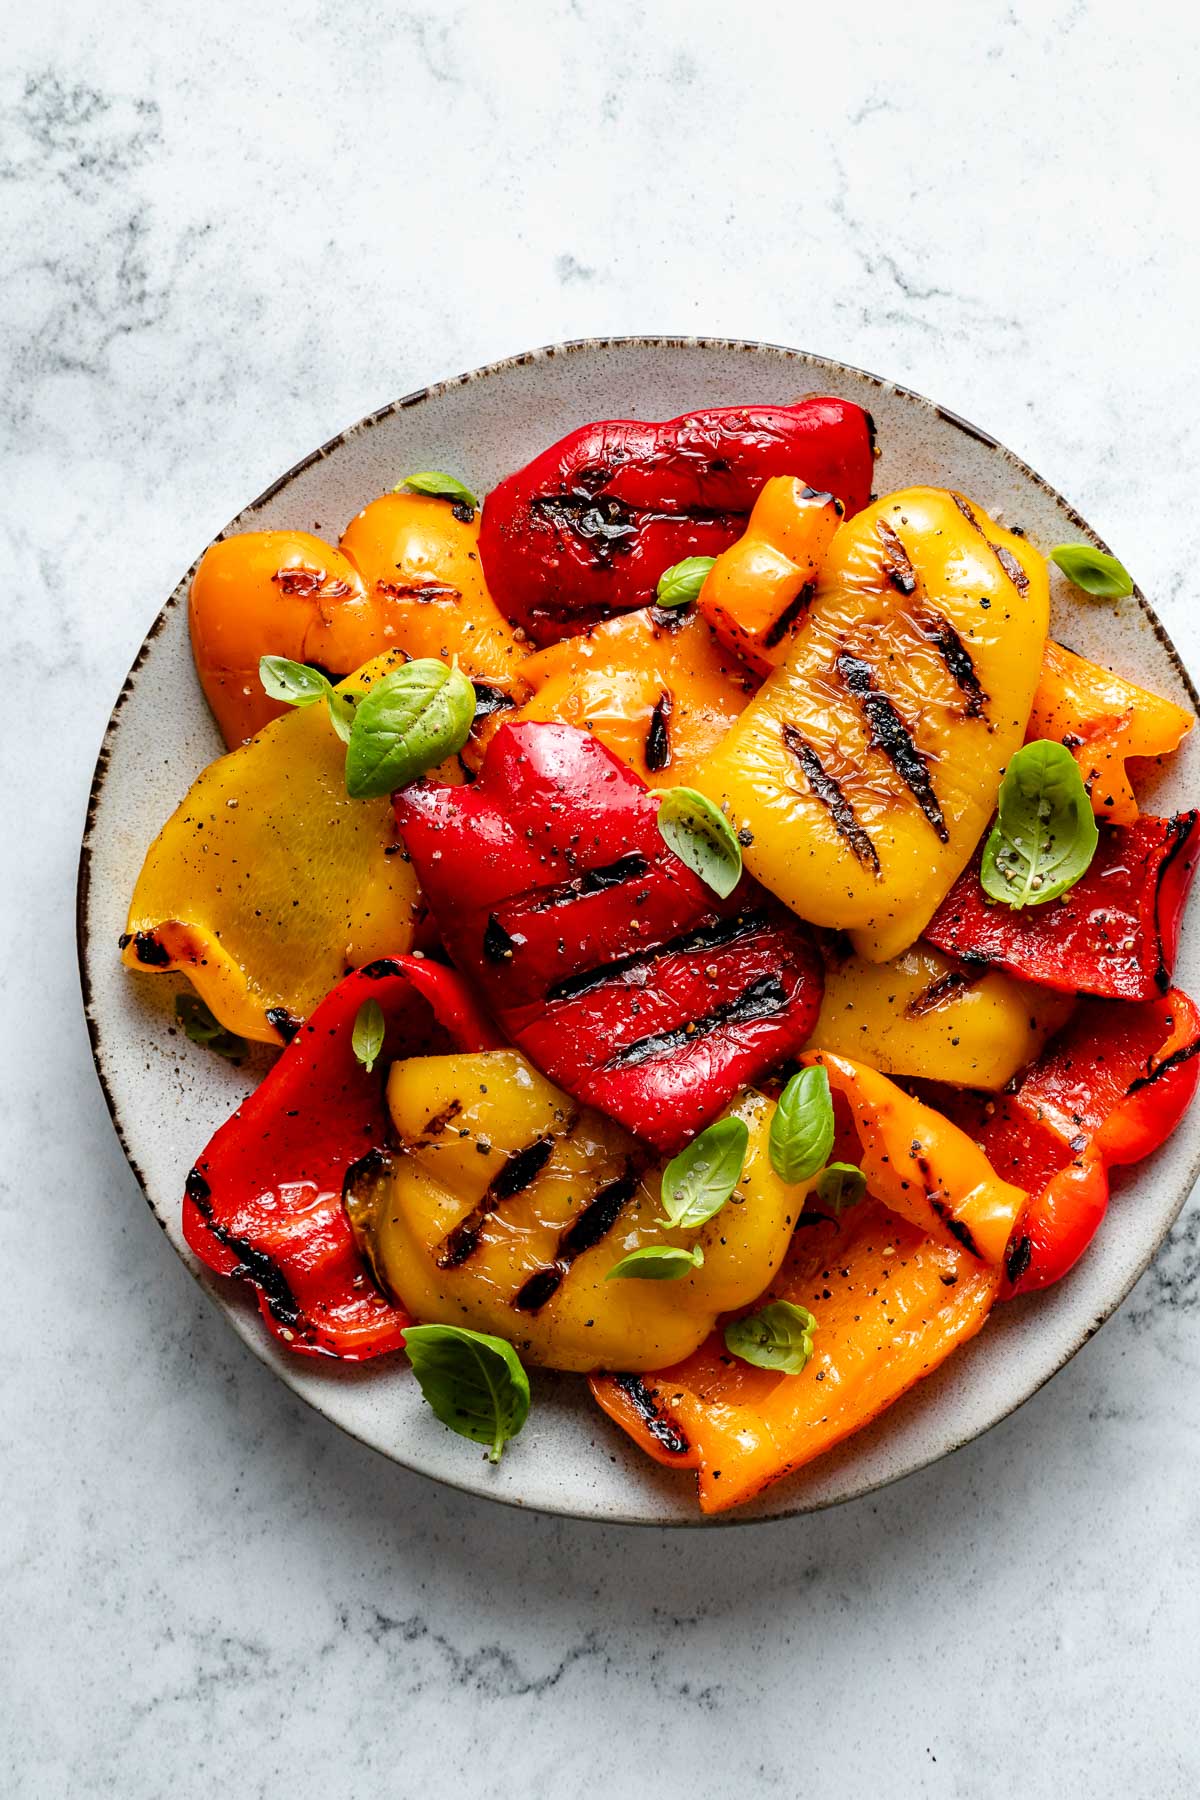
Bell peppers are one of the best things you can put on a skewer — they hold their shape, they soften just enough with heat, and their natural sweetness intensifies on the grill. Threading them in alternating colors makes for a bright, good-looking plate with almost no effort. The sweet chili glaze here is just sweet chili sauce (the bottle from any grocery store works perfectly) thinned with a little lime juice and brushed on in the last few minutes of grilling so it doesn't burn. If you're using wooden skewers, soak them in water for 30 minutes before threading — I've skipped this step and ended up with charred sticks and lost half my peppers onto the coals.
Ingredients
- 3 bell peppers (red, yellow, and orange), cut into 1½-inch chunks
- 1 red onion, cut into 1½-inch chunks
- 2 tablespoons olive oil
- ½ teaspoon salt
- ¼ teaspoon black pepper
- 3 tablespoons sweet chili sauce (store-bought)
- 1 tablespoon fresh lime juice
- 1 teaspoon soy sauce
- Fresh cilantro for serving
Instructions
- If using wooden skewers, soak them in cold water for at least 30 minutes. Thread pepper chunks and onion pieces onto skewers, alternating colors.
- Brush assembled skewers with olive oil and season with salt and pepper.
- Stir together sweet chili sauce, lime juice, and soy sauce in a small bowl. Set aside.
- Preheat grill to medium-high (400°F). Grill skewers for 8–10 minutes total, turning every 2–3 minutes.
- In the last 2 minutes of grilling, brush generously with the sweet chili glaze and let it caramelize slightly on each side.
- Remove from grill, scatter fresh cilantro over the top, and serve with remaining glaze on the side for dipping.
11. Grilled Eggplant with Tahini Dipping Sauce
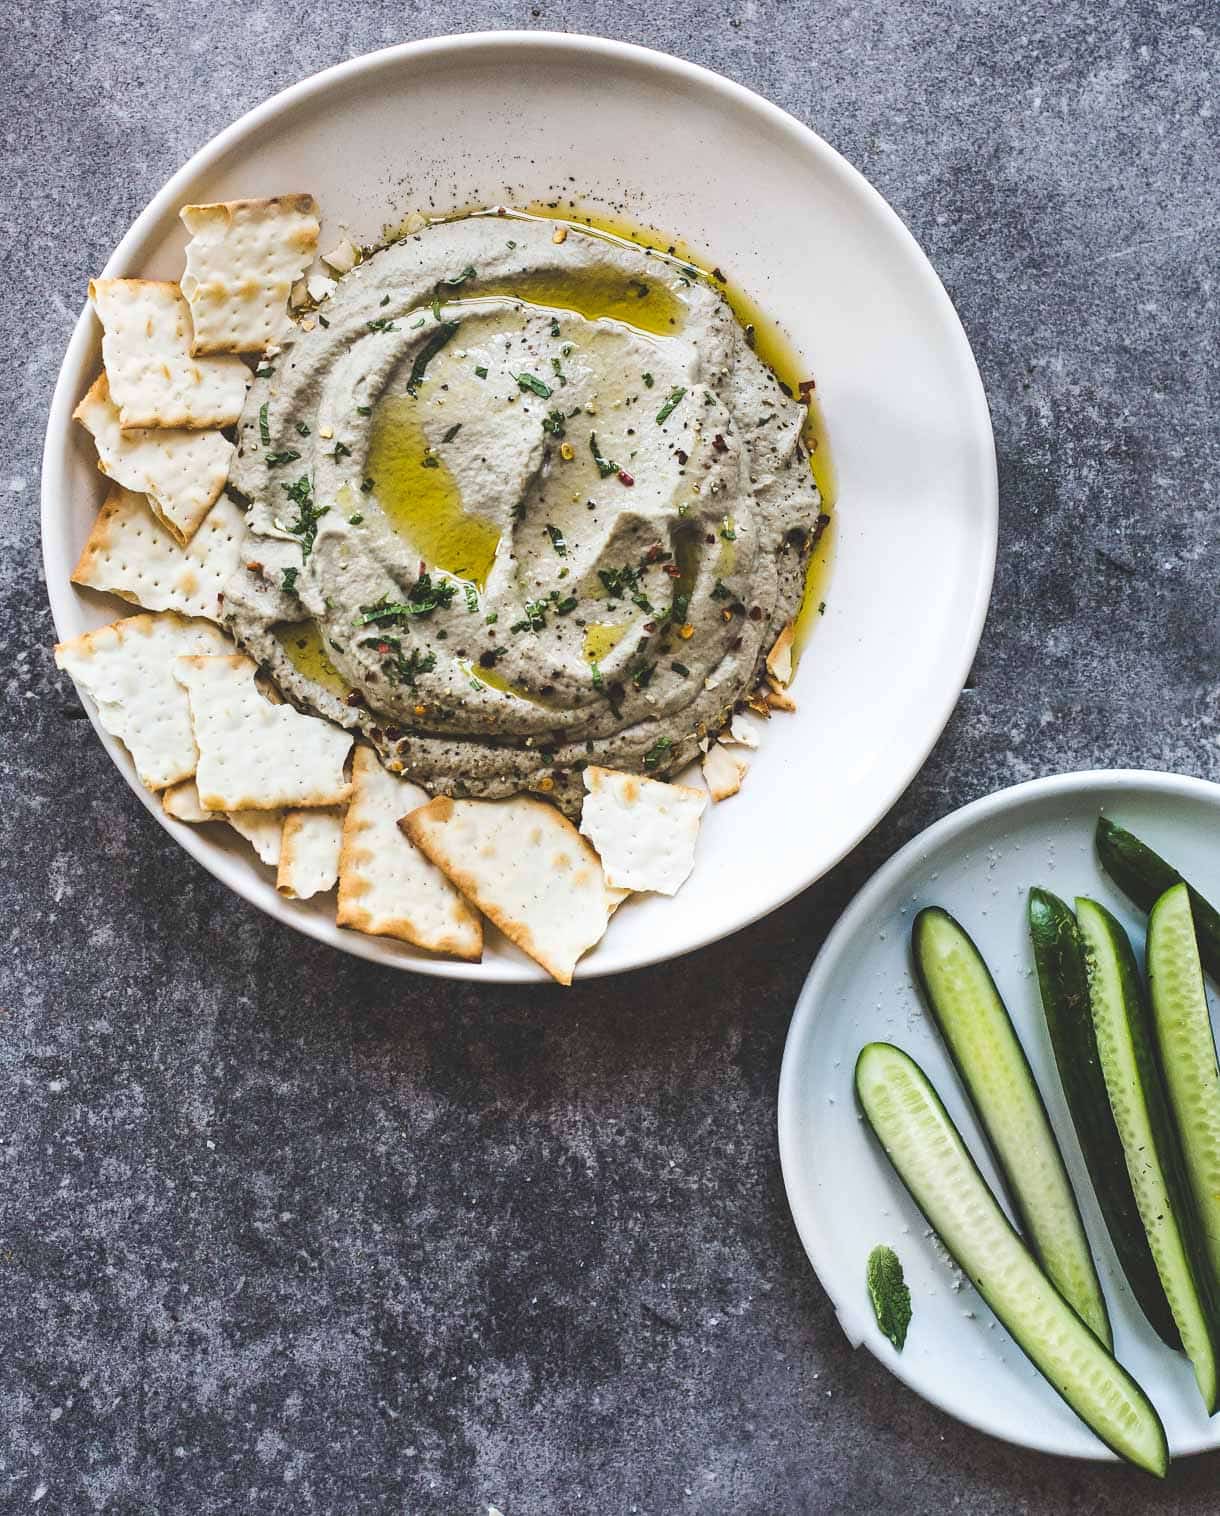
Eggplant and tahini is a combination that shows up across so much of the food I grew up eating, so grilling eggplant and pairing it with a lemony tahini sauce felt completely natural to me. The trick to grilled eggplant that isn't bitter or spongy is **salting the slices, letting them sit for 15 minutes, and pressing out the moisture** before they go near heat. After that, a high-heat grill gives you slices with a lightly smoky, creamy interior and actual char on the surface. The tahini sauce here is thin enough to drizzle — not a thick paste — and the lemon keeps it from being heavy. This is one I'd serve at a BBQ alongside almost anything.
Ingredients
- 2 medium eggplants, sliced into ½-inch rounds
- 1½ teaspoons kosher salt (for drawing out moisture)
- 3 tablespoons olive oil
- ½ teaspoon cumin
- ½ teaspoon smoked paprika
- ¼ cup tahini
- 3 tablespoons fresh lemon juice
- 1 clove garlic, minced or grated
- 2–4 tablespoons cold water (to thin the sauce)
- Fresh parsley and a pinch of sumac for serving (sumac optional)
Instructions
- Lay eggplant slices on a sheet pan and sprinkle both sides with kosher salt. Let sit for 15 minutes, then press firmly with paper towels to absorb as much liquid as possible.
- Brush dried eggplant slices on both sides with olive oil, then dust lightly with cumin and smoked paprika.
- Whisk together tahini, lemon juice, and garlic in a small bowl. Add cold water one tablespoon at a time until the sauce is thin and drizzleable. Season with a pinch of salt.
- Preheat grill to medium-high (400–425°F). Grill eggplant slices for 4–5 minutes per side until deep grill marks appear and the flesh is tender all the way through.
- Arrange grilled eggplant on a platter, drizzle tahini sauce generously over the top, scatter fresh parsley and a pinch of sumac, and serve warm or at room temperature.
10. Honey Sriracha Grilled Brussels Sprouts

Brussels sprouts on the grill are something people overlook completely at summer cookouts, and I think that's a real missed opportunity. Halved sprouts sit flat on the grate, the cut side chars and gets nutty and slightly crispy, and the honey sriracha glaze plays off that bitterness in exactly the right way — sweet, hot, and a little sticky. The most important step here is **parboiling them for 3 minutes before grilling** — it guarantees the inside cooks through before the outside burns. I skipped this once because I was in a hurry, and ended up with beautifully charred sprouts that were still hard in the middle. Three minutes of parboiling takes care of the whole problem.
Ingredients
- 1 lb brussels sprouts, trimmed and halved
- 2 tablespoons olive oil
- ½ teaspoon salt
- ¼ teaspoon black pepper
- 2 tablespoons honey
- 1 tablespoon sriracha (adjust to your heat preference)
- 1 tablespoon soy sauce
- 1 teaspoon apple cider vinegar
- Sesame seeds for serving
Instructions
- Bring a pot of salted water to a boil. Add halved Brussels sprouts and parboil for 3 minutes. Drain and pat dry thoroughly.
- Toss parboiled sprouts with olive oil, salt, and pepper.
- Whisk honey, sriracha, soy sauce, and apple cider vinegar together in a small bowl.
- Preheat grill to medium-high (400°F). Place sprouts cut-side down on the grill. Cook for 3–4 minutes without moving until the cut side is charred and caramelized, then flip and cook 2–3 minutes more.
- In the last minute of grilling, brush the honey sriracha glaze over the sprouts and let it bubble and set.
- Transfer to a plate, drizzle with any remaining glaze, and scatter sesame seeds on top before serving.
9. Grilled Cauliflower Steaks with Chimichurri
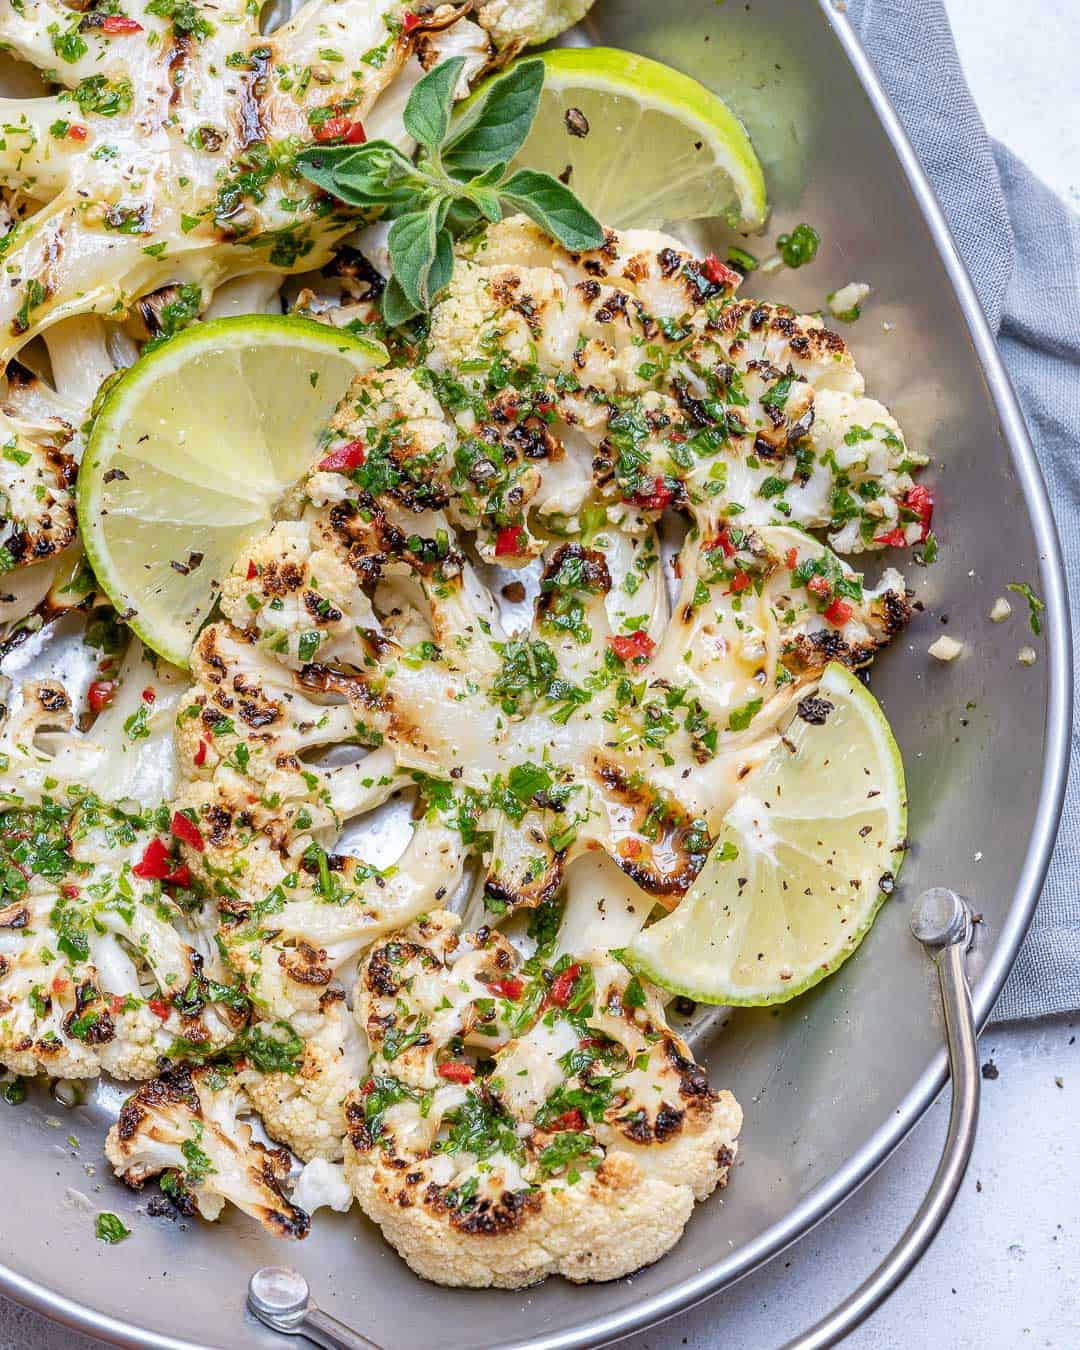
Cauliflower steaks were one of those things I skeptically tried once and then made three times in the same week. You slice the whole head through the core so the steak holds together, brush it aggressively with olive oil and smoked paprika, and let the grill do the work. The chimichurri is the part that takes this from "fine vegetable" to something people actually ask about. It's bright, garlicky, and a little sharp from the red wine vinegar — exactly what a thick charred cauliflower steak needs alongside it.
Ingredients
- 1 large head cauliflower, sliced into 1-inch steaks
- 3 tablespoons olive oil
- 1 teaspoon smoked paprika
- ½ teaspoon garlic powder
- ½ teaspoon salt
- ¼ teaspoon black pepper
- 1 cup fresh flat-leaf parsley, packed
- 3 tablespoons fresh oregano leaves (or 1 teaspoon dried)
- 3 garlic cloves
- ¼ cup olive oil (for chimichurri)
- 2 tablespoons red wine vinegar
- ¼ teaspoon red pepper flakes
- Salt to taste
Instructions
- Make the chimichurri first so the flavors have time to develop: pulse parsley, oregano, and garlic in a food processor (or chop very finely by hand) until roughly minced. Stir in the olive oil, red wine vinegar, red pepper flakes, and salt. Set aside.
- Slice the cauliflower head into 1-inch steaks from top through the core. You'll get 2-3 solid steaks from the center; the outer florets will fall apart — save those for roasting later.
- Whisk together 3 tablespoons olive oil, smoked paprika, garlic powder, salt, and pepper. Brush both sides of each steak generously.
- Preheat grill to medium-high heat (around 425°F). Oil the grates well — cauliflower sticks more than most vegetables.
- Grill steaks 5-6 minutes per side without moving them, until deep char marks form and the cauliflower is tender when pierced with a knife.
- Transfer to a platter and spoon chimichurri generously over the top while still hot. Serve immediately.
8. Garlic Parmesan Grilled Artichoke Halves

Artichokes feel intimidating until you've done them once — after that, they're just a vegetable. The key step is parboiling them before they ever touch the grill; raw artichoke on the grill just chars on the outside while staying tough in the middle. Once they're halved, brushed with garlic butter, and finished on the grates, the cut face gets this gorgeous caramelized crust with the parmesan melted into all the crevices. Serve them with a simple lemon aioli or even just good mayonnaise with a squeeze of lemon — that's all they need.
Ingredients
- 2 large artichokes
- 1 lemon, halved (plus extra for serving)
- 4 tablespoons unsalted butter, melted
- 3 garlic cloves, minced
- 2 tablespoons olive oil
- ⅓ cup finely grated parmesan
- Salt and black pepper to taste
- 2 tablespoons fresh parsley, chopped
Instructions
- Bring a large pot of salted water to a boil. Squeeze in the juice of one lemon half and add the spent halves to the water. Trim the top inch off each artichoke and snip the sharp tips off the outer leaves with scissors.
- Boil artichokes for 25-30 minutes until a knife slides into the base with moderate resistance — they should be mostly tender but not falling apart. Drain and let cool enough to handle.
- Slice each artichoke in half lengthwise. Use a spoon to scoop out the fuzzy choke from the center.
- Mix melted butter, minced garlic, and olive oil together. Brush cut sides and inner leaves generously with the garlic butter. Season with salt and pepper.
- Preheat grill to medium-high. Place artichokes cut-side down and grill 4-5 minutes until the face is deeply charred and caramelized.
- Flip, sprinkle parmesan over the cut face, and grill another 2 minutes until cheese melts. Finish with fresh parsley and a squeeze of lemon.
7. Grilled Romaine Lettuce Caesar Salad

The first time someone told me you could grill lettuce, I thought they were joking. Then I tried it and understood immediately. The outer leaves get lightly wilted and smoky while the inner core stays crisp — it's a completely different texture than raw Caesar salad, in the best way. The dressing here is a quick no-anchovies version using Worcestershire sauce instead, so it's a little more approachable for guests who are skeptical about fish. This takes about 8 minutes start to finish once the grill is hot, which makes it one of my easiest summer sides.
Ingredients
- 2 romaine hearts, halved lengthwise
- 2 tablespoons olive oil
- Salt and black pepper
- ⅓ cup mayonnaise
- 2 tablespoons fresh lemon juice
- 1 teaspoon Worcestershire sauce
- 1 teaspoon Dijon mustard
- 1 garlic clove, grated
- ¼ cup parmesan, shaved or grated
- Croutons for serving (store-bought works fine)
Instructions
- Whisk together mayonnaise, lemon juice, Worcestershire, Dijon, and grated garlic until smooth. Taste and adjust salt — it should be tangy and savory. Refrigerate until ready to serve.
- Brush the cut sides of the romaine halves with olive oil and season lightly with salt and pepper. Don't soak them — a light, even coat is all you need.
- Preheat grill to high heat. You want quick, intense heat so the lettuce chars without cooking through completely.
- Place romaine halves cut-side down on the grates. Grill 2-3 minutes without moving — you want visible char lines and slight wilting on the outer leaves.
- Flip and grill the rounded side for just 1 minute. The goal is a little smokiness, not cooked lettuce.
- Transfer to a platter, drizzle dressing over generously, top with parmesan and croutons, and serve immediately while still slightly warm.
6. Balsamic Glazed Grilled Tomato Skewers

Cherry tomatoes on the grill are one of those things that sounds almost too simple, but the results are genuinely stunning. The heat concentrates all that sweetness, the skins blister and split just slightly, and the balsamic glaze caramelizes into something almost jammy. Thread them on skewers so they don't fall through the grates — if you're using wooden skewers, soak them in water for at least 30 minutes first so they don't catch fire. A handful of fresh basil torn over the top at the end is not optional in my opinion.
Ingredients
- 2 pints cherry tomatoes (mixed colors look great)
- 3 tablespoons olive oil
- 3 tablespoons balsamic vinegar
- 1 tablespoon honey
- 2 garlic cloves, minced
- ½ teaspoon dried oregano
- Salt and black pepper to taste
- Fresh basil leaves for serving
- Wooden or metal skewers
Instructions
- If using wooden skewers, soak in water for at least 30 minutes. Whisk together olive oil, balsamic vinegar, honey, garlic, and oregano to make the glaze.
- Thread cherry tomatoes onto skewers, about 6-8 per skewer. Place in a shallow dish and pour about half the glaze over them, turning to coat. Let them sit for 10 minutes while the grill heats up.
- Preheat grill to medium-high heat. Reserve the remaining glaze for brushing while they cook.
- Place skewers on the grill. Cook 2-3 minutes per side, turning once, until the tomatoes are blistered and beginning to soften. Brush with reserved glaze each time you turn them.
- Remove from grill when tomatoes are jammy and caramelized but still holding their shape — they should look slightly collapsed but not falling apart.
- Season with salt and pepper, scatter torn fresh basil over everything, and serve warm or at room temperature.
5. Grilled Sweet Potato Planks with Chipotle Butter

Sweet potatoes on the grill are one of those things I resisted for a long time because I was convinced they'd just burn on the outside and stay raw in the middle. The trick I finally figured out is to microwave them for 3-4 minutes first, just enough to start the cooking, then finish them on the grill for the char and the smokiness. The chipotle butter melts into the planks while they're still hot and the combination of sweet, smoky, and slightly spicy is genuinely hard to stop eating. Zainab picks off the spicy butter and just eats the plain planks — that's fine, more chipotle butter for the rest of us.
Ingredients
- 3 medium sweet potatoes, scrubbed
- 2 tablespoons olive oil
- Salt and black pepper
- 4 tablespoons unsalted butter, softened to room temperature
- 1-2 chipotle peppers in adobo sauce, finely minced
- 1 teaspoon adobo sauce (from the can)
- 1 teaspoon lime juice
- ¼ teaspoon garlic powder
- Fresh cilantro for serving (optional)
Instructions
- Make the chipotle butter first: mash together softened butter, minced chipotle peppers, adobo sauce, lime juice, and garlic powder until fully combined. Refrigerate until needed — it can be made up to 3 days ahead.
- Slice sweet potatoes lengthwise into ½-inch planks. Microwave in a single layer for 3-4 minutes until slightly softened but not fully cooked through. This par-cooking step is what prevents the burnt-outside-raw-inside problem.
- Brush planks on both sides with olive oil and season with salt and pepper.
- Preheat grill to medium-high heat (around 400°F). Grill sweet potato planks 4-5 minutes per side until deep grill marks form and the flesh is completely tender when pierced.
- Transfer to a serving platter immediately and top each plank with a generous knob of chipotle butter while still hot, letting it melt over the surface.
- Scatter cilantro over if using, and serve while warm. They hold up well at room temperature too, so they're good for BBQ buffet setups.
4. Charred Grilled Scallions with Lime Crema

These are inspired by calcots, the charred green onions that are a huge deal in Catalonia — they roast them over fire until the outer layer is completely black, then you peel that back and dip the tender inside in romesco sauce. My version uses scallions instead of the harder-to-find calcots, and the dipping sauce is a quick lime crema that takes about two minutes to mix together. The char on scallions mellows out their sharpness and turns them almost sweet. My husband was deeply skeptical when I put a plate of blackened onions in front of him. He ate the entire plate.
Ingredients
- 3 bunches scallions (green onions), roots trimmed
- 2 tablespoons olive oil
- Flaky sea salt
- ½ cup sour cream
- 2 tablespoons mayonnaise
- 2 tablespoons fresh lime juice
- 1 teaspoon lime zest
- ½ teaspoon garlic powder
- Salt to taste
- Smoked paprika for garnish
Instructions
- Make the lime crema: stir together sour cream, mayonnaise, lime juice, lime zest, and garlic powder until smooth. Season with salt, dust lightly with smoked paprika, and refrigerate until serving.
- Toss scallions with olive oil until well coated. Don't be shy — you need enough oil to help them char evenly without drying out.
- Preheat grill to high heat. You want intense direct heat for this one.
- Lay scallions directly on the grates in a single layer. Grill 3-4 minutes per side until the outer layers are deeply charred and the white bulb ends are tender. They'll look almost burnt — that's correct.
- Transfer to a platter, sprinkle with flaky sea salt, and serve immediately alongside the lime crema for dipping. Guests peel back the charred outer layer to reveal the tender, sweet interior.
3. Grilled Green Beans with Toasted Almonds
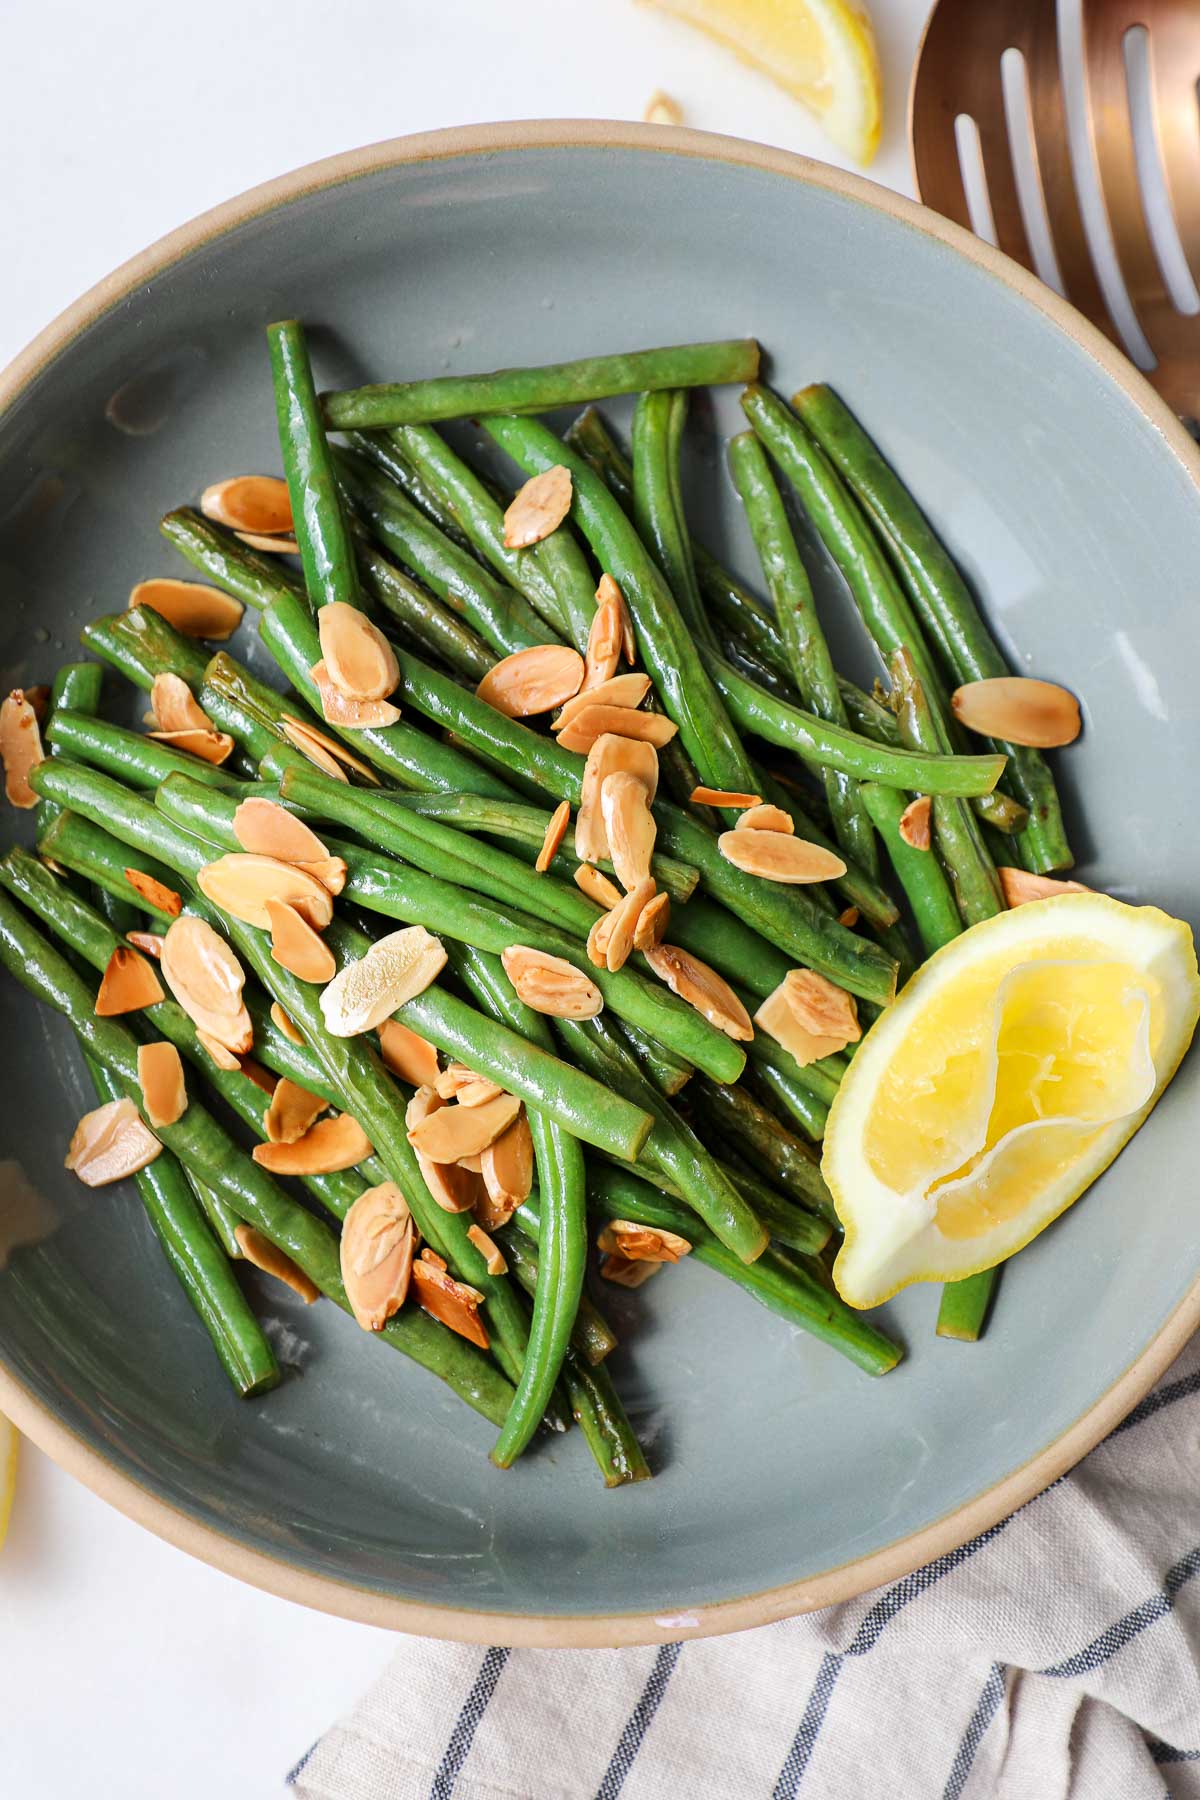
Green beans are underrated on the grill, mostly because people don't know the trick: use a grill basket or foil packet so they don't fall through the grates, and keep the heat high so they blister fast instead of steaming slowly. The result is blistered, slightly crispy green beans with just enough snap left in them — nothing like the soggy steamed version. Tossing them with toasted almonds and a squeeze of lemon at the end adds crunch and brightness that makes this feel complete rather than like an afterthought of a side dish. I make a double batch every time because they disappear faster than anything else on the table.
Ingredients
- 1 lb fresh green beans, ends trimmed
- 2 tablespoons olive oil
- 3 garlic cloves, minced
- ½ teaspoon salt
- ¼ teaspoon black pepper
- ¼ teaspoon red pepper flakes (optional)
- ⅓ cup sliced almonds
- 1 tablespoon unsalted butter
- 1 tablespoon fresh lemon juice
- Lemon zest for finishing
Instructions
- Toss green beans with olive oil, garlic, salt, pepper, and red pepper flakes until evenly coated. Let them sit for 10 minutes while the grill heats — the garlic starts to infuse into the oil.
- Preheat grill to high heat. Place a grill basket on the grates and let it heat up for 2 minutes before adding the beans — a hot basket means better blistering.
- Add green beans to the grill basket in a single layer. Grill 8-10 minutes total, tossing every 2-3 minutes, until blistered in spots and tender-crisp. You want some char but not mush.
- While the beans grill, toast almonds in a small dry skillet over medium heat for 2-3 minutes, stirring constantly, until golden and fragrant. Add butter and swirl to coat.
- Transfer grilled green beans to a serving bowl, pour the buttered almonds over them, add lemon juice, and toss everything together.
- Finish with a little lemon zest and an extra pinch of salt. Serve immediately — these are best hot off the grill.
2. Mediterranean Grilled Vegetable Flatbread
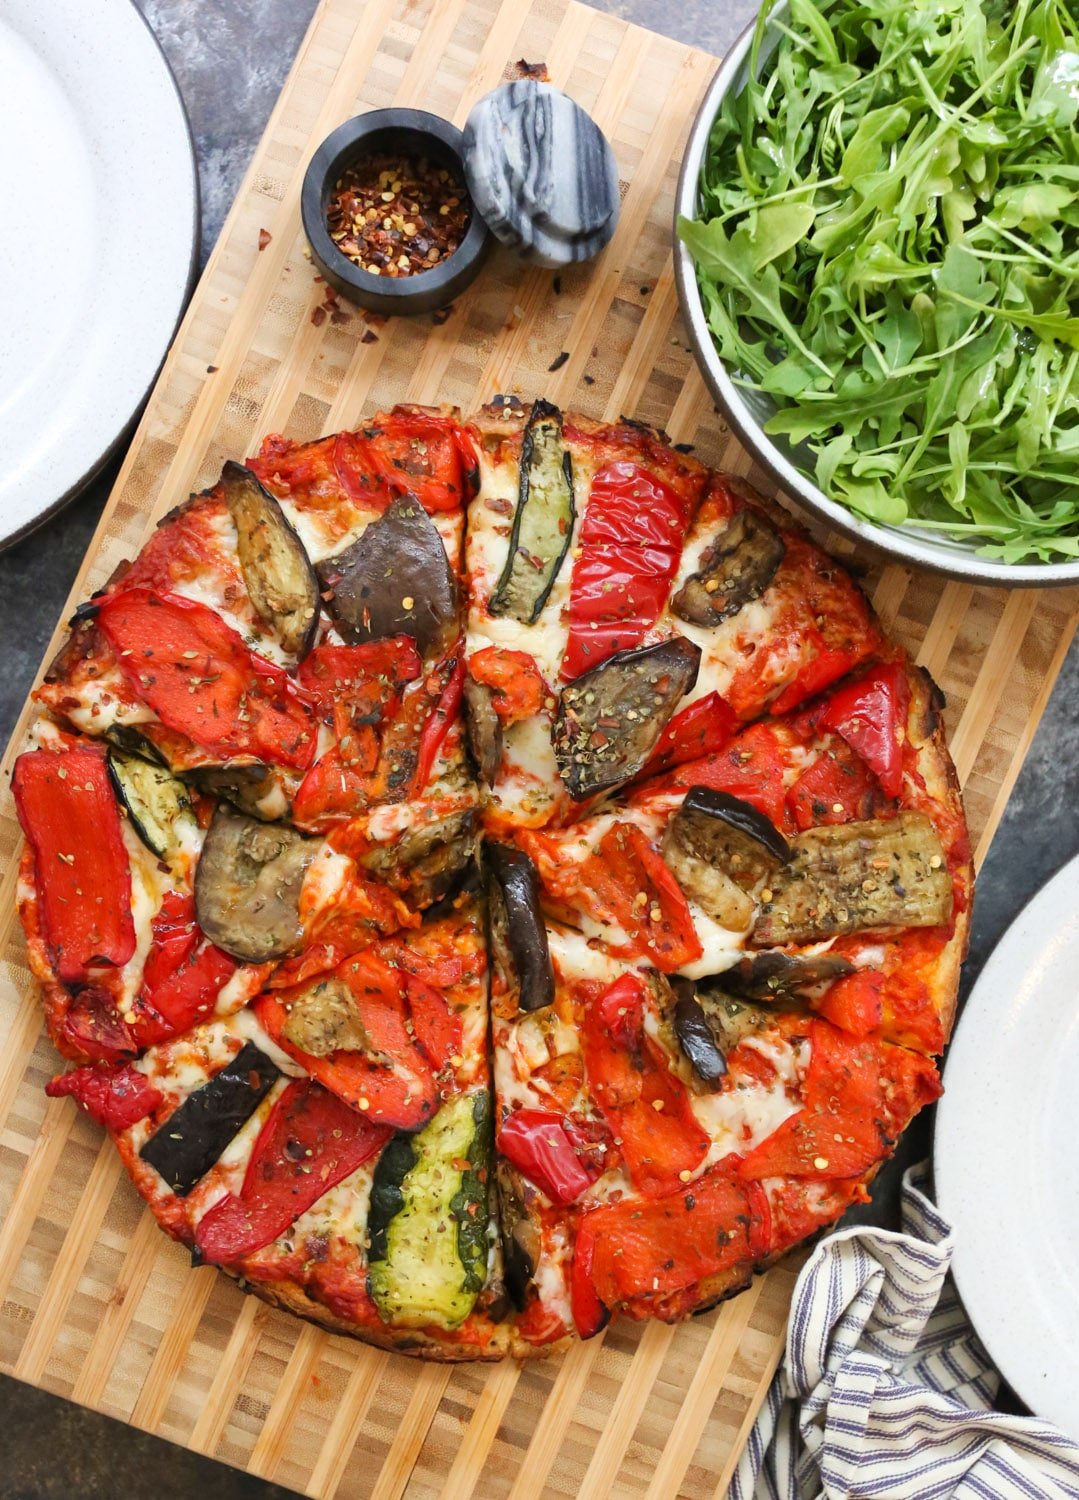
This one blurs the line between side dish and main, which is exactly why it's near the top of this list. Store-bought naan or flatbread goes straight onto the grill grates for about two minutes per side — it gets crispy on the outside, chewy in the middle, and picks up just enough smoke. Then you pile it with grilled vegetables, a smear of hummus or labneh, some crumbled feta, and olives. It's not a traditional recipe from any one place, it's just what happens when I clean out the vegetable drawer before a summer cookout. Every time I serve this, at least two people ask me for the recipe.
Ingredients
- 4 pieces store-bought naan or flatbread
- 1 medium zucchini, sliced into ¼-inch rounds
- 1 red bell pepper, quartered
- 1 small red onion, sliced into ½-inch rings
- 3 tablespoons olive oil (divided)
- Salt and black pepper
- ½ cup hummus or labneh (plain Greek yogurt works as a substitute)
- ½ cup crumbled feta cheese
- ¼ cup pitted kalamata olives, halved
- 1 teaspoon dried oregano
- Fresh parsley or mint for garnish
- Red pepper flakes and extra olive oil for finishing
Instructions
- Toss zucchini, bell pepper, and red onion with 2 tablespoons olive oil, salt, and pepper. Grill over medium-high heat — about 3-4 minutes per side for the peppers and onion, 2-3 minutes per side for the zucchini — until charred and tender. Set aside.
- Once vegetables are done, brush flatbreads lightly with remaining olive oil on both sides.
- Grill flatbreads directly on the grates over medium heat for 1-2 minutes per side until crispy with grill marks and the bread puffs slightly. Watch them closely — they go from perfect to burnt fast.
- Spread each flatbread with a generous layer of hummus or labneh while still warm.
- Roughly chop or tear the grilled vegetables and distribute them over the flatbreads. Top with crumbled feta, olives, and a sprinkle of dried oregano.
- Drizzle with a little extra olive oil, scatter fresh parsley or mint over the top, add red pepper flakes if you like heat, and slice into pieces for serving. Serve warm or at room temperature.
1. Grilled Avocado with Pico de Gallo
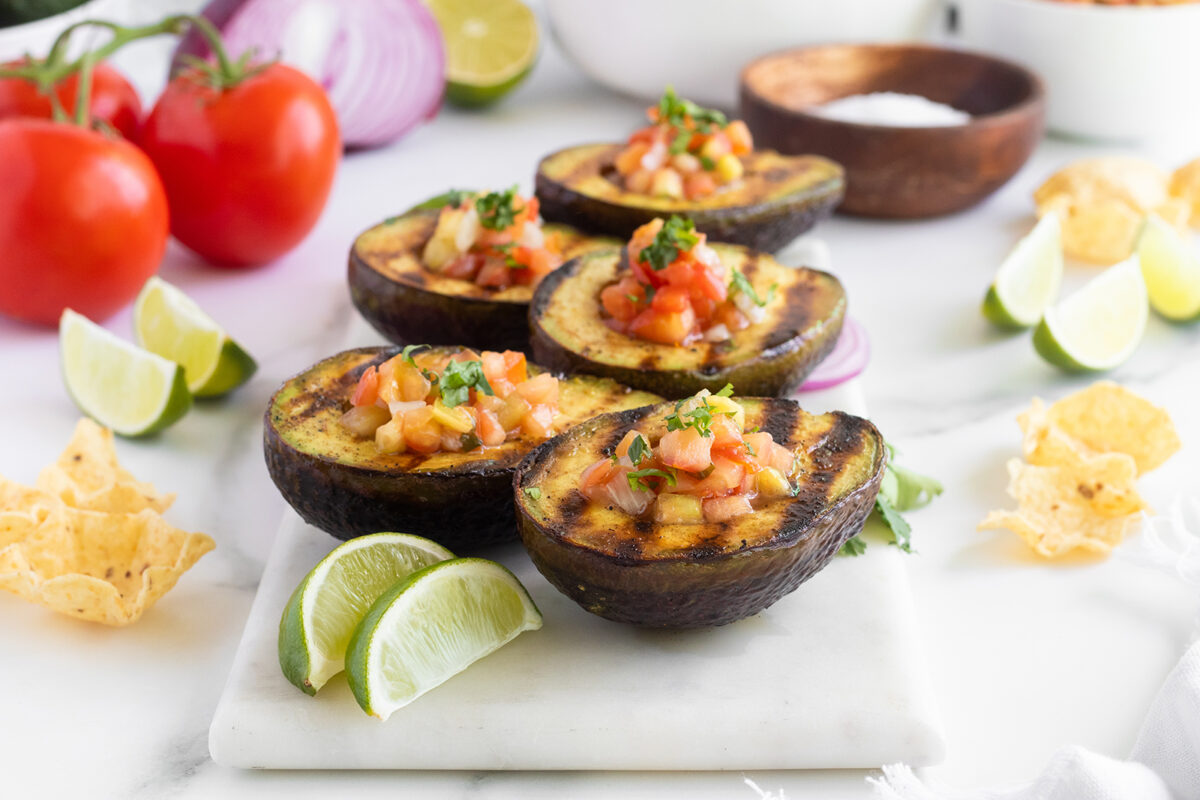
Grilled avocado was one of those things I dismissed for a long time — it seemed unnecessary, like a solution to a problem that didn't exist. Then I tried it and understood immediately. Heat does something remarkable to avocado: it deepens the creaminess, softens any underripe spots, and the cut side picks up these faint char marks that make it look genuinely beautiful on a plate. Topped with a quick fresh pico de gallo, this is the kind of side dish that disappears faster than anything else on the table.
The key is choosing avocados that are just barely ripe — if they're fully soft, they'll fall apart on the grill. You want them to have a tiny bit of resistance when you press the skin. Two minutes cut-side down over direct heat is all it takes. Don't move them around or they'll stick. The pico de gallo comes together in five minutes and you can make it ahead, which means this whole thing is ready before anyone's finished setting the table.
Ingredients
- 2 avocados, halved and pitted (just barely ripe)
- 1 tablespoon olive oil
- ¼ teaspoon kosher salt
- ¼ teaspoon black pepper
- 2 medium roma tomatoes, finely diced
- ¼ cup red onion, finely diced
- 1 jalapeño, seeded and minced (optional)
- 2 tablespoons fresh cilantro, chopped
- 2 tablespoons fresh lime juice (about 1 lime)
- ¼ teaspoon salt, for the pico
Instructions
- Make the pico de gallo first: combine diced tomatoes, red onion, jalapeño, cilantro, lime juice, and salt in a small bowl. Stir and set aside — it gets better the longer it sits, so even 10 minutes helps.
- Preheat your grill to medium-high heat (about 400°F). Brush the cut sides of the avocado halves with olive oil and season lightly with salt and pepper.
- Place avocados cut-side down directly on the grill grates. Don't touch them for 2 minutes — they'll release naturally when they're ready. If they're sticking, give them another 30 seconds.
- Flip the avocados skin-side down and grill for another 1 minute just to warm through. You're not trying to cook the avocado — just heat it and get those grill marks.
- Transfer to a serving plate, spoon a generous amount of pico de gallo into the hollow of each avocado half, and serve immediately.
That's all 17 of them — and honestly, putting this list together reminded me how much I underused my grill for vegetables for years. I'd fire it up for chicken or burgers and the vegetables would be an afterthought, thrown on at the end with no real thought. These recipes changed that. Now the vegetables are sometimes the reason I light the grill in the first place.
Whether you're building a full summer BBQ spread or just need one solid side dish for a weeknight dinner, something on this list will fit. Some of these take five minutes. Some need a little more attention. But none of them need you to be a professional chef — just a hot grill, decent seasoning, and a little patience to not pull things off too early.
If you want more ideas for your summer table, check out my Recipe Roundups — there's plenty more where this came from. And if you try any of these, I'd genuinely love to know which one landed best at your table. 🥦🌽🔥
Frequently Asked Questions
What vegetables are best for grilling?
Zucchini, bell peppers, corn, asparagus, eggplant, mushrooms, and red onion all grill beautifully. They have enough density to hold up to high heat without falling apart. I'd avoid anything too watery or too delicate — things like cucumbers or baby spinach don't belong on a grill.
How do I keep vegetables from sticking to the grill?
Two things help: a clean grill grate and oil on the vegetables themselves. Brush or toss your vegetables in oil before they go on, and make sure the grill is properly preheated. I learned the hard way that putting vegetables on a cold or dirty grate is a recipe for losing half your food to the grill.
Can I prep grilled vegetables ahead of time?
Yes — and they actually taste better after sitting for a bit. Grilled vegetables absorb seasoning as they cool, so making them an hour before serving is genuinely a good idea. Store them at room temperature if serving within two hours, or refrigerate and bring them back to room temp before putting them out.
What if I don't have an outdoor grill — can I use a grill pan?
A cast iron grill pan works well for most of these recipes. You won't get the same smoky flavor from charcoal, but the char marks and caramelization are totally achievable indoors. Heat your grill pan over medium-high for a few minutes before adding anything — it needs to be properly hot or the vegetables will steam instead of sear.
How do I season grilled vegetables simply?
benefits of olive oil, salt, pepper, and garlic powder is honestly all you need as a base. From there you can go in any direction — Italian herbs, smoked paprika, lemon zest, a drizzle of balsamic after grilling. The grill does most of the flavor work for you through caramelization, so you don't need complicated marinades to end up with something really good.
Share This Post!
If this list helped you plan your summer BBQ, pin it or share it with someone who could use some vegetable inspiration. The more people grilling vegetables instead of ignoring them, the better. 🌽🔥
View More Recipes here Recipe Roundups





Comments
No Comments