
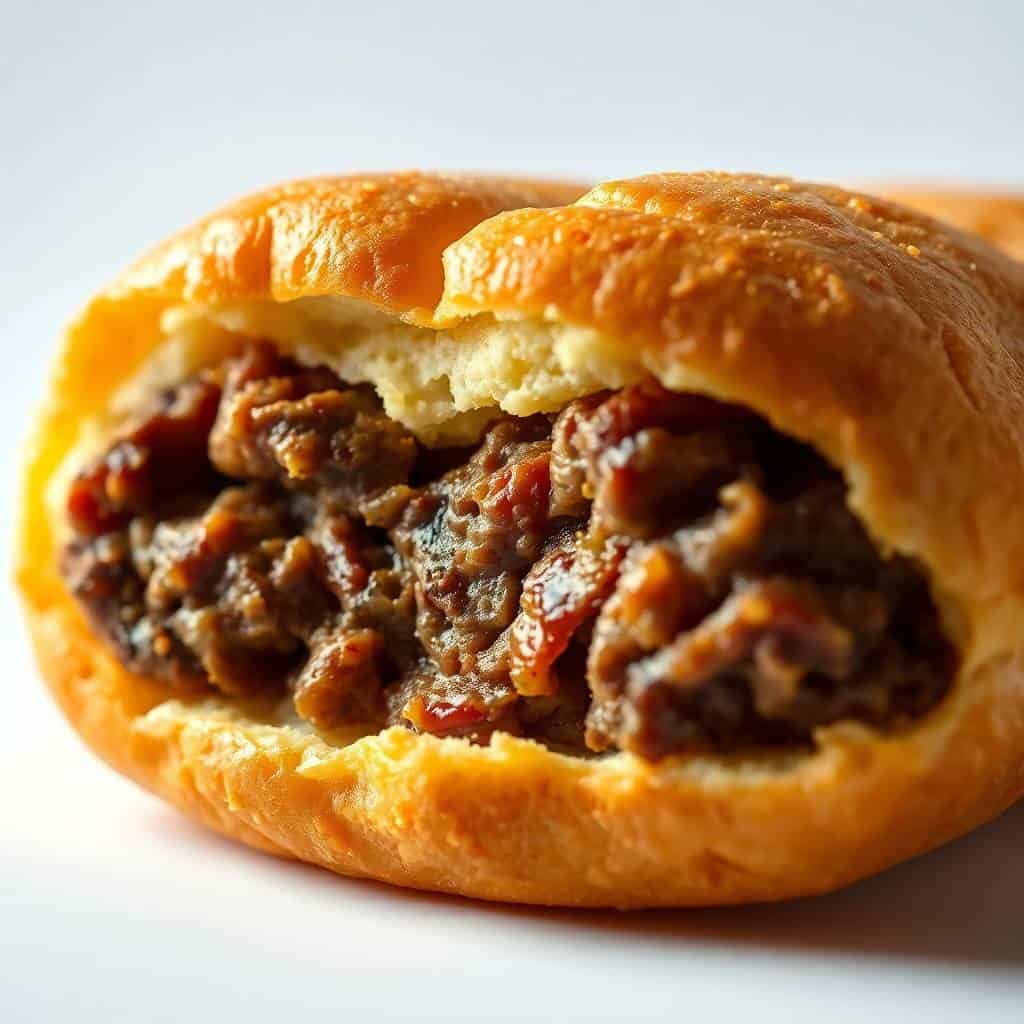
Beerocks aren't something I grew up with — where I come from in Pakistan, stuffed bread means something closer to a paratha or a kulcha. I first came across these at a potluck a few years ago, and I didn't know what I was eating, but I ate three of them before I thought to ask. Soft baked bun, savory ground beef, cabbage, onions — all sealed up in this tidy little pocket. I went home and figured out how to make them myself.
What I love about beerocks — also called Runzas in the Midwest — is that the filling does something interesting inside the dough. The cabbage softens and kind of disappears into the beef, and the whole thing steams gently from inside while the outside bakes golden. It's a different experience from any stuffed bread I'd made before. The key, I learned after a few tries, is cooling the filling completely before you wrap it. Warm filling makes the dough sticky and hard to seal, and you end up with leaky buns. Ask me how I know.
My husband was skeptical the first time I served these. He kept asking what was in them. Then he ate four in one sitting, so I consider that a win. Zainab likes hers with a little mustard for dipping. Saad doesn't want anything near his — just the plain bun straight from the pan. I make a double batch now because twelve disappears faster than I expect, and I like having some in the freezer for the nights I have nothing planned. If you're looking for a good make-ahead freezer meal, these are right up there with my cheesy chicken and rice casserole in terms of how well they hold up.
Don't be put off by the yeast dough step. I know it sounds like a project, but it genuinely comes together quickly, and the rise time is hands-off — you're just waiting. The filling cooks in under 15 minutes while the dough rises. The whole process is very manageable for a weekend afternoon, and you'll have meals sorted for the next few days.

Why You'll Love This Recipe
- They're genuinely handheld: No plate required, no fork, no mess. I pack these into lunchboxes for the kids and they actually get eaten — which is more than I can say for a lot of things I send with them. They hold together well even after sitting for a few hours, and they're just as good at room temperature as they are hot from the oven.
- The filling is simple but it works: Ground beef, cabbage, onion, garlic powder. Nothing exotic, nothing you need a specialty store for. The cabbage shrinks way down when it cooks so don't be alarmed when you add it raw — it looks like too much until it doesn't. The seasoning is mild enough that kids eat it, but you can spice it up for adults easily.
- They freeze beautifully: I bake the full batch, let them cool completely, then wrap them individually and freeze. To reheat, I pull them out and put them in a 350°F oven for about 15 minutes straight from frozen. They come out tasting like they just baked. This is the kind of thing that makes future-me feel very grateful to past-me.
- The dough is forgiving: I don't own a stand mixer and I knead this by hand on my counter. It takes about 8 minutes and it's not difficult. The dough is soft and slightly sticky, which is what you want — if it's too stiff, the buns come out dense. A little flour on the counter for rolling is all you need. No special equipment, no fuss.
- Budget friendly in a real way: One pound of ground beef and a small cabbage make 12 filled buns. That feeds a family of four with leftovers, and the total cost of ingredients is genuinely low. Ground beef and cabbage are two of the cheapest things at any grocery store — Walmart, Aldi, wherever you shop. This isn't budget friendly in the way that means it tastes like compromise. It actually tastes like you made something worth the effort.
Ingredients
- For the Dough:
- 1 cup warm milk
- 2¼ teaspoons active dry yeast (1 standard packet)
- 2 tablespoons sugar
- ¼ cup vegetable oil
- 1 large egg
- 3 cups all-purpose flour, plus more for kneading
- 1 teaspoon salt
- For the Filling:
- 1 tablespoon oil or butter
- 1 pound ground beef
- 1 small onion, finely diced
- 1 small head green cabbage, finely chopped (about 3–4 cups raw)
- 1 teaspoon salt
- ½ teaspoon black pepper
- ½ teaspoon garlic powder
- Optional: pinch of caraway seeds
- Optional: ½ cup shredded cheddar cheese mixed into filling
Directions
- Activate the yeast: In a large bowl, combine the warm milk, sugar, and yeast. Stir briefly and let it sit for 5–10 minutes until it looks foamy. If it doesn't foam, your yeast may be old — this happened to me once and I figured it out too late, so check it before moving on.
- Make the dough: Add the oil, egg, salt, and flour to the yeast mixture. Stir until a shaggy dough forms, then turn it out onto a lightly floured counter and knead for about 8 minutes until smooth and slightly tacky. Place it back in the bowl, cover with a clean kitchen towel, and let it rise for 45 minutes to 1 hour.
- Cook the filling: While the dough rises, heat a tablespoon of oil in a large skillet over medium heat. Add the ground beef and cook, breaking it up, until browned all the way through. Add the onion and cook for 3–4 minutes until soft. Add the cabbage, salt, pepper, and garlic powder, and stir everything together. Cook for another 5–7 minutes until the cabbage is completely soft. Spread the filling on a plate or sheet pan and let it cool completely — this step matters, so don't rush it.
- Assemble the beerocks: Preheat your oven to 375°F (190°C). Punch the dough down and divide it into 12 equal pieces. On a lightly floured surface, roll each piece into a circle about 5–6 inches across. Place 2–3 tablespoons of cooled filling in the center. Fold the dough up around the filling and pinch the edges together firmly — really press those seams closed or they'll open in the oven.
- Bake: Place each beerock seam-side down on a parchment-lined baking sheet. Let them rest for 10 minutes. If you want a glossy golden top, brush with a quick egg wash (1 egg beaten with a splash of water). Bake for 20–25 minutes until golden brown.
- Cool slightly before serving: Let them sit for at least 5 minutes before eating — the filling holds a lot of heat and you will burn the roof of your mouth if you don't wait. Trust me on this one.
Tips for Success
- Cool the filling completely before assembling: I cannot stress this enough. The first time I made beerocks, I was impatient and tried to fill them while the beef mixture was still warm. The dough got soft and sticky, the seams wouldn't hold, and I had filling leaking out all over the pan. Spread the filling out on a plate and give it a full 20–30 minutes. It's worth the wait.
- Don't overfill: It's tempting to pile in more filling but if you go past 3 tablespoons, the dough stretches too thin and tears when you try to seal it. The filling also expands slightly in the heat of the oven, so what seems like not enough filling at assembly is usually just right when they come out baked.
- Pinch those seams firmly and flip them seam-side down: The double action of pinching tightly and then placing them sealed-side down on the pan keeps everything contained. Even if a seam isn't perfect, having it against the pan means any leaks happen underneath where you can't see them. The bottoms end up slightly crispy and that's honestly the best part anyway.
- Let the dough rise properly: If your kitchen is cold, the rise will take longer. I sometimes turn my oven on to the lowest setting for 2 minutes, then turn it off and put the covered bowl in there. It creates a warm, draft-free environment that helps the yeast do its thing. You're looking for the dough to roughly double in size before you work with it.
- Make sure your cabbage is finely chopped: Big chunks of cabbage don't cook down the same way and you end up with a chunky, awkward filling that's hard to seal. Fine chop — or you can pulse it a few times in a food processor if you have one. If you don't, a sharp knife and a few extra minutes of chopping does the job fine.
Variations
- Cheesy beerocks: Mix about half a cup of shredded cheddar into the cooled filling before assembling. The cheese melts into the beef and cabbage while it bakes and makes the filling noticeably richer. My husband prefers them this way. Sharp cheddar works better here than mild — it holds its flavor against the beef.
- Spiced up version: Add a teaspoon of garam masala or a pinch of cayenne to the filling. This is the version I make for myself on nights when the kids are eating something else. It's not traditional at all, but the warm spice works surprisingly well with the beef and cabbage. If you like a little heat, a finely chopped jalapeño added with the onion does the same thing.
- Ground turkey swap: If you want to make these a little lighter, ground turkey works in place of ground beef. It's drier than beef so I add an extra tablespoon of butter to the pan to compensate. Season it a little more aggressively too — turkey needs more salt and garlic than beef does to taste like something.
- Mini beerocks for parties: Divide the dough into 24 pieces instead of 12 and use a scant tablespoon of filling in each. They bake in about 15–18 minutes and are easy to serve as finger food at a gathering. I've brought these to a couple of potlucks and they always go fast. Pair them with a side of mustard and a fun homemade bread project if you're putting out a spread.
- Vegetarian filling: Replace the beef with cooked green lentils (about 1½ cups cooked) and double up on the garlic and black pepper. Add a tablespoon of soy sauce or Worcestershire to give it some savory depth. It's not the same as the beef version but it's genuinely good — I made this once when I forgot to defrost the meat and ended up making it intentionally ever since.
Serving and Storage
Serving
Serve warm, about 5 minutes out of the oven. They're good on their own but really come alive with a dipping sauce on the side. Mustard is the classic pairing — yellow mustard, Dijon, or even a grainy whole grain mustard all work. Zainab likes ketchup. I sometimes put out dill pickles alongside them the way you'd serve them at an old-school diner. If you're serving these as a main dinner, a simple green salad on the side keeps the meal from feeling too heavy.
Storage
Let them cool completely before storing — if you put warm beerocks in a sealed container, they steam themselves soggy. Once cooled, they keep in an airtight container in the refrigerator for up to 4 days. To reheat, pop them in a 350°F oven for 10–12 minutes. The microwave works in a pinch (about 60–90 seconds) but the crust softens. For freezing, wrap each beerock individually in foil or plastic wrap, then put them all in a zip-lock bag. They freeze well for up to 3 months. Reheat straight from frozen at 350°F for 18–20 minutes.

Frequently Asked Questions
Can I make beerocks ahead of time?
Yes, and they're honestly better as a make-ahead recipe. You can bake the full batch, cool them, and refrigerate or freeze them. Reheat in a 350°F oven directly from frozen for about 18–20 minutes or from the fridge for 10–12 minutes. You can also assemble them unbaked, place them on a sheet pan in the freezer until solid, then transfer to a bag — bake from frozen at 375°F for about 30–35 minutes.
Can I use store-bought dough?
You can. Pizza dough or refrigerated roll dough from the grocery store both work — I've used both when I was short on time. The homemade dough is softer and slightly richer, but store-bought will absolutely get the job done. Trader Joe's pizza dough is probably the most convenient option if you have one nearby.
My seams keep opening in the oven — what am I doing wrong?
Usually it's one of two things: the filling was too warm when you assembled them (warm filling makes the dough slippery and hard to seal), or the seams weren't pinched tightly enough. Make sure the filling is fully cooled and really press those edges together with your fingers before placing them seam-side down on the pan. The pan placement is actually your backup — even imperfect seams stay mostly sealed when they're pressed against the parchment.
What do beerocks taste like?
The best way I can describe them: a soft dinner roll wrapped around a savory, slightly sweet beef and cabbage filling. The cabbage cooks down completely and blends into the beef so it's not strong or cabbagey in a sharp way — it just adds a mild sweetness and body to the filling. The dough stays soft inside and gets a little golden and slightly crisp on the outside.
Can I make these vegetarian?
Yes — replace the ground beef with 1½ cups of cooked green or brown lentils. Add a tablespoon of soy sauce or Worcestershire sauce to give the filling some depth, and season more generously with salt, pepper, and garlic powder. The texture is different from the beef version but the filling holds together well and still tastes savory and satisfying.
BEEF BEEROCKS
Ingredients
For the Dough:
- 1 cup warm milk
- 2 ¼ teaspoons active dry yeast
- 2 tablespoons sugar
- 3 cups all-purpose flour more as needed
- 1 teaspoon salt
- ¼ cup vegetable oil
- 1 large egg
For the Filling:
- 1 tablespoon oil or butter
- 1 pound ground beef
- 1 small head green cabbage finely chopped
- 1 small onion diced
- 1 teaspoon salt
- ½ teaspoon black pepper
- ½ teaspoon garlic powder
- Optional: pinch of caraway seeds
Instructions
Make the Dough:
- In a bowl, combine warm milk, yeast, and sugar. Let sit until frothy (about 5–10 mins). Stir in oil, egg, salt, and flour. Knead until smooth. Cover and let rise for 45 mins.
Cook the Filling:
- While dough rises, heat oil in a pan. Add ground beef and cook until browned. Add onion, cabbage, and seasonings. Cook until cabbage is soft. Let cool.
Assemble the Beerocks:
- Preheat oven to 375°F (190°C). Divide dough into 12 pieces. Roll each into a circle. Add 2–3 tablespoons of filling to the center. Fold and pinch edges to seal.
Bake:
- Place seam-side down on a baking sheet. Optional: brush tops with egg wash. Bake for 20–25 minutes, until golden brown.
Notes
- Freeze after baking and reheat in oven or microwave.
- Add cheese to the filling for extra richness.
- Serve with mustard or dill pickles for a tangy bite.
I've made beerocks probably a dozen times now and I still find them satisfying every time. There's something about pulling a tray of golden buns out of the oven that feels like an accomplishment, even though the actual work is pretty simple. They're the kind of food that makes your kitchen smell incredible and gets everyone wandering in to see what's happening.
What I like most about them practically is the freezer situation. I bake 24 at a time (two full batches of dough, double the filling) and we eat some that day and freeze the rest. On any given busy Tuesday, I can pull two out of the freezer, put them in the oven while I'm helping with homework, and have a real dinner on the table without any real effort. That kind of cooking feels genuinely useful in a way that some recipes don't.
If you're new to yeast doughs, this is actually a good one to start with — it's forgiving and the stakes feel low because you're wrapping the dough around filling anyway. It's not like a loaf of bread where the texture is the whole point. Try it once and you'll see what I mean. And when you need something sweet to round out the meal, I've been making a lot of strawberry rhubarb crisp lately — it's the kind of easy dessert that pairs well with any hearty main.
Make a big batch, freeze half, and thank yourself later. 🥖❤️
{"@context":"https://schema.org","@type":"Article","headline":"BEEF BEEROCKS","description":"Soft bread rolls filled with seasoned ground beef, cabbage, and onion—these Beef Beerocks are perfect hand-held comfort food for any occasion.","datePublished":"2025-05-06T03:35:34+00:00","dateModified":"2026-05-04T03:48:45+00:00","author":{"@type":"Person","name":"Sana Umer","url":"https://forfoodiefriends.com/about/","description":"Self-taught home cook with 10+ years of kitchen experience. Mom of two who develops every recipe in her own kitchen.","jobTitle":"Recipe Developer & Food Blogger","image":"https://forfoodiefriends.com/wp-content/uploads/sana-umer-author-photo.jpg"},"publisher":{"@type":"Organization","name":"For Foodie Friends","url":"https://forfoodiefriends.com/","logo":{"@type":"ImageObject","url":"https://forfoodiefriends.com/wp-content/uploads/forfoodiefriends-logo.png"}},"mainEntityOfPage":{"@type":"WebPage","@id":"https://forfoodiefriends.com/beef-beerocks/"},"image":"https://forfoodiefriends.com/wp-content/uploads/2025/05/BEEF-BEEROCKS.jpg"}





Comments
No Comments