
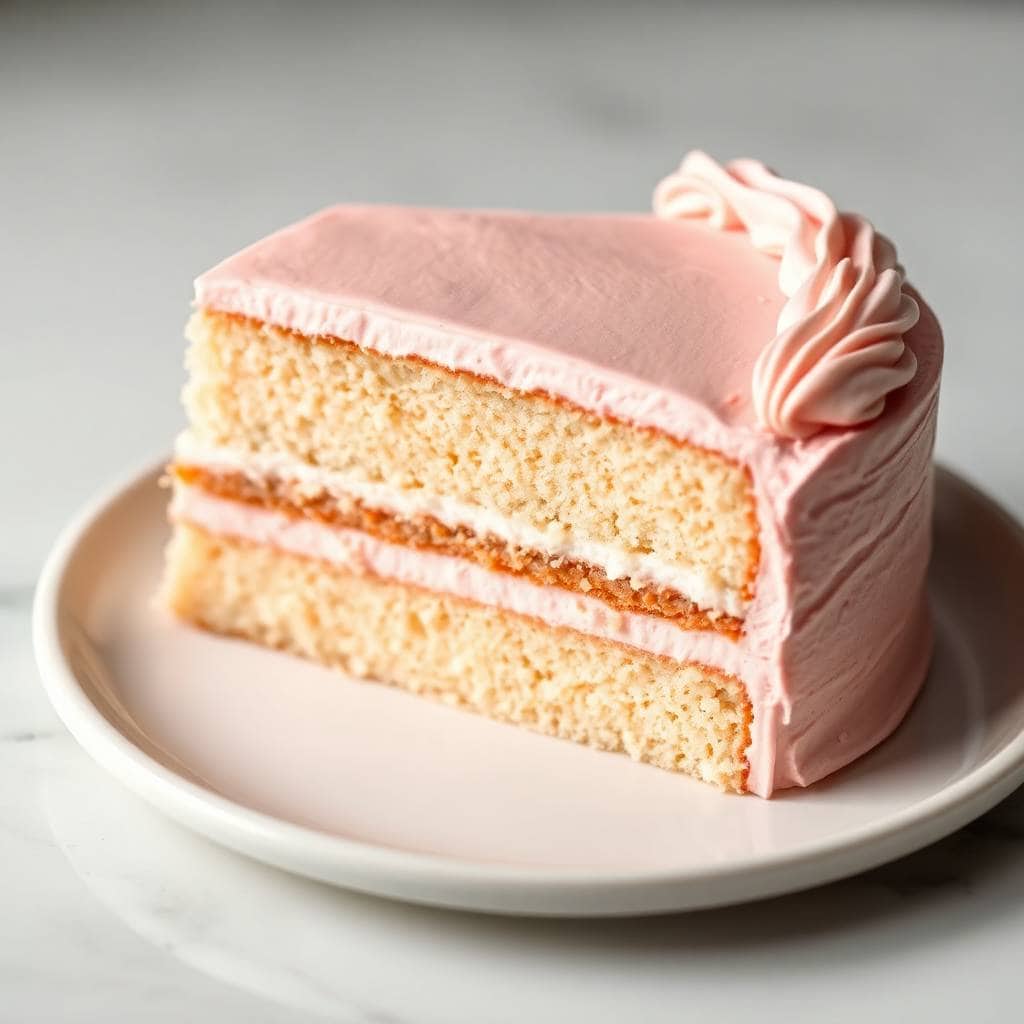
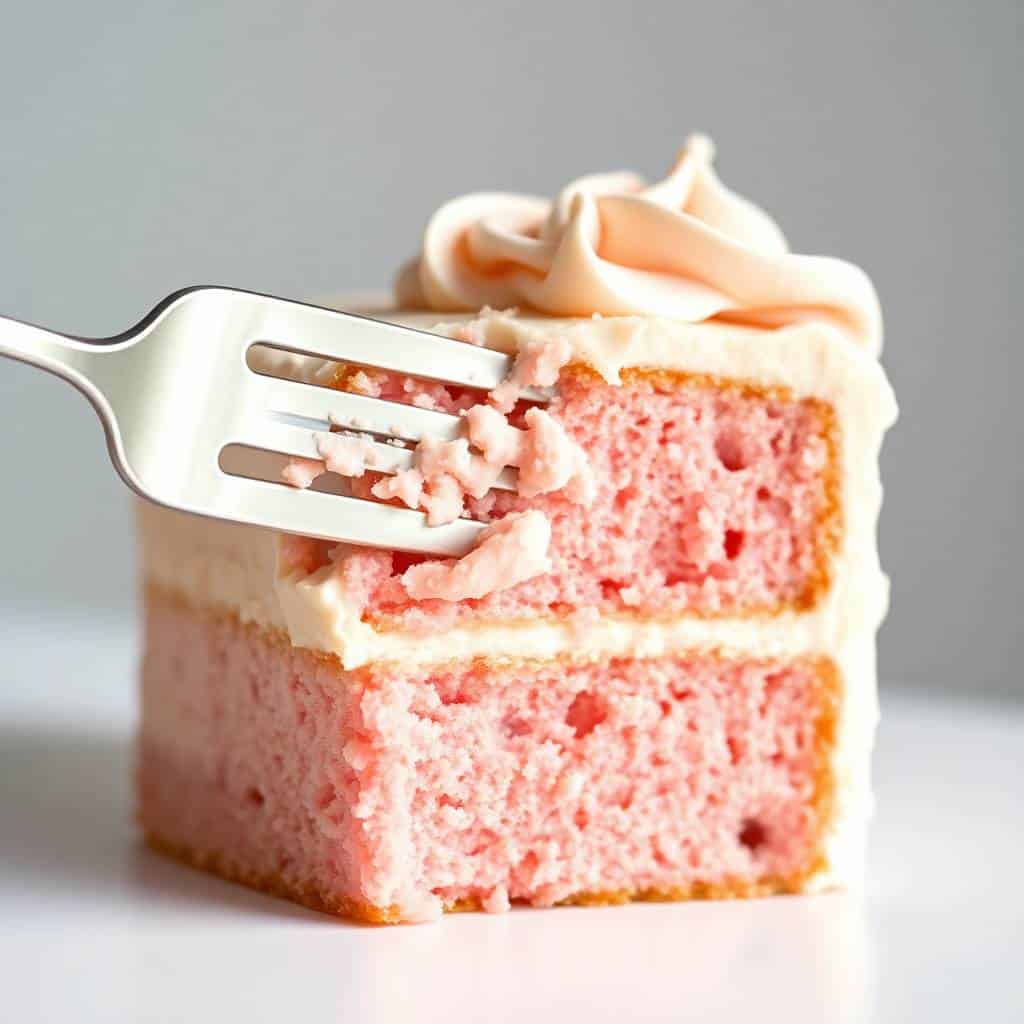
I made this cake for the first time for my neighbor's bridal shower and I was genuinely nervous about it. A champagne cake sounds like something that belongs in a bakery window, not in my regular home kitchen. But the ingredients are straightforward, the method isn't complicated, and the result — that pale pink, lightly bubbly, soft cake — looked like I'd actually tried really hard even though it came together in about an hour.
What makes this cake work is the champagne doing double duty. It's in the batter, which keeps the crumb light and just barely fruity. And if you brush the cooled layers with a little extra champagne before frosting, you get this subtle depth that a plain vanilla cake just doesn't have. It's not boozy. It's not overwhelming. It just tastes like something a little special.
My husband thought I'd bought it from a bakery when he first saw it on the counter, which is honestly the highest compliment he gives. Zainab kept asking if the pink was strawberry flavor (it's not, but the color is convincing). I've made it twice since that first bridal shower — once for a birthday and once just because I had half a bottle of rosé sitting in the fridge and no good reason not to. If you're looking for a dessert that looks impressive without requiring pastry school skills, this is the one. And if you want something a little more casual to round out a celebration spread, my Berry Bliss Valentine's Smoothie Bowl pairs really nicely with this for a brunch-style party.
One thing I'll say upfront: make sure your butter, eggs, and milk are all at room temperature before you start. I skipped this the first time because I was impatient, and the batter looked slightly curdled and the layers came out a bit denser than they should be. Room temperature ingredients blend into a smooth, even batter that bakes up soft. It's worth waiting the 30 minutes.
Why You'll Love This Recipe
- It looks like a lot of effort but isn't: The pink layers and fluffy frosting make this look like a serious occasion cake, but the actual method is just creaming butter, adding eggs, and alternating wet and dry ingredients — stuff you've done before. I had it in the oven in under 20 minutes. The decorating takes longer than the baking, which is a good sign.
- The champagne actually does something: I was skeptical at first — I thought the flavor would bake off completely and I'd just have regular vanilla cake in pink. But the champagne gives the crumb a very light, almost floral quality that's different from a standard white cake. It's subtle, not obvious, and that's exactly right for this kind of dessert.
- One bottle serves the cake and the table: You only need ¾ cup of pink champagne for the batter, which means you have most of the bottle left to pour for guests. I make a double batch of the cake when I'm feeding a crowd because even a two-layer cake disappears fast at a party.
- The frosting is adaptable: The base here is buttercream, which you can tint pink to match the layers or keep white for contrast. I've also done a cream cheese version (just swap half the butter for cream cheese) and it adds a nice tang. Either way, it holds up well and isn't too sweet if you add the champagne to the frosting too.
- It works for so many occasions: I've made this for a bridal shower, a birthday, and a random Friday. The pink makes it feel celebratory but the flavors are simple enough that it doesn't need a special reason. It also slices cleanly when cold, which matters when you're trying to plate it nicely for guests.
Ingredients
- 2 ½ cups all-purpose flour
- 2 ½ teaspoons baking powder
- ¼ teaspoon salt
- 1 cup unsalted butter, softened to room temperature
- 2 cups granulated sugar
- 4 large eggs, at room temperature
- 1 teaspoon vanilla extract
- ¾ cup pink champagne or sparkling rosé (plus a splash for brushing the layers)
- ½ cup whole milk, at room temperature
- Pink food coloring, gel-based (optional — a tiny drop goes a long way)
- 2 cups buttercream frosting (store-bought works fine, or make your own)
- Optional garnish: edible glitter, fresh berries, or pearl sprinkles
Directions
- Preheat the oven: Set your oven to 350°F (175°C). Grease and line two 8-inch round cake pans with parchment paper circles. Flouring the sides after greasing helps the cake release cleanly — I skip this and regret it every time.
- Mix the dry ingredients: In a medium bowl, whisk together the flour, baking powder, and salt. Set this aside. Whisking instead of just dumping everything together ensures the baking powder is evenly distributed, which means even rise.
- Cream the butter and sugar: In a large bowl, beat the softened butter and sugar together on medium speed for about 3–4 minutes until pale and fluffy. This step matters — rushing it means the cake won't be as light. If you don't have a mixer, a wooden spoon and some elbow grease works, but it'll take about 6–7 minutes of solid stirring.
- Add the eggs and vanilla: Add the eggs one at a time, beating well after each one. Then mix in the vanilla. If the batter looks slightly curdled at this point, don't panic — it'll come together once you add the flour.
- Alternate dry ingredients with wet: Add the flour mixture in three parts, alternating with the pink champagne and milk (start and end with flour). Mix each addition just until combined. Overmixing here develops gluten and makes the cake tough instead of tender.
- Add the food coloring: If you want a deeper pink, add one small drop of gel food coloring and stir gently. Gel coloring is much more concentrated than liquid — I used liquid the first time and added way too much trying to get the color right. Stick with gel if you have it.
- Bake: Divide the batter evenly between your prepared pans and bake for 25–30 minutes, until a toothpick inserted in the center comes out clean. Don't open the oven before the 25-minute mark or the layers might sink in the middle.
- Cool and brush: Let the cakes cool in the pans for 10 minutes, then transfer to a wire rack. Once completely cool, brush each layer lightly with a splash of champagne. This step is optional but it adds flavor and keeps the cake moist for an extra day.
- Frost and assemble: Place one layer on your serving plate and spread buttercream over the top. Set the second layer on top and frost the top and sides. Smooth it out with a spatula or the back of a spoon. Decorate with berries, edible glitter, or pearl sprinkles if you like.
Tips for Success
- Room temperature everything: Cold butter won't cream properly — it just chunks around the bowl instead of becoming light and airy. Cold eggs can cause the batter to seize. I pull everything out of the fridge at least 30 minutes before I start. This single habit changed the texture of my cakes dramatically.
- Stop mixing as soon as the flour disappears: Overmixing is the most common reason a from-scratch cake turns out dense and chewy instead of soft. Once you can't see dry flour in the batter, stop. A few small streaks are fine — they'll incorporate during baking. I set a timer for myself now because I have a habit of mixing too long out of habit.
- Use gel food coloring, not liquid: Liquid food coloring is watery — it adds volume to your batter without adding much color, and you end up adding too much trying to get a visible pink. Gel coloring from Wilton (available at Walmart or any craft store) gives you a vivid pink with a single toothpick dip. A little goes a very long way.
- Chill the layers before frosting: If your cake layers are even slightly warm, the buttercream will slide right off and you'll end up with a messy mess instead of clean layers. I cool mine completely on a rack, then pop them in the fridge for 20 minutes before I start frosting. It makes the whole process cleaner and easier.
- Sift your powdered sugar for the frosting: If you're making your own buttercream, sift the powdered sugar before adding it. Unsifted powdered sugar has small lumps that don't always break down, especially if your butter isn't warm enough. Sifting takes two minutes and means your frosting will be completely smooth. I skipped this once and ended up with speckled frosting full of tiny sugar lumps — not cute on a celebration cake.
Variations
- Strawberry champagne cake: Fold ½ cup of fresh strawberry purée into the batter before baking. It deepens the pink naturally (so you may not even need food coloring) and adds a fresh, fruity note that works really well with the champagne. I made this version for a summer birthday and it was honestly even better than the original.
- Sparkling rosé version: Swap the pink champagne for a dry sparkling rosé. The flavor is slightly more complex and the natural color of the rosé gives the batter a warmer pink tone without needing as much food coloring. Any reasonably priced bottle from Aldi or Trader Joe's works perfectly — you don't need anything expensive.
- Lemon zest twist: Add 1 teaspoon of fresh lemon zest to the batter and another ½ teaspoon to the frosting. It brightens everything up and cuts through the sweetness a little. This is my husband's preferred version — he finds plain buttercream cakes a bit one-note, but the lemon makes him go back for a second slice.
- Cupcake version: Divide the batter into lined cupcake tins and bake at 350°F for 15–18 minutes. This is a good option if you're serving a crowd where slicing a layered cake would be awkward. I did this for Zainab's school event — 24 mini pink cupcakes with a swirl of pink frosting, and they were gone in ten minutes.
- Cream cheese frosting swap: Replace the buttercream with cream cheese frosting (8 oz cream cheese, ½ cup butter, 2 cups powdered sugar, 1 tablespoon champagne). It's tangier and less sweet, which balances the cake nicely. This is similar to what I do with my pumpkin bars with cream cheese frosting — that tangy-sweet combination is just hard to beat on a celebration cake.
Serving and Storage
Serving
This cake is best served slightly chilled or at room temperature — I take it out of the fridge about 20 minutes before I plan to cut it so the frosting has a chance to soften slightly. It slices very cleanly when cold, which is useful if you need neat, even slices for a party. Fresh berries on the side (strawberries, raspberries) look beautiful with the pink and add a tartness that balances the sweet frosting. Naturally, a glass of something bubbly alongside it makes the whole thing feel more intentional.
Storage
Store the frosted cake in an airtight container in the fridge for up to 4 days. The champagne brushing on the layers actually helps keep the crumb from drying out, so day 2 and day 3 slices are still really good. If you want to make it ahead, you can bake and cool the unfrosted layers, wrap them tightly in plastic wrap, and refrigerate for up to 2 days — or freeze them for up to 2 months. Frost the cake the day you're serving it for the best result. If you freeze the layers, thaw them in the fridge overnight before assembling.
Frequently Asked Questions
Can I use regular white champagne instead of pink?
Yes, regular champagne or any dry sparkling wine works fine here. The flavor stays light and bubbly. You'll just need to rely more on the food coloring for the pink — the batter won't pick up the blush tone that pink champagne or rosé naturally gives it. Taste-wise, there's very little difference.
Can I bake the layers ahead of time?
Absolutely. I almost always bake the layers the day before a party and store them wrapped in plastic wrap at room temperature overnight, or in the fridge if it's more than one day ahead. Then I frost on the day. It actually makes the whole process less stressful — you're not rushing to cool the cake before guests arrive.
Is this cake safe for kids to eat?
Most of the alcohol bakes off during the 25–30 minutes in the oven, so the baked layers are generally considered fine for children. If you want to be cautious, just skip the champagne brush on the cooled layers — that's where the alcohol stays more present since it's not heated. Zainab had a slice at the birthday party with no issues, but every family makes their own call on this.
Can I freeze this cake?
Yes — freeze the unfrosted layers only. Wrap each layer tightly in two layers of plastic wrap and freeze for up to 2 months. Buttercream doesn't freeze as well — it can get grainy when it thaws. Defrost the layers overnight in the fridge, let them come to room temperature, then assemble and frost fresh.
What can I substitute for milk in this recipe?
Full-fat oat milk or whole milk are both fine. For a richer crumb, you can use half-and-half instead of milk — it adds a bit more fat which keeps the cake tender. Greek yogurt thinned with a tablespoon of water also works well and gives the crumb a slight tang that's actually really nice against the sweet frosting.
PINK CHAMPAGNE CAKE RECIPE
Ingredients
- 2 ½ cups all-purpose flour
- 2 ½ teaspoons baking powder
- ¼ teaspoon salt
- 1 cup unsalted butter softened
- 2 cups granulated sugar
- 4 large eggs
- 1 teaspoon vanilla extract
- ¾ cup pink champagne or sparkling wine
- ½ cup milk
- Pink food coloring optional
- 2 cups buttercream frosting
- Optional garnish: edible glitter or fresh berries
Instructions
- Preheat the Oven: Preheat oven to 350°F (175°C). Grease and line two 8-inch round cake pans.
- Mix Dry Ingredients: In a bowl, whisk together flour, baking powder, and salt.
- Make the Batter: In a large bowl, beat butter and sugar until light and fluffy. Add eggs one at a time, then vanilla. Gradually add dry ingredients alternately with pink champagne and milk. Add food coloring if desired.
- Bake: Divide batter evenly between prepared pans. Bake for 25–30 minutes or until a toothpick comes out clean. Cool completely.
- Assemble and Frost: Spread buttercream between layers and over the cake. Decorate with edible glitter or fresh berries.
- Serve: Slice and enjoy this festive, elegant cake.
Notes
- Make Ahead: Bake the cake layers in advance and store in an airtight container. Frost just before serving.
- Customizing the Flavor: Add a splash of pink liqueur for stronger flavor or use cream cheese frosting for a tangy twist.
- Serving Suggestions: Serve with a glass of champagne or sparkling juice for celebrations.
- Allergy-Friendly Options: Use dairy-free butter and milk to make it vegan-friendly.
- Storage Tips: Store in an airtight container at room temperature for up to 2 days or refrigerate for up to 4 days.
I've made a lot of cakes over the years — birthday cakes, tea cakes, sheet cakes for school events — and this pink champagne version has become the one I reach for whenever the occasion actually calls for something that looks intentional. It's not complicated. The ingredients are things you'd find at any grocery store. But the result has a quiet elegance to it that a standard chocolate or vanilla cake just doesn't carry in the same way.
The champagne brushing step is the one I'd push you not to skip. I know it seems fussy, but it takes about two minutes and the difference in moisture between a brushed and unbrushed layer is genuinely noticeable on day two. If you're making this for a party where the cake might sit out for a bit, that brushing is what keeps it from tasting dry by the time it gets to the last few slices.
If you're building a celebration spread around this, the Candy Apple Shots are a fun festive drink pairing for an adults-only party. And if you're feeding a crowd that wants something savory alongside the sweet, my Creamy Cajun Shrimp and Chicken Pasta is the kind of main dish that can hold its own next to a showstopper cake. Both come together without too much stress on a party day.
Make this the next time you have something to celebrate — or the next time you need an excuse to open a bottle of something bubbly. Either works. 🎂🥂✨
If you liked this, you might also enjoy these:
- Berry Bliss Valentine's Smoothie Bowl — a pretty, no-bake option for a celebration brunch
- Candy Apple Shots: Twisted Party Drinks for Fall Celebrations — a fun festive drink to serve alongside
-
{"@context":"https://schema.org","@type":"Article","headline":"PINK CHAMPAGNE CAKE RECIPE","description":"Celebrate with Pink Champagne Cake — a moist, elegant cake infused with pink champagne and frosted with creamy, bubbly-inspired icing.","datePublished":"2025-10-16T09:47:45+00:00","dateModified":"2026-05-03T20:50:18+00:00","author":{"@type":"Person","name":"Sana Umer","url":"https://forfoodiefriends.com/about/","description":"Self-taught home cook with 10+ years of kitchen experience. Mom of two who develops every recipe in her own kitchen.","jobTitle":"Recipe Developer & Food Blogger","image":"https://forfoodiefriends.com/wp-content/uploads/sana-umer-author-photo.jpg"},"publisher":{"@type":"Organization","name":"For Foodie Friends","url":"https://forfoodiefriends.com/","logo":{"@type":"ImageObject","url":"https://forfoodiefriends.com/wp-content/uploads/forfoodiefriends-logo.png"}},"mainEntityOfPage":{"@type":"WebPage","@id":"https://forfoodiefriends.com/pink-champagne-cake-recipe/"},"image":"https://forfoodiefriends.com/wp-content/uploads/2025/10/PINK-CHAMPAGNE-CAKE-RECIPE.jpg"}






Comments
No Comments