
There's something about a slice of chocolate raspberry mousse cake sitting on the counter that makes my whole kitchen go quiet — at least for the thirty seconds before Zainab spots it and starts asking when she can have a piece. I've been making layered mousse cakes for a few years now, and this one has become the version I come back to every time I need something that looks genuinely impressive without requiring a pastry degree.
What makes this cake work is the combination of textures and temperatures. The chocolate cake base is dense and fudgy — I use hot coffee instead of plain water in the batter, which deepens the cocoa flavor in a way that's hard to explain until you taste it. On top of that goes a cooked raspberry filling (real fruit, not jam from a jar), then a cloud of chocolate mousse, then ganache poured over the whole thing. Each layer does a different job. They all need each other.
This is the cake I make for birthdays in our house. My husband's birthday, Zainab's, and honestly sometimes just because I want to bake something that takes a little effort and pays off. If you're looking for something that feels more like a celebration dessert than a weeknight treat, this is it. It's also worth mentioning: if you love raspberry and chocolate together, my White Chocolate Raspberry Tiramisu uses a similar flavor combination in a completely different format — and it's no-bake, which is a bonus.
One thing to know before you start: this cake has chilling time built in. Plan for it the day before you need it. The mousse layer needs at least 4 hours to set before you add the ganache, so rushing this one will cost you. I learned that lesson the first time I made it — I tried to speed things up by pouring warm ganache over a not-quite-set mousse, and the layers collapsed into each other. Tasted fine, looked like a mess. Give yourself the time.
Why You'll Love This Recipe
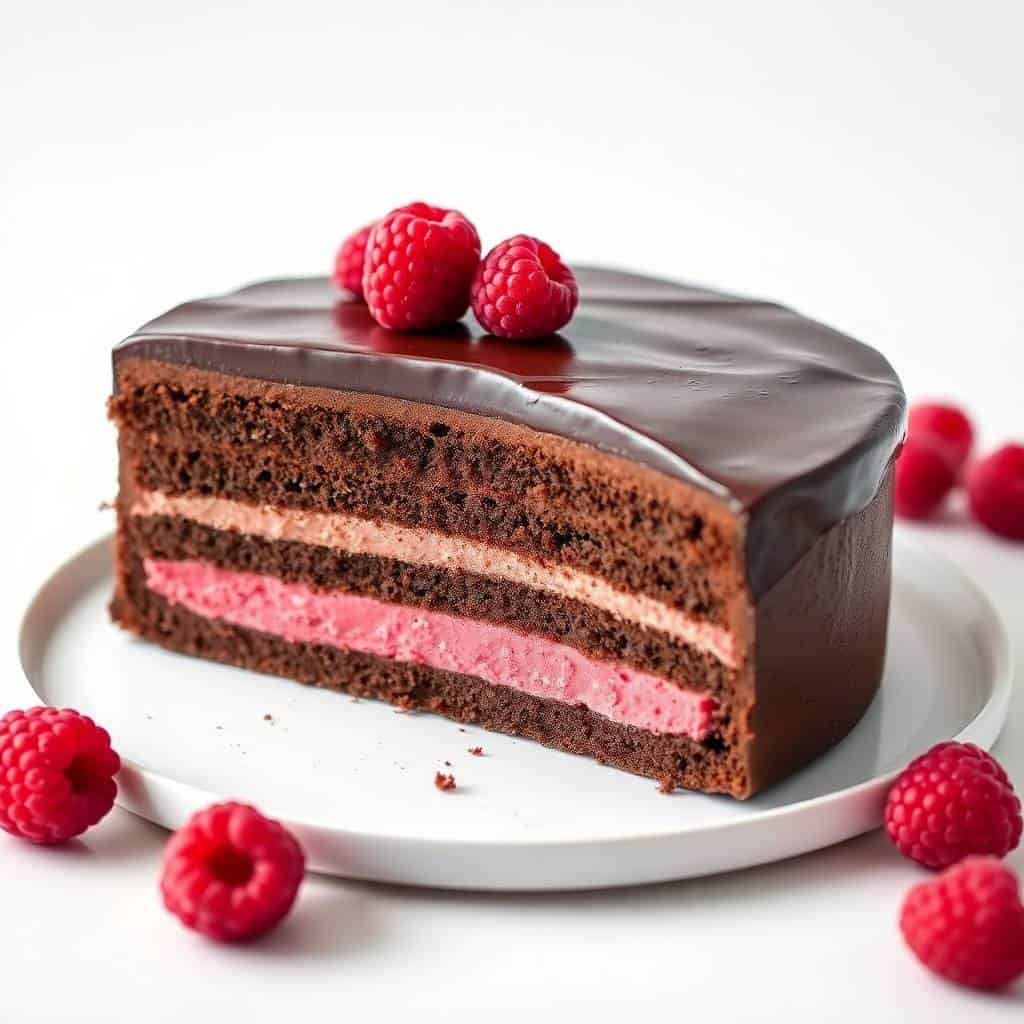
- Three distinct layers, each with its own texture: The cake base is dense and moist, the mousse is airy and light, and the ganache is silky and rich. When you cut a clean slice and see all three sitting there, it's satisfying in a way that single-layer cakes just aren't. Every bite has something different going on.
- The raspberry cuts through the richness: Chocolate on chocolate on chocolate can get heavy fast. The raspberry filling in the middle changes that completely — it's tart and a little bright, and it makes the whole cake feel more balanced. You don't feel like you need to stop after one slice (though you probably should).
- It's actually make-ahead friendly: This is genuinely one of those cakes that's better the next day. The layers firm up overnight, the flavors settle, and slicing becomes much cleaner. I always make this the evening before I need it, which also means there's no day-of stress about whether things have set properly.
- It looks like it came from a bakery without bakery-level equipment: I don't own a stand mixer or any fancy pastry tools. A hand mixer, an 8-inch springform pan, and a regular saucepan are all I used. The ganache drip does a lot of visual work on its own — pour it while it's still a little warm and it cascades down the sides exactly the way you want it to.
- You can use frozen raspberries year-round: Fresh raspberries are great if they're in season and affordable. But the filling is cooked and blended, so frozen works just as well — I've made this both ways and honestly can't tell the difference in the final cake. Frozen raspberries from Walmart or Aldi are what I usually reach for.
Ingredients
- For the Chocolate Cake:
- 1 cup all-purpose flour
- ½ cup unsweetened cocoa powder
- 1 teaspoon baking powder
- ½ teaspoon baking soda
- ¼ teaspoon salt
- ¾ cup granulated sugar
- 2 large eggs
- ½ cup buttermilk (or ½ cup milk + ½ teaspoon white vinegar, let sit 5 minutes)
- ¼ cup vegetable oil
- 1 teaspoon vanilla extract
- ½ cup hot coffee or hot water (coffee deepens the chocolate flavor — use water if you prefer)
- For the Raspberry Filling:
- 1 cup fresh or frozen raspberries
- 2 tablespoons granulated sugar
- 1 teaspoon lemon juice
- 1 teaspoon cornstarch mixed with 1 tablespoon cold water
- For the Chocolate Mousse:
- 1½ cups heavy cream, cold
- 1 cup semi-sweet chocolate chips
- 2 tablespoons powdered sugar
- 1 teaspoon vanilla extract
- For the Ganache Topping:
- ½ cup heavy cream
- ¾ cup dark chocolate chips
- To finish:
- Fresh raspberries for garnish
- Chocolate curls or shavings (optional)
Directions
- Preheat and prep your pans: Set your oven to 350°F (175°C). Grease two 8-inch round cake pans and line the bottoms with parchment paper. Don't skip the parchment — removing the layers cleanly matters for assembly.
- Make the cake batter: Whisk all dry ingredients together in a large bowl — flour, cocoa, baking powder, baking soda, salt, and sugar. In a separate bowl, whisk together the eggs, buttermilk, oil, and vanilla. Pour the wet ingredients into the dry and mix until just combined, then stir in the hot coffee. The batter will be thin — that's normal, and it's what makes the cake so moist.
- Bake the cake layers: Divide the batter evenly between the two pans and bake for 22–25 minutes, until a toothpick inserted in the center comes out clean. Let them cool in the pans for 10 minutes, then turn out onto a wire rack and cool completely before assembling. Warm cake will melt your mousse — patience here matters.
- Make the raspberry filling: In a small saucepan over medium heat, combine raspberries, sugar, and lemon juice. Cook for 3–4 minutes, stirring often, until the berries break down. Stir in the cornstarch mixture and cook another minute until thickened. Take it off the heat and let it cool completely. I sometimes pop it in the fridge to speed this up.
- Make the chocolate mousse: Melt the chocolate chips in a heatproof bowl — I do 30-second bursts in the microwave, stirring between each. Let it cool until it's no longer warm to the touch (if you add it to the cream while hot, it seizes). In a separate bowl, whip the heavy cream, powdered sugar, and vanilla together until soft peaks form. Gently fold the melted chocolate into the whipped cream in two or three additions. You want it combined but still light — stop when you can't see any white streaks.
- Assemble the cake: Place one cooled cake layer on a plate or cake stand. Spread the raspberry filling over the top, all the way to the edges. Spoon the chocolate mousse over the raspberry layer and spread it out. Place the second cake layer on top and press down gently. Cover the top and sides with the remaining mousse, using a spatula to smooth it. Refrigerate for at least 4 hours, or overnight.
- Make and pour the ganache: Heat the ½ cup heavy cream in a small saucepan until it just begins to steam — you don't want a rolling boil. Pour it over the dark chocolate chips in a bowl and let it sit, undisturbed, for 2 minutes. Then stir from the center outward until smooth and glossy. Let it cool for 5–8 minutes so it thickens slightly before pouring. Pour over the chilled cake and let it drip naturally over the sides.
- Decorate and serve: Top with fresh raspberries and chocolate curls if you have them. Refrigerate until the ganache is fully set, at least 30 minutes. To slice cleanly, run a sharp knife under hot water, wipe it dry, and cut. Repeat between slices.
Tips for Success
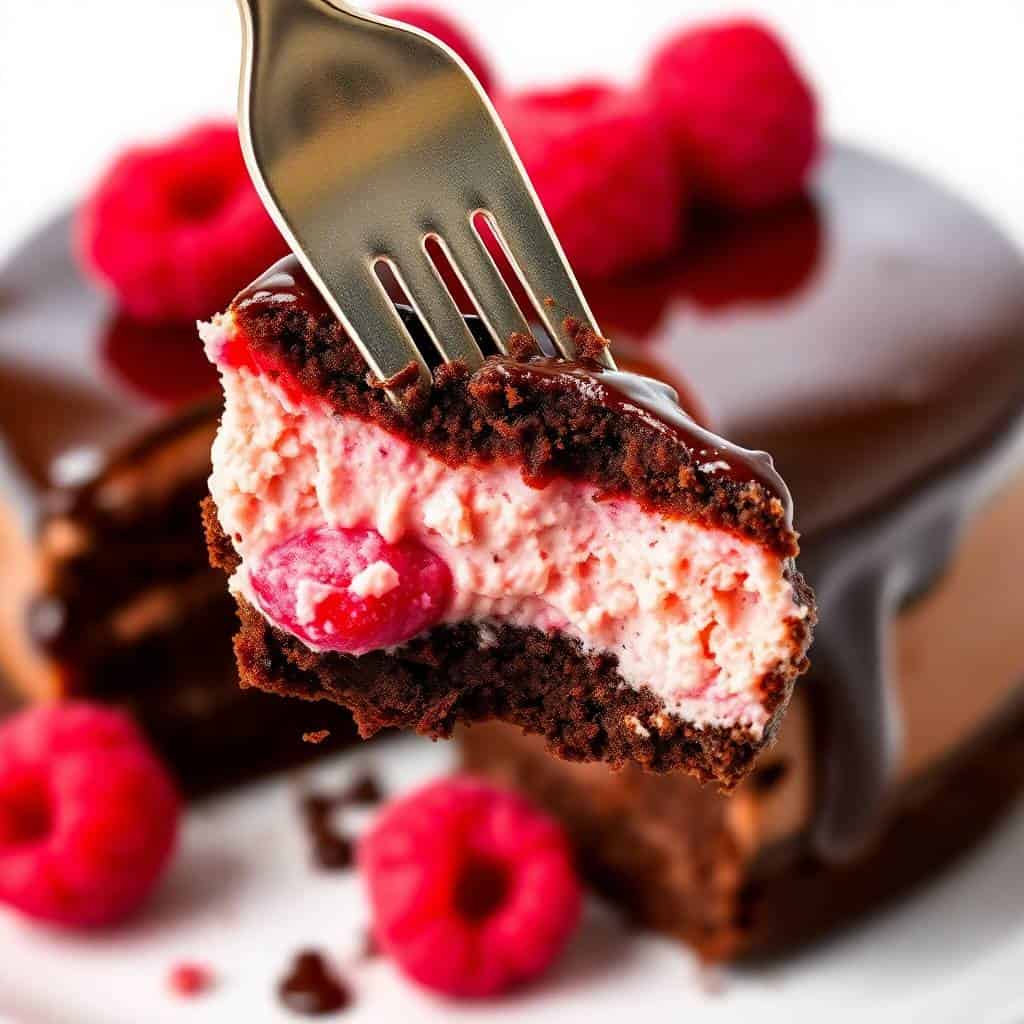
- Let your cake layers cool completely before assembling: I've tried to rush this step more than once, and warm cake melts the mousse into a puddle. I now bake the cake layers the morning of the day I assemble, or even the day before and wrap them in plastic wrap once cool. Cold layers are actually easier to work with anyway.
- Cool the melted chocolate before folding it into the cream: This is the one step I see people mess up most. If the chocolate is still warm when it hits the whipped cream, you'll end up with a grainy, heavy mousse instead of a light one. I spread the melted chocolate onto a plate and let it sit for 10 minutes, or put it in the fridge for 5. You want it cool but still fluid — not solidified.
- Don't overwhip the cream for the mousse: Soft peaks — not stiff peaks. When you pull the whisk up and the cream forms a peak that gently folds over, that's right. Whip too far and the mousse will be grainy and dense. It also becomes harder to fold in the chocolate without deflating everything.
- Use a springform pan for the chilling step: After assembling the layers, I transfer the whole thing to a springform pan before refrigerating. The walls hold the mousse in place while it firms up, and releasing the springform gives you clean, straight edges. If you don't have one, don't worry — you can refrigerate it in a regular cake pan lined with plastic wrap and peel it away before serving.
- Let the ganache cool before pouring: I learned this the hard way — poured it straight out of the pan once and it was so thin it ran off the sides completely before setting. Let it sit in the bowl for 5–8 minutes, stirring occasionally, until it coats the back of a spoon with some resistance. Then pour. It'll still drip beautifully but will actually stay on the cake.
Variations
- White chocolate mousse instead of dark: Swap the semi-sweet chocolate chips in the mousse for white chocolate chips. It gives you a sweeter, creamier mousse that contrasts beautifully with the tart raspberry filling. If you like the white chocolate and raspberry combination, my White Chocolate Raspberry Tiramisu uses that same pairing in a completely different dessert — worth bookmarking.
- Mixed berry filling: Replace the raspberries with a mix of raspberries, strawberries, and blueberries. The flavor gets a little more complex and the color is gorgeous — deeper and richer than straight raspberry. I've done this in summer when all three berries are on sale at Costco, and it works beautifully with the chocolate mousse.
- Spiced chocolate base: Add ½ teaspoon of cinnamon or a tiny pinch of cayenne to the cake batter. This is something I'd make for my Pakistani family — spiced chocolate is very familiar to us, and it pairs surprisingly well with fruit. The warmth in the cake plays against the cold mousse in a way that feels intentional, not accidental.
- Vegan version: Use full-fat coconut cream instead of heavy cream in both the mousse and ganache, and substitute a flax egg (1 tablespoon ground flaxseed + 3 tablespoons water, rested 5 minutes) for each egg in the cake. Agar-agar can replace gelatin if you're using a gelatin-set mousse version — follow the agar package directions, because it's not a straight 1:1 swap. I haven't tested this version myself, but several readers have reported it works well.
- Mini individual cakes: Use a muffin tin or silicone molds to make individual portions. Cut cake rounds with a cookie cutter to fit, layer in the raspberry filling and mousse, then top with a small pour of ganache. These are great for a dinner party because everyone gets their own piece and the presentation is cleaner than slicing a full cake. I make a double batch of the mousse when I do this because small portions go fast.
Serving and Storage
Serving
Serve this cake cold, straight from the fridge. The mousse holds its shape best when chilled, and the ganache has a better texture when it hasn't been sitting at room temperature for too long. I slice it with a warm knife — run it under hot water for 30 seconds, wipe dry, and cut. Repeat between every single slice if you want clean edges. A spoonful of the leftover raspberry filling on the plate makes a nice presentation, and a little extra whipped cream on the side never hurt anyone.
Storage
Keep the cake covered in the refrigerator for up to 3 days. I cover it with a cake dome or press plastic wrap gently against any cut surfaces to keep the mousse from drying out. For freezing: you can freeze the assembled cake without the ganache topping for up to a month — wrap it well in plastic wrap, then foil. Thaw overnight in the fridge, then make and pour the ganache fresh before serving. The texture of the mousse holds up reasonably well from frozen, though the raspberry filling can release a little extra moisture as it thaws, which is why I make the ganache fresh.

Frequently Asked Questions
Can I make this cake a day ahead?
Yes — and honestly, I'd encourage it. The layers firm up overnight, slicing is much cleaner, and the flavors settle in a way that day-of assembly just doesn't achieve. I assemble everything except the ganache the evening before, refrigerate overnight, then make the ganache fresh the morning I'm serving it. Works every time.
Can I freeze this cake?
You can freeze the assembled layers (without the ganache topping) for up to a month. Wrap the whole cake tightly in plastic wrap, then in foil. Thaw overnight in the fridge. Once it's thawed, make a fresh batch of ganache and pour it over — the mousse layer can get slightly watery after freezing, and fresh ganache covers that up nicely. I wouldn't freeze slices individually because the mousse tends to lose its texture.
Can I use frozen raspberries instead of fresh?
Absolutely. Frozen raspberries work great for the filling since it gets cooked down anyway. Just thaw them fully first and drain off any excess liquid before adding them to the pan — too much water in the filling makes it hard to thicken properly with the cornstarch. For the garnish on top I prefer fresh, but that's just about looks.
My mousse came out grainy — what happened?
Almost always it's one of two things: the melted chocolate was still too warm when it hit the whipped cream, or the cream was overwhipped. The chocolate needs to be cool but still fluid — not set, but not warm. And the cream should be at soft peaks, not stiff. If you catch it early enough and the mousse is just slightly grainy, try folding in a tablespoon or two of unwhipped cold cream to loosen it up. It won't be perfect but it's usually salvageable.
Can I make this gluten-free?
The mousse, filling, and ganache are naturally gluten-free — it's just the cake base that needs adjusting. A 1:1 gluten-free flour blend (like the kind from Bob's Red Mill or the Walmart store brand) works well as a direct substitute for the all-purpose flour. The texture is slightly denser than the original, but the moisture from the buttermilk and oil compensates for it. I've made it this way for a friend with celiac and she said you couldn't tell the difference.
CHOCOLATE RASPBERRY MOUSSE CAKE
Ingredients
For the Chocolate Cake:
- 1 cup all-purpose flour
- ½ cup cocoa powder
- 1 teaspoon baking powder
- ½ teaspoon baking soda
- ¼ teaspoon salt
- ¾ cup sugar
- 2 large eggs
- ½ cup buttermilk
- ¼ cup vegetable oil
- 1 teaspoon vanilla extract
- ½ cup hot coffee or water
For the Raspberry Filling:
- 1 cup fresh or frozen raspberries
- 2 tablespoons sugar
- 1 teaspoon lemon juice
- 1 teaspoon cornstarch mixed with 1 tablespoon water
For the Chocolate Mousse:
- 1 ½ cups heavy cream
- 1 cup semi-sweet chocolate chips
- 2 tablespoons powdered sugar
- 1 teaspoon vanilla extract
For the Ganache Topping:
- ½ cup heavy cream
- ¾ cup dark chocolate chips
Instructions
- Preheat Oven: Set oven to 350°F (175°C). Grease two 8-inch round cake pans and line with parchment paper.
- Prepare Cake Batter: Whisk dry ingredients together. Add eggs, buttermilk, oil, and vanilla; mix well. Stir in hot coffee until smooth.
- Bake: Divide into pans and bake for 22–25 minutes. Let cool completely.
- Make Raspberry Filling: In a small pan, cook raspberries, sugar, and lemon juice for 3–4 minutes. Stir in cornstarch mix and cook until thickened. Cool completely.
- Prepare Chocolate Mousse: Heat chocolate chips until melted. Cool slightly. Whip cream, sugar, and vanilla until soft peaks form. Gently fold in melted chocolate.
- Assemble Cake: Place one cake layer on a plate, spread raspberry filling, then top with mousse. Add second cake layer and cover with more mousse.
- Add Ganache: Pour warm ganache over chilled cake, letting it drip beautifully down the sides.
- Decorate: Top with fresh raspberries and chocolate curls. Chill for at least 2 hours before serving.
Notes
- Storage: Refrigerate for up to 3 days.
- Tip: Use a springform pan for easy layering and clean edges.
This cake takes time — I won't pretend otherwise. But almost all of that time is passive: the cake cooling





Comments
No Comments