
Every October, Zainab starts asking me when I'm going to make "the scary cupcakes." She means these — red velvet cupcakes with cream cheese frosting and that drizzle of red syrup that looks a little too much like something from a horror film. I made them for the first time two Halloweens ago on a whim, and now they're basically a non-negotiable tradition in our house.
What I like about red velvet is that it's not just a regular chocolate cake dyed red — there's actually a real cocoa flavour in there, and the buttermilk keeps everything tender in a way that oil-only cakes sometimes miss. The vinegar isn't there to be weird; it reacts with the baking soda and the cocoa and helps set that deep colour. I was skeptical the first time I saw vinegar in a cake recipe, but I've learned not to question it.
The cream cheese frosting is the part my family fights over. My husband prefers his cupcakes with a modest swirl. Zainab wants as much frosting as physically possible. I've started making a little extra batch of frosting just to keep the peace. If you're looking for something equally indulgent to bake around the holidays, my Raspberry Cinnamon Rolls with Cream Cheese Frosting use a similar frosting base and are just as popular in my kitchen.
One thing I'll say upfront: don't rush the cooling step. I tried frosting a batch while they were still slightly warm once, and the frosting slid right off. Completely my fault, completely avoidable. Give them a full 30–40 minutes on the rack before you even think about the frosting bowl. Everything else about this recipe is genuinely straightforward.
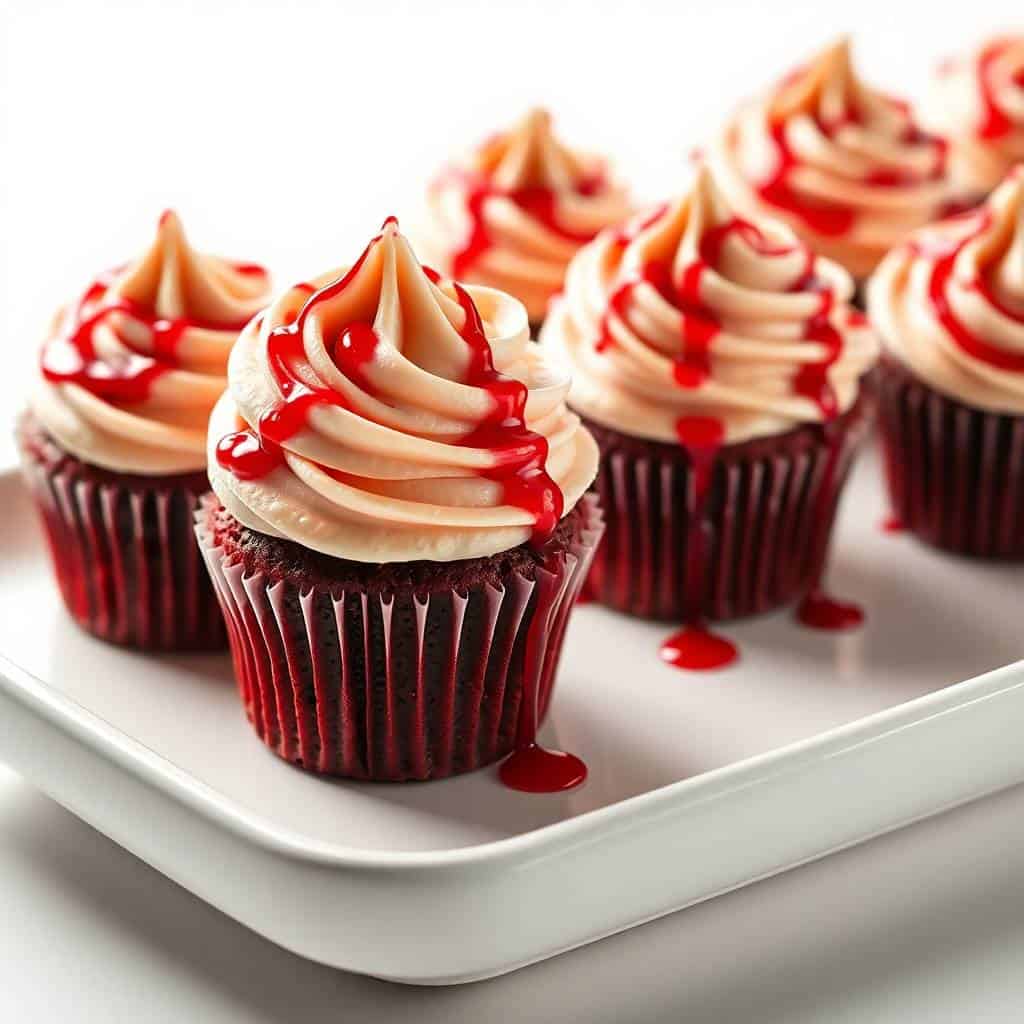
Why You'll Love This Recipe
- That colour is genuinely dramatic: The deep crimson against white cream cheese frosting looks like you put in way more effort than you did. I've brought these to Halloween gatherings and people always ask if I ordered them from somewhere. The colour comes from gel food colouring, which you can find at Walmart or any craft store — it's more concentrated than liquid dye so you use less and it doesn't affect the batter texture.
- Buttermilk keeps these genuinely moist: I've made red velvet with just milk before and the texture was fine but not great. Buttermilk adds a slight tang and keeps the crumb tender for days — not just on the day you bake them. If you don't have buttermilk in the fridge, I've got a quick fix in the Tips section below.
- The cream cheese frosting is tangy enough to balance the sweetness: Pure buttercream on a sweet cupcake can get cloying fast. Cream cheese cuts through that. The frosting here is smooth, not grainy, as long as your butter and cream cheese are both soft before you start. I pull them out of the fridge about 20 minutes before I'm ready to frost.
- One bowl for the batter, one for the frosting: There's no creaming butter, no separating eggs, no folding in stages. You whisk the dry ingredients, mix the wet ingredients, combine them, done. Even on a busy evening when I'm also thinking about dinner — something like my One Pan Sausage and Veggie Bake — I can have these cupcakes in the oven in under 15 minutes.
- The "blood" effect takes about 30 seconds: Red gel icing from any supermarket baking aisle or a simple raspberry syrup drizzled on top just before serving — that's all it is. It looks like you spent time on it. You didn't. That's the whole point.
Ingredients
- 1 ½ cups all-purpose flour
- 1 cup granulated sugar
- 1 teaspoon unsweetened cocoa powder
- ½ teaspoon baking soda
- ½ teaspoon salt
- ½ cup vegetable oil
- 1 large egg, room temperature
- ½ cup buttermilk, room temperature (see Tips if you don't have any)
- 1 tablespoon red gel food colouring (liquid dye works in a pinch but use gel if you can)
- 1 teaspoon vanilla extract
- 1 teaspoon white vinegar
- For the Frosting:
- ½ cup (1 stick / 4 oz) unsalted butter, softened
- 8 oz cream cheese, softened (full-fat gives the best texture)
- 2 cups powdered sugar, sifted
- 1 teaspoon vanilla extract
- Optional decoration: red gel icing or raspberry syrup for the "bloody" drizzle
Directions
- Preheat and prep your pan: Heat your oven to 350°F (175°C) and line a 12-cup muffin tin with paper cupcake liners. I use regular liners from Walmart — nothing fancy needed. Getting everything ready before you mix means you're not scrambling once the batter is done.
- Mix the dry ingredients: In a medium bowl, whisk together the flour, cocoa powder, baking soda, and salt. Set this aside. Whisking the dry ingredients separately first makes sure the baking soda and cocoa are evenly distributed before they meet the wet ingredients.
- Mix the wet ingredients: In a large bowl, beat together the oil, sugar, and egg until smooth. Add the buttermilk, red food colouring, vanilla, and vinegar, and mix until everything is combined and the colour looks uniform. It should be a vivid red — if it looks pink, add a touch more gel.
- Combine wet and dry: Gradually add the dry ingredients into the wet bowl, stirring gently until just combined. Stop mixing as soon as you don't see flour streaks. Overmixing develops gluten and makes the cupcakes dense instead of tender.
- Fill the liners and bake: Divide the batter evenly among the 12 liners, filling each about ⅔ full. I use a large cookie scoop for this — it's faster and keeps the portions even. Bake for 20–22 minutes, or until a toothpick inserted into the centre comes out clean or with just a couple of dry crumbs.
- Cool completely: Let the cupcakes sit in the tin for 5 minutes, then transfer them to a wire rack. They need to be fully cooled before frosting — I mean it. I once tried to rush this and ended up with a soupy frosting mess.
- Make the cream cheese frosting: Beat the softened butter and cream cheese together until smooth and fluffy, about 2–3 minutes. Add the sifted powdered sugar and vanilla, and beat again until creamy. If the frosting feels too soft, refrigerate it for 15 minutes before piping.
- Frost and add the "blood" effect: Frost the cooled cupcakes using a piping bag fitted with a star tip, or just spread it on with a knife — both work. Right before serving, drizzle a little red gel icing or raspberry syrup over the frosting in a way that looks intentionally dramatic. A small spoon works fine for this.
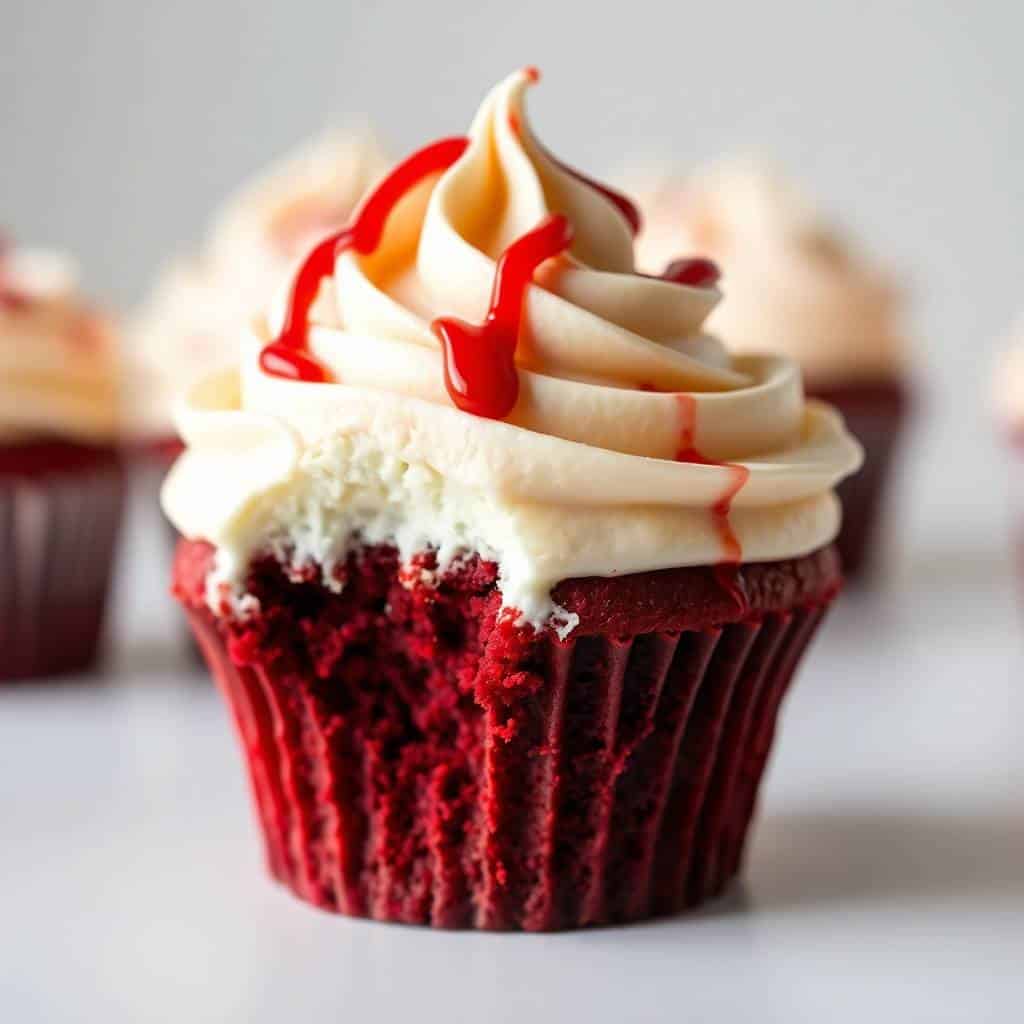
Tips for Success
- Make your own buttermilk if you need to: Add ½ tablespoon of white vinegar or lemon juice to ½ cup of regular whole milk. Stir it and let it sit for 5 minutes — it'll curdle slightly, which is exactly what you want. This is what I do about half the time because I don't always have buttermilk on hand, and the cupcakes come out just as good.
- Cold cream cheese makes lumpy frosting: I learned this the hard way on my second batch. If your cream cheese is still cold from the fridge when you start beating it, you'll end up with small lumps in the frosting that don't beat out no matter how long you go. Pull both the butter and cream cheese out 20 minutes before you need them. Room temperature is the difference between silky and grainy.
- Use gel food colouring, not liquid: Liquid red dye takes a lot more to get that deep colour, and adding too much can thin the batter or leave a slightly off taste. Gel is concentrated — one tablespoon of a good gel gives you a vivid, saturated red without messing with the batter consistency. I use the Wilton red gel from Walmart, it's about $3.
- Don't overmix once the flour goes in: This is the one step where I slow down and pay attention. Once the wet and dry ingredients start coming together, I switch from a whisk to a spatula and fold gently. The moment I don't see dry flour anymore, I stop. Over-beaten batter = tough cupcakes. Under-mixed is actually better than over-mixed here.
- Add the blood drizzle right before serving: If you drizzle the red syrup or gel hours ahead, it can bleed into the frosting and lose that fresh, dramatic look. I do all the frosting in the morning and keep the cupcakes in the fridge, then drizzle the "blood" right as I'm setting them out. Takes 30 seconds and the visual impact is completely worth it.
Variations
- Stuffed with raspberry jam: Once the cupcakes are cooled, use a small knife or apple corer to cut a little well in the centre of each one. Fill it with a teaspoon of raspberry jam, then frost over the top. When someone bites in and sees the red filling, the reaction is always worth it — it really does look like something out of a Halloween movie. Zainab thinks this version is the best one.
- Black velvet version: Swap the red gel for black gel food colouring and you get a completely different but equally dramatic cupcake. The contrast of black crumb and white cream cheese frosting is striking — it leans more gothic than gory. I've made this version alongside the red ones and arranged them together on a platter for a Halloween party. Very effective.
- Mini cupcakes: Use a mini muffin tin and reduce the bake time to about 10–12 minutes. Check at 10 minutes with a toothpick. Mini versions are great for parties where you want people to try more than one thing. I double the batch when I make minis because they disappear faster than you'd expect.
- Espresso boost: Add 1 teaspoon of instant espresso powder to the dry ingredients. You won't taste coffee — it just deepens and intensifies the cocoa flavour. My husband noticed a difference before I told him what I'd changed. It's a small tweak but it makes the cupcakes taste noticeably richer.
- Vegan version: Replace the egg with a flax egg (1 tablespoon ground flaxseed + 3 tablespoons water, rested for 5 minutes). Use plant-based butter and vegan cream cheese for the frosting, and swap the buttermilk for almond milk + ½ tablespoon of apple cider vinegar. I haven't perfected this myself — the texture is slightly different — but it gets close enough that no one has complained.
Serving and Storage
Serving
Serve these at room temperature — the frosting is a little too firm straight from the fridge and the flavour opens up once it's not cold. I usually take them out of the refrigerator about 20 minutes before I want to serve them. Add the red syrup or gel drizzle right before setting them out on the table so the effect looks fresh. If you're taking them to a party, transport them unfrosted and frost on arrival — they travel better that way and you won't end up with smeared frosting.
Storage
Frosted cupcakes keep in an airtight container in the fridge for up to 4 days. Unfrosted cupcakes can sit covered at room temperature for 2 days, or you can freeze them (unfrosted) for up to 2 months — just wrap each one individually in cling film before putting them in a freezer bag. Thaw at room temperature for a couple of hours, then frost fresh. I almost always have a stash of unfrosted cupcakes in my freezer come October so I can pull them out on short notice.
Frequently Asked Questions
Can I make these cupcakes a day ahead?
Yes, and honestly I prefer baking them the day before. Bake and cool completely, then store unfrosted in an airtight container overnight. Make the frosting fresh the next day and frost right before serving — the cream cheese frosting holds better when it hasn't been sitting on the cupcake for 24 hours. The "blood" drizzle always goes on last, right before people see them.
What can I use if I don't have buttermilk?
Add ½ tablespoon of white vinegar or lemon juice to ½ cup of whole milk, stir, and let it sit for 5 minutes. It'll look slightly curdled — that's correct. This homemade version works almost identically to store-bought buttermilk in this recipe. I use this substitute regularly and have never noticed a difference in the finished cupcakes.
Can I use natural food colouring instead of gel dye?
You can, but the colour will be more muted — think dusty pink rather than deep red. Beet powder is the most common natural option; start with 2 teaspoons and adjust from there. Pomegranate juice also works but adds liquid to the batter, so reduce the buttermilk slightly to compensate. If vivid red is important to you (especially for the Halloween look), gel dye really is the easier route.
Can I freeze these cupcakes?
Freeze them unfrosted only. Wrap each cooled cupcake individually in cling film, then put them all in a zip-lock freezer bag. They keep well for up to 2 months. Thaw at room temperature for a couple of hours before frosting. I do this every Halloween — I bake a double batch in late October, freeze half, and pull them out when I need them.
Why does this recipe use vinegar?
The vinegar reacts with the baking soda to help the cupcakes rise and stay tender. It also reacts with the cocoa powder, which is part of what gives red velvet its distinct slightly-tangy flavour profile — it's not just a chocolate cake. Don't skip it. The amount is small enough that you won't taste it at all in the finished cupcake.
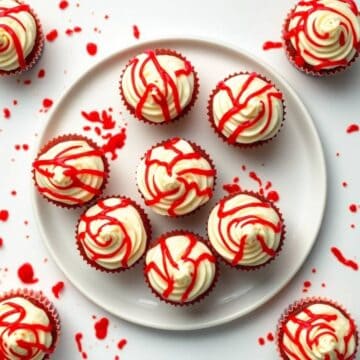
BLOODY RED VELVET CUPCAKES
Ingredients
For the Cupcakes:
- 1 ½ cups all-purpose flour
- 1 cup granulated sugar
- 1 teaspoon cocoa powder
- ½ teaspoon baking soda
- ½ teaspoon salt
- ½ cup vegetable oil
- 1 large egg
- ½ cup buttermilk
- 1 tablespoon red food coloring
- 1 teaspoon vanilla extract
- 1 teaspoon white vinegar
For the Frosting:
- ½ cup unsalted butter softened
- 8 oz cream cheese softened
- 2 cups powdered sugar
- 1 teaspoon vanilla extract
Instructions
- Preheat the Oven: Preheat oven to 350°F (175°C). Line a 12-cup muffin pan with cupcake liners.
- Mix Dry Ingredients: In a medium bowl, whisk together flour, cocoa powder, baking soda, and salt. Set aside.
- Mix Wet Ingredients: In a large bowl, beat together oil, sugar, and egg until smooth. Add buttermilk, red food coloring, vanilla, and vinegar, mixing until combined.
- Combine: Gradually add dry ingredients to wet ingredients, mixing until smooth.
- Fill Cupcake Liners: Divide batter evenly among liners, filling each about ⅔ full.
- Bake: Bake for 20–22 minutes or until a toothpick inserted comes out clean. Cool completely on a wire rack.
- Frost: Beat together butter and cream cheese until creamy. Gradually add powdered sugar and vanilla, beating until smooth. Frost cooled cupcakes.
- Optional Decoration: Drizzle with red gel or syrup for a “bloody” effect.
Notes
- Make Ahead: Cupcakes can be baked a day in advance; frost just before serving.
- Customizing Flavor: Add a teaspoon of espresso powder for a richer chocolate undertone.
- Serving Suggestions: Perfect for Halloween parties, themed events, or a dramatic dessert display.
- Storage Tips: Store in an airtight container in the fridge for up to 3 days.
These cupcakes have become one of those things my family looks forward to the way some families look forward to decorating the tree or carving pumpkins. The recipe isn't complicated — it's a reliable one-bowl batter with a frosting that comes together in minutes — but the finished result looks like you fussed over it for hours. That's the kind of baking I'm always chasing.
I appreciate that the chocolate flavour is subtle here, not overwhelming. It's enough to make this feel like more than a plain vanilla cupcake, but the cocoa stays in the background where it belongs. The real flavour is in that tangy cream cheese frosting, which is why I always make sure I have enough of it. If you enjoy that cream cheese frosting pairing as much as I do, my Chocolate Salami is another one that hits a similar note of rich, slightly sophisticated dessert without much fuss.
If you make these, I hope you get the same reaction I did the first time I set them out — people doing a double take at the table before they reach for one. That moment is the whole reason to bake something dramatic. Go ahead and pile on the frosting. Drizzle the syrup like you mean it. Halloween only comes once a year. 🎃🩸





Comments
No Comments